Introduction
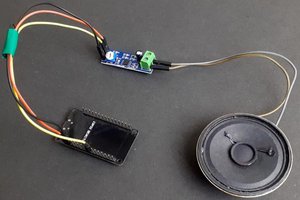
The E-Speaker is a smart, portable, and versatile audio system built using the ESP32 microcontroller. Leveraging the ESP32’s Wi-Fi and Bluetooth capabilities, this project creates an affordable and efficient smart speaker capable of streaming music, playing audio files, and providing basic voice assistant functionalities.
For Full Project:
https://electronicsworkshops.com/2024/12/05/e-speaker-using-esp32/

Bill Of Materials
| SN | COMPONENTS NAME | DESCRIPTION | QUANTITY | |
|---|---|---|---|---|
| 1 | ESP-32 | wroom | 1 | https://amzn.to/3wBRTzS |
| 2 | Speaker | 8-ohms | 1 | https://amzn.to/3e4o4S7 |
| 3 | Connecting Wires | Jumper Wires | 20 | https://amzn.to/3LCRiU7 |
| 4 | Amplifier Module | LM386 | 1 | https://amzn.to/3d0K0O1 |
Features
- Wireless audio streaming via Bluetooth and Wi-Fi
- Support for multiple audio formats (MP3, WAV, etc.)
- Integration with online music services (e.g., Spotify, internet radio)
- Compact and portable design
- Voice command support using a microphone
- Control via a smartphone app or web interface
Block Diagram

Audio Files and Arduino IDE Audio Files
This is the most important part of this project. To play audio sounds on the ESP32 board, we need audio files in .wav format because ESP32 can play an audio file in .wav format only.
First of all we must be make the audio file ready that we want to play in our speaker. You can also record your own audio file in this case.
After that, download and install the Audacity Audio Editor App. This app will be used to change the file type, Sample Rate, and other properties.
Coding
We are using ESP-32 as our main controller so, we must add esp 32 board from board manager of arduino IDE.
ESP-32 Board link for Arduino IDE : https://dl.espressif.com/dl/package_esp32_index.json
Here, we are going to use the XT DAC Audio library from XTronical. The XT DAC Audio library can be downloaded from here.
Once you download XT DAC Audio library in zip format you must add the library in your arduino IDE.

Once you add the library, you can conform weather the library is added to arduino IDE by going to example section.

If it is successfully added, you can see XT_DAC_Audio at the end of the example section. You can also open and upload wavspeed code to test weather the hardware is properly functioning or not.
It contain two file Wavspeed main file and sound.h file. Wavspeed contain the main code and sound.h contain the hex code of the audio file.


select the respective board and port from the arduino IDE. Upload the code to esp 32 and enjoy with the audio output in your speaker.

Adding your own audio file
If you want to add your own audio file then you can download the code below:
Once you extract this you can two file here:

open code.ino file

Go to sound.h section. and replace it with the respective audio hex code. I have already discussed how we generate audio hex code above:

once you paste your hex file in sound.h section. make sure your data type must be const unsigned char as below:


Order Directly from PCB WAY
I have already uploaded all these required manufacturing files in PCBWAY website. You can easily go to the below link and place you order, and get your Own Home Automation PCB manufactured from one of the best pcb manufacturer PCBWAY
Conclusion
The E-Speaker using ESP32 is a cost-effective and feature-rich project that combines the power of modern microcontrollers with smart audio functionality. It is ideal for DIY enthusiasts looking to explore IoT and audio electronics. With its scalability and flexibility, the project opens the door to numerous enhancements and integrations.
For Full Project:
https://electronicsworkshops.com/2024/12/05/e-speaker-using-esp32/...
Read more » electronicsworkshops
 Bob Darlington


 Pablo Antonio Camacho Jr.