 mclien
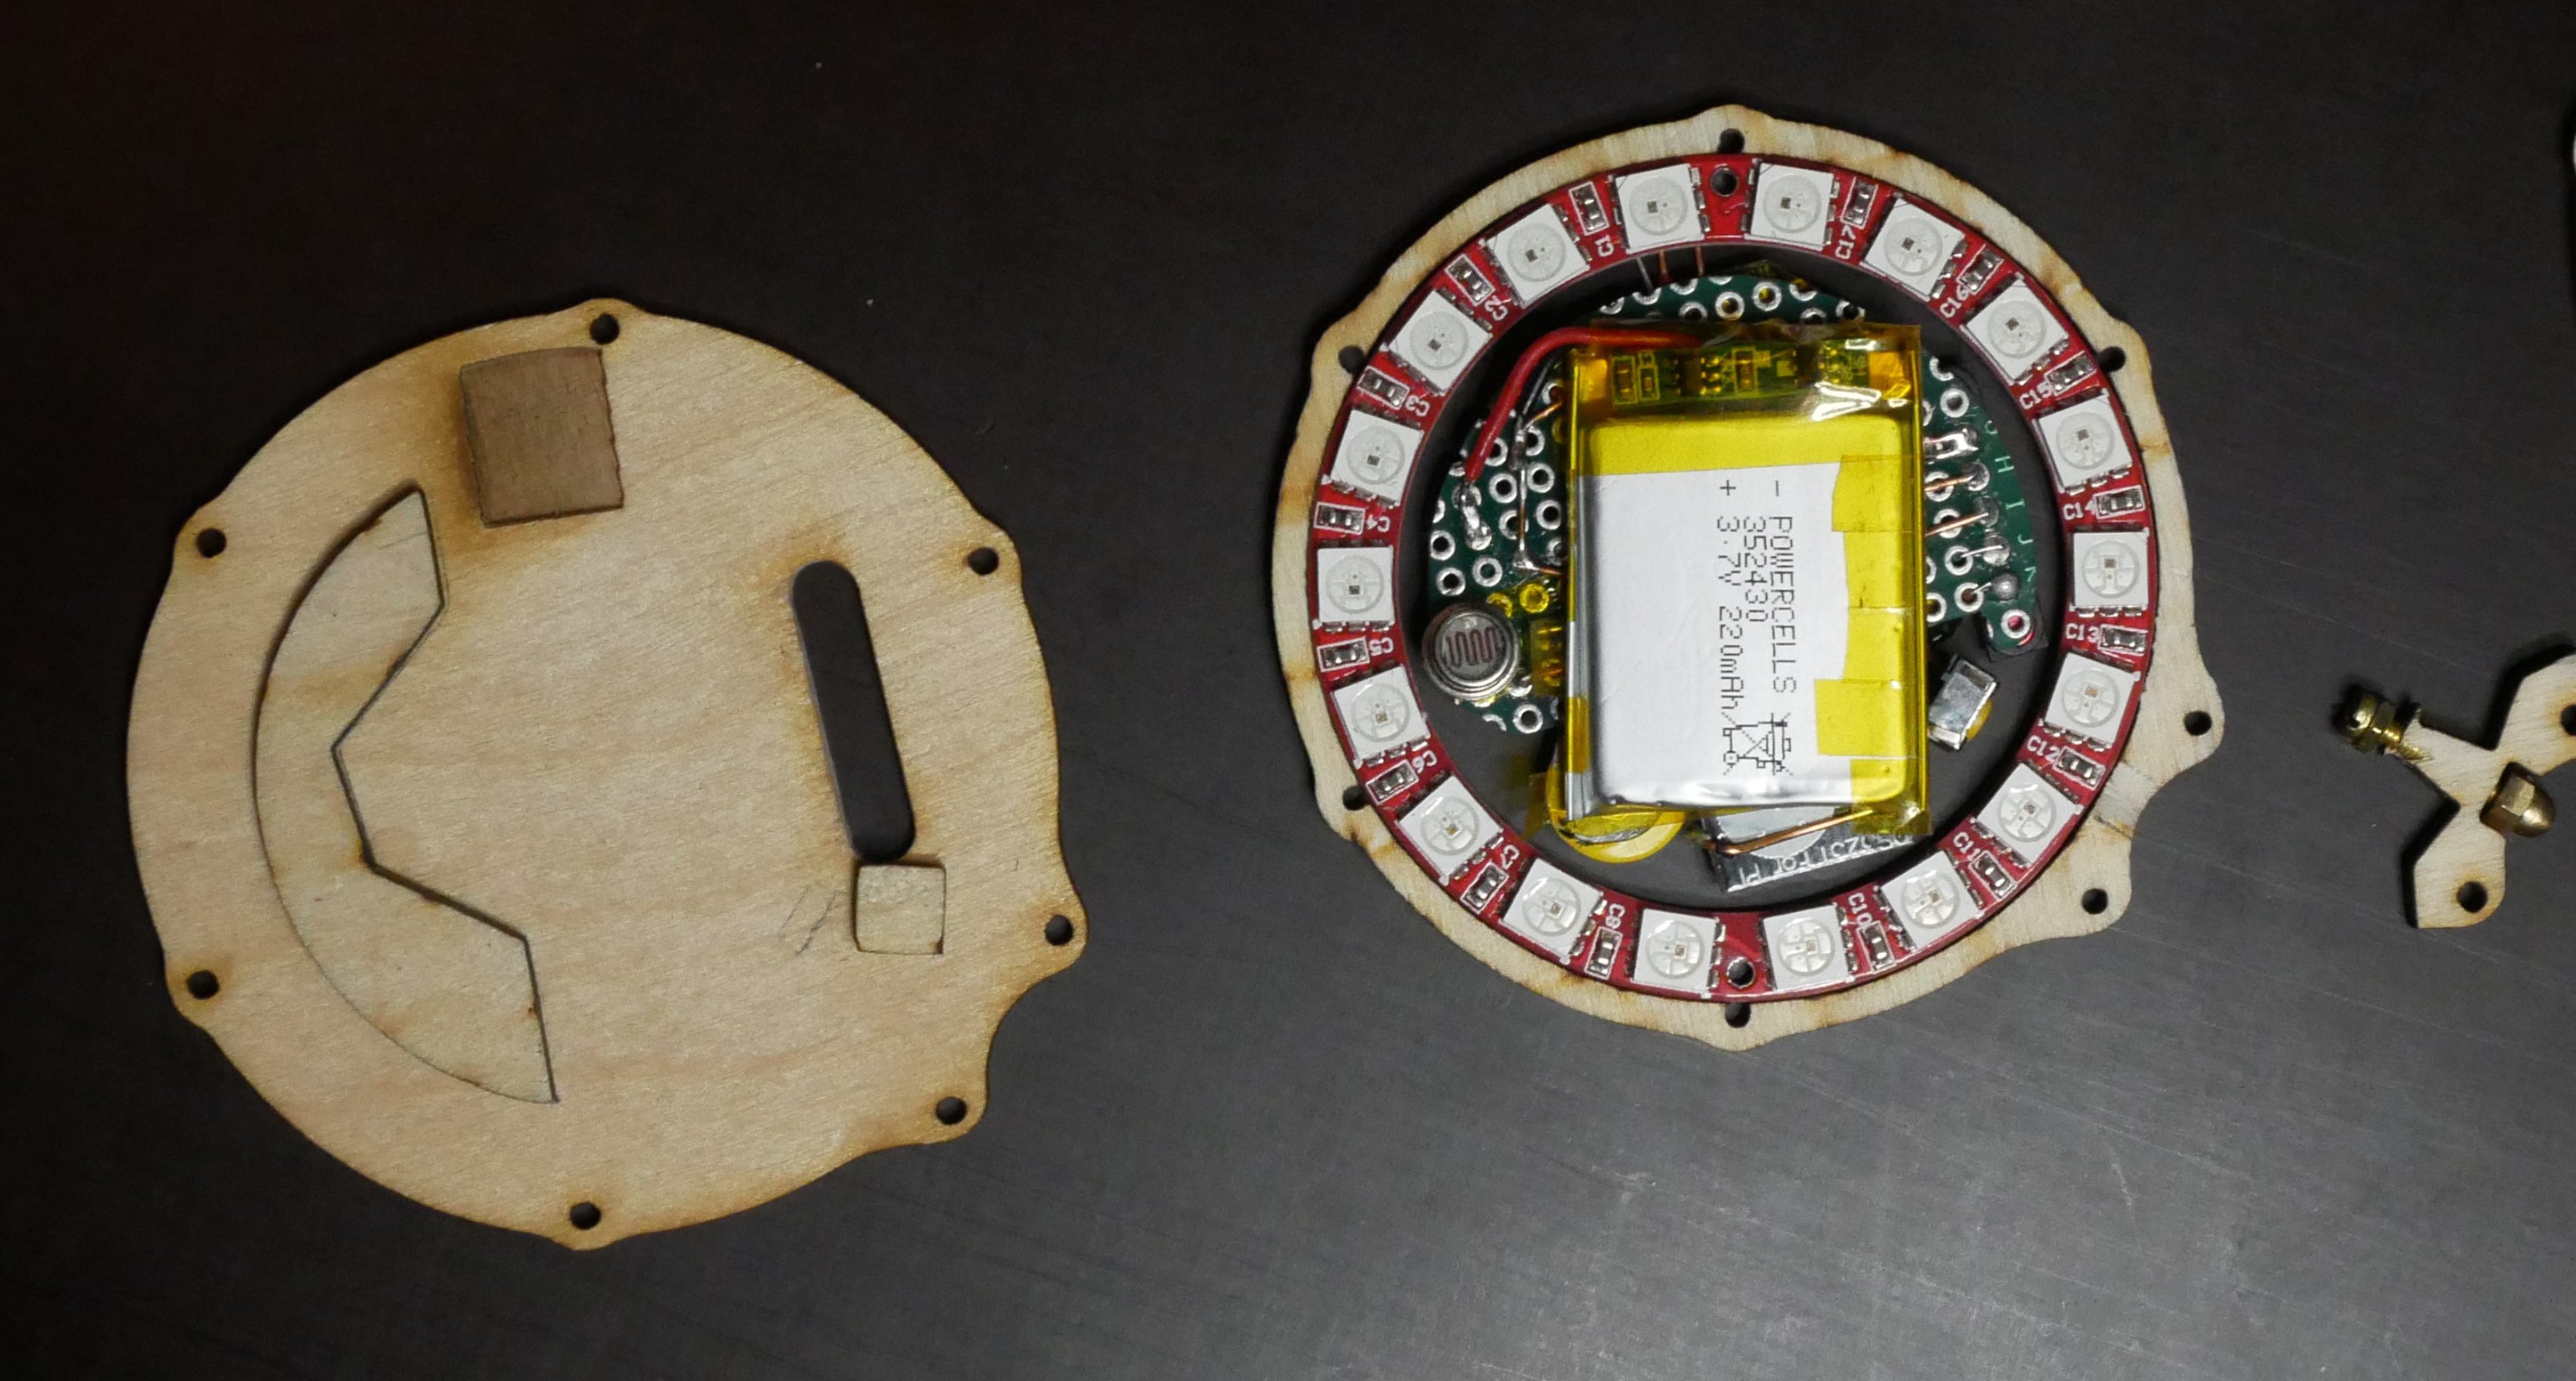
So finally putting everything together:
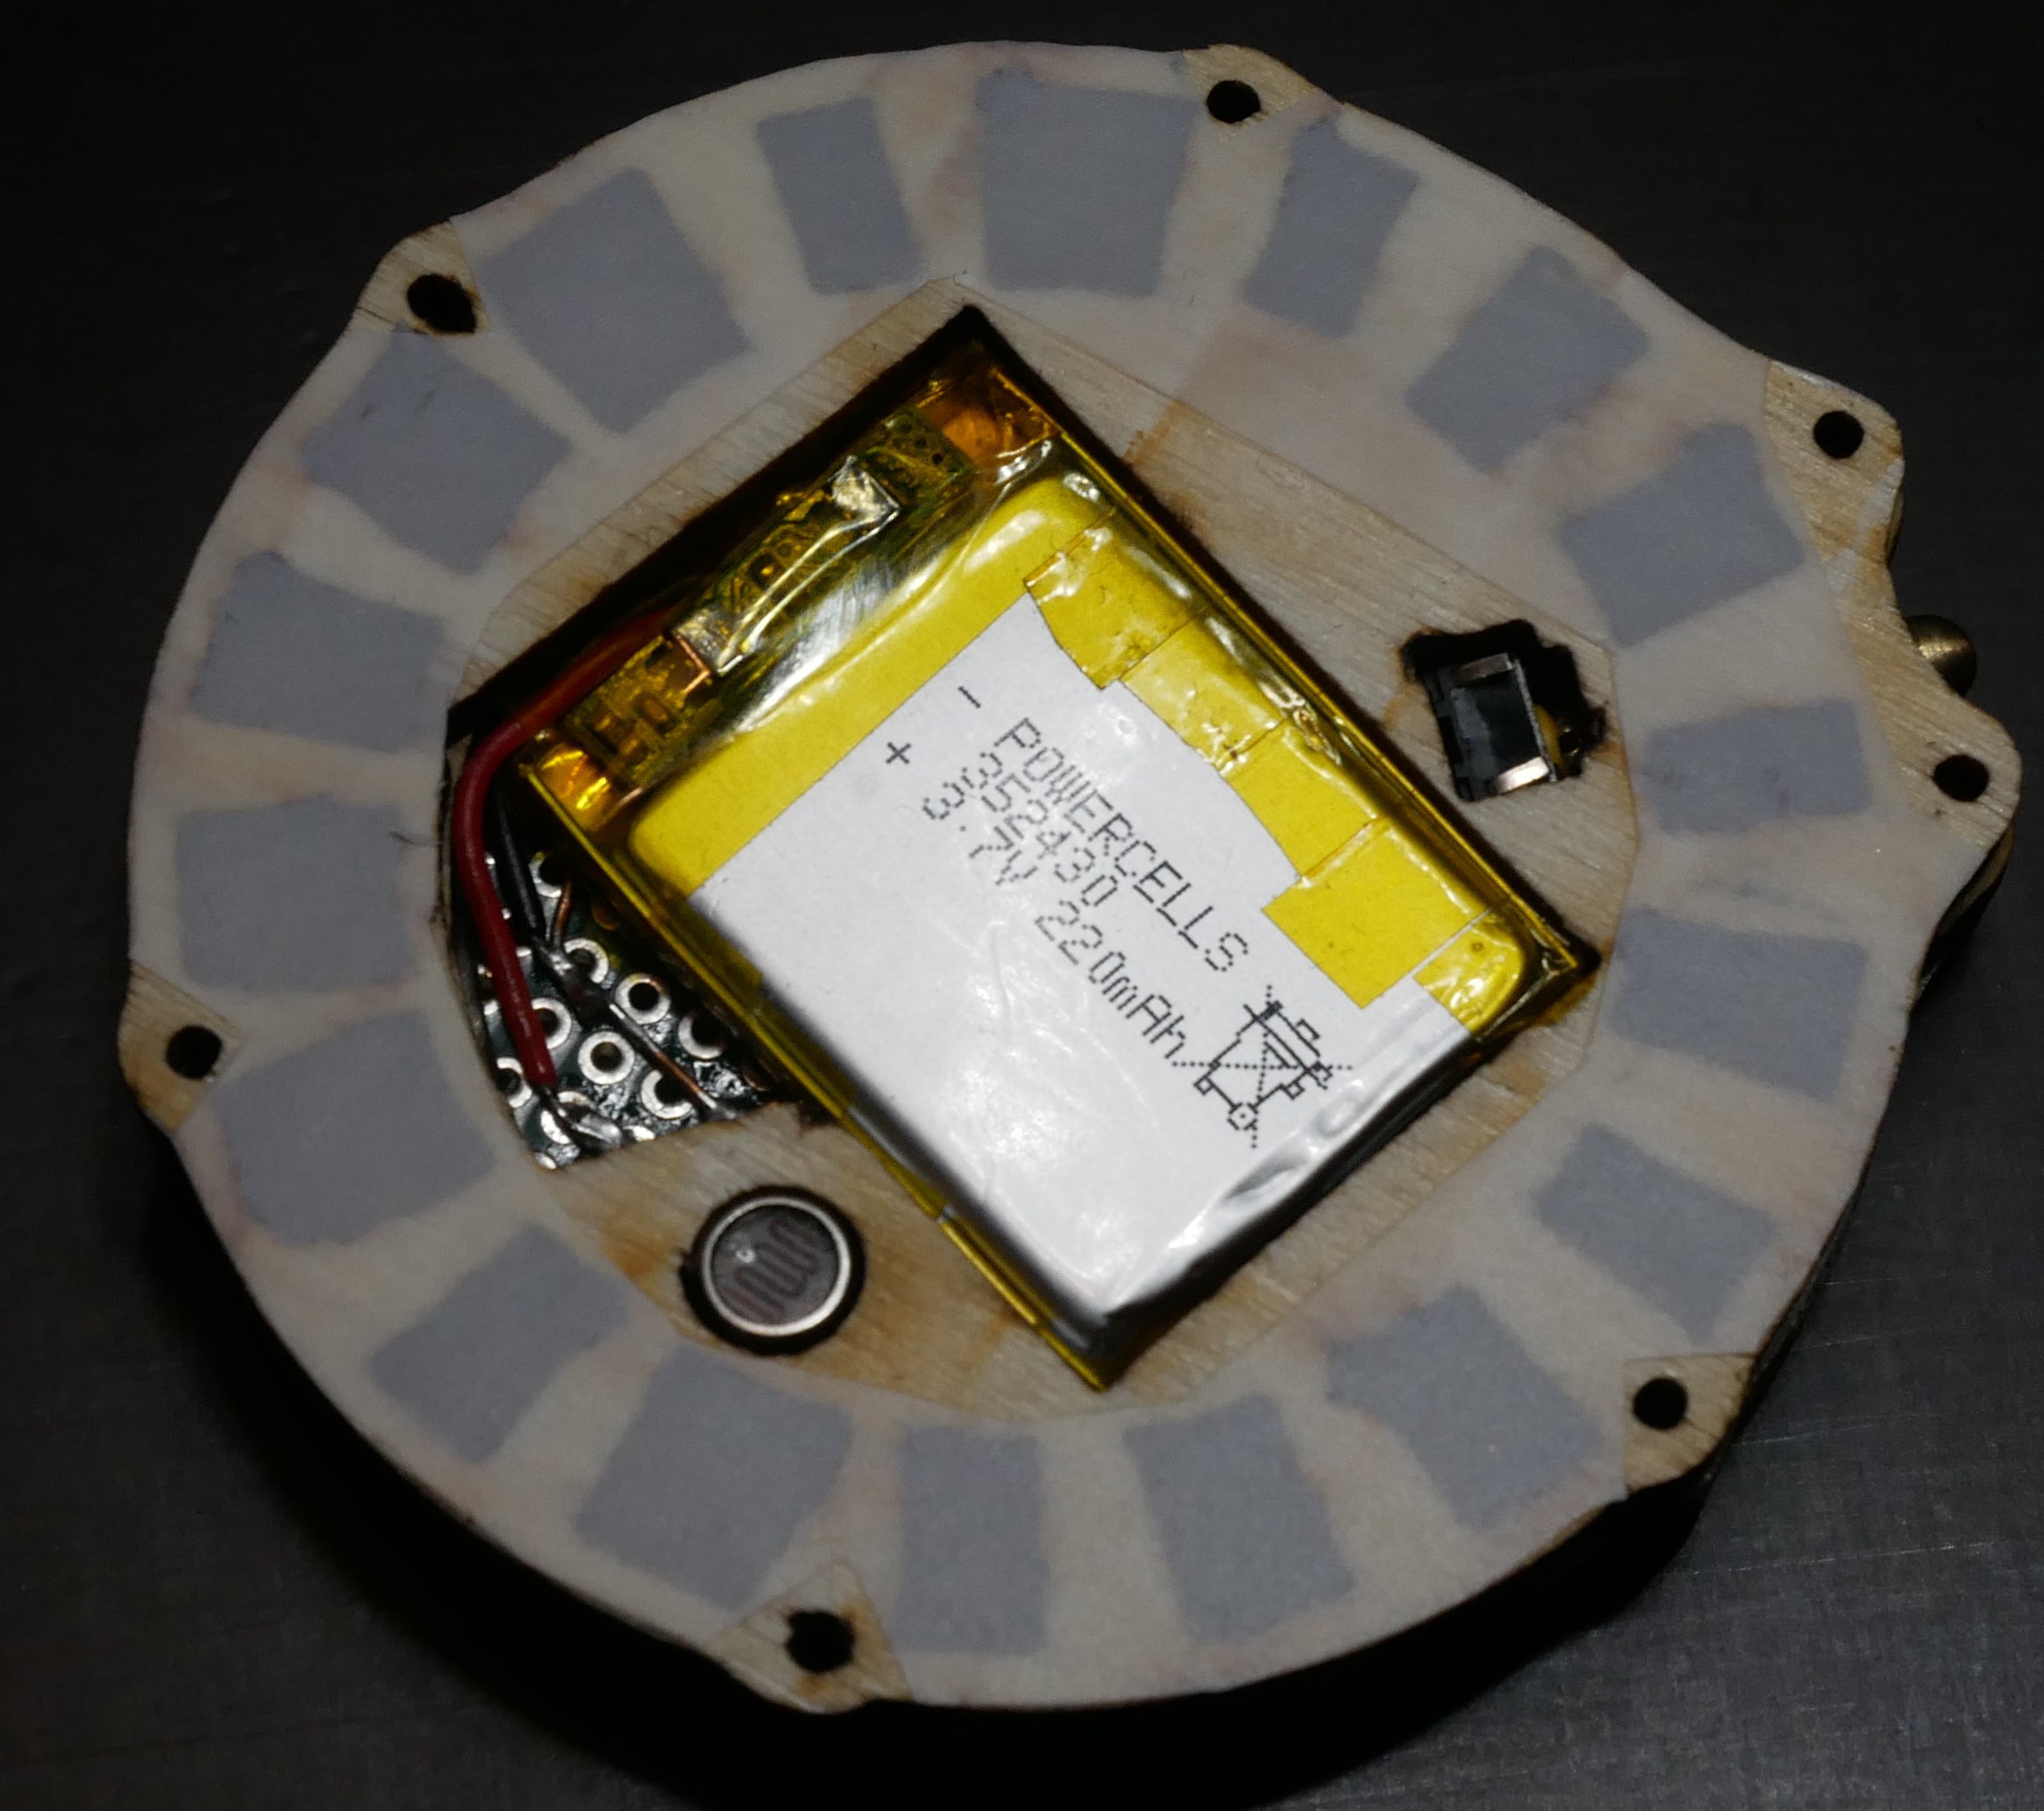
Bottom part has some small layers of wood to hold the PCB in place, the small ring around the LED pcb needs to be handled carefully (once in place it is stable) and the little screw which becomes the on-switch.
The brown rectangle is a shallow engraved pocket for the wires soldered at the back of the LED ring
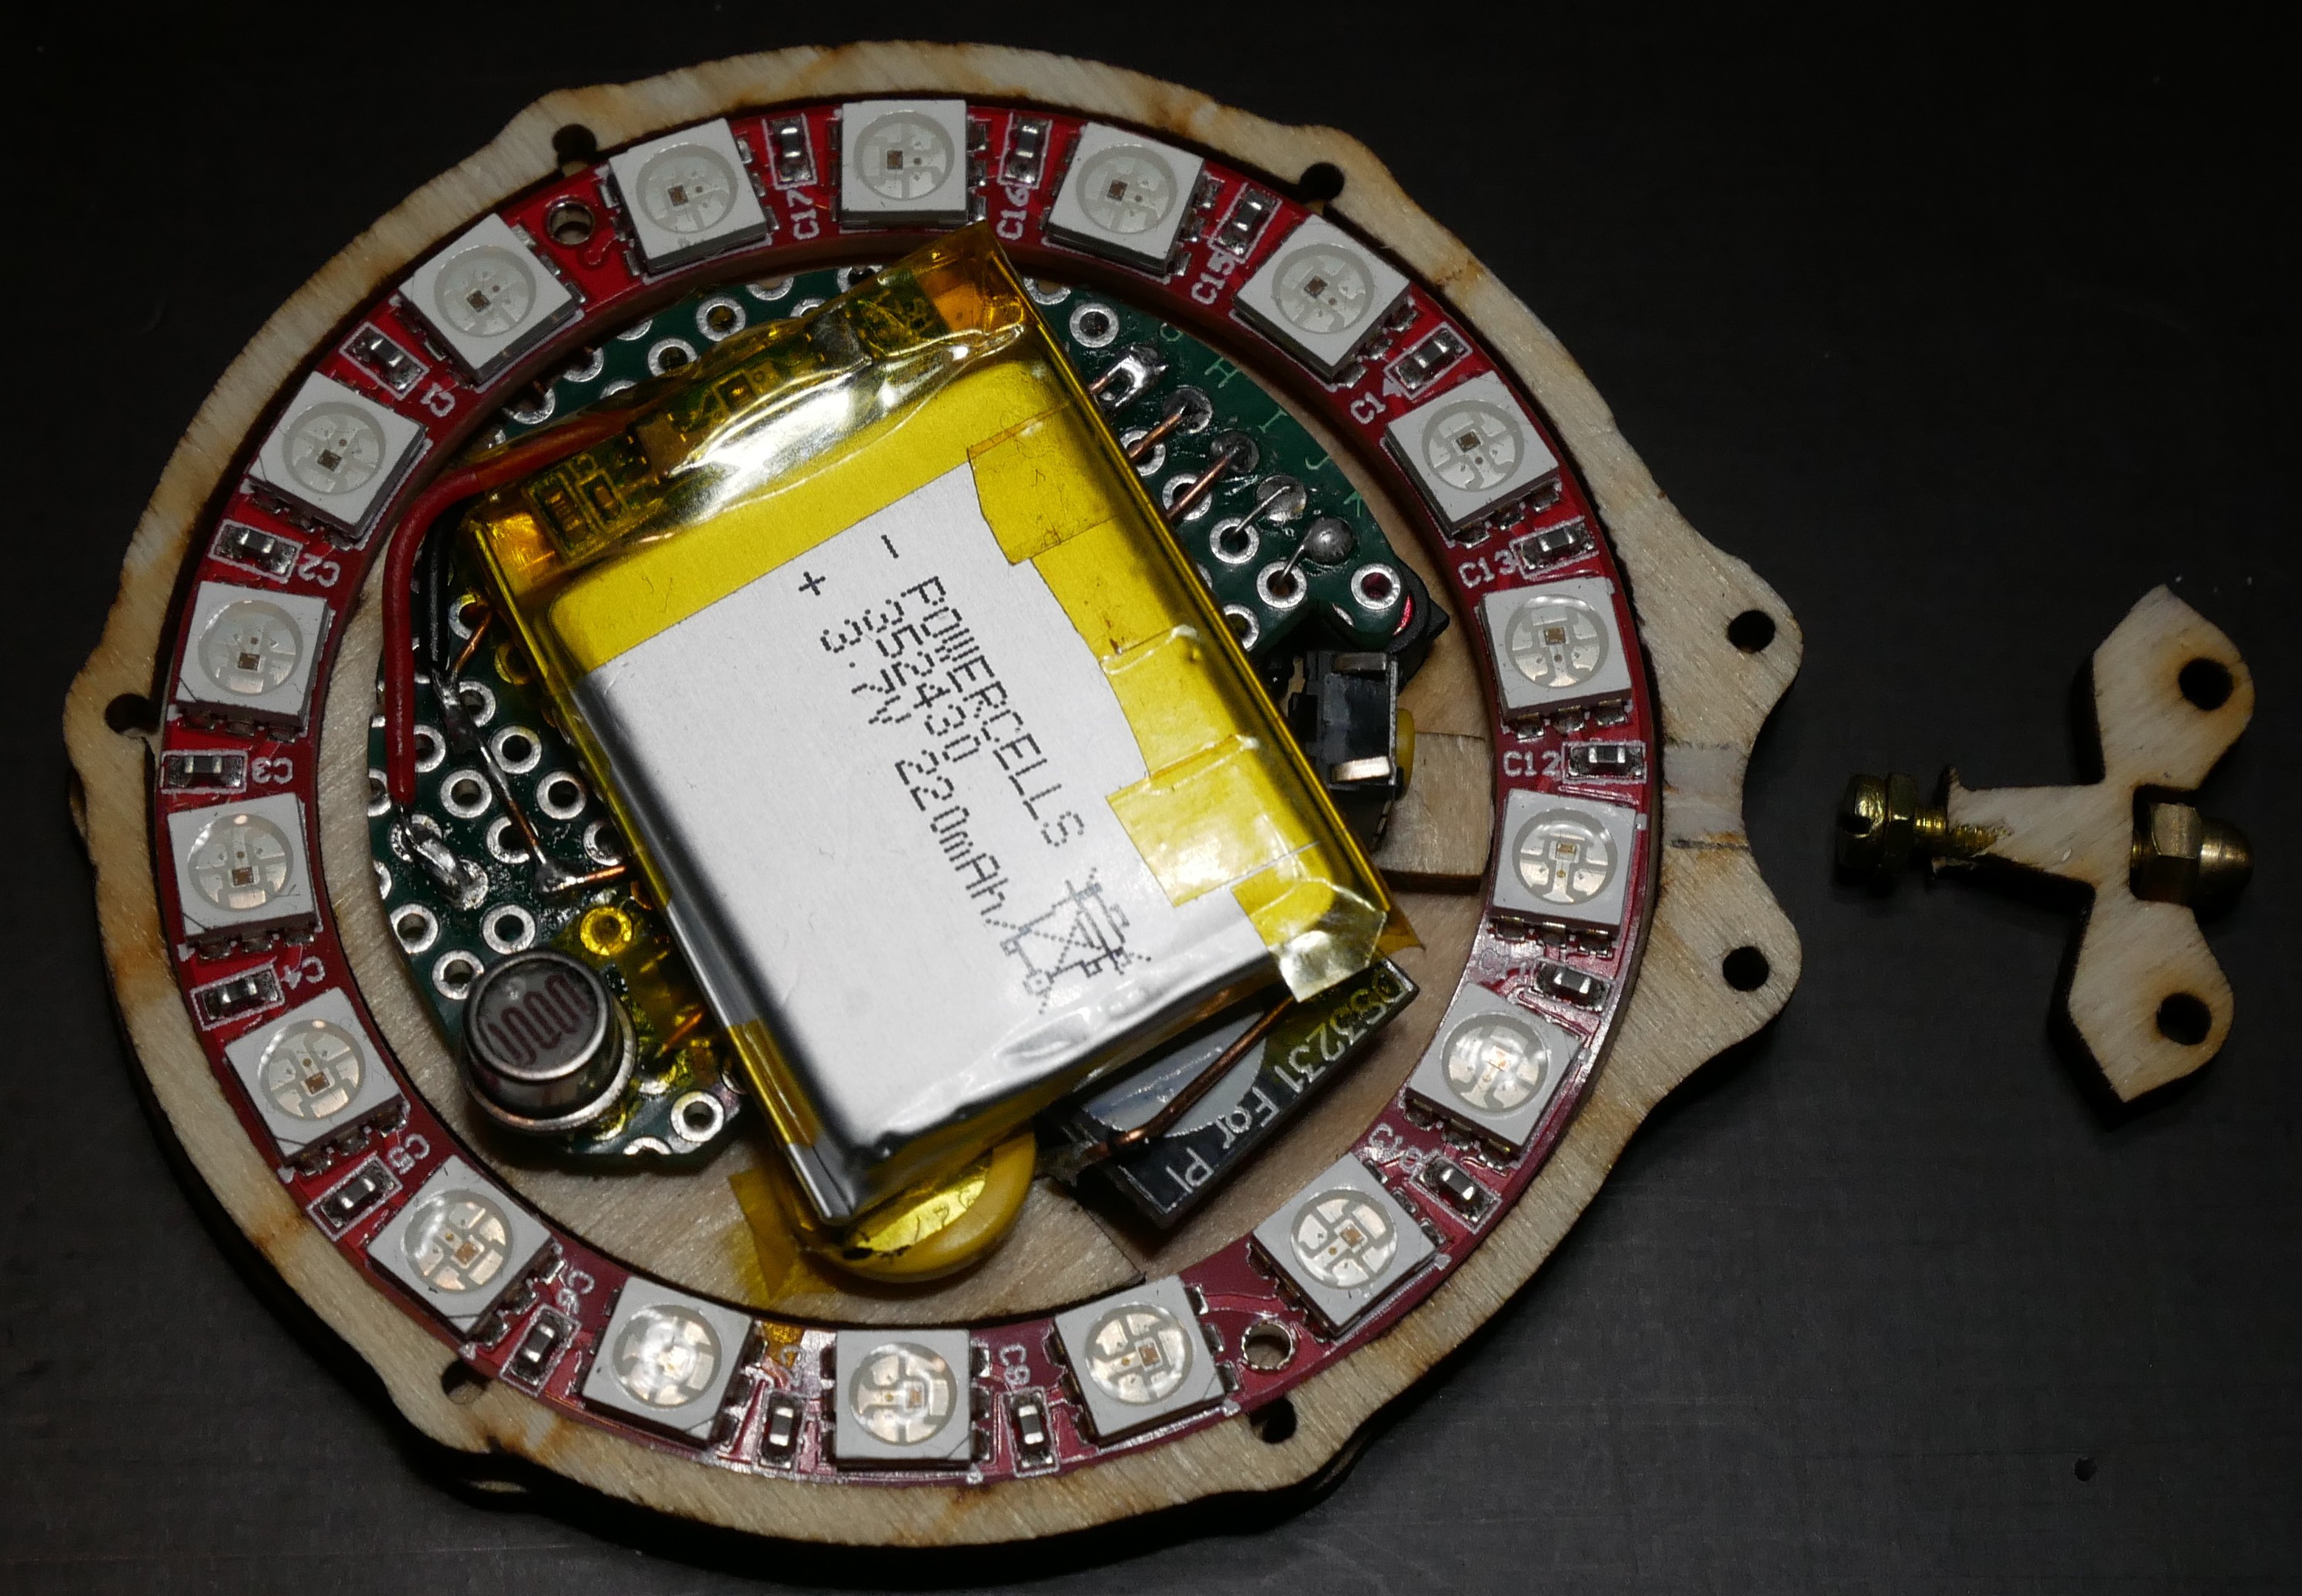
Closeup of the first step of the stack up:
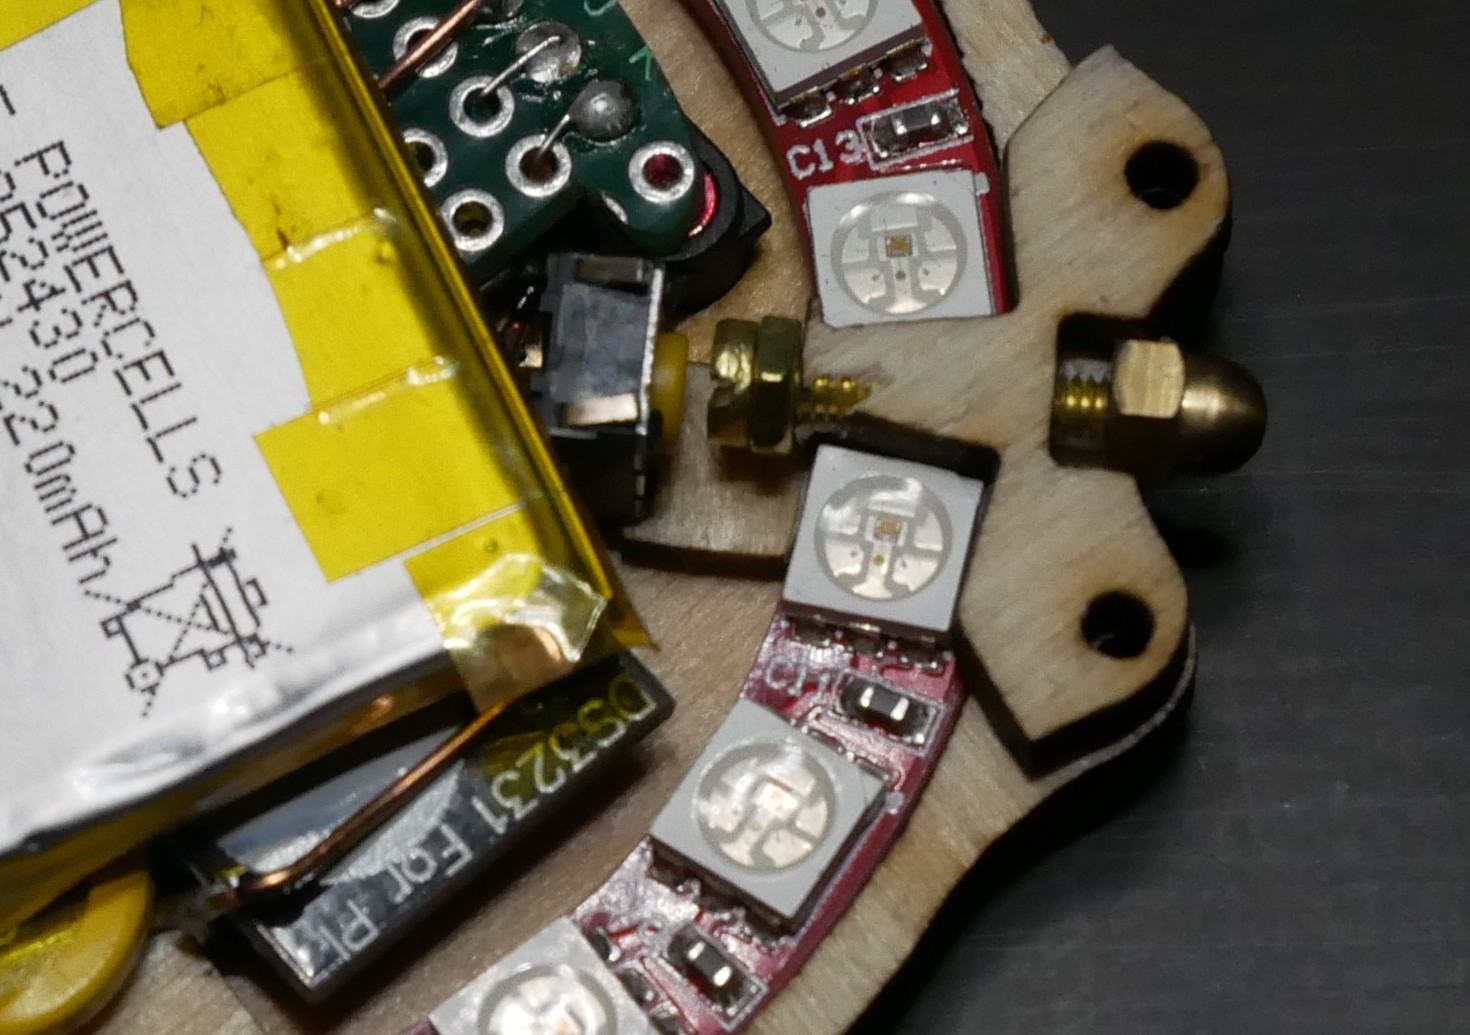
there is a little groove to apply for the hex nut part
Detail of the push button setup. (it is quite difficult to get the the 2mm hole in the 3mm plywood (this is the best of 4 tries)
On top of that the LED frame, covered with a adhesive diffusor film. Also supports the parts a bit.
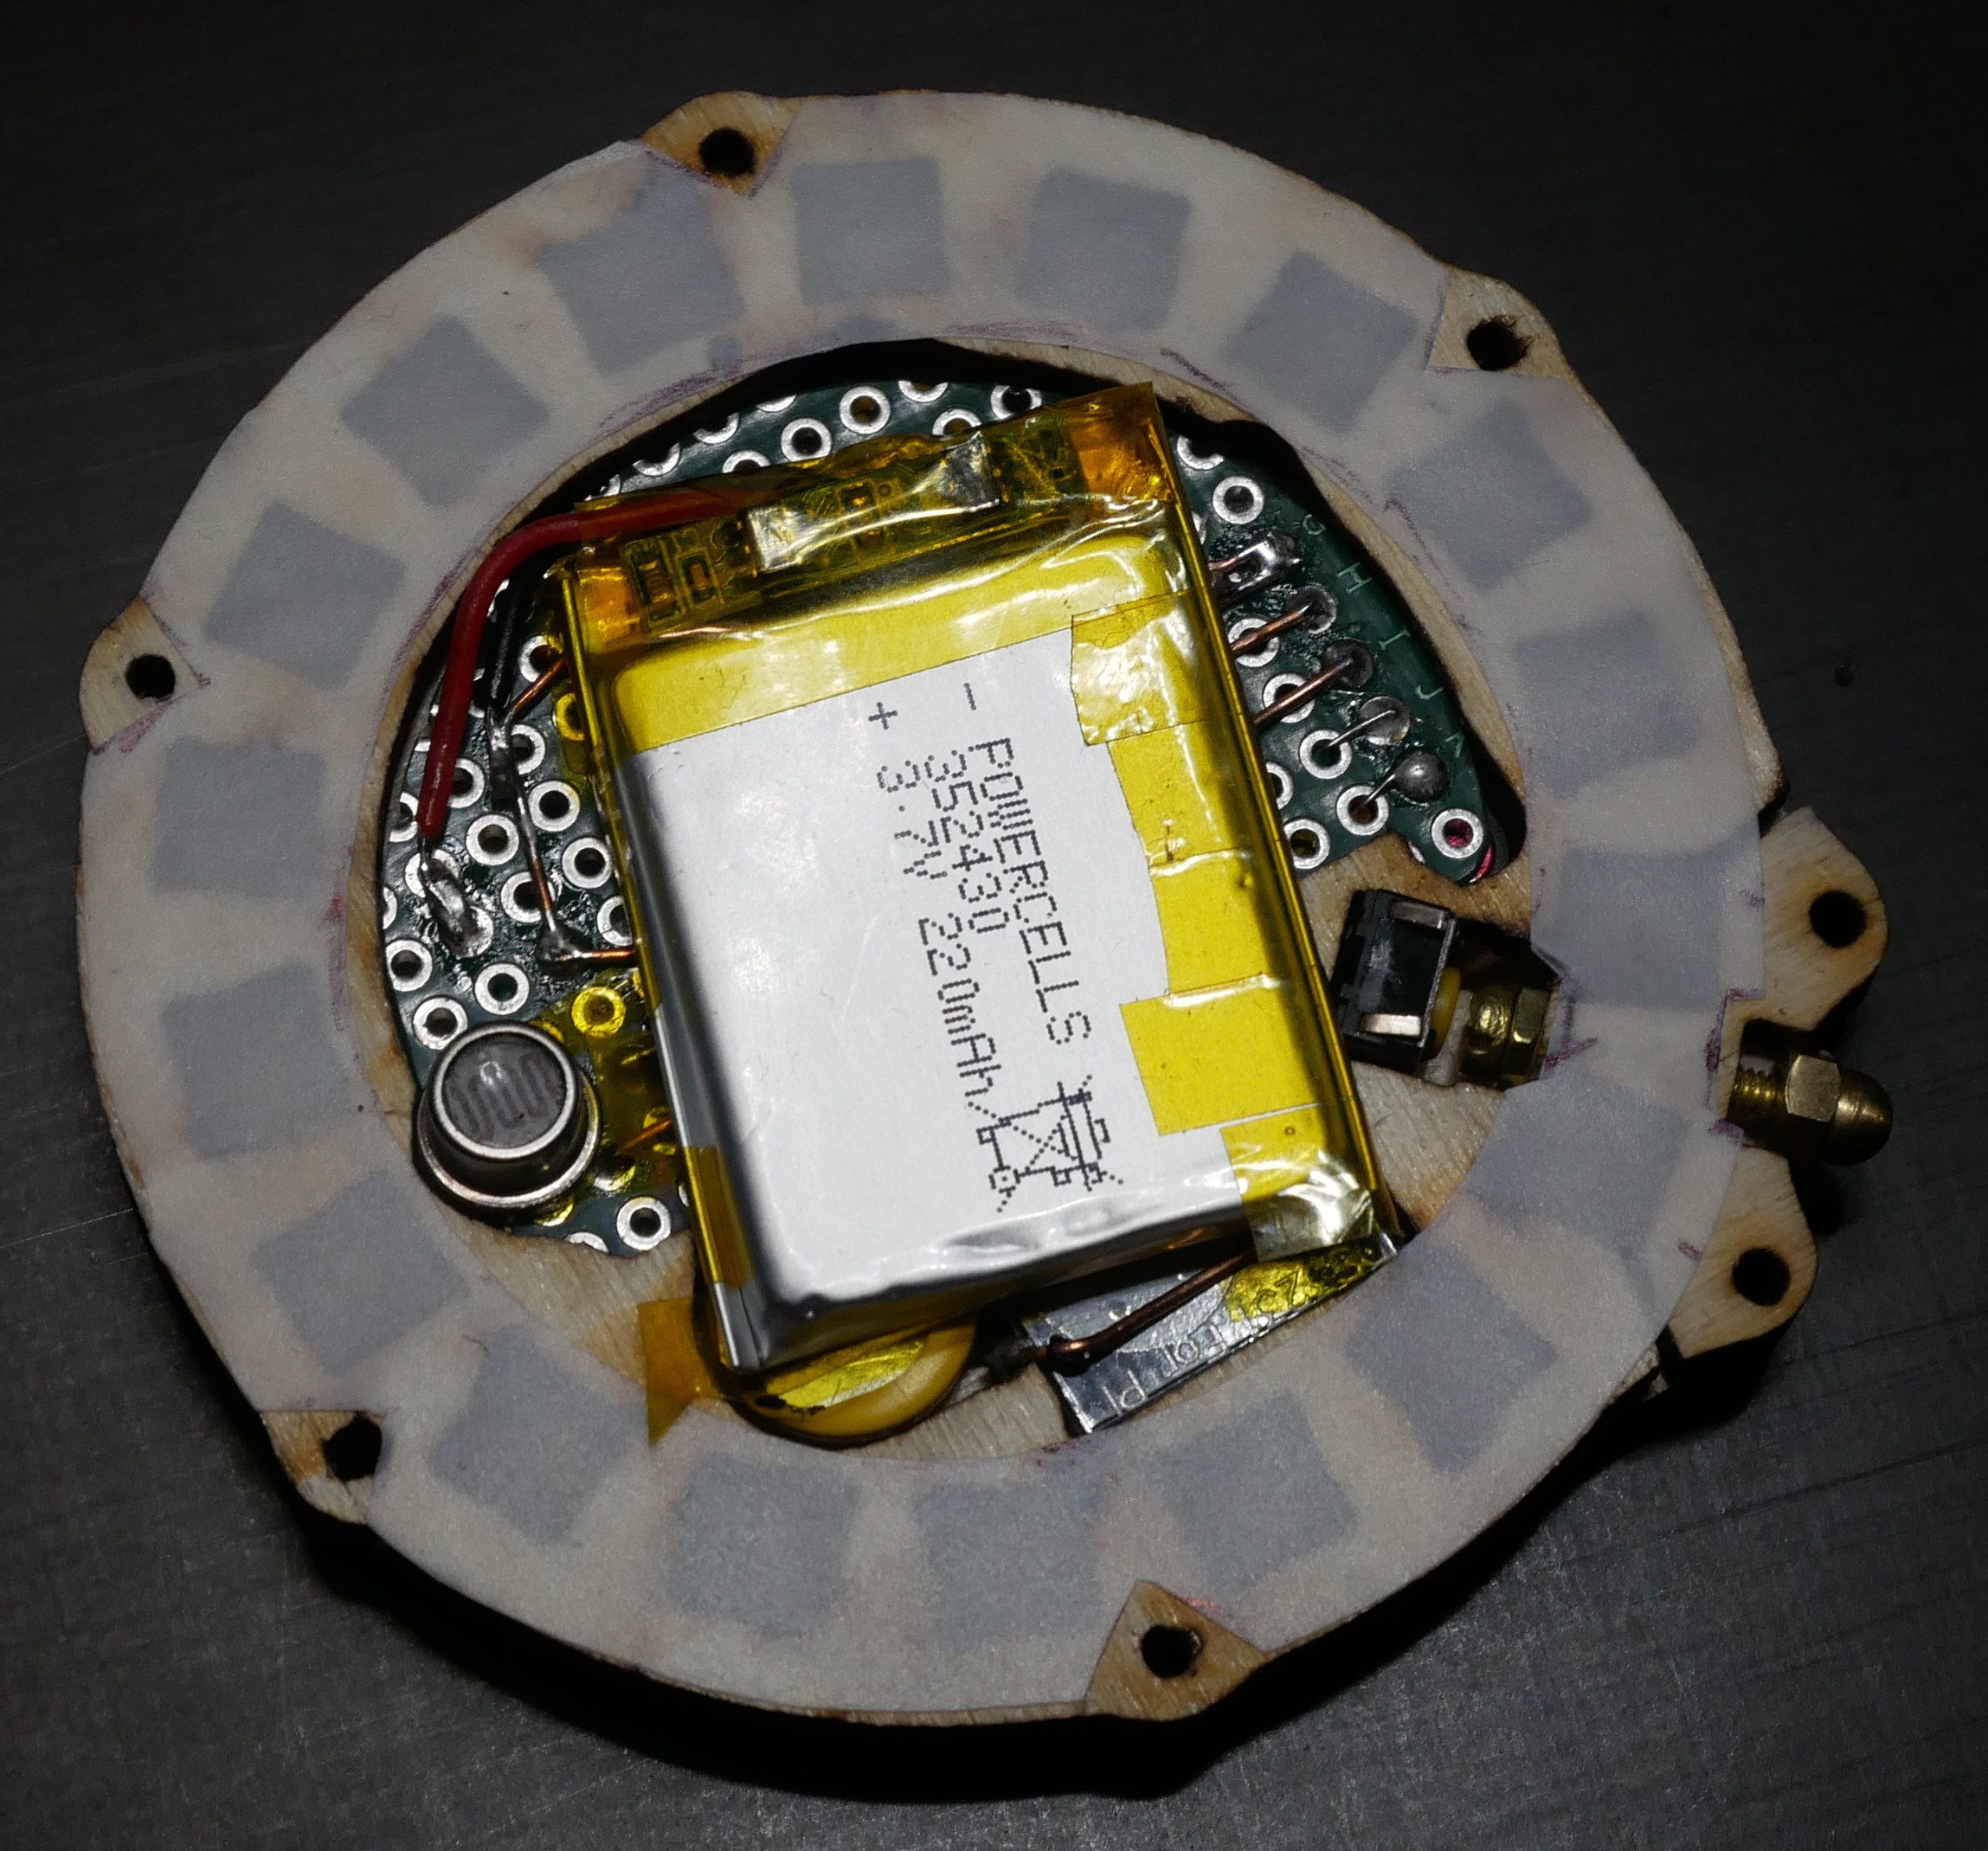
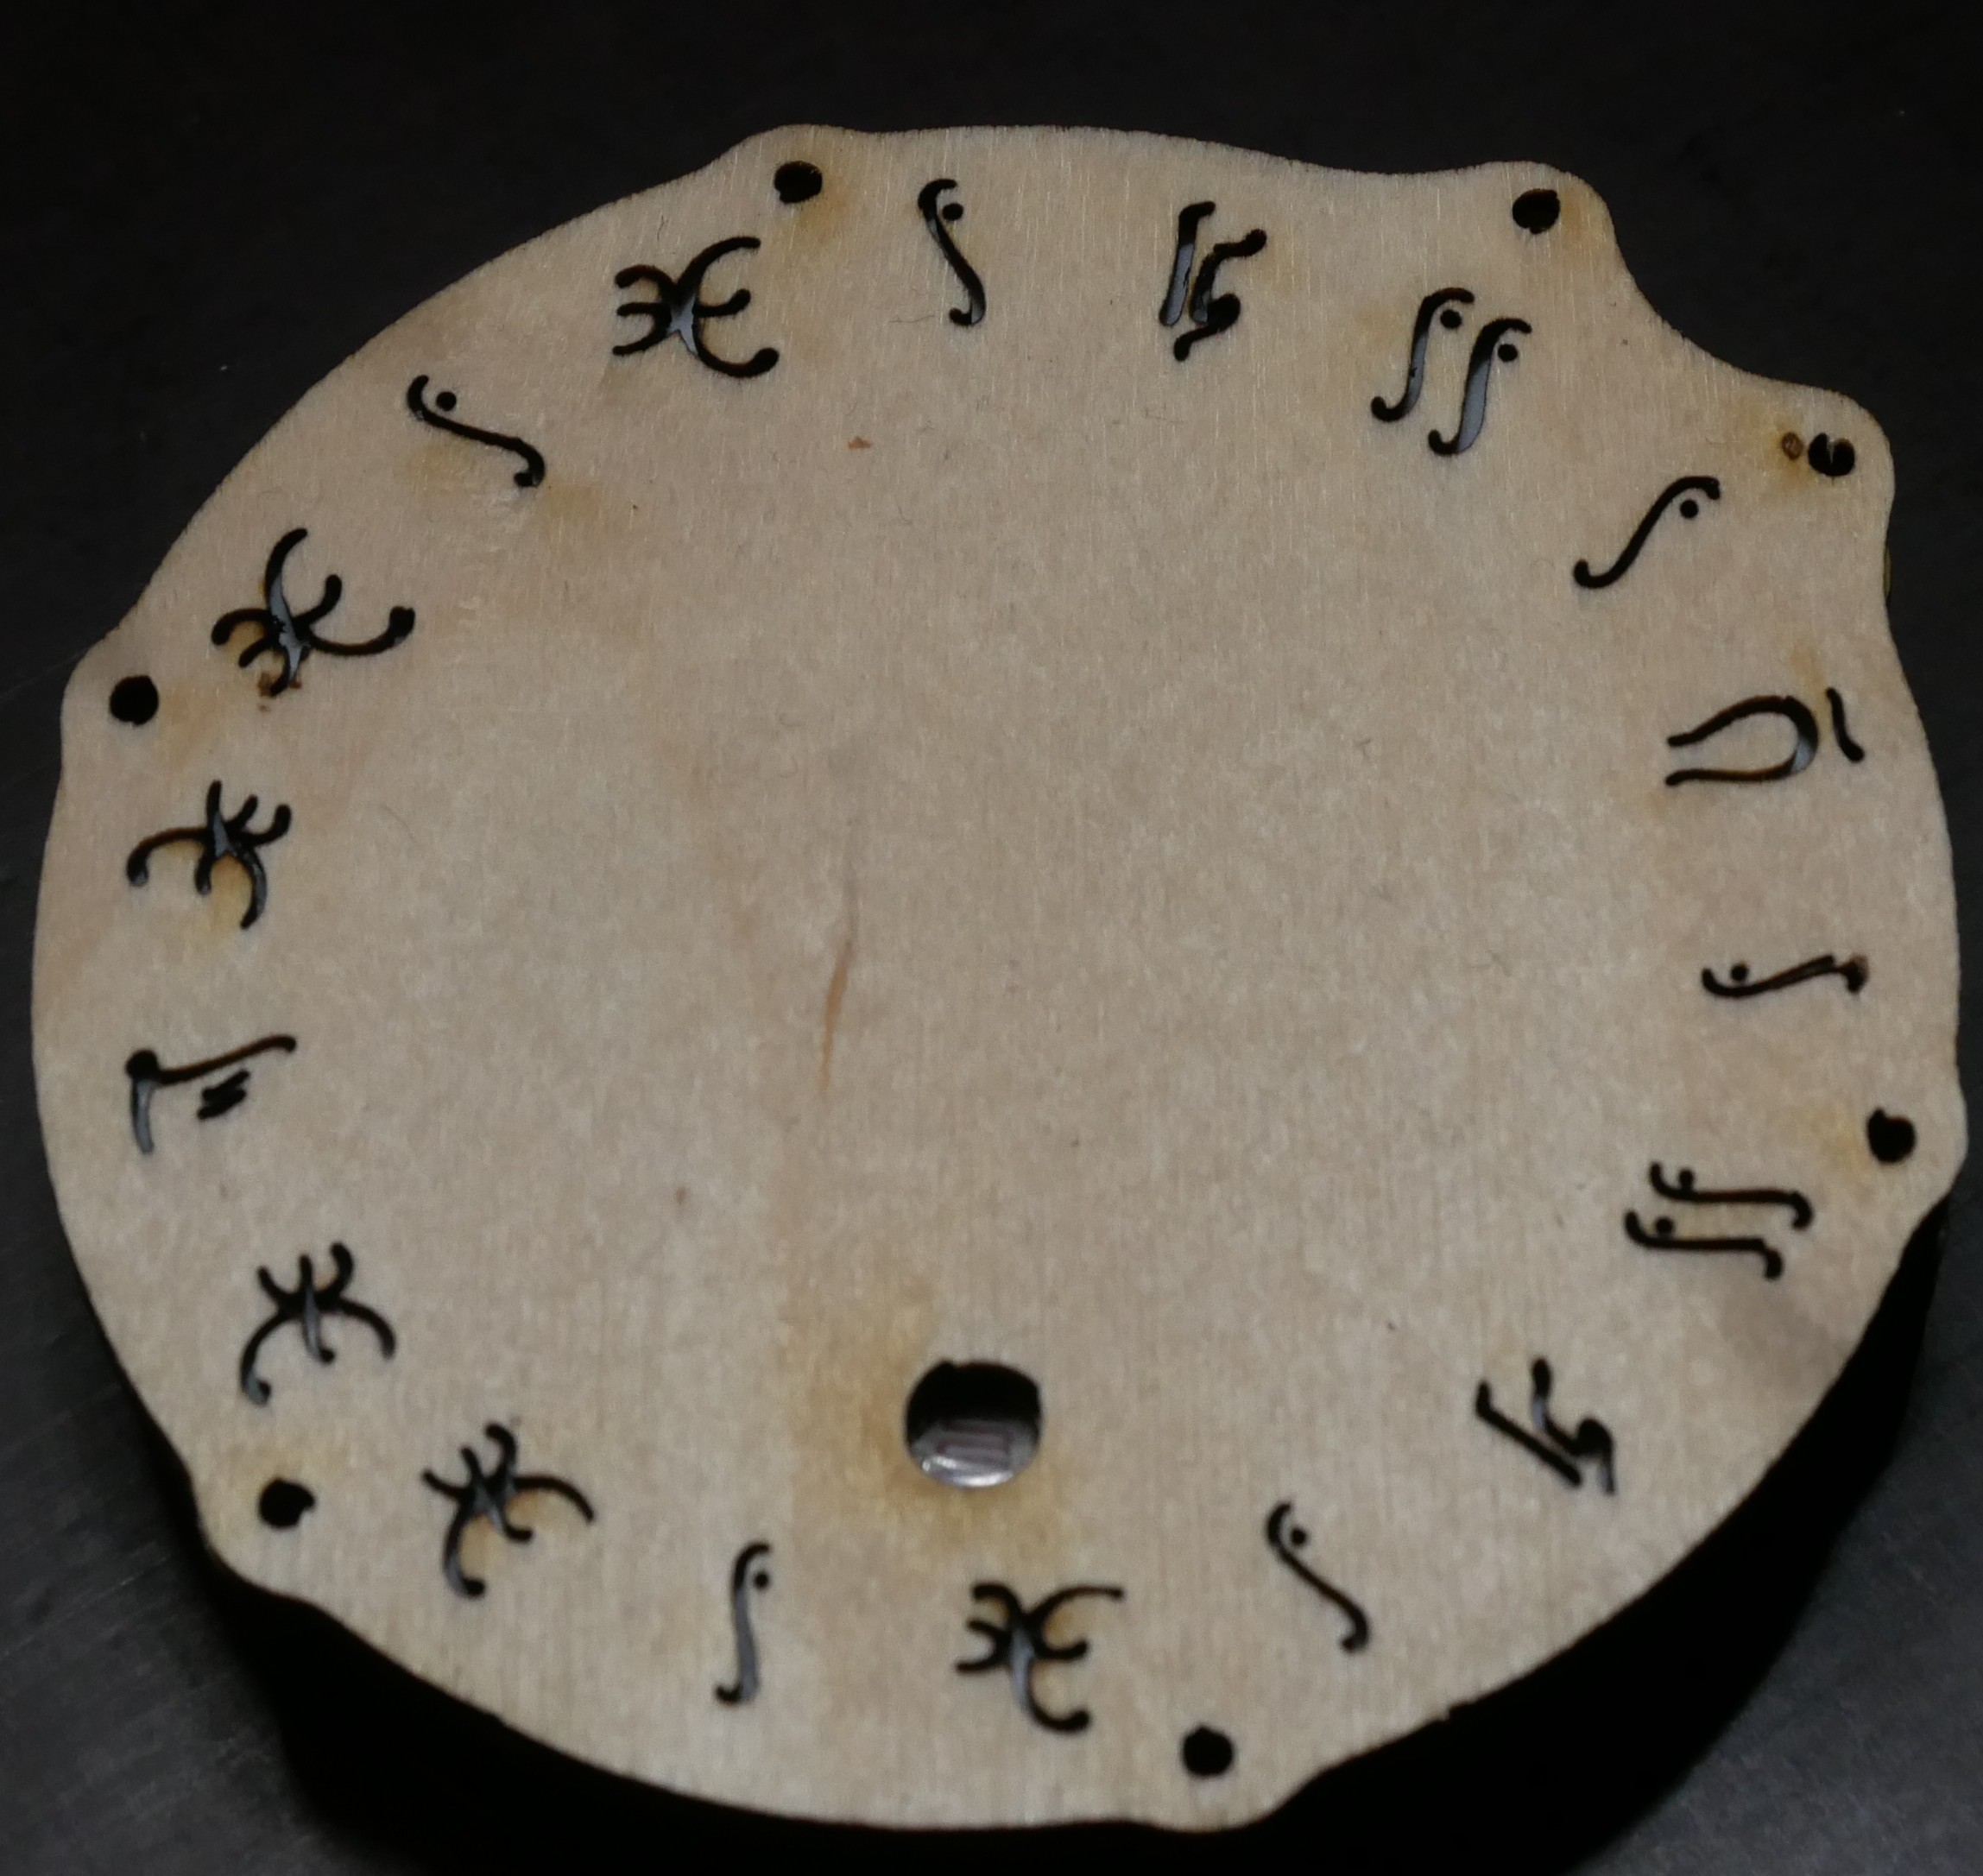
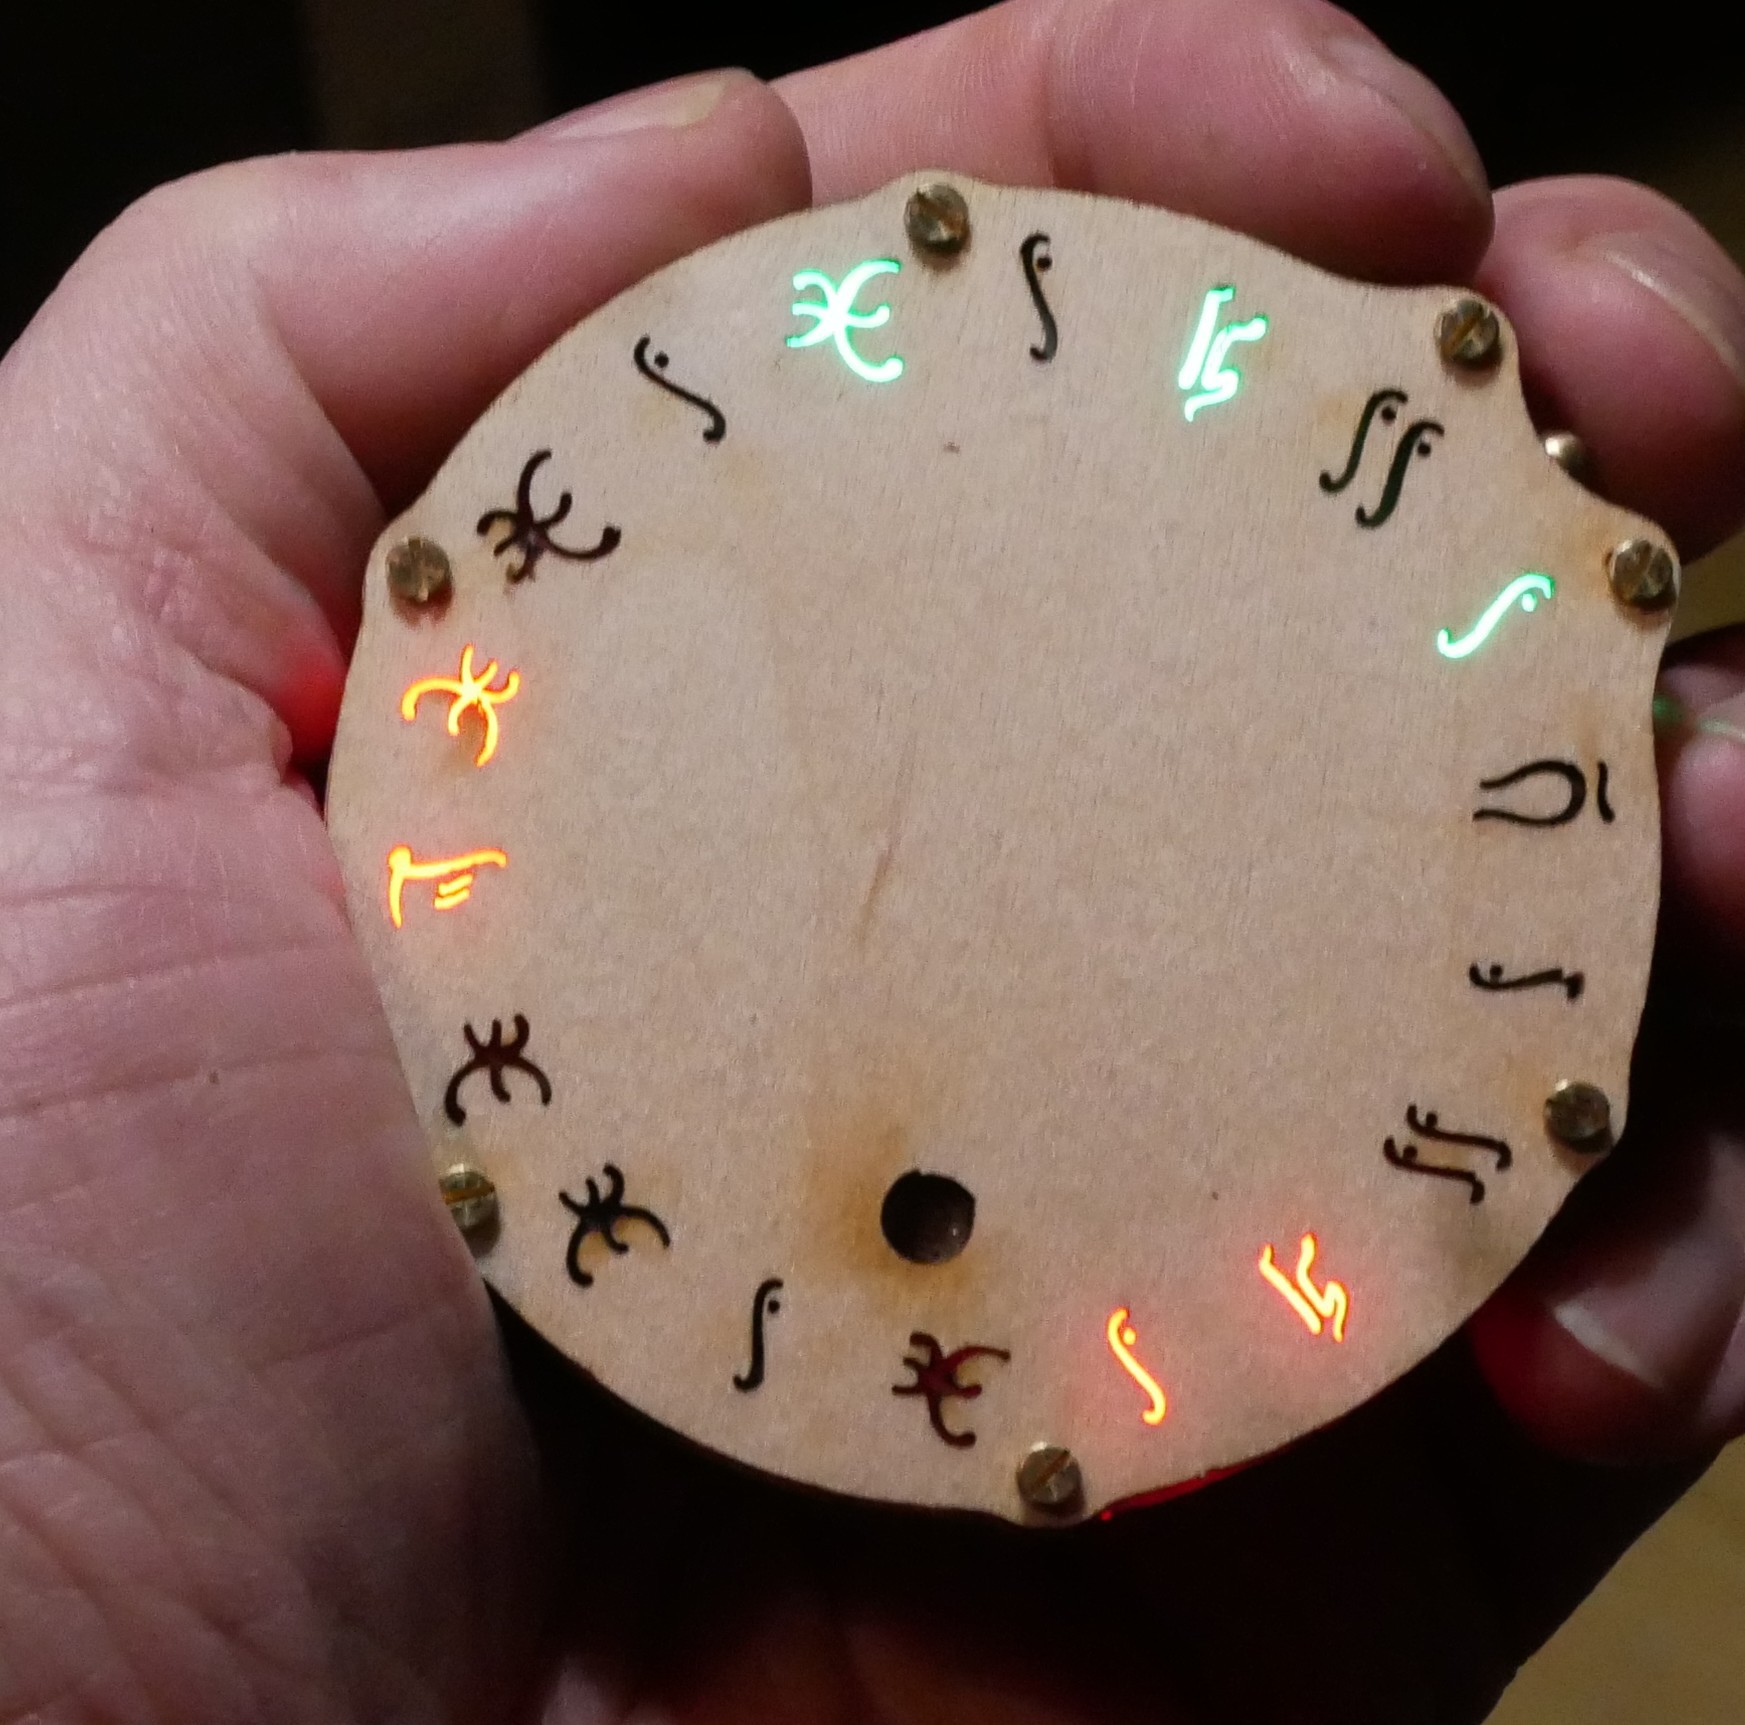
And the next layer with the second film and cutouts to adjust to the letters on top (those are a bit different depending on which kind of alphabet is used (this one is for the pylea runes):
Also holds the LDR and battery in place.
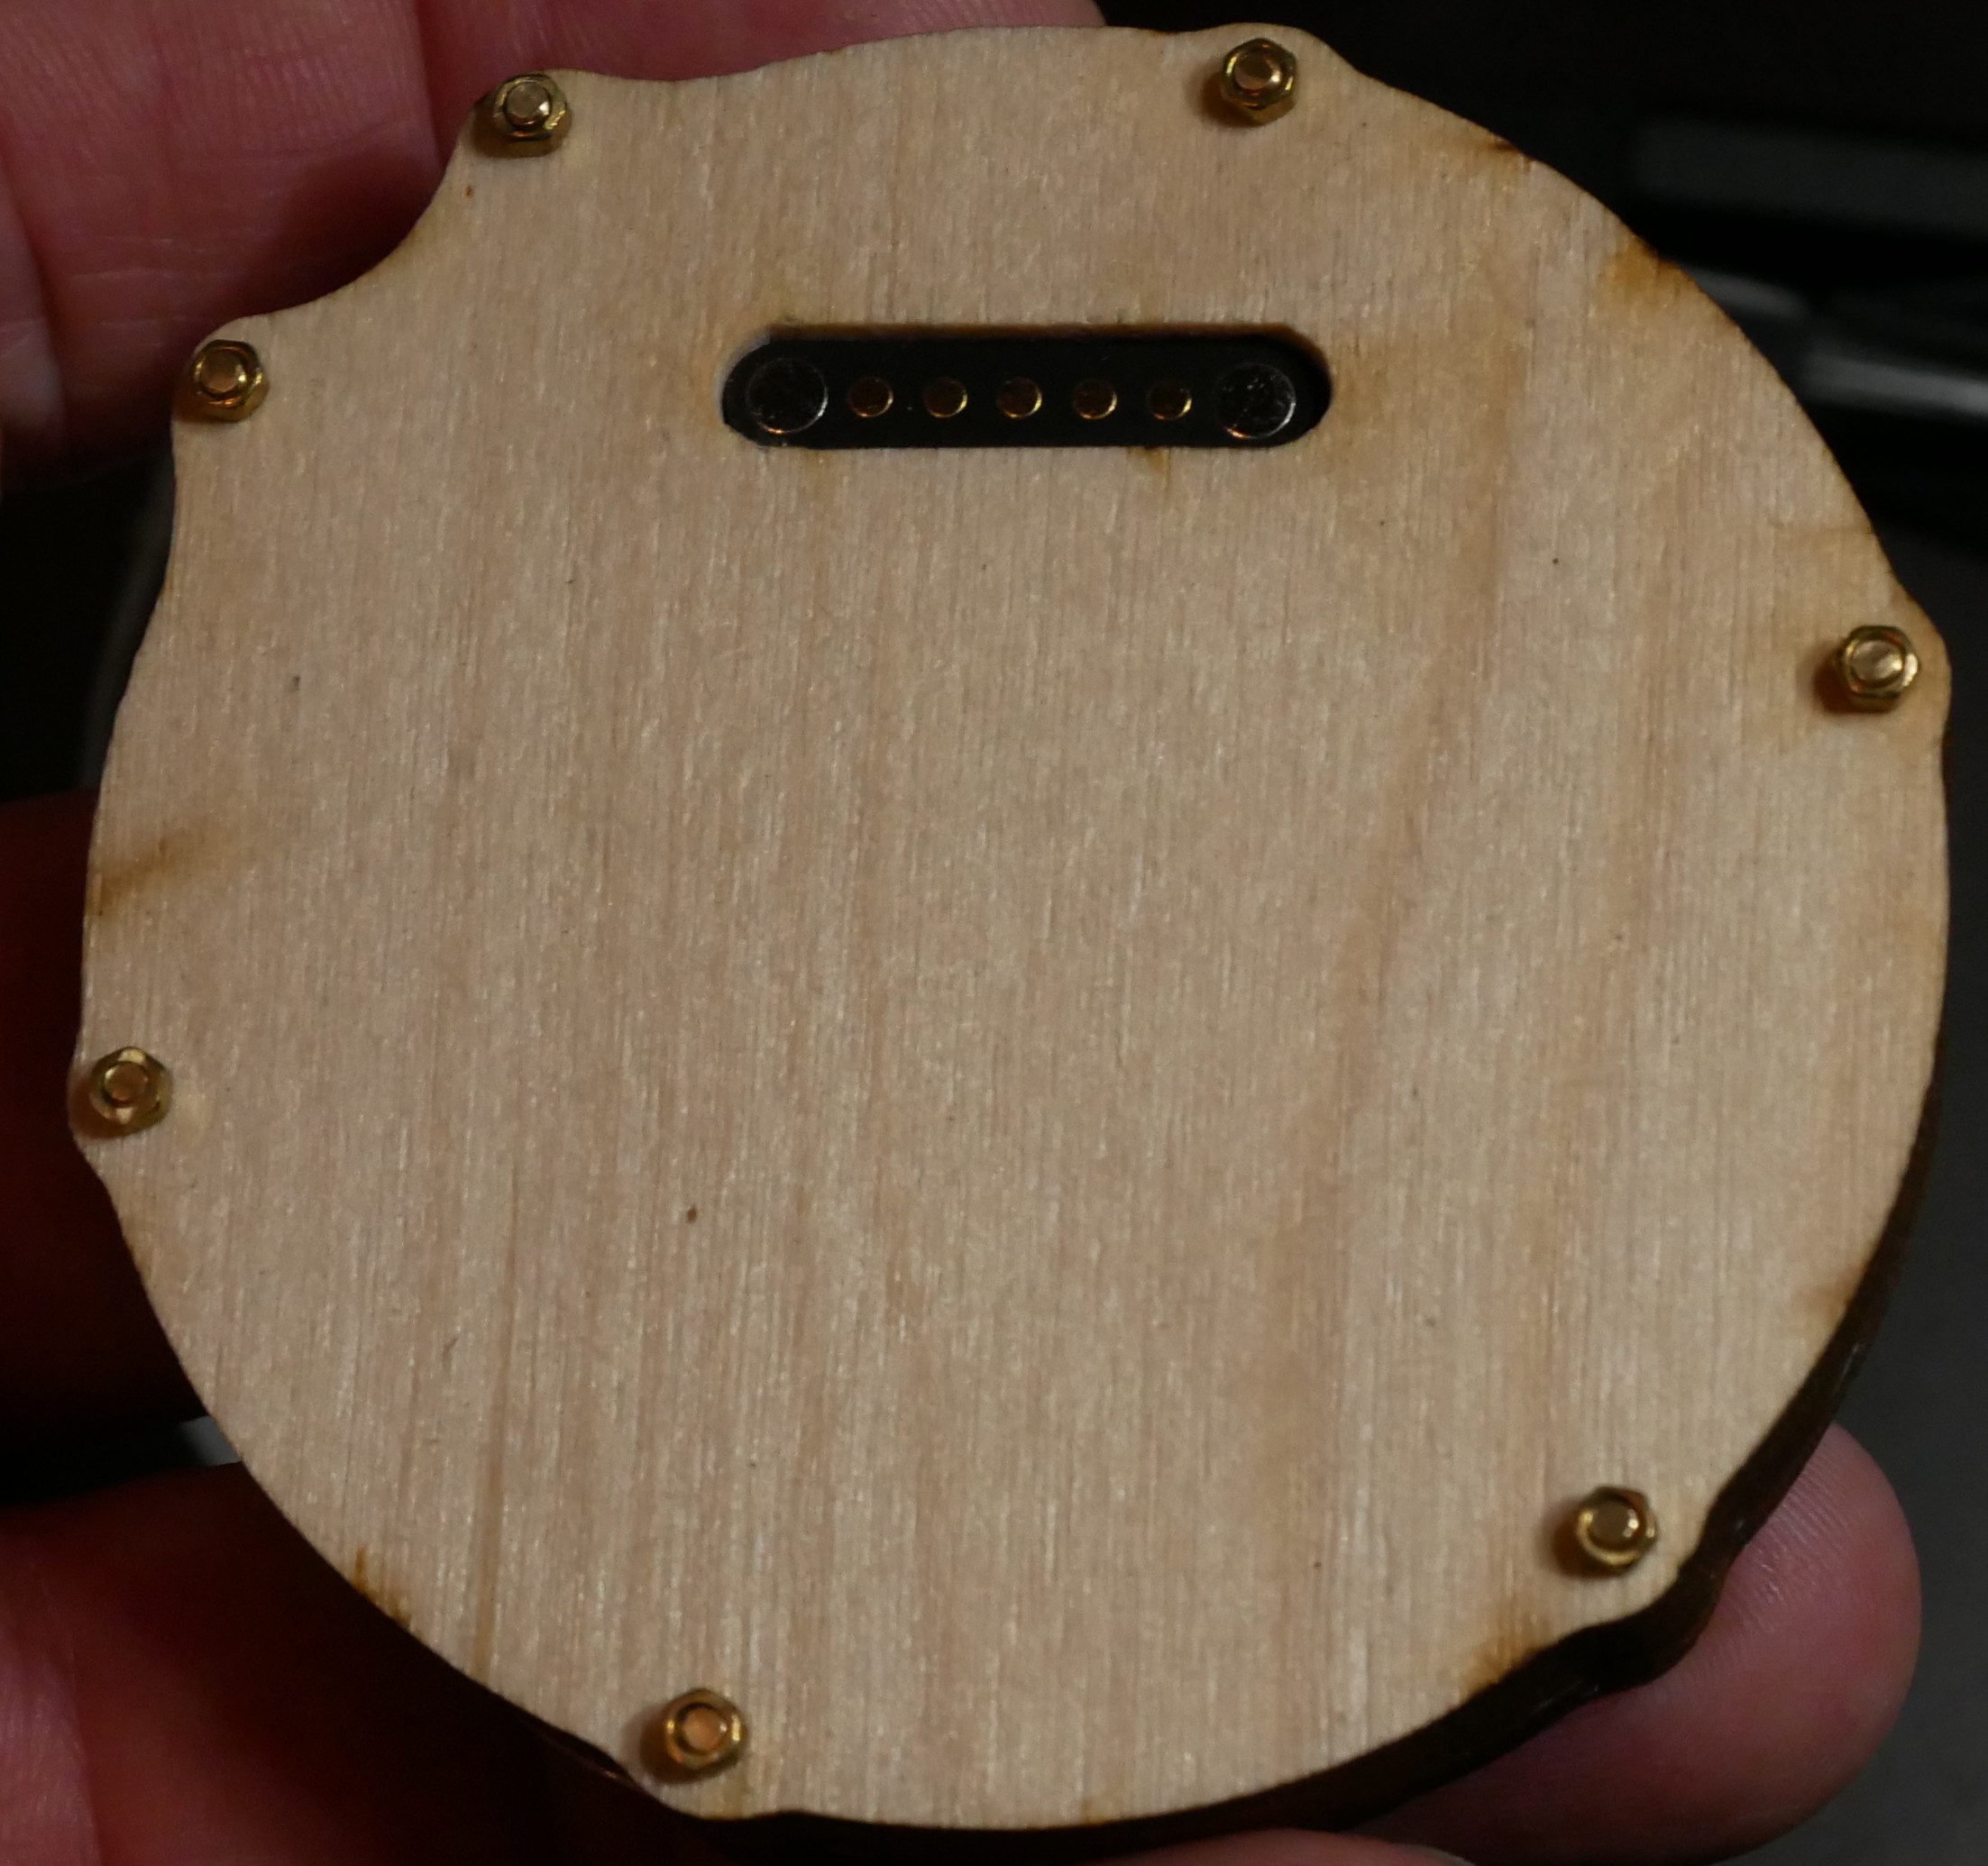
And the final cover of wood (1.5mm thin), with a bit nicer wood than the poplar I used for the rest (birch IIRC). I noticed the not very precise cutouts, there was a problem with the x axe of my lasercutter, that wasn't running smoothly.
Hold together with M1.6 brass screws (or is the correct term nuts and bolts?).
backside with the magnetic connector and front at 16:44
Discussions
Become a Hackaday.io Member
Create an account to leave a comment. Already have an account? Log In.