The Raspberry Pi boots from a USB flash drive (or microSD card). You need to install Raspberry Pi OS on a USB flash drive that you will use with your Pi. For more details about alternative methods of setting up your Raspberry Pi, refer to the Viam docs.
Install Raspberry Pi OS
Connect the USB flash drive (or microSD card) to your computer.
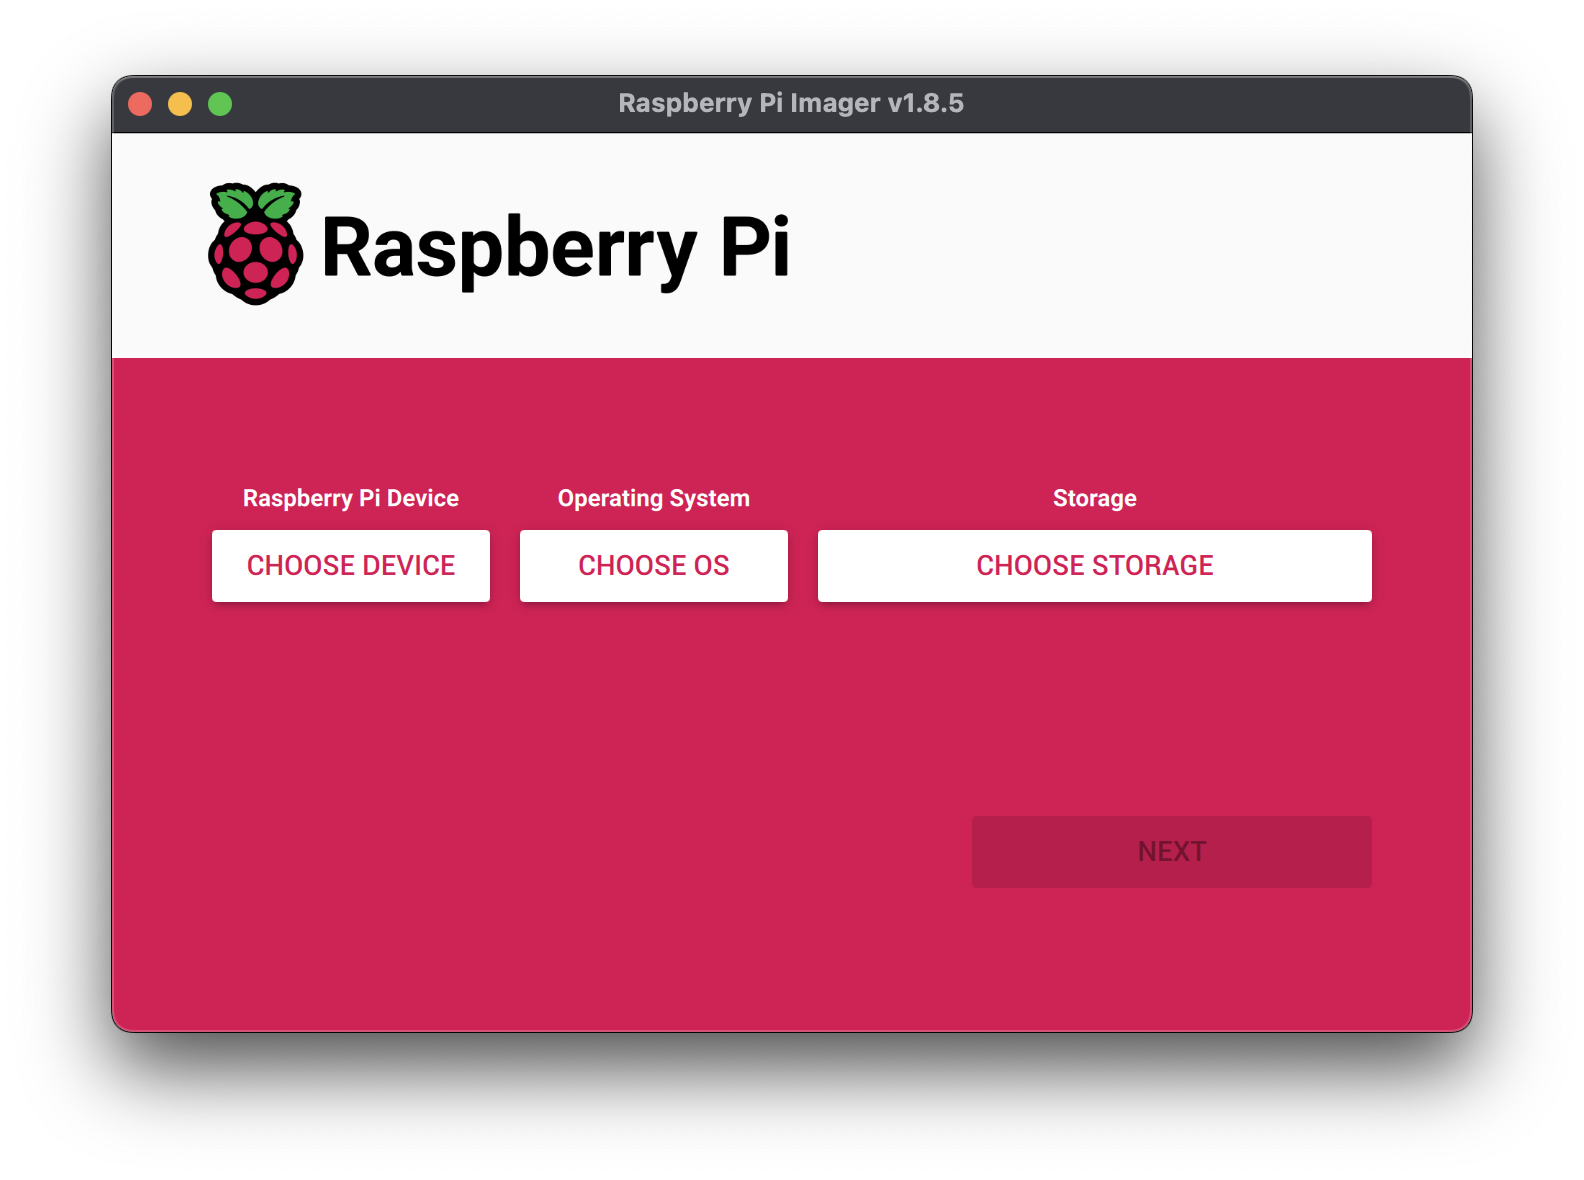
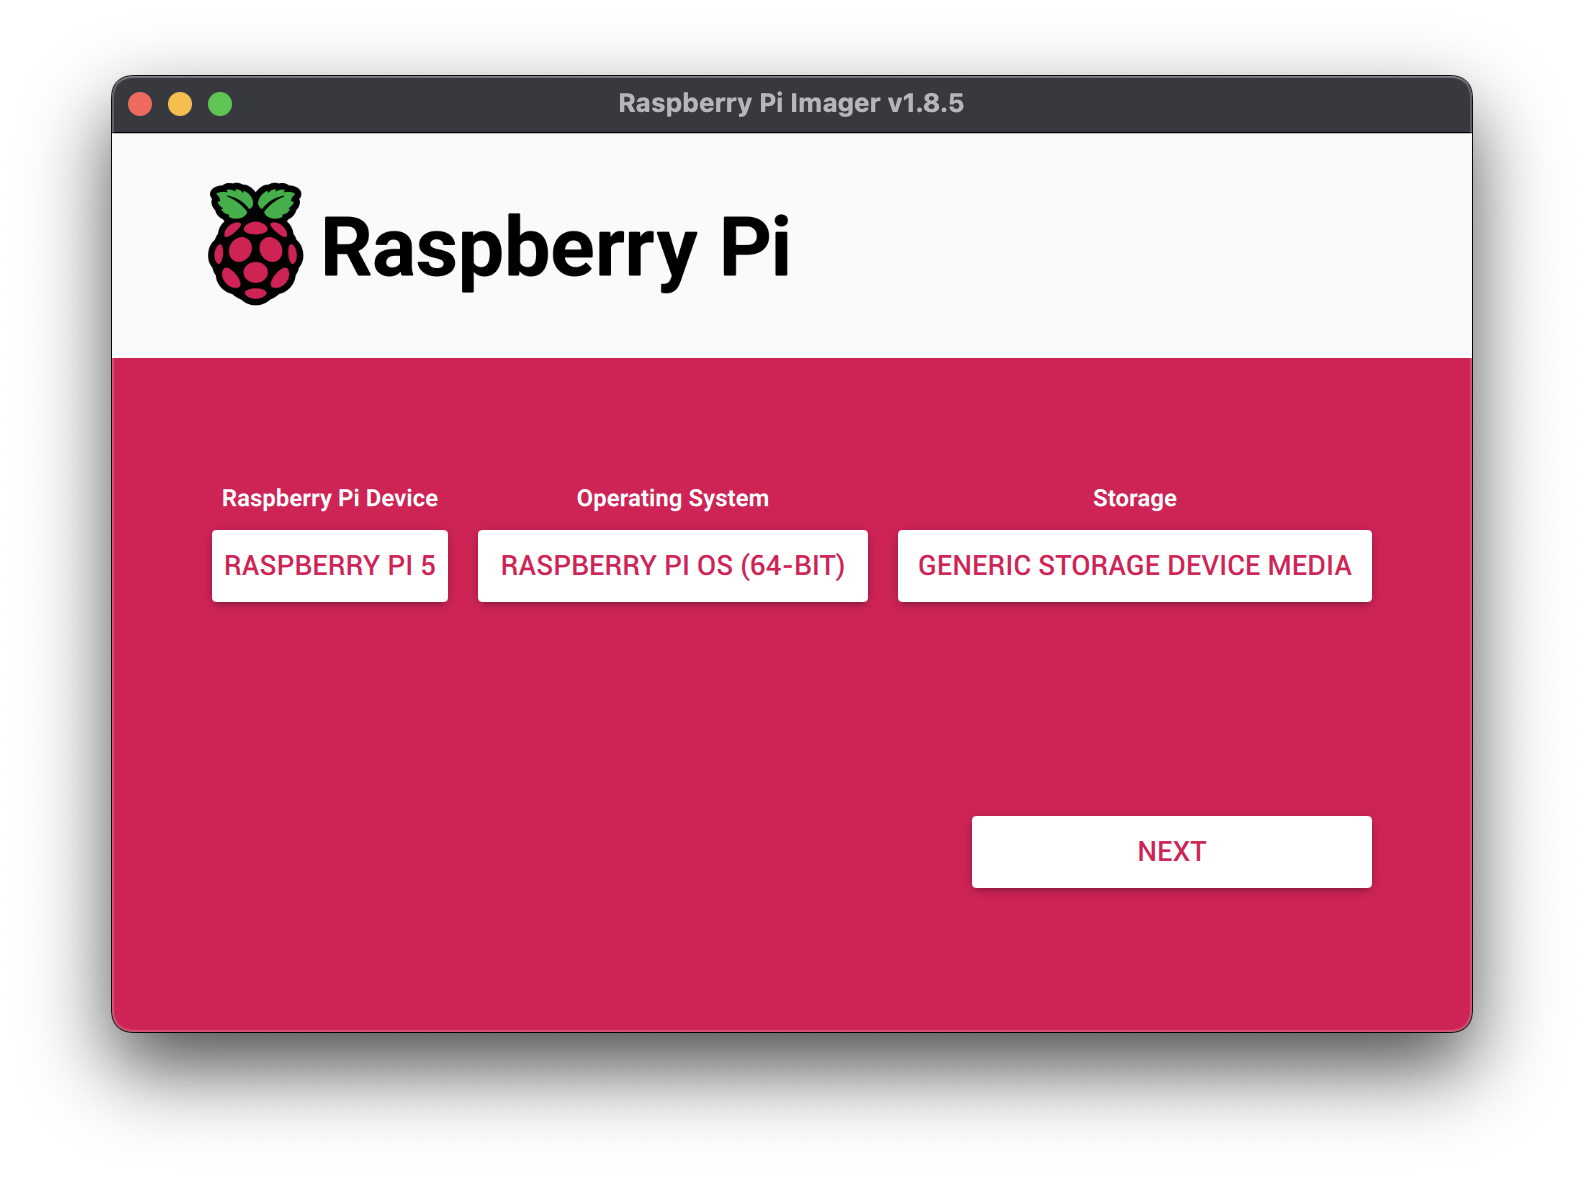
Click CHOOSE DEVICE. Select your model of Pi, which is Raspberry Pi 5.
Click CHOOSE OS. Select Raspberry Pi OS (64-bit) from the menu.
Click CHOOSE STORAGE. From the list of devices, select the USB flash drive you intend to use in your Raspberry Pi.
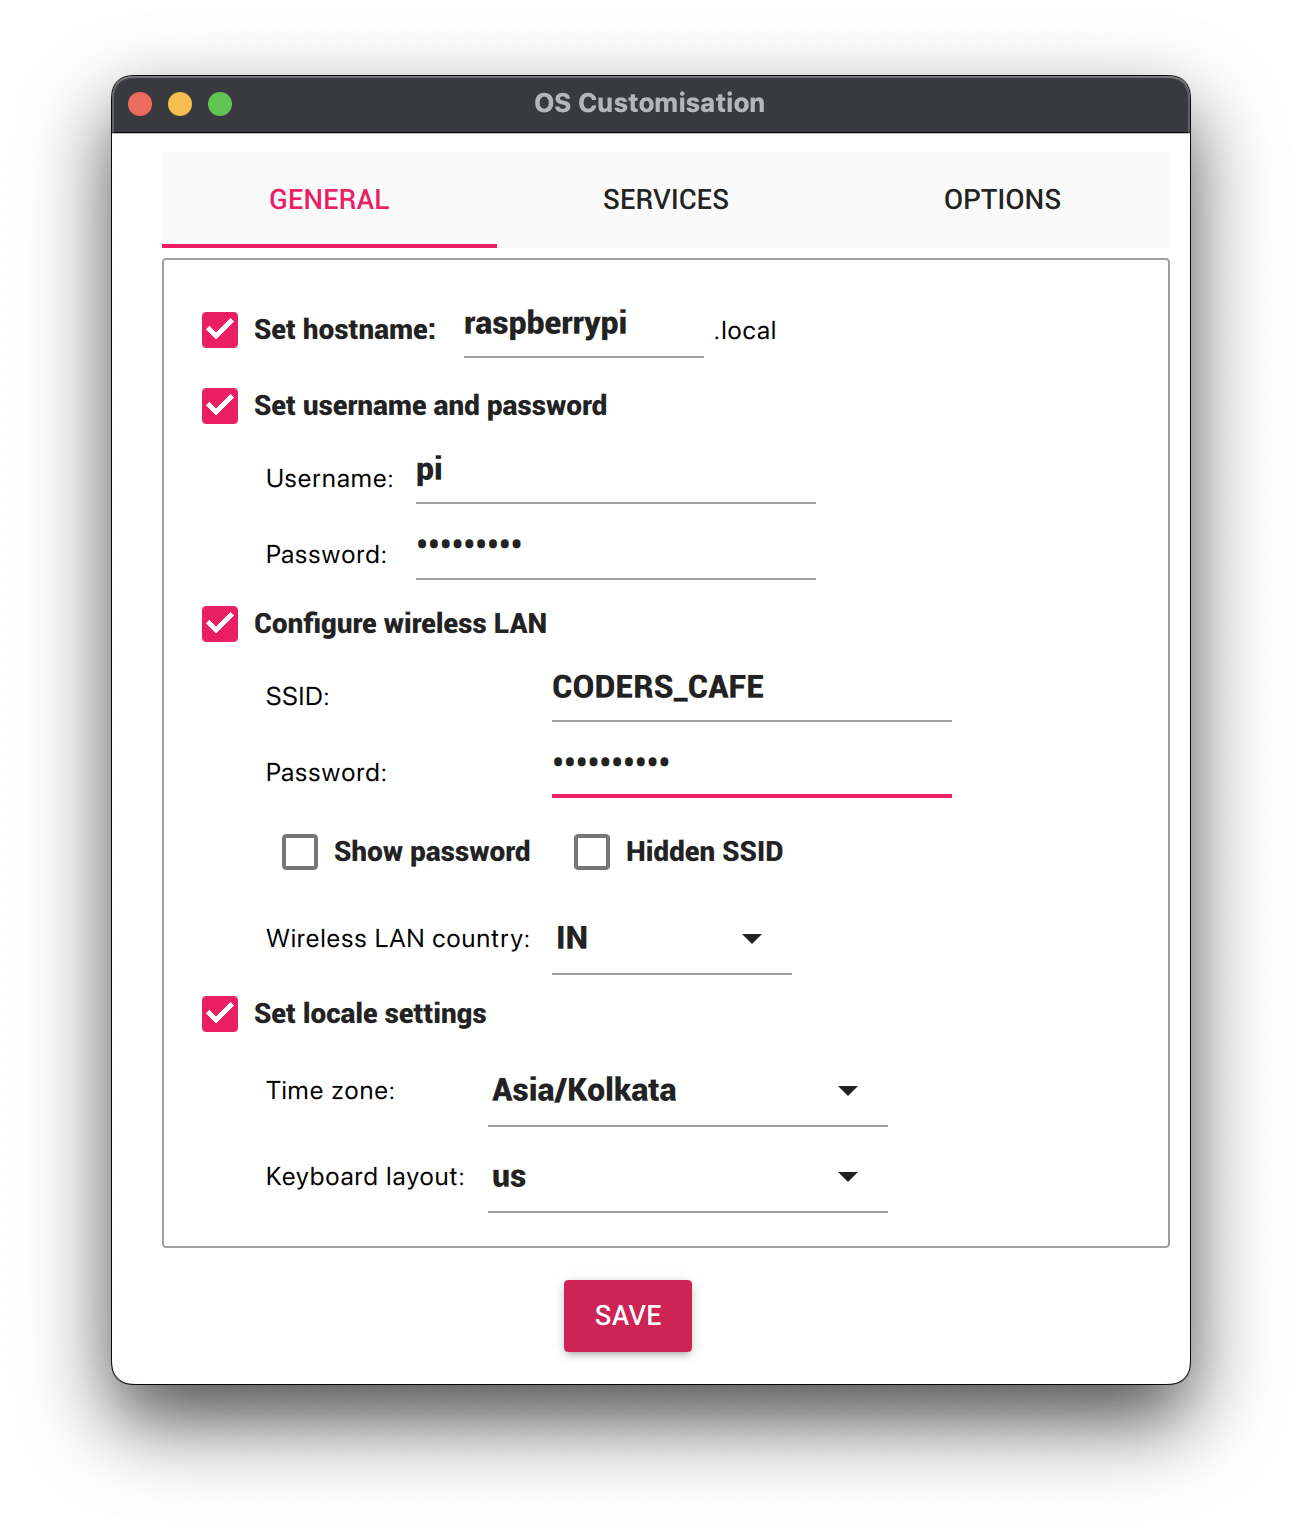
Configure your Raspberry Pi for remote access. Click Next. When prompted to apply OS customization settings, select EDIT SETTINGS.
Check Set hostname and enter the name you would like to access the Pi by in that field, for example, raspberrypi.
Select the checkbox for Set username and password and set a username (for example, your first name) that you will use to log into the Pi. If you skip this step, the default username will be pi (not recommended for security reasons). And specify a password.
Connect your Pi to Wi-Fi so that you can run viam-server wirelessly. Check Configure wireless LAN and enter your wireless network credentials. SSID is your Wi-Fi network name, and password is the network password. Change the section Wireless LAN country to where your router is currently being operated.
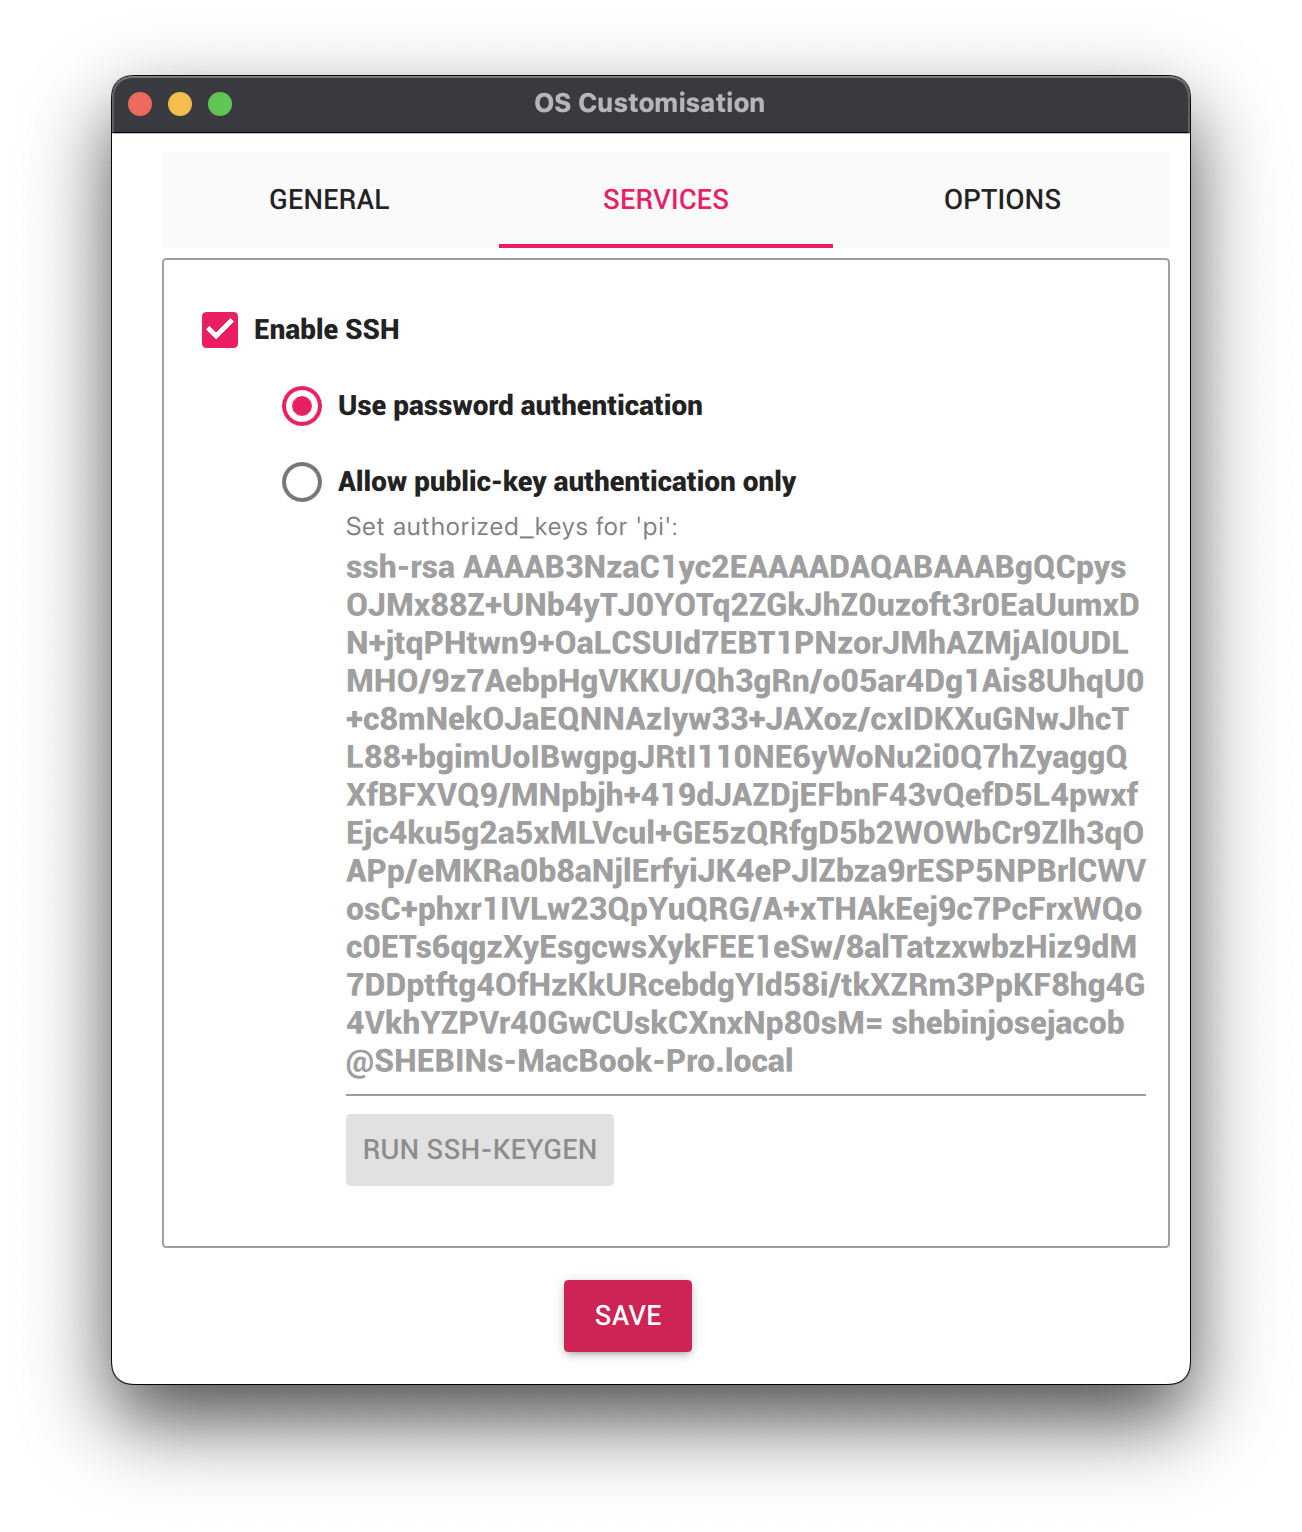
Select the SERVICES tab, check Enable SSH, and select Use password authentication. Be sure that you remember the hostname and username you set, as you will need this when you SSH into your Pi.
Save your updates, and confirm YES to apply OS customization settings. Confirm YES to erase data on the USB flash drive. You may also be prompted by your operating system to enter an administrator password. After granting permissions to the Imager, it will begin writing and then verifying the Linux installation to the USB flash drive.
Remove the USB flash drive from your computer when the installation is complete.
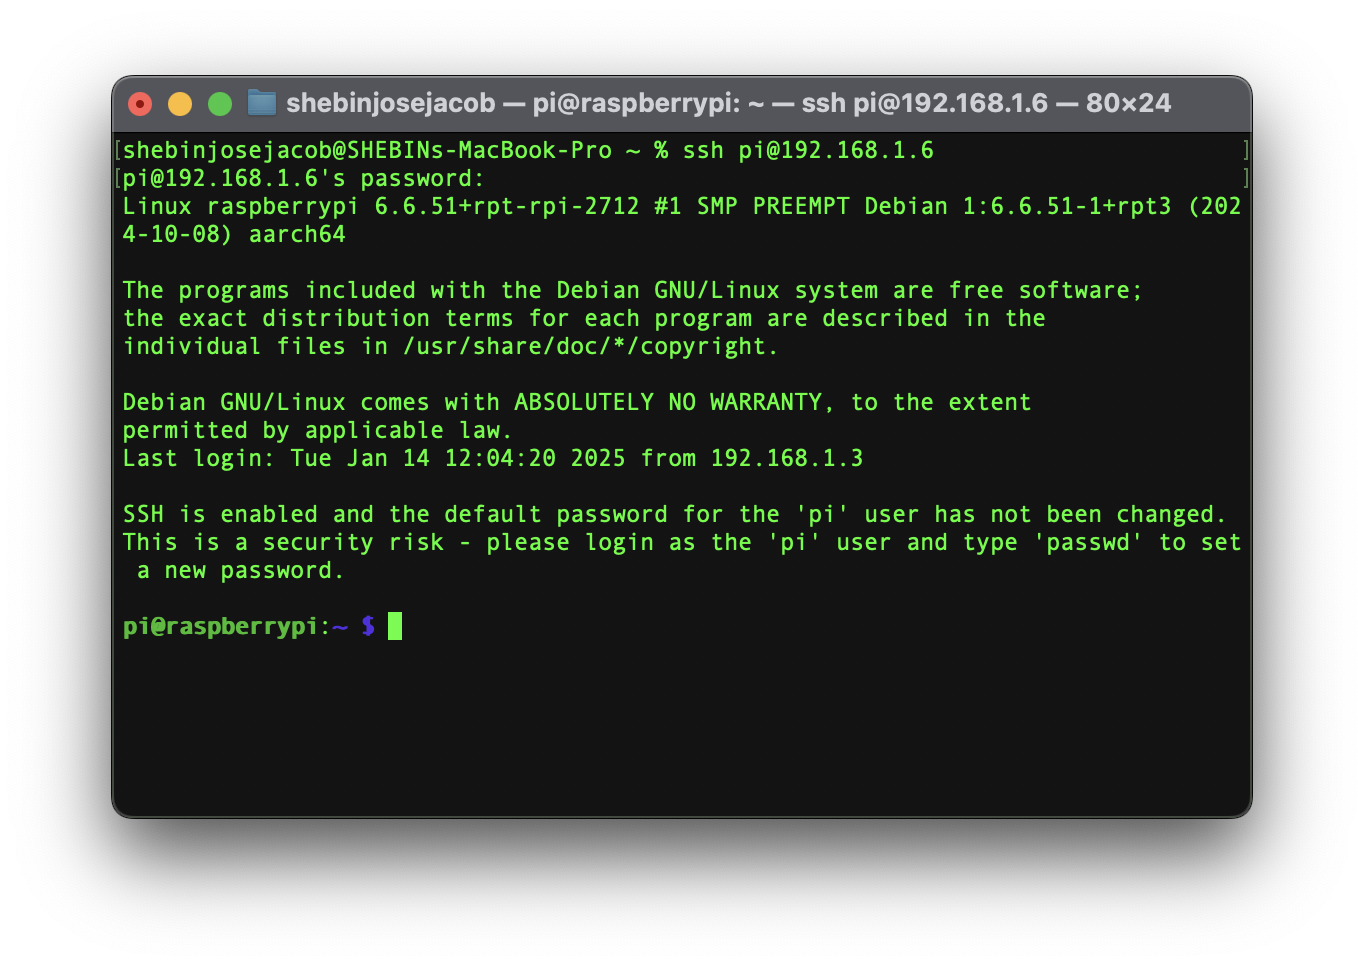
Connect with SSH
Place the USB flash drive into your Raspberry Pi and boot the Pi by plugging it in to an outlet. A red LED will turn on to indicate that the Pi is connected to power. Make sure you are using a 5V 5A (25W) power supply. USB boot is disabled by default when connected to a 3A power supply, so adequate amperage is required for the optimal performance of your Raspberry Pi 5.
Once the Pi is started, connect to it with SSH. From a command line terminal window, enter the following command. The text in <> should be replaced (including the < and > symbols themselves) with the user and hostname you configured when you set up your Pi.
ssh <USERNAME>@<HOSTNAME>.local
If you are prompted “Are you sure you want to continue connecting?”, type “yes” and hit enter. Then, enter the password for your username. You should be greeted by a login message and a command prompt.
Update your Raspberry Pi to ensure all the latest packages are installed
sudo apt update
sudo apt upgrade
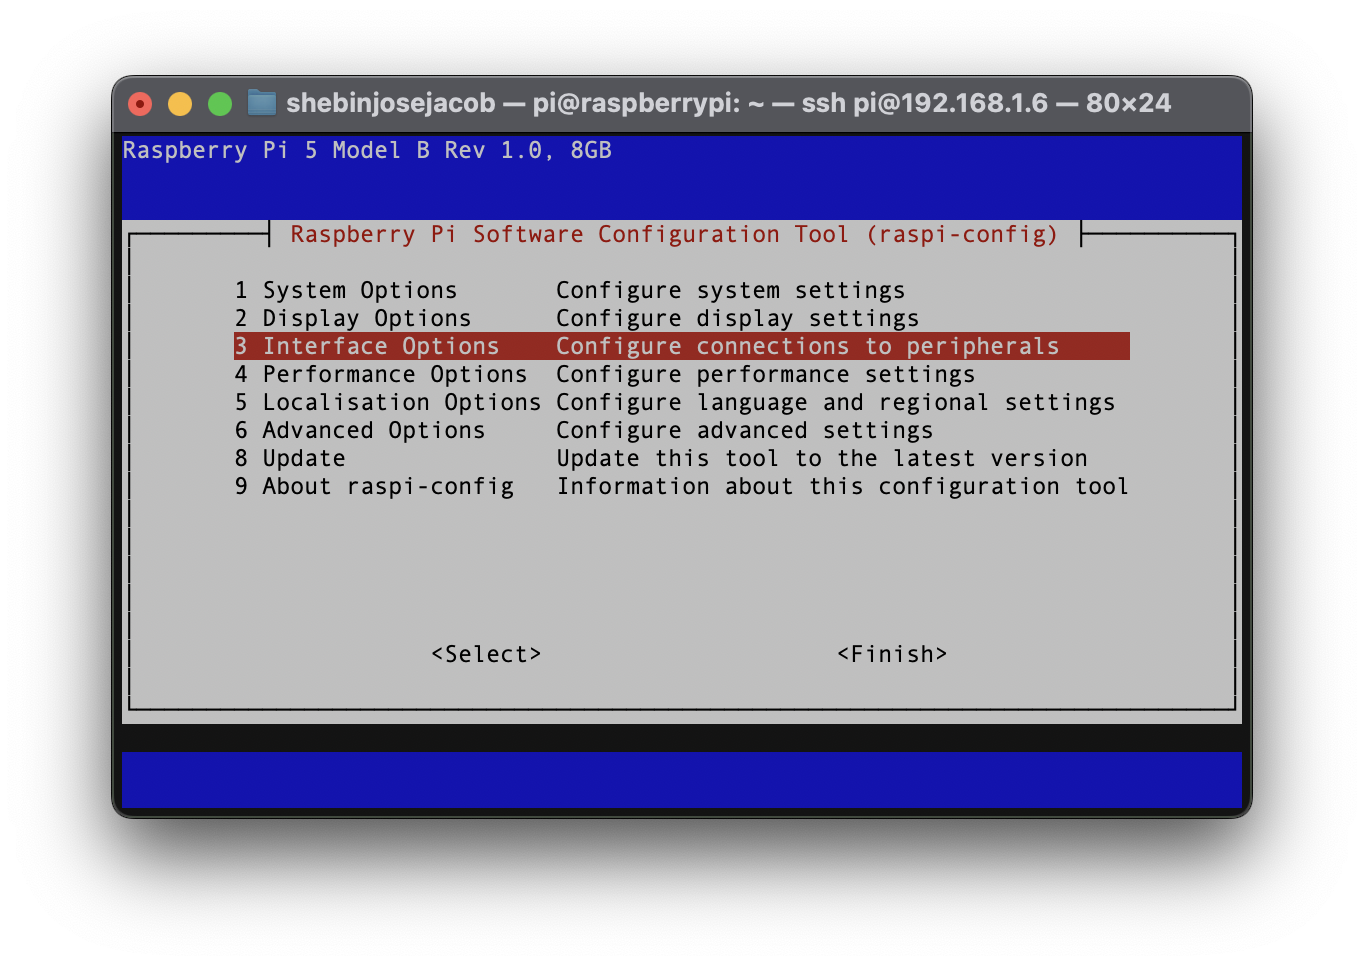
Enable communication protocols
Launch the Pi configuration tool by running the following command
sudo raspi-config
Use your keyboard to select Interface Options, and press return.
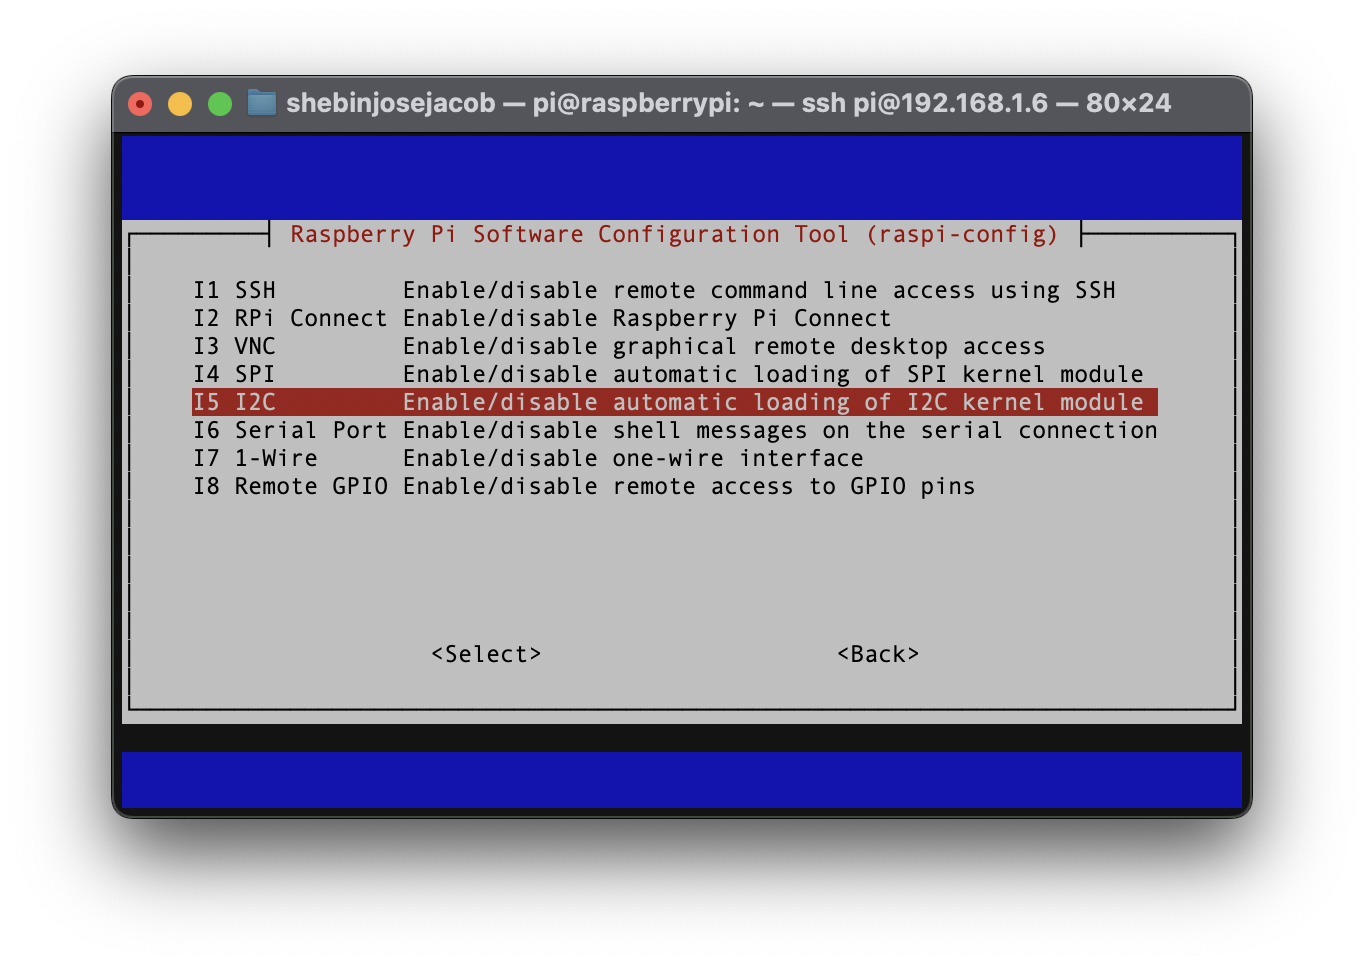
Enable the relevant protocols to support our hardware. Since you are using a sensor that communicates over the I2C, enable I2C.
Confirm the options to enable I2C interface. And reboot the Pi when you're finished.
Configure Your Machine
Create Your Machine
In the Viam app under the LOCATIONS tab, create a machine by typing in a name and clicking Add machine.
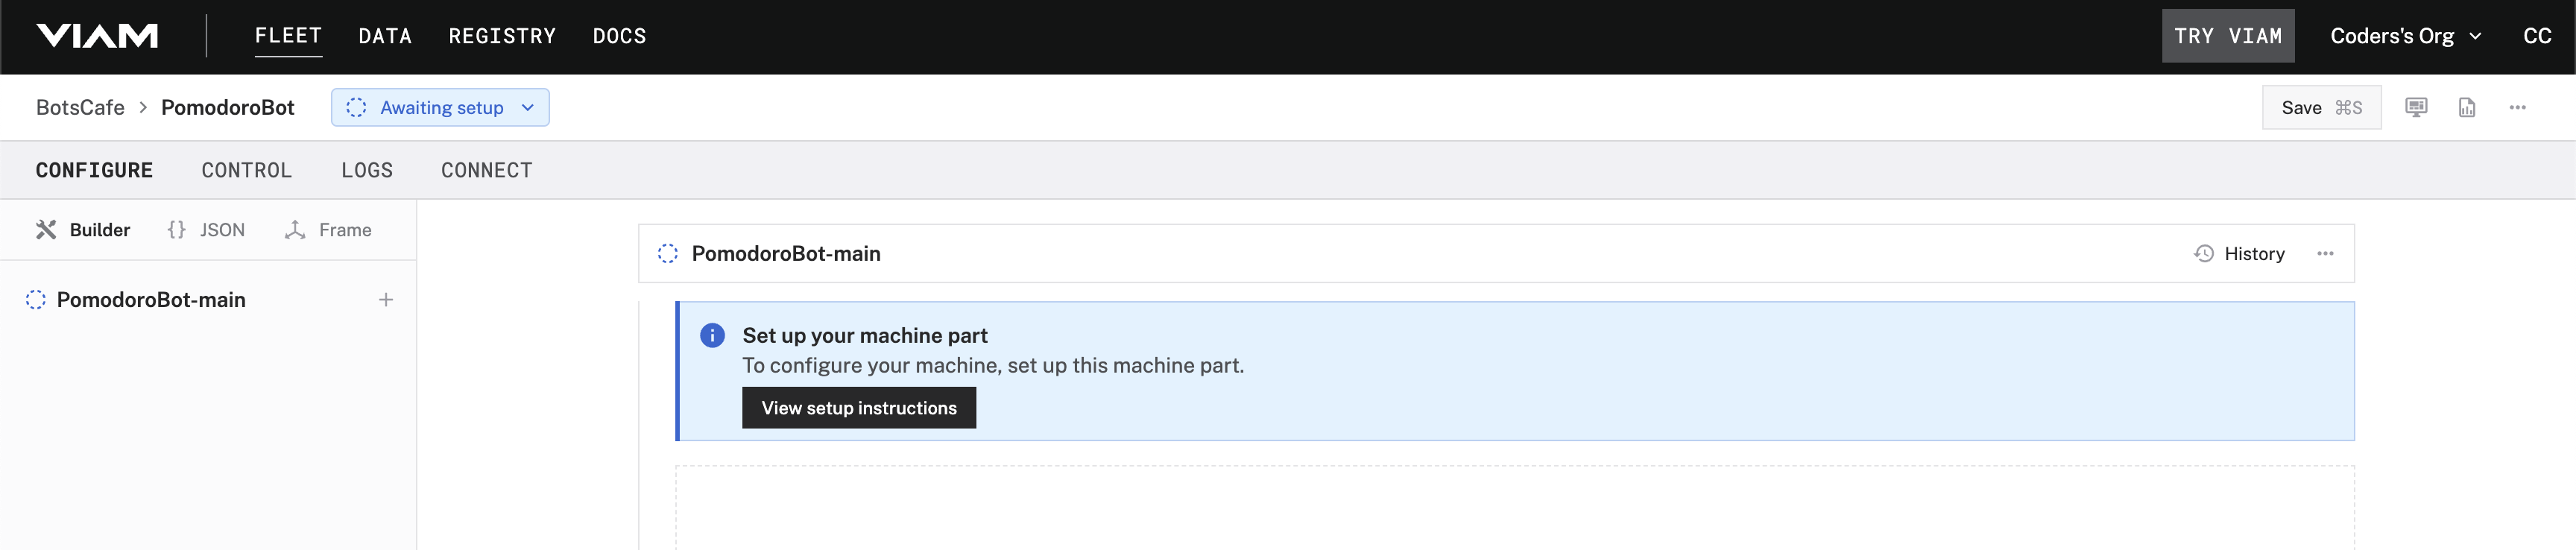
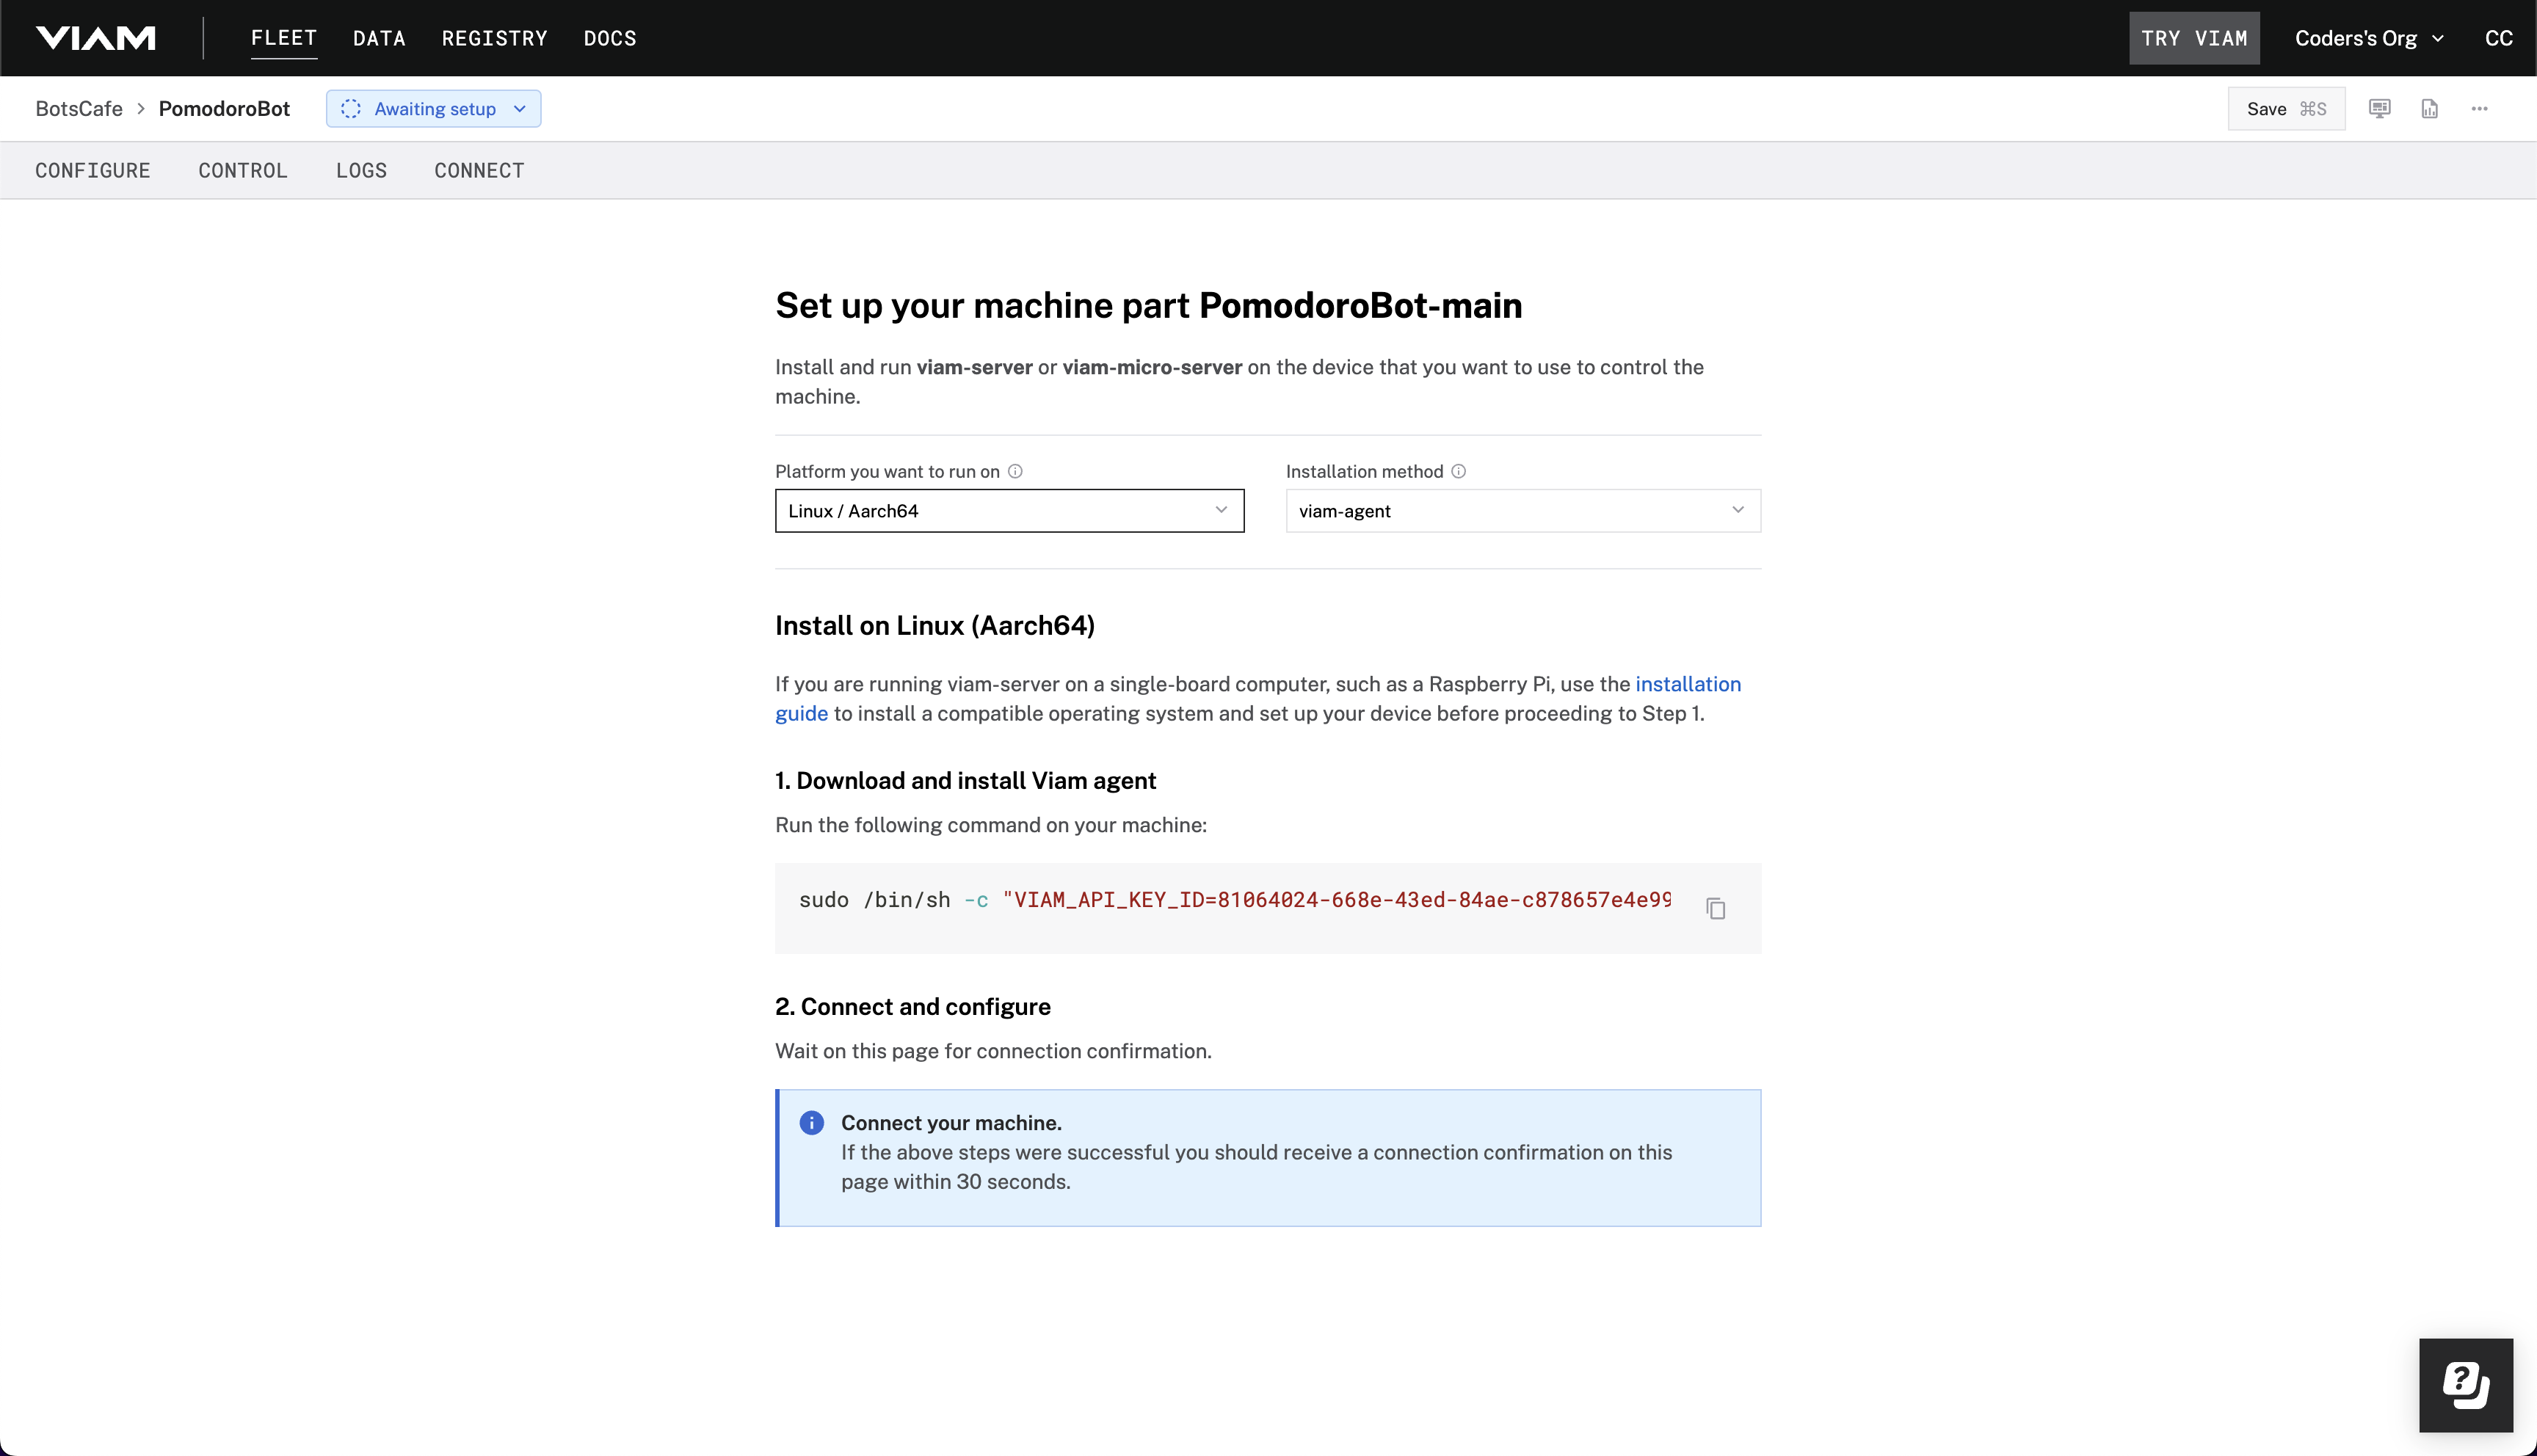
Click View setup instructions.
Install viam-server on the Raspberry Pi device that you want to use to communicate with and control your Pomodoro Bot. Select the Linux / Aarch64 platform for the Raspberry Pi, and leave your installation method as viam-agent.
Use the viam-agent to download and install viam-server on your Raspberry Pi. Follow the instructions to run the command provided in the setup instructions from the SSH prompt of your Raspberry Pi. The setup page will indicate when the machine is successfully connected.
Add your Raspberry Pi
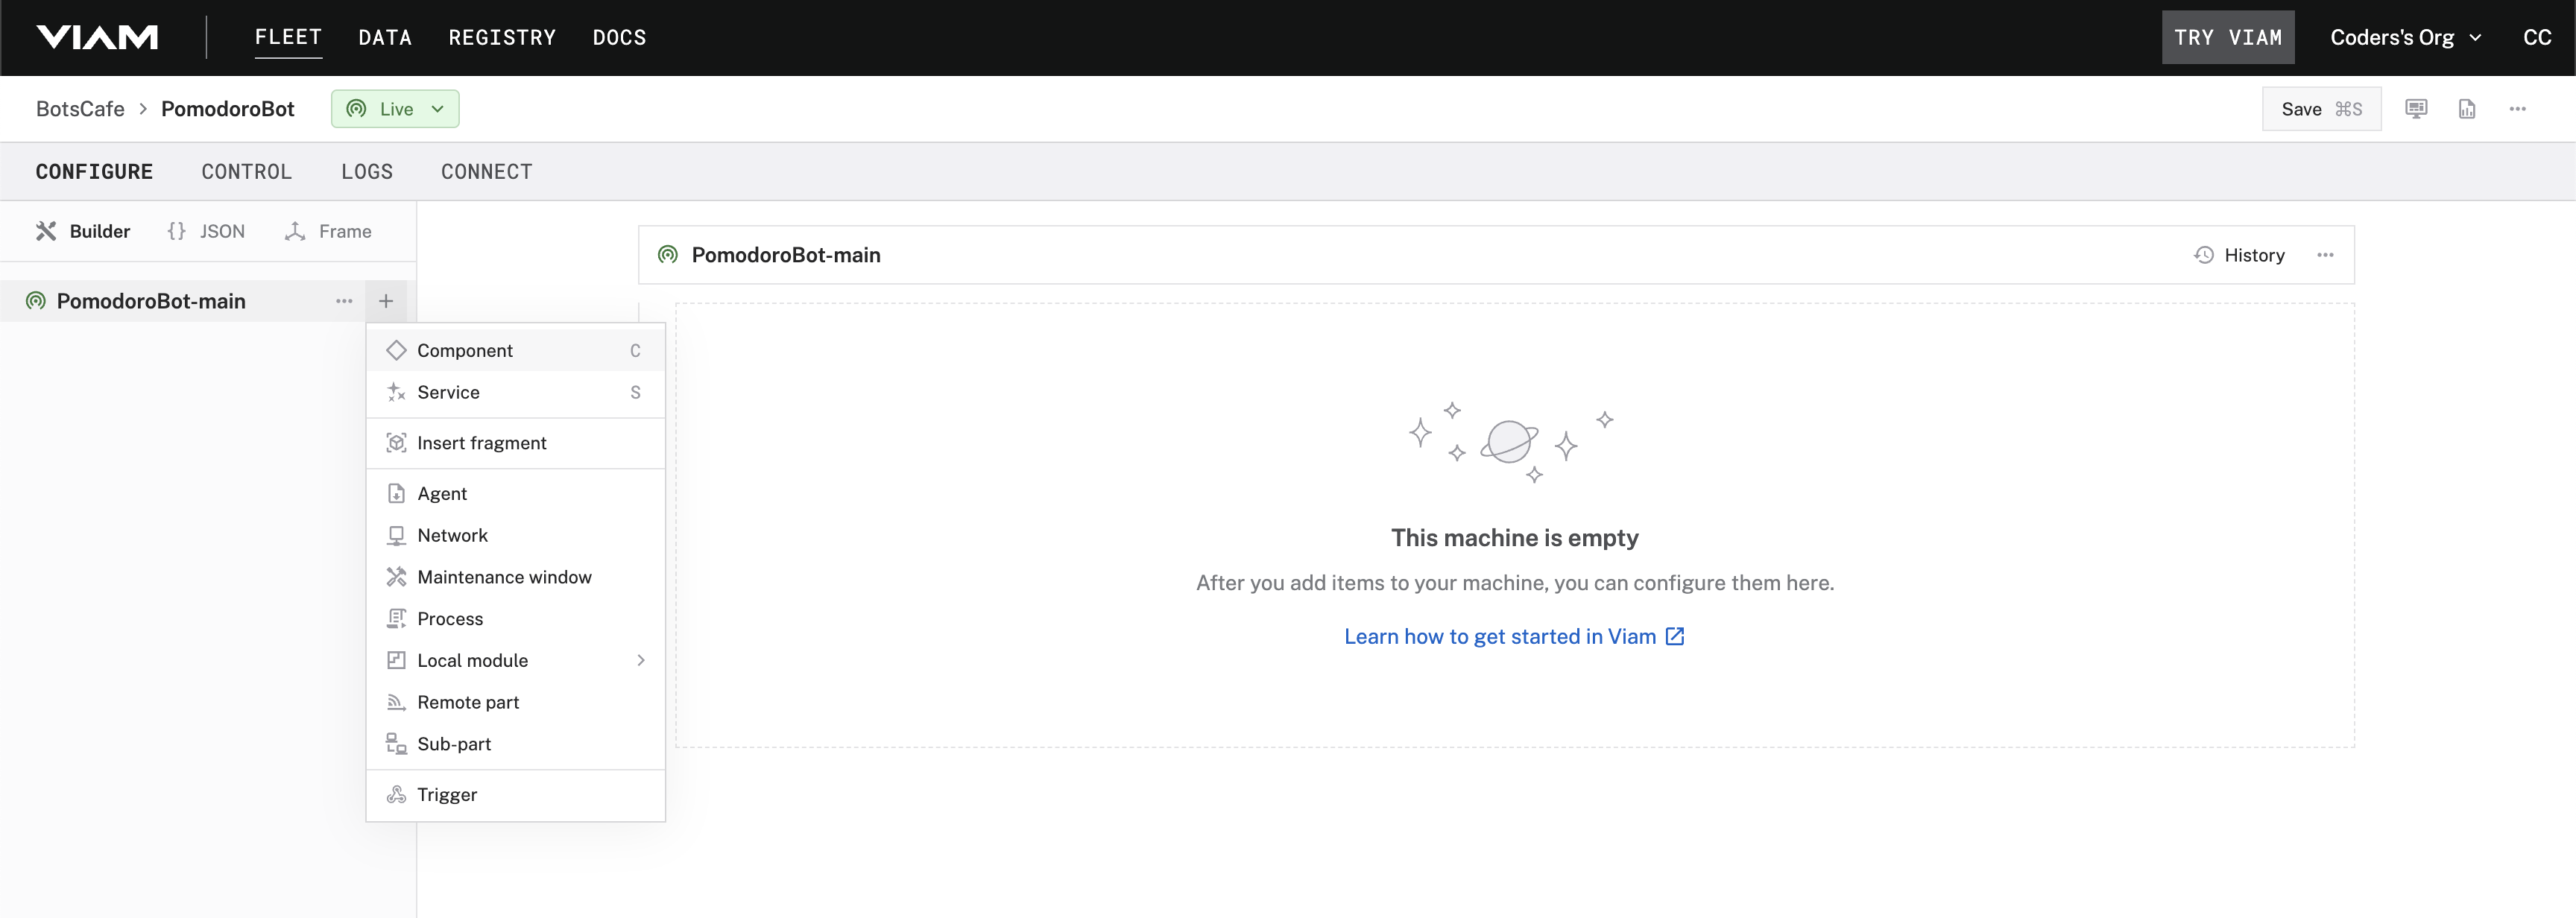
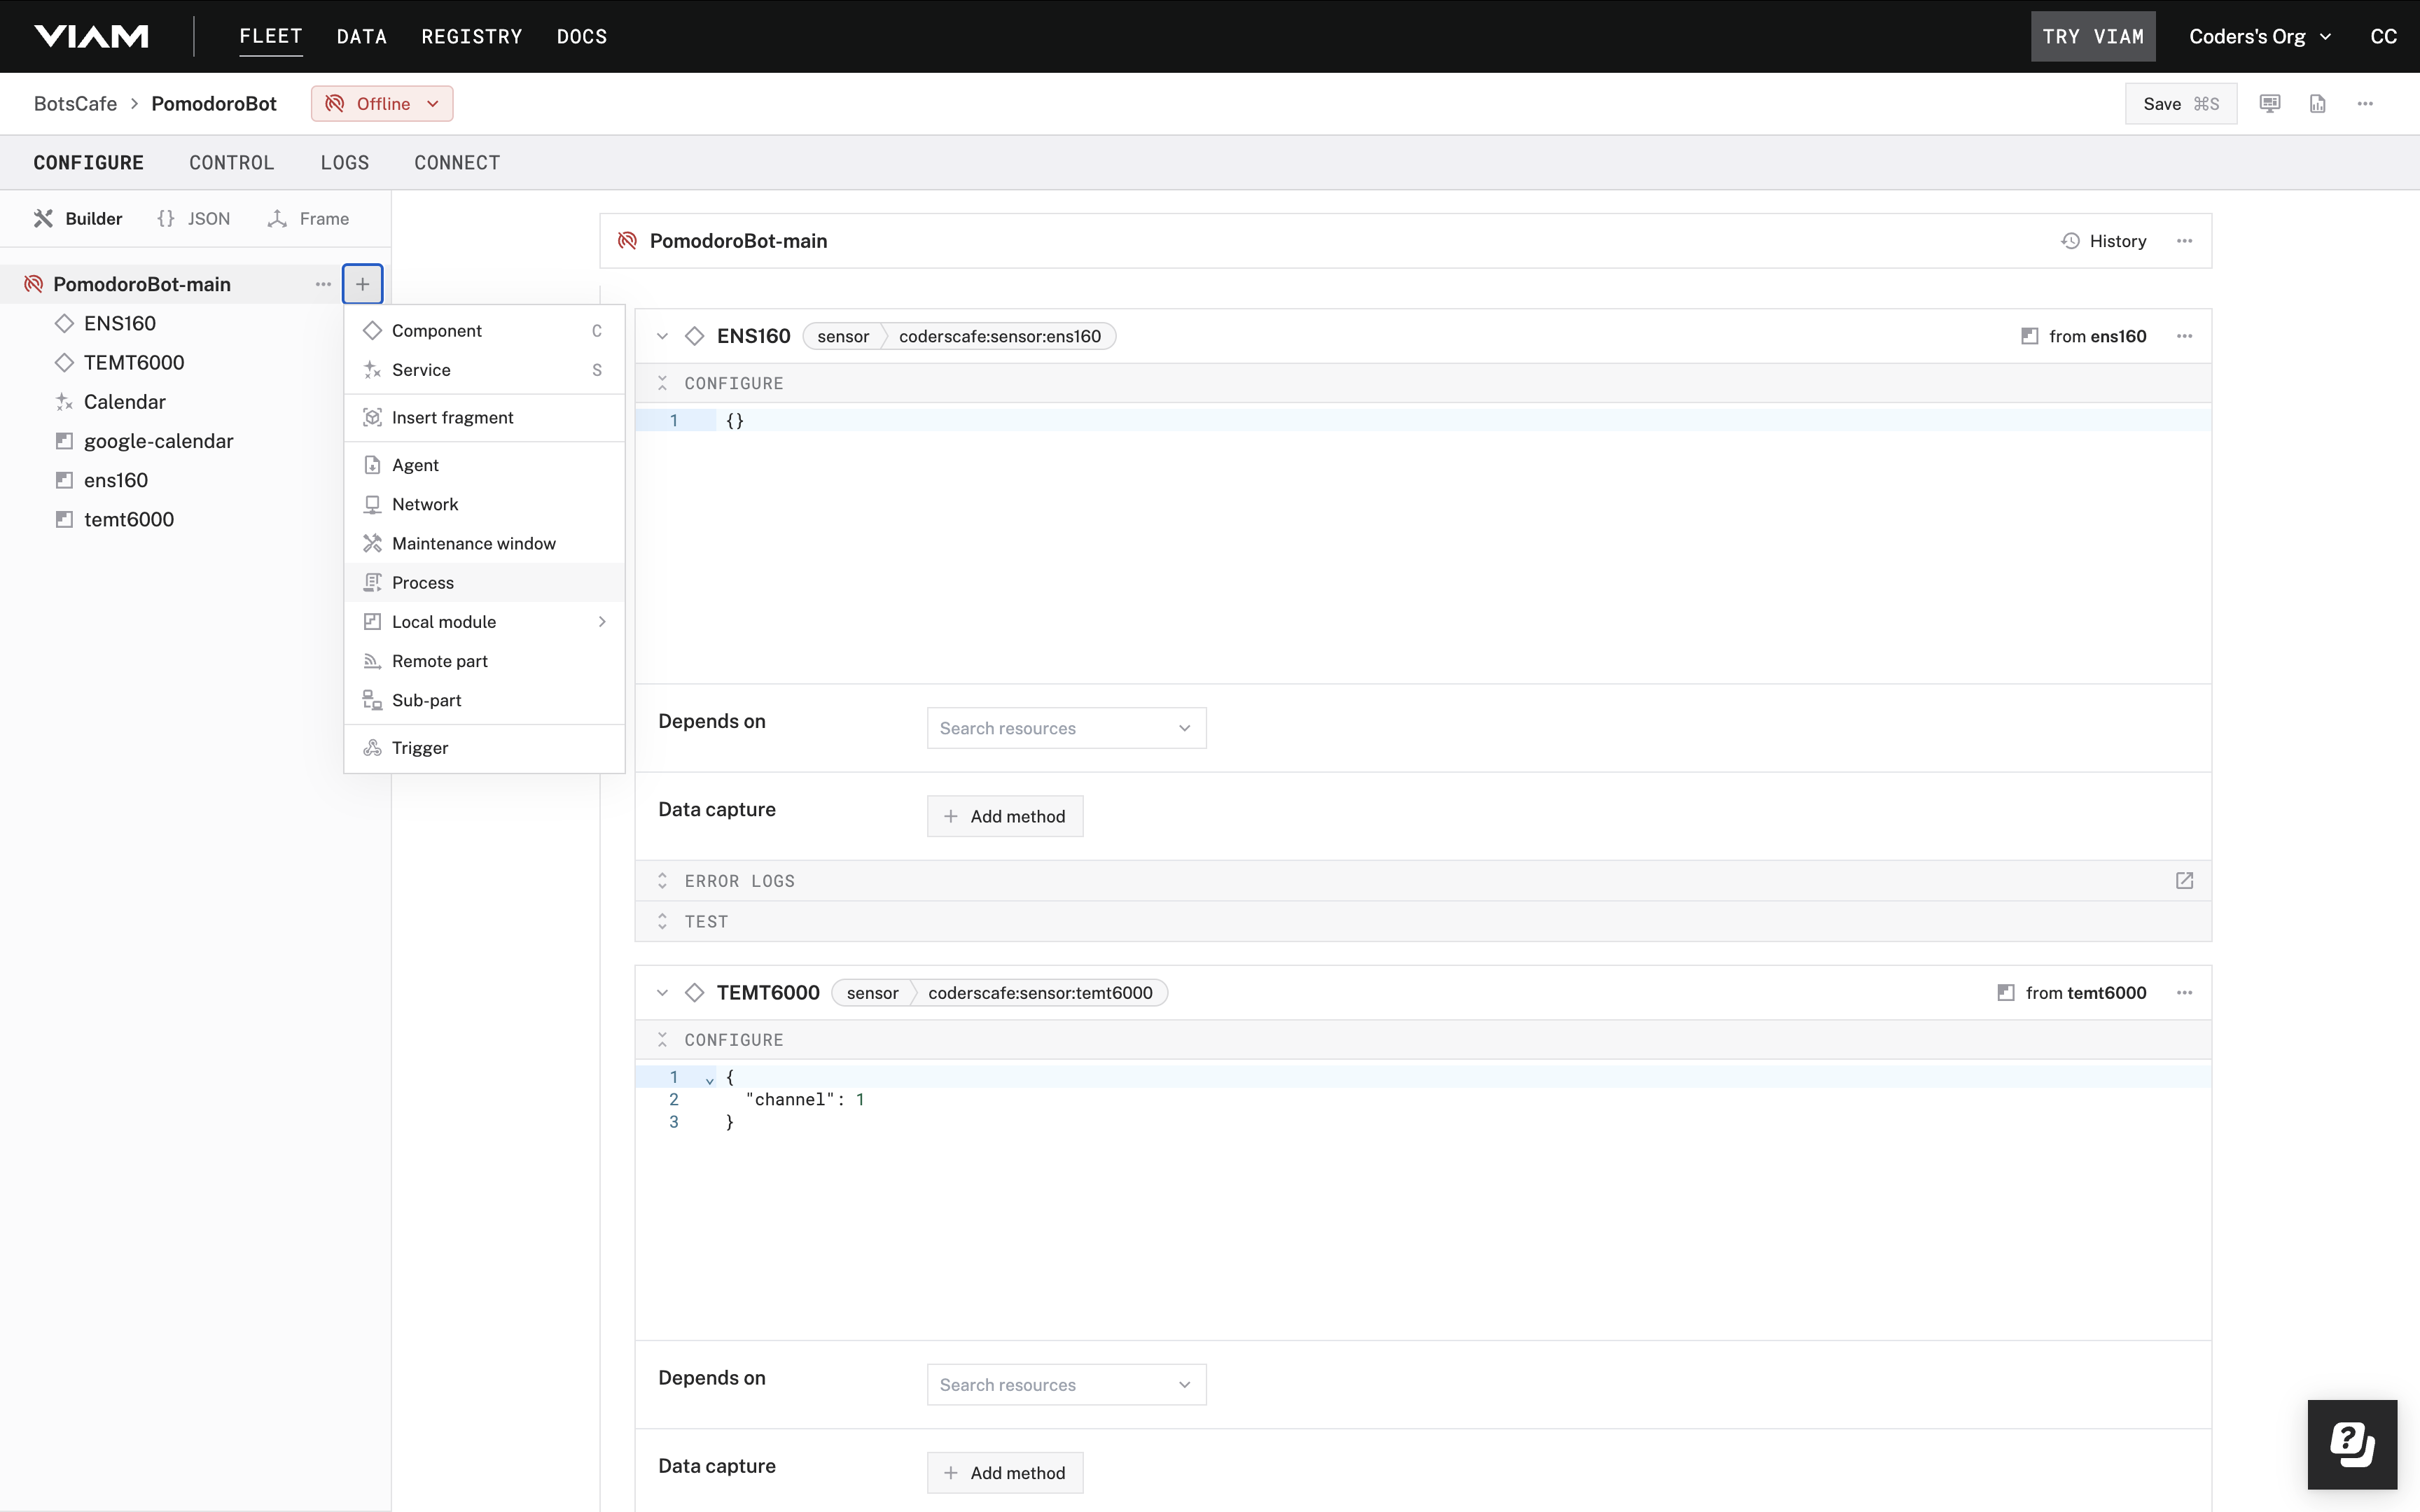
In the Viam app, find the CONFIGURE tab. It's time to configure your hardware.
Click the + icon in the left-hand menu and select Component.
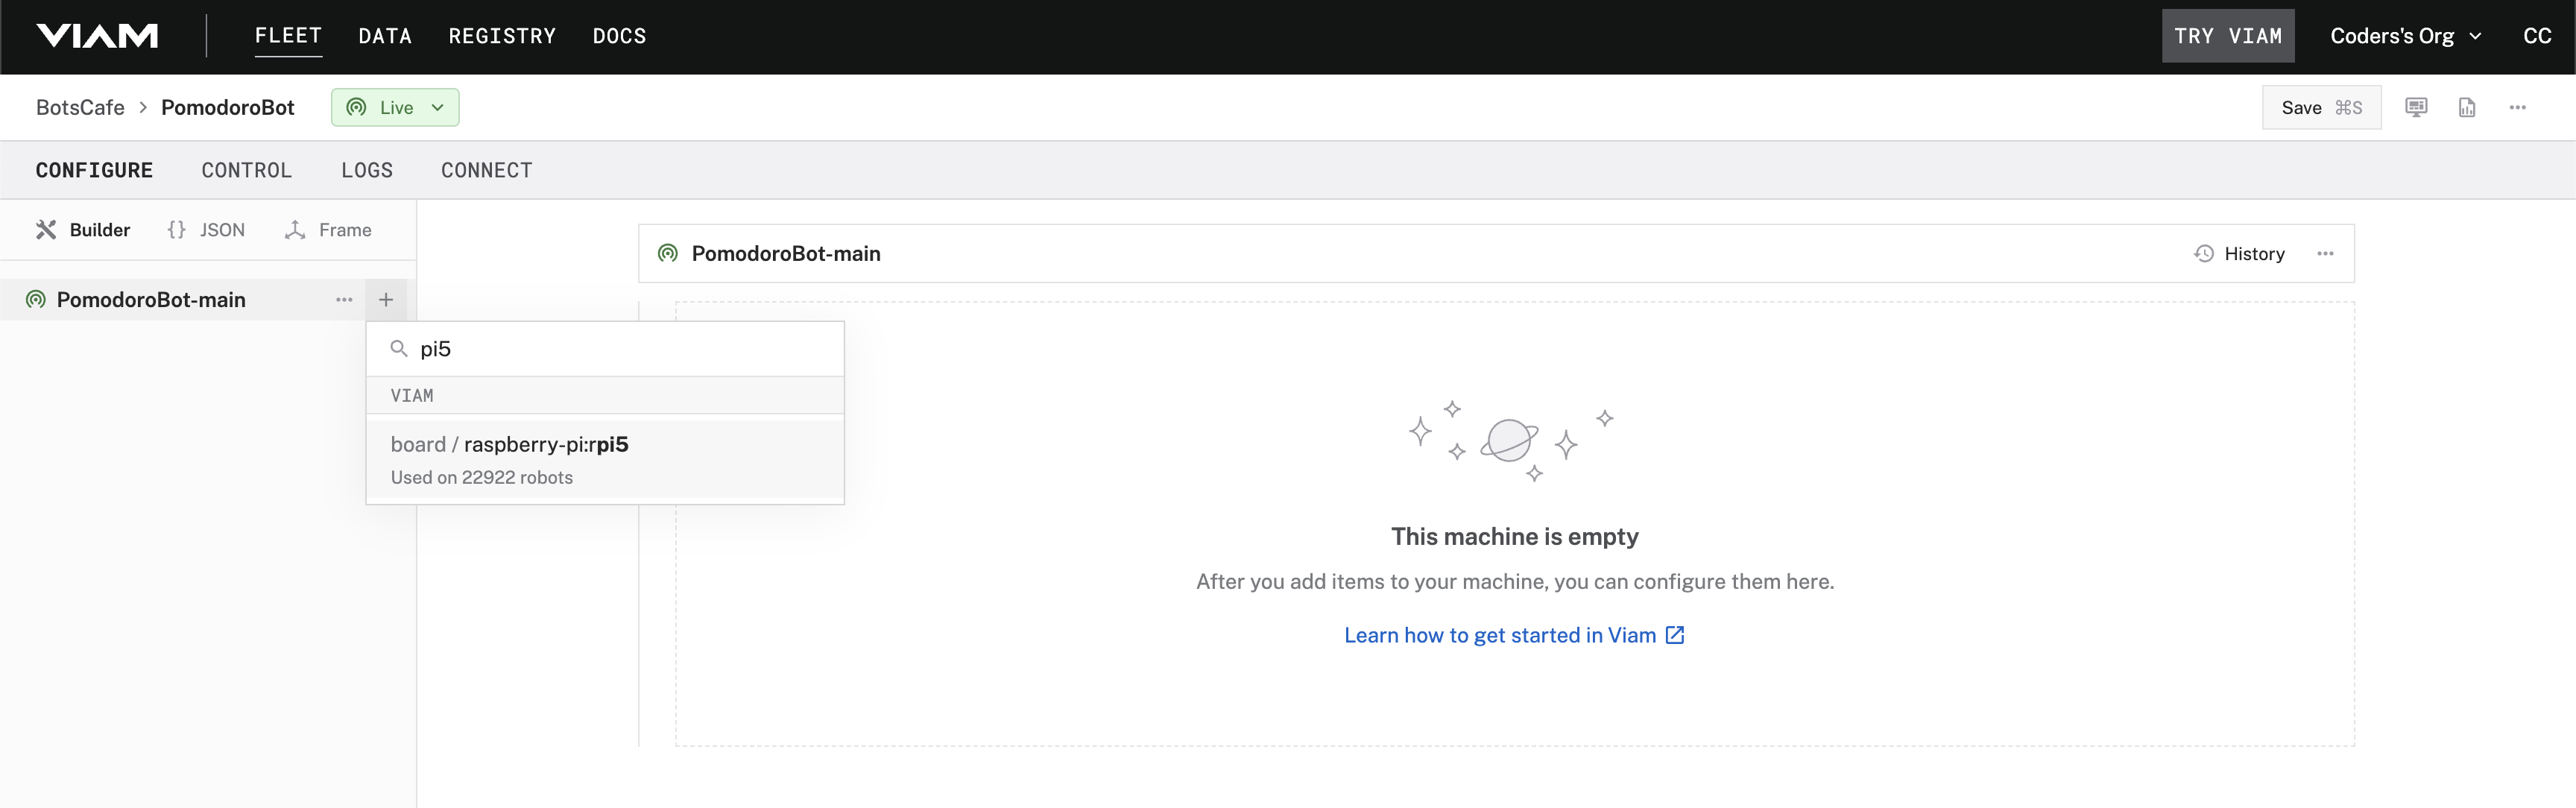
Select board, and find the pi5 module. This adds the module for working with the Raspberry Pi 5's GPIO pins.
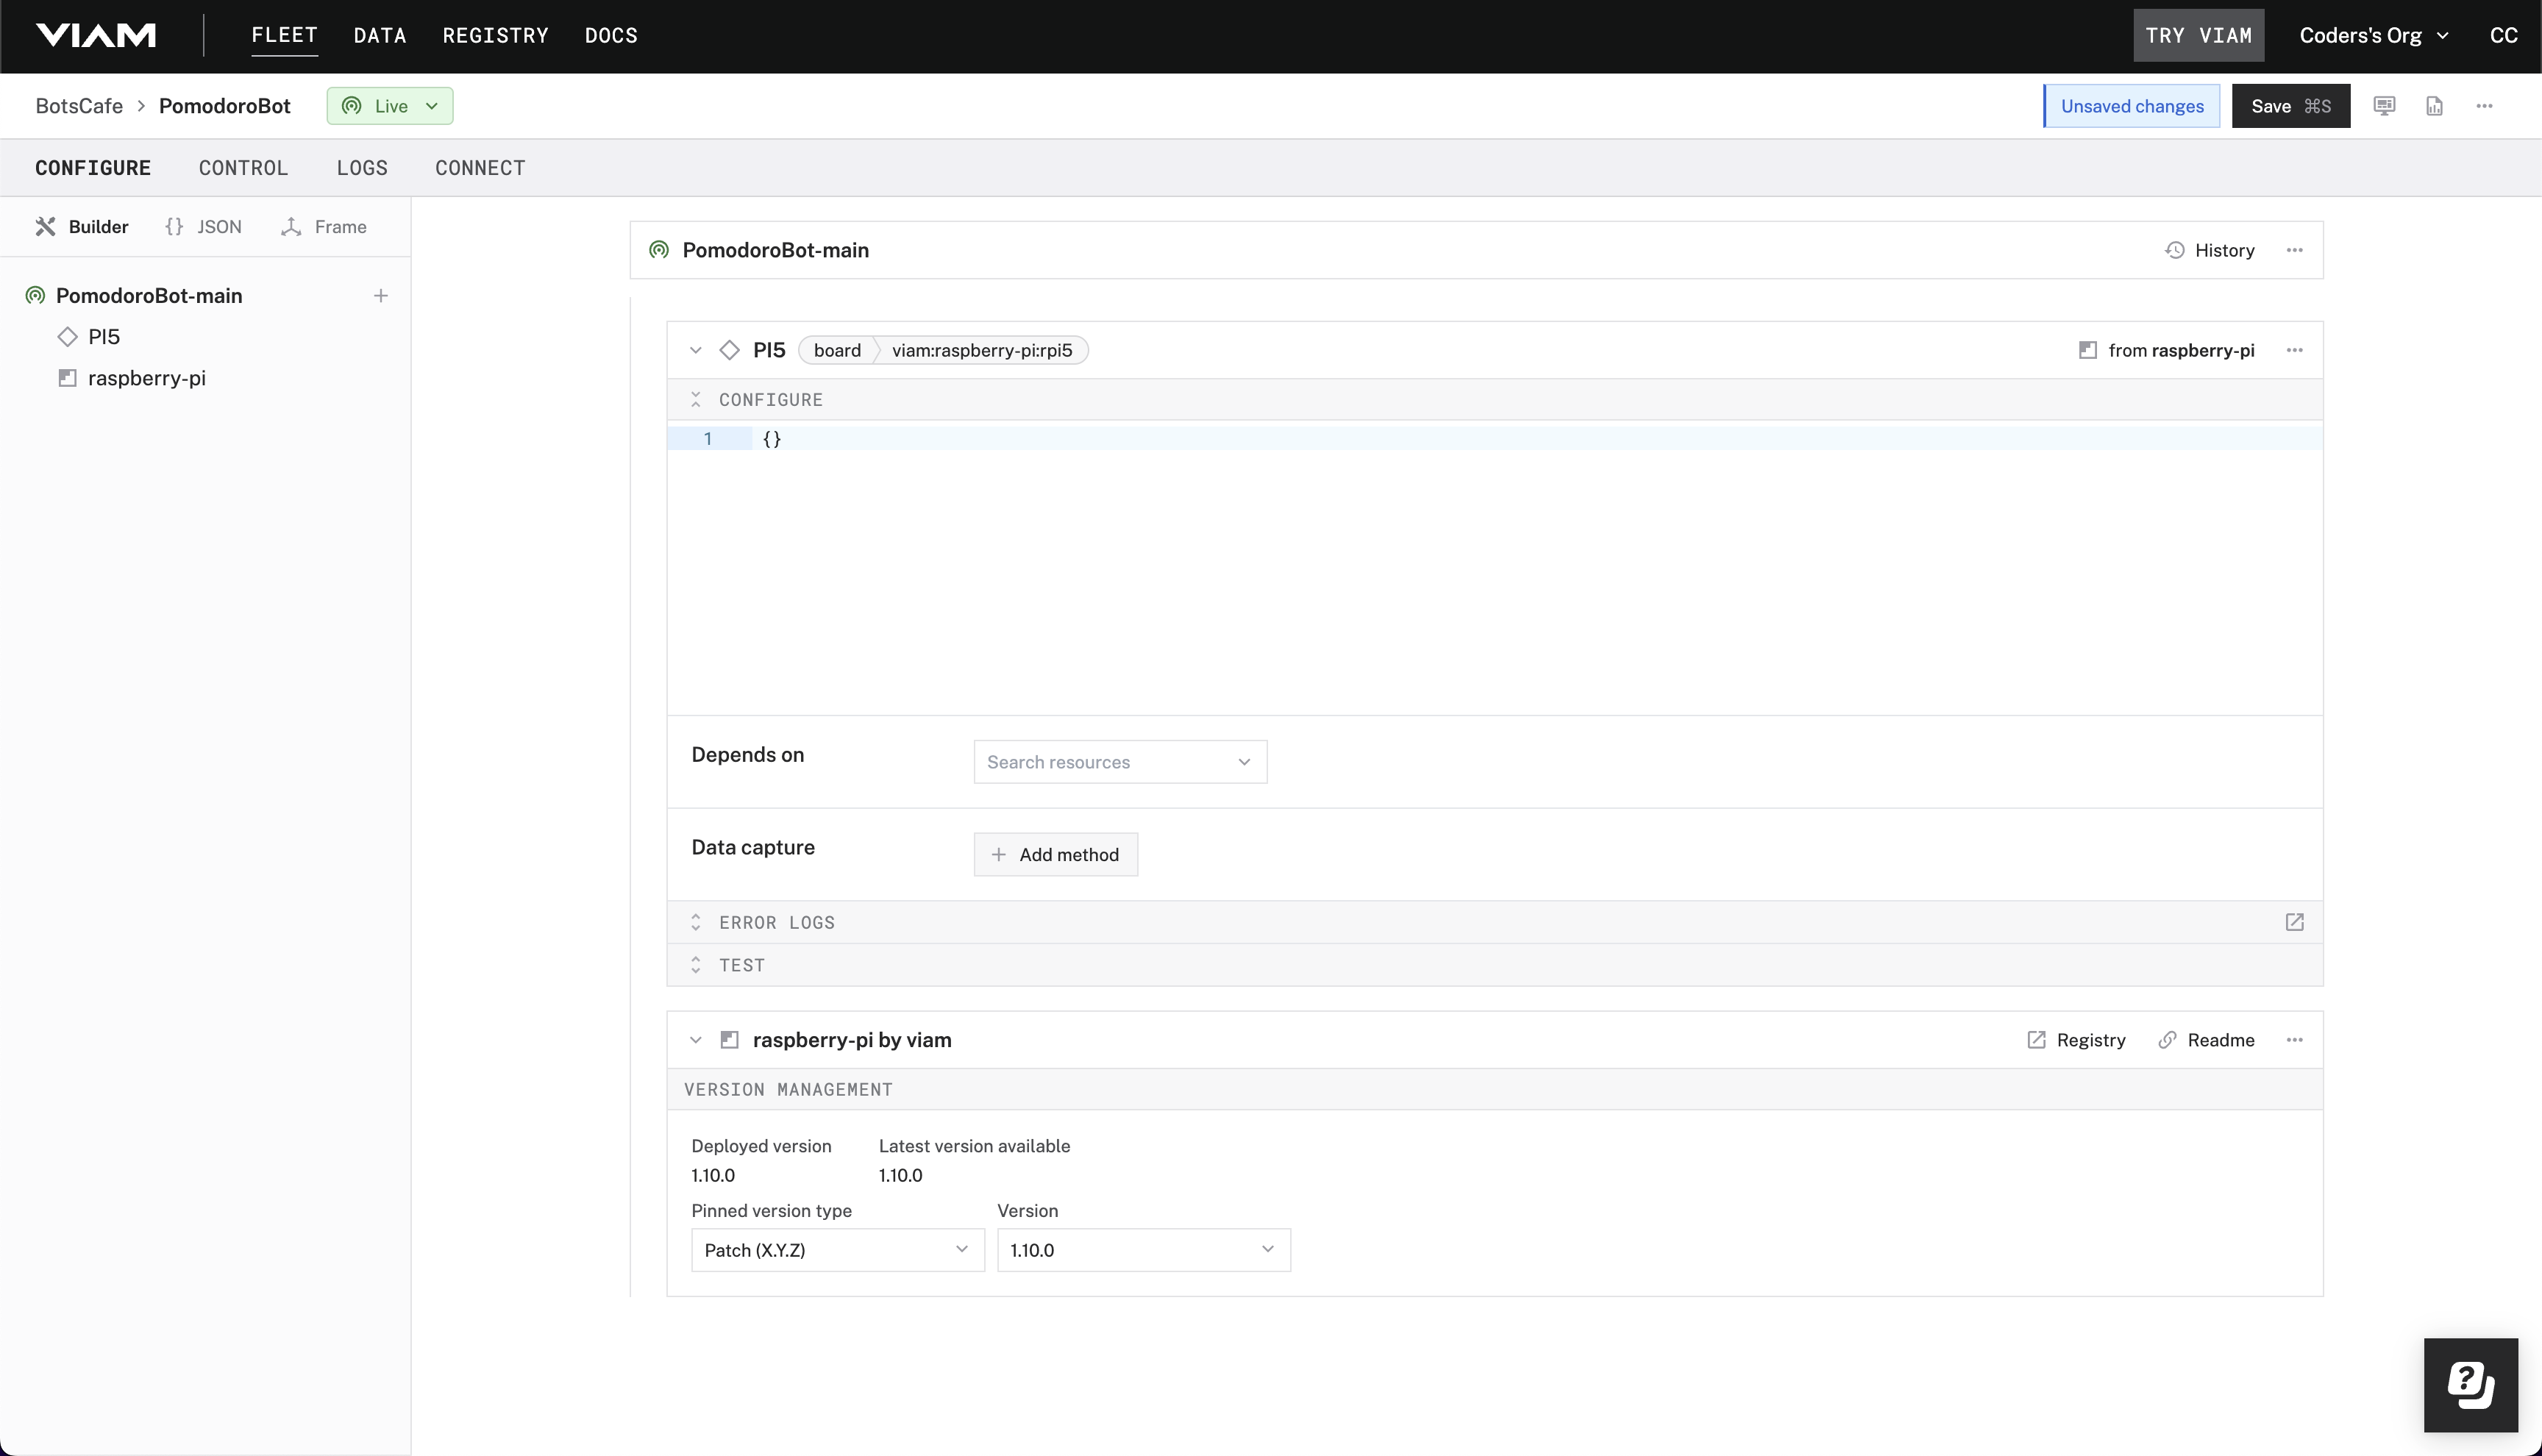
Notice adding this module adds the board hardware component called PI5. The collapsible card on the right corresponds to the part listed in the left sidebar.
Click Save in the top right to save and apply your configuration changes. If any problems occur, check under the LOGS tab to see what might be going wrong.
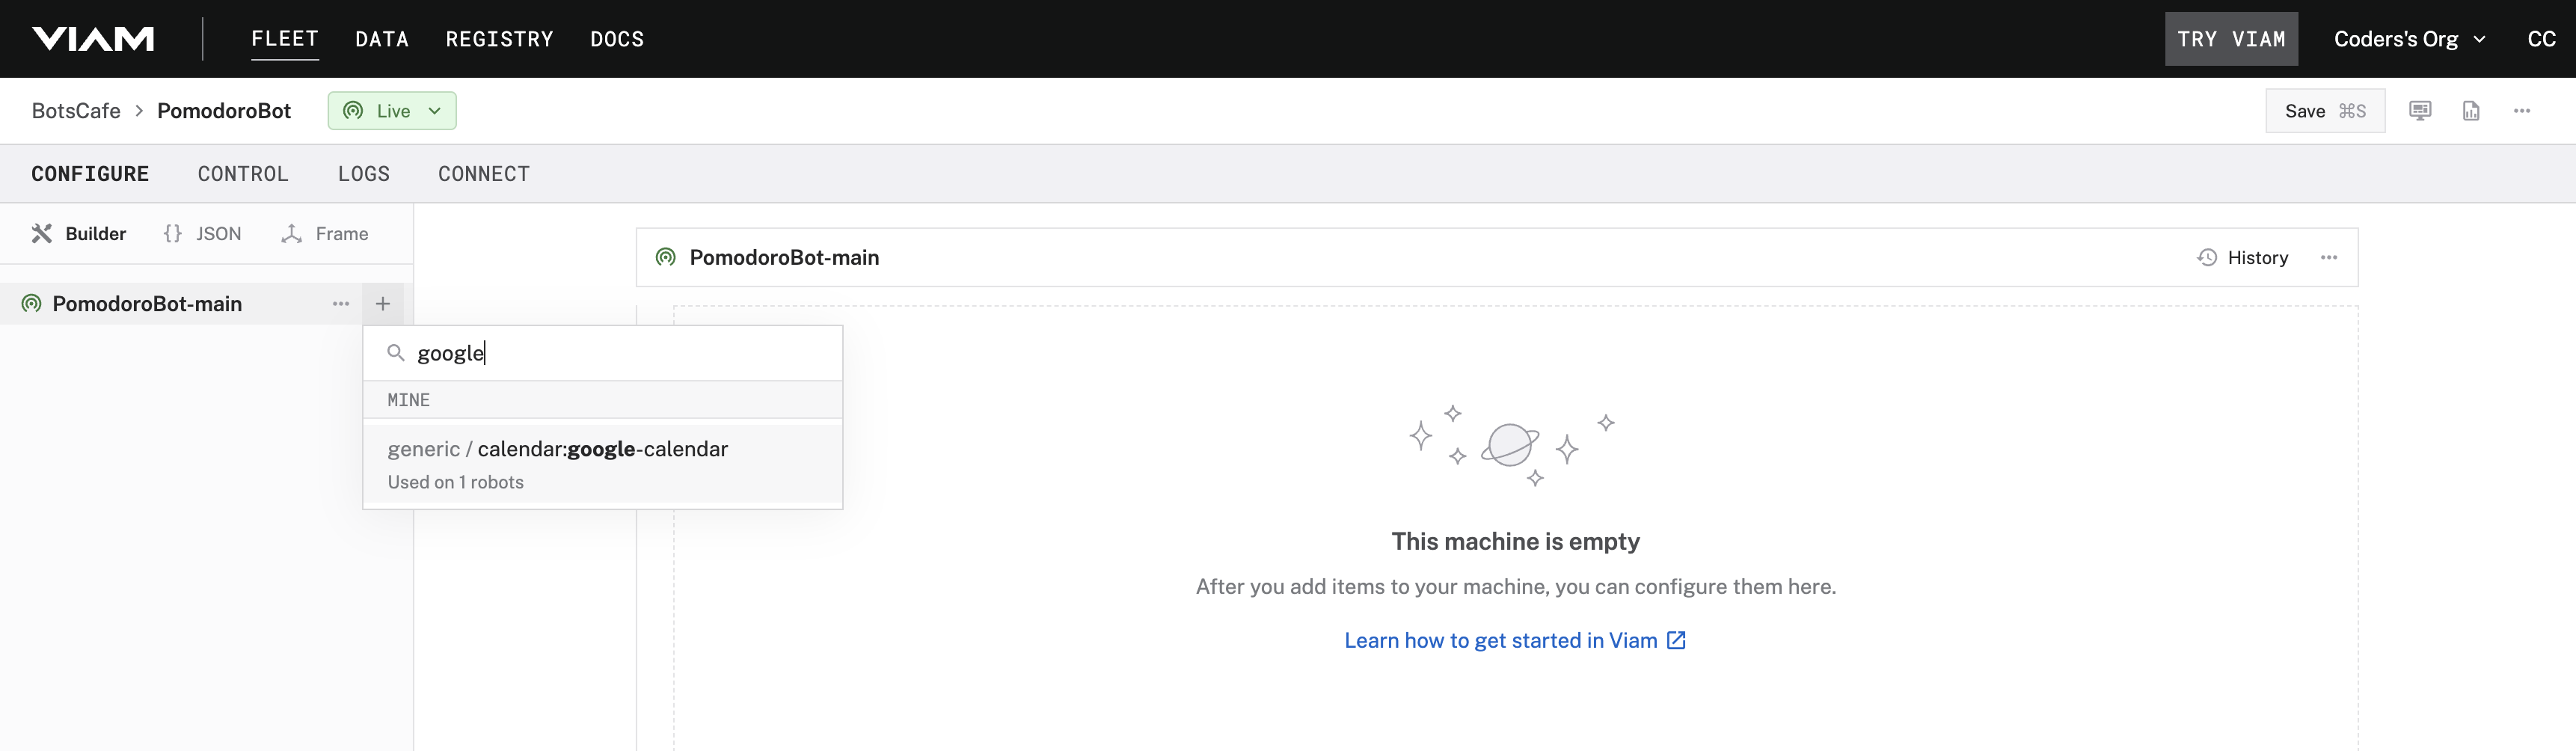
Integrate Google Calendar
Now let's set up your Pomodoro Bot to work with Google Calendar, so you can stay on top of your schedule without losing focus. Once integrated, your bot will automatically sync with your calendar to manage events and reminders.
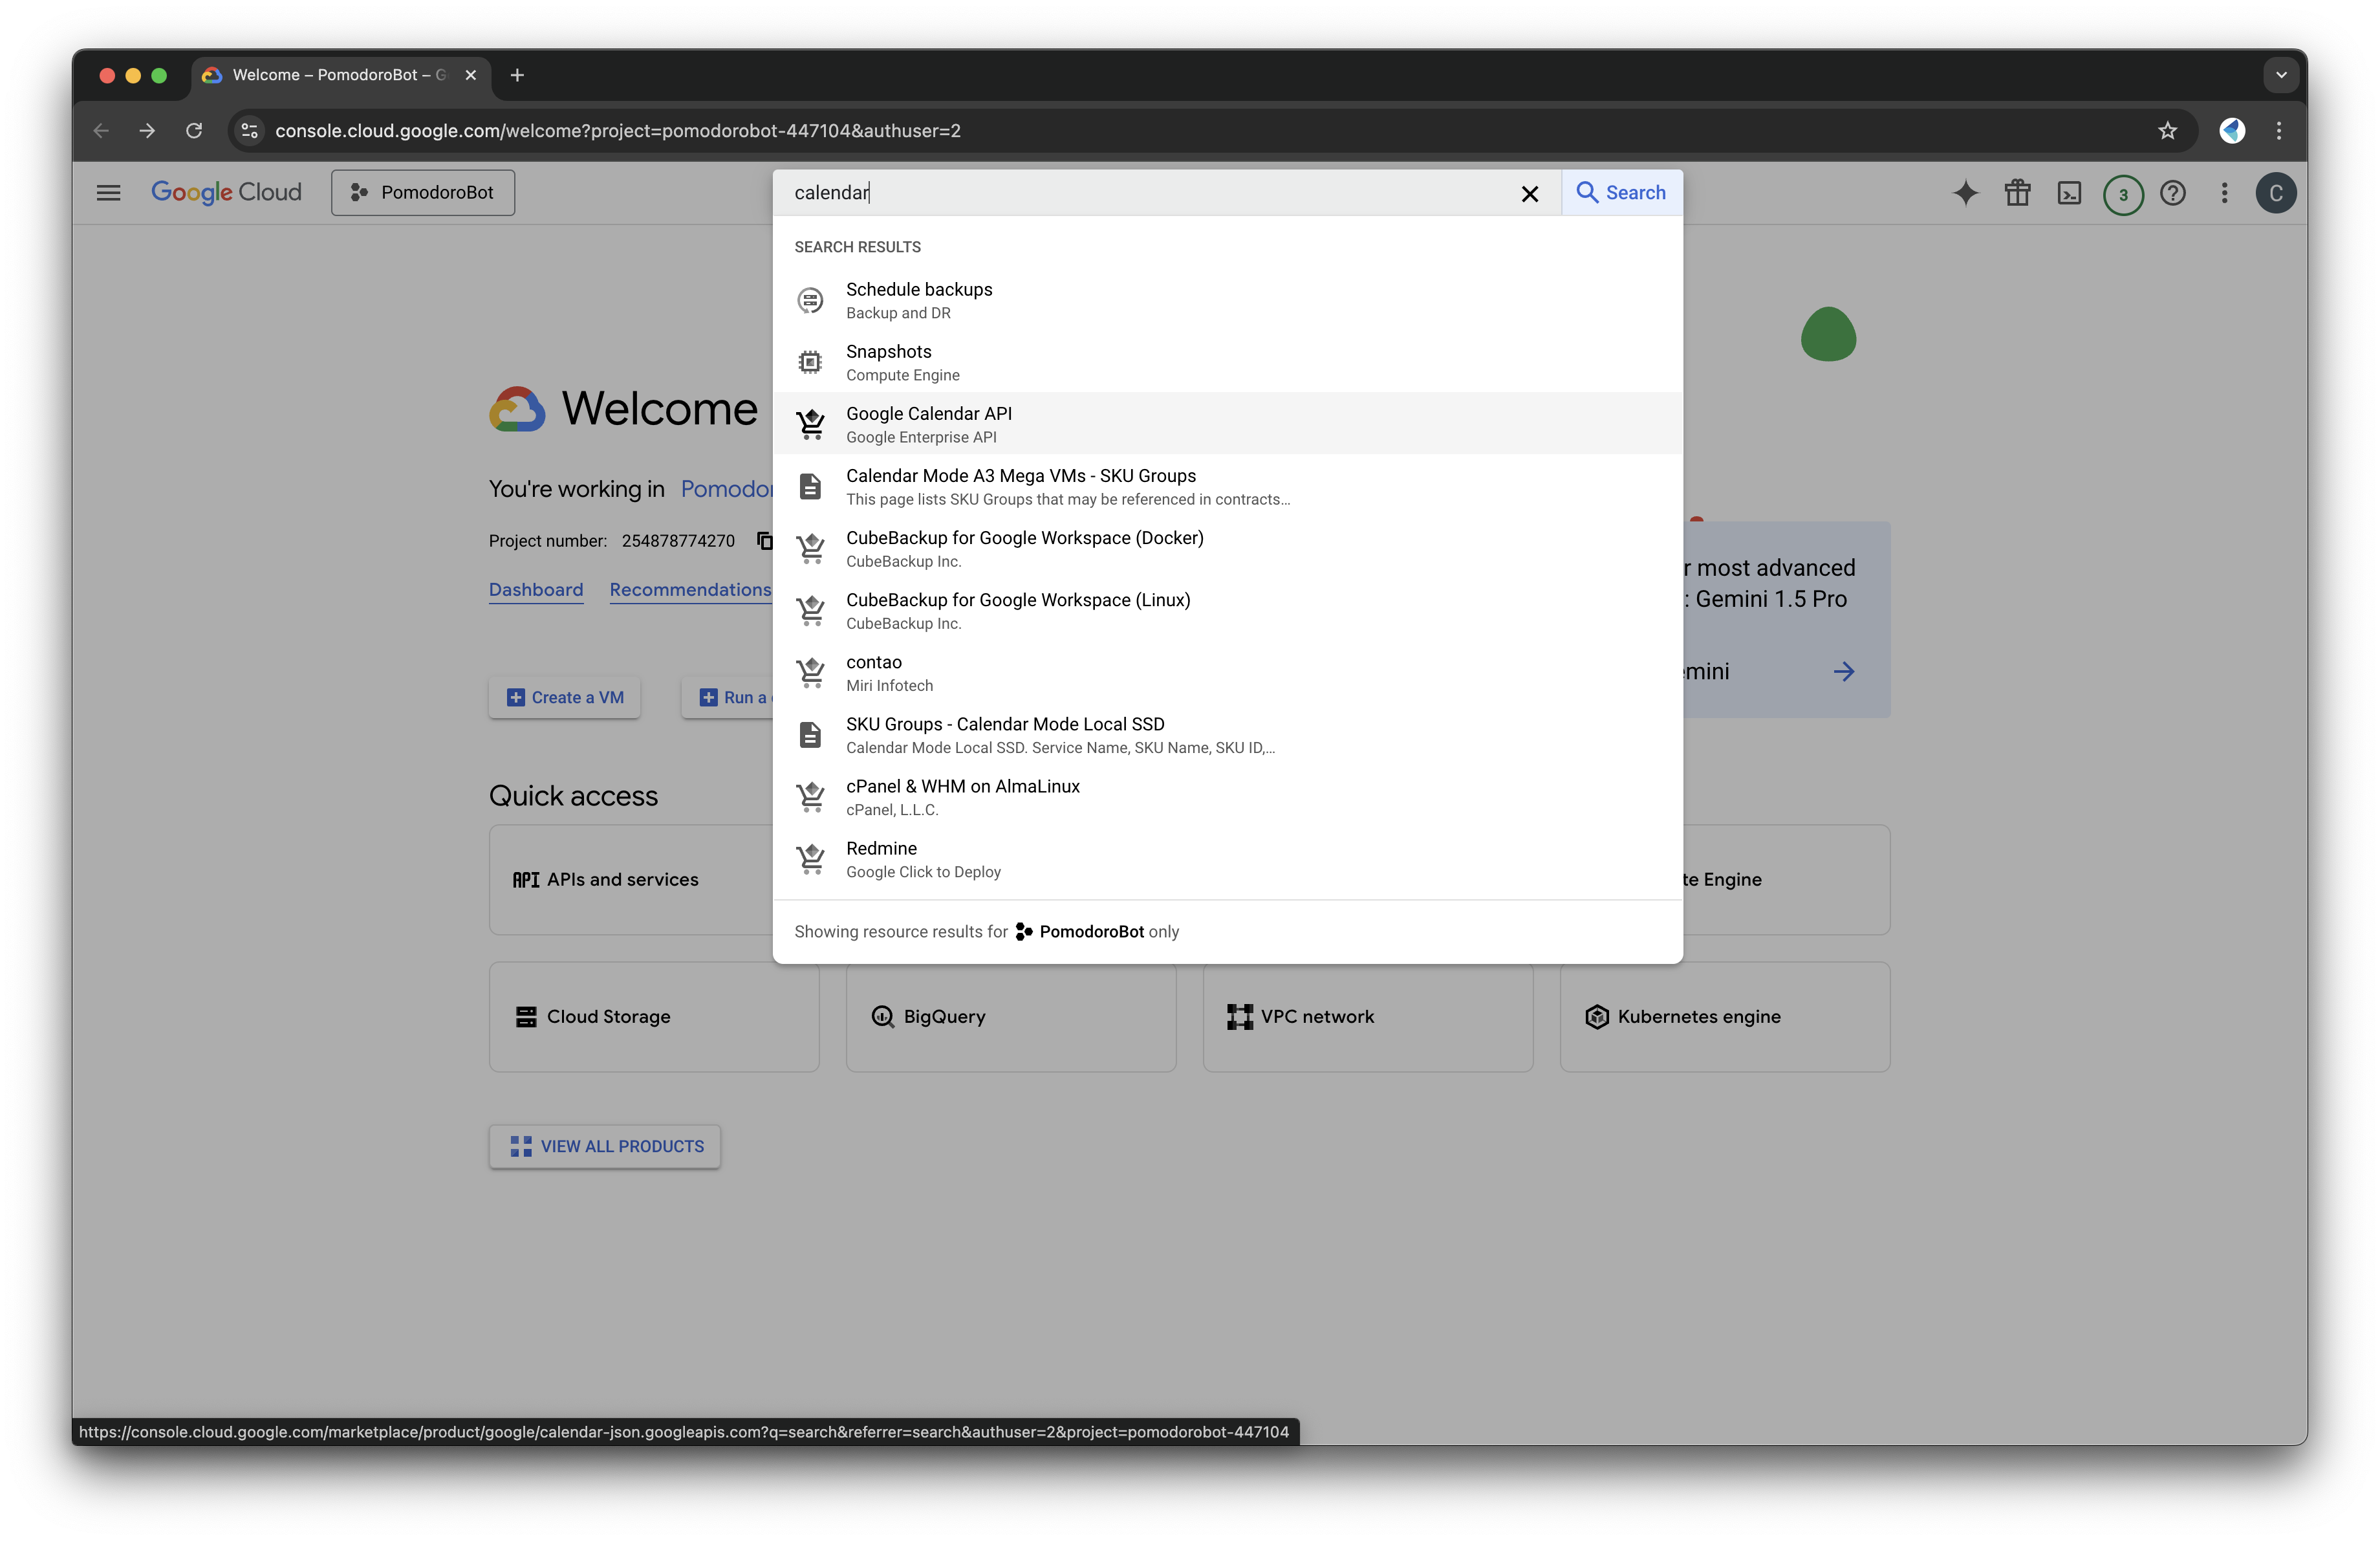
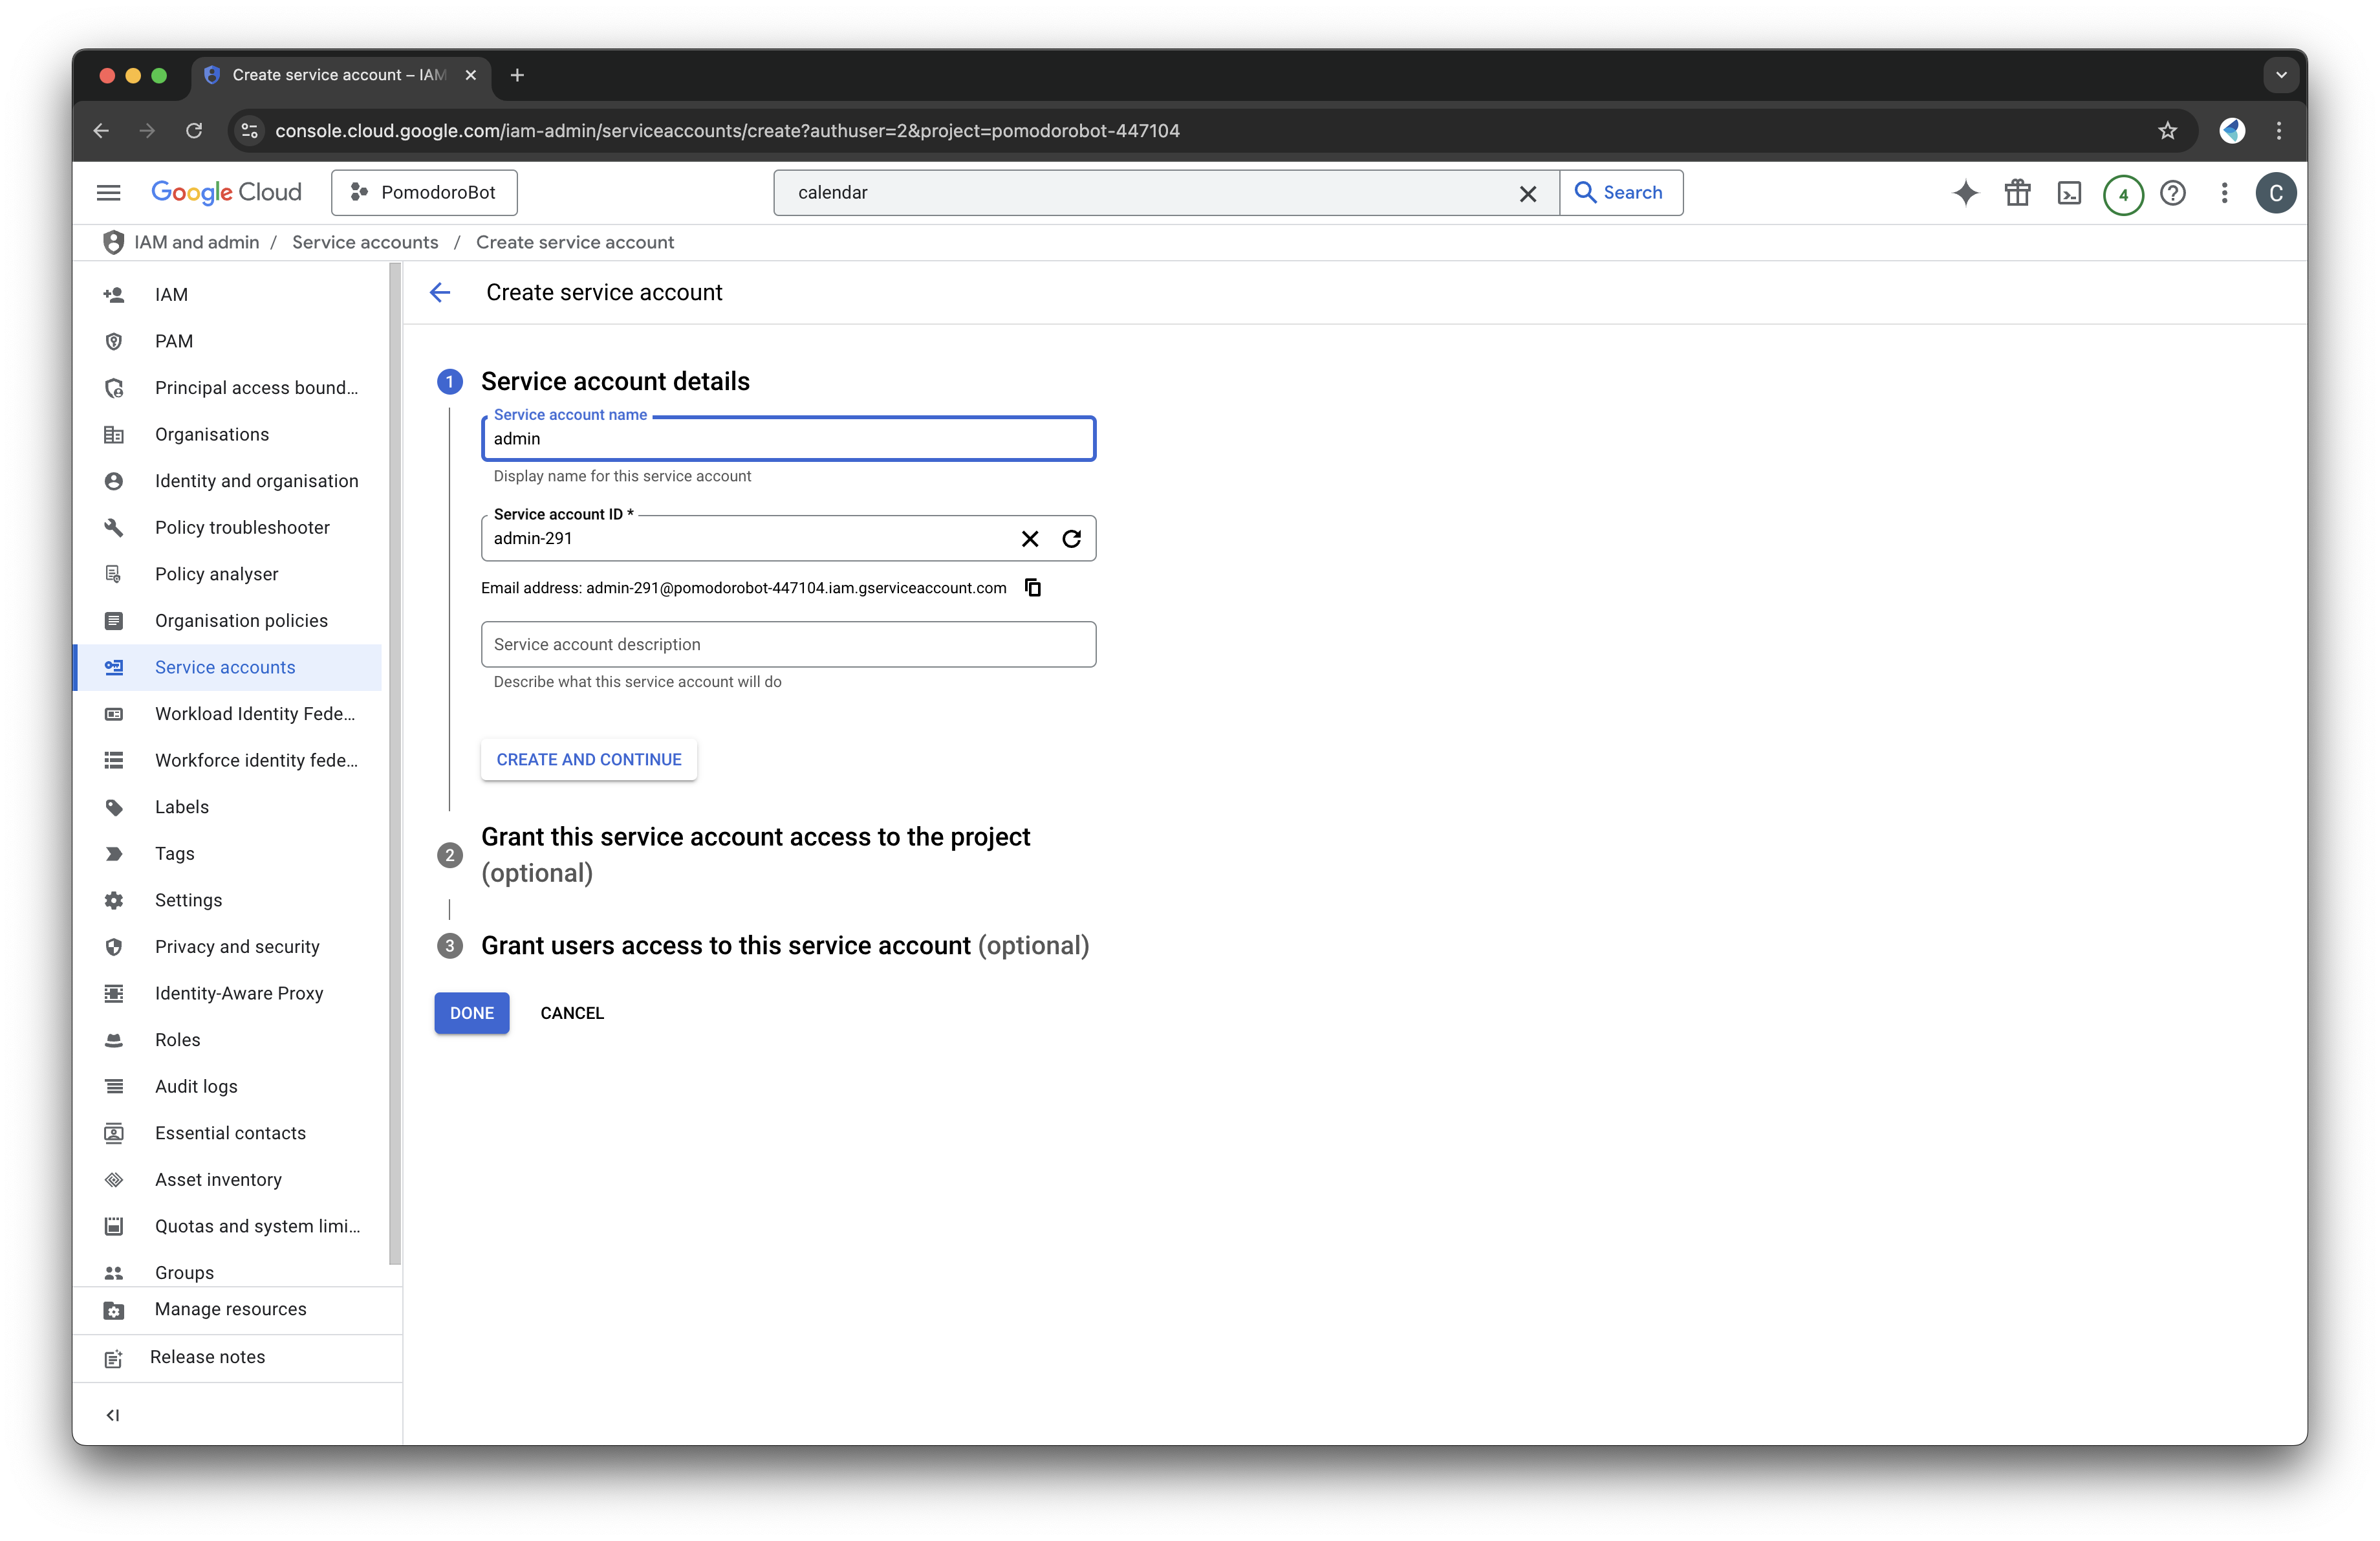
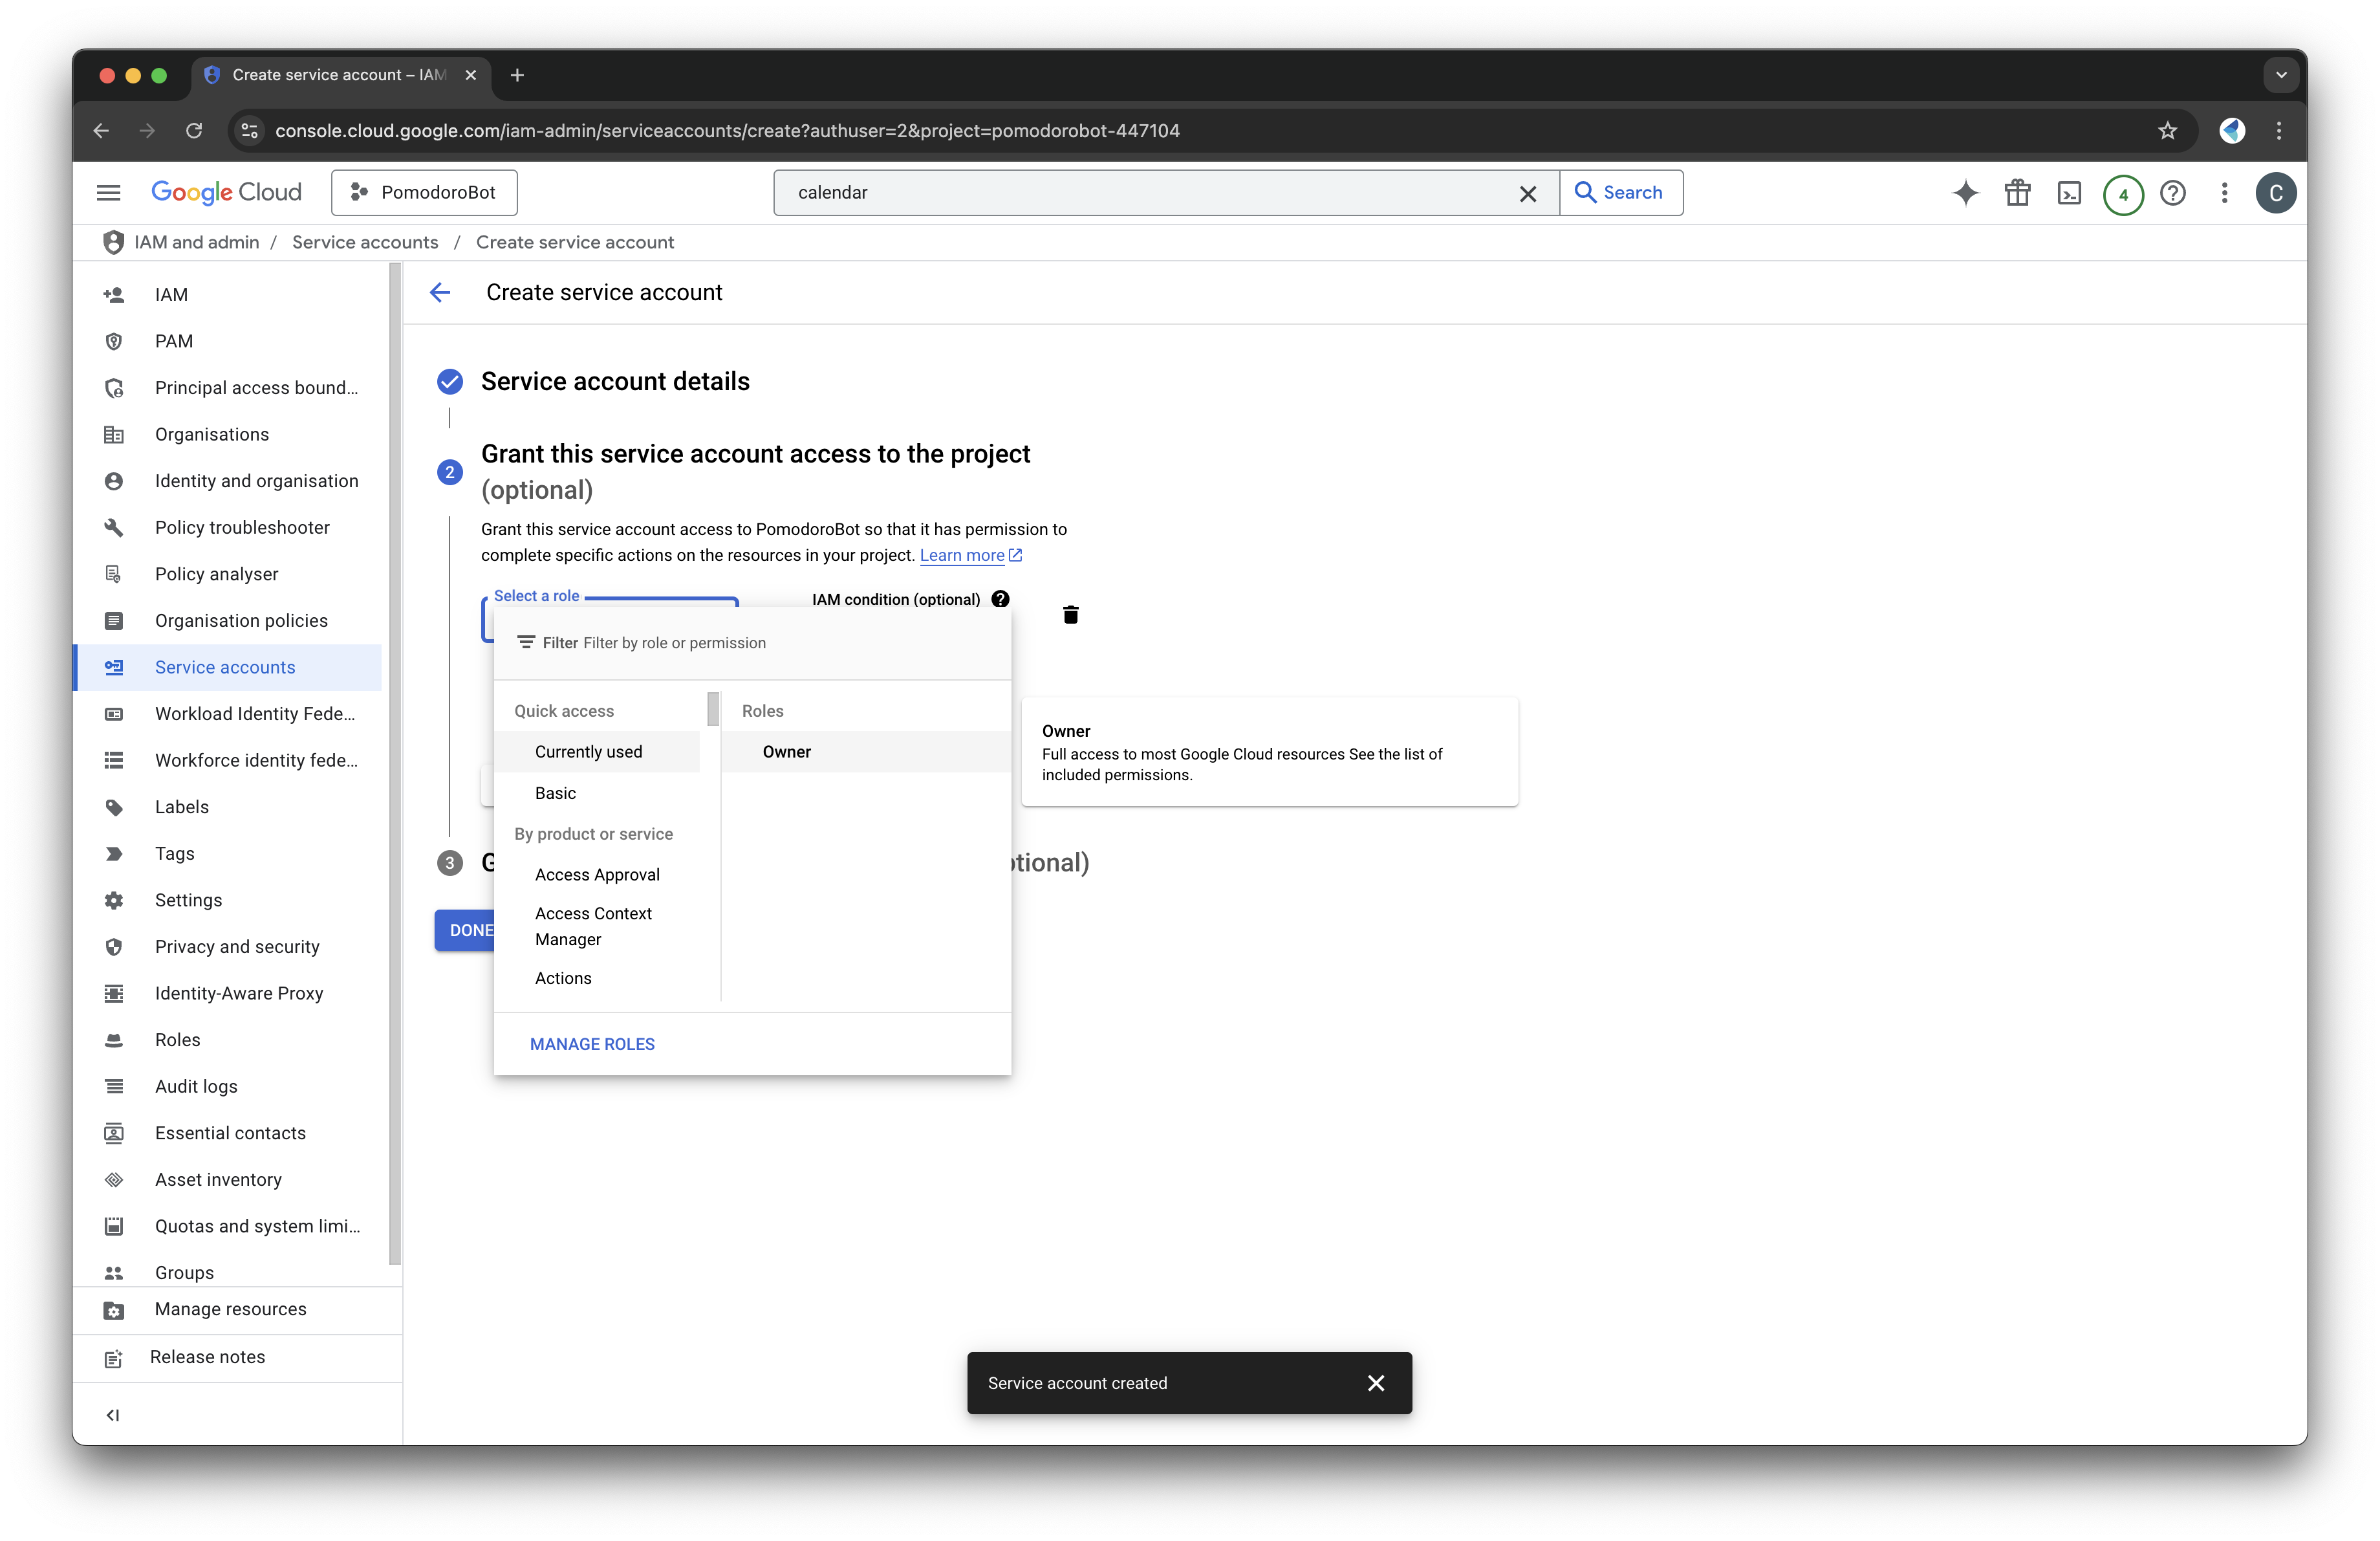
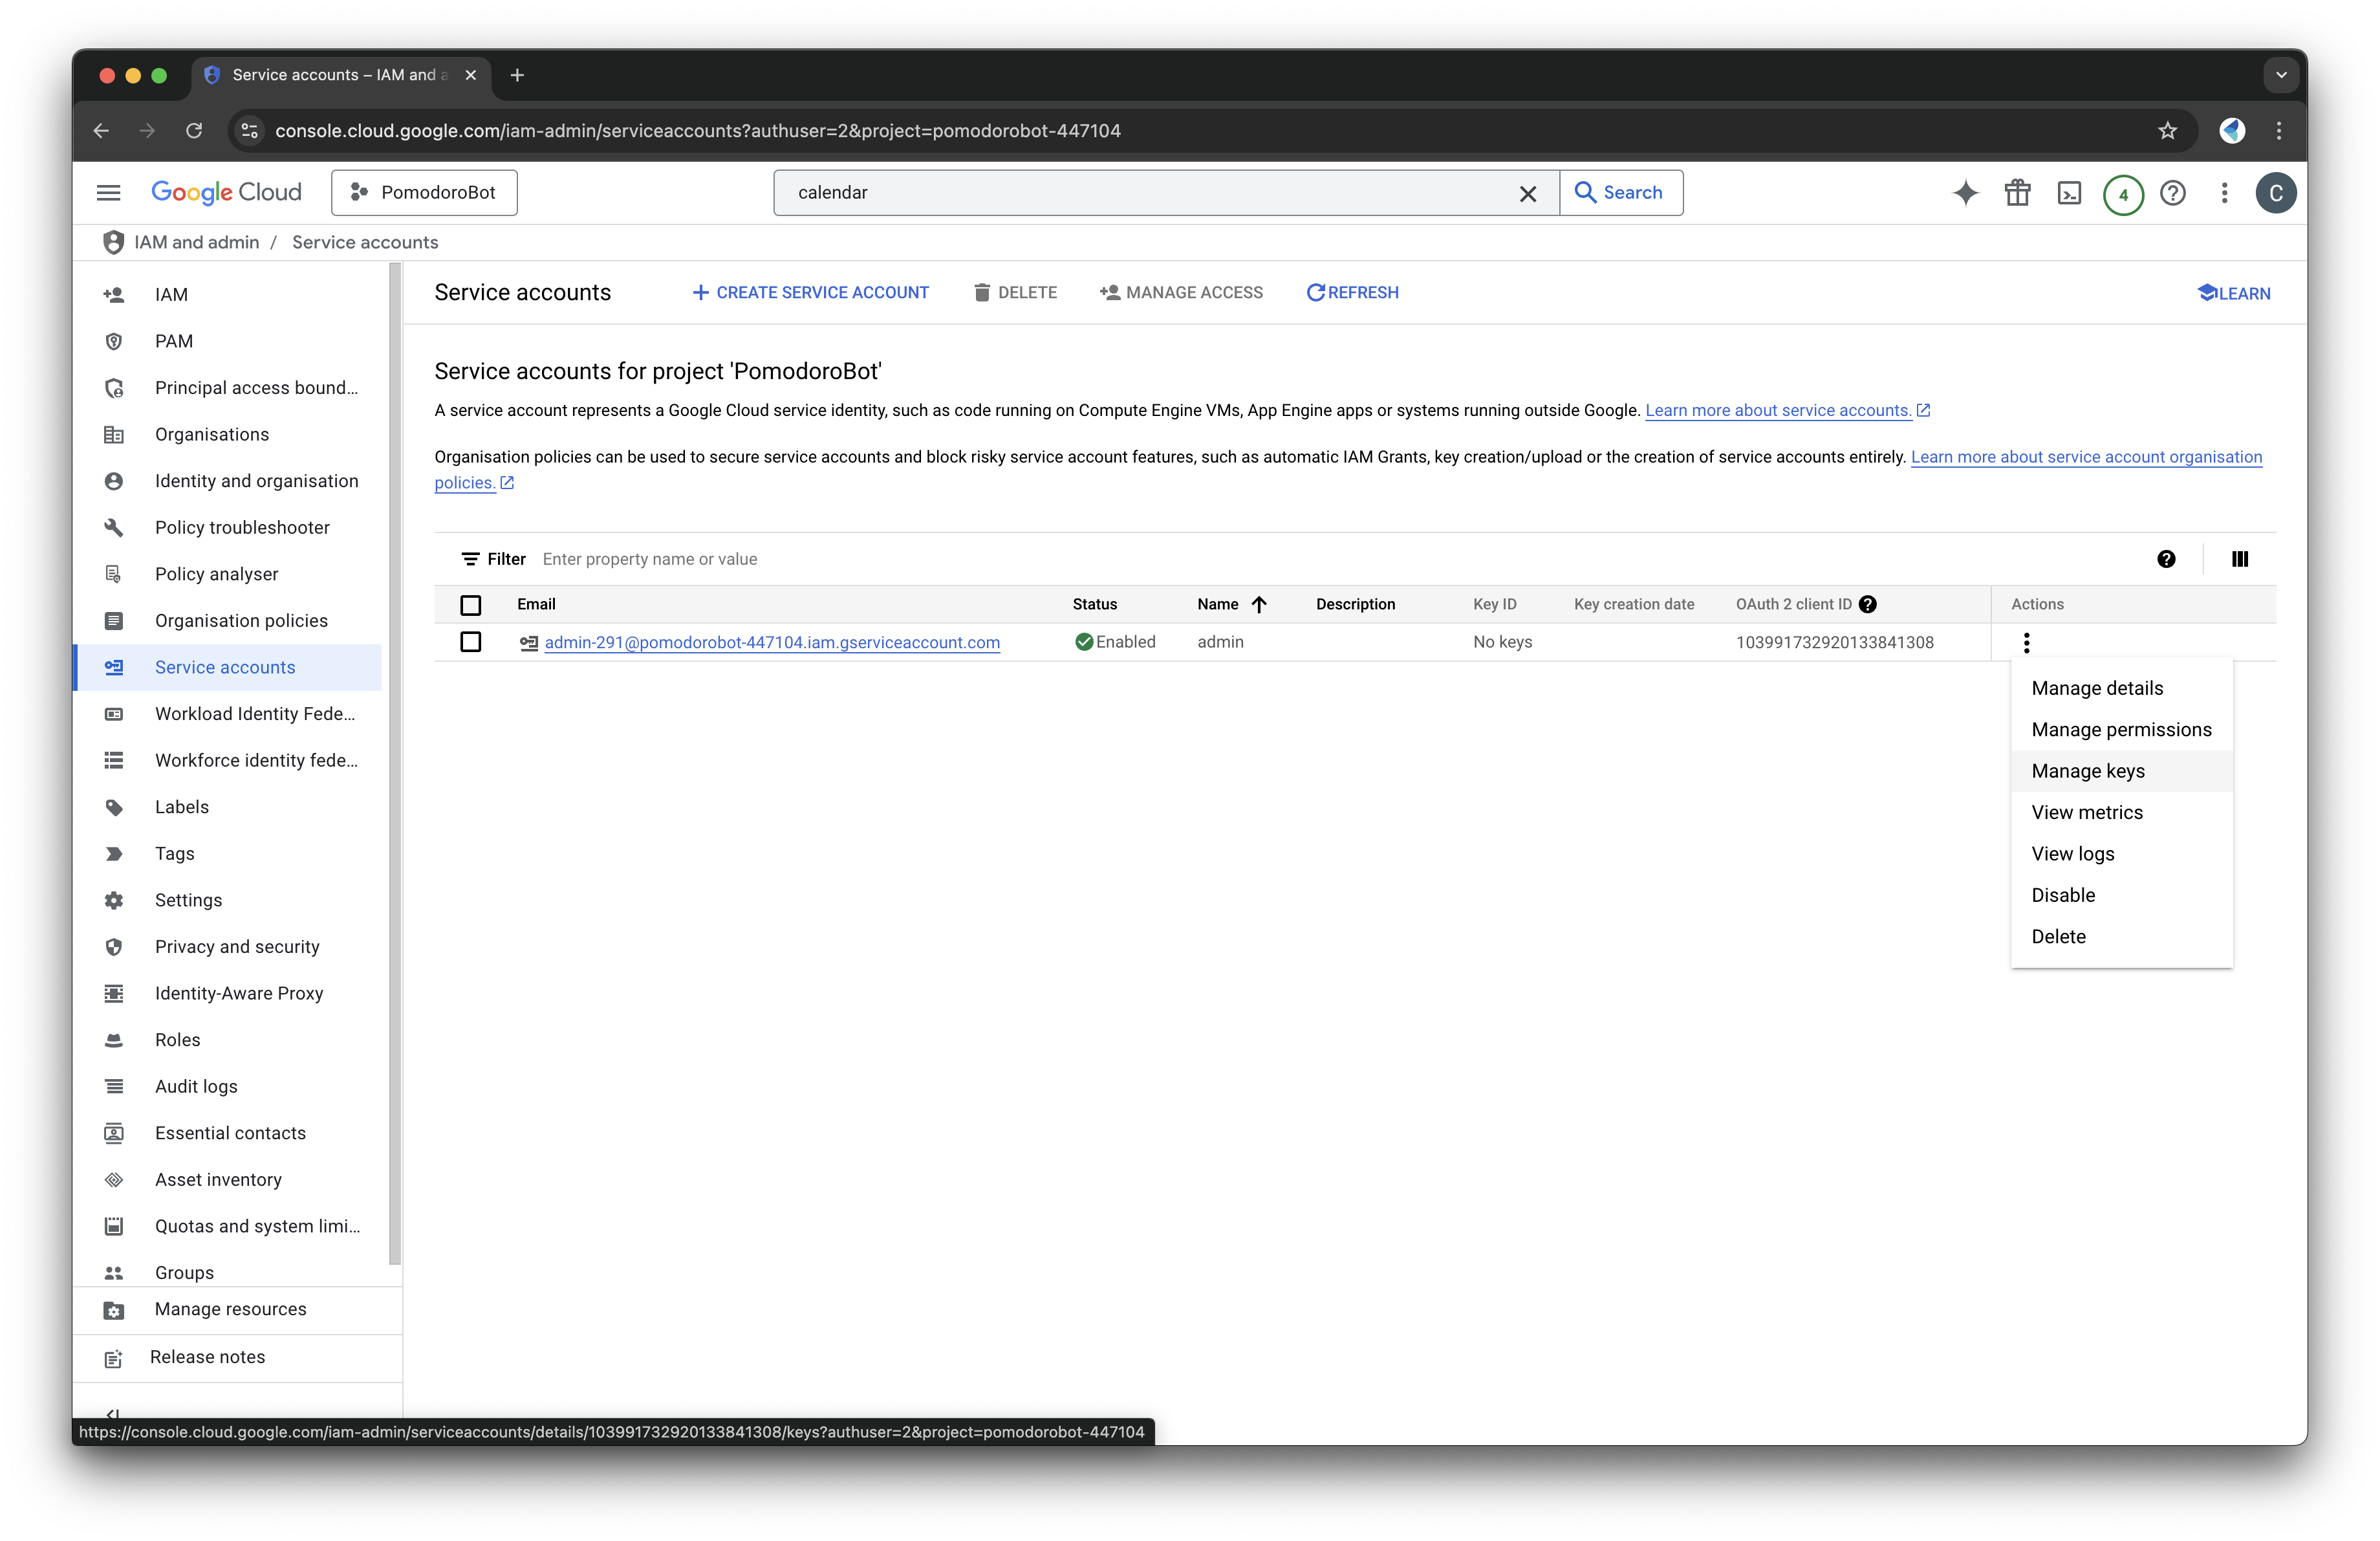
Set Up a Google Cloud Project
1. Go to the Google Cloud Console. 2. Create a new project specifically for this integration.
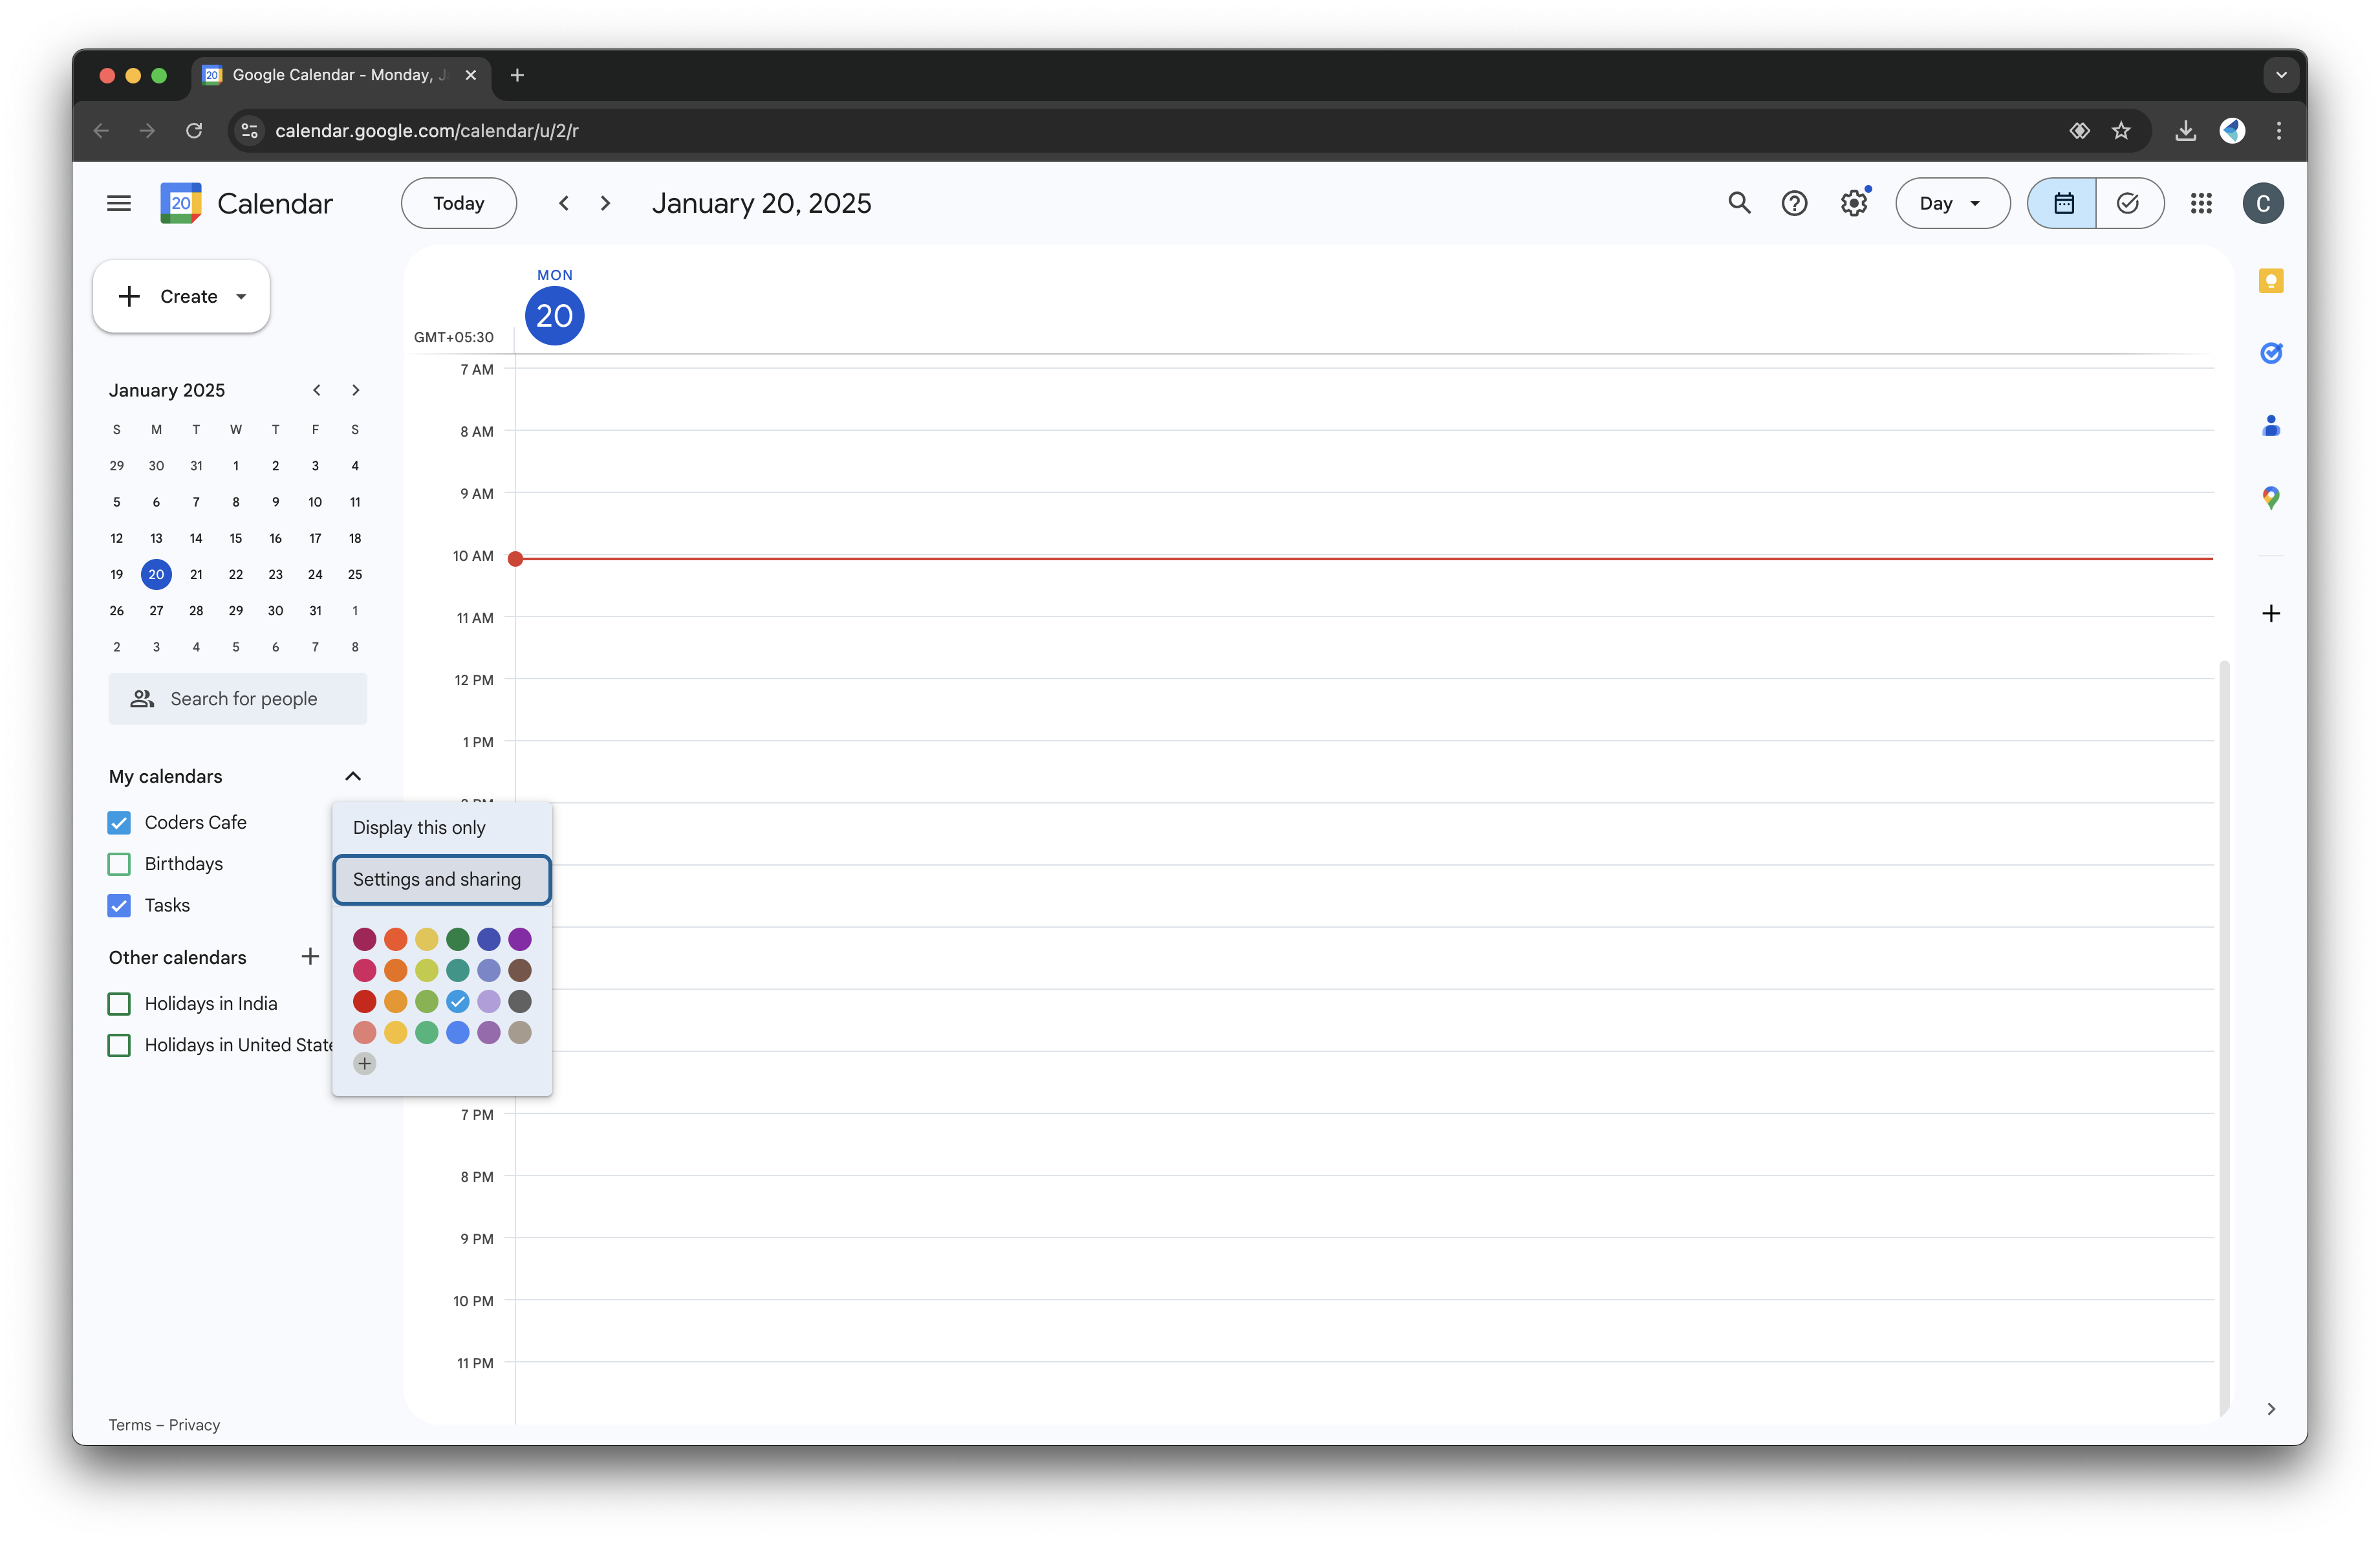
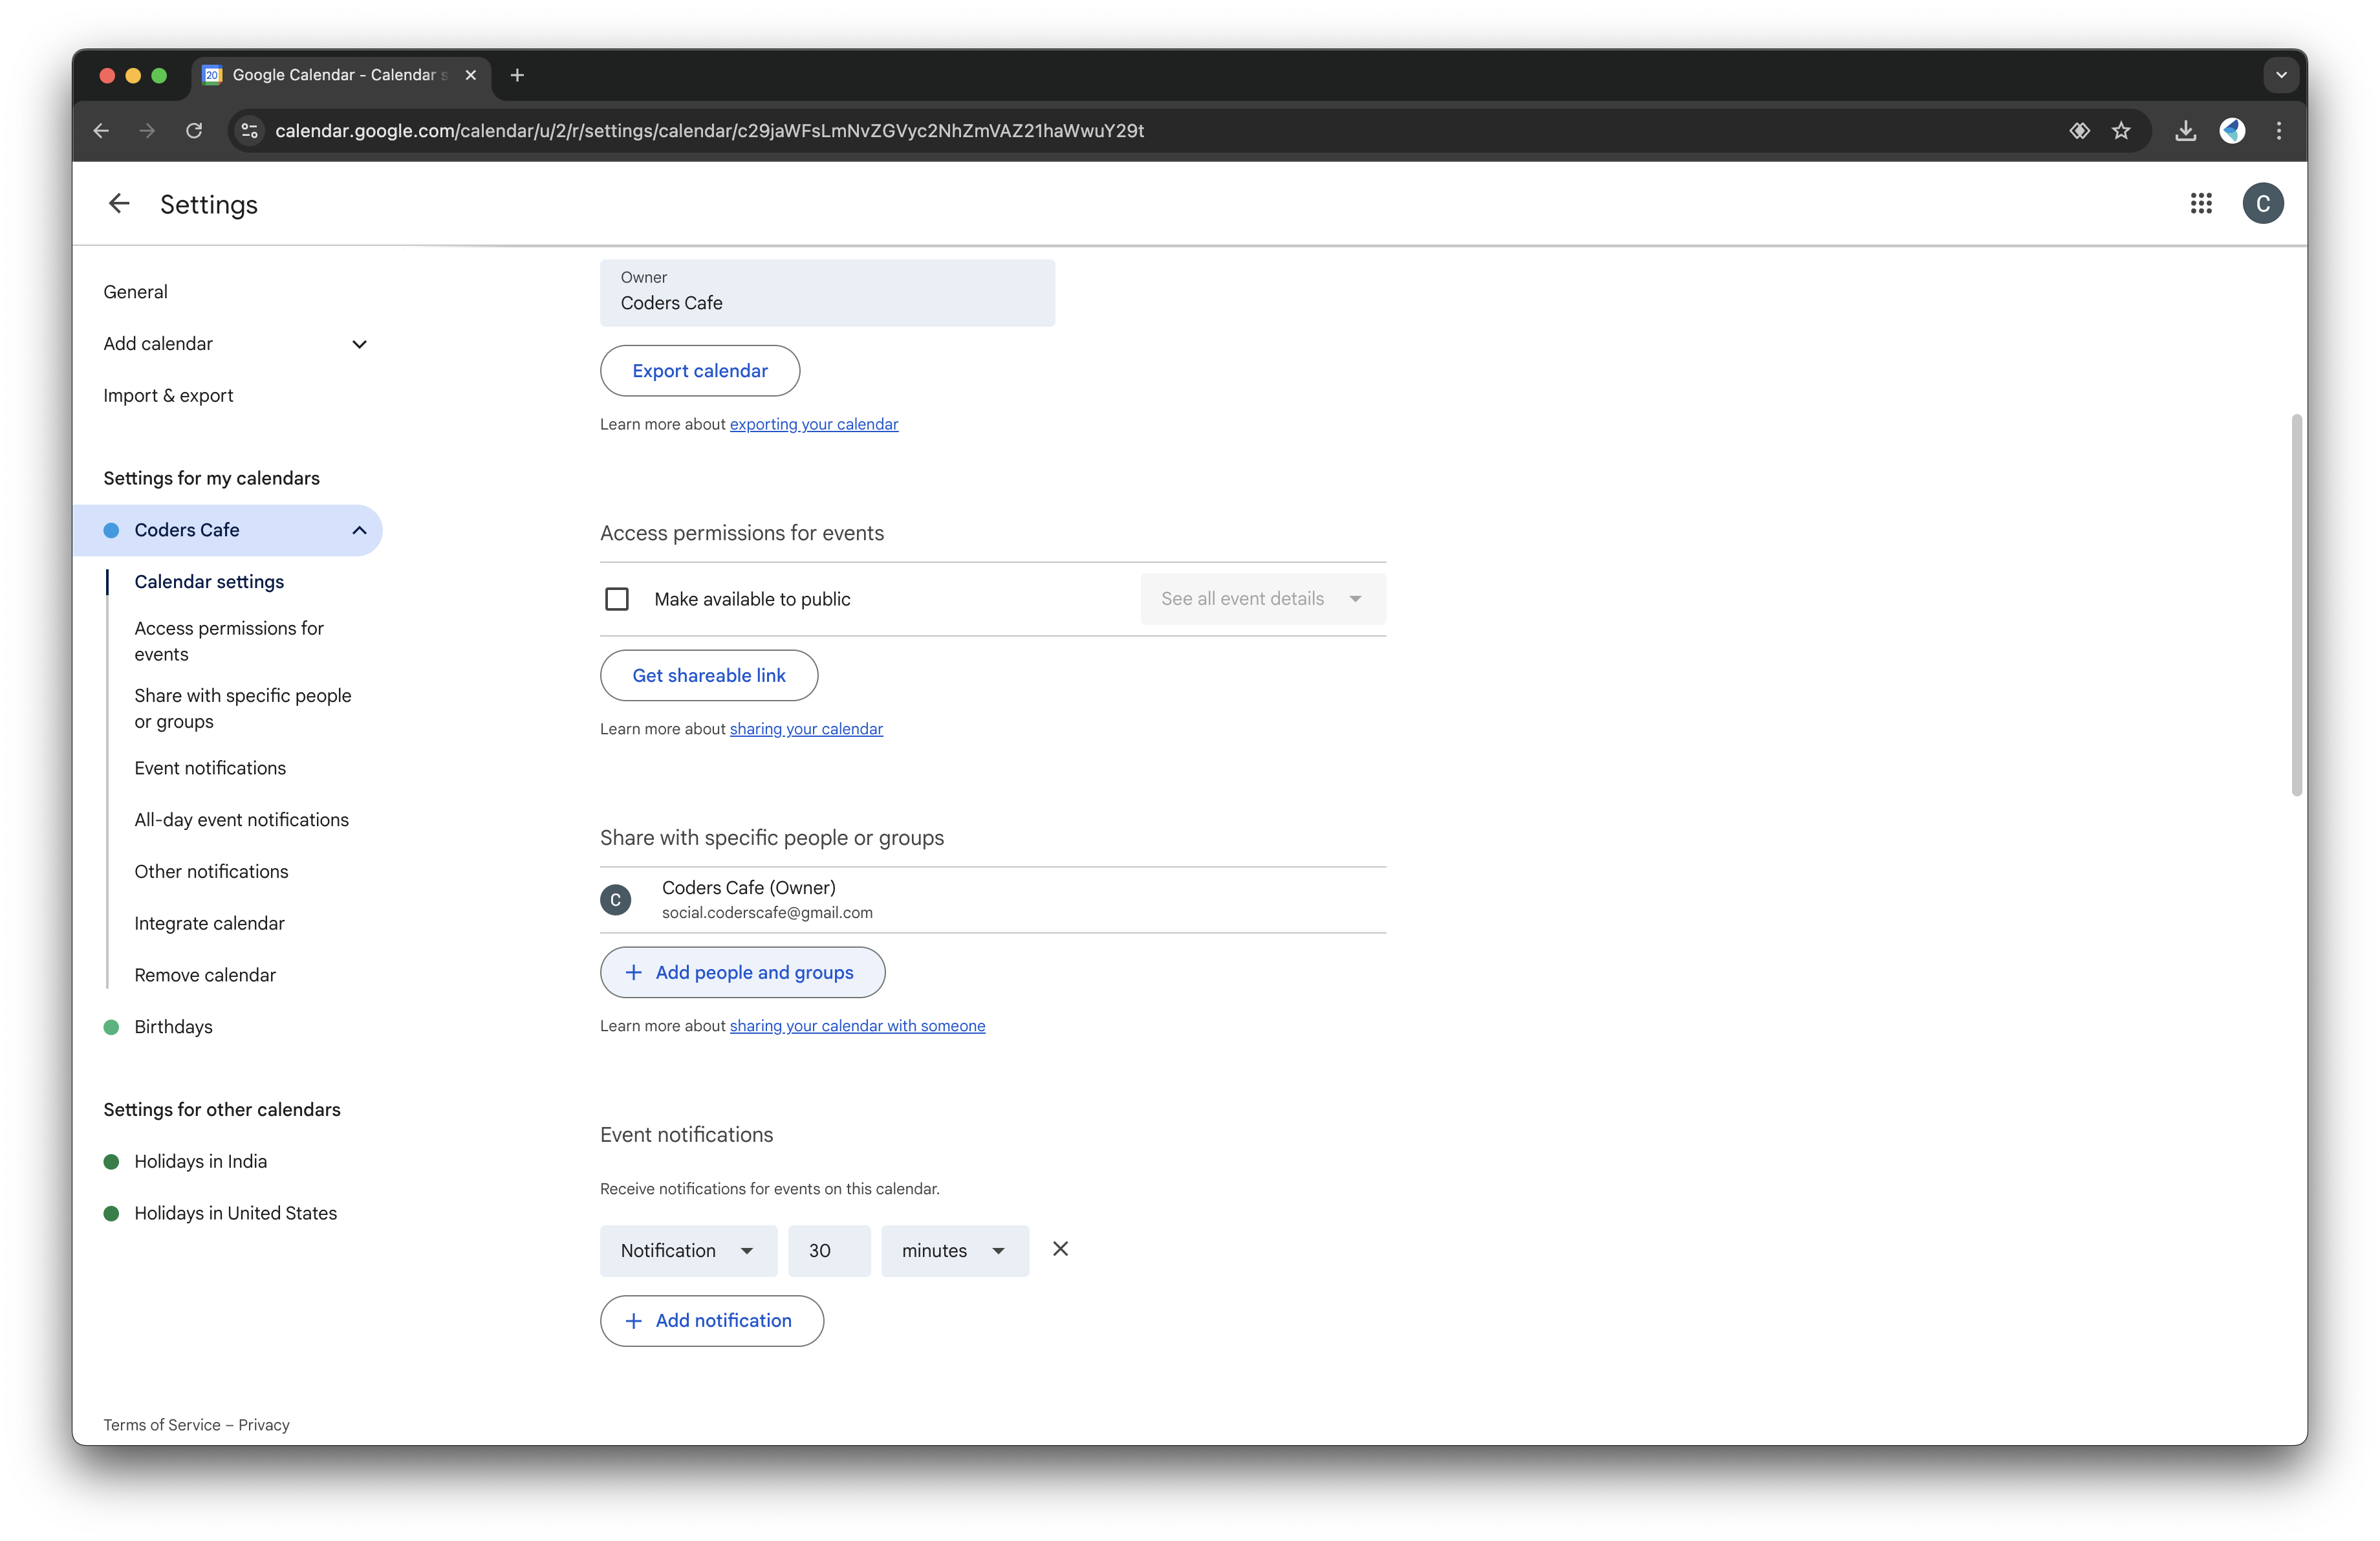
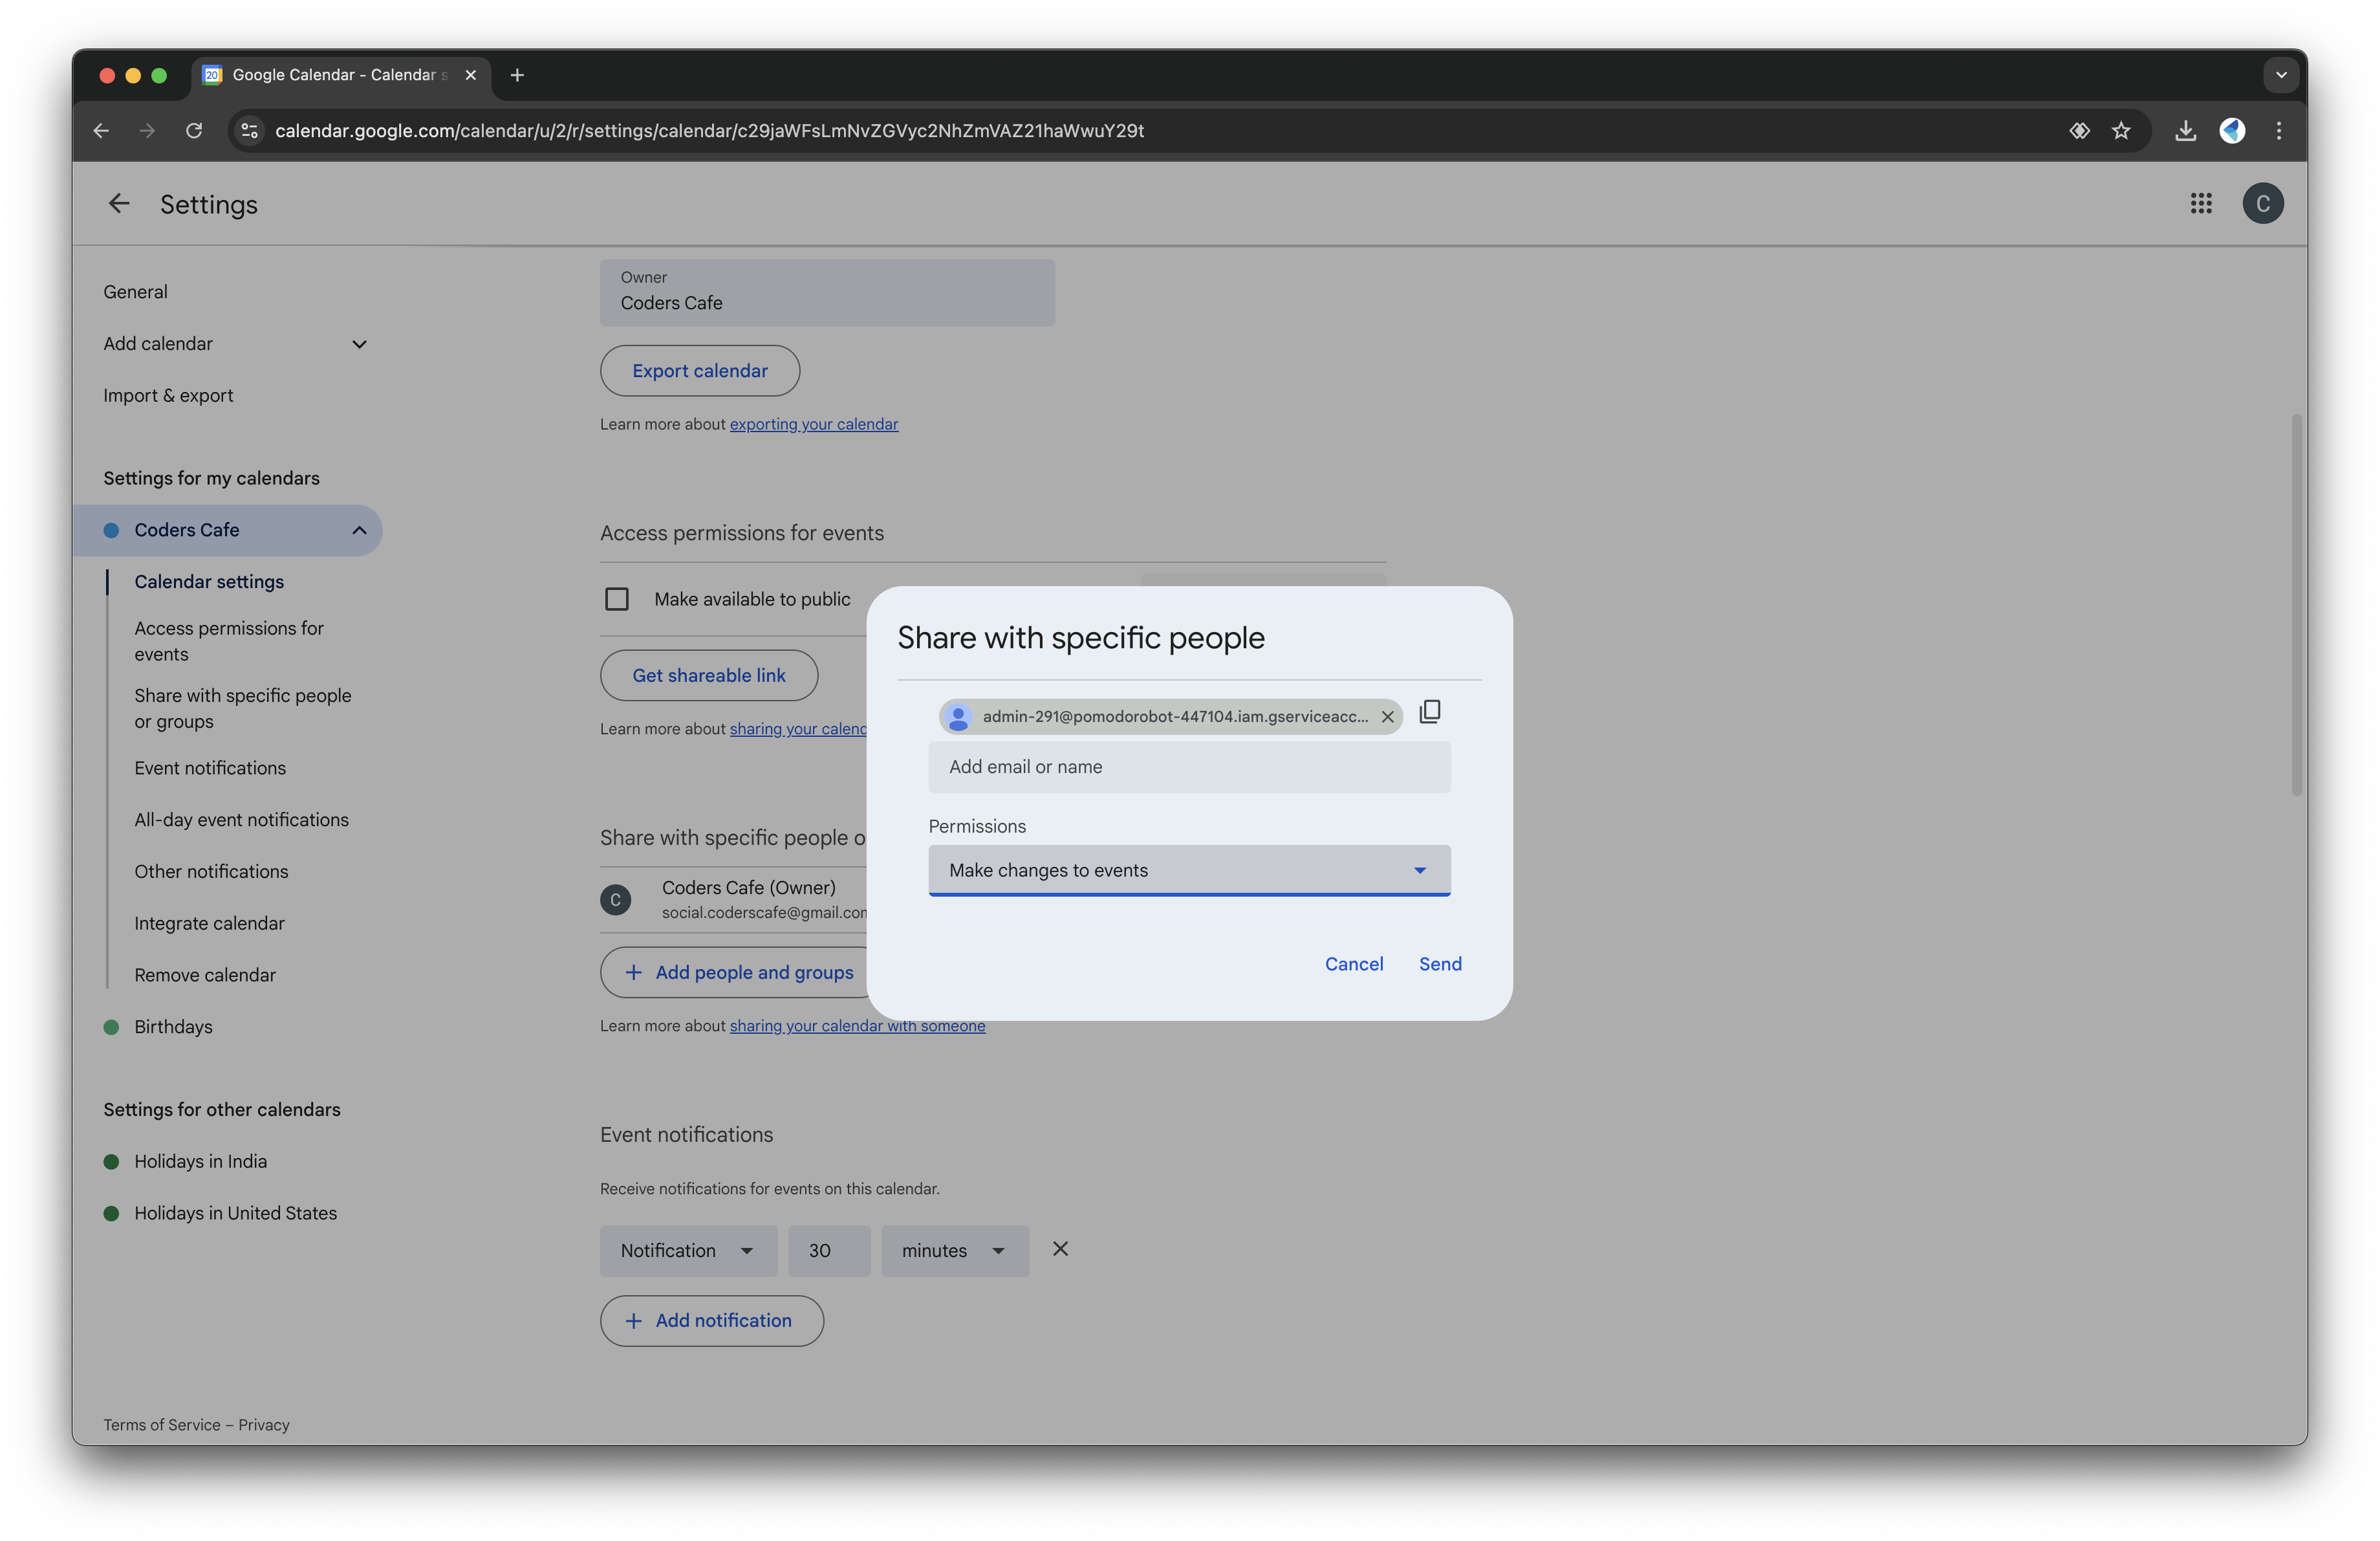
3. In Settings and Sharing, find the Share with specific people section:
Enter the email address from the service account key file.
Give it permission to Make changes to events.
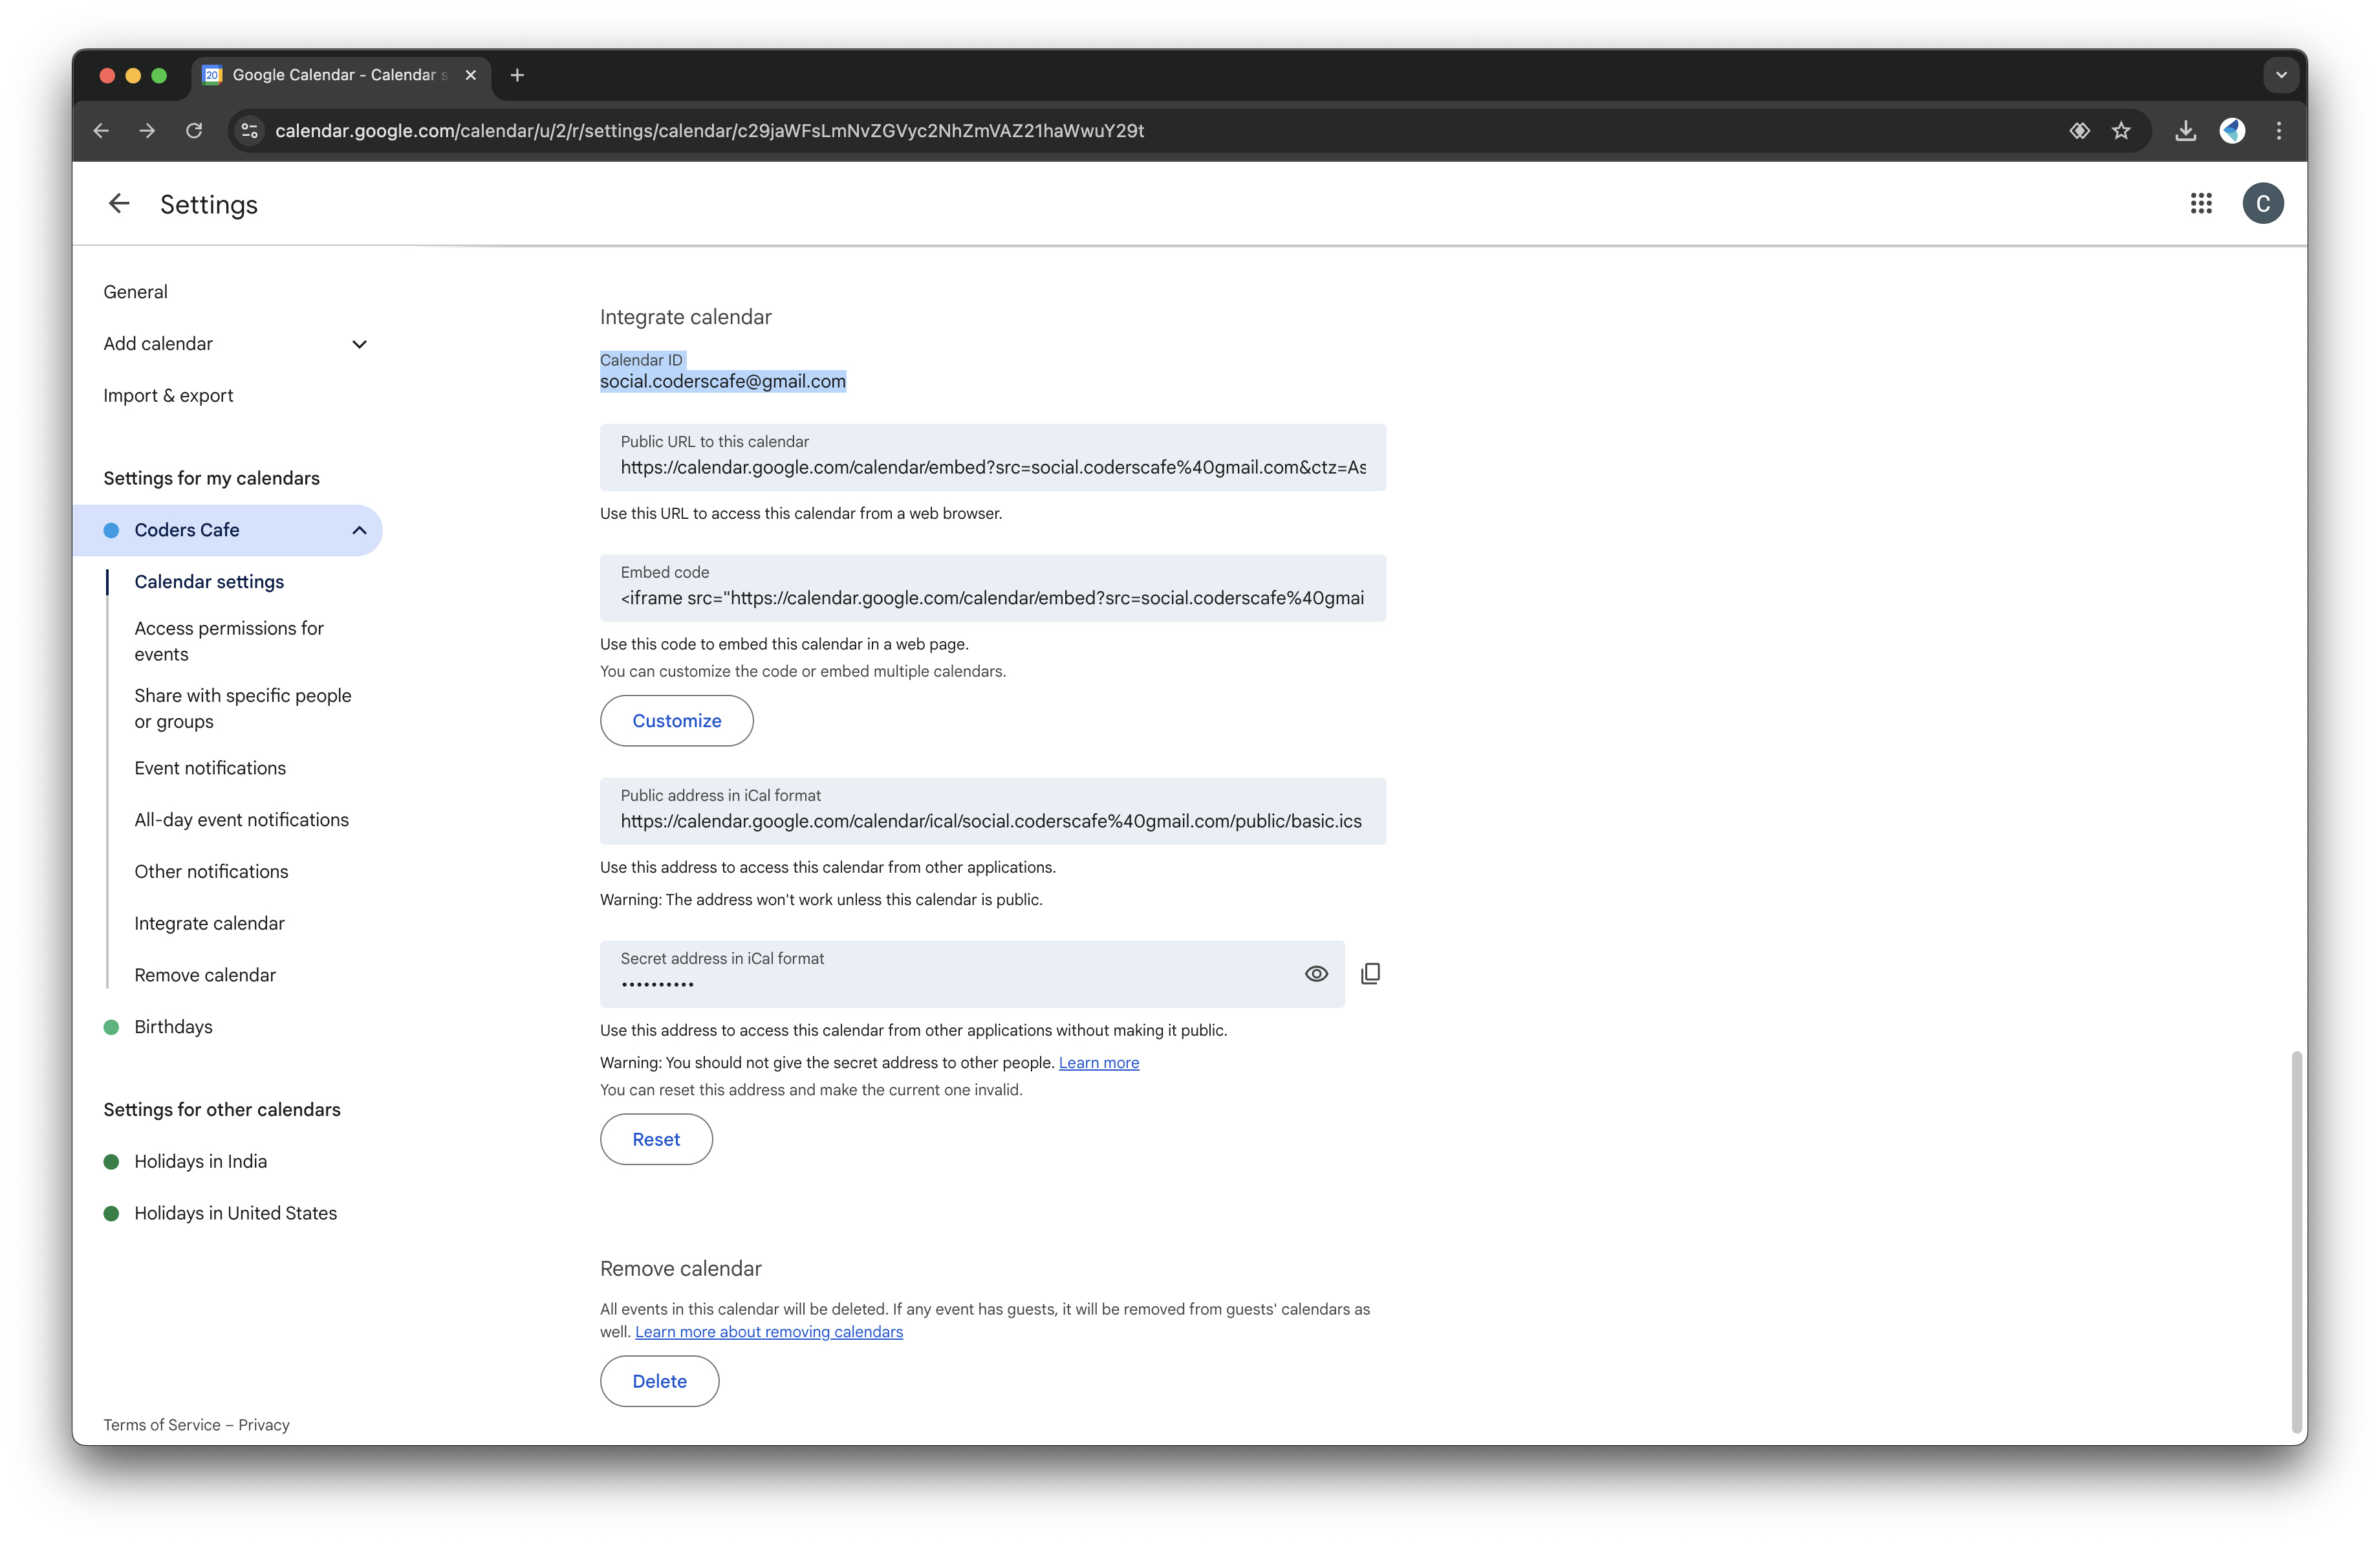
Scroll down to "Integrate Calendar" and copy the Calendar ID for the next steps.
Connect Your Calendar to the Pomodoro Bot
1. Open the Viam app and go to the CONFIGURE tab. 2. Add the Calendar module, and provide:
The Calendar ID you copied earlier.
The path to the service account JSON file.
3. Save your changes to complete the setup.
Test the Integration
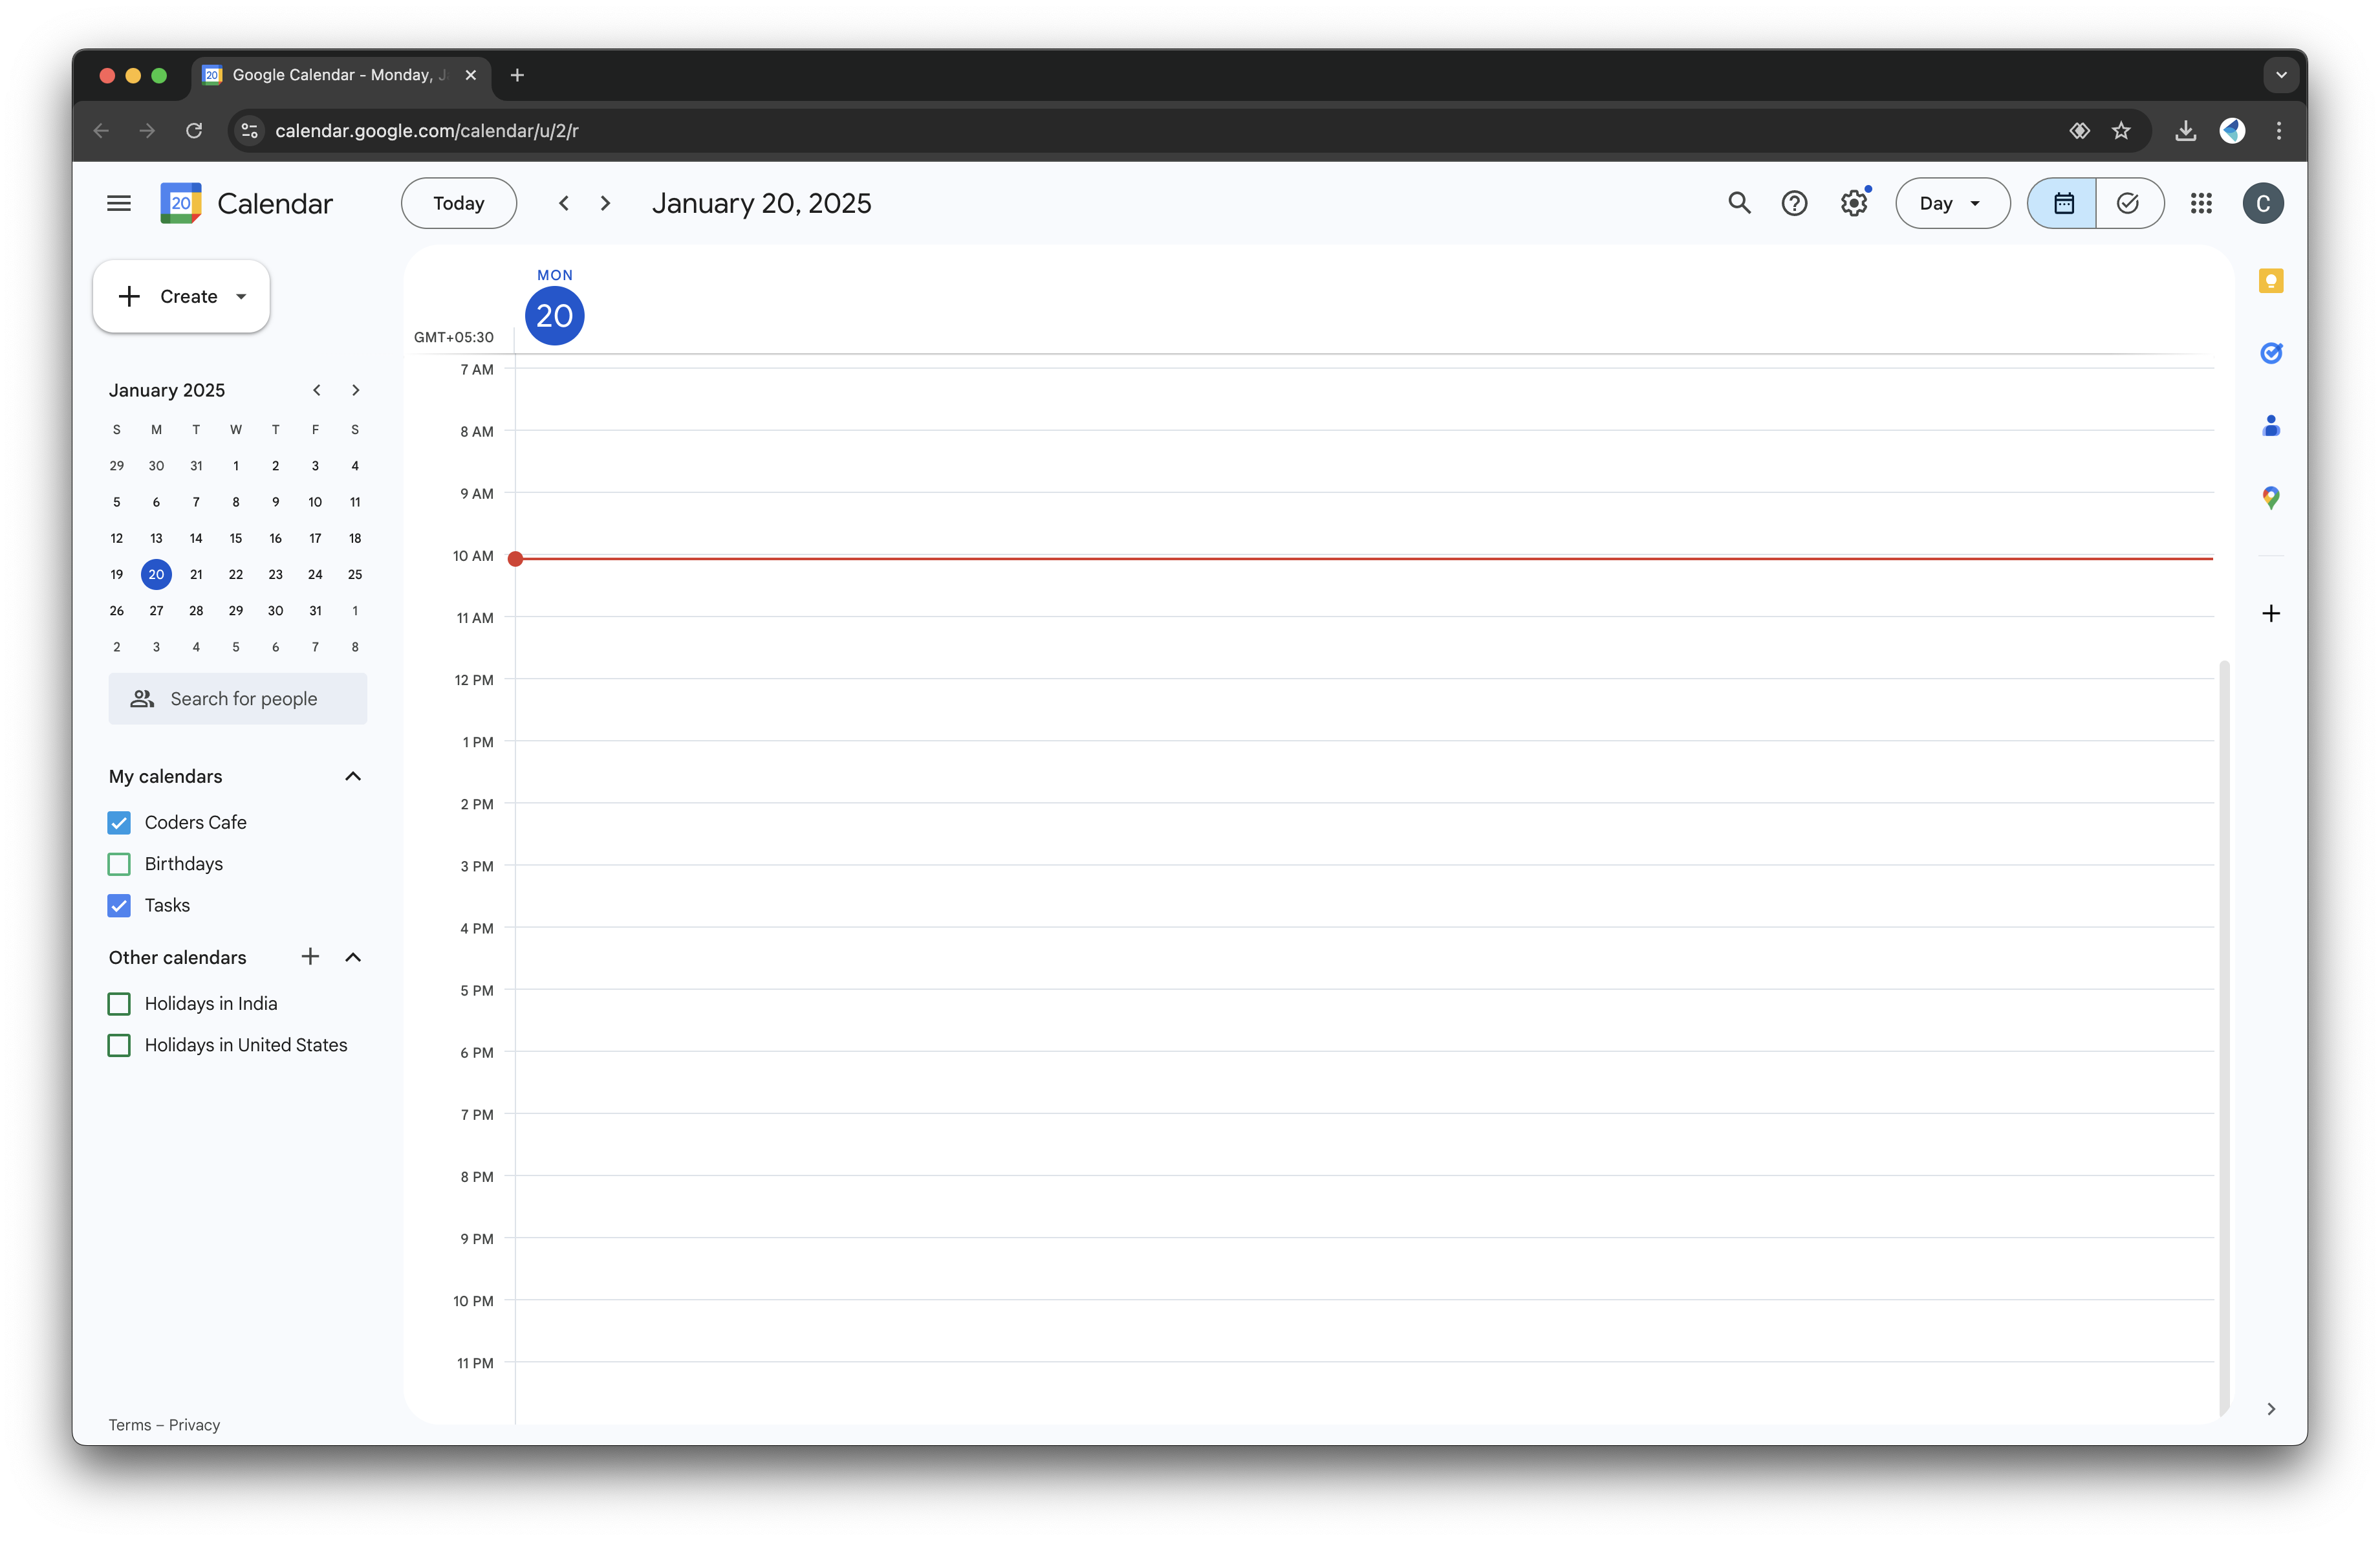
1. Create a test event in Google Calendar:
Name it something like Test Meeting and save the event.
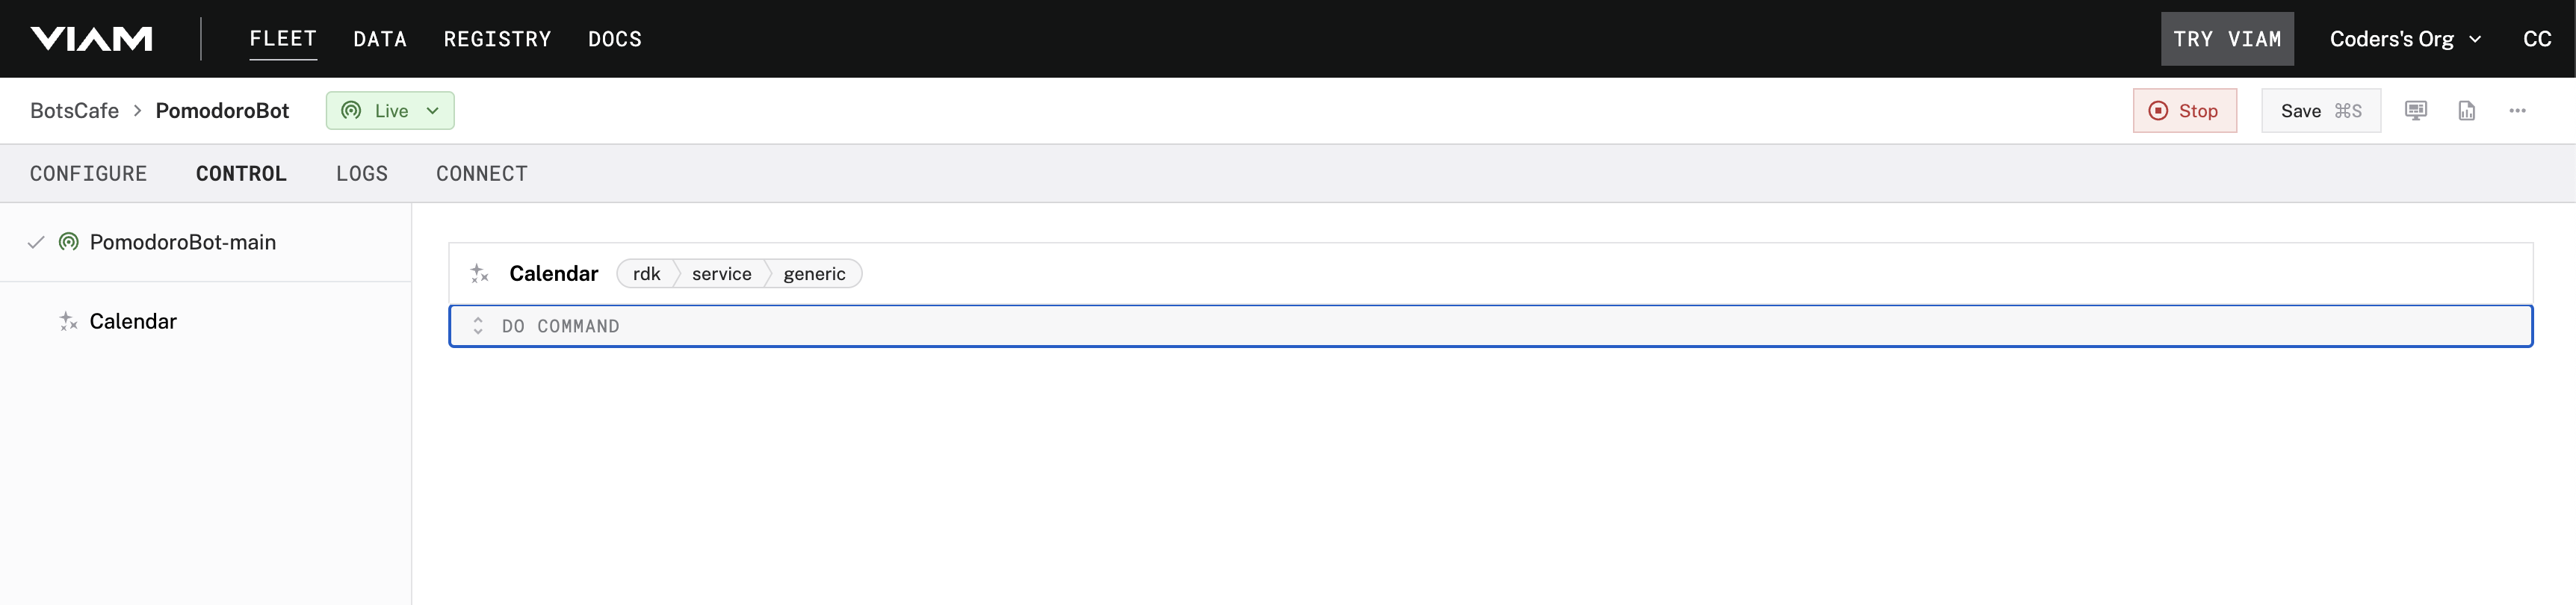
2. Go back to the Viam app and open the Control* tab.
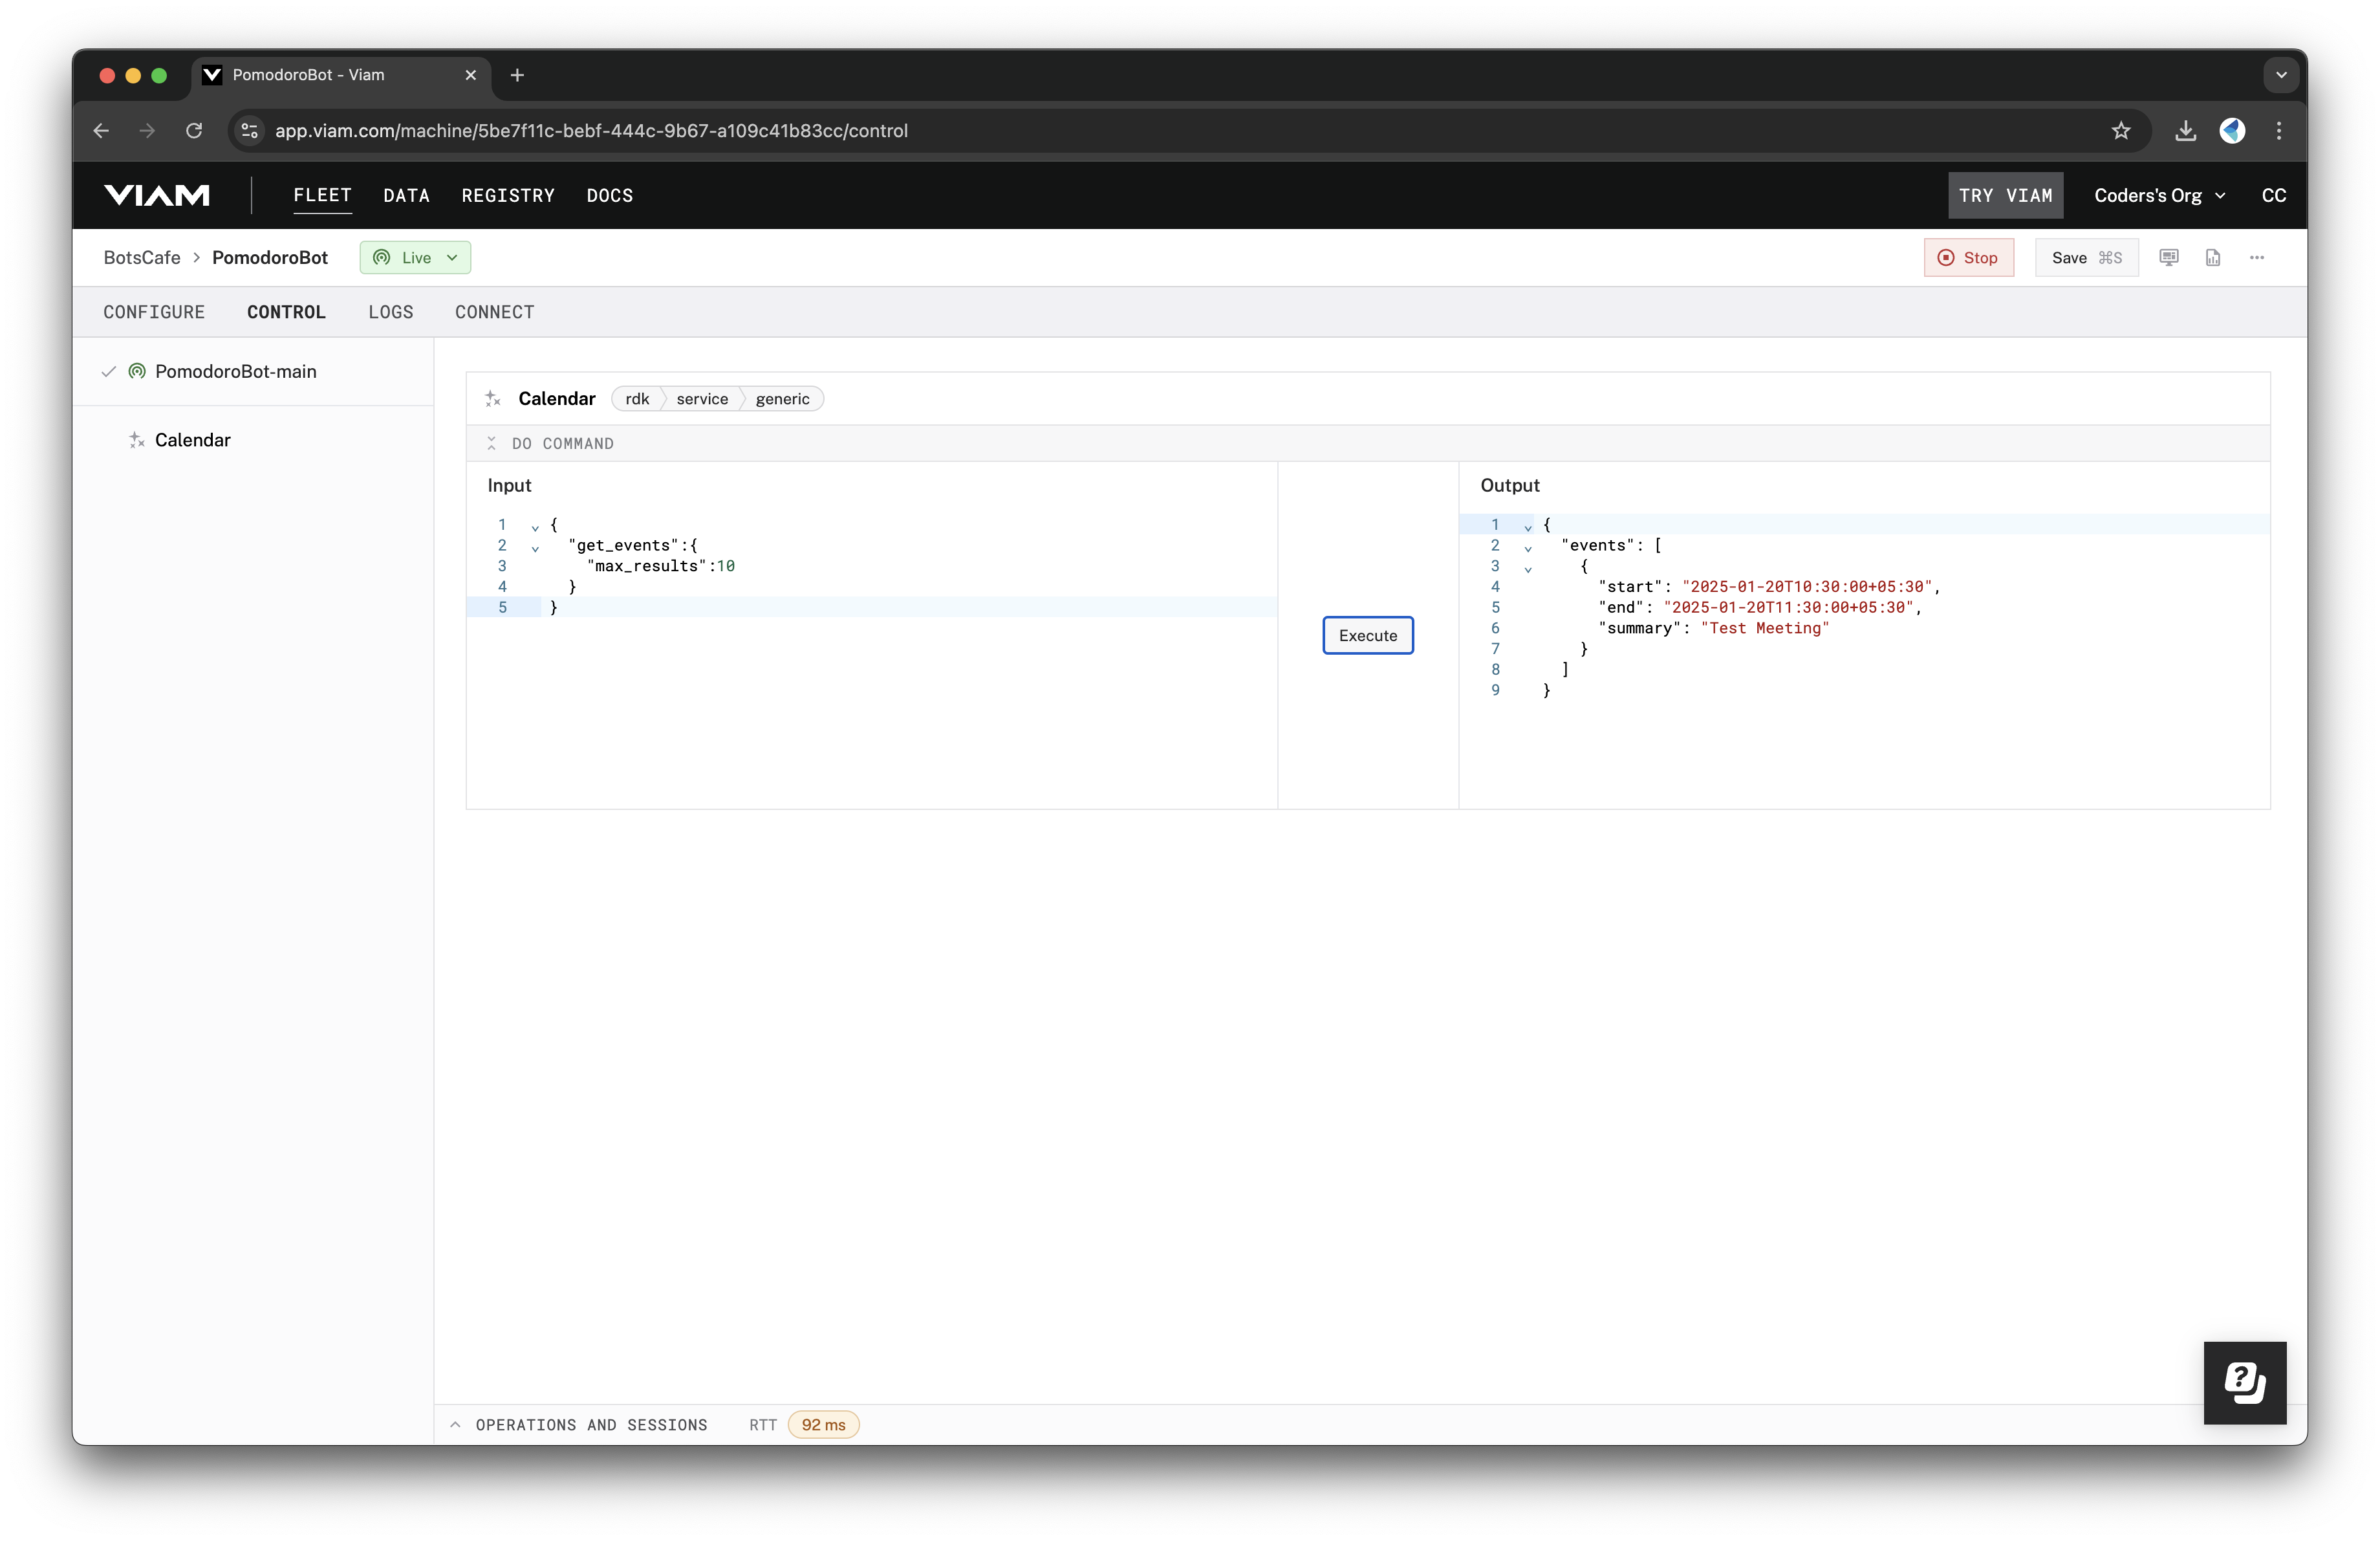
3. Use the given command in the DO COMMAND interface to check for upcoming calendar events.
{ "get_events": { "max_results": 10 } }
If everything is working correctly, you should see your test event ("Test Meeting") listed in the results. This confirms that your Pomodoro Bot is successfully linked to your Google Calendar.
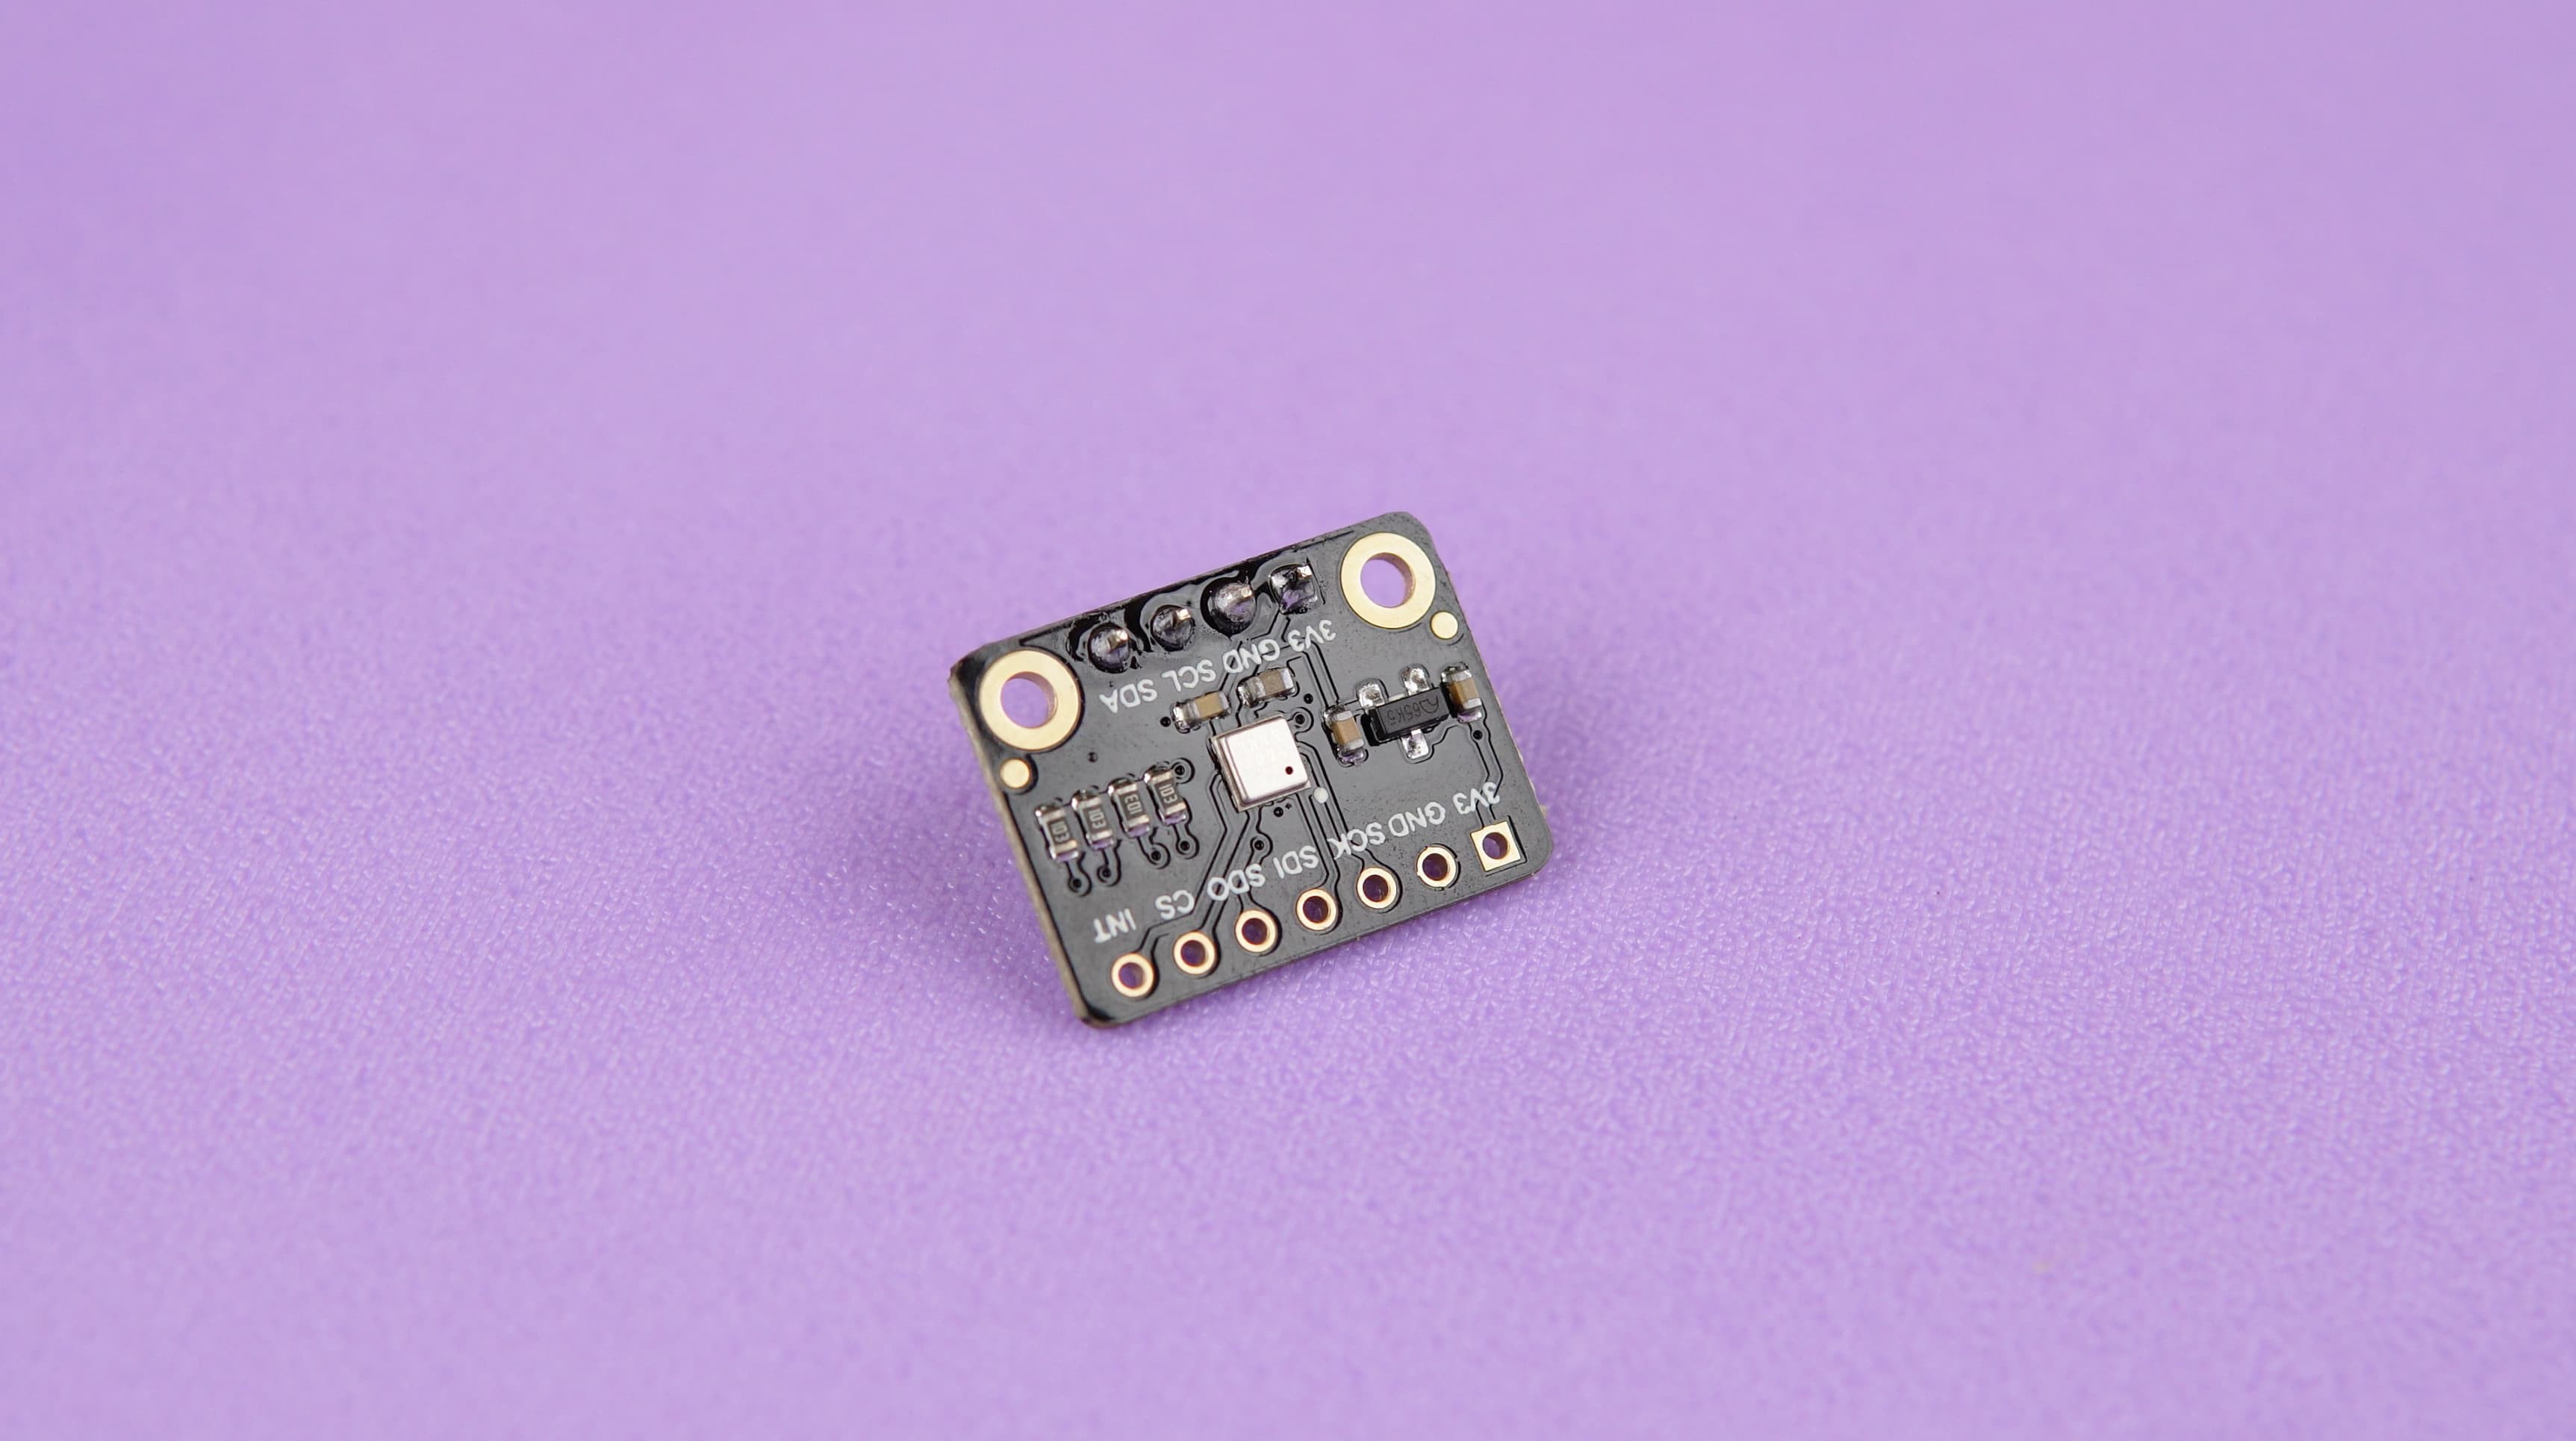
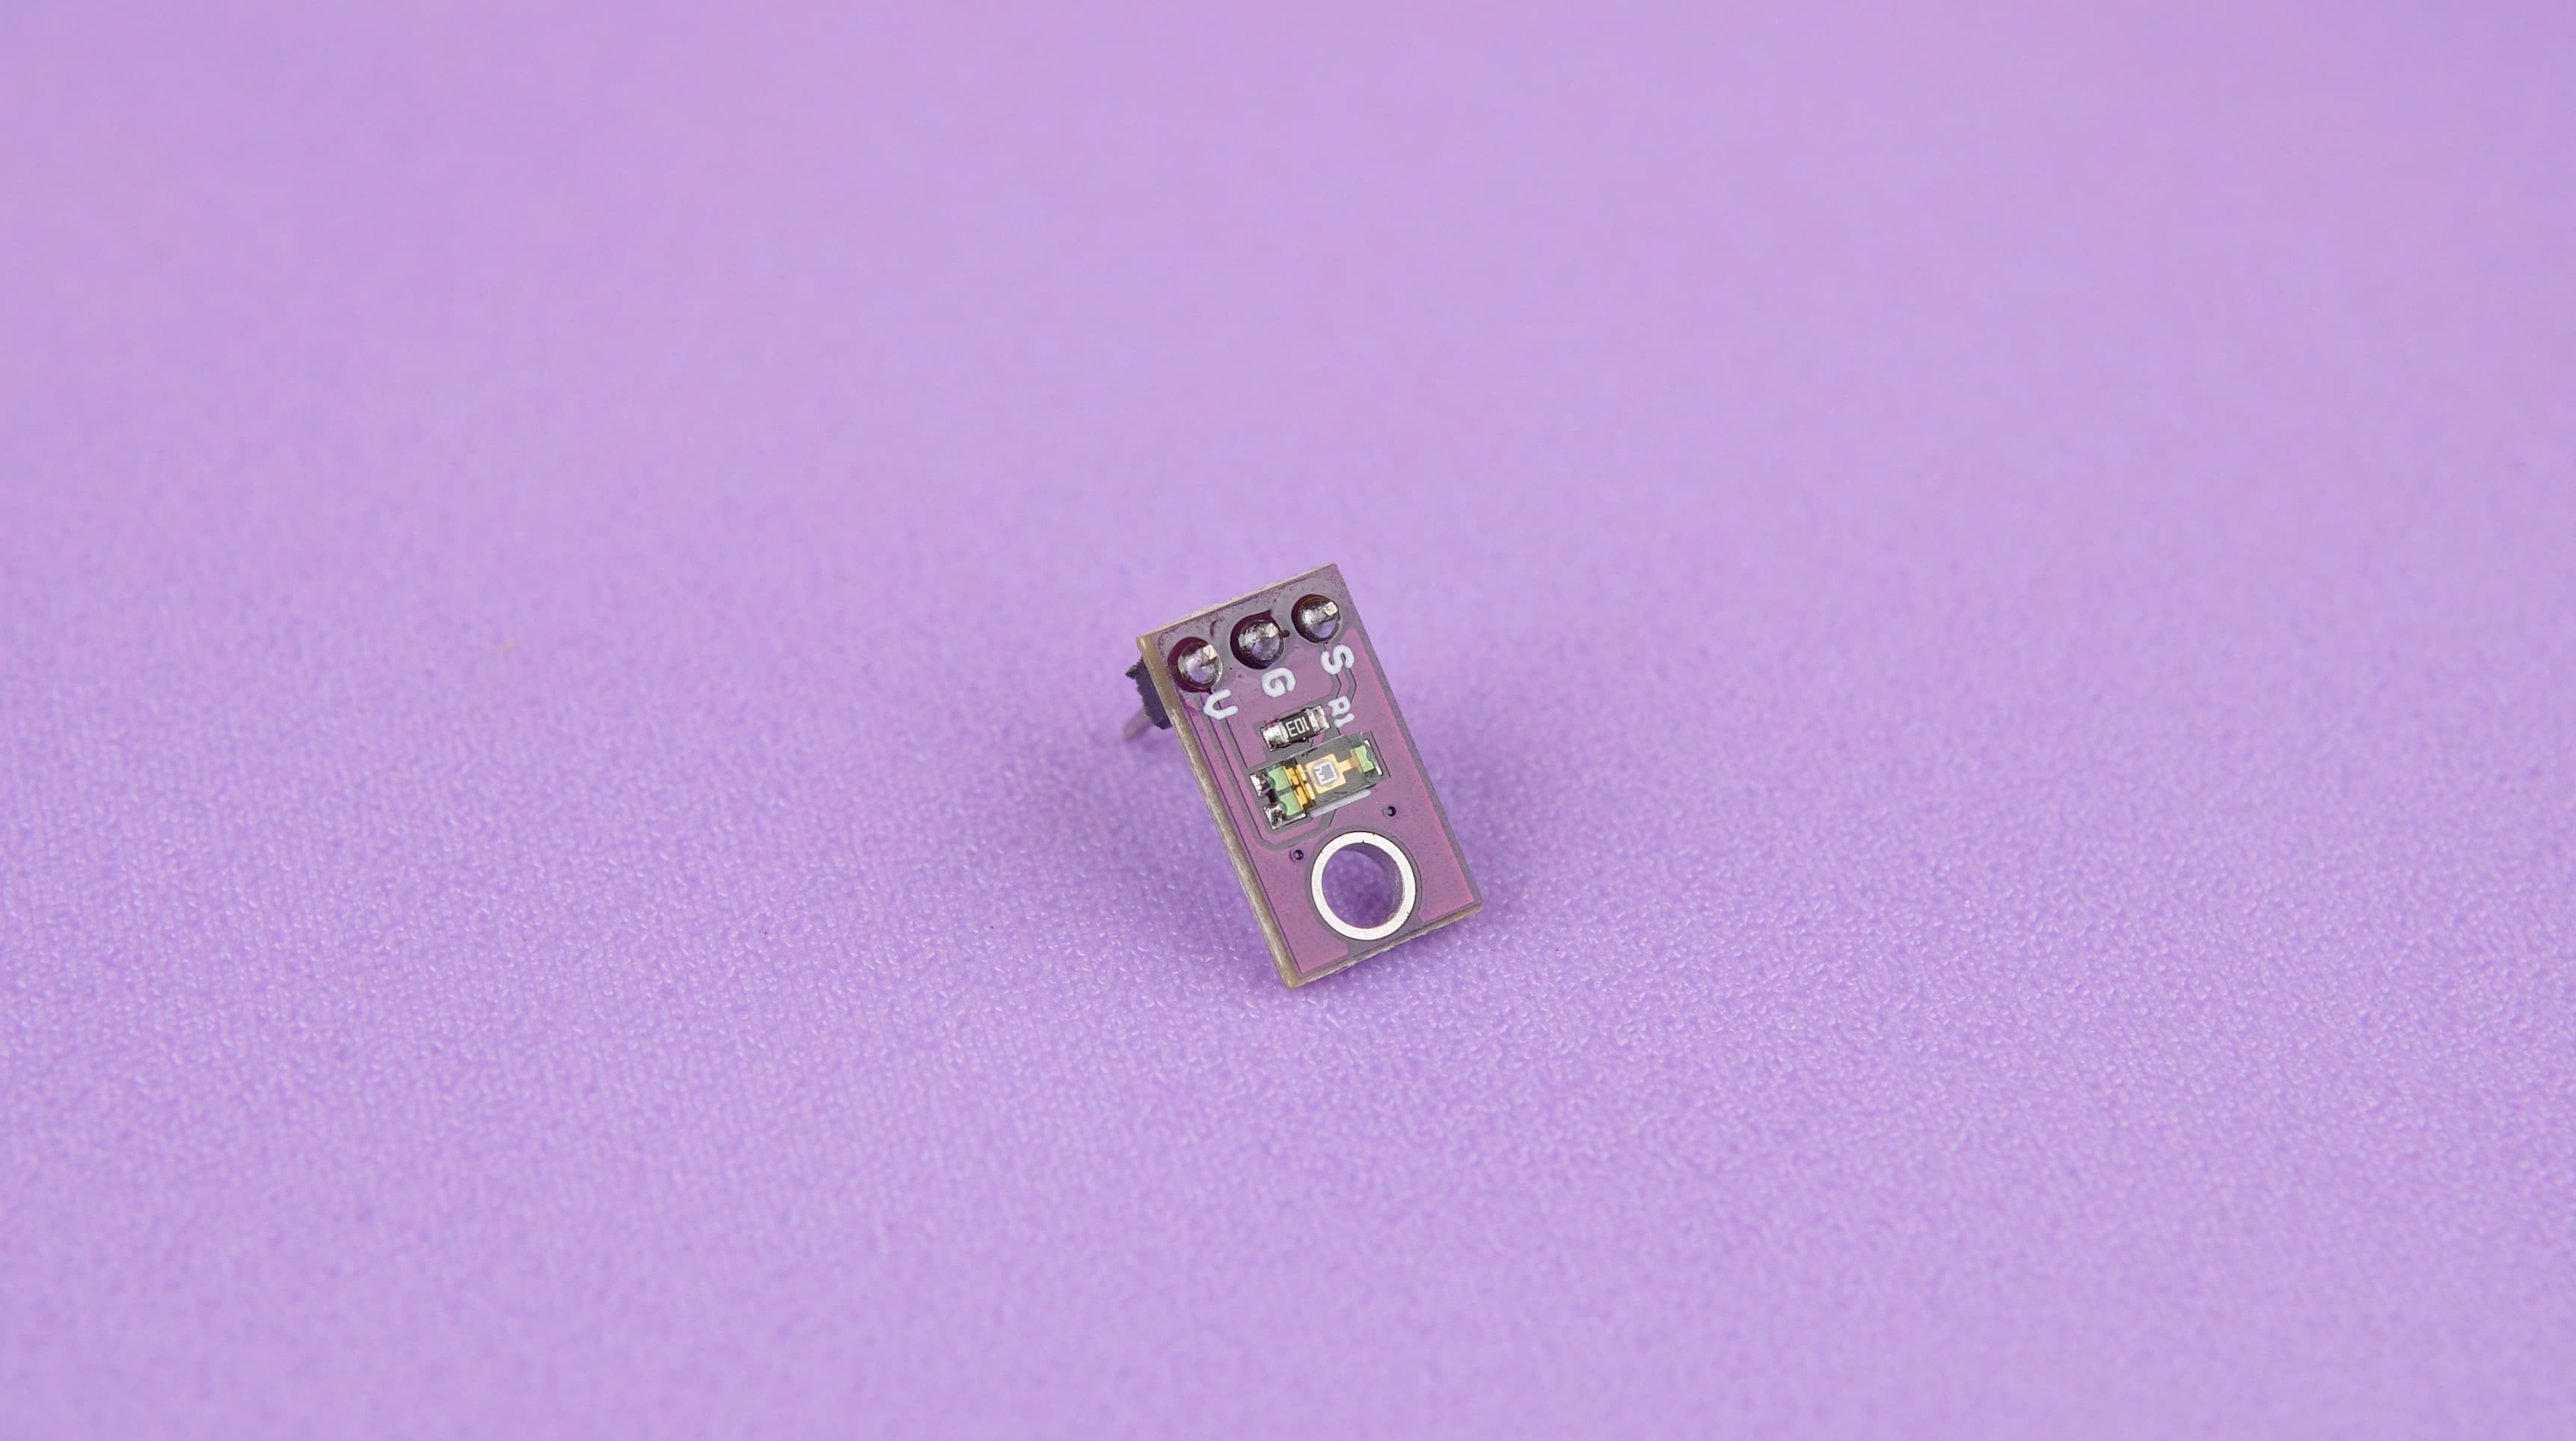
Integrate ENS160 Air Quality Sensor
Let's integrate the ENS160 air quality sensor with your Pomodoro Bot to monitor indoor air quality effectively. The ENS160 sensor tracks VOCs (volatile organic compounds), eCO2 (equivalent carbon dioxide), and provides an Air Quality Index (AQI) – vital for maintaining an optimal workspace environment.
Hardware Setup
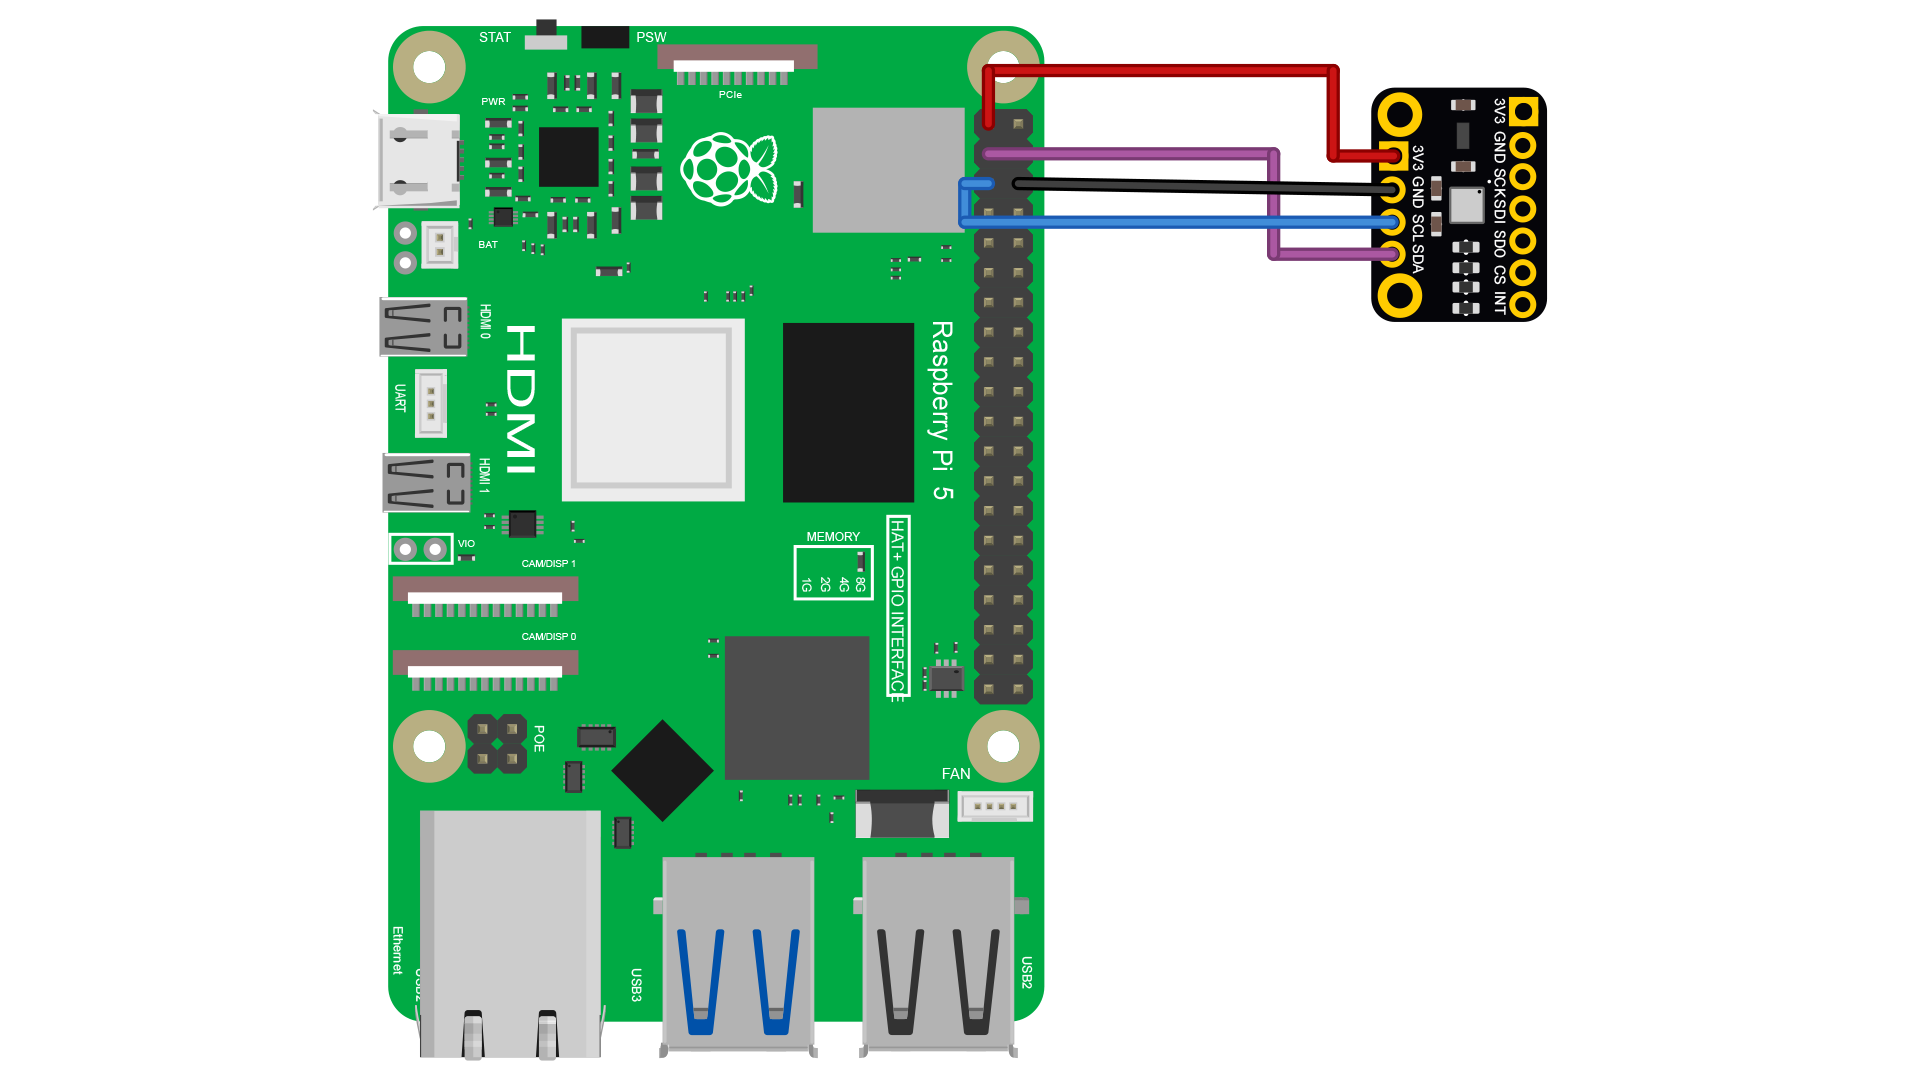
Power Connections:
Connect the VCC pin of the ENS160 sensor to the 3.3 Volts pin on the Raspberry Pi.
Connect the Ground pin of the ENS160 sensor to a Ground pin on the Raspberry Pi.
I2C Communication:
Wire the SCL pin of the ENS160 sensor to the SCL pin on the Raspberry Pi.
Wire the SDA pin of the ENS160 sensor to the SDA pin on the Raspberry Pi.
Ensure all connections are secure and double-check your wiring to avoid any issues.
Software Integration
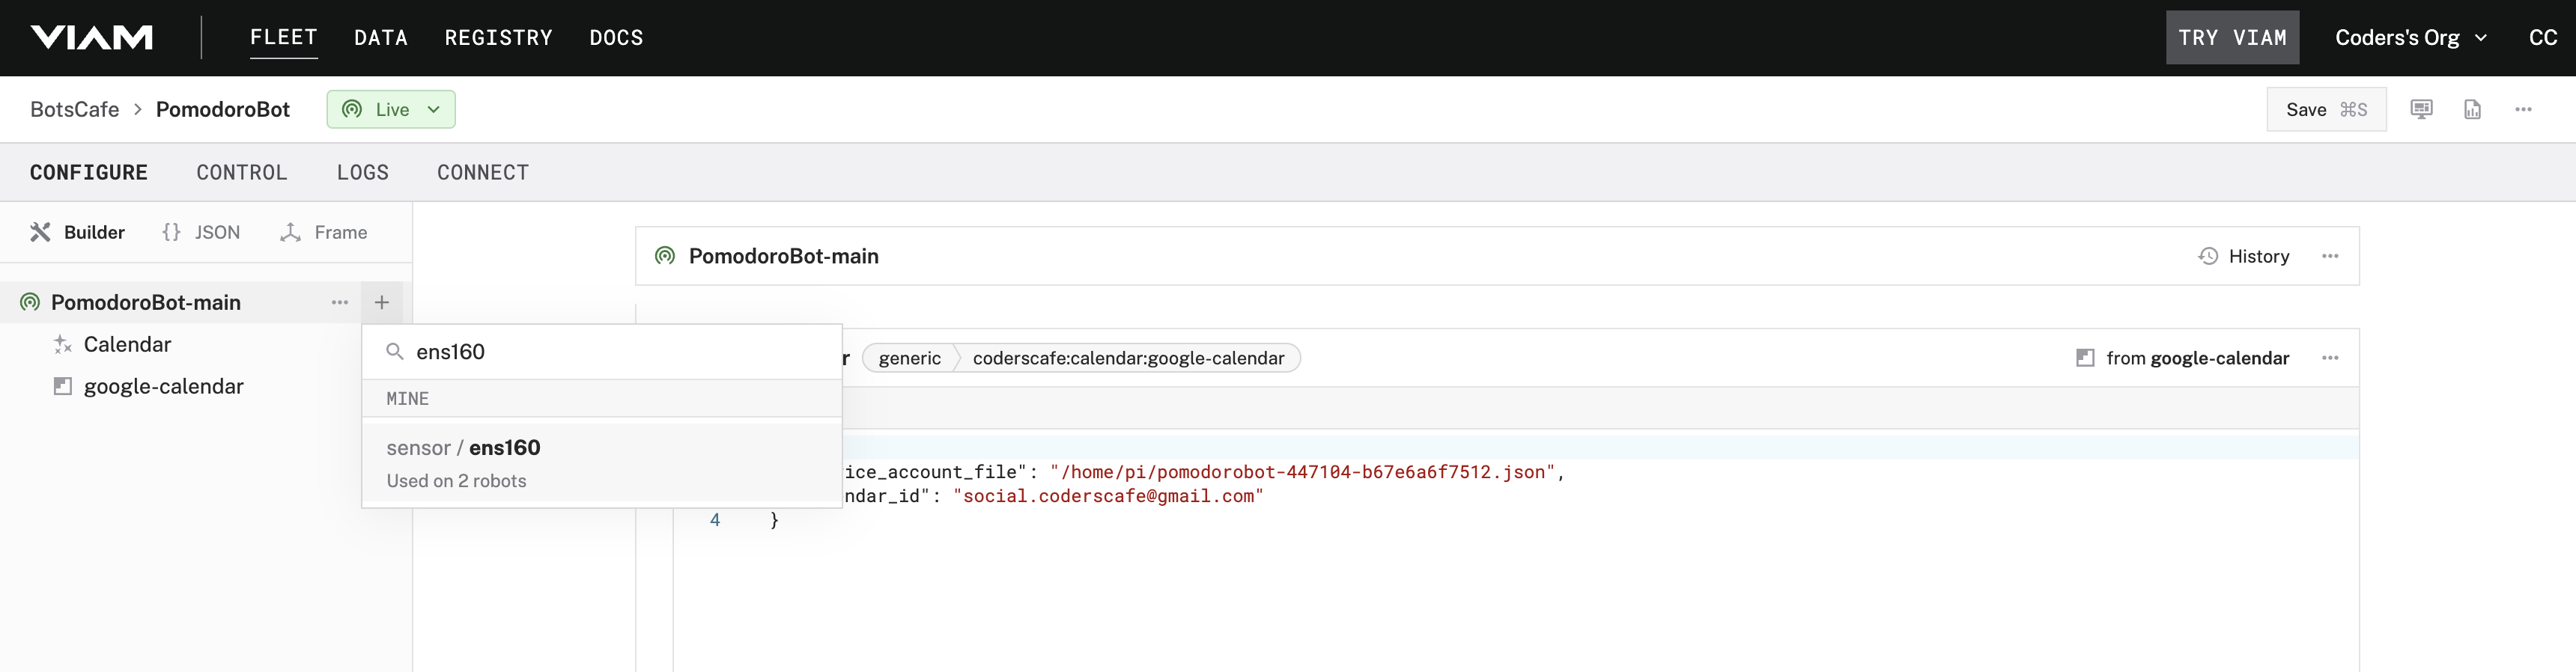
Add the ENS160 Sensor to the Viam App:
Open the Viam app.
Navigate to the CONFIGURE tab.
Add a new component for the ENS160 sensor.
Click "Save" and wait for the component to finish setup.
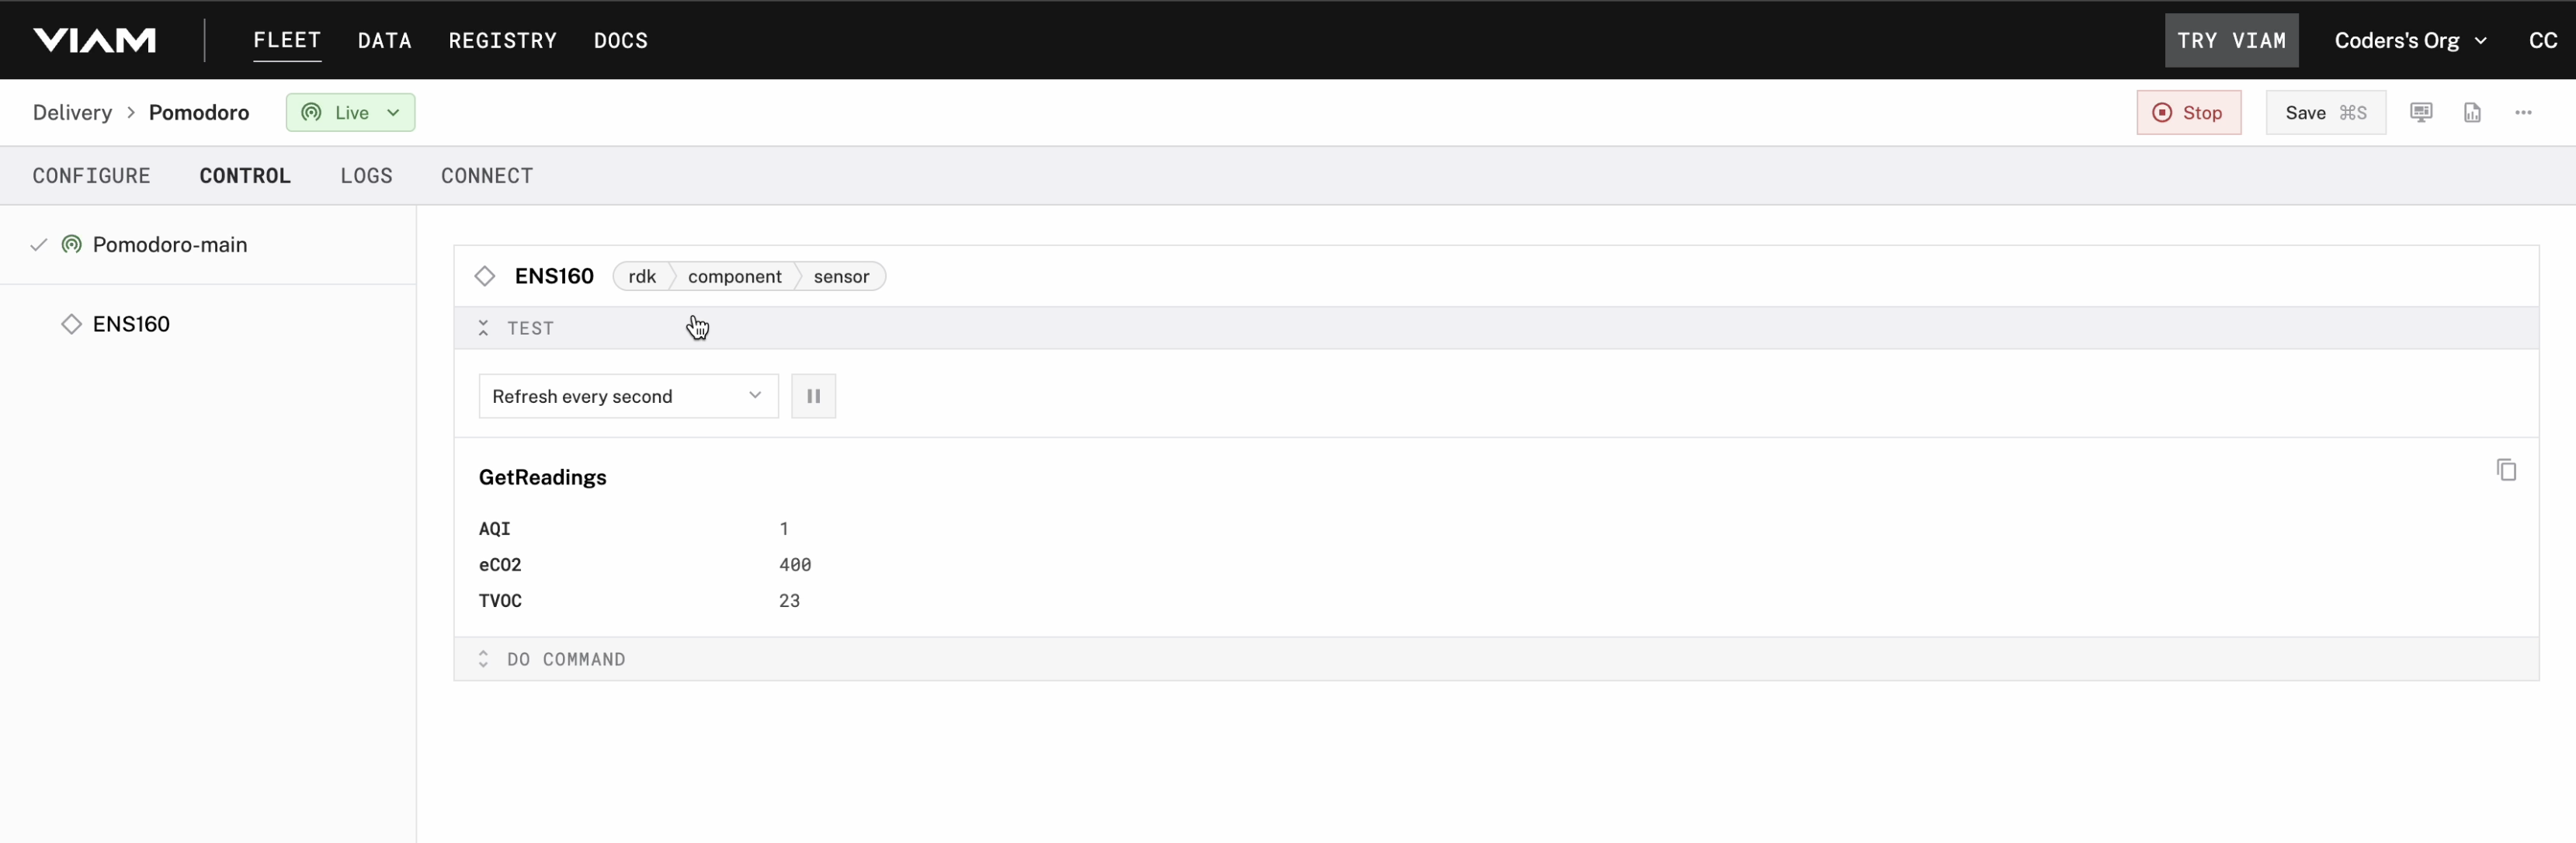
Testing the Integration:
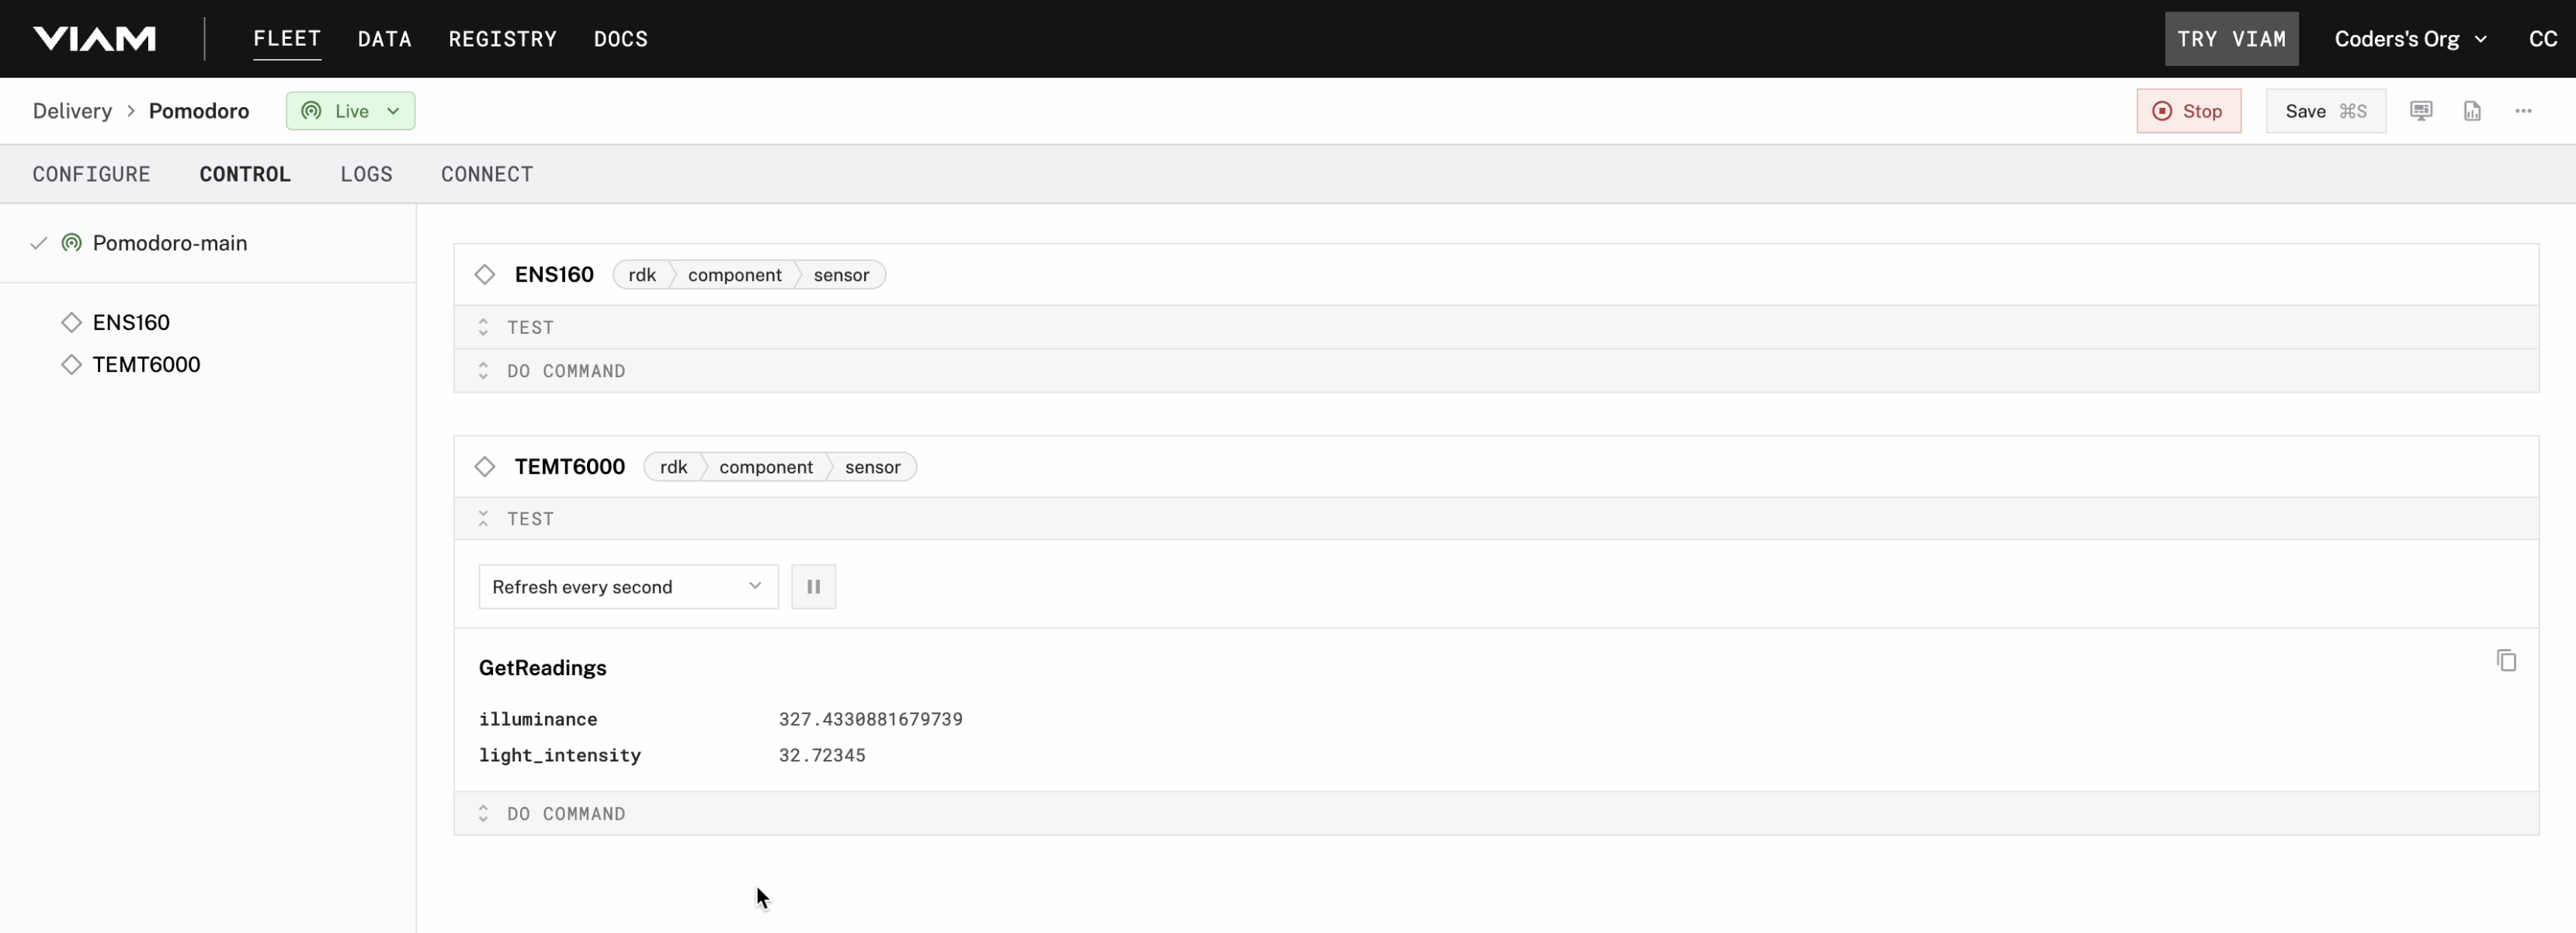
Switch to the Control tab in the Viam app.
Observe the live data feed from the ENS160 sensor, including real-time air quality metrics such as VOC levels, eCO2 values, and AQI.
Integrate TEMT6000 Ambient Light Sensor
Enhance your Pomodoro Bot by integrating the TEMT6000 ambient light sensor, which monitors light levels to help optimize workspace lighting for improved productivity. With this sensor, your bot can detect ambient light intensity and make adjustments as necessary to create a comfortable and efficient working environment.
Hardware Setup
1.Components:
TEMT6000 Ambient Light Sensor
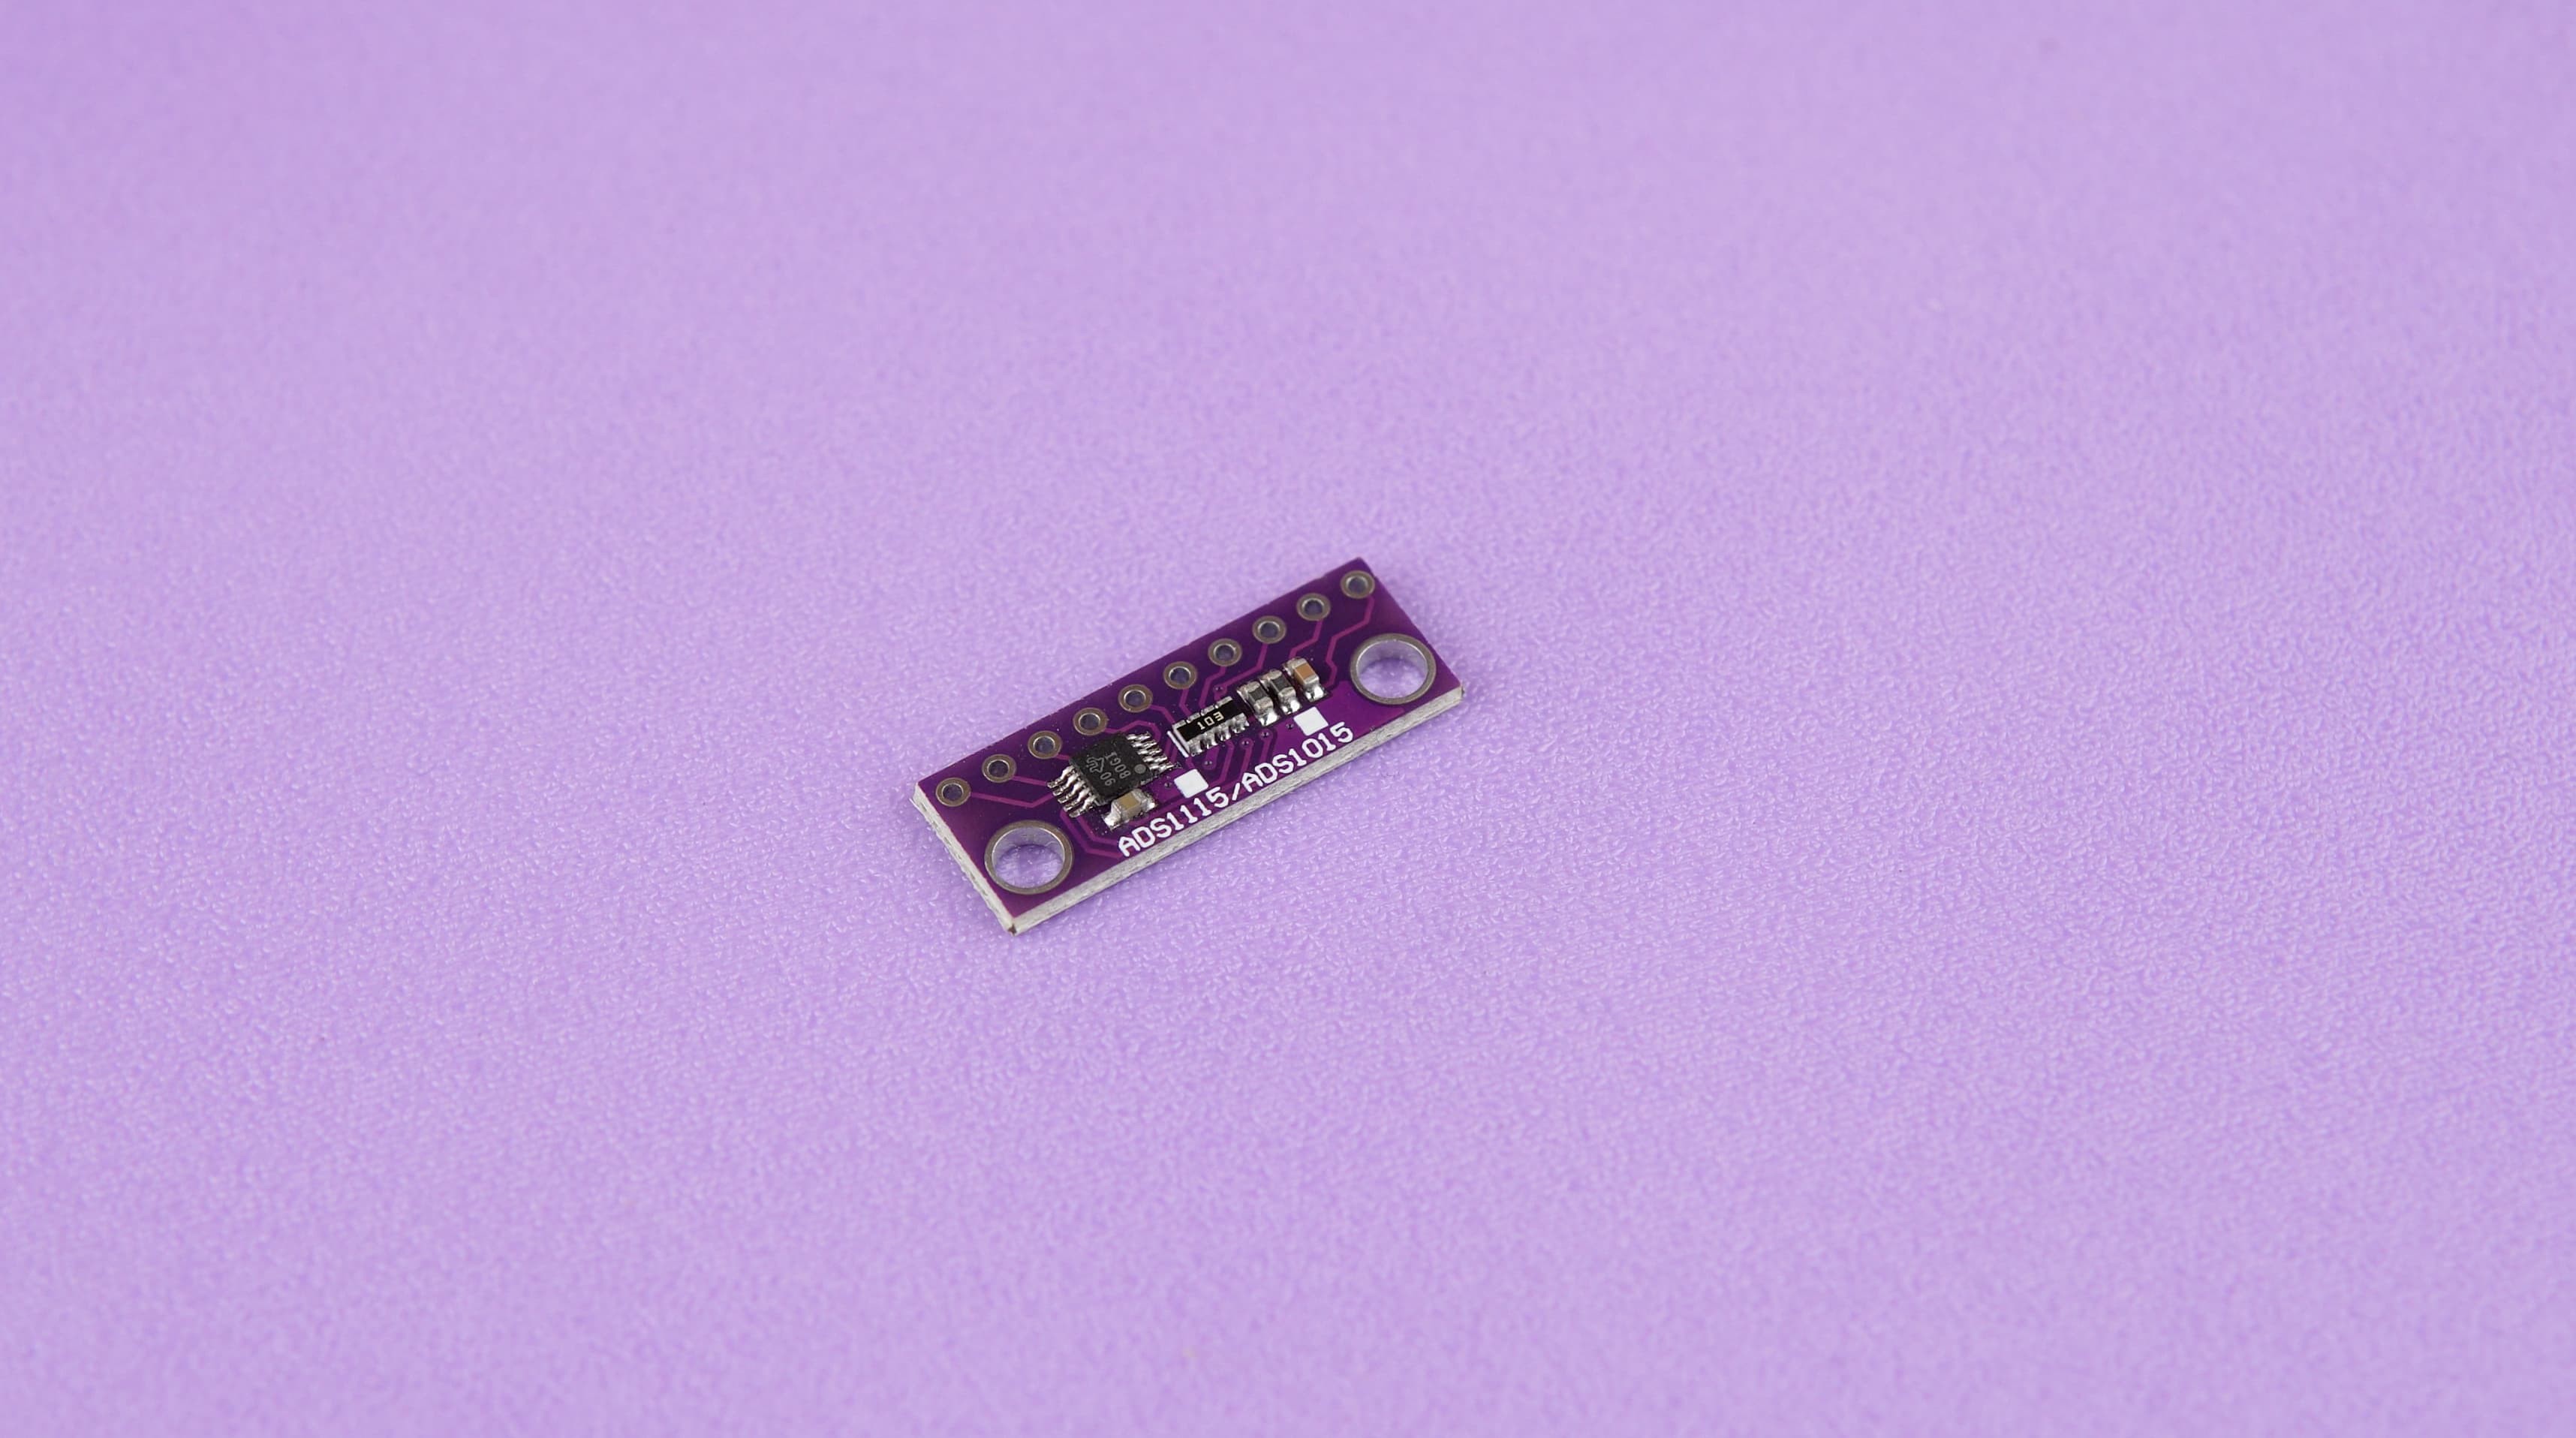
ADS1115 Analog-to-Digital Converter (ADC)
2. Connections:
TEMT6000 to ADS1115:
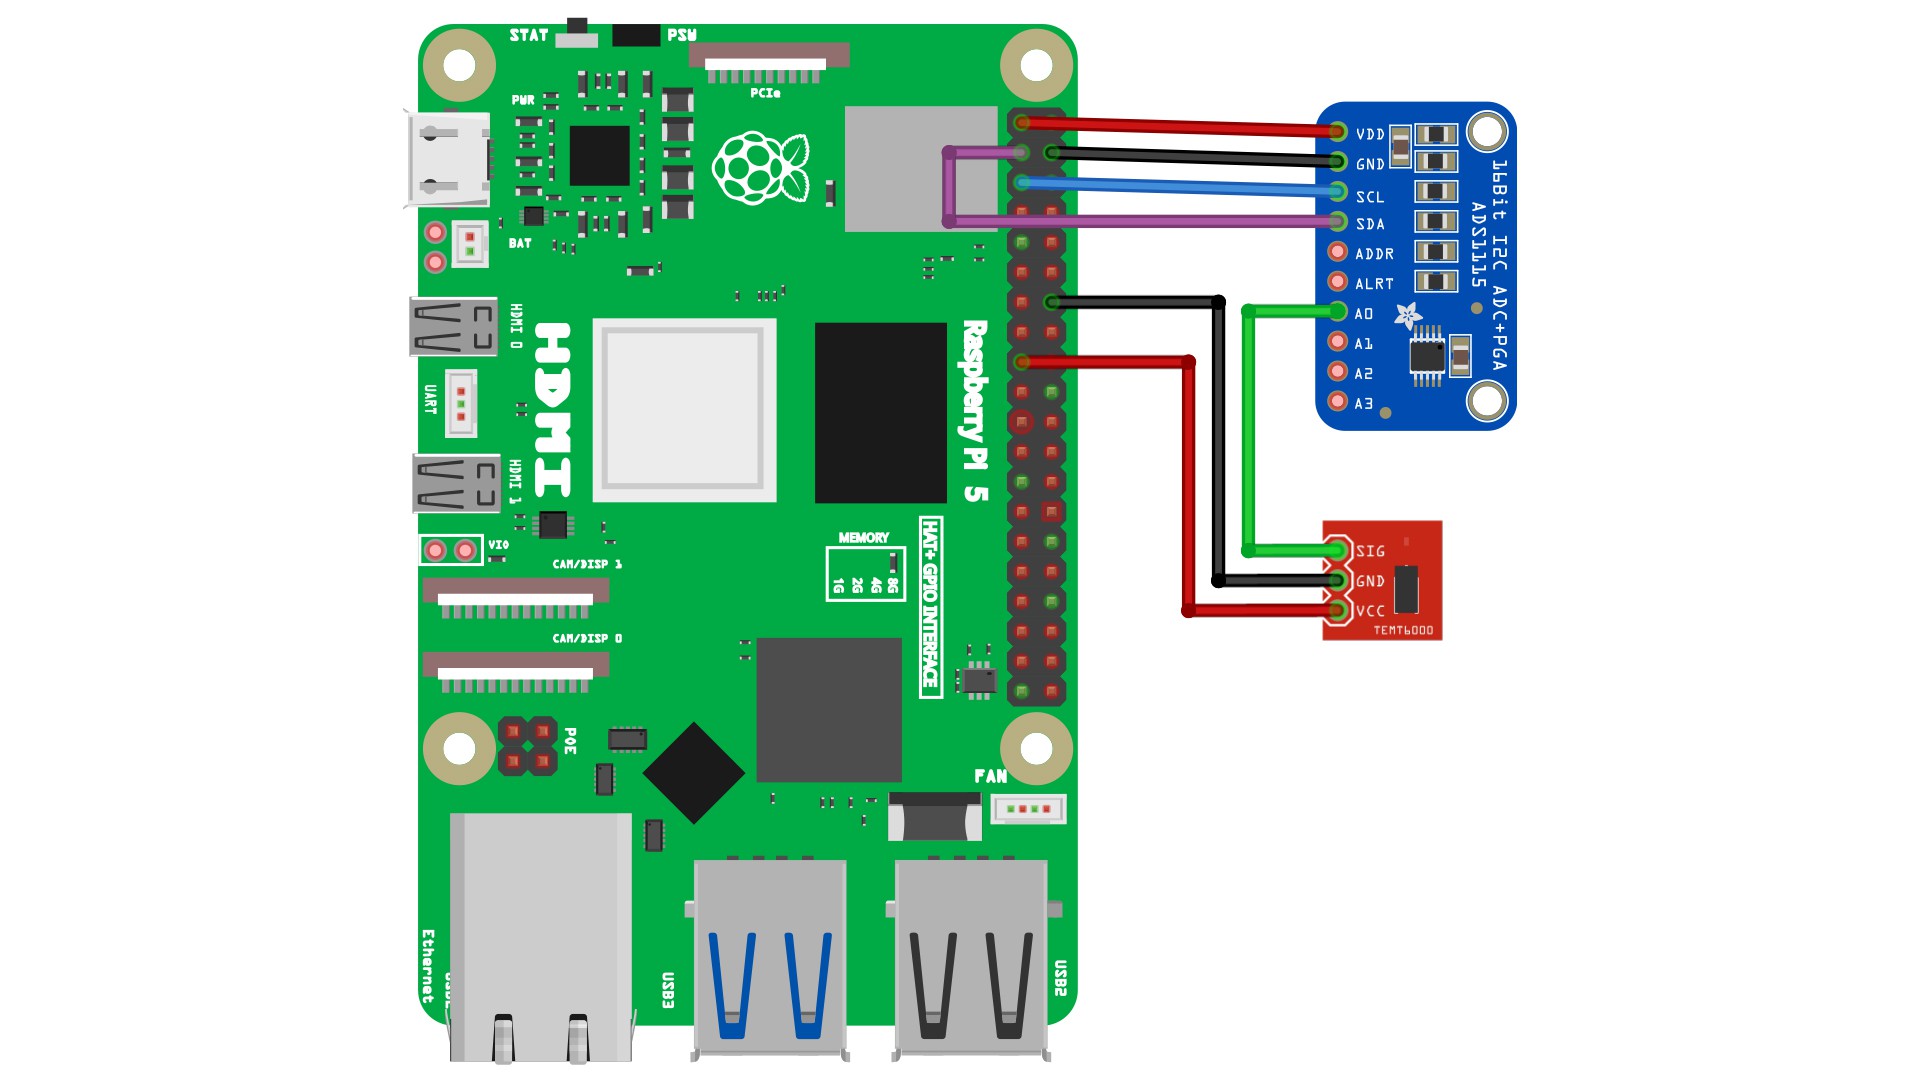
Connect the S or SIG Pin(analog output pin) of the TEMT6000 to one of the analog input channels (e.g., A0) on the ADS1115.
Connect the VCC pin of the TEMT6000 to the 3.3V pin on the Raspberry Pi.
Connect the Ground pin of the TEMT6000 to the Ground pin on the Raspberry Pi.
ADS1115 to Raspberry Pi:
Connect the SCL pin of the ADS1115 to the SCL pin on the Raspberry Pi.
Connect the SDA pin of the ADS1115 to the SDA pin on the Raspberry Pi.
Connect the VCC pin of the ADS1115 to the 3.3 Volts pin on the Raspberry Pi.
Connect the Ground pin of the ADS1115 to a Ground pin on the Raspberry Pi.
Software Integration
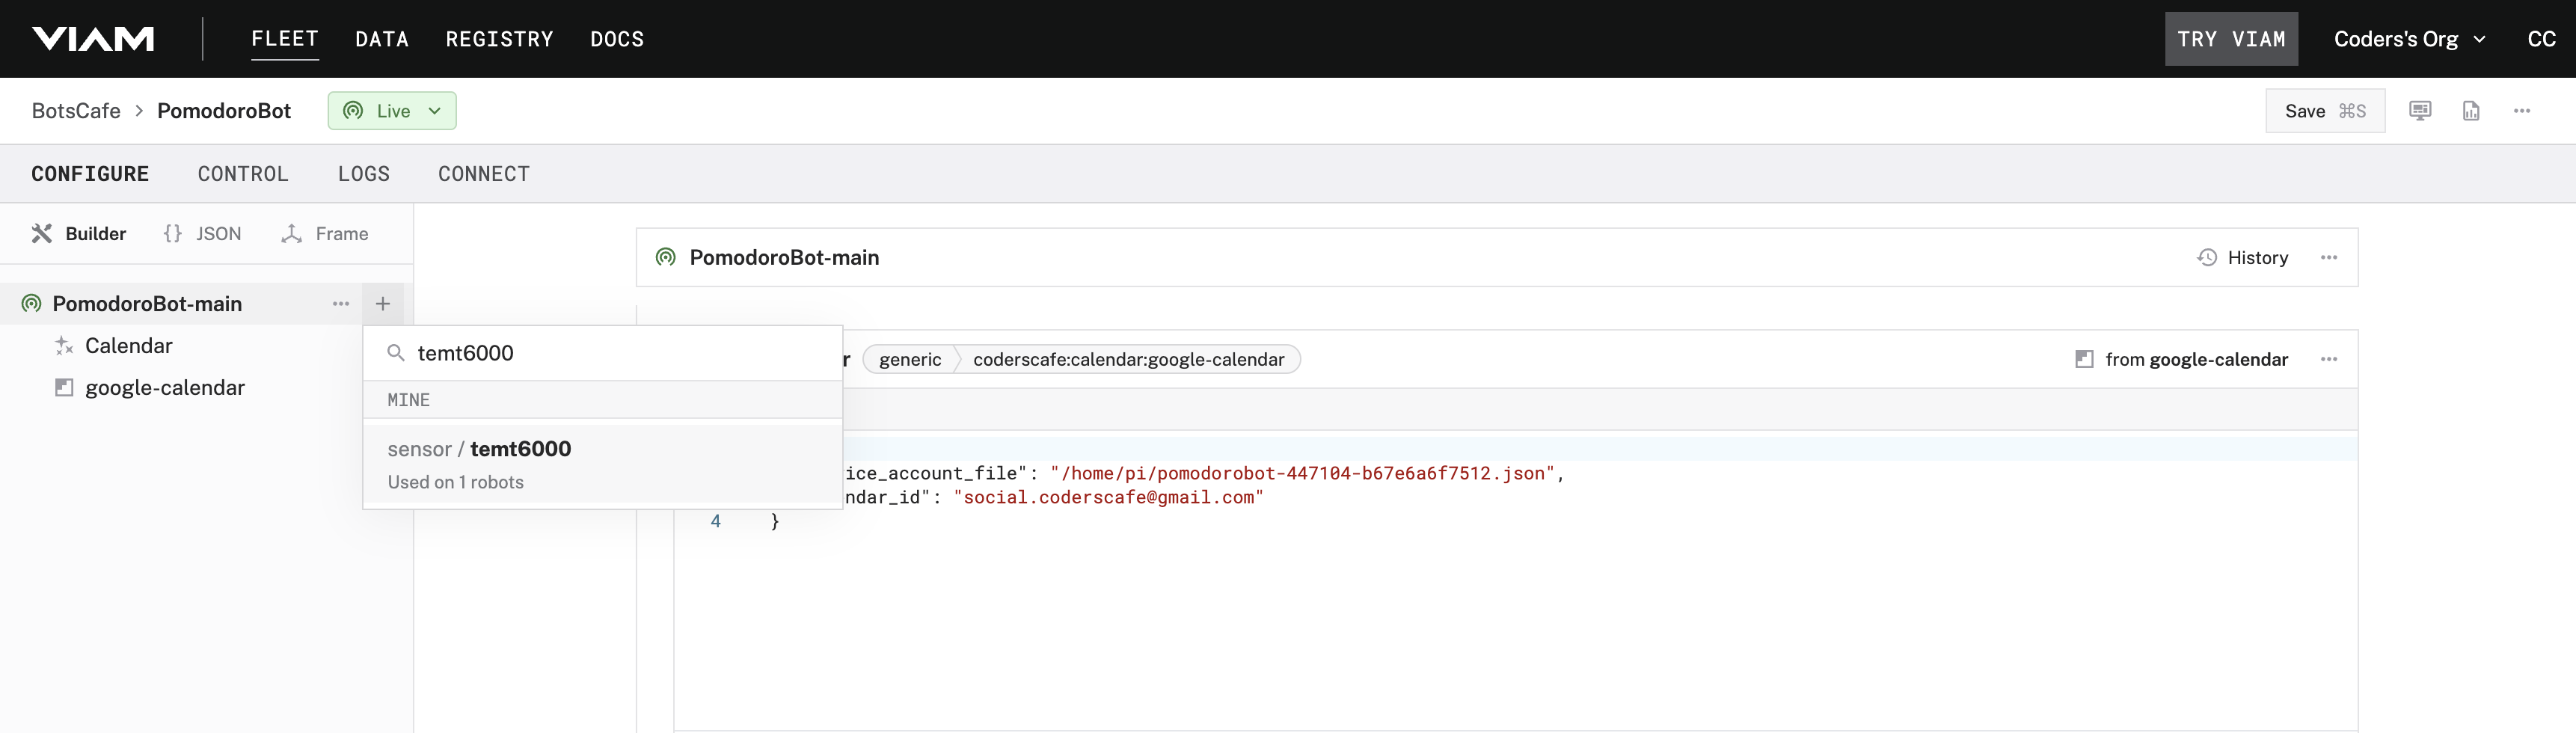
Add the TEMT6000 Sensor in Viam App:
Open the Viam application.
Navigate to the CONFIGURE tab.
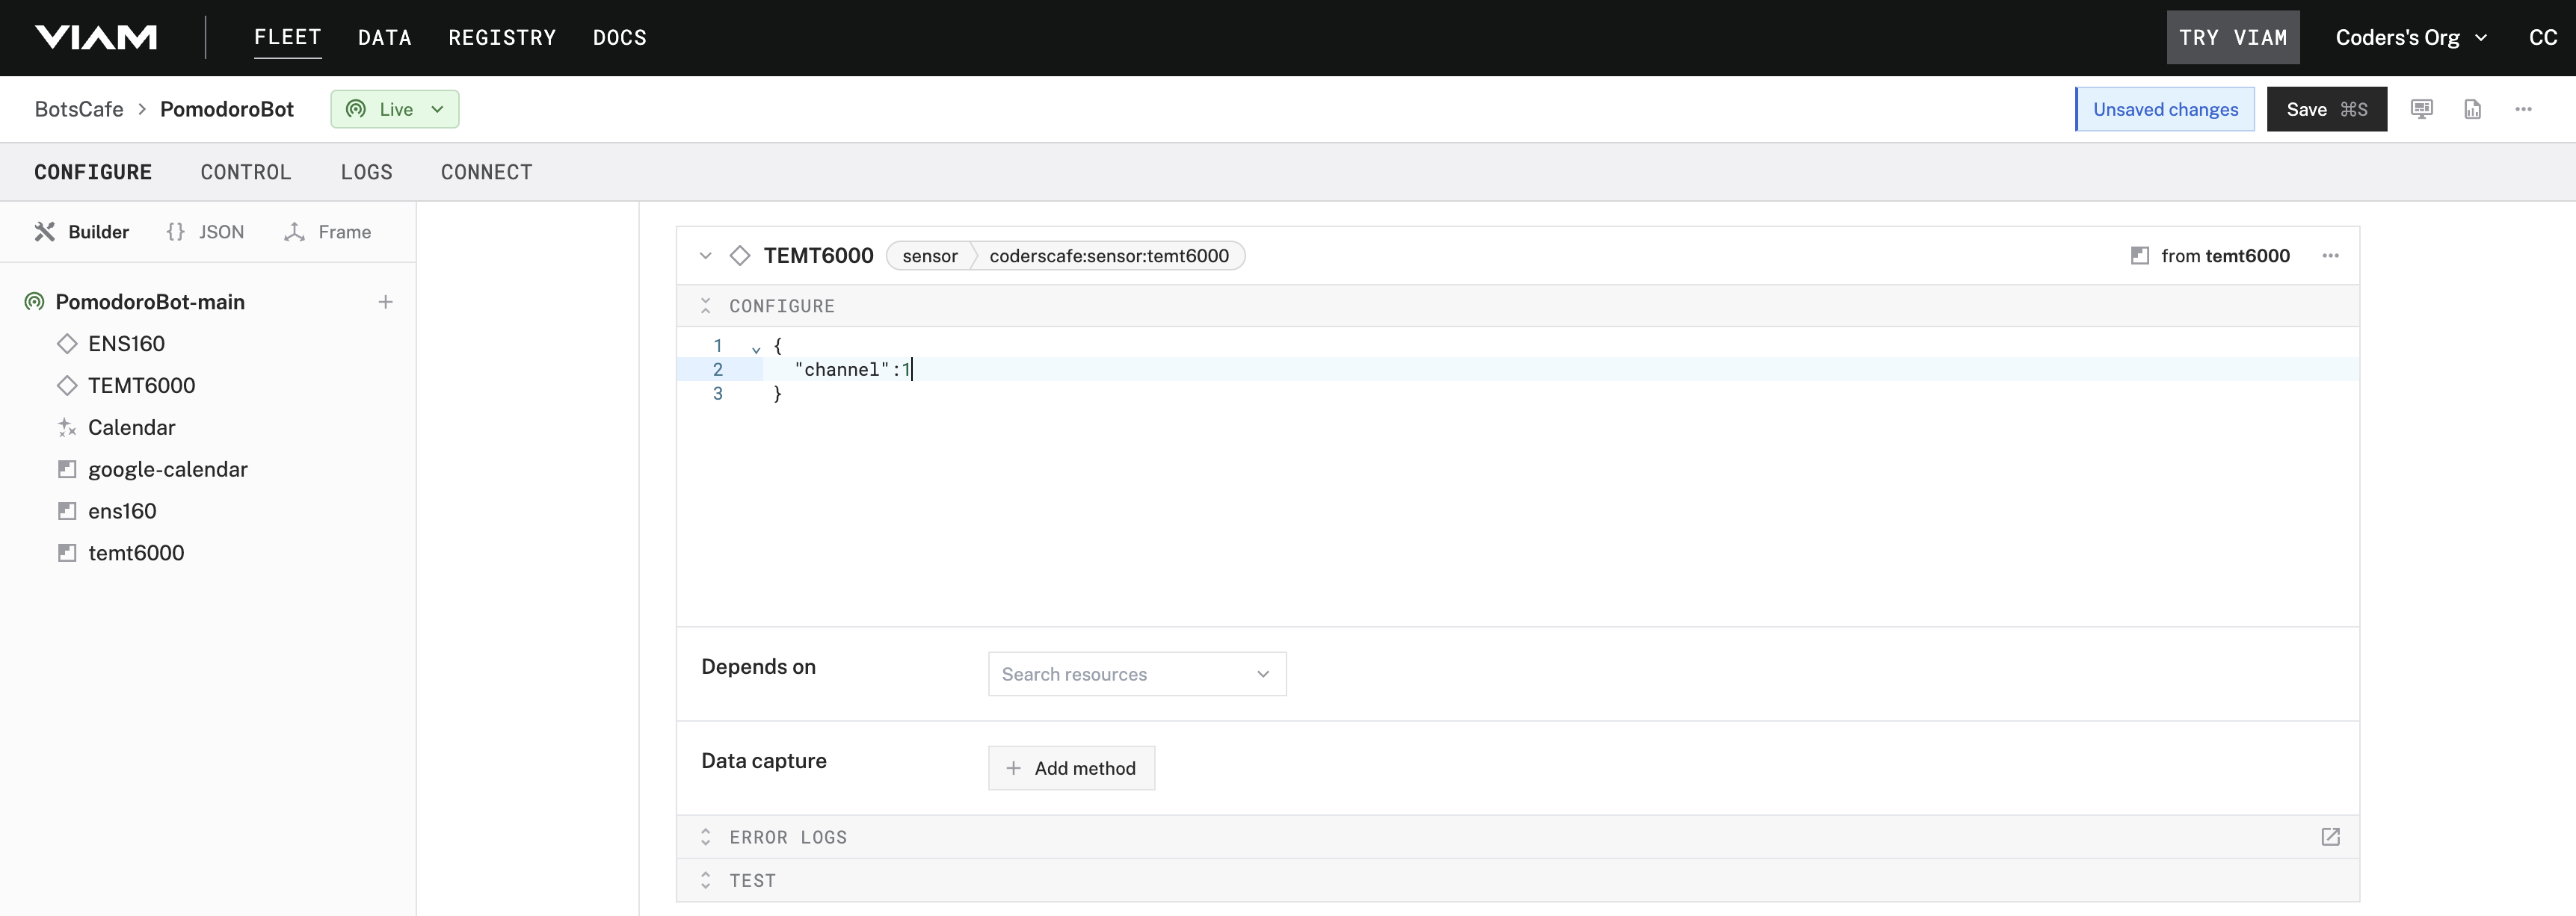
Add the TEMT6000 sensor as a new component, specifying its ADC channel.
Click "Save" and wait for the component to finish setup.
Testing the Sensor:
Switch to the Control tab in the Viam app.
Observe the live data feed from the TEMT6000 sensor.
Adjust the lighting around the sensor and verify that the readings update in real time.
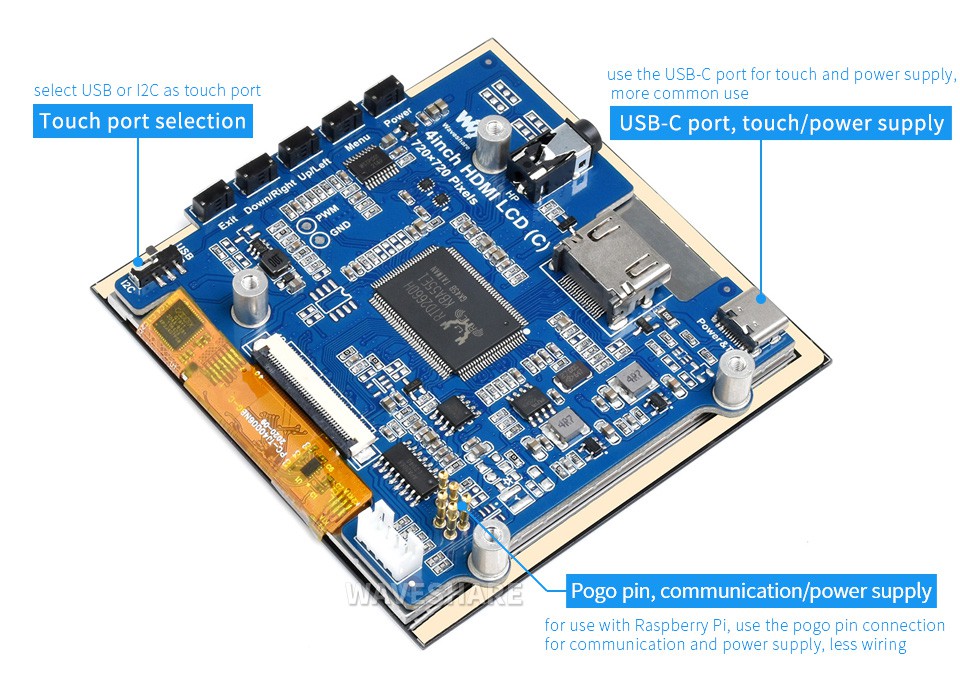
Integrate a 4-Inch HDMI Capacitive Touch Display
Adding a display to your Pomodoro Bot elevates it from a functional productivity tool to an interactive and engaging companion. With a screen, your bot can visually communicate, provide intuitive feedback, and motivate you with friendly reminders or fun animations.
Features
4-inch IPS screen, hardware resolution is 720 × 720.
5-point capacitive touch, toughened glass panel, hardness up to 6H.
When used with Raspberry Pi, it supports Raspberry Pi OS / Ubuntu / Kali and Retropie.
Ubuntu is supported when used with Jetson Nano.
When used as a computer monitor, it supports Windows 11/10/8.1/8/7.
Onboard dual touch circuit, optional USB Type-C or I2C touch, it has more application scenarios.
With a 3.5mm audio and speaker interface, it supports HDMI audio output.
Hardware Connection
Set the touch switch on the back of the screen to "I2C".
Fix the Raspberry Pi to the screen through the copper posts, and pay attention to aligning the position of the ejector pins.
Connect the HDMI port of the Raspberry Pi to the LCD.
Connect USB-C on Display to USB port on Raspberry Pi to enable touch interactions.
Software Setup
Follow the instructions to Setup Raspberry Pi using Pi Imager.
After the setup is completed, insert the SD card into your computer and open the config.txt file in the root directory of the SD card, and add the following code at the end of the file:
Download the 4inch HDMI LCD (C) DTBO file and extract the 3 dtbo files. Copy these 3 files to the overlays directory (/boot/overlays/).
Save the changes to the config.txt file, eject the SD card safely, and insert it into the Raspberry Pi.
Power on the Raspberry Pi and wait for more than ten seconds to display normally
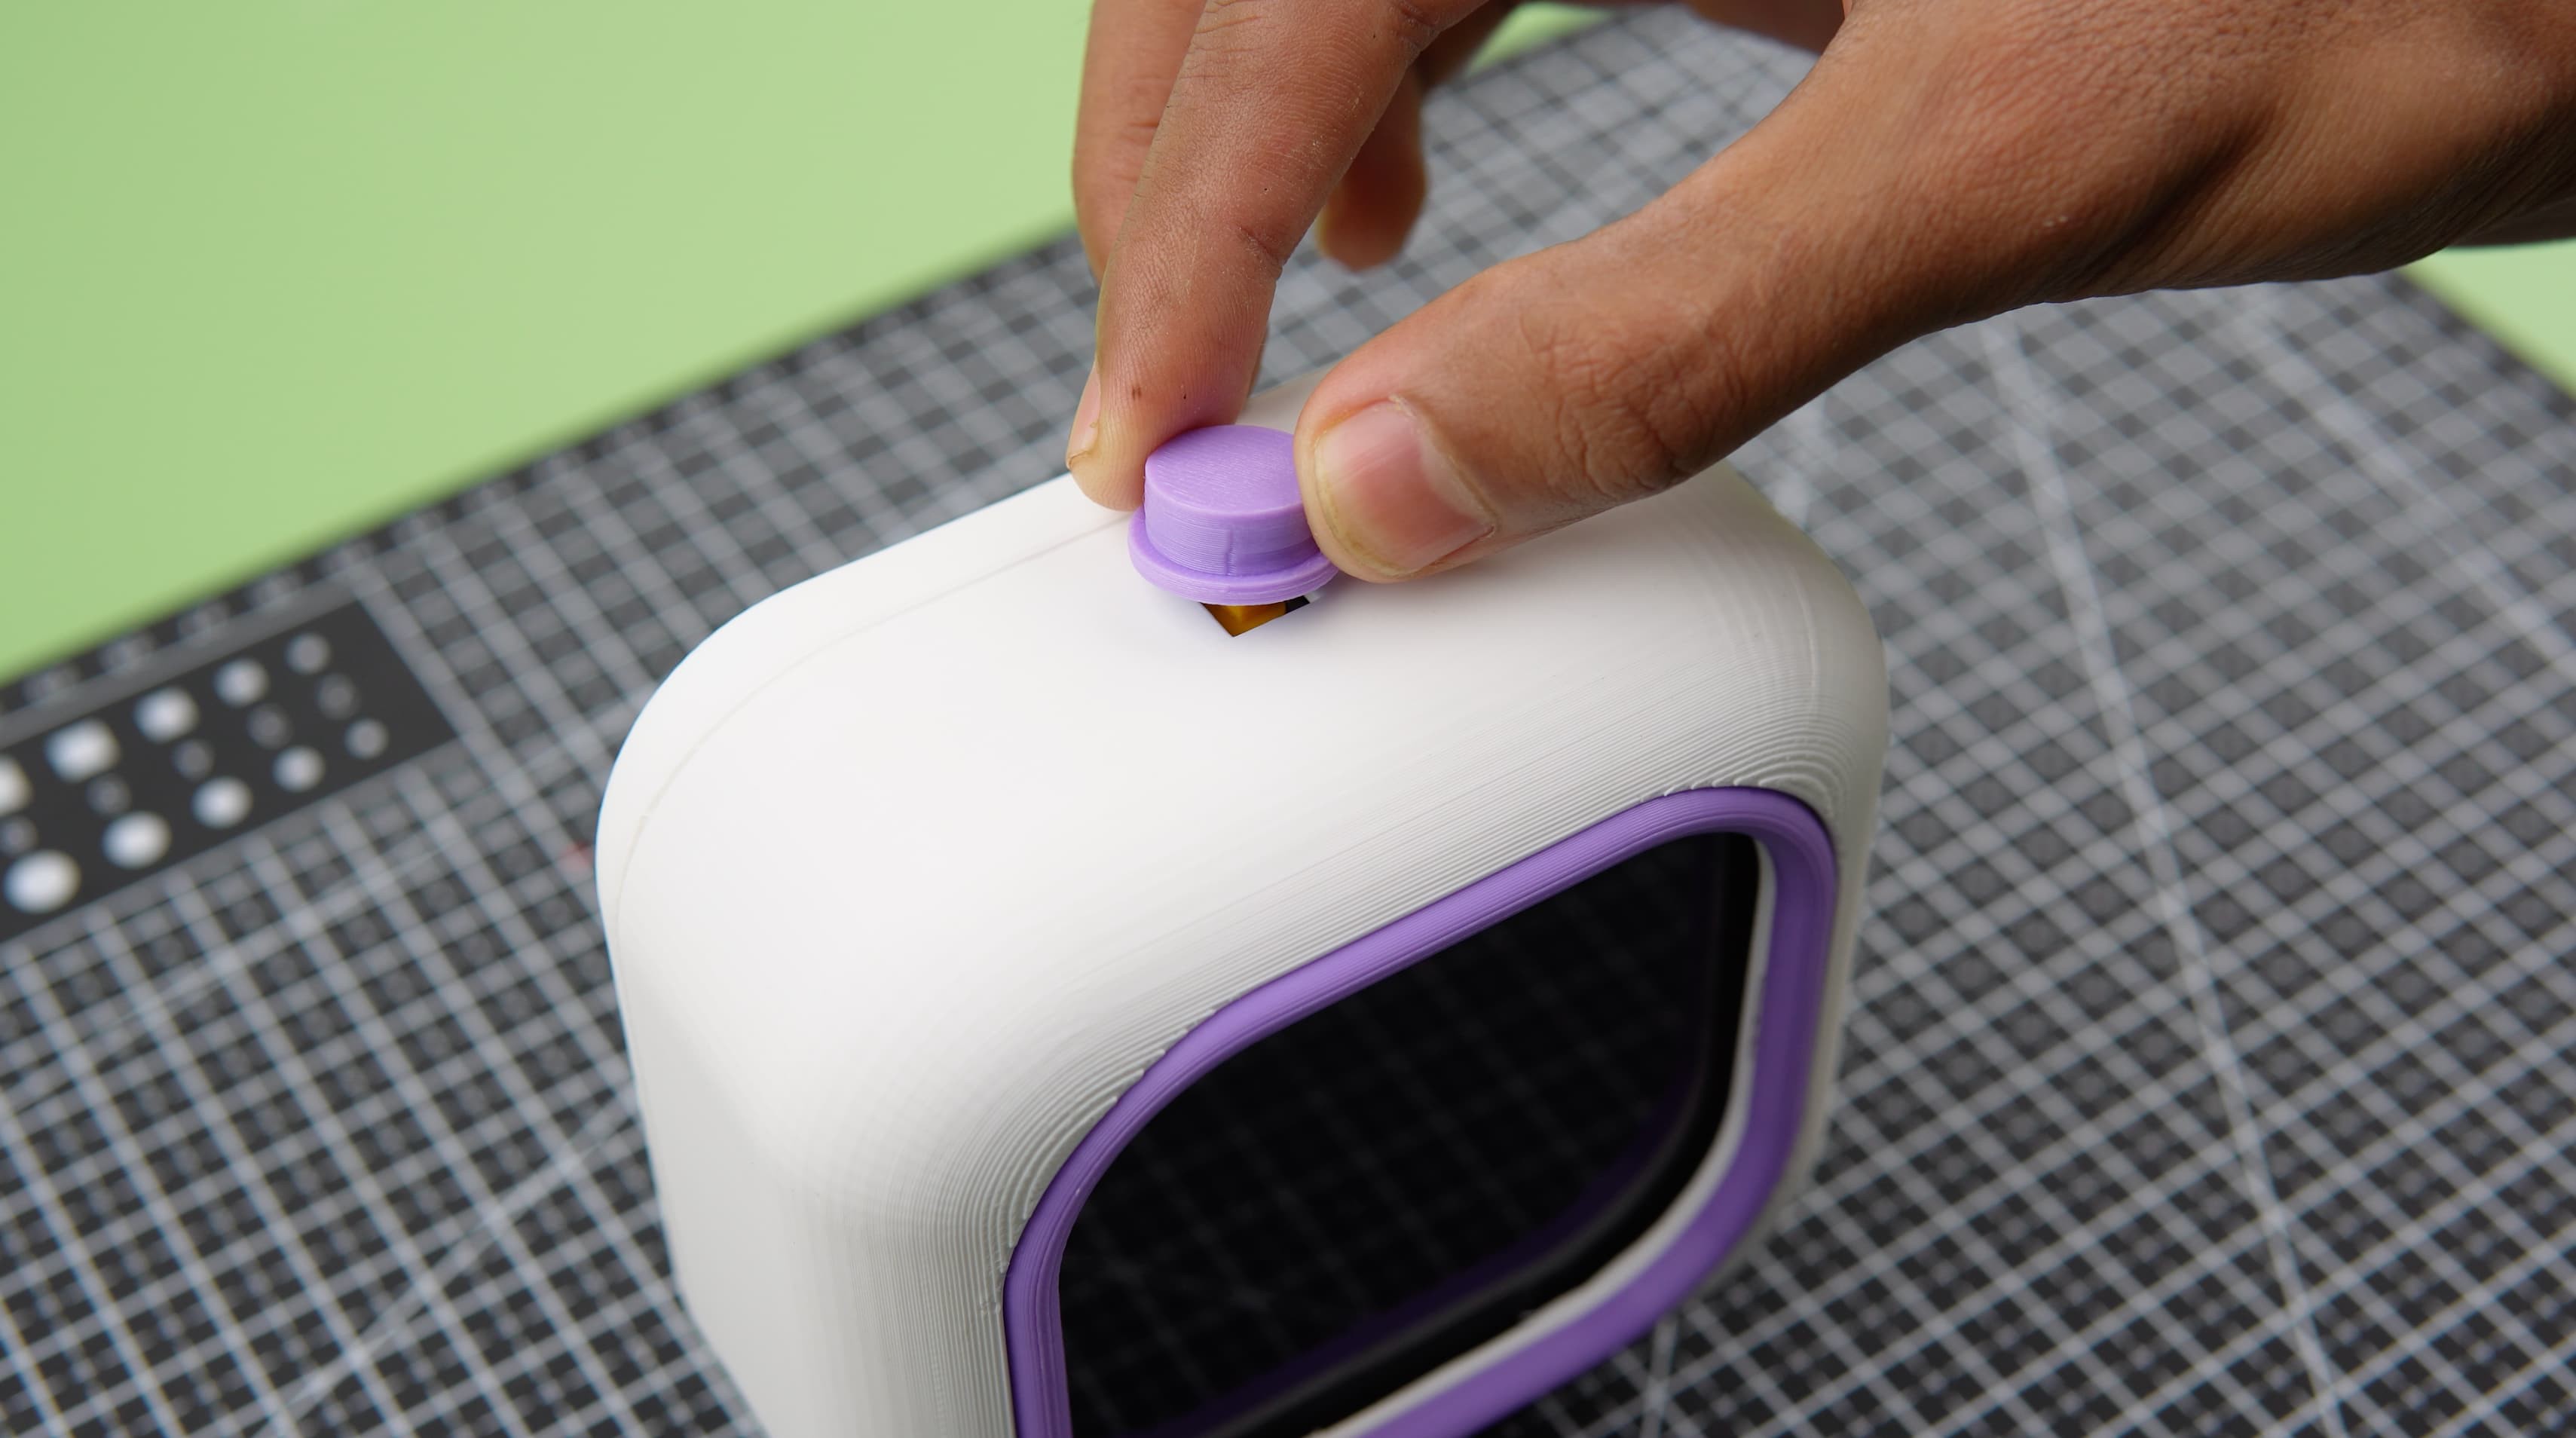
Integrate Button To Pomodoro Bot
To enhance the functionality of your Pomodoro Bot, you can integrate a push button to allow manual control, such as starting or stopping tasks, resetting timers, or triggering specific actions. Here's how to add a push button:
Hardware Setup
Components Needed:
Push button module
Jumper wires
Wiring:
Connect VCC pin of the push button to a 5V pin on the Raspberry Pi.
Connect GND pin of the push button to a Ground pin on the Raspberry Pi.
Connect OUT pin of the push button to a GPIO 17 on the Raspberry Pi.
By adding a push button, you can make your Pomodoro Bot more interactive and user-friendly!
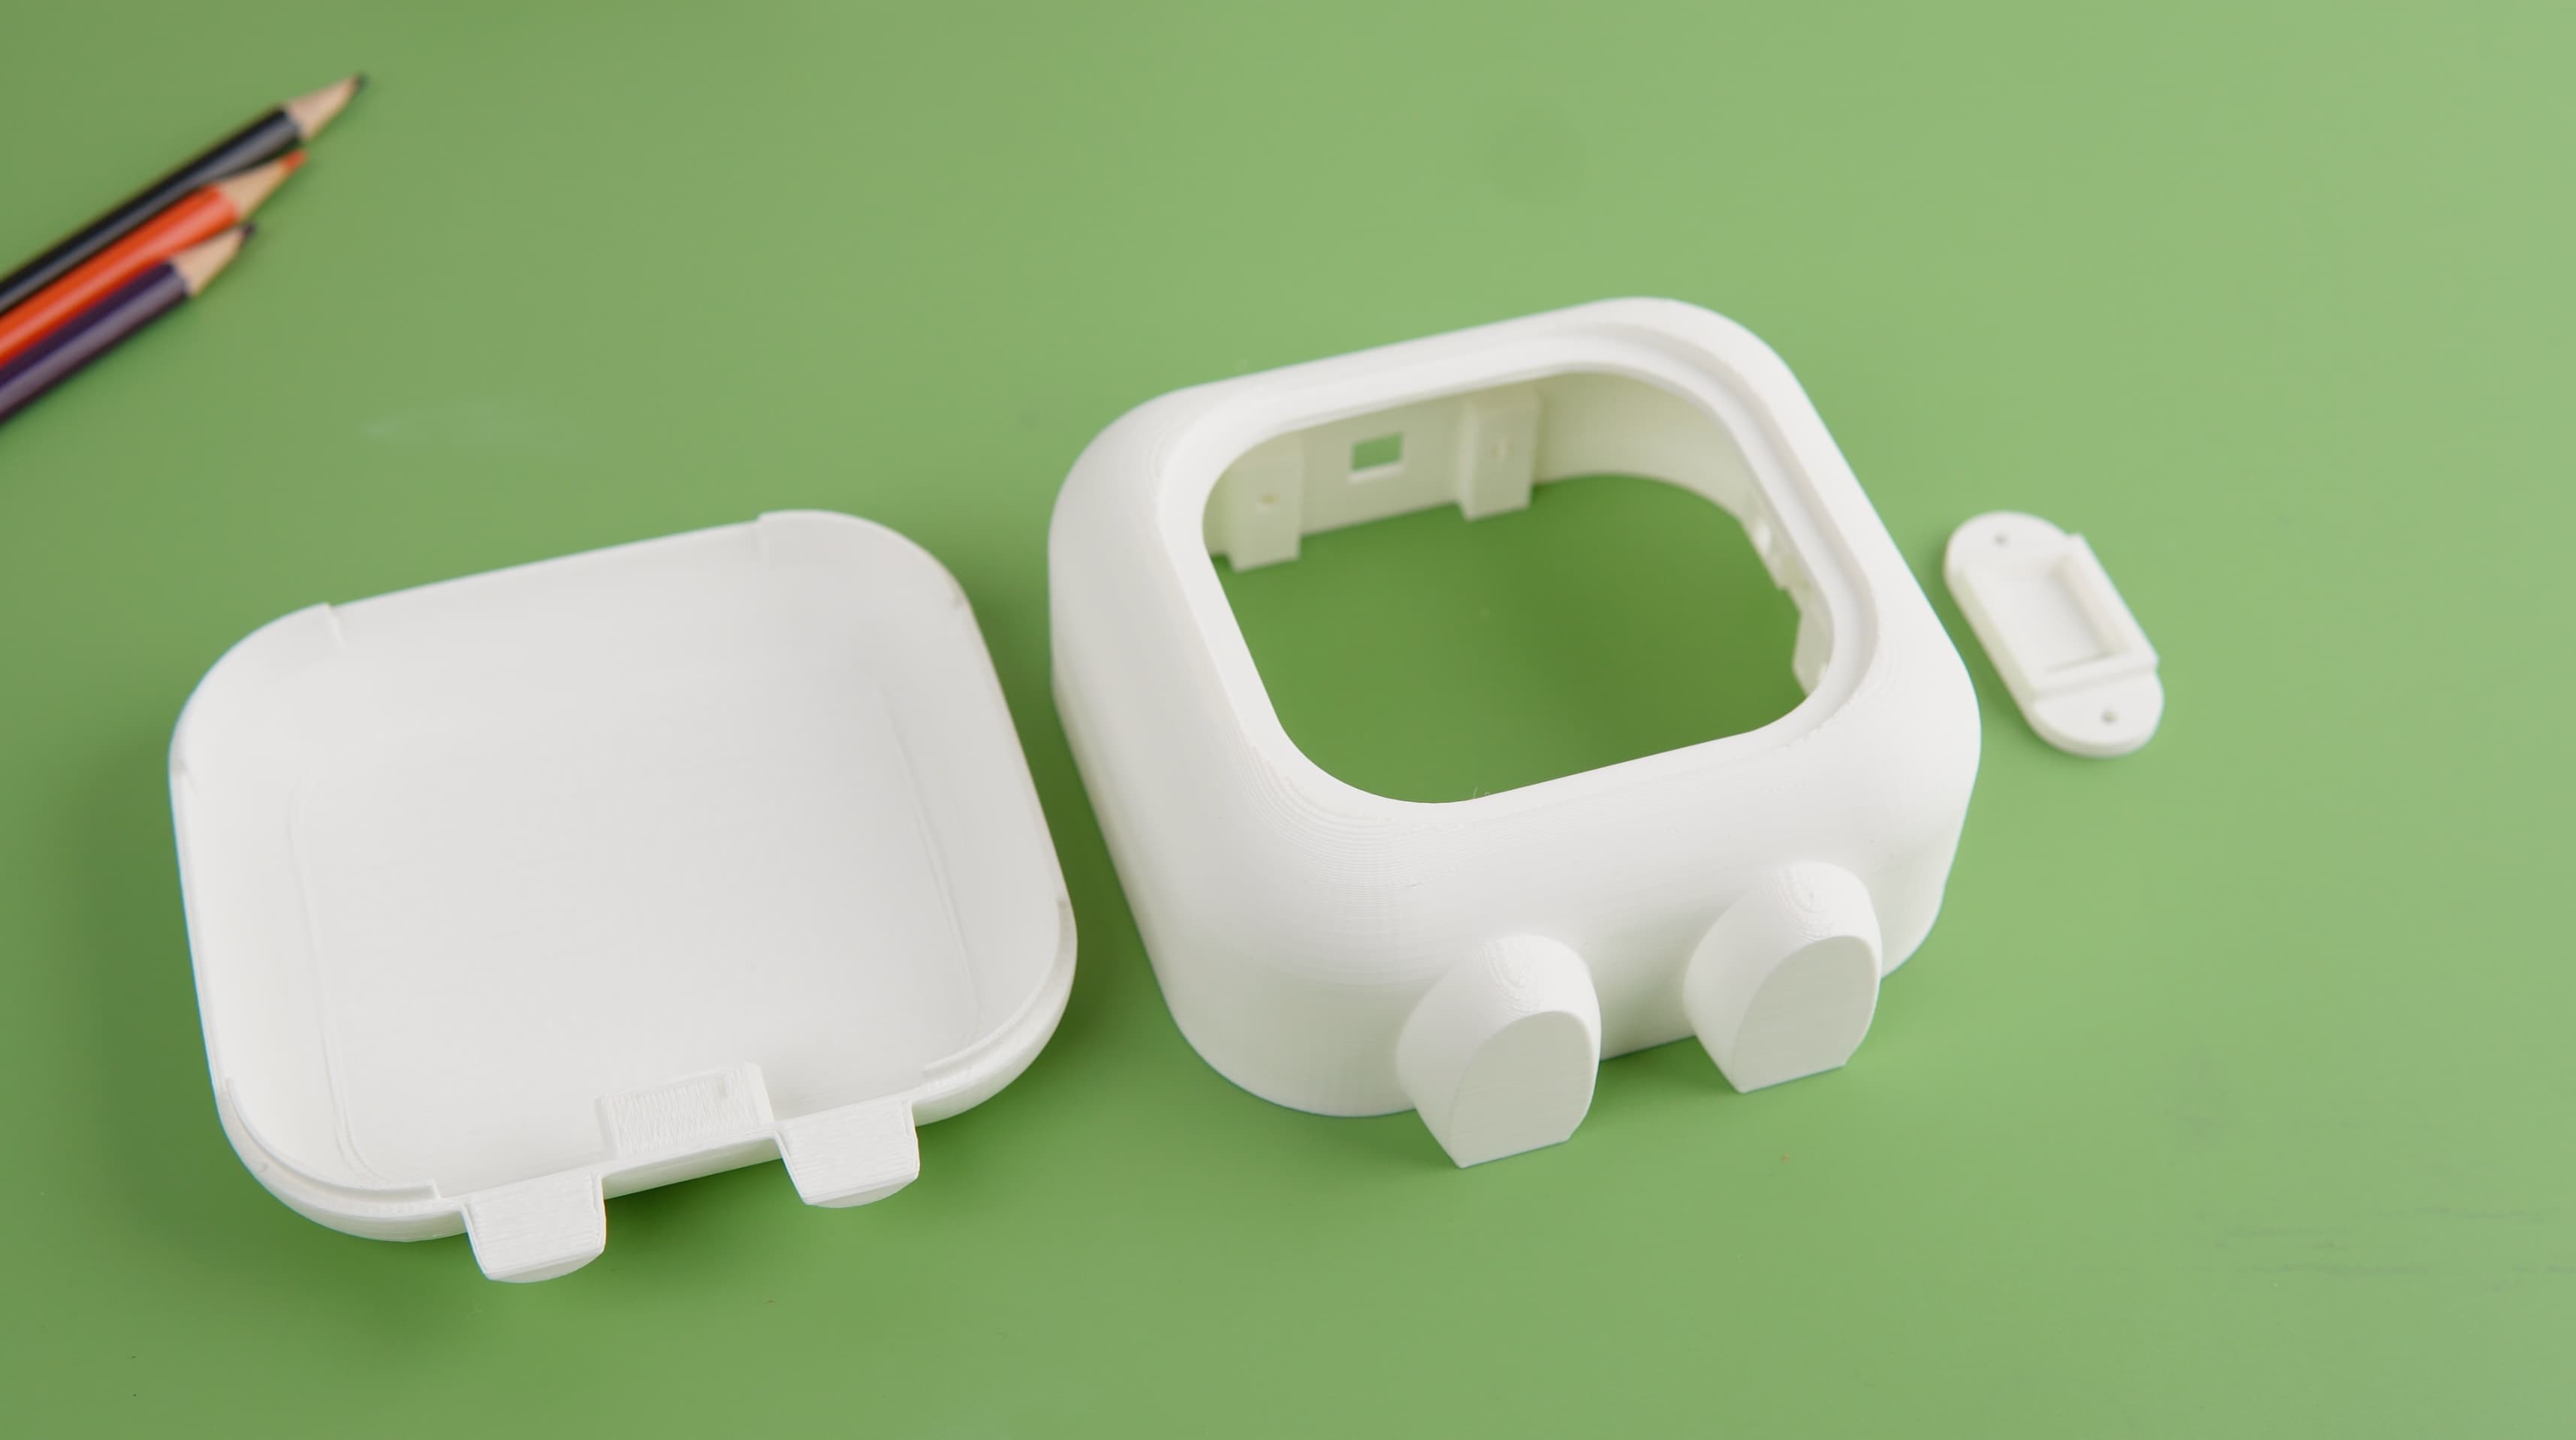
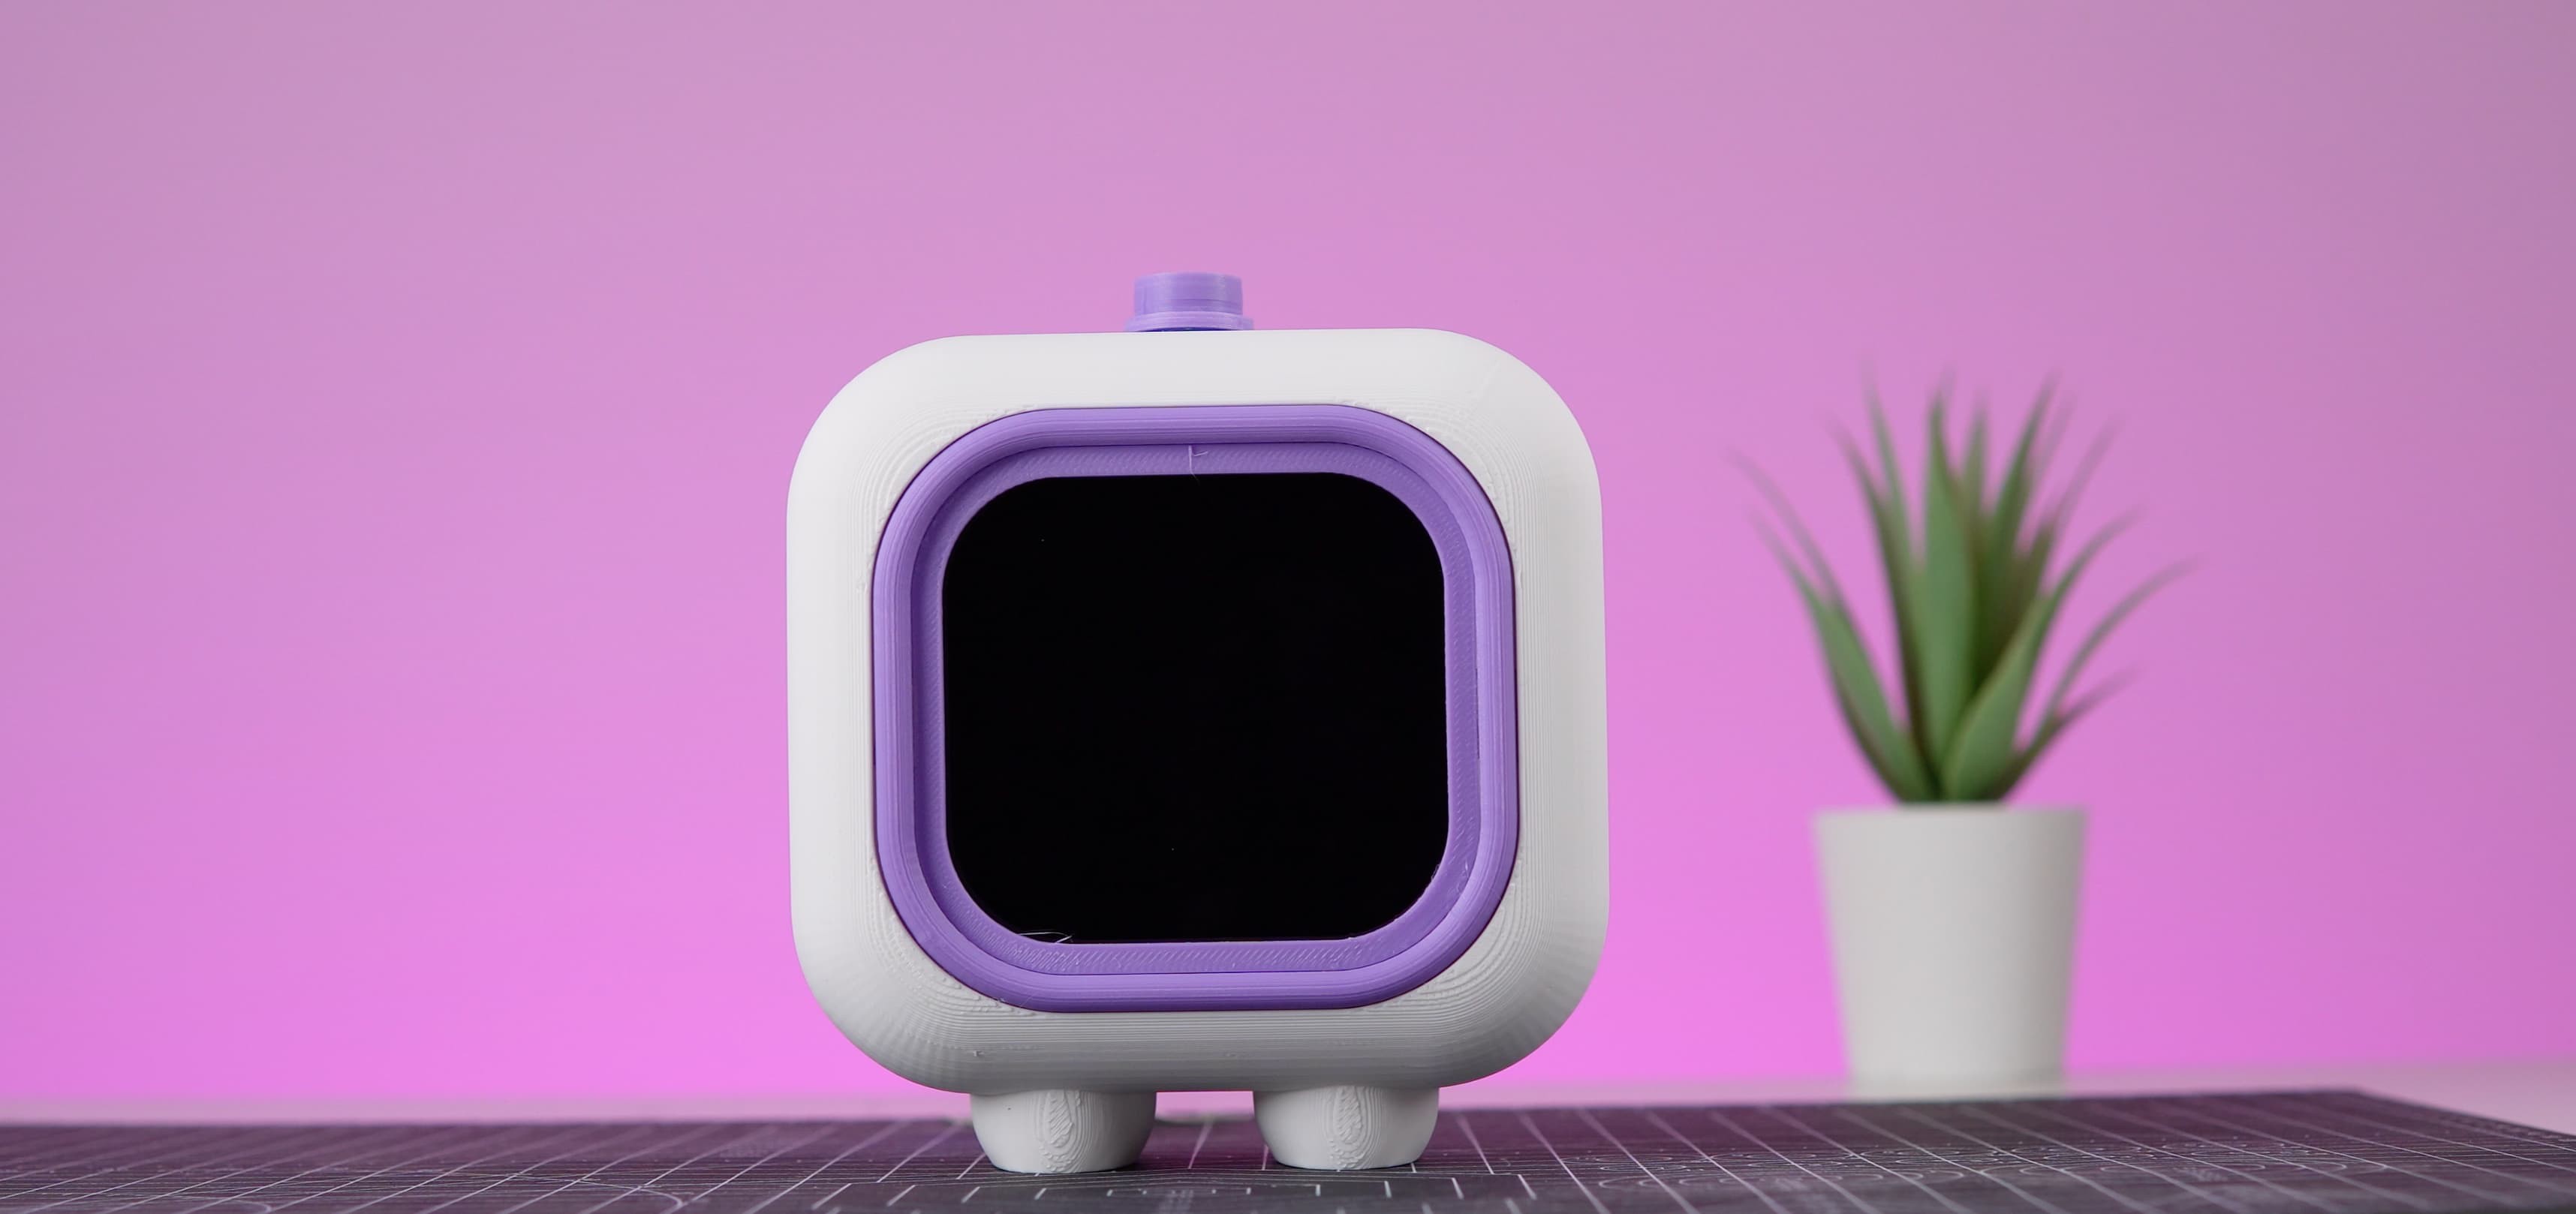
3D Design and Fabrication
Aesthetics and Personality
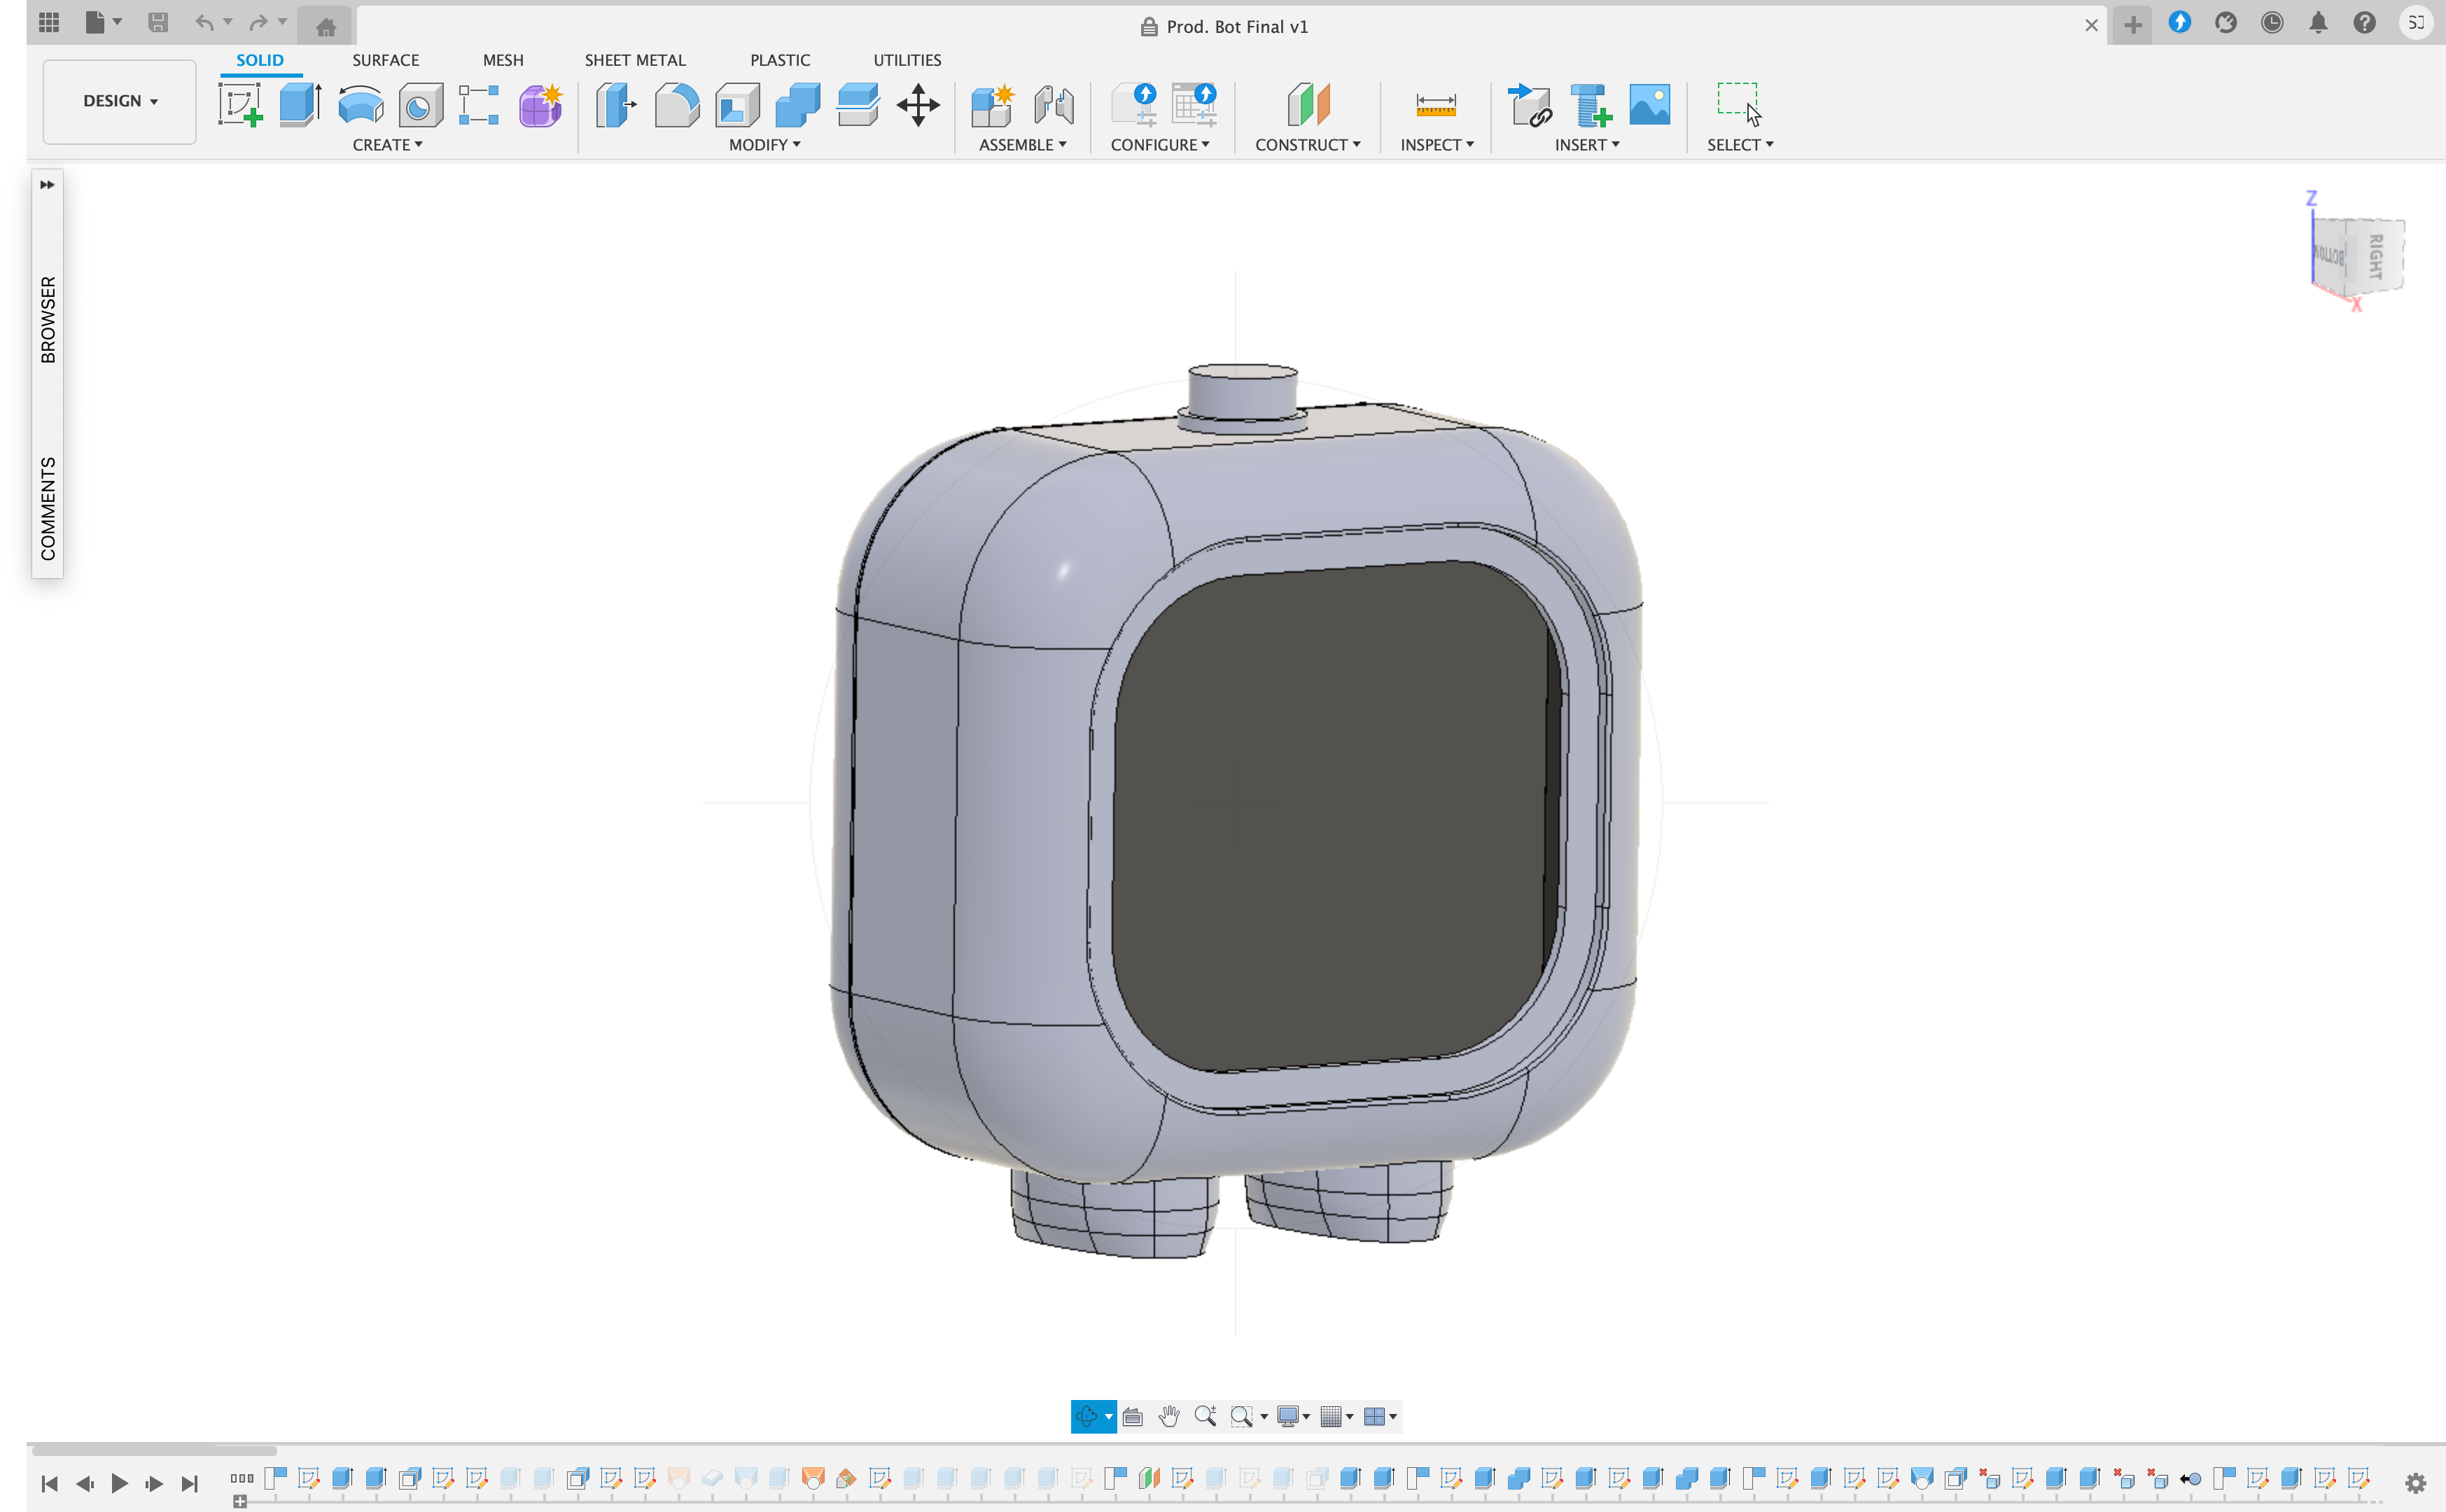
We envisioned the Pomodoro Bot as more than just a functional tool. It needed to be visually appealing and possess a unique personality. To achieve this we used Fusion 360, to craft a 3D model, carefully balancing aesthetics and practicality. This process involved refining every detail to ensure the bot was both charming and functional.
The final result is a compact and modern 3D-printed bot that is not only a productivity powerhouse but also a delightful desk companion designed to bring a smile to your face while helping you stay focused.
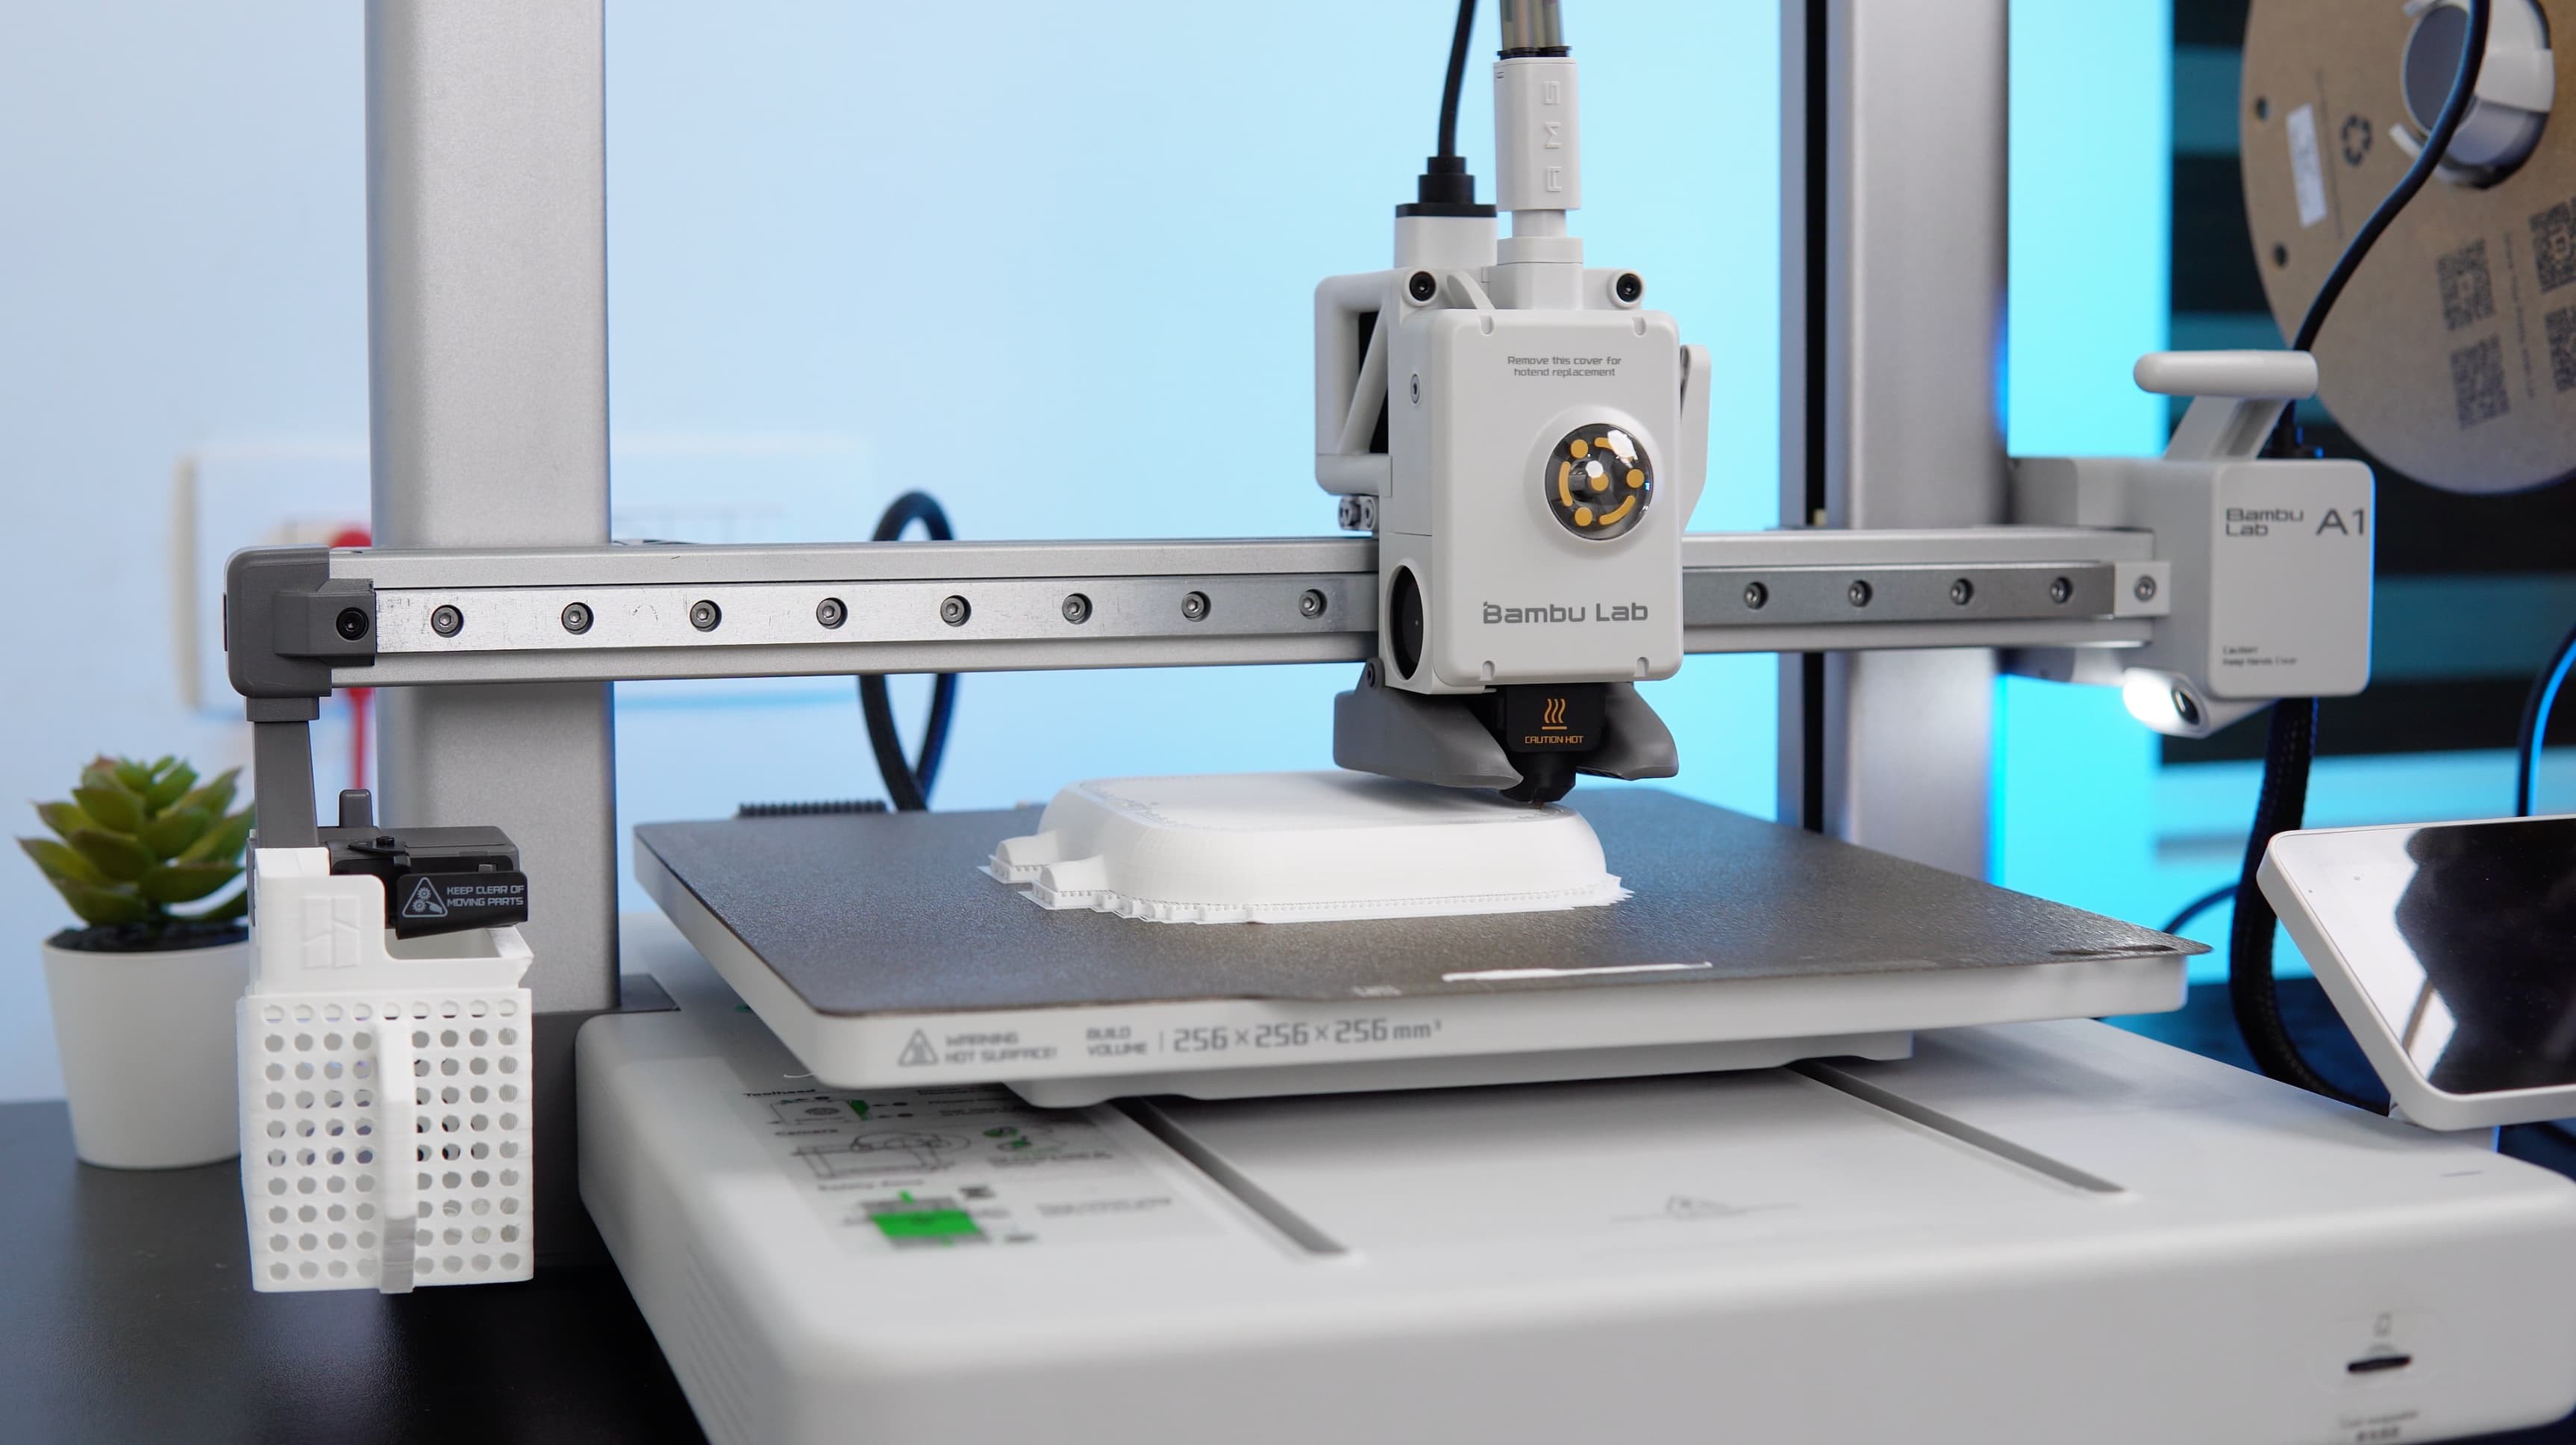
3D Printing Process
After finalizing the design, we brought our concept to life through 3D printing. We utilized the Bambu A1 3D printer to:
Create the bot's physical form with precision and efficiency.
Achieve a durable and well-crafted model that perfectly matched our design vision.
This 3D printing step was crucial in transforming the digital design into a tangible, high-quality physical product.
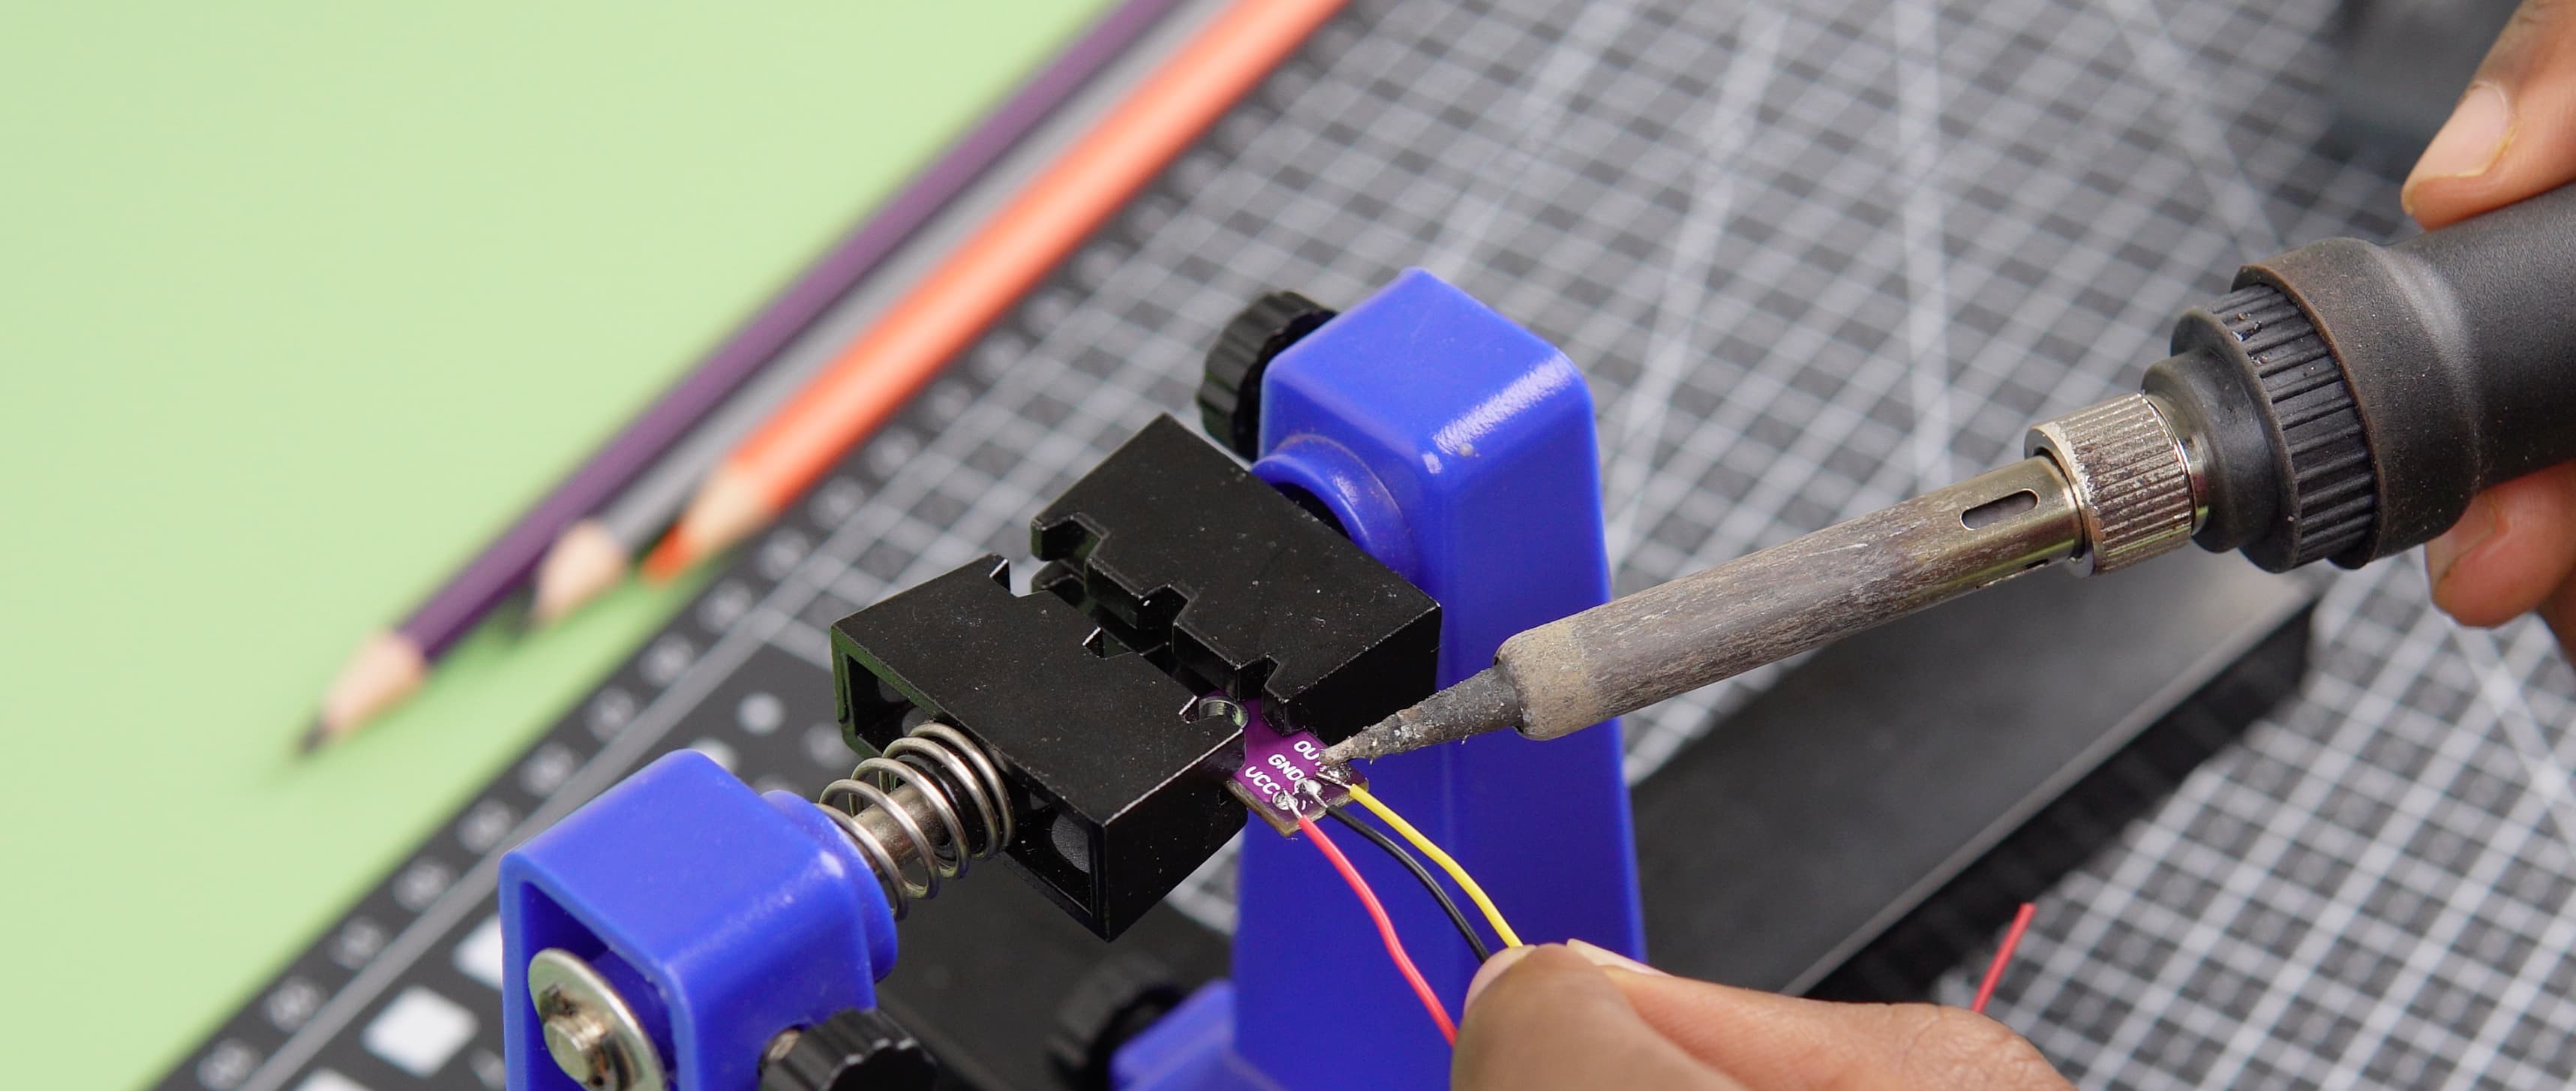
Soldering: We began by soldering wires to all necessary components, ensuring reliable electrical connections.
Component Mounting: We secured the components together using tiny screws, creating a firm and stable assembly.
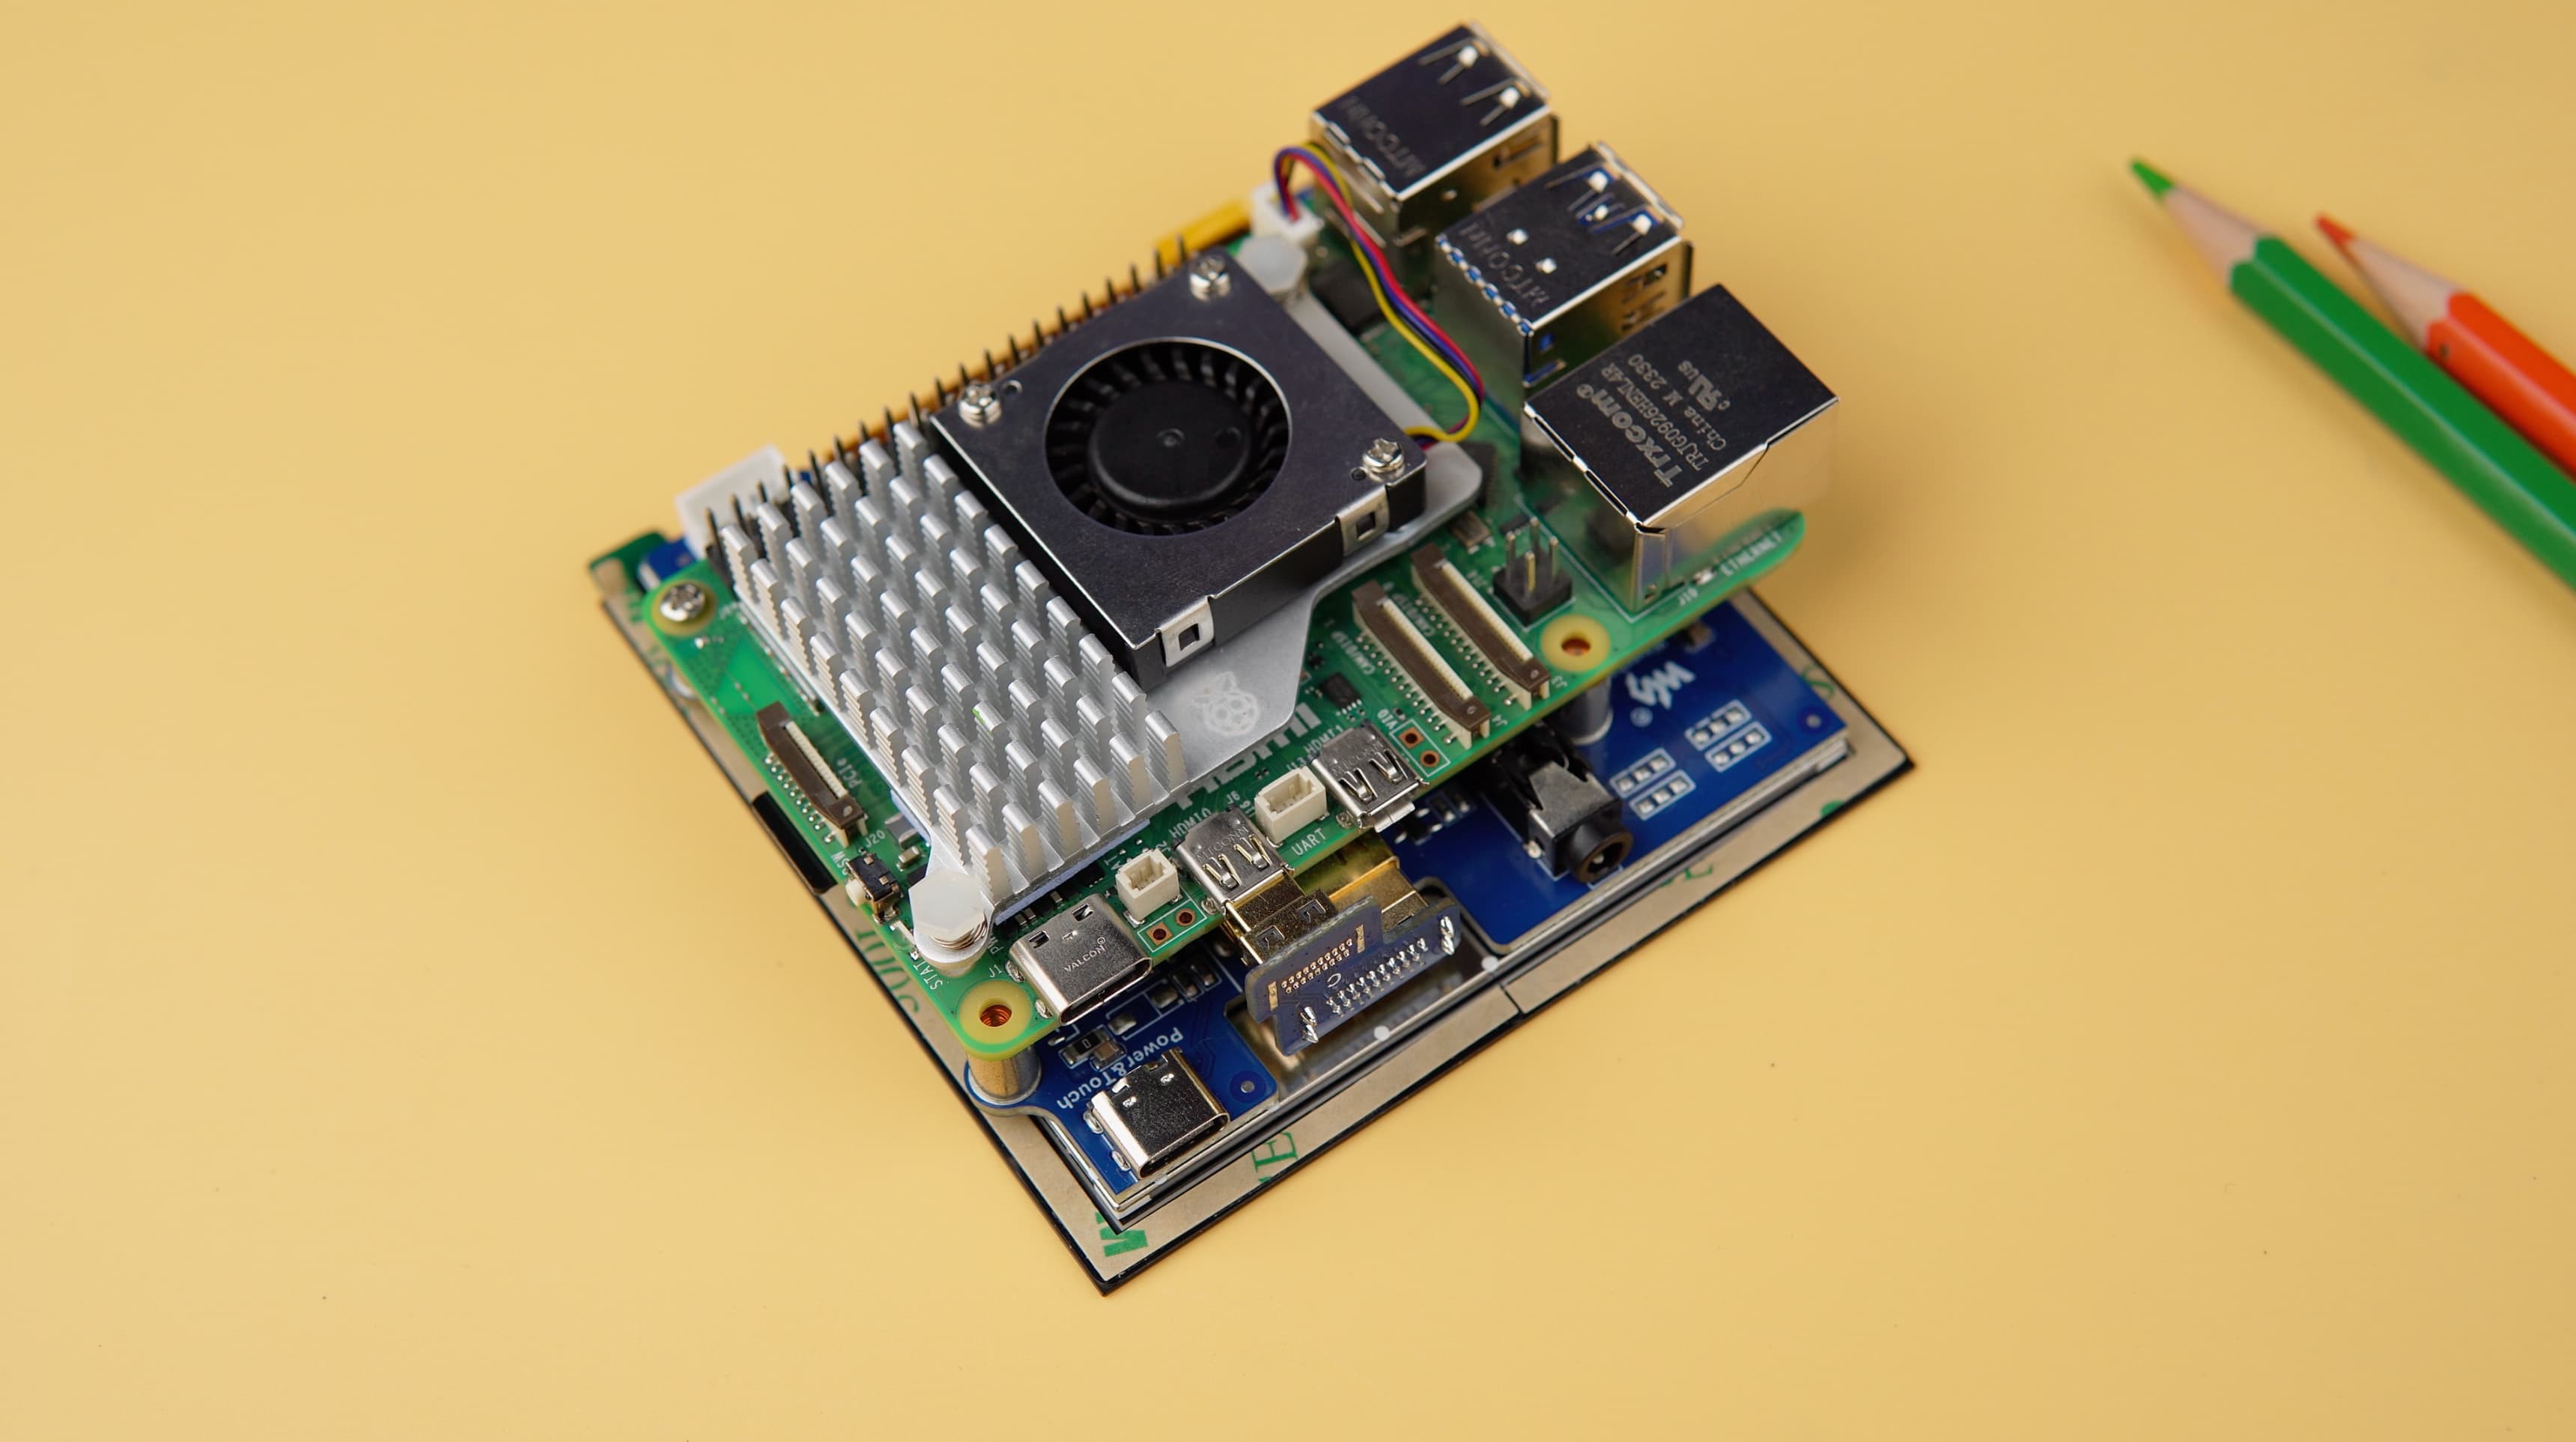
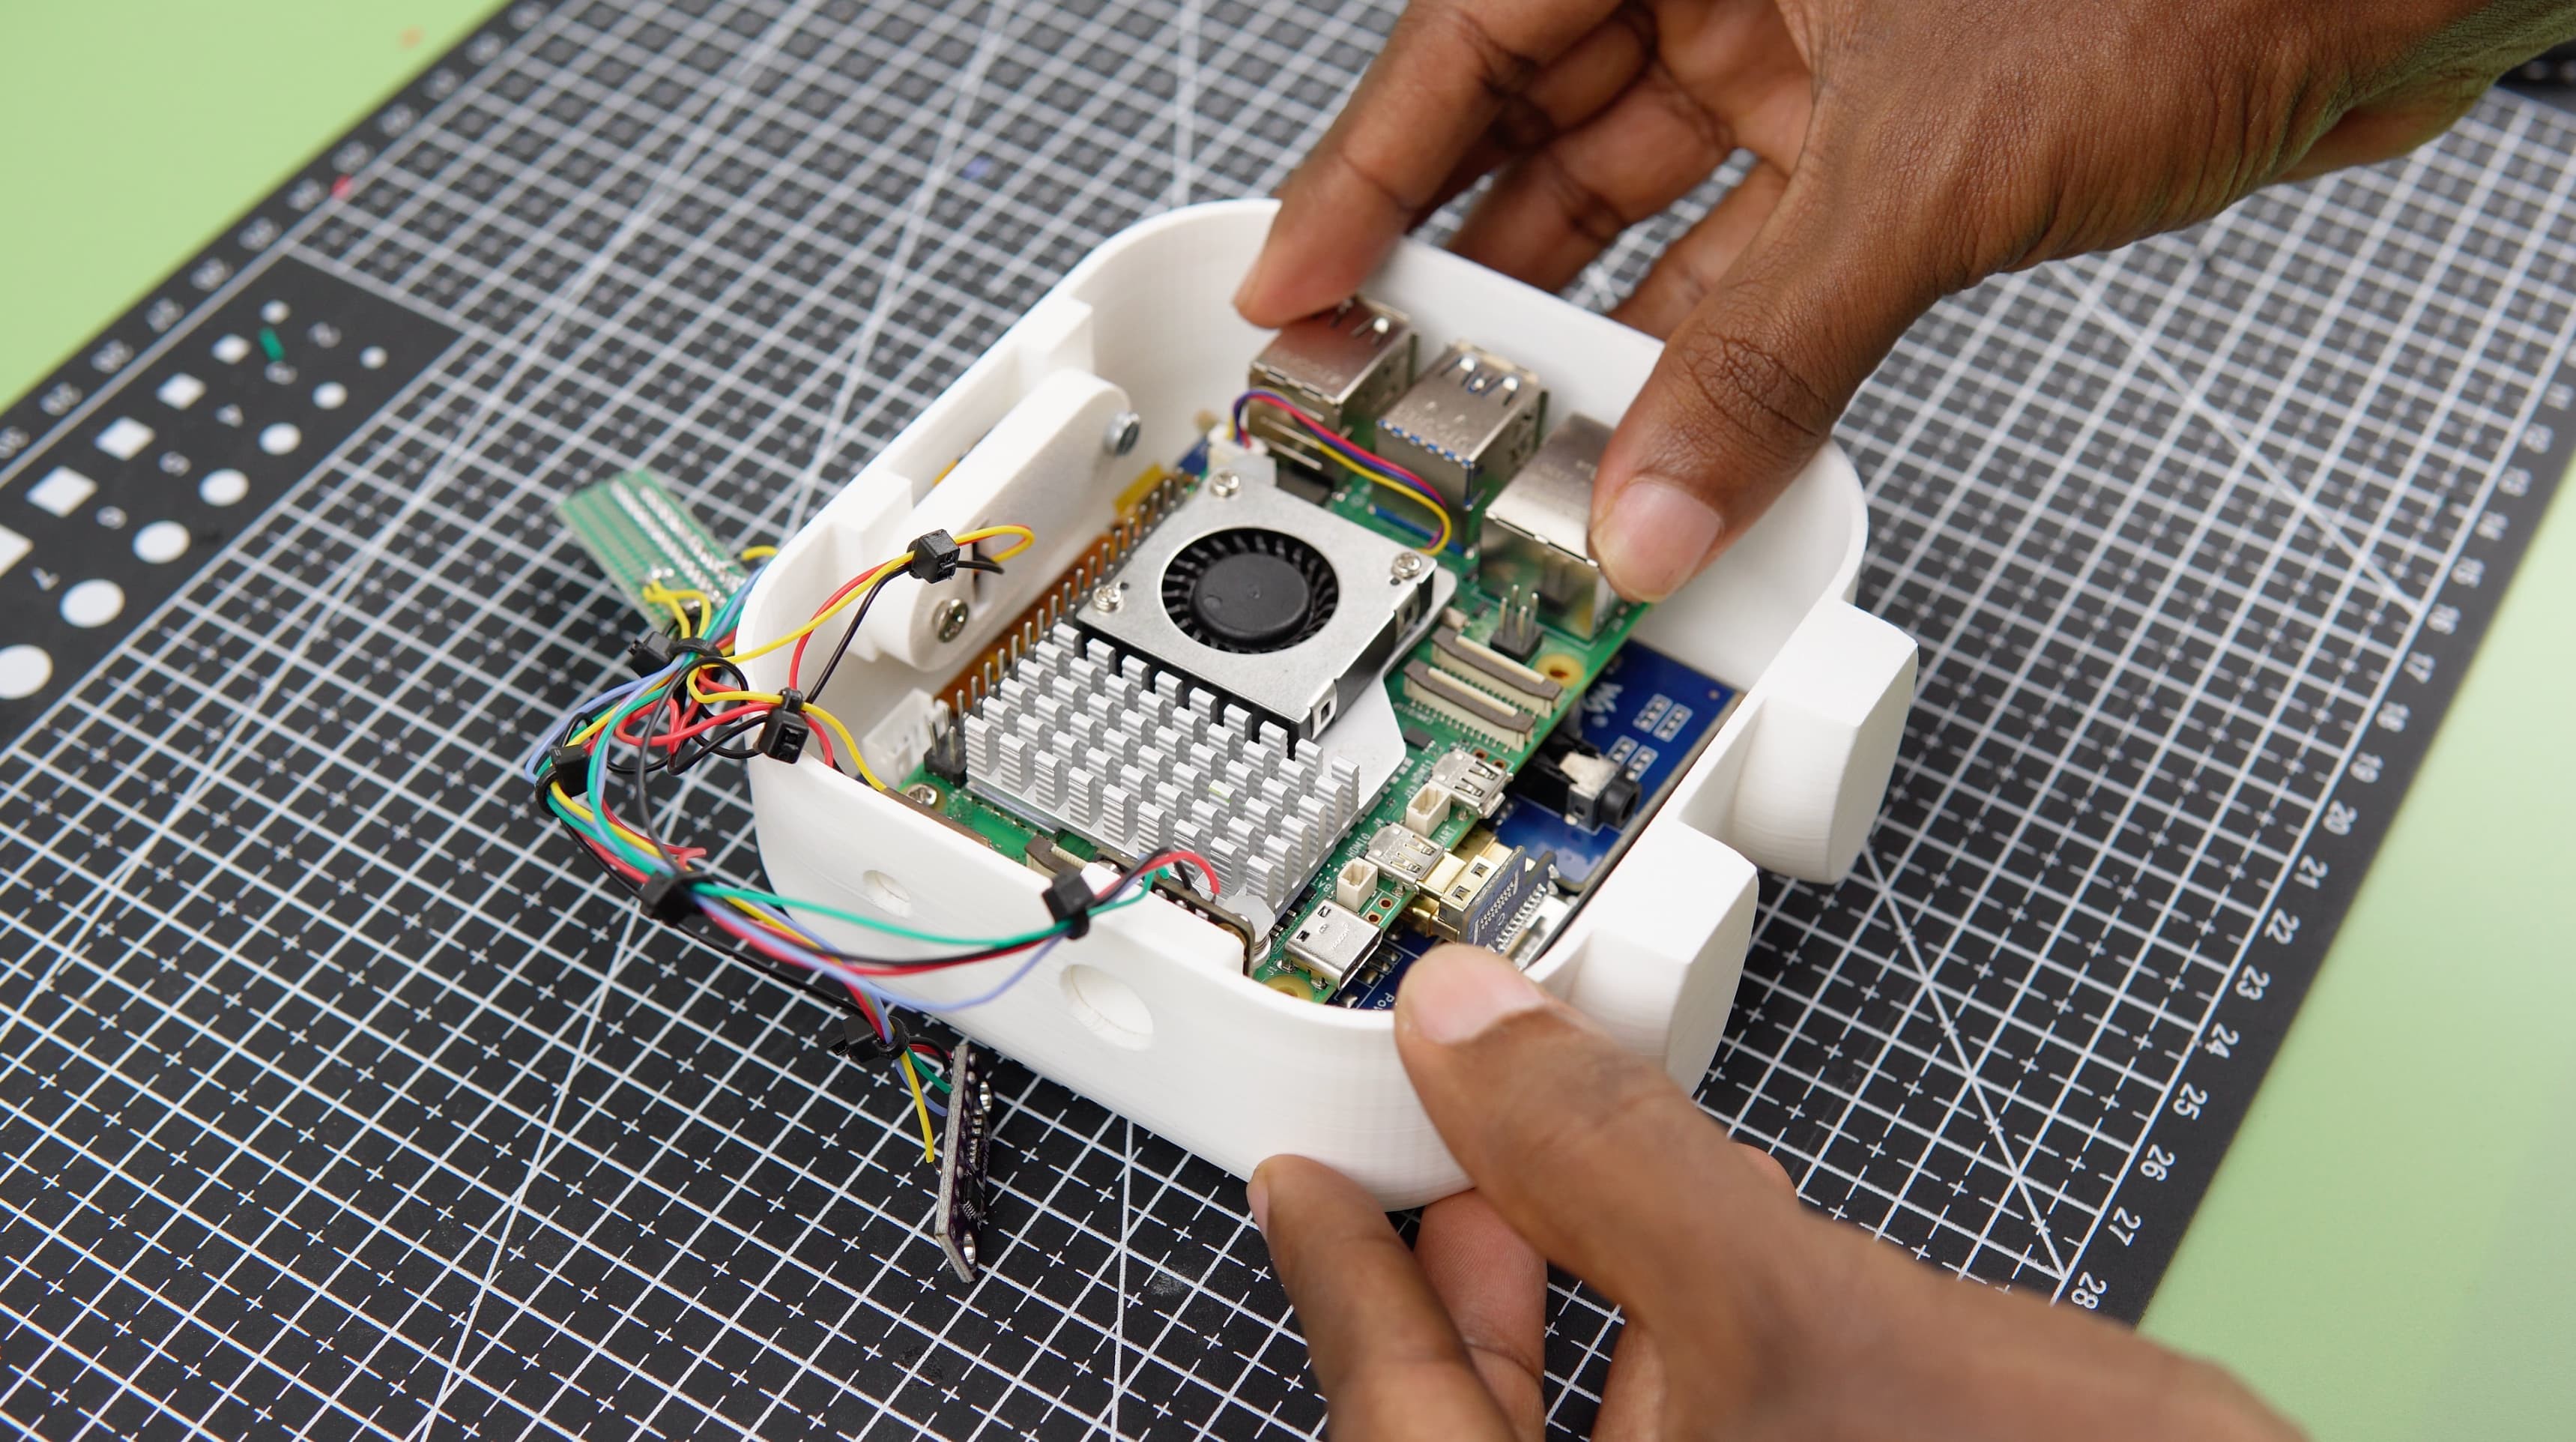
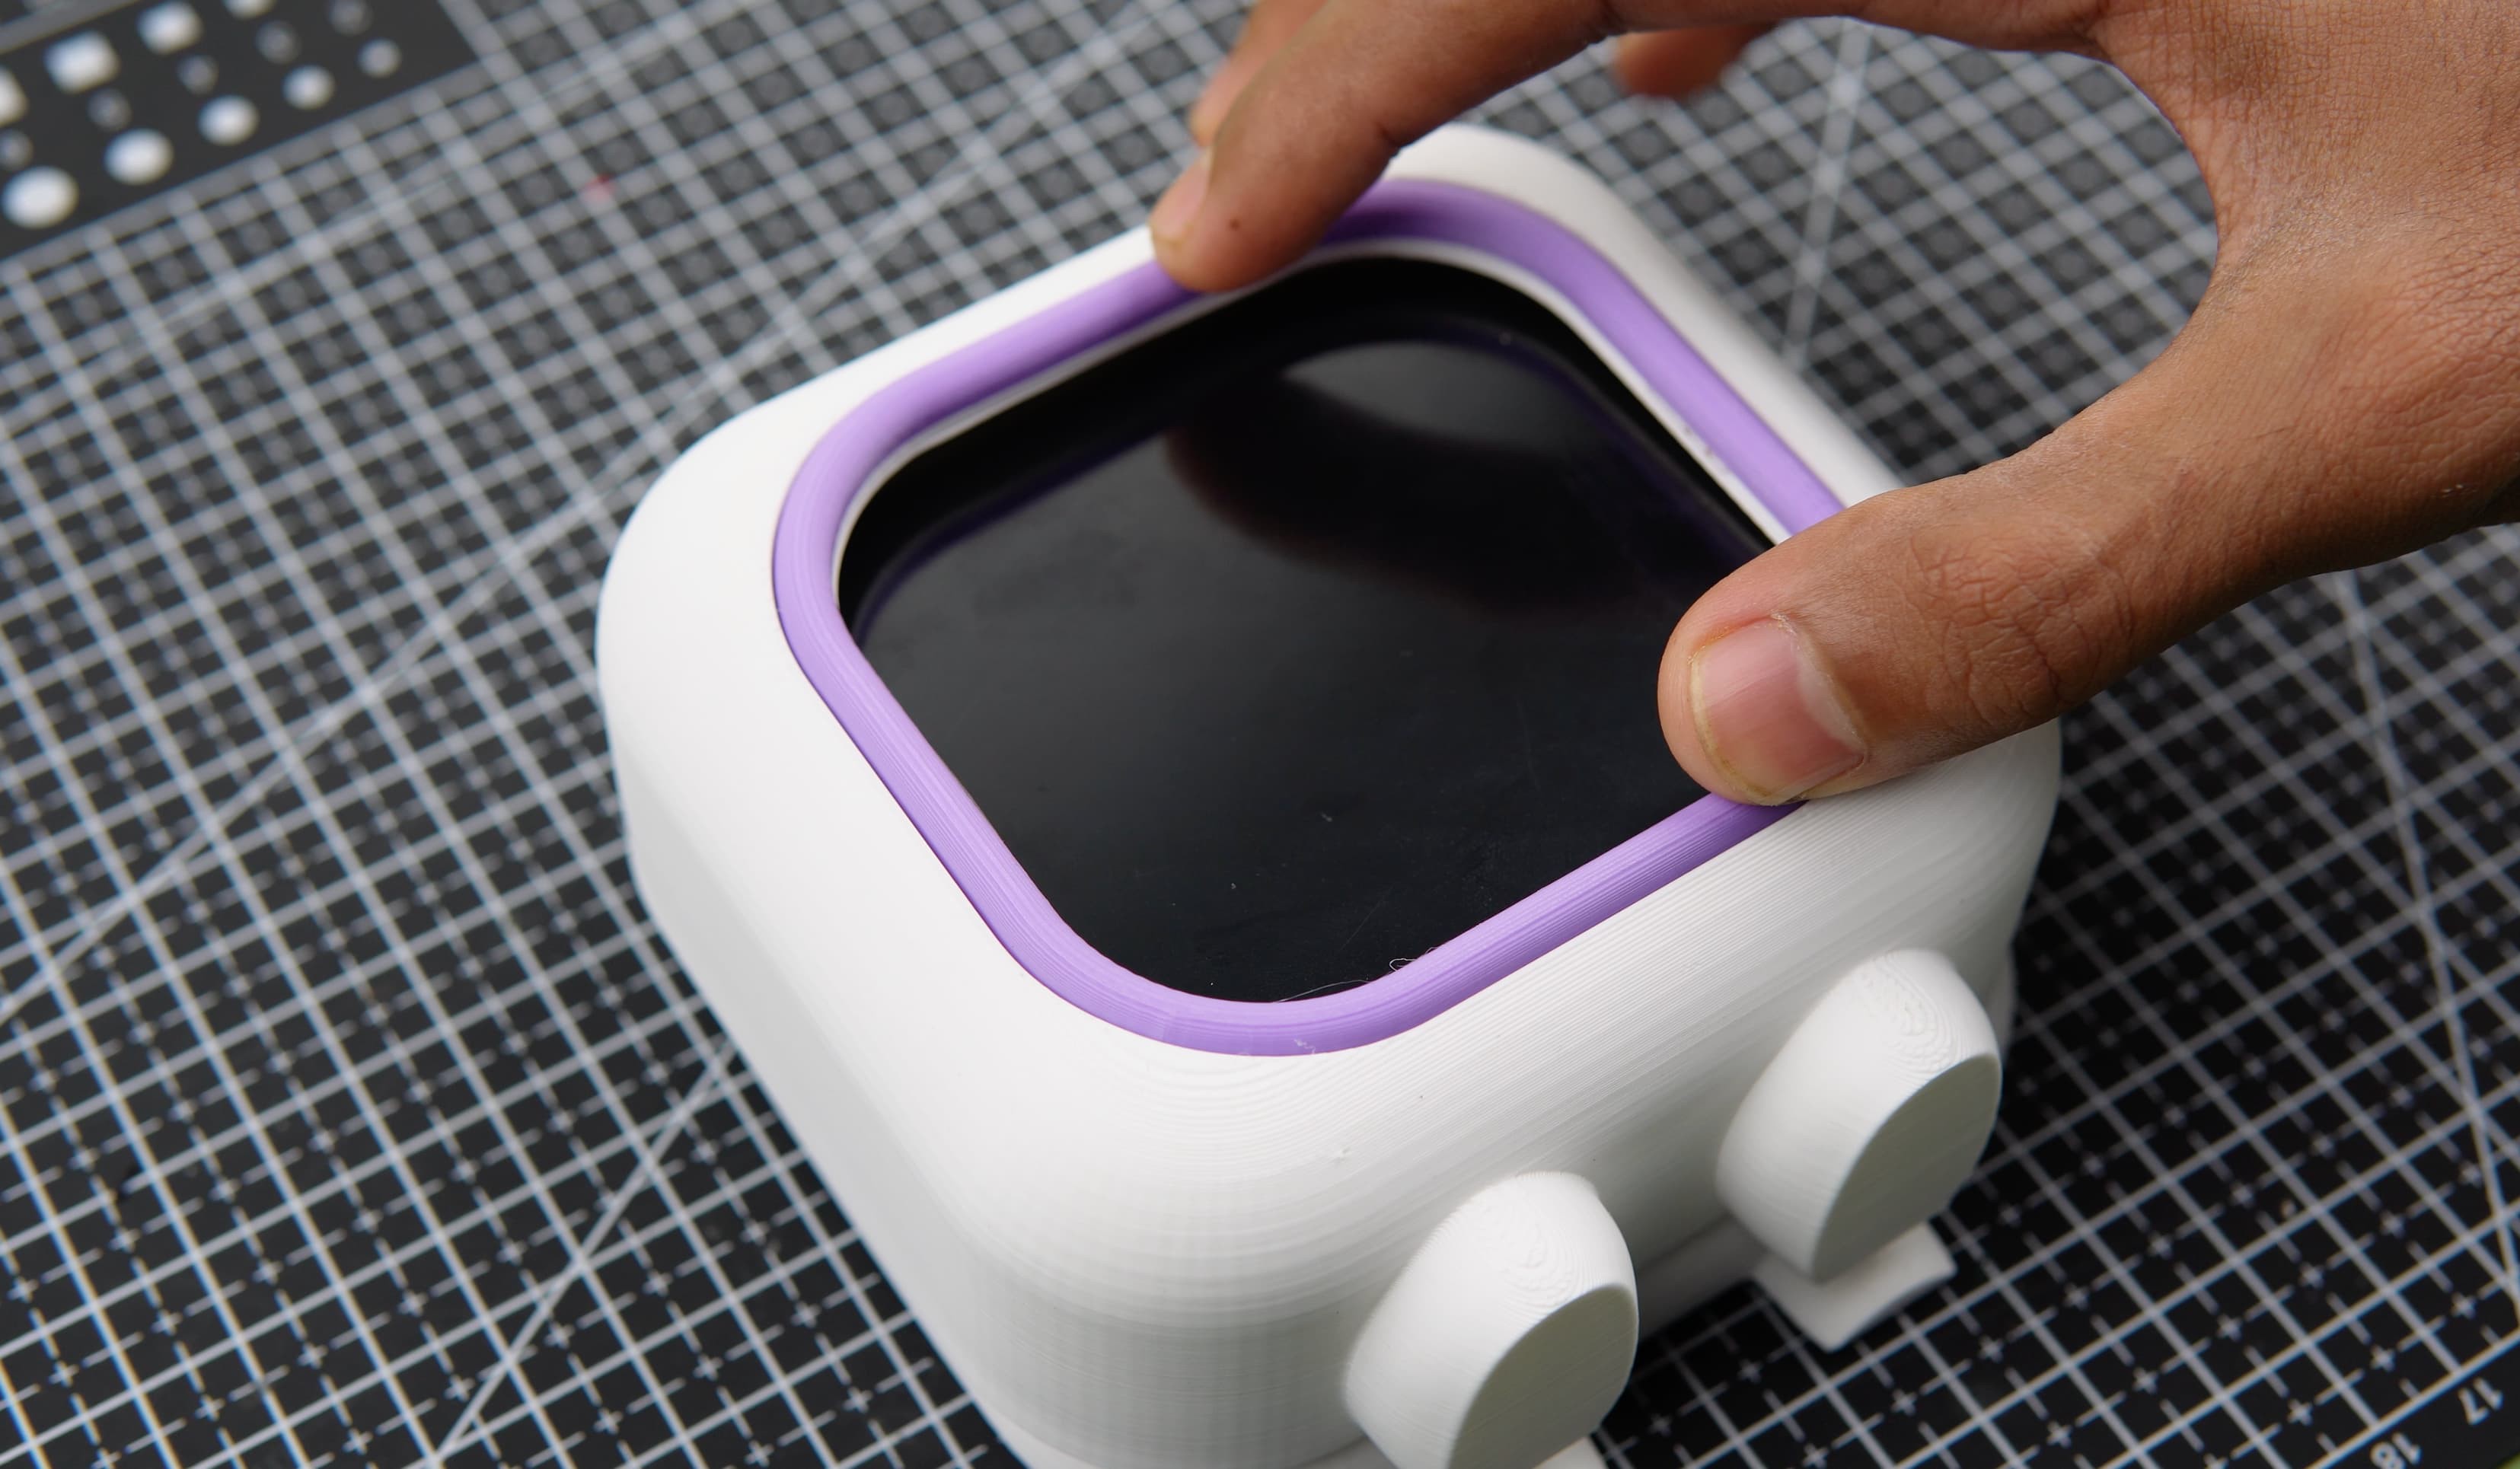
Raspberry Pi and Display Integration: The Raspberry Pi and Waveshare display were carefully installed into the main body of the project.
Modular Connections: Female headers were utilized to solder connections between the components and the Raspberry Pi, facilitating modularity and ease of maintenance.
Power Delivery: Male and female USB breakout boards were employed to efficiently power the Raspberry Pi.
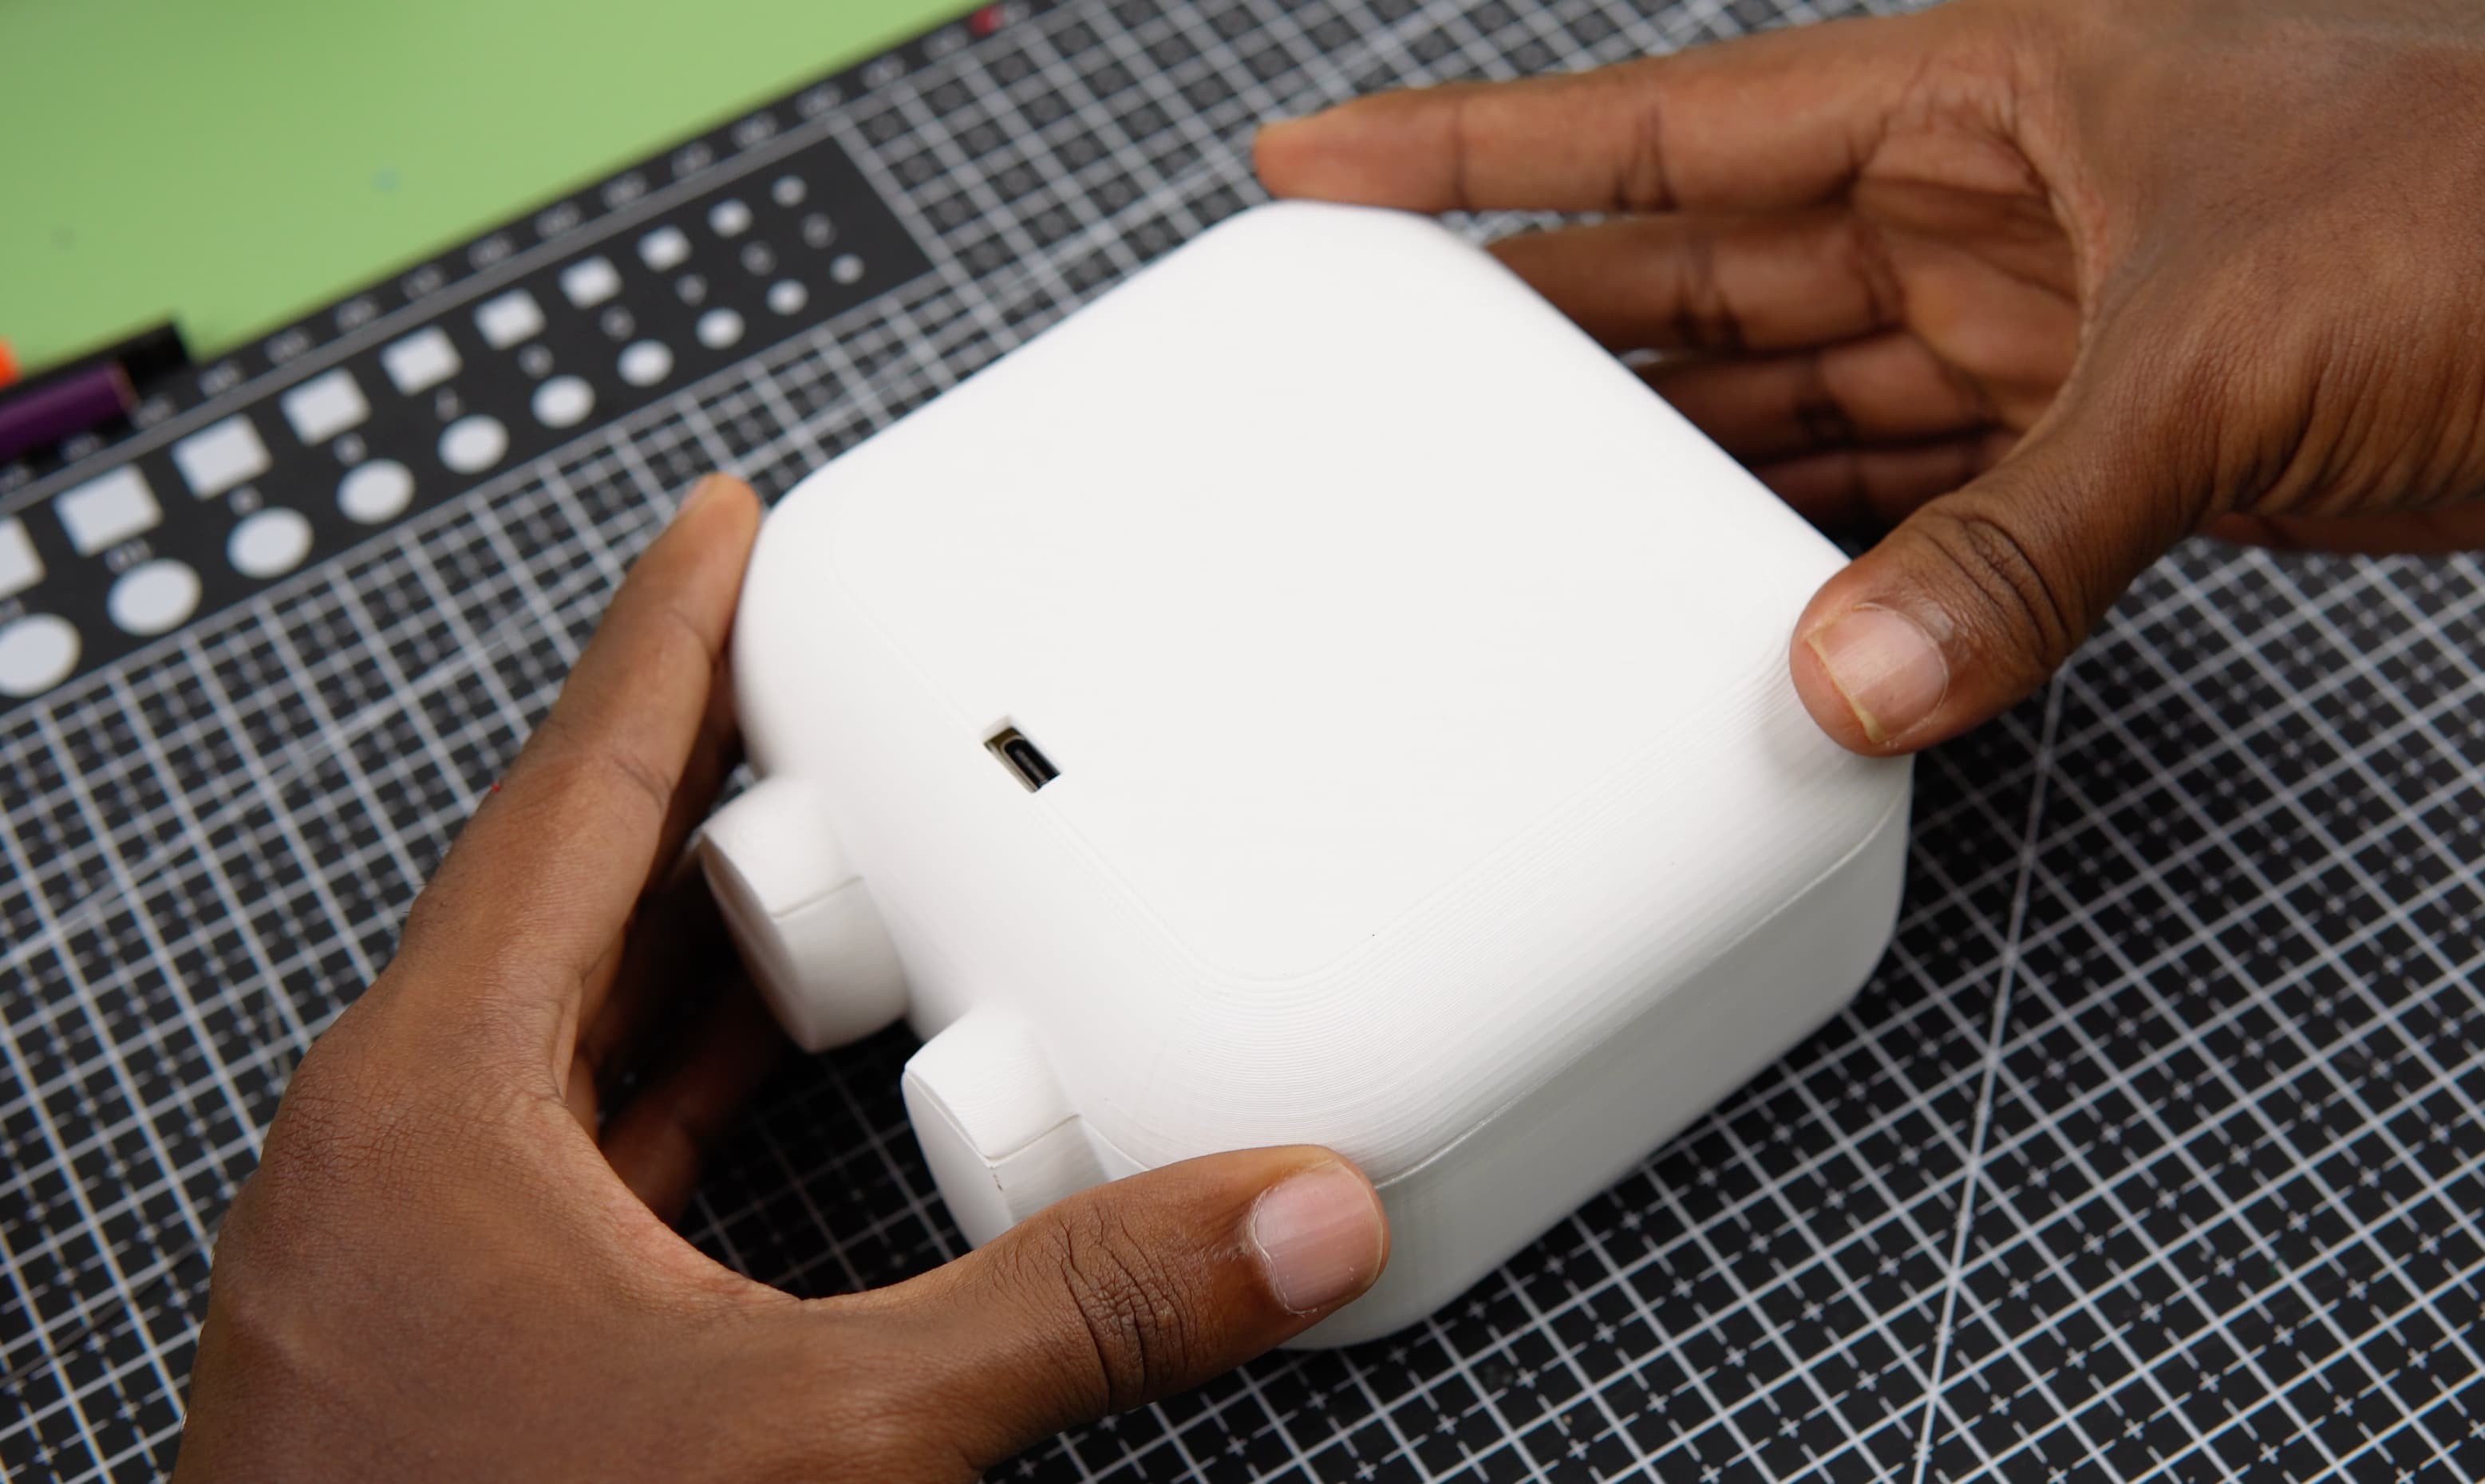
Final Assembly: The back cover was positioned and secured, completing the assembly process.
Result: The final result is a sleek and functional Pomodoro Bot ready to enhance productivity and brighten any workspace.
Giving Life To Our Pomodoro Bot
1. Power Up the Raspberry Pi
Once the assembly process is complete, power up your Raspberry Pi. You can do this by connecting the power supply to the Raspberry Pi's power jack.
2. Verify Functionality
After powering up, take a moment to verify that everything is functioning as expected. This may involve checking the Raspberry Pi's LED indicators and ensuring the Waveshare display turns on.
3. Download Source Code
The next step is to download the source code for the Pomodoro Bot application on to your Raspberry Pi. You can download the code from the following GitHub repository:
Open the downloaded source code and navigate to the Code directory. Locate the file named main.py.
Within main.py, you will need to replace the following placeholders with your own values:
API Key: Locate the section where the API key is stored and replace it with your own API key.
API Key ID: Similarly, find the section where the API Key ID is stored and replace it with your unique ID.
Component Names (Optional): If you have used different component names during configuration, you may need to modify the corresponding names within the code.
5. Run the Pomodoro Bot Code
Once you've made the necessary edits to main.py, save the changes.
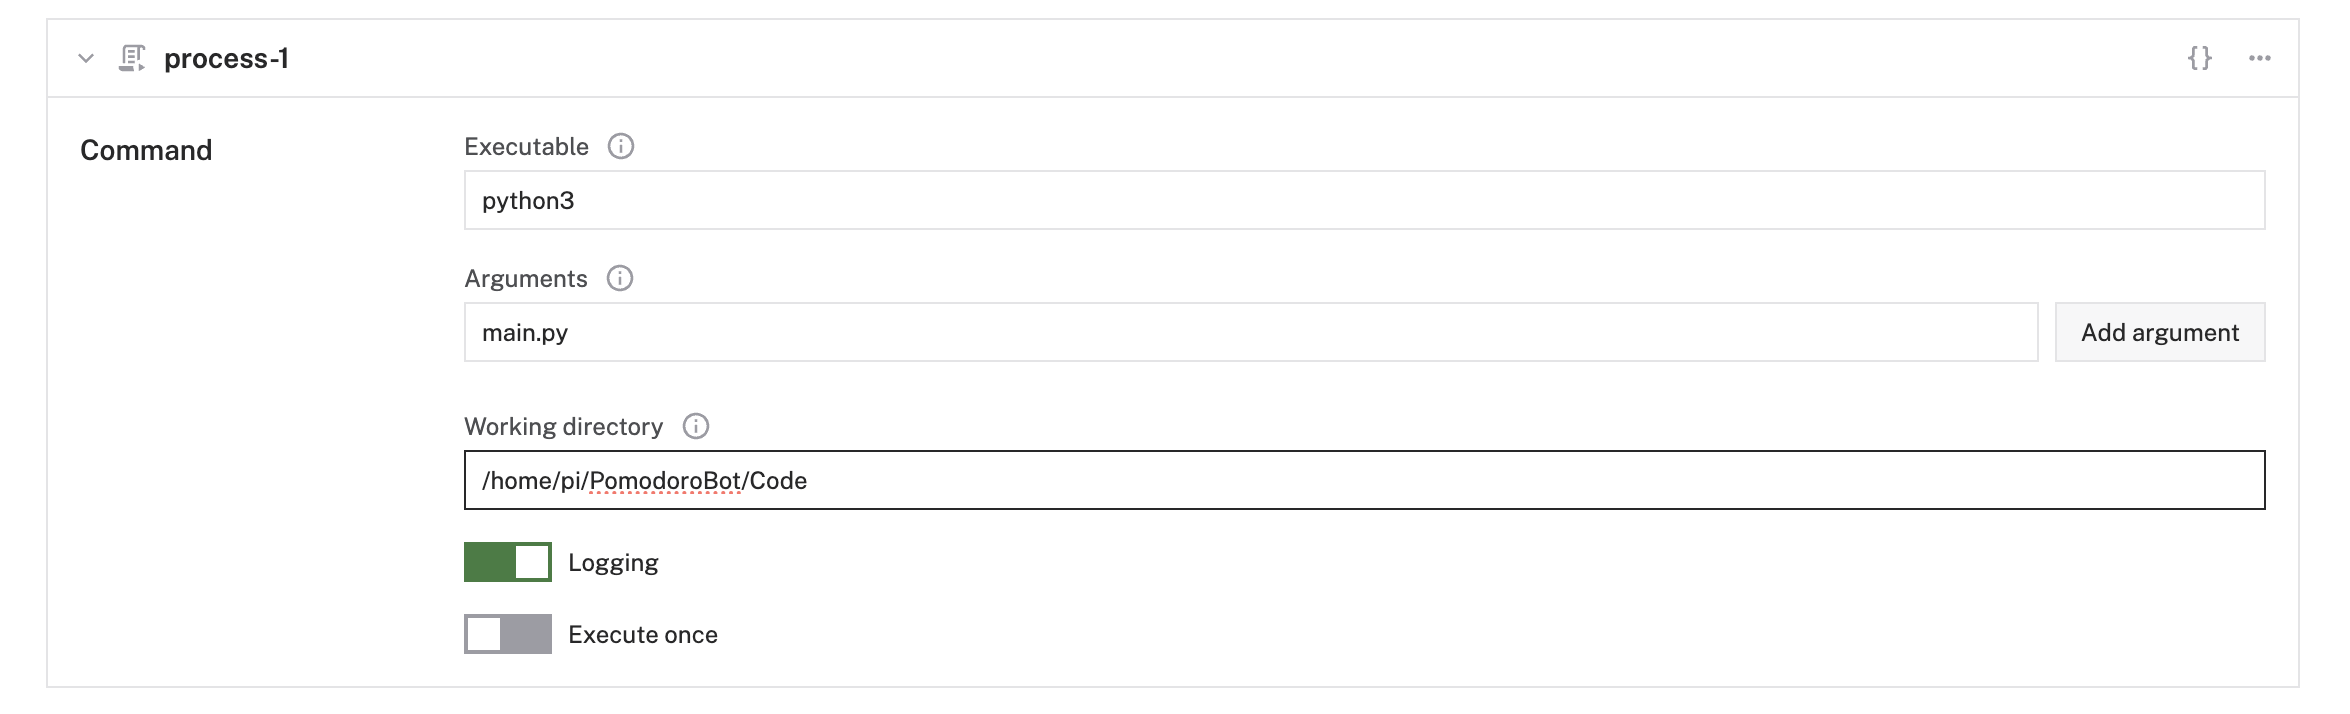
Back in the Configure tab in the Viam app, add a new Process.
Configure the Process by adding relevant details like Executable, Arguments and Working Directory.
Executable: python3
Arguments: main.py (Python script name)
Working Directory: /home/pi/PomodoroBot/Code (Your working directory)
Save and wait for the process to finish setup.
6. See Your Pomodoro Bot Alive!
If everything is configured correctly, the Pomodoro Bot application should launch and your Raspberry Pi will transform into a functional Pomodoro Bot, ready to help you manage your work sessions and boost your productivity.
 Coders Cafe