Electronic_Maze
Arduino Radar Using Android Mobile App
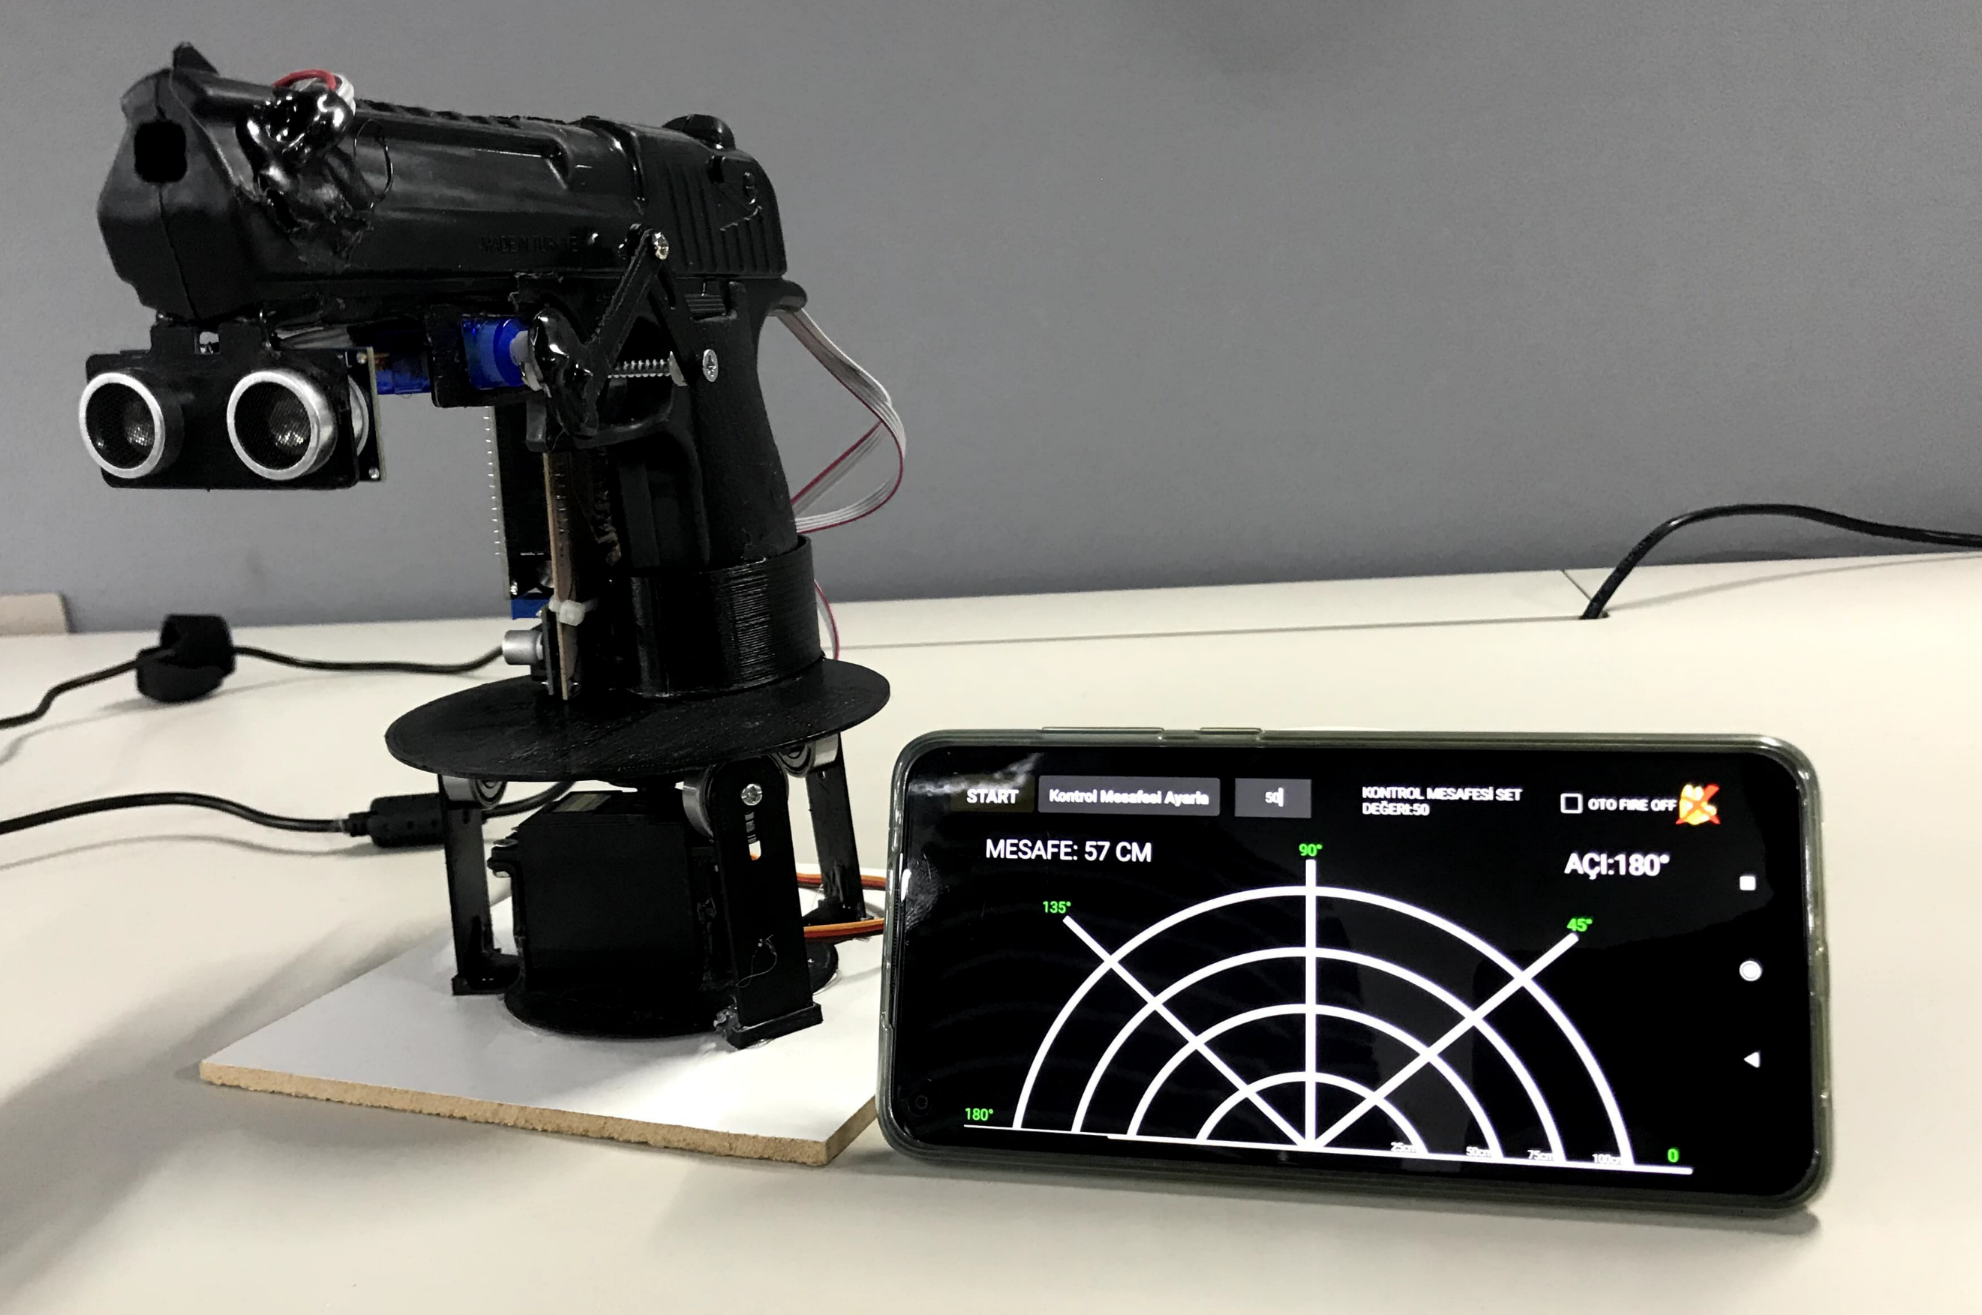
This project is a radar system powered by ultrasonic sensors and servo motors. This system detects obstacles and collects distance and angle information and can be controlled via Bluetooth via a mobile application. The system provides the user with features such as target identification and automatic firing.
Click to buy the app, version only available for Android:PLAY STORE APP
Supplies
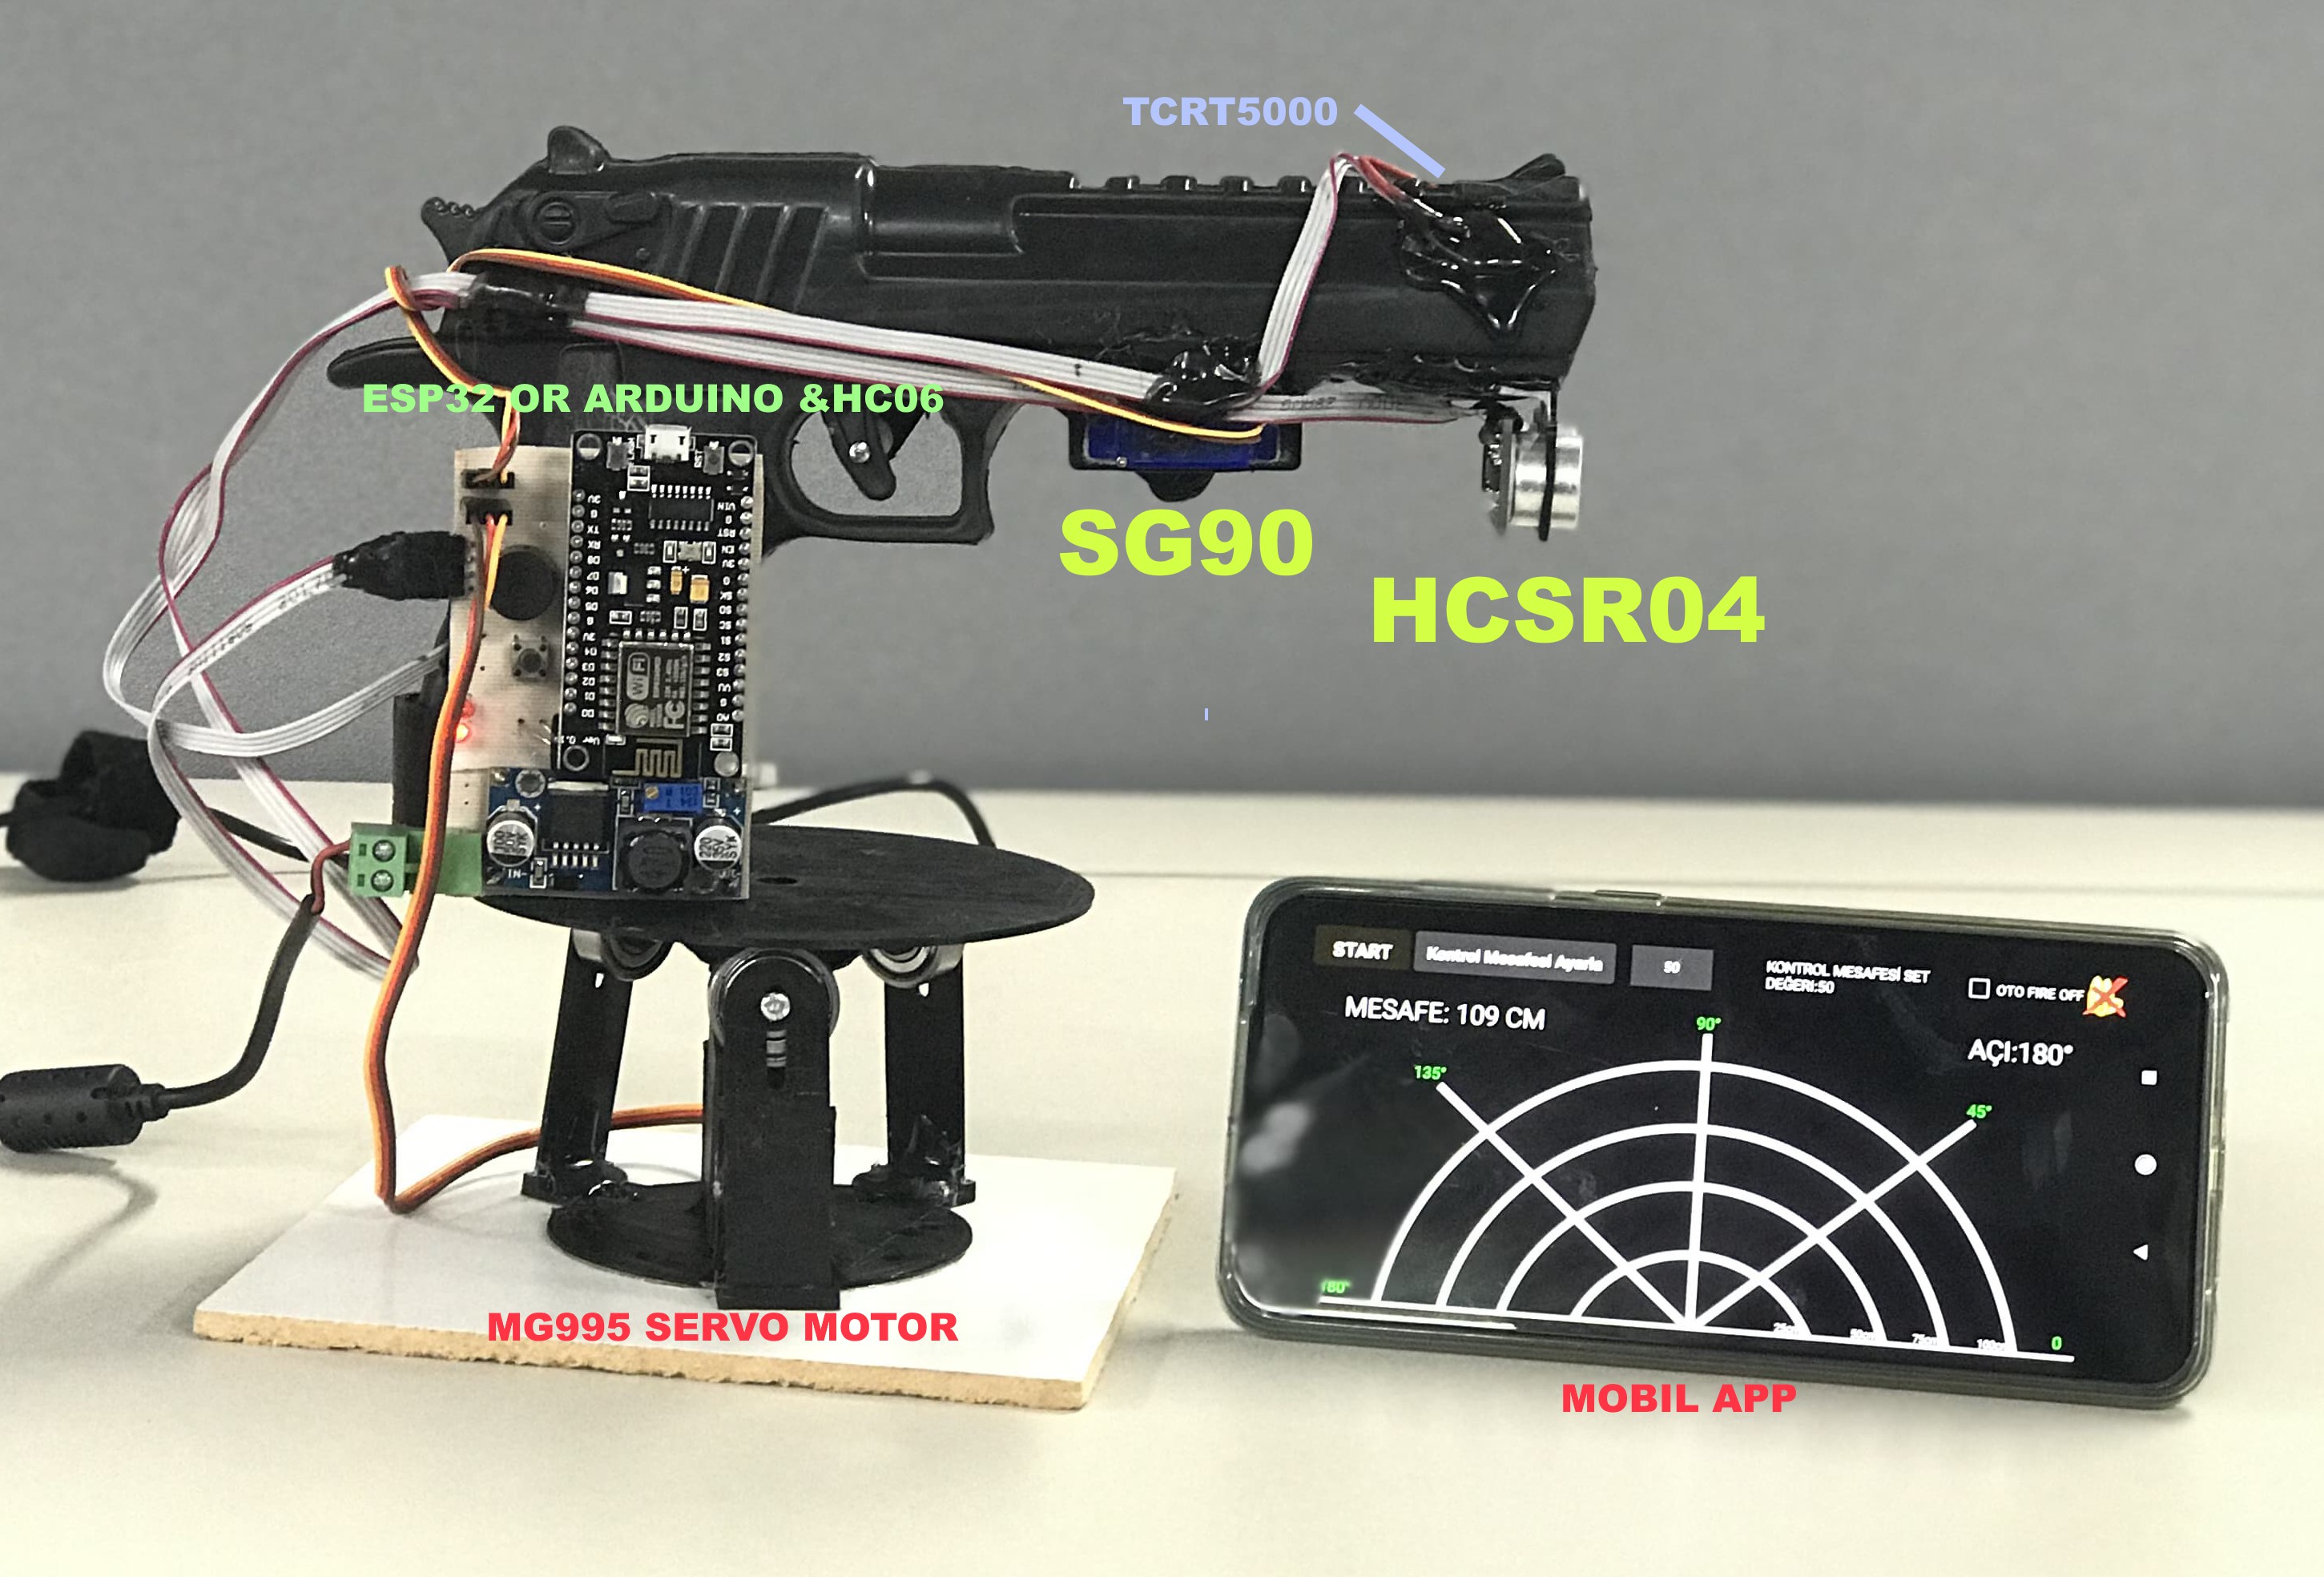
Key Components of the System
- HC-SR04 Ultrasonic Sensor: Used to measure the distance of targets.
- SG90 AND MG995 Servo Motors: Used for radar scanning and firing.
- Bluetooth Module (HC-05 / HC-06/ESP32): Allows data to be transferred wirelessly to the mobile application.
- ESP32 / Arduino: Processes the sensor data and transmits it to the application.
- TCRT5000: Checks whether there is a bullet.
- LM2596 power module: provides power to the circuit.
- Mobile Application: Interface that allows the user to control and monitor the radar unit.
Step 1: HOW TO USE
Send and Receive Data
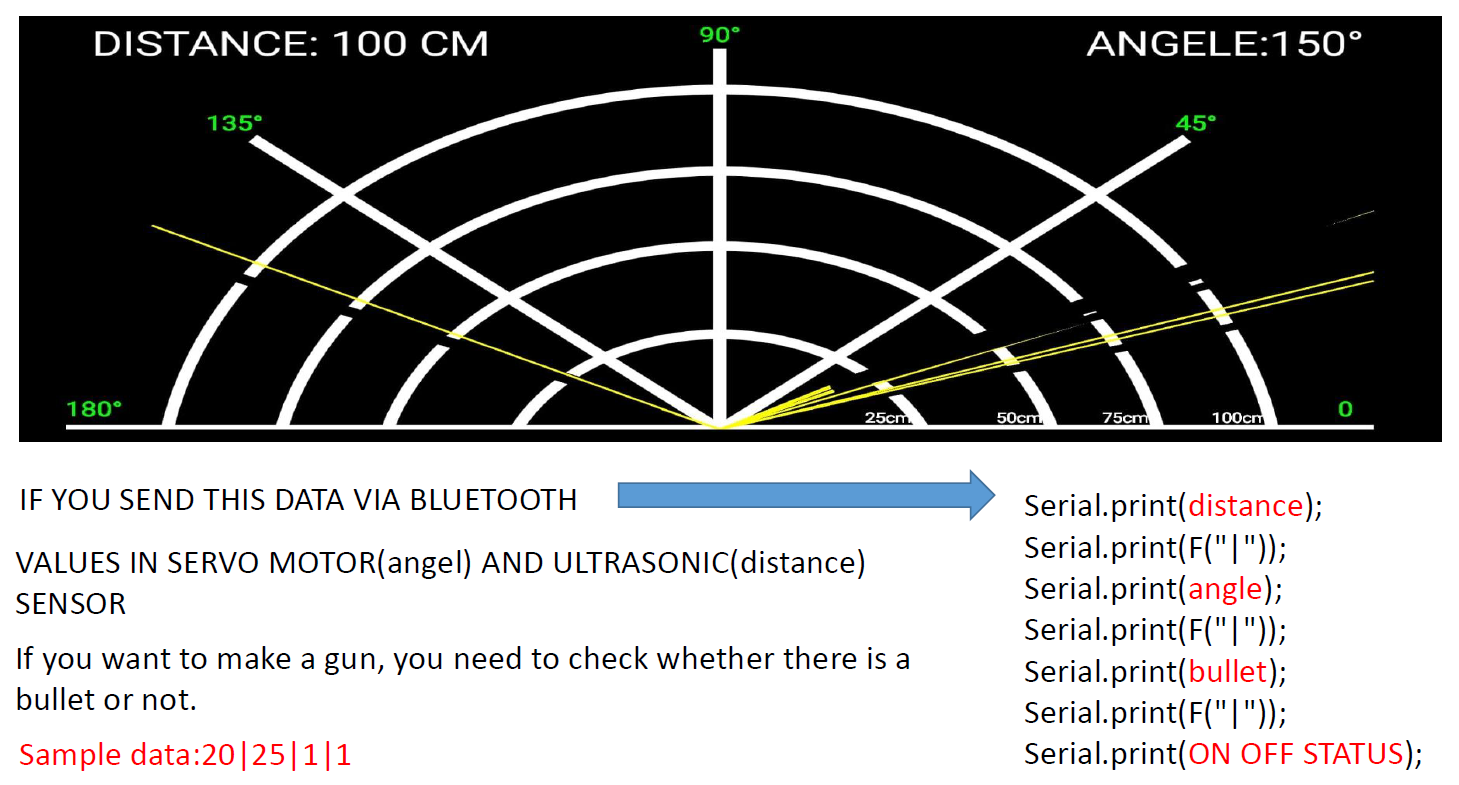
Sensor and Servo Motor Data: The radar system sends distance, angle and firing information to the mobile application via Bluetooth.
Sample Data Format:20|25|1|1\rn
- 20: Distance (cm)
- 25: Servo motor angle (degrees)
- 1: Whether there are bullets (1: Yes, 0: No)
- 1: System active status (1: RUNING, 0: STOPING)
Mobile Application Commands: The user can send commands to the radar system through the application.
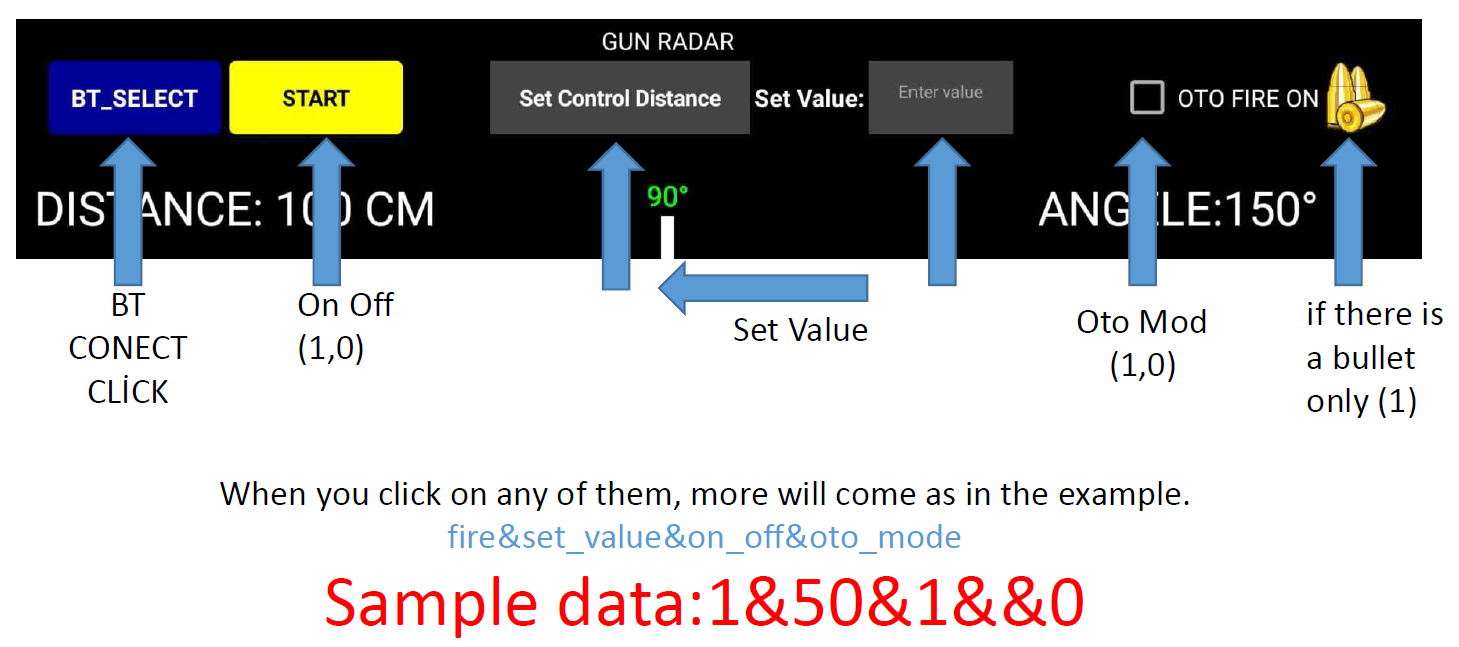
Sample Command Format: fire&set_value&on_off&oto_mode
Sample Data: 1&50&1&0\rn
- 1: Ignition command (1: Fire, 0: No fire)
- 50: Target distance limit (cm)
- 1: System on/off status (1: START CMD, 0: STOP CMD)
- 0: Automatic mode (1: Active, 0: Off)
Mobile Application and Control Panel
The app offers the user the following control options:
Bluetooth Connection: Press the “BT_SELECT” key to communicate with the radar unit.
System RUN/STOP: Activate the system with the “START” button.
Target Distance Setting: Enter the distance value with “Set Control Distance”.
Auto Fire Mode: Activate by checking the “AUTO FIRE ON” box.
Bullet Control: The system can be activated if there is a bullet.
The completed version of the project is as above. If requested, full code and file sharing will be made on the cult 3d page.
Thanks for reading...
 Sounak Ranjan Das