 Alexander Kirillov
Preliminaries: what is XRP?
XRP is a robotics kit created by consortium of several organizations, including Sparkfun, Worcester Polytechnic Institute, FIRST, and many more; see https://experientialrobotics.org/. It is primarily intended for use in education.
It has been in beta for about 2 years, but recently (March 2025) they released version 1, which has significant improvements.
Useful links:
- Main page
- Sparkfun product page; you can buy it there or from Digikey (currently, Digikey only stocks beta version)
- User guide (needs updating): https://xrpusersguide.readthedocs.io/en/latest/course/introduction.html
- Hardware - controller: documentation, pinout, github
- Hardware - 3d printed: files for 3d printing, source CAD (OnShape)
- Software: online IDE (XRPcode), API docs, github
- Firmware: Micropython .uf2 file (normally not needed, as the IDE has built-in tools for updating firmware); in case your firmware is completely messed up, use flash_nuke .uf2 file that erases the flash memory
- Some projects using XRP: https://www.printables.com/model/1216372-xrp-robot-kit/related
Features
XRP is a typical 2-motor small differential drive robot, programmable in micropython. In addition to basic features, it also has:
- Motor encoders
- IMU and code to use it for turns
- support (connectors and code) for additional motors and servos
Main feature of XPR is that it is easily customizable (unlike, say, Zumo, 3pi+, or Alvik). Chassis is 3d printed (and it has been designed with great care), making it easy to modify; there are numerous attachment points for adding extra actuators or sensors.
It also comes with a well-supported library and a whole course curriculum, and the price is reasonable - if you are willing to 3d print your own parts, the rest is just $99, and they offer discount to educators/robotics teams, which brings it down to $73.
Weaknesses
Here are some things I think can be improved. Most of them are inevitable consequence of designing the robot to be cheap and used in schools; some are my own preferences - to each, his own.
- Size. The XRP is slightly too large (19x19 cm) for my taste; I'd prefer it to be slightly smaller.
- Battery. The kit uses 4 NiMH batteries, which provides about 5v fully charged - barely enough for motors. It'd be better to use LiPo (though I understand the safety risks, especially when used in school environment) or 5 batteries
- Tiny switch and buttons. The main power switch is small, and I really like the on/off be large and sturdy, so you do not have to squint looking for it when your robot is misbehaving
- O-rings as tires: sometimes they do not provide enough traction
- Sensors: 2-sensor line follower and a HC-SR04 distance sensor work as a starting point for beginners, but the robot would really
- User interface: XRP has one NeoPixel and one user button. It works, but I'd love to see a proper OLED display and several user buttons, like 3pi+.
Since the whole design is open source, I am trying to modify the XRP to address all of the above. I'll document the project here.
My modifications
Better wheels
I made new wheels which work with Pololu's silicone tires https://www.pololu.com/product/3409.
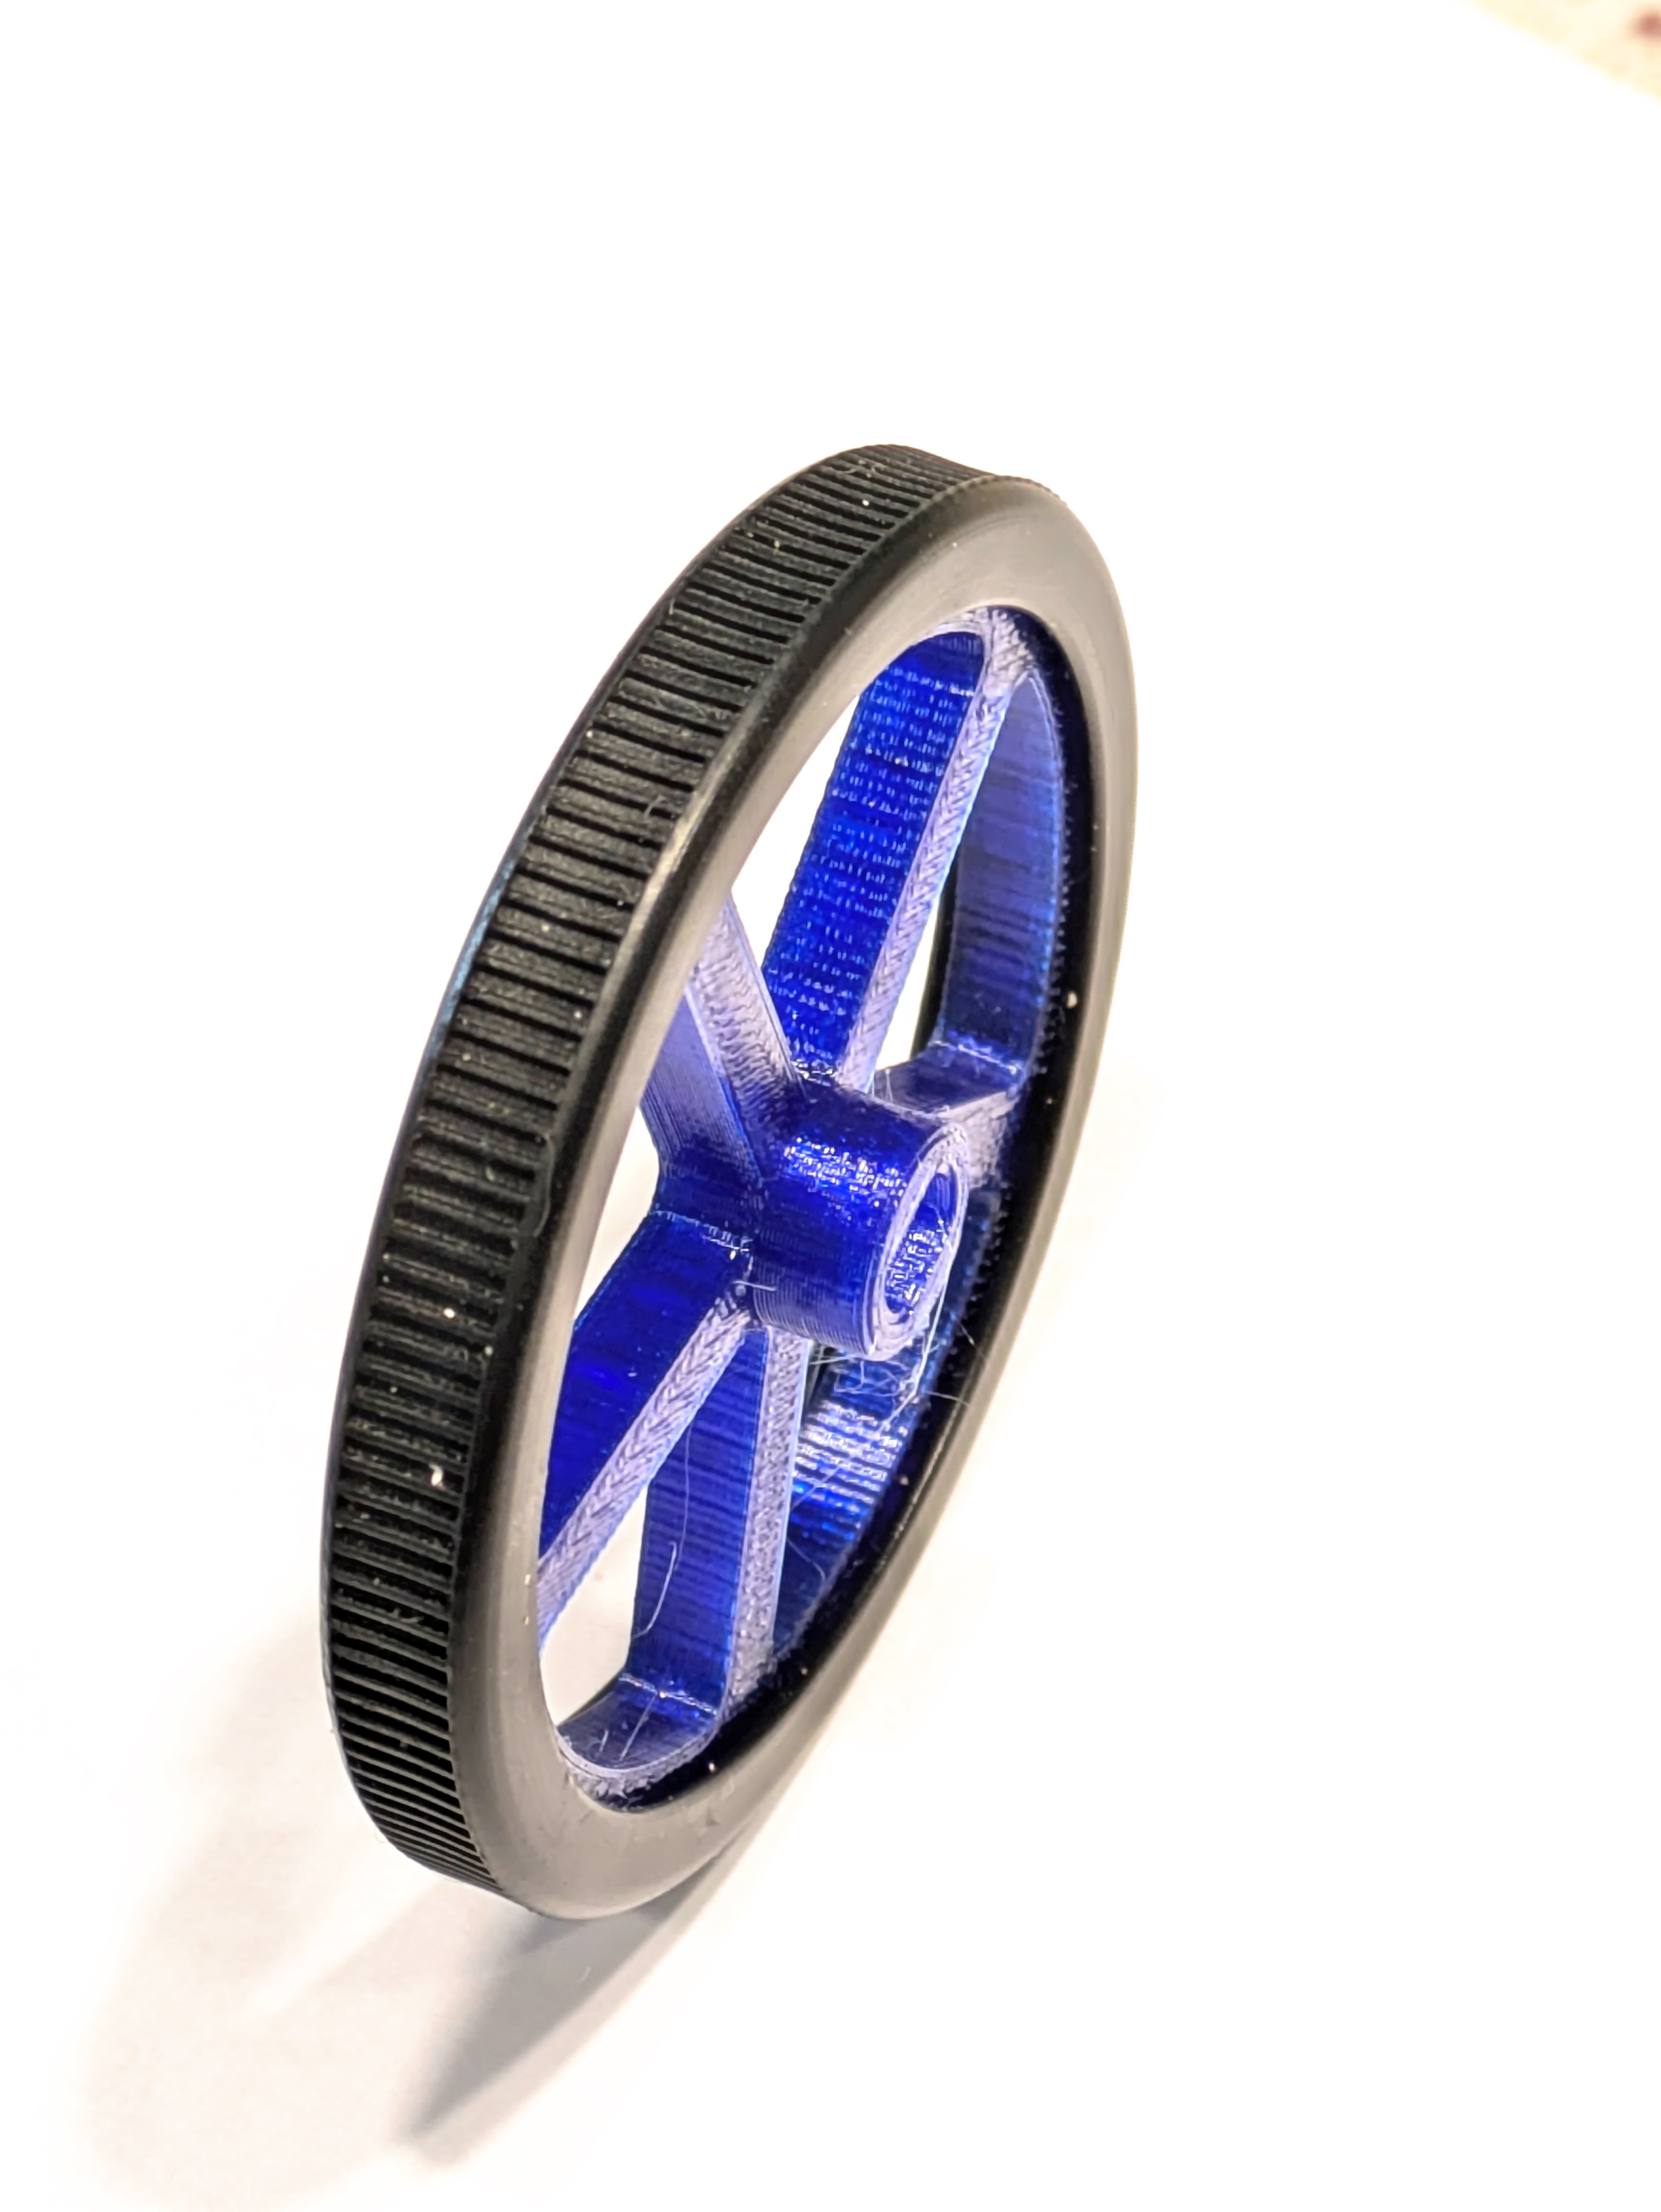
They have same diameter as original wheels, so they can be used without any modifications to the rest of the chassis.
Design files are here: https://www.printables.com/model/1275321-wheel-for-xrp-robot-pololu-tires
Display board
This add-on board contains a 135x240 TFT SPI display, 2 user buttons, a large on/off switch, and two neopixels. It plugs into the headers of the XRP controller.
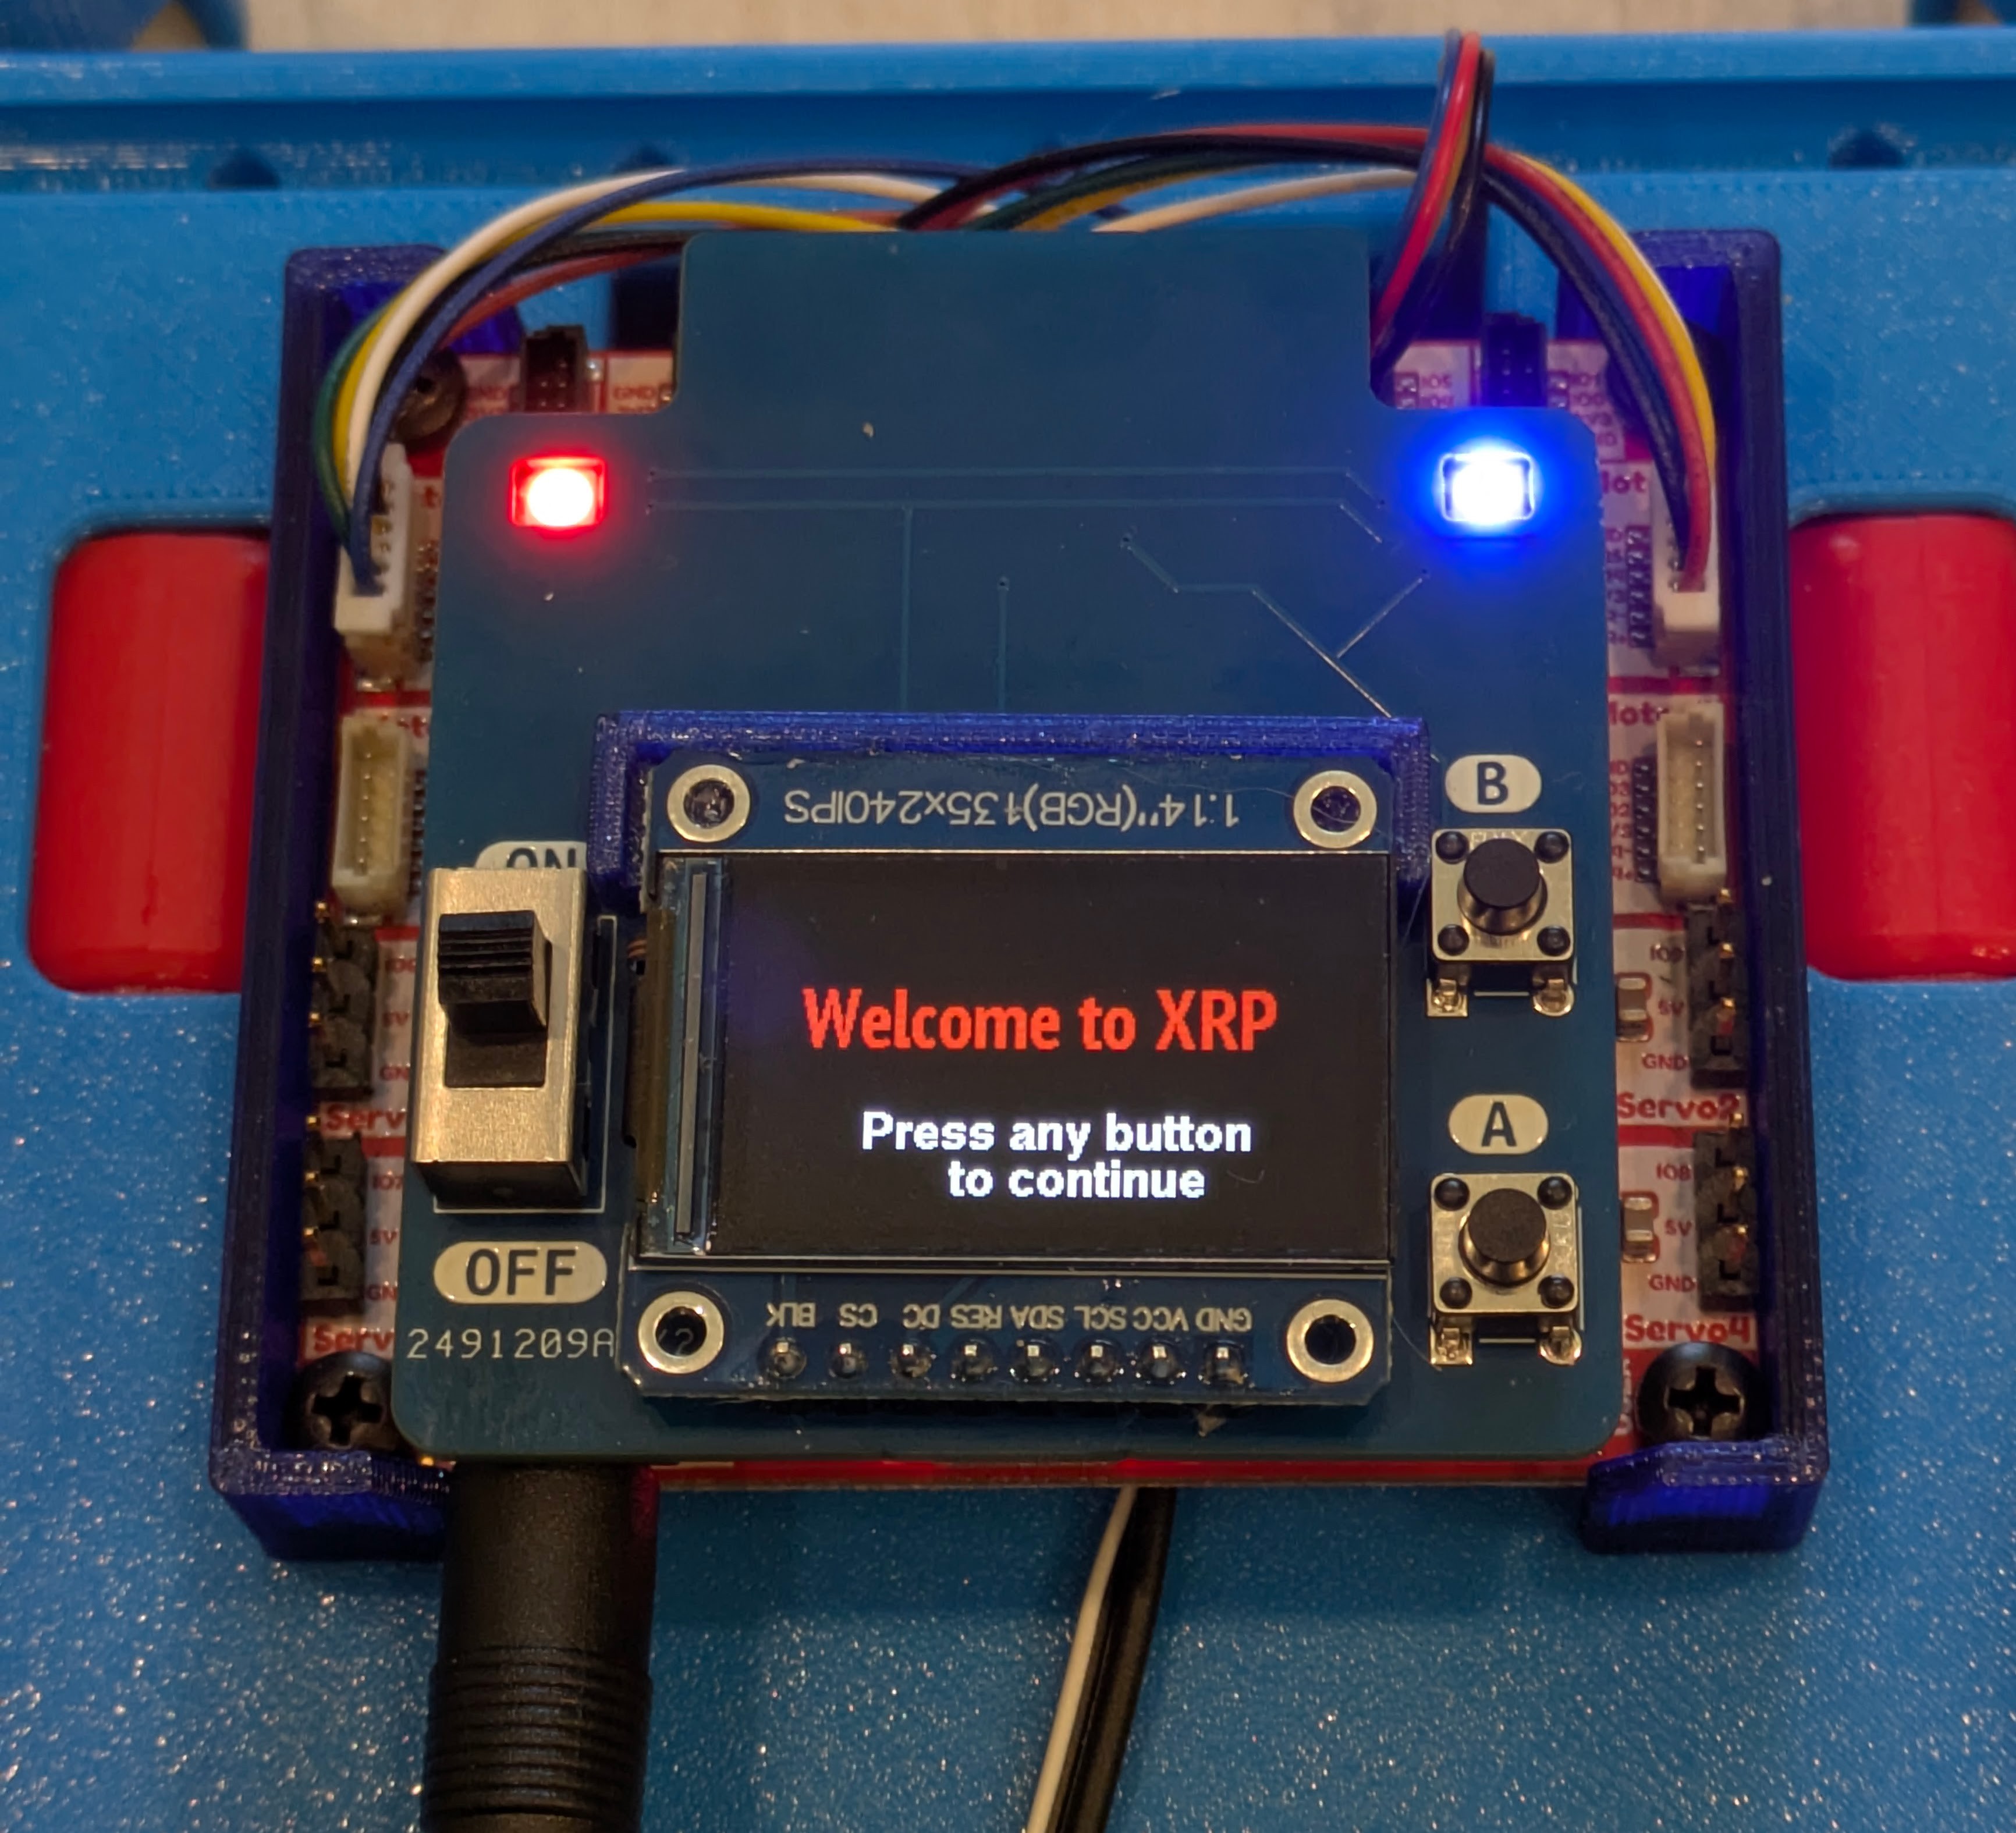
Source files are in github, and full documentation at https://xrpdisplay.readthedocs.io/
Custom chassis
My final modification is creating a custom chassis for the robot. This is work in progress.
Features:
- Smaller size
- Uses two 18650 batteries
Design in Fusion 360: https://a360.co/43SxnfM
Printable files: https://www.printables.com/model/1286151-small-xrp-frame
You will need:
- The XRP kit: controller, motors, wiring, sensors, caster balls, o-rings for tires
- The chassis itself (3d printed)
- Battery clip (3d printed)
- Two copies of controller support brackets (3d printed)
- Two wheels (3d printed - either original from XRP kit or the customized ones above)
- Four M3 screws (8mm long - not longer!)
To power the chassis, you have two options:
- Two 18650 Li-Ion batteries and a holder. You will need to find a holder that provides barrel connector, e..g this one from AliExpress.
- Alternatively, you can use a 2s (7.4V) Li-Ion or LiPo battery pack. The pack should be no larger than 70x40x19mm. I recommend using a pack which contains 2 18650 batteries wrapped together, e.g. this one from Amazon, instead of a LiPo battery pack (which contains soft pouches).
You will need either to replace the connector (warning: replacing connector on a live battery requires great caution; any mistake can result in fire or explosion) or make an adapter from whatever connector is provided by the pack to the 5.5x2.1 mm barrel jack
Option 1 is easier and safer, but it requires you to remove the batteries every time you need to recharge them, which is annoying. Option 2 allows you to charge the batteries in place.