 methodicalmaker_
Project Video:
Features (the tl;dr):
- Almost entirely 3D printed (other than a motor, 4 bearings, some sensors, and the nuts and bolts
- Detects that the treat level is low before completely running out! no more sad cats that hear the food dispenser going off, only to be left with an empty belly!
- Self hosted wifi configuration page (connect to the AP, go to 192.168.4.1, enter your wifi settings, and it will join your wifi network
- Completely self hosted web UI / API - configure all your settings, vend treats remotely from other smart devices, and track your cats stats!
- MQTT support - connect your treat dispenser to a platform like homeassistant to see graphs of your cats activity and be alerted to when the treat dispenser is almost out of treats.
- A bunch of cool design features
- internal wire channels for cleaner design
- integrated springy labyrinth joint to prevent gear lubricant from leaking out over time
- easy to adapt base so you can mount it on your own creations
- Simple electronics
- All off-the-shelf sensor boards. No analog components other than some 470 ohm resistors for the LED's used in the light break sensors for detecting treats
_____________________
The deeper dive:
This project went through a few different design iterations.
Version 1 was based around a hopper that was gravity fed. Treats would fall into a casset wheel which would rotate 180deg until treats would fall out the front.
This design went through multiple itterations, but it suffered from 2 main flaws. The first was that the hopper (not shown above) had feed issues. This was solved by putting a vibrating motor on the side of the hopper, but it was incredibly loud and would wake us up at night. The second was due to inconsistencies in treat size. This design worked about 70% of the time, but if there was an abnormally large treat, it would jam. If there was an abnormally small treat, 1.5 treats would fall in and it would also jam. Most of the time, the motor would overpower the treat and just grind it up, but it wouldn't come out when it should, which upset my cat.
The root cause was that the dispenser didn't actually detect the treat coming out, just that it had rotated the correct distance.
Version 2 aimed to solve the feed issues, and i would come back to the hopper after, since that ended up being a major time sink in the v1 design.

Version 2 moved away from gravity feeding, and instead used a "vending machine auger" style screw to advance treats forward. Instead of trusting the rotation, i used a line break sensor at the dispensing spout. overall, this design showed a lot more promise. Sometimes treats wouldn't feed out the front and would get "smashed" into the front bearing cap. I attempted to solve this by adding holes to the screw, but that didnt work. Instead, i eventually added in a front scoop to guide treats to the center of the outer cylinder.
The main issue with this design was that it didnt have the hopper, and adding too many treats would cause it to over-vend at best, and jam at worse. I manually overcame this for a while by spacing out 10 or so treats. This design was also fairly long, so it could bounce up and down during heavy sprinting. This could cause treats to advance forward towards the spout if they were in the final inch or so. My cat actually learned this behavior, and stopped running as consistently.
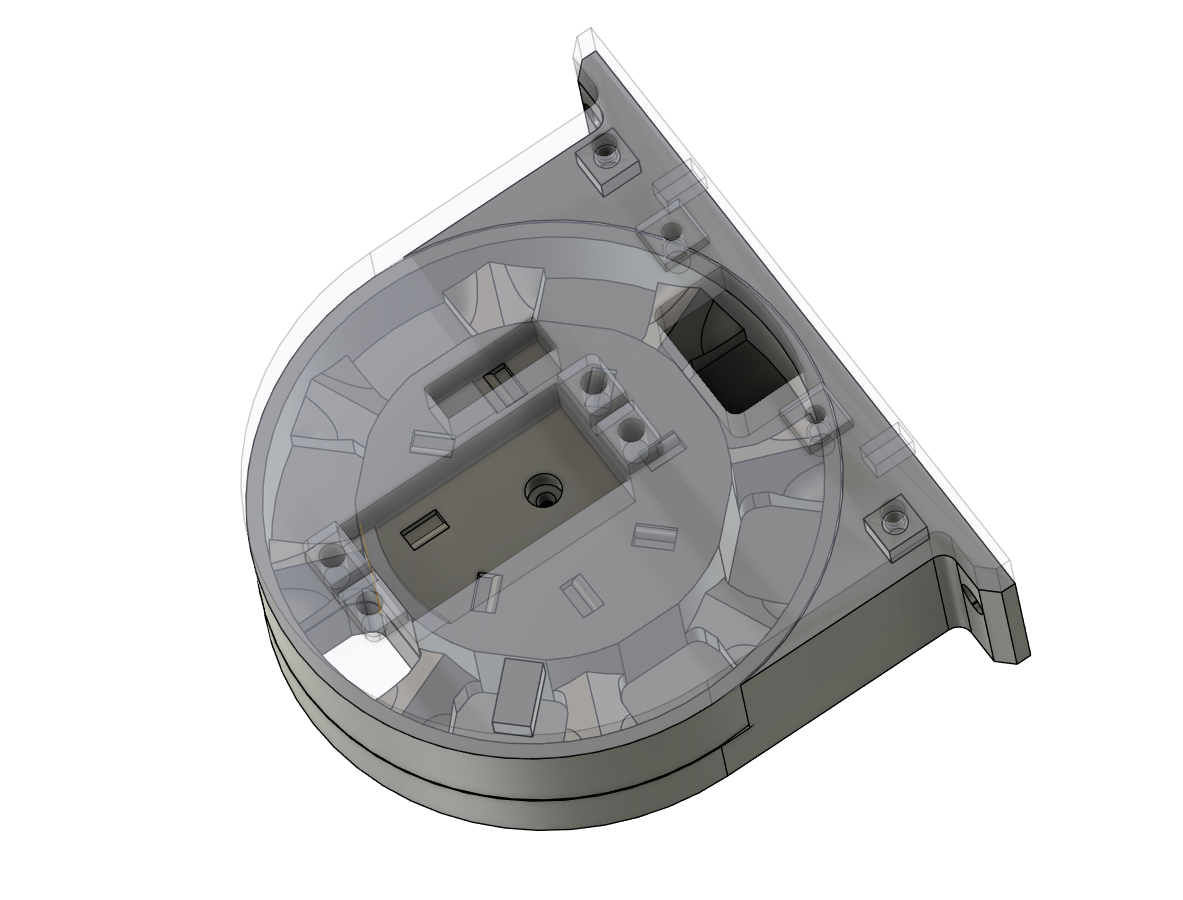
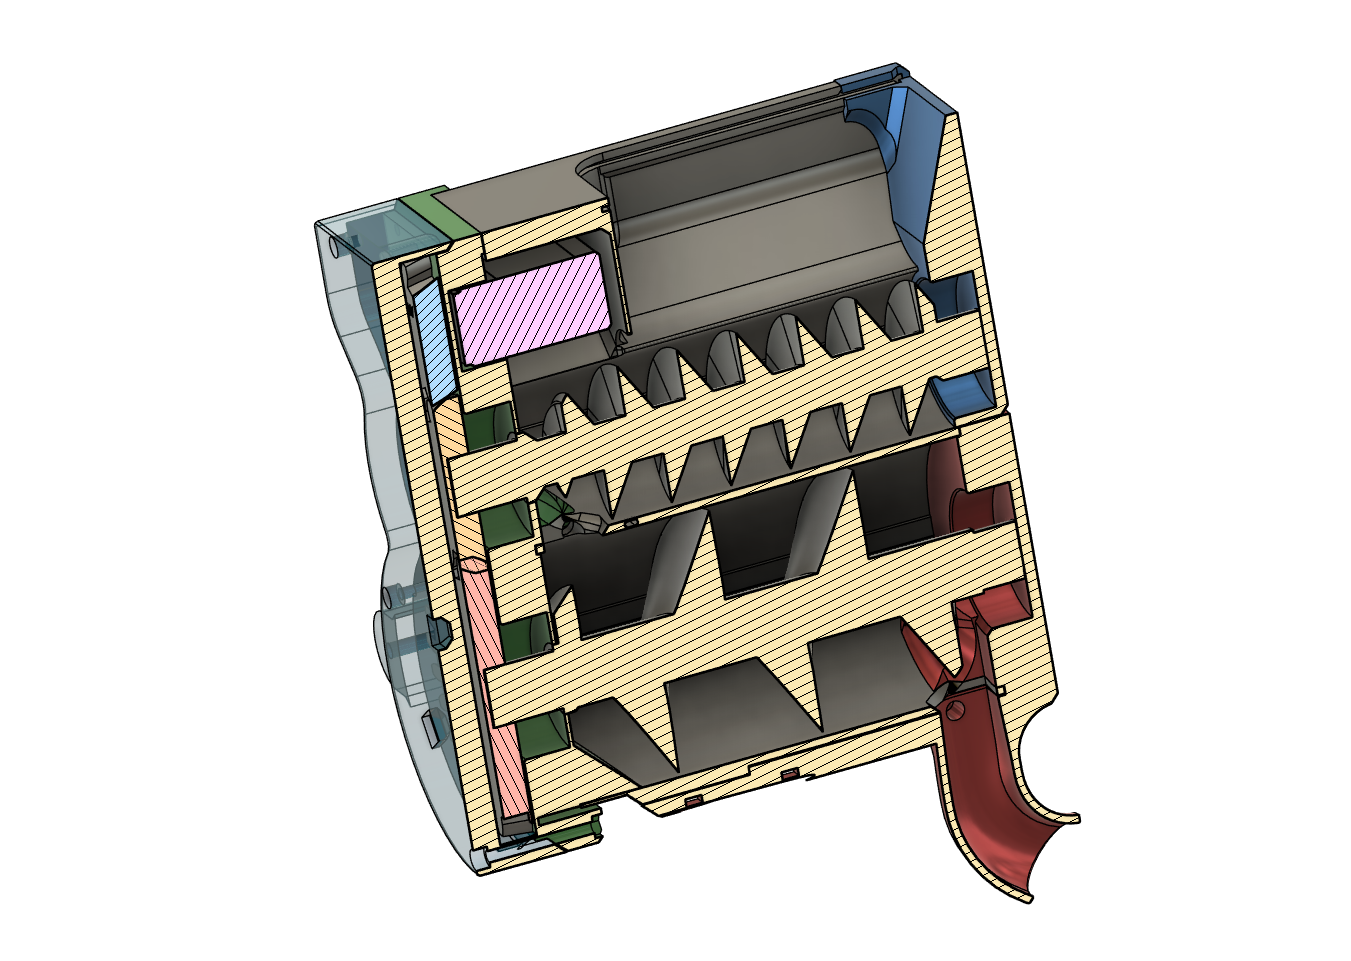
Version 3 is what you see above. It solved the hopper issue, but in a way where the gearing (both between the actual gears, and the turn count on the screws) slightly preferences the bottom advancing treats faster, so that way the treats are spaced out as they drop between the upper and lower chambers.
Speaking of upper and lower chambers, Another issue with V2 was that it could only detect treats coming out the front, so "out of treat" detection was done by seeing that the auger spun for longer than some threshold (30s). This meant that when the treats did run out, my cat would end up disappointed, as he knows the sound means treats are coming his way. V3 fixes this by adding a 2nd light break sensor between the upper hopper chamber, and the lower dispensing chamber. A timer is resumed / stopped every time a treat is being dispensed, and if that hopper sensor doesn't see a treat in a short time span (5s), it can flag that its out of treats, while still using the longer (30s) threshold for the overall dispensing routine. This means you get notified its out of treats while theres still a few left, and no more sad cat!
Version 3 also adds some cosmetic features, like moving the motor inboard on the design instead of hanging off the bottom. It also changes the mounting to be more stiff, and adds a slight upward tilt to even if the mount loosens over time, my cat cant cheat the system by jolting the cat wheel. It also adds some internal wire channels so that the sensor wires (mostly) are routed internally in the printed parts instead of being taped to the outside.
to recap, this double decker design solves two problems:
- A single auger screw thats fully loaded with treats is too coarse in its dispensing. Over filling it led to jams. If you tried to fill it slightly less, then multiple (5-8) treats would come out at once, which defeats the purpose of this being a way to exercise my cat at a net caloric negative. Filling the hopper to the point where only single treats came out would require refilling daily / multiple times a day.
- The double decker design solves this by having the top hopper feed treats slower than the bottom hopper dispenses them. This means you have a large treat reservoir while still spacing out the treats in the bottom level so you have more fine control.
- The single auger design can only detect when a cat treat hasn't come out within some threshold of time to detect that its empty. My cat quickly learned that the motor sound meant he was getting a treat. Because of this, the “out of treat” events were a negative stimuli that caused him to avoid running.
- The double decker design places a second light break sensor between the upper hopper and the lower main body. We can detect that a treat hasn't fallen from the hopper and alert the pet owner while theres still a handful of treats left in the device. No more sad and hungry cats!
_____________________
Build instructions:
Check out the included instruction images in the printables link. They walk you through step-by-step! The few in the model page are to show examples - to see the full guide, make sure to download the zip file containing all the images!
Parts needed (contains affiliate links):
- Bearings (larger than normal skateboard wheel ones, 8mm ID is too small for 3d printed shafts): https://amzn.to/3YnEGZj
- Nuts and bolts: https://amzn.to/44fU6CG
- m3 4mm, 12mm, and 30mm needed.
- m4 30mm needed.
- Motor: https://amzn.to/3Yh9LxW
- Light break sensors: https://amzn.to/3GrLTBq
- LEDs: https://amzn.to/3YUmVRw
- hall effect sensor: https://amzn.to/3GwKzgF
- Magnets (10mm x 3mm) : https://amzn.to/4cPdlFo
_____________________
comments on coding:
The project was initially designed for an arduino uno R4, however i ran into a lot of issues with running freeRTOS on an MCU with so little memory. This was for a design competition, and i was running out of time, so i quickly rewrote the code for an esp32. The code is pretty bad quality, and i hope to refactor it into multiple different files in the near future, but it is useable and commented in its current design, just (mostly) all in one file. Link to the github is in the printables link. Ill probably add it here once i dont wince at it when i open it haha.
Its written in platformIO, so just add the vscode extension, and when you go to build it, it will also do all the dependency management for you. If you haven't used platformIO, theres some basic "where to click" instructions included in the build instruction images hosted on printables.