 Ludwin
Introduction
This project started with a simple idea: building a complete, standalone heart rate monitor using inexpensive and easily available components.
Instead of yet another breadboard prototype, the goal was to create a compact device that is ready to use and easy to replicate — perfect for makers who want to explore biosensing without needing complex tools.
All it takes is a bit of soldering experience and access to a 3D printer. Everything else is open source and well-documented, from code to case.
The One Hertz Challenge
This project was created as a submission to the One Hertz Challenge, a competition hosted by Hackaday and DigiKey.
The challenge: Build something that operates around one hertz — something that ticks, pulses, or beats once per second.
A natural and fascinating choice? The human heart.
Our heartbeat typically hovers close to one hertz, making it the perfect subject for this challenge.
This project not only visualizes your pulse in beats per minute (BPM) but also directly in hertz, reminding you that your body itself is a beautiful one-hertz oscillator.

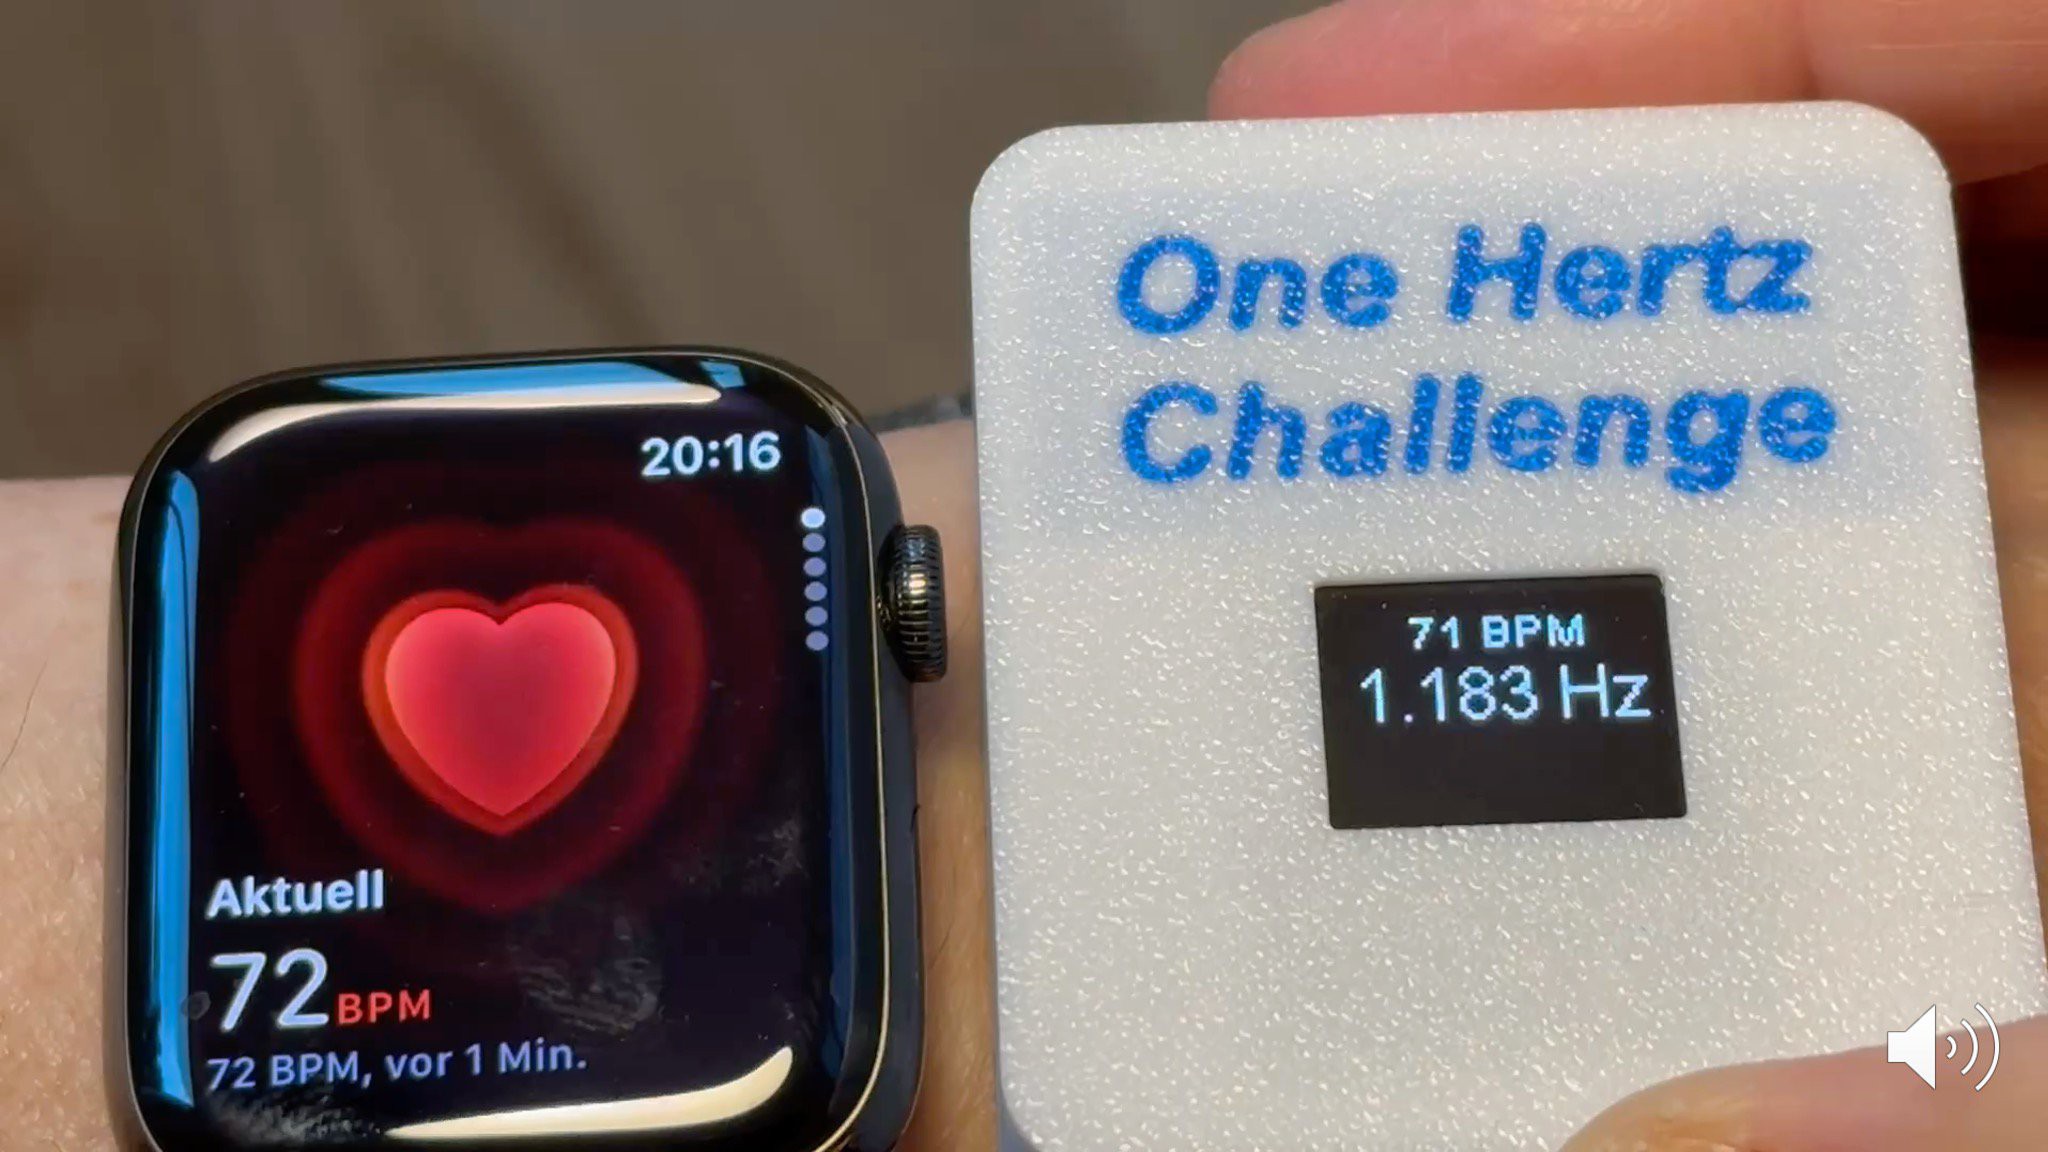
Accuracy Compared to Apple Watch
To validate the accuracy of the DIY heart rate monitor,, I compared its readings with those of an Apple Watch. The results are surprisingly close — both devices track the pulse in real time and deliver nearly identical values.
Minor differences can occur due to different averaging intervals. While the Apple Watch uses proprietary smoothing algorithms, my device calculates a rolling average over a few beats — simple, but effective.
This comparison shows that even with a minimal sensor setup, reliable heart rate monitoring is possible.
How Pulse Sensing Works
At the heart of the project is the MAX30102 pulse sensor.
It uses infrared light to detect subtle changes in light absorption caused by blood flow beneath the skin.
Each time your heart beats, the blood vessels expand slightly, changing how much IR light is absorbed. These changes form a waveform from which the heart rate can be derived.
Although the sensor can also estimate blood oxygen levels, this project focuses solely on measuring heart rate for simplicity and reliability.

Parts Overview
This project was designed with simplicity and accessibility in mind.
Only a few, inexpensive components are needed:
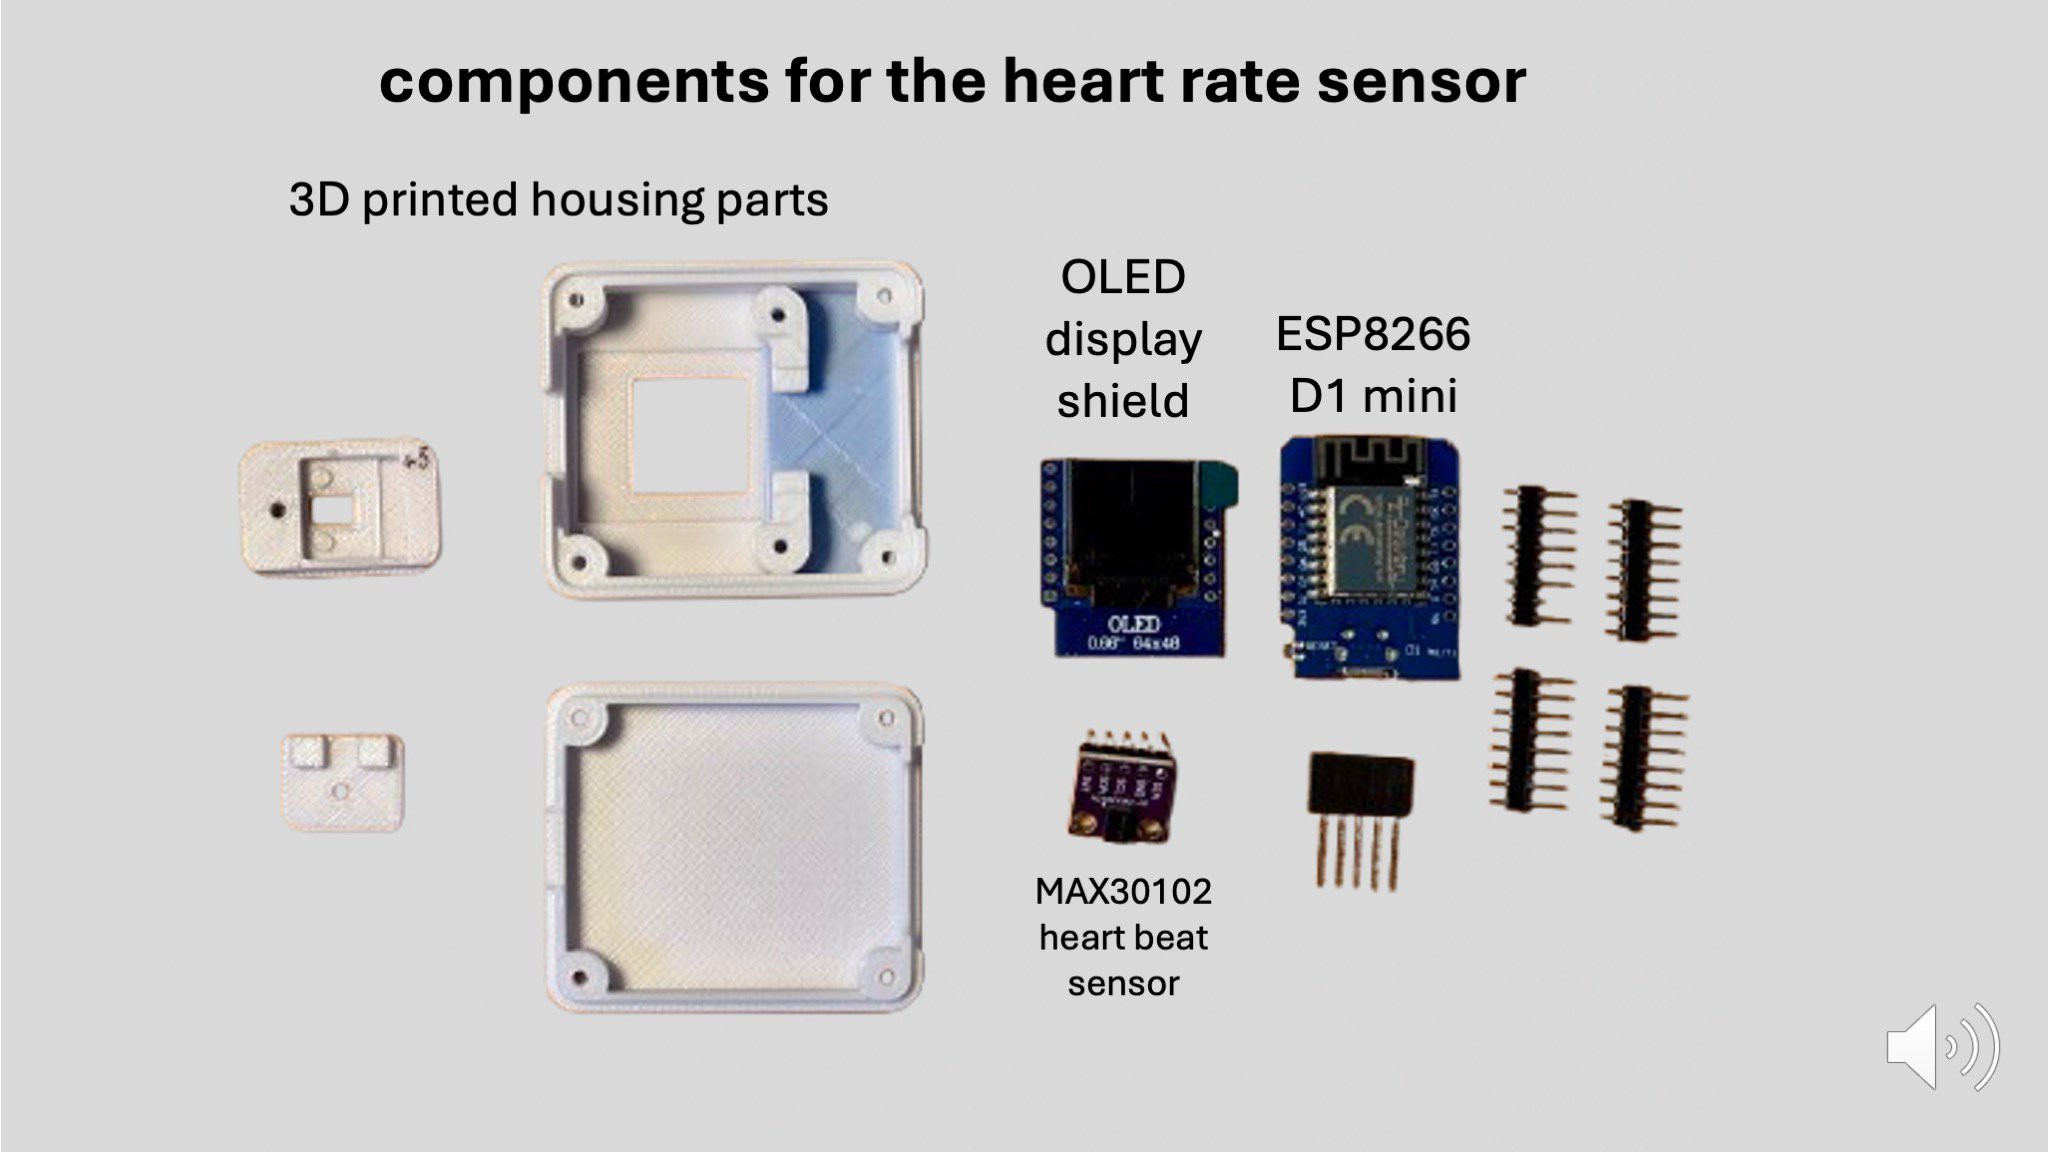
- Wemos D1 mini (ESP8266-based microcontroller) (you might use a clone)
- MAX30102 pulse sensor
- 0.66” OLED display (SSD1306, I²C interface)
- Basic jumper wires and pin headers
- Custom 3D-printed enclosure
No specialized hardware is required, and all parts are easy to find from common electronics suppliers.
You only need basic soldering tools and access to a 3D printer to get started.
Fusion 360 Case Design
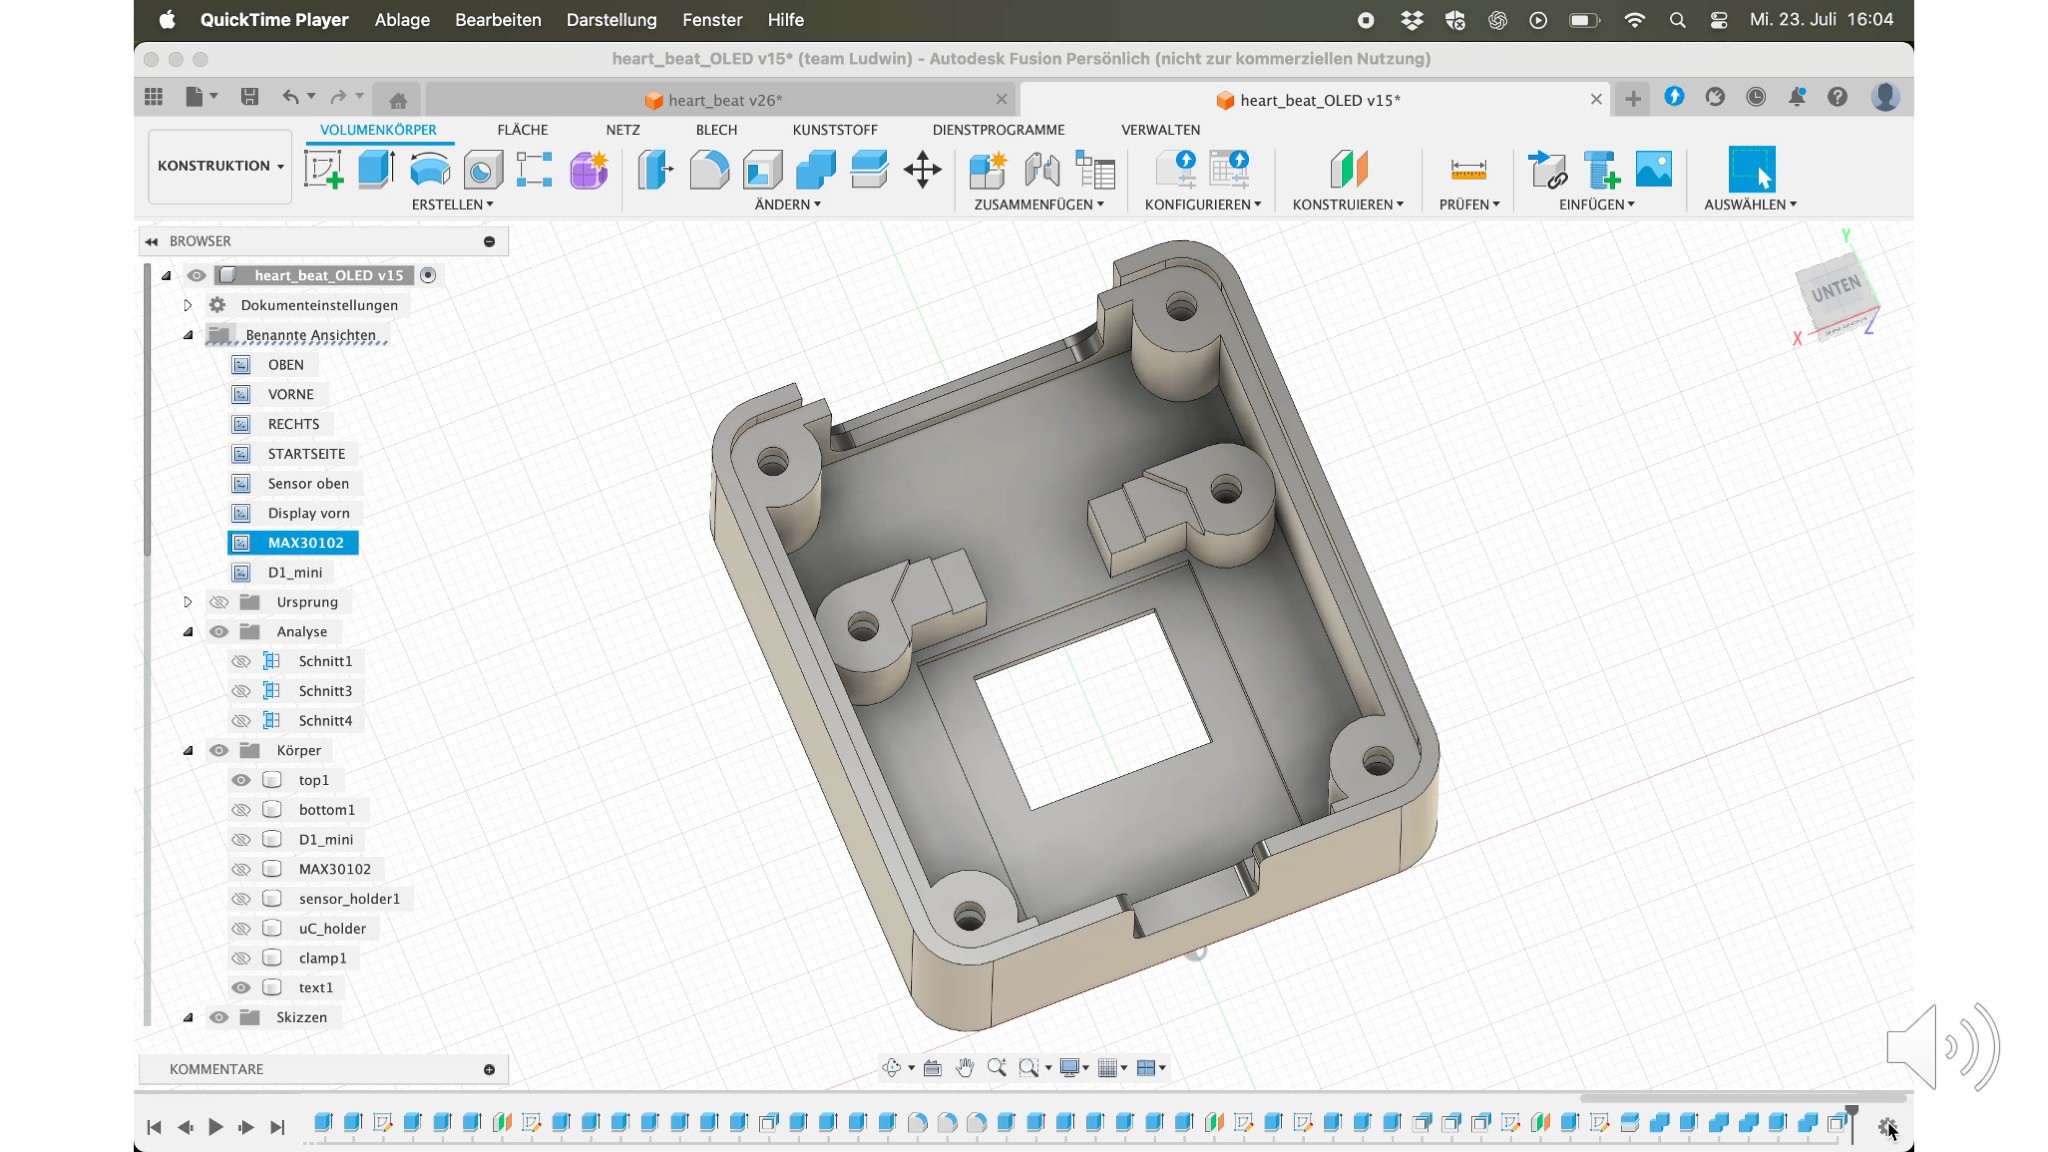
To ensure a compact and well-integrated device, a complete 3D model of the enclosure and electronic components was created in Fusion 360.
- The design centers around a structural top shell, which holds all components in place.
- The Wemos D1 mini with its soldered-on OLED display is mounted directly inside the case and secured with a crossbar.
- The MAX30102 sensor is placed on top, held in position with a custom clip and holder.
- The bottom shell closes the enclosure securely.
All 3D models are available as STL files in the GitHub repository, so you can print and customize the case to your liking.
Mounting the Display and Microcontroller
To minimize the height of the assembly and keep the design compact, the typical stackable header pins were not used.
Instead, simple male pin headers were soldered directly to the microcontroller and the OLED display.
To achieve the exact spacing between the two components, small plastic spacers—taken from standard pin header strips—were stacked between them.
This approach is simple, effective, and allows for a low-profile layout that fits perfectly into the case.
The images on the slide show exactly how the spacers are removed and re-used for precise alignment.

Wiring and Power
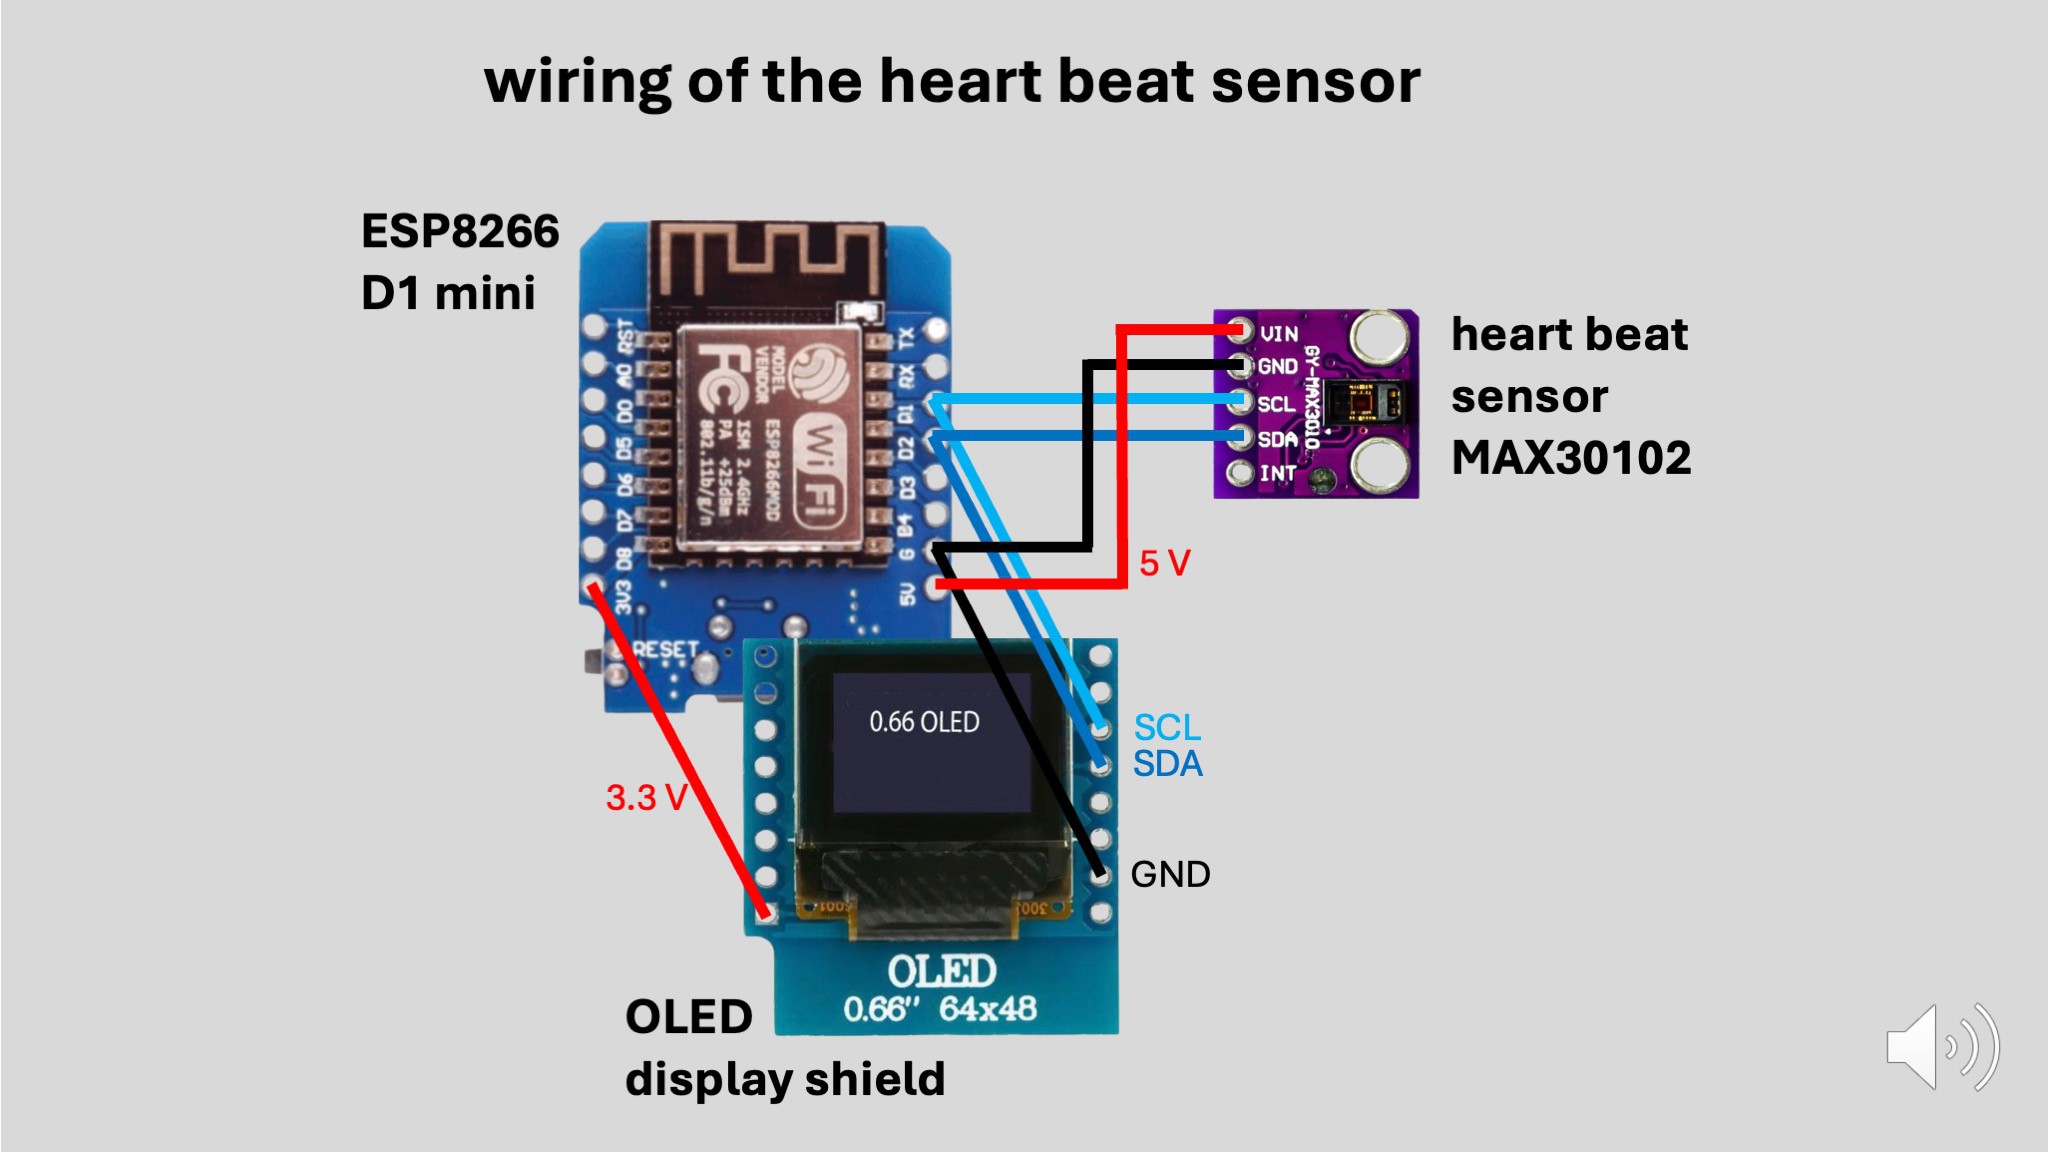
The wiring is simple and uses only four essential connections between the Wemos D1 mini and the OLED display:
- GND (ground)
- 3.3V (power)
- SDA (data)
- SCL (clock)
These are standard I2C lines, which are also shared with the MAX30102 pulse sensor.
The sensor itself is powered via 5V, which is available from the D1 mini’s USB supply.
The entire circuit is powered through the USB port, so no additional power supply or battery is required for basic operation.
This setup keeps the wiring minimal, clean, and easy to replicate—even for beginners.
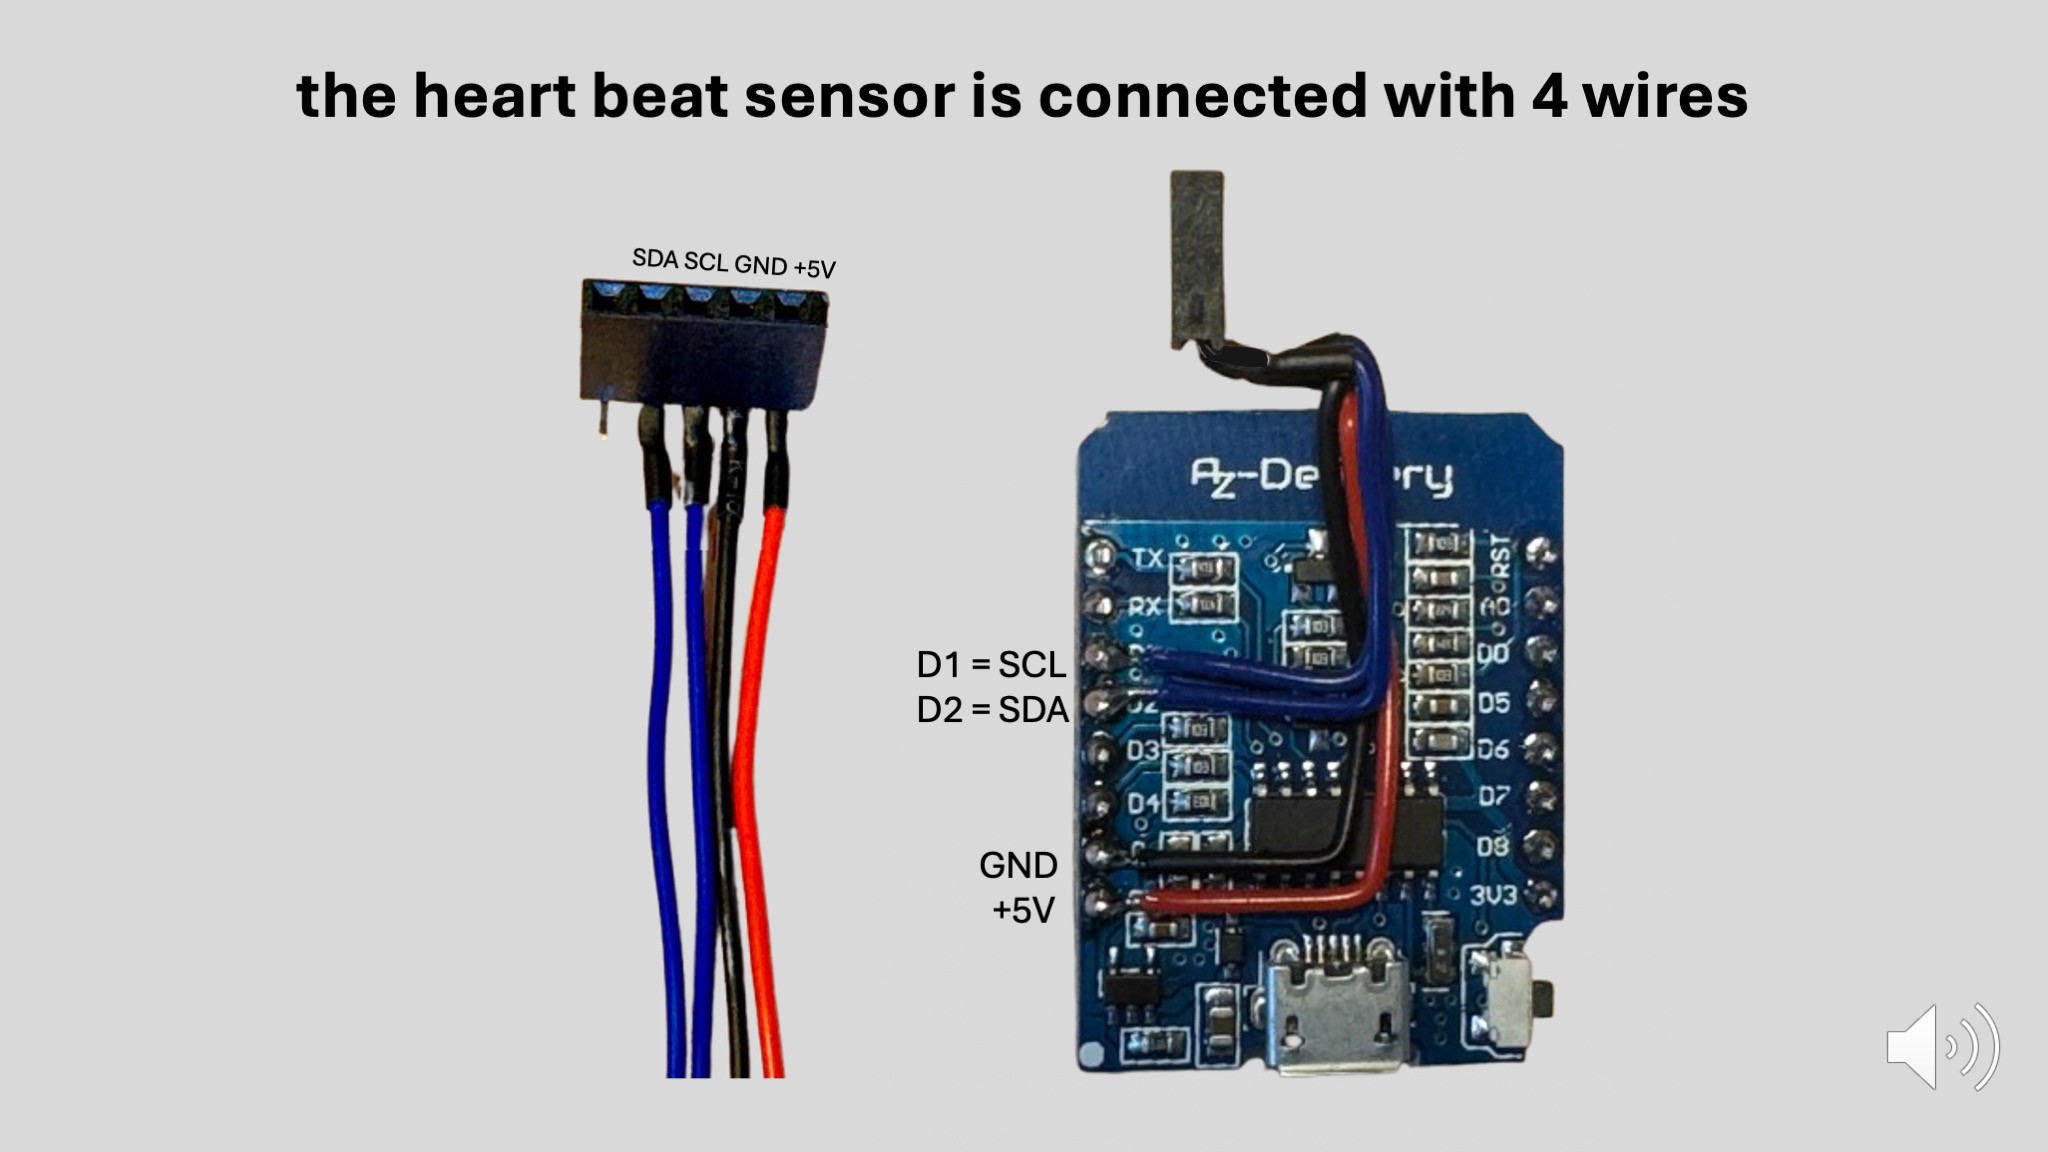
Soldering the Sensor Connector
To connect the MAX30102 pulse sensor, a 4-pin connector is soldered directly to the back side of the Wemos D1 mini.
This approach keeps the wiring compact and out of sight, allowing for a cleaner build and easier assembly within the tight space of the custom 3D-printed case.
The four wires—GND, 5V, SDA, and SCL—are then connected from this header to the sensor.
This method avoids clutter on the top side and contributes to the device’s neat and integrated look.
Final Assembly
With all components prepared, the final assembly begins.
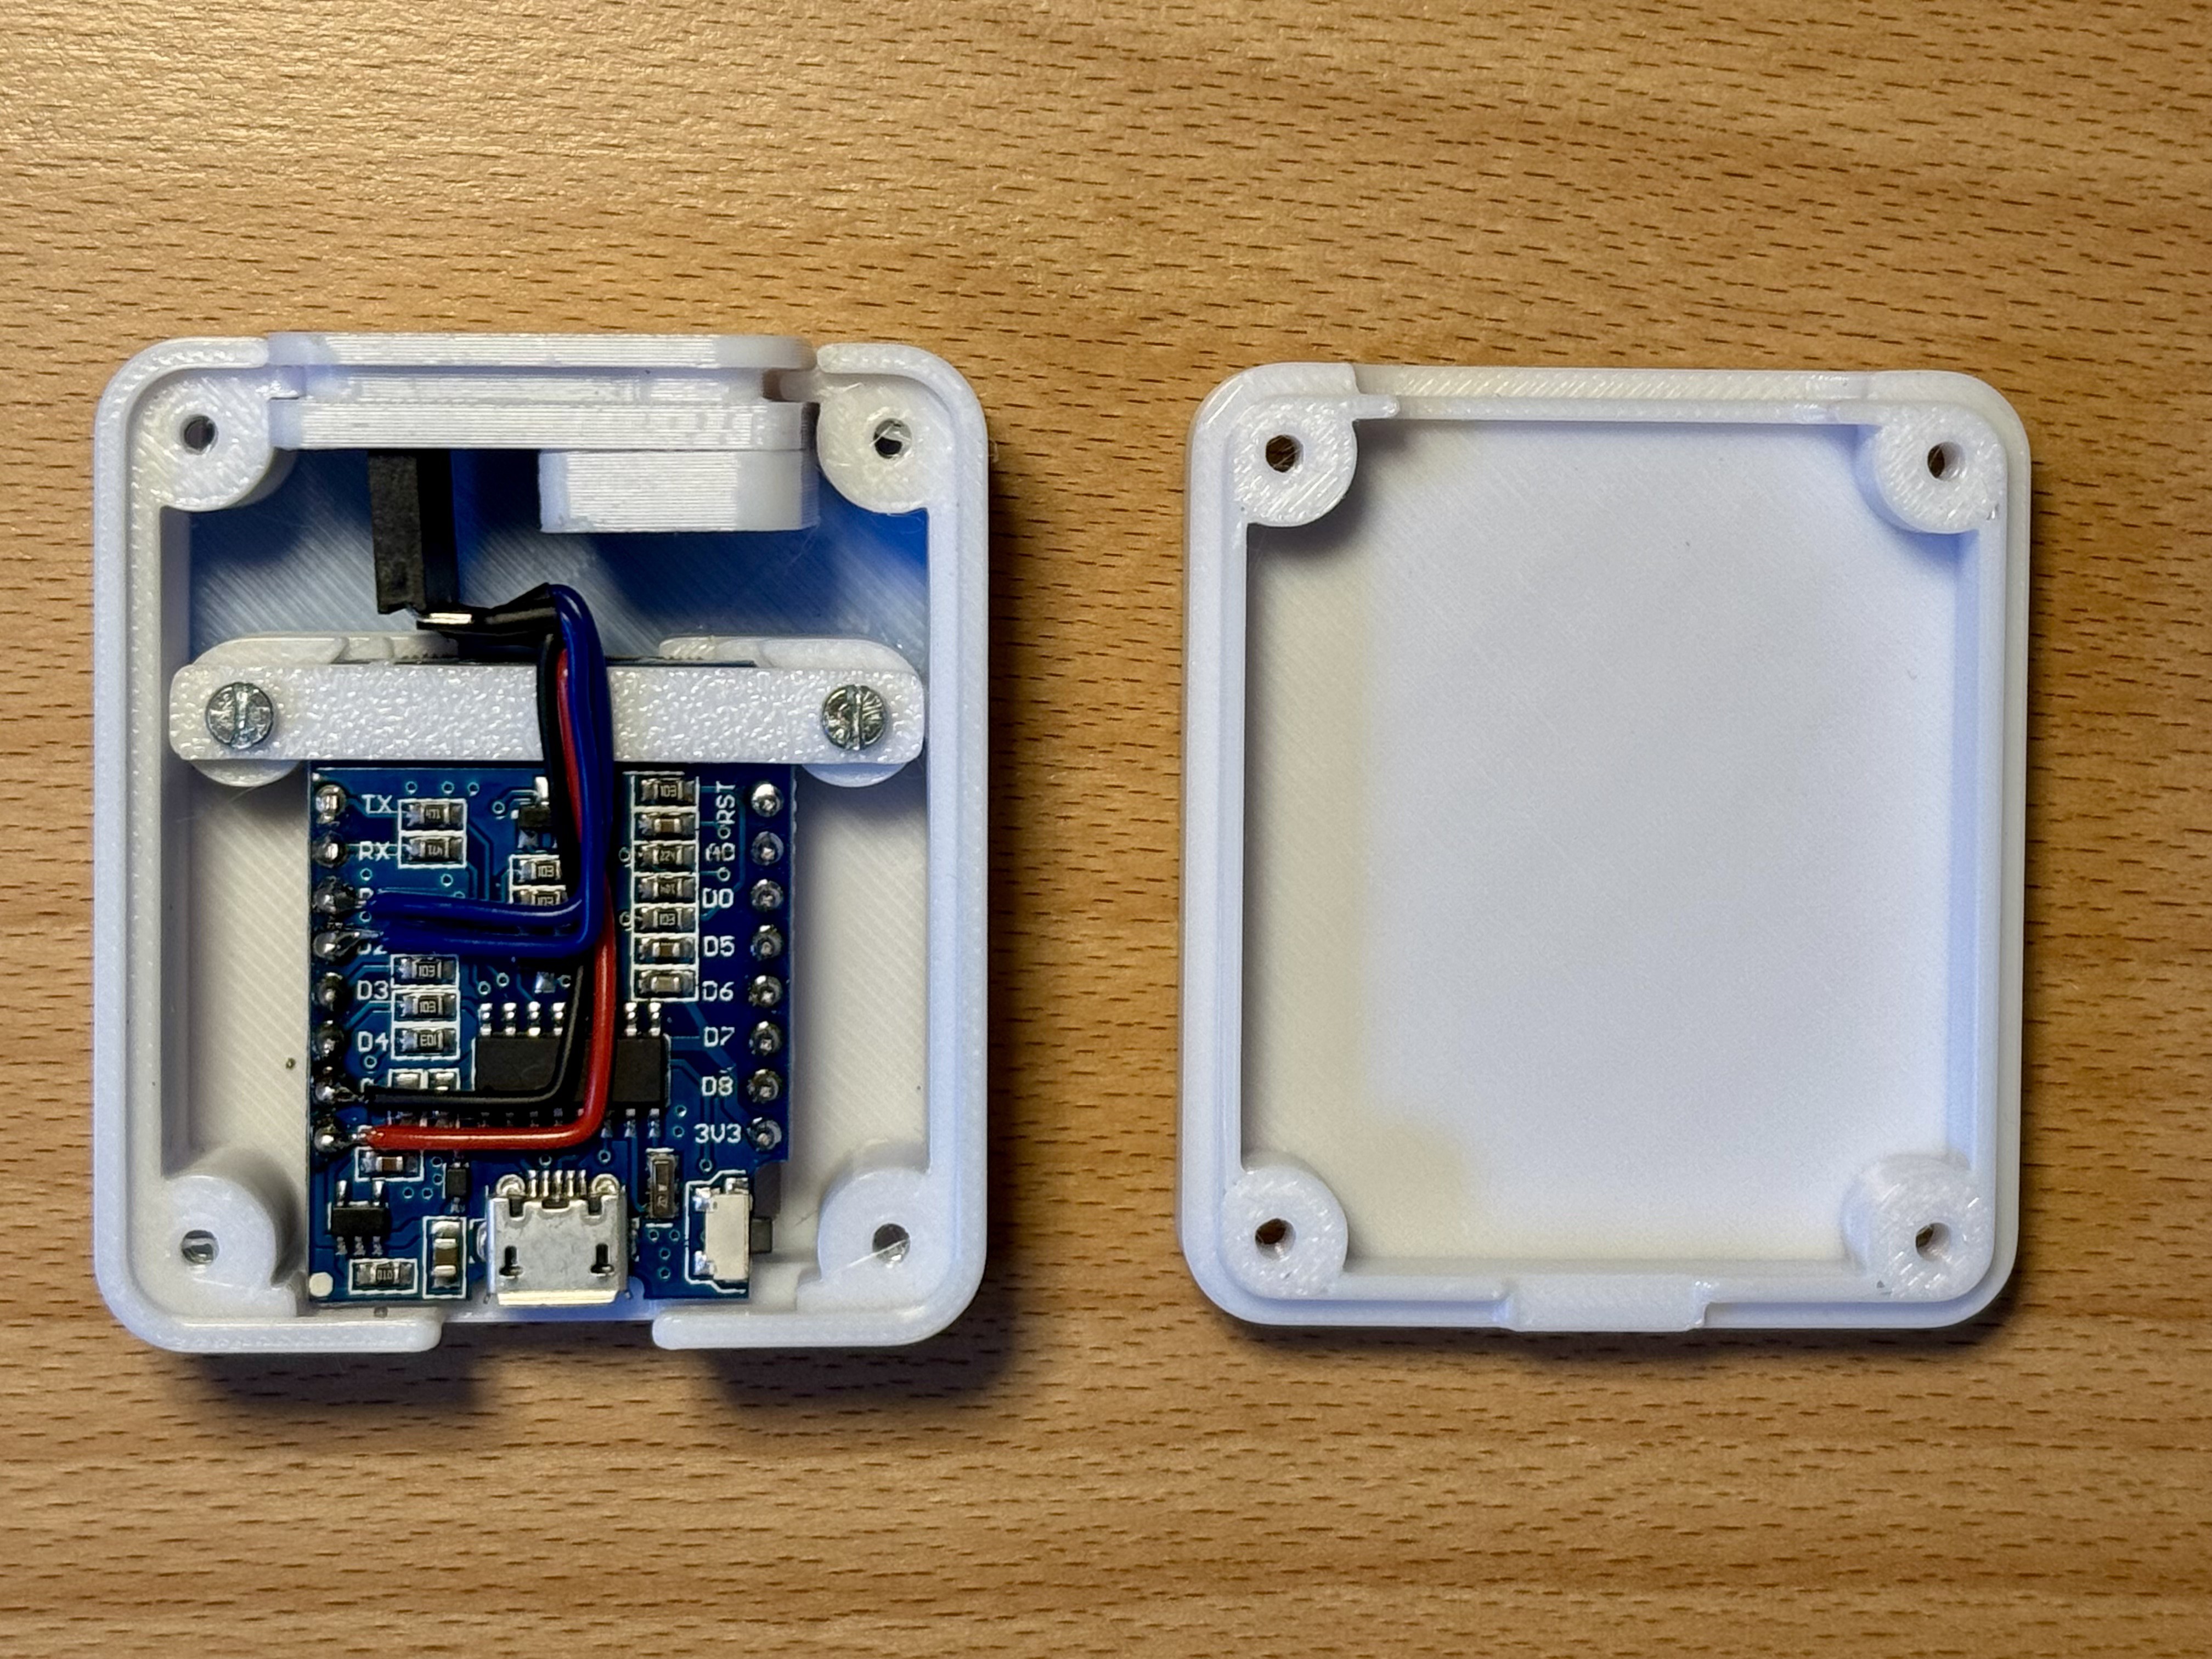
The microcontroller with the OLED display is mounted into the top section of the case using a small bracket.
The MAX30102 sensor is inserted into its dedicated holder and secured with a clip from above.
Once everything is in place, the bottom cover is attached, enclosing all electronics in a compact and robust housing.
To keep the video concise, this step is shown at increased playback speed — but as you’ll see, assembly is simple and straightforward.
All STL files for the case are available in the GitHub repository, so you can print and assemble it yourself in no time.
Software – Two Ways to Build and Upload
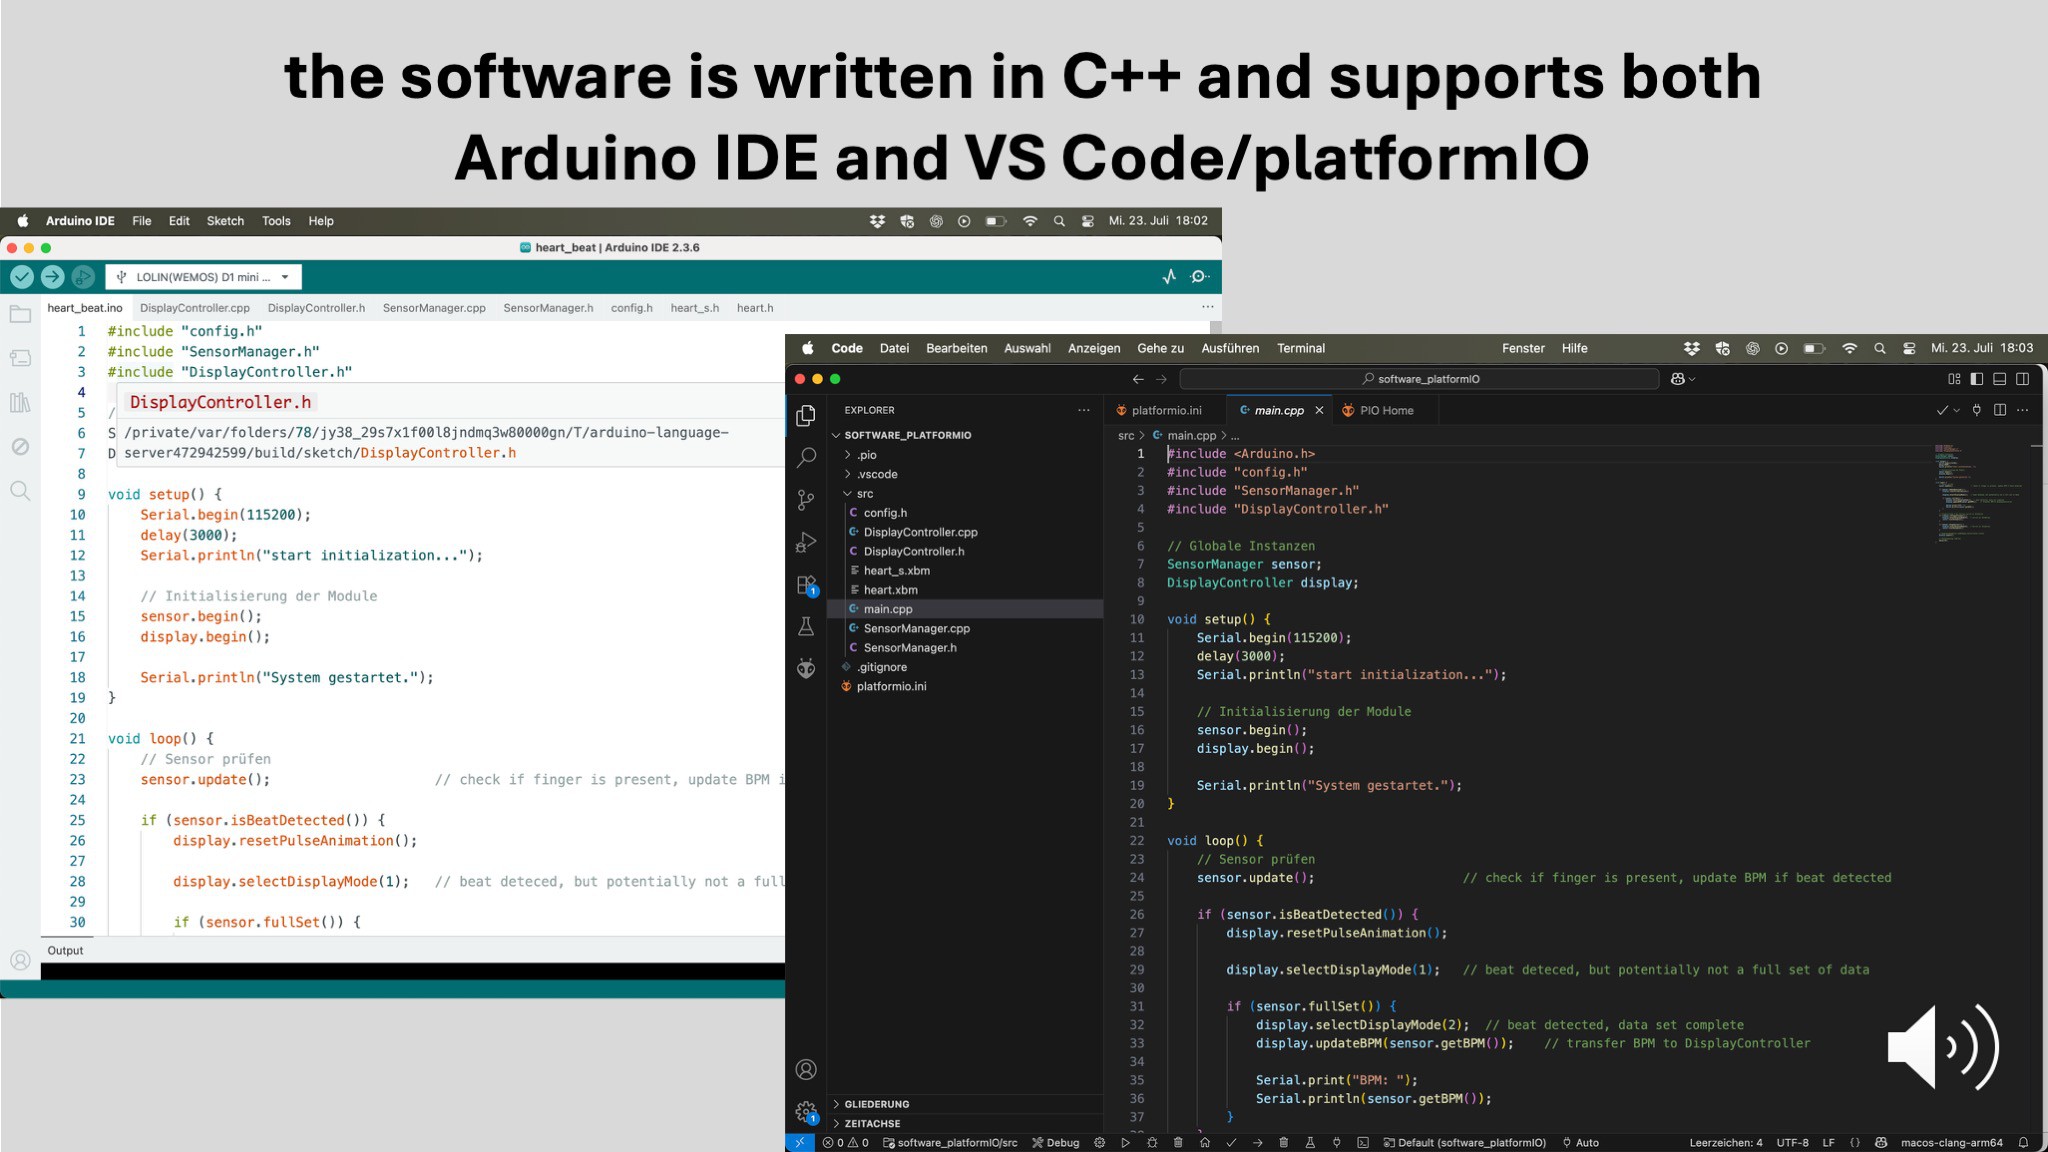
This project supports two development environments, giving you full flexibility depending on your preference and experience level.
Option 1: Arduino IDE
Perfect for beginners or casual makers.
Simply open the heart_beat.ino file in the Arduino IDE, select the “LOLIN (WEMOS) D1 R2 & mini” board, install the required libraries, and upload the sketch to your device via USB.
Option 2: PlatformIO (VS Code)
A more powerful and scalable option for advanced users.
Open the software_platformIO folder in Visual Studio Code with the PlatformIO extension installed.
All dependencies and settings are managed automatically via the included platformio.ini file. Just click “Build” and “Upload” — and you’re done.
Both setups are fully documented in the GitHub repository.
Closing Thoughts
This project is not only a great fit for the One Hertz Challenge, but also a practical and rewarding DIY build.
With a handful of low-cost components and a 3D-printed case, you can build a fully enclosed, portable, and open source heart rate device that actually works.
Whether you’re looking to learn more about biosignals, sensor integration, or just want to bring your heartbeat to life at 1 Hz — this project is for you.