 Edward
Today we successfully tested direct GPIO output control on a Raspberry Pi 4B using C# and .NET 8. Here's a quick recap of the progress:
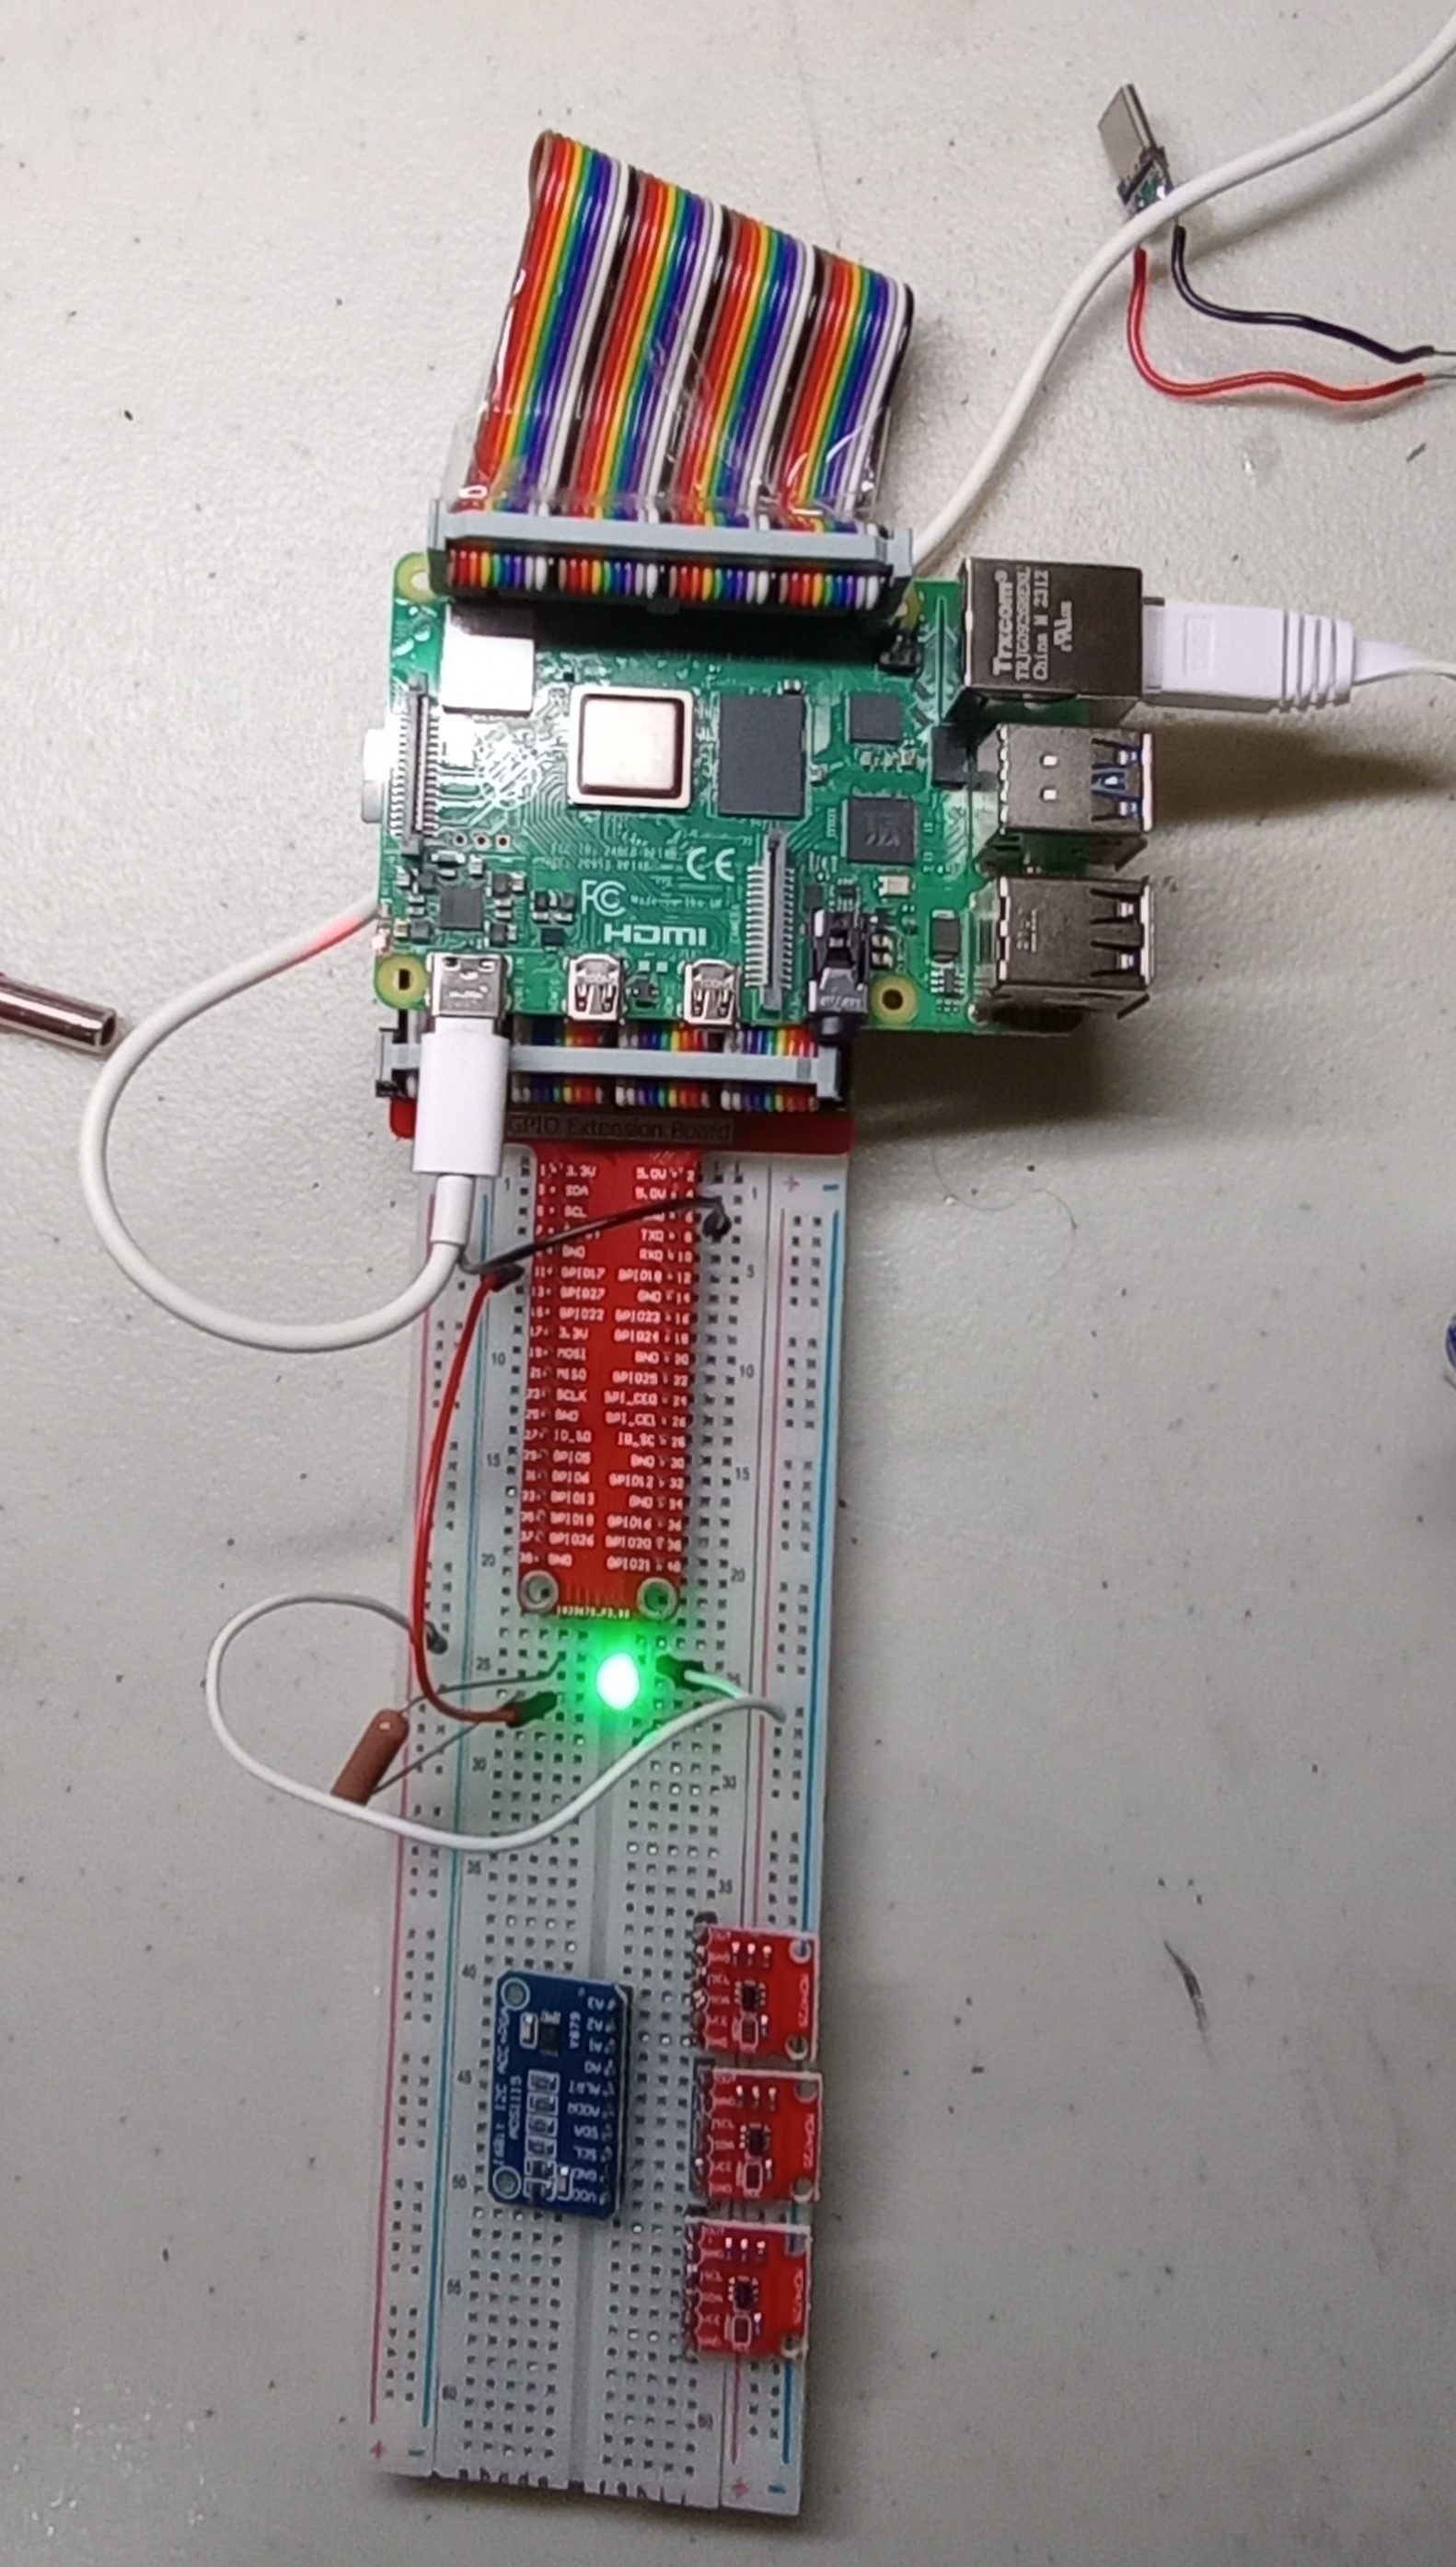
1. GPIO Setup
-
Connected a GPIO extension board to the Pi for easier breadboard access.
-
Wired GPIO17 to an LED through a 1kΩ current-limiting resistor.
-
Verified voltage with a multimeter before connecting the load.
2. Power Supply
-
Initially used a SANMIM switching supply that delivered 4.9V.
-
Swapped it out for a different supply delivering 5.04V to ensure the Pi was properly powered.
3. C# Code
-
Created a minimal console application in Visual Studio targeting .NET 8.
-
Used the
System.Device.Gpiolibrary to control GPIO17. -
Wrote code to drive the pin high for 10 seconds, then set it low.
-
Observed GPIO17 output go to 3.3V, and the LED lit up brightly as expected.
4. Outcome
-
GPIO test was a success using C# only, no Python required.
-
This lays the foundation for moving forward with the MCP23017 I/O expander in future phases.
Code
using System;
using System.Device.Gpio;
using System.Threading;

class Program {
    static void Main() {
        int pin = 17; // GPIO17
        using var controller = new GpioController();

        controller.OpenPin(pin, PinMode.Output);
        Console.WriteLine("Setting GPIO17 HIGH (3.3V)");
        controller.Write(pin, PinValue.High);

        Thread.Sleep(10000); // Hold for 10 seconds

        Console.WriteLine("Turning GPIO17 LOW (0V)");
        controller.Write(pin, PinValue.Low);

        controller.ClosePin(pin);
        Console.WriteLine("Done.");
    }
}
Discussions
Become a Hackaday.io Member
Create an account to leave a comment. Already have an account? Log In.