 Ai-Thinker
Environment Setup
The official example documentation provides very detailed instructions. You can check this article: BW21-CBV-Kit — Arduino Environment Setup Tutorial
One thing worth mentioning is the chip package download. Some people may encounter issues downloading Arduino.
If manual downloading feels troublesome, try switching to different networks. For example, I couldn’t download with my broadband, but switching to mobile data worked instantly.
Example
After setting up the environment, we can test some example code. There are many demos available.
I tried an object recognition demo. The detailed AI code can be found here:https://fcniufr8ibx1.feishu.cn/wiki/S9ShwrLeai0vBDkV8HAcuFLXn5g
- Select the correct serial port.
- Choose the example code.
- Configure your Wi-Fi SSID and password in the code so that the video stream can be viewed on your computer.
Press the reset button, compile and upload the code, then reboot to wait for Wi-Fi connection.
- Note: Some users may face Wi-Fi connection issues. Often this is due to the PC hotspot. For example, my PC hotspot couldn’t even connect to my phone, so instead I used my phone’s hotspot, connecting both the development board and my computer to it.
If everything works fine, open the serial monitor. You’ll see the connection link, which you can open in a browser.
Once opened, it redirects to a video stream where you can see the recognized images.
This was my experience setting up the environment and testing the code. The examples are very detailed, and following the steps makes everything work quickly. The documentation is truly comprehensive and very user-friendly.
The code I used was based on the official object recognition example.

 Norbert Zare
 Lutetium
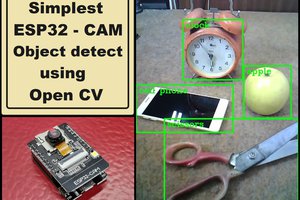
 mircemk
 Louis H