 Mihai Oltean
I built a multifunctional roof with 2 slopes:
- On the north side, I have built a small vegetable garden.
- On the south side, I have installed solar panels,
The roof has a single layer, meaning there is NO tile under the solar panels, nor under the pots in which the vegetables grow!
There are multiple reasons for which I initiated this project:
- Roofs have large surfaces, but they are used for only one purpose: to protect the house from rain and snow. We should have more benefits from these large surfaces! For example, we could get electricity and food from these surfaces!
- Solar panels are mounted on top of the tiles. There are 2 layers basically. This is a waste of material, because solar panels are resistant enough to protect the house from rain and snow. They can be used as tiles. But it needs to be well insulated!
- Vegetables need little soil while trees need a lot more. We could plant only trees at ground level and vegetables on the roof.
- I started with an old roof, which needed renovation.
The building on which I built the roof has a footprint of 15x7m. Currently, on the South side, I have installed solar panels spanning a width of 6.5m. On the North side, the hanging garden is 1.3m wide and 4.5m long. The rest of the roof is covered with sheet metal tiles. I plan to extend the ideas to the entire roof, depending on the test results.
I made the roof structure of iron. I tried to avoid wood as much as possible. Trees have a much more important function than being used in construction: to produce clean air! I did use wood for the laces under the tiles, for the support of the plant gutters, and on the front side (OSB).
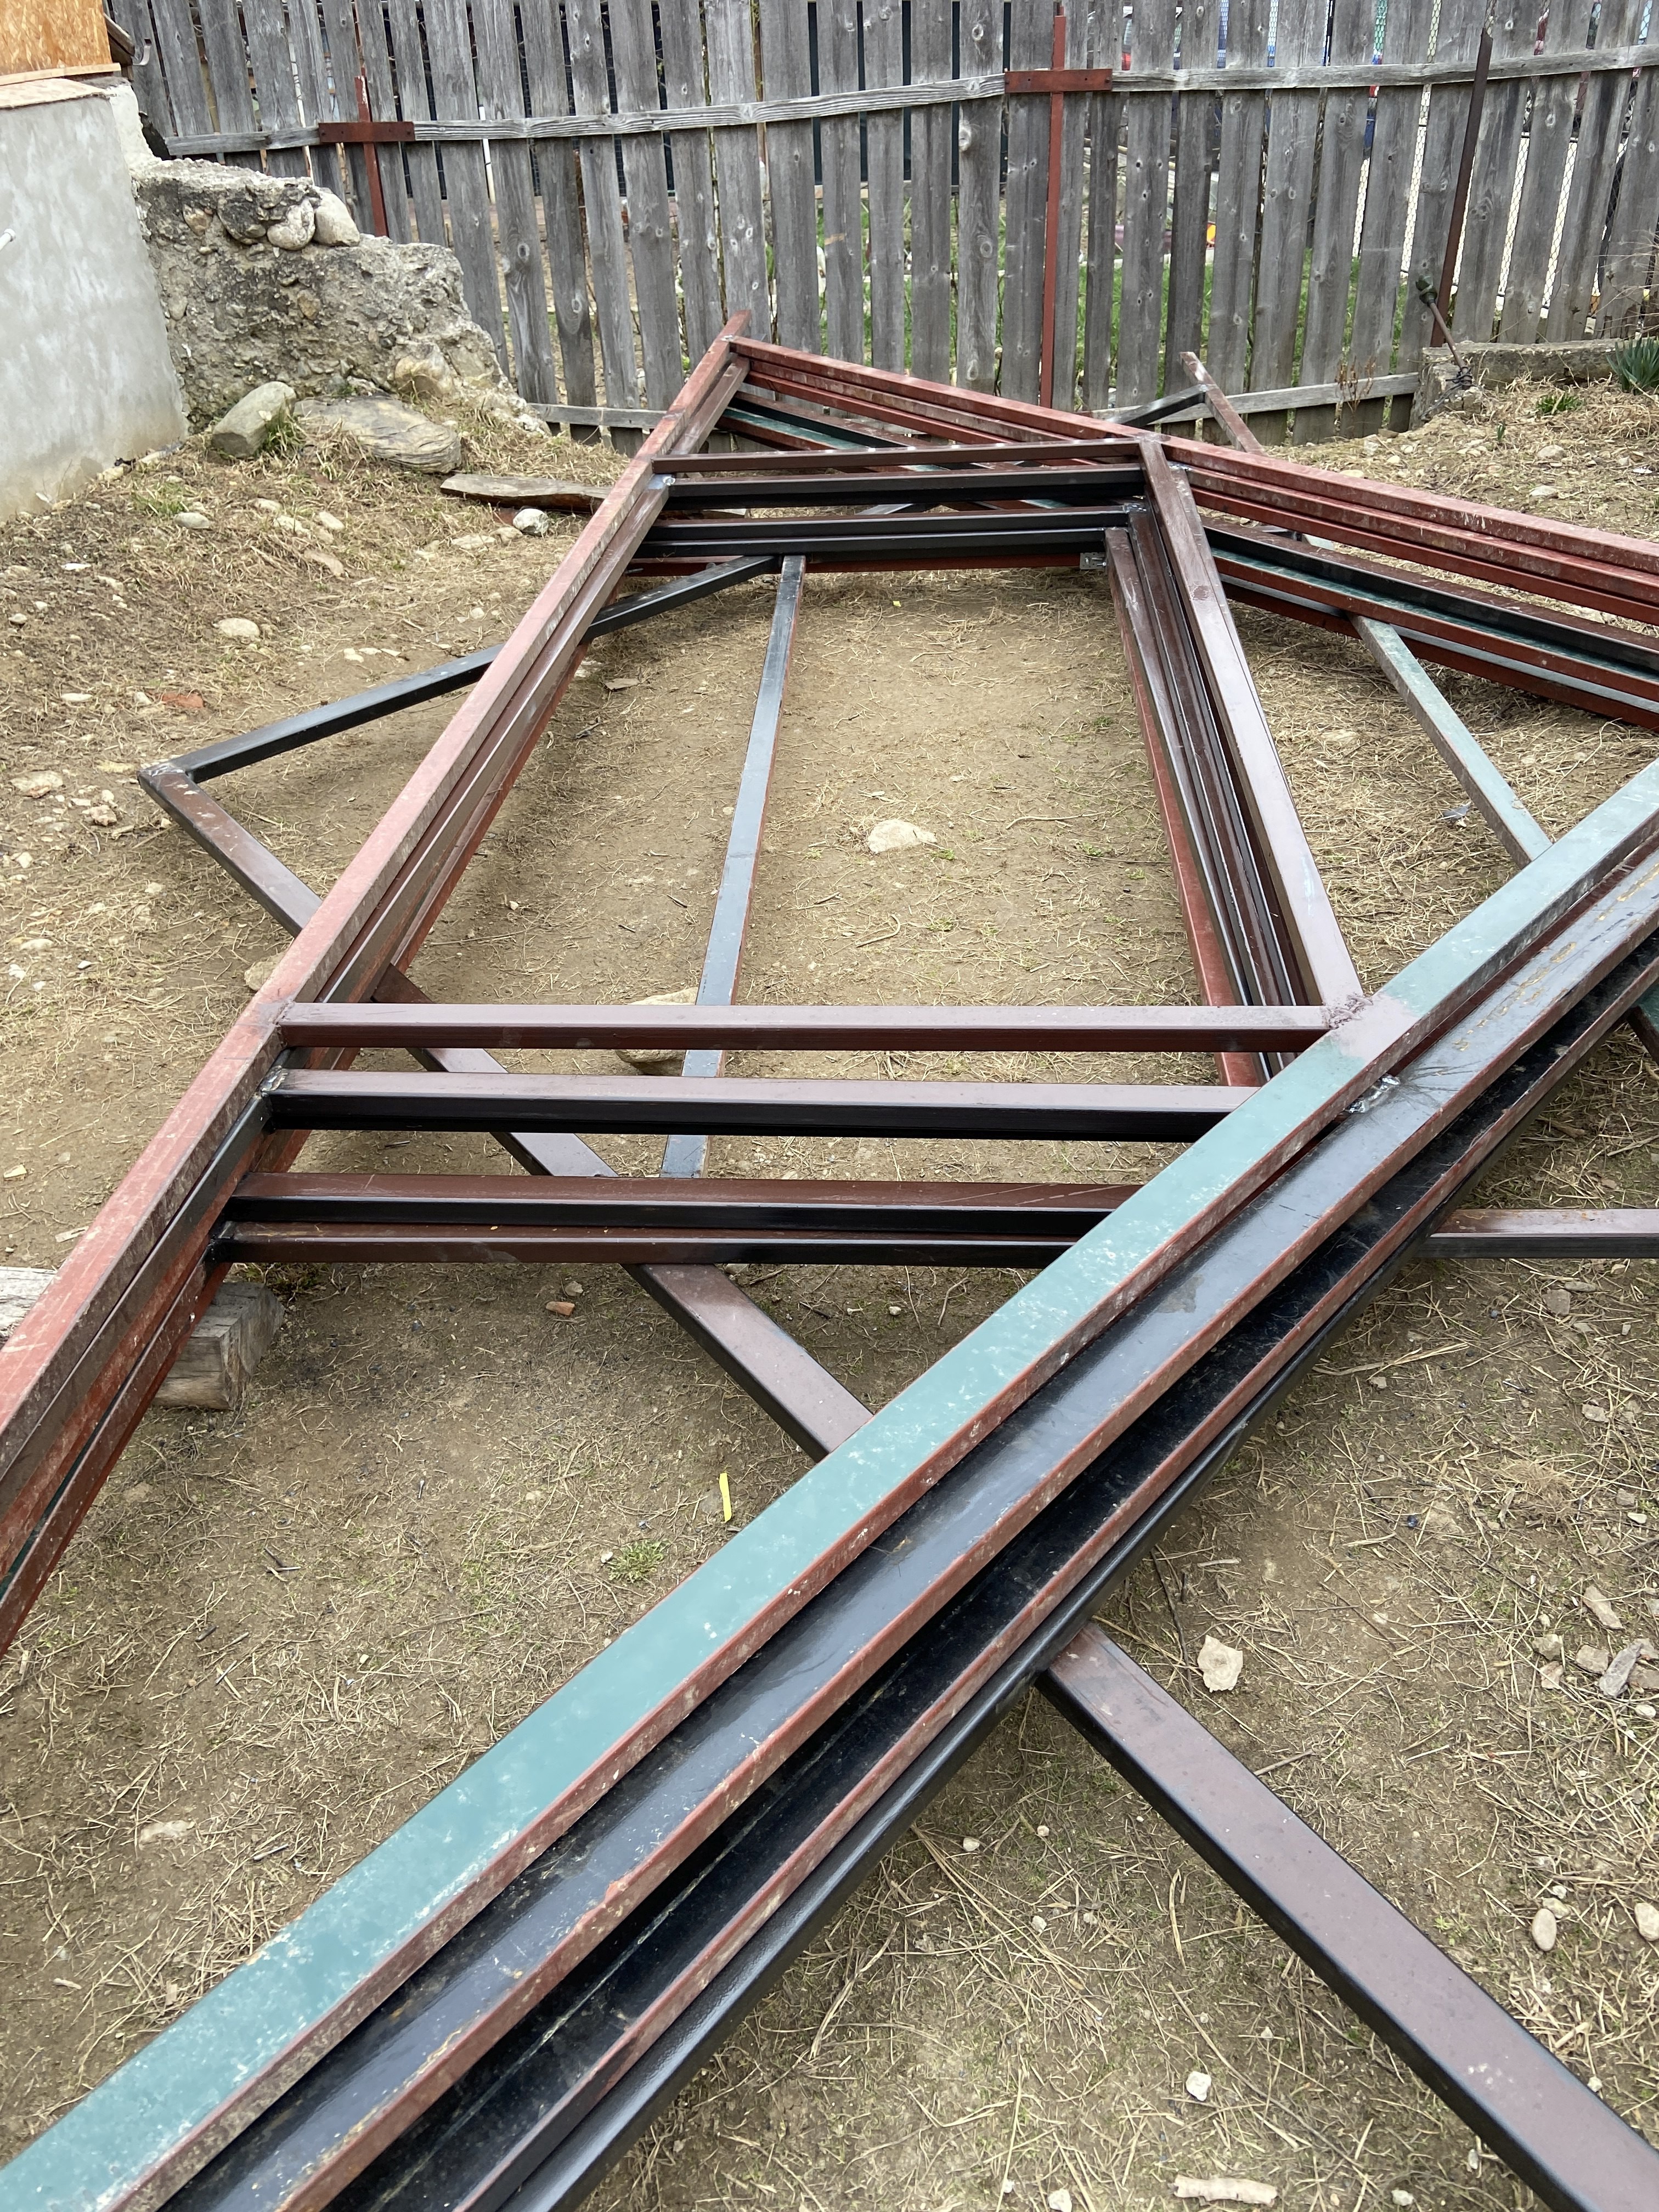
Initially, I intended to build everything in Lego style, without welding, only by mechanical fastening. The beams, rafters, etc. should have been connected only by screws. I built 2 trusses in this way, but then I gave up because the iron at that length (7m) was deforming and the components were no longer joining properly.
The trusses (queen type) are built from an 80x40x3 profile, but with a 60x40x3 base and interior elements. One truss weighs approximately 100 kg. I used 13 supports along the entire length of the house.
The solar panels are placed between T40 metal profiles. I attached the panels to the T40 from inside the attic. Between the profiles and the panels I left a 3-4mm space in which I put silicone. Due to the incorrect application of the silicone (a beginner's mistake), a few holes were left through which water entered. So, I had to put a bituminous waterproofing tape, which would not have been necessary if I had applied the silicone correctly.
The vegetables are grown in rectangular gutters (cisterns) (120x90) made of 0.6 mm sheet metal. The angle of the roof (38 degrees) is calculated so that these gutters fit together perfectly (the bottom corner of one ends where the top corner of the next begins).
The gutters are placed on two wooden supports (a board 4.5m long, 14 cm wide and 4cm thick) cut in steps. The insulation between the gutters is made with a 75mm wide bituminous tape. I attached the gutters to the wooden support with self-tapping screws. Inside the gutters, I put (only close to the ends) pieces of wood so that I could step on them when I climb up to take care of the vegetables. But in the future, I will put some pieces of 80x80 pipe as a support for the leg.
At the moment, I have grown tomatoes and peppers, which have borne fruit. I have also sown lettuce and spinach, but they have come out very poorly (I only sowed them in July), and a few days ago I threw some wheat grains on them, which have sprouted very well.
There is a lot to say about this project. Some details (but not all) can be found on the project website. It took me personally 2 years to implement it (from the moment I started designing), and I was helped (ideas+work) by several friends. I have changed the design several times, and I have bought many materials that I have not used later. It also requires...
Read more »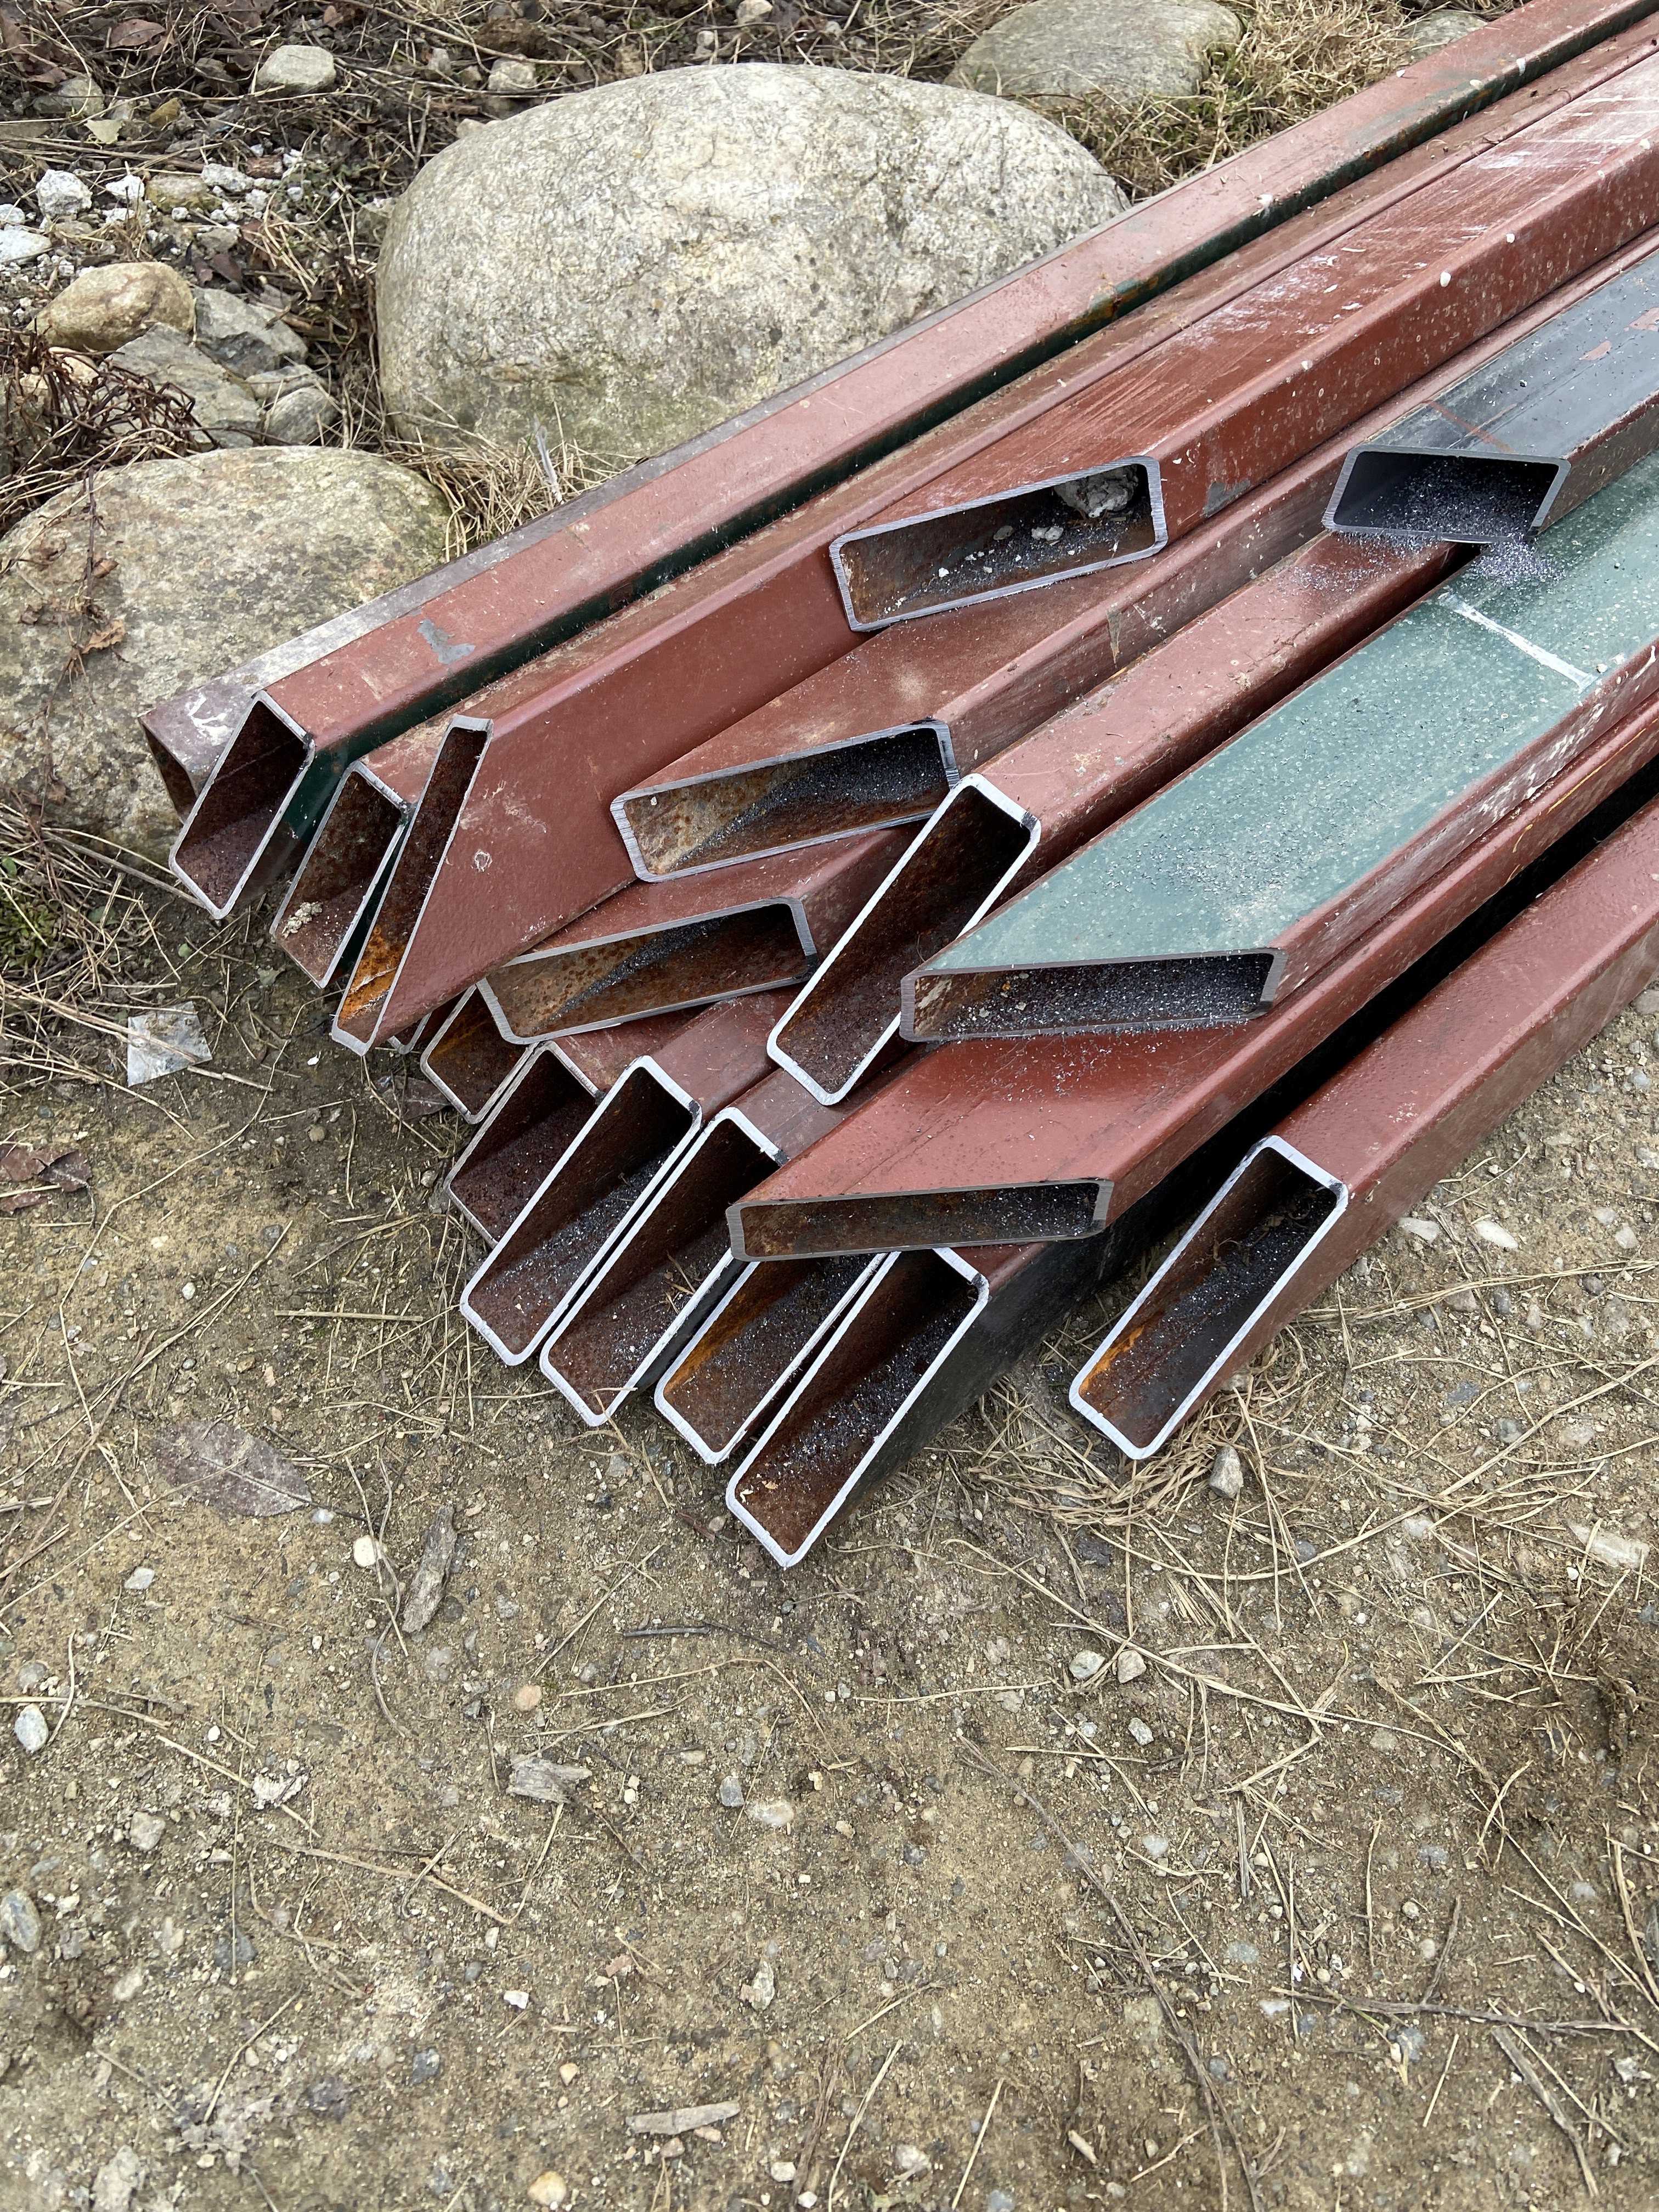

 Glytch
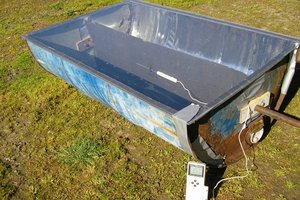
 the.fedora
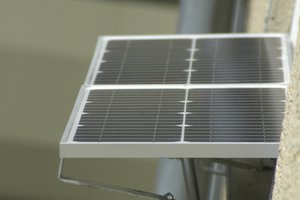
 Jack Pearse