 Stephen G
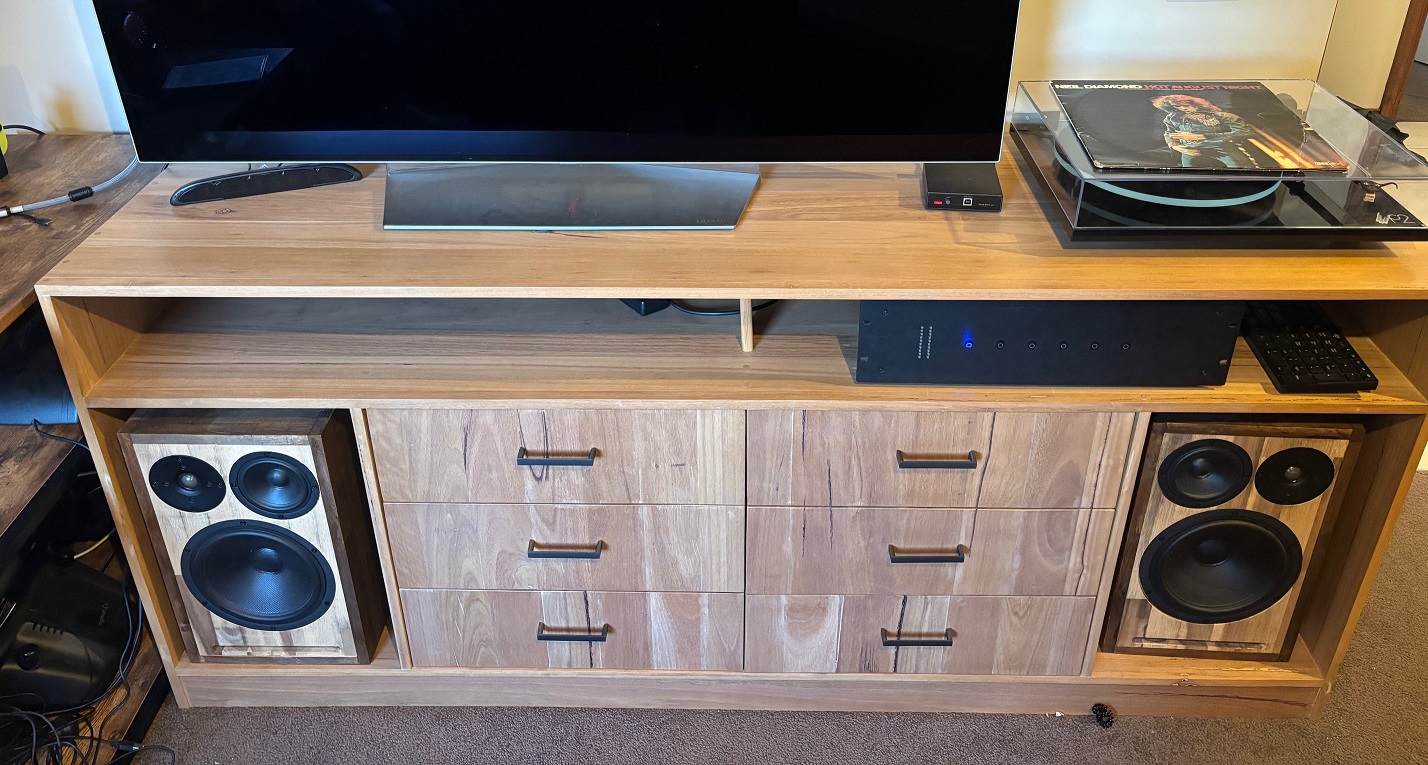
The vision for this project was to be able to source audio from analog inputs (e.g. record player, TV), and use a software crossover to enable fully customisable (and tweakable) audio processing. In addition, I wanted all of the amplification inside the same box, and I wanted it to look semi-professional. I am pretty happy with the way it has turned out.
It's based around the ezsound-6x8 multichannel soundcard for the Pi5 which I designed from scratch. You can find the writeup of that project here. I am hoping to launch this soundcard on Crowdsupply in the near future - if you are interested, please leave a comment!
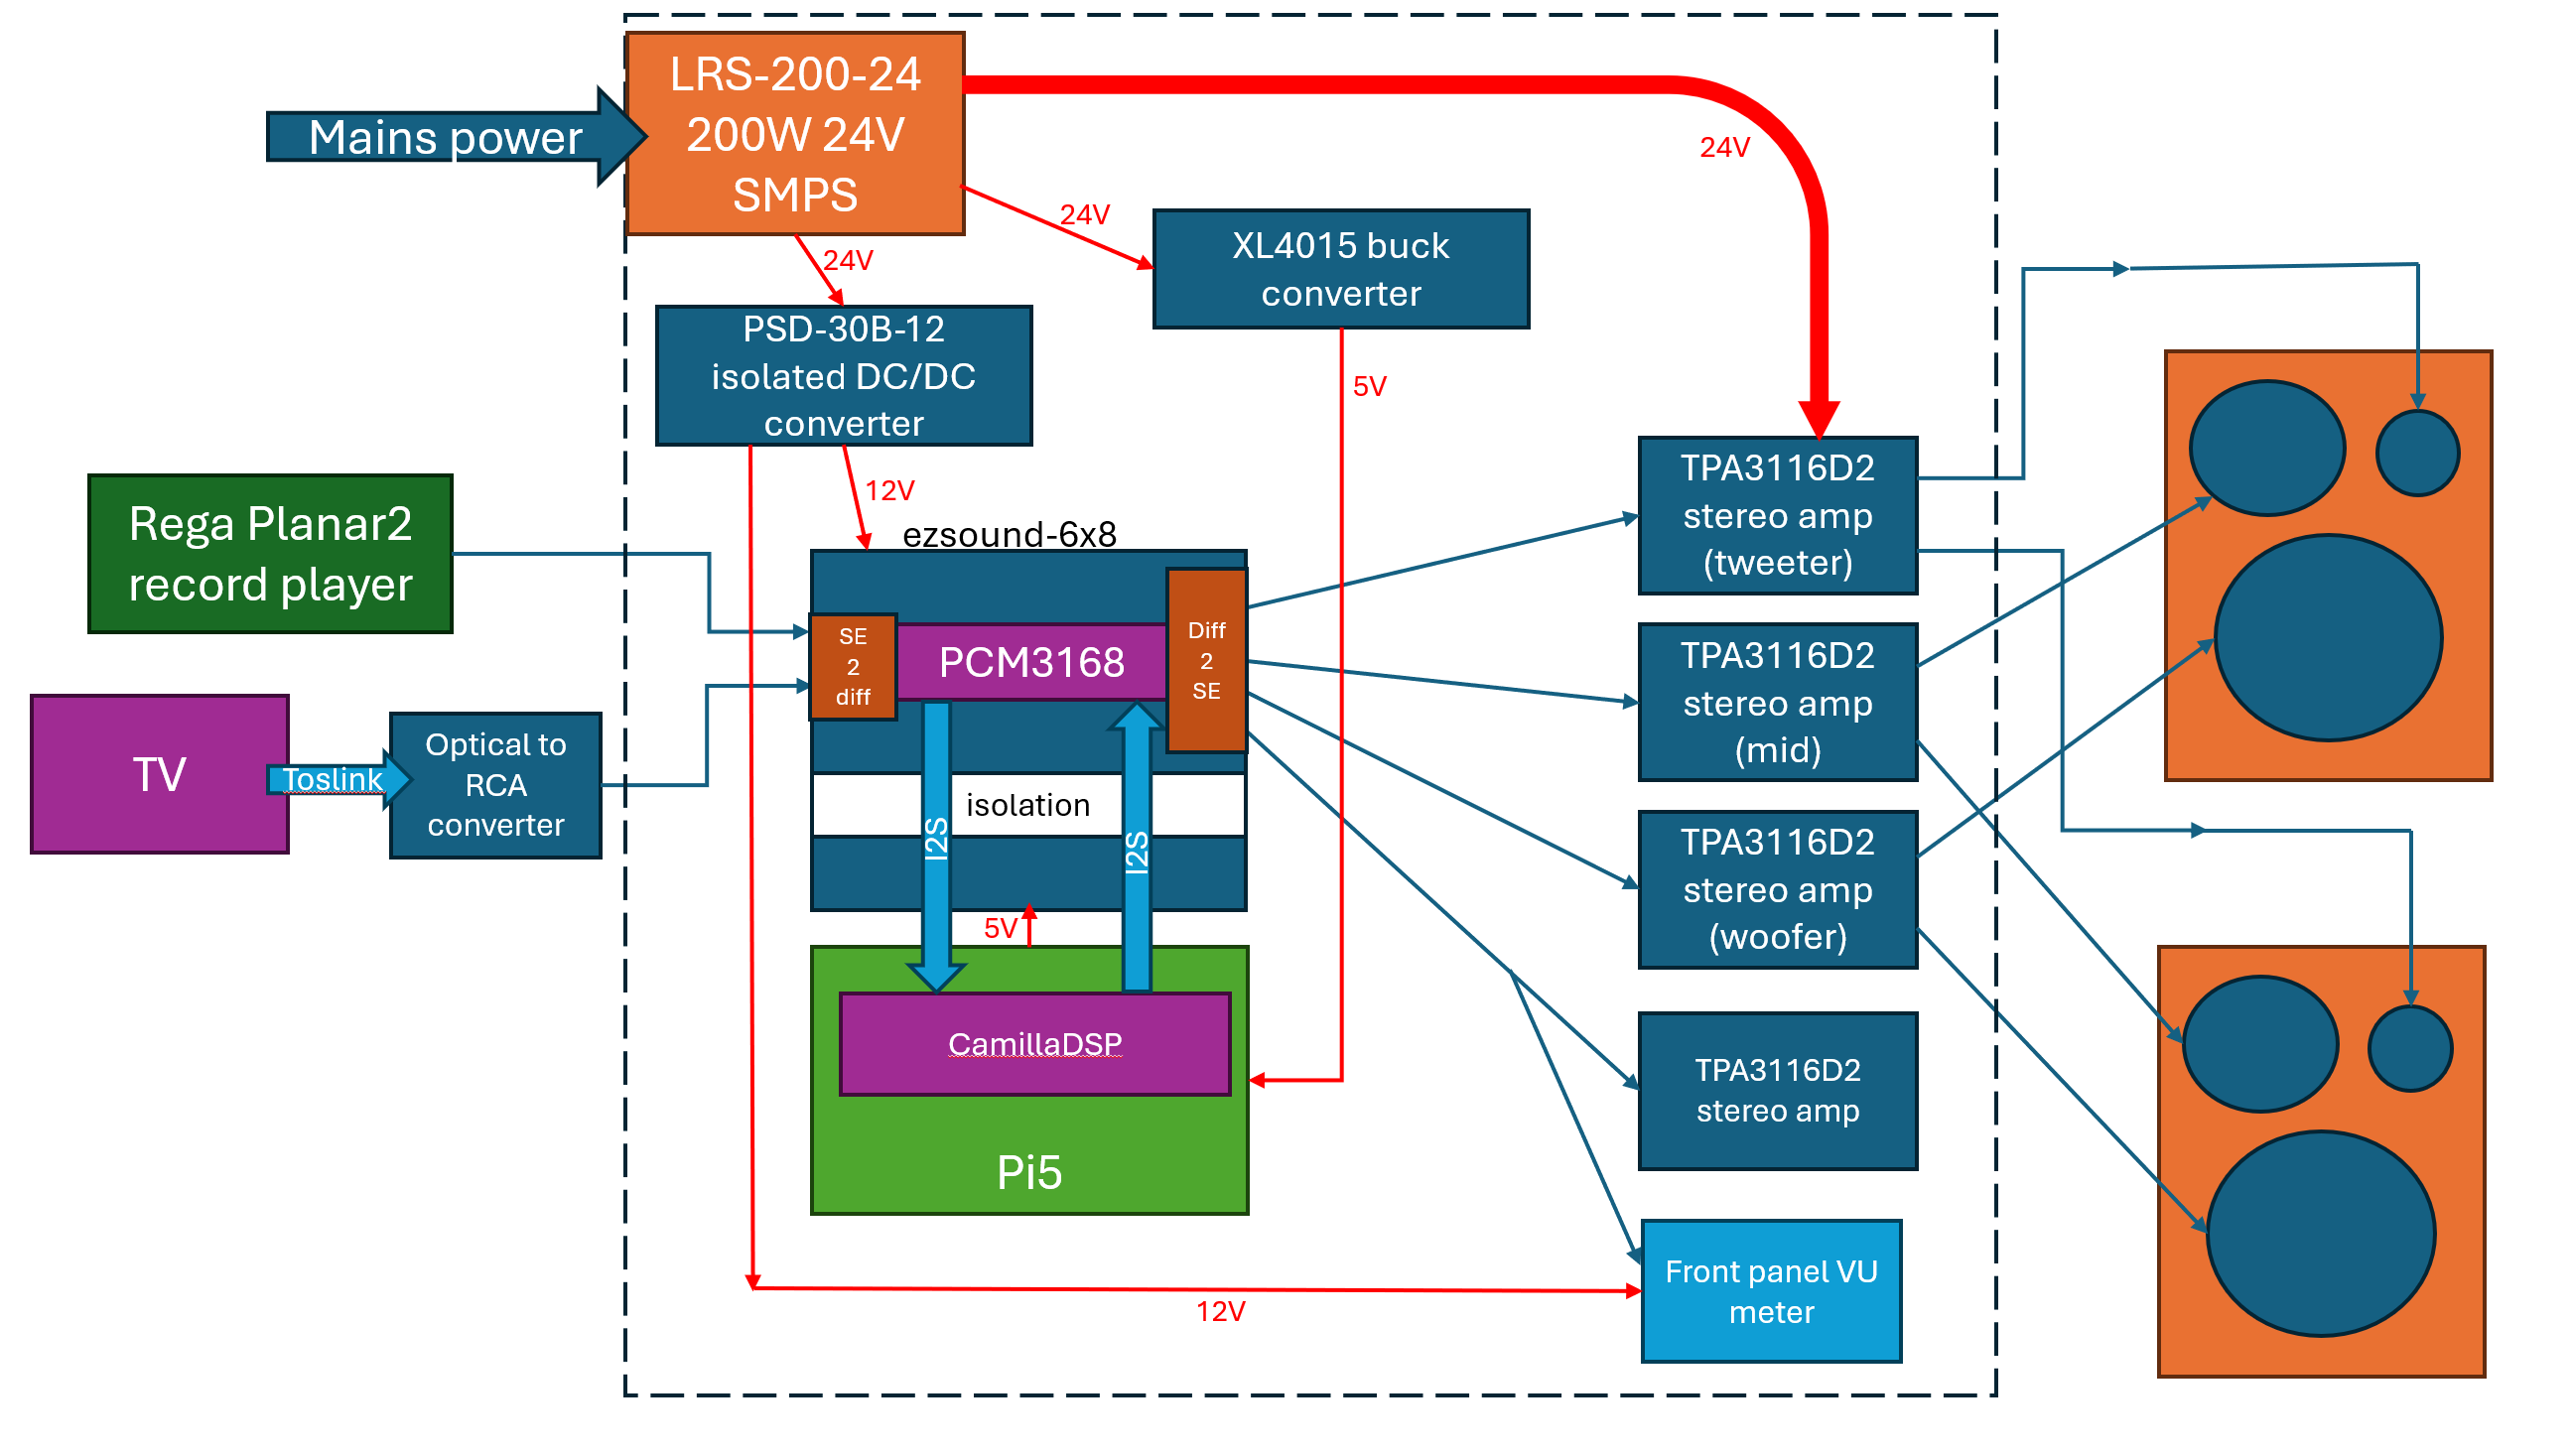
Here's the layout of the eventual system. As you can see, the inputs are fed into the ezsound-6x8, which converts them to digital. This is fed to the RPi's I2S input and processed by the incredible CamillaDSP engine. This acts as a crossover, and outputs 8 channels. There's a stereo pair for tweeter, mid and woofer, and finally an unmodified monitor output which feeds a front panel VU meter. Pretty simple, right?
I'll talk through the different pieces one by one.
Power
I used Meanwell power supplies to generate 24V DC (required by the amps) and to step that down to 12V (for the soundcard and panel meter). I used a cheap XL4015 buck converter from Aliexpress to power the Pi. One thing worth mentioning is the method for connecting the Pi. I took a USB-C to USB-A cable, cut off the USB-A end. I attached the black and red cables from inside the USB cable to the buck converter output. I prefer this approach because the USB-C plug is rated to several amps, and jumper wires are not.
Regarding the LRS-200-24 AC/DC SMPS - if you look at the build photos, you'll see I have been very careful to fully shield all mains components - the stuff that looks like cardboard is actually an insulating material that covers the SMPS terminals completely (holes allow the insulated wires to exit). The mains leads (blue and brown) from the master switch run all the way along between the SMPS and case to get to the input terminals, which are located on the same end as the ouput terminals. Originally, I was using the 350W version which has a fan, but the fan was way too noisy and I didn't need the extra power.
Going with a high-quality prebuilt 24V-12V DC/DC converter to supply the analog audio side of the soundcard was a no brainer for me, because this is the part which is the most sensitive to noise. On the other hand, the Pi is not fussy and I just bought a buck converter from Aliexpress that can provide enough current.
Amplifiers
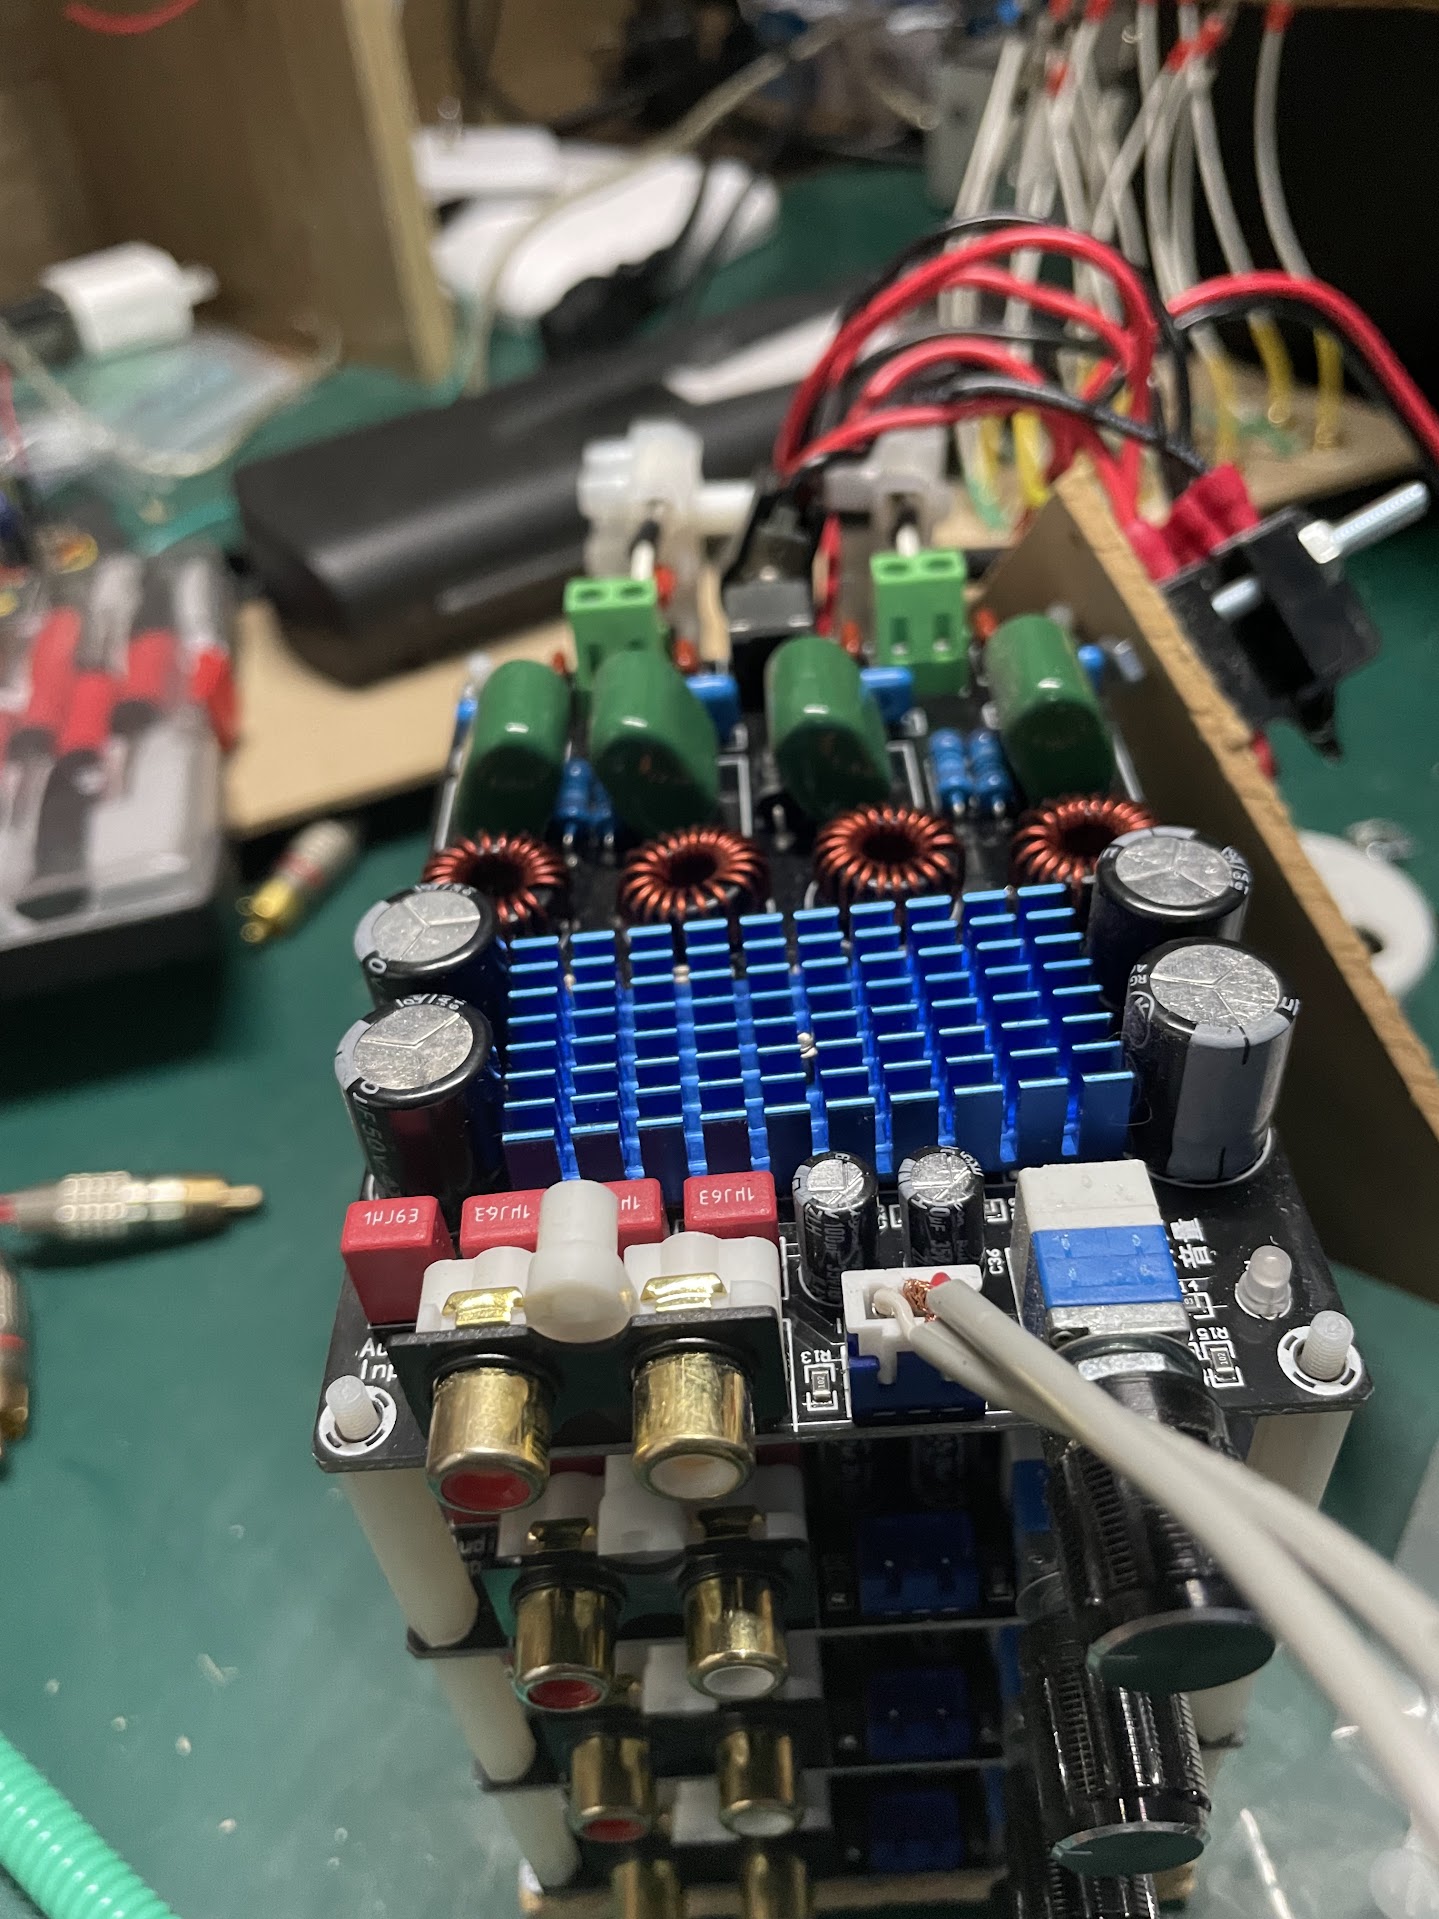
I ordered four amplifier boards from Aliexpress, and made some customisations as described in this DIYAudio post. These Class D (aka chip-amp) boards have one TPA3116D2 chip in BTL configuration for each channel, and use high quality parts. They cost me less than $10 USD each in 2020! Unfortunately they were configured with maximum-gain setting, resulting in hiss when nothing is playing, but the modifications fixed that (bringing gain down to 20dB). They are no longer available, but there's plenty of choice for stereo amplifiers boards out there. Unfortunately, a lot of them are crap. BTW, you don't need much power if you have an amplifier for each driver and no losses in a crossover! In hindsight, I could have used something much smaller, but I had no way to know that.
As you can see in the photos, I made them into a quadruple-decker "amp sandwich" and mounted them vertically.
Pi5 + ezsound-6x8
You can read about the design and build of the soundcard on its project page. The actual crossover is implemented in CamillaDSP and the processing pipeline is shown below.
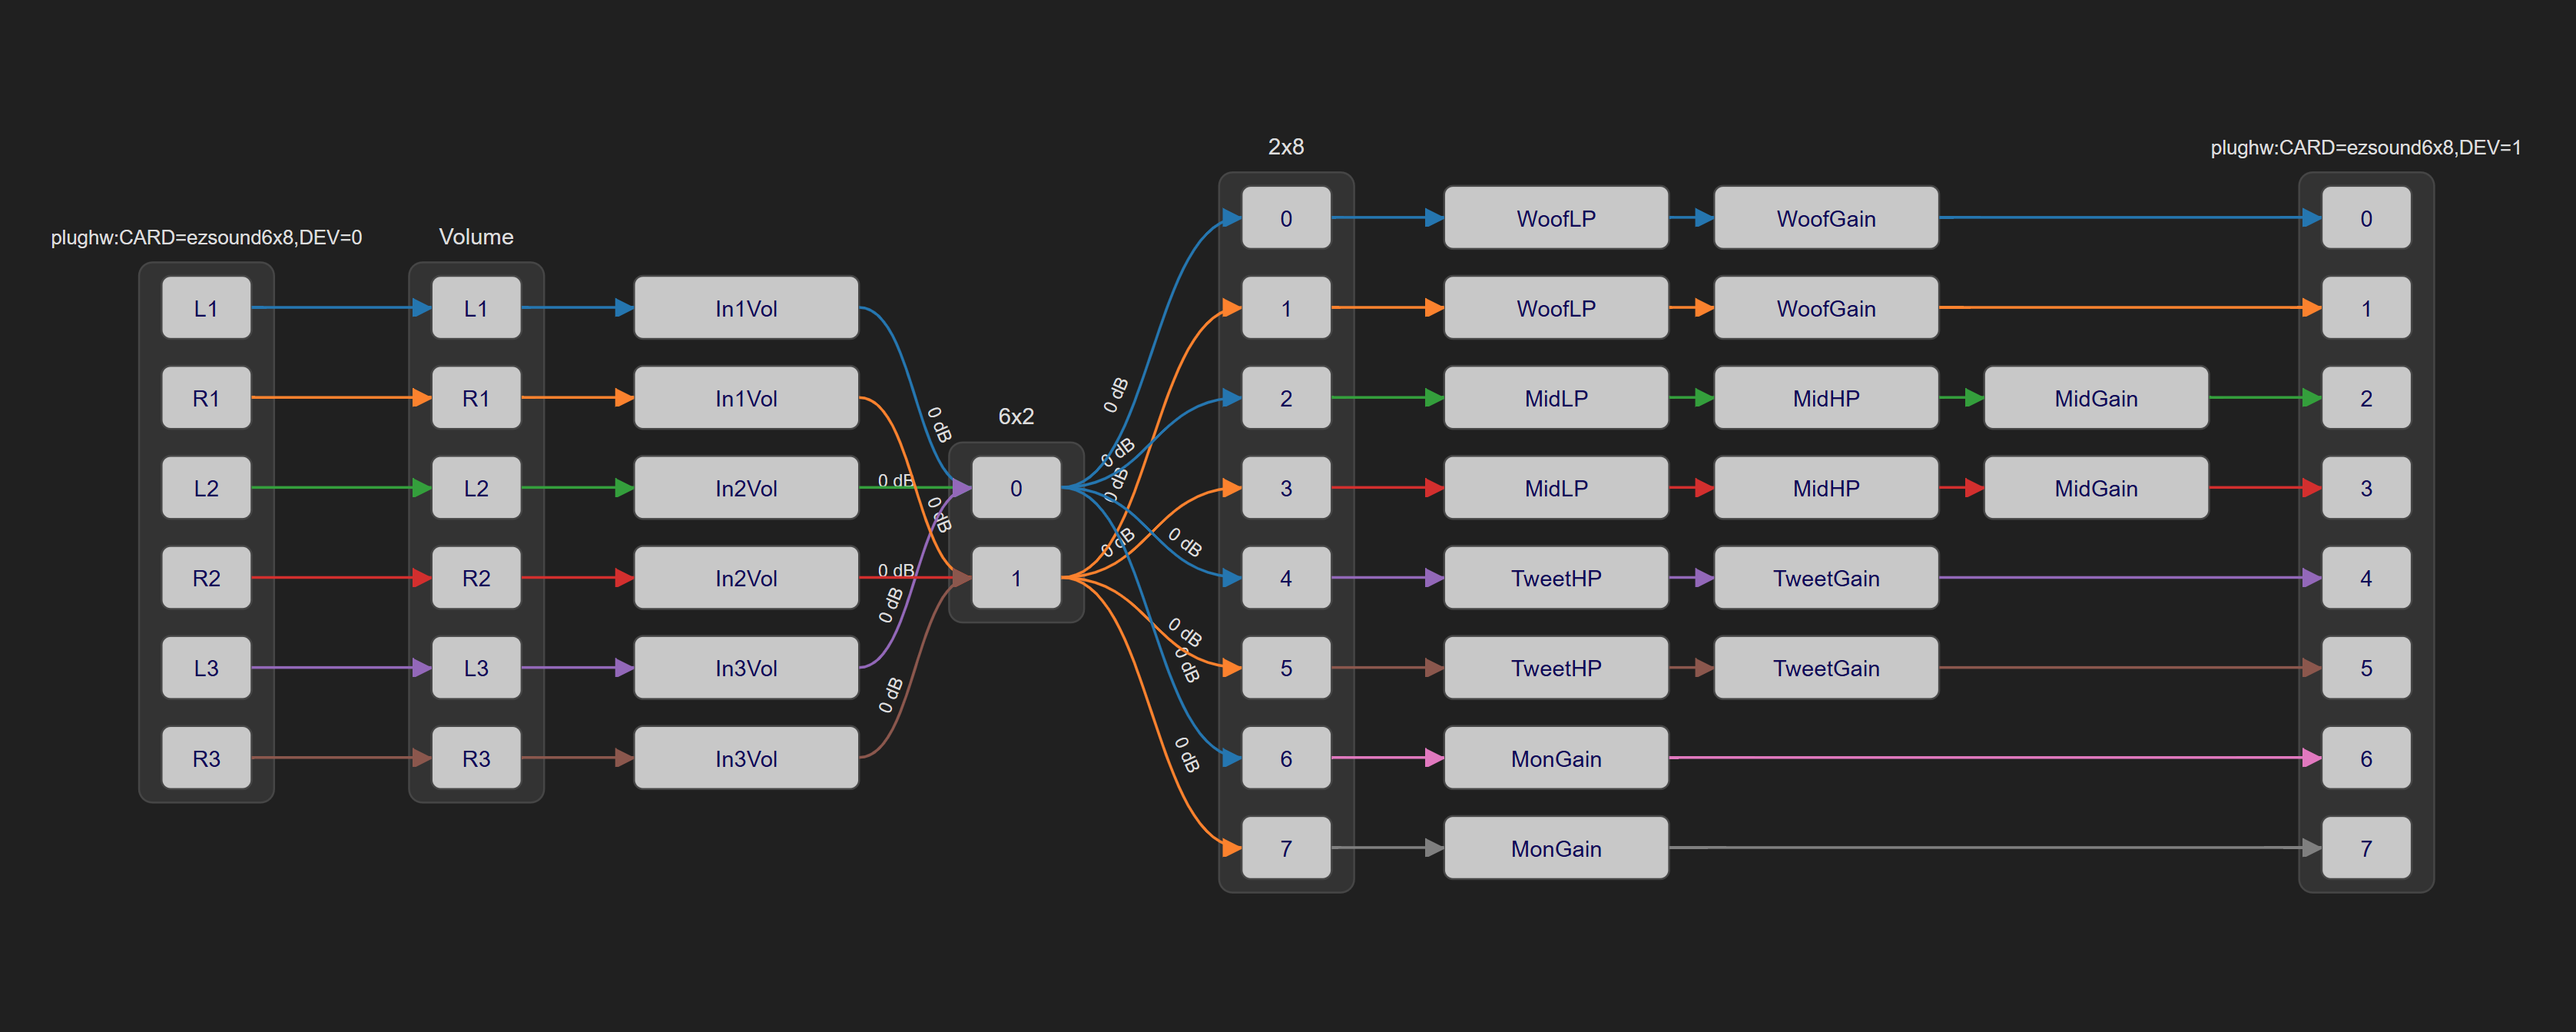
Each input has a volume control. Input selection is currently done by simply muting the inputs I don't want. These are split into four pairs, which have lowpass and/or highpass filters and a gain control (the monitor channels have...
Read more »