 Ruslan Nadyrshin
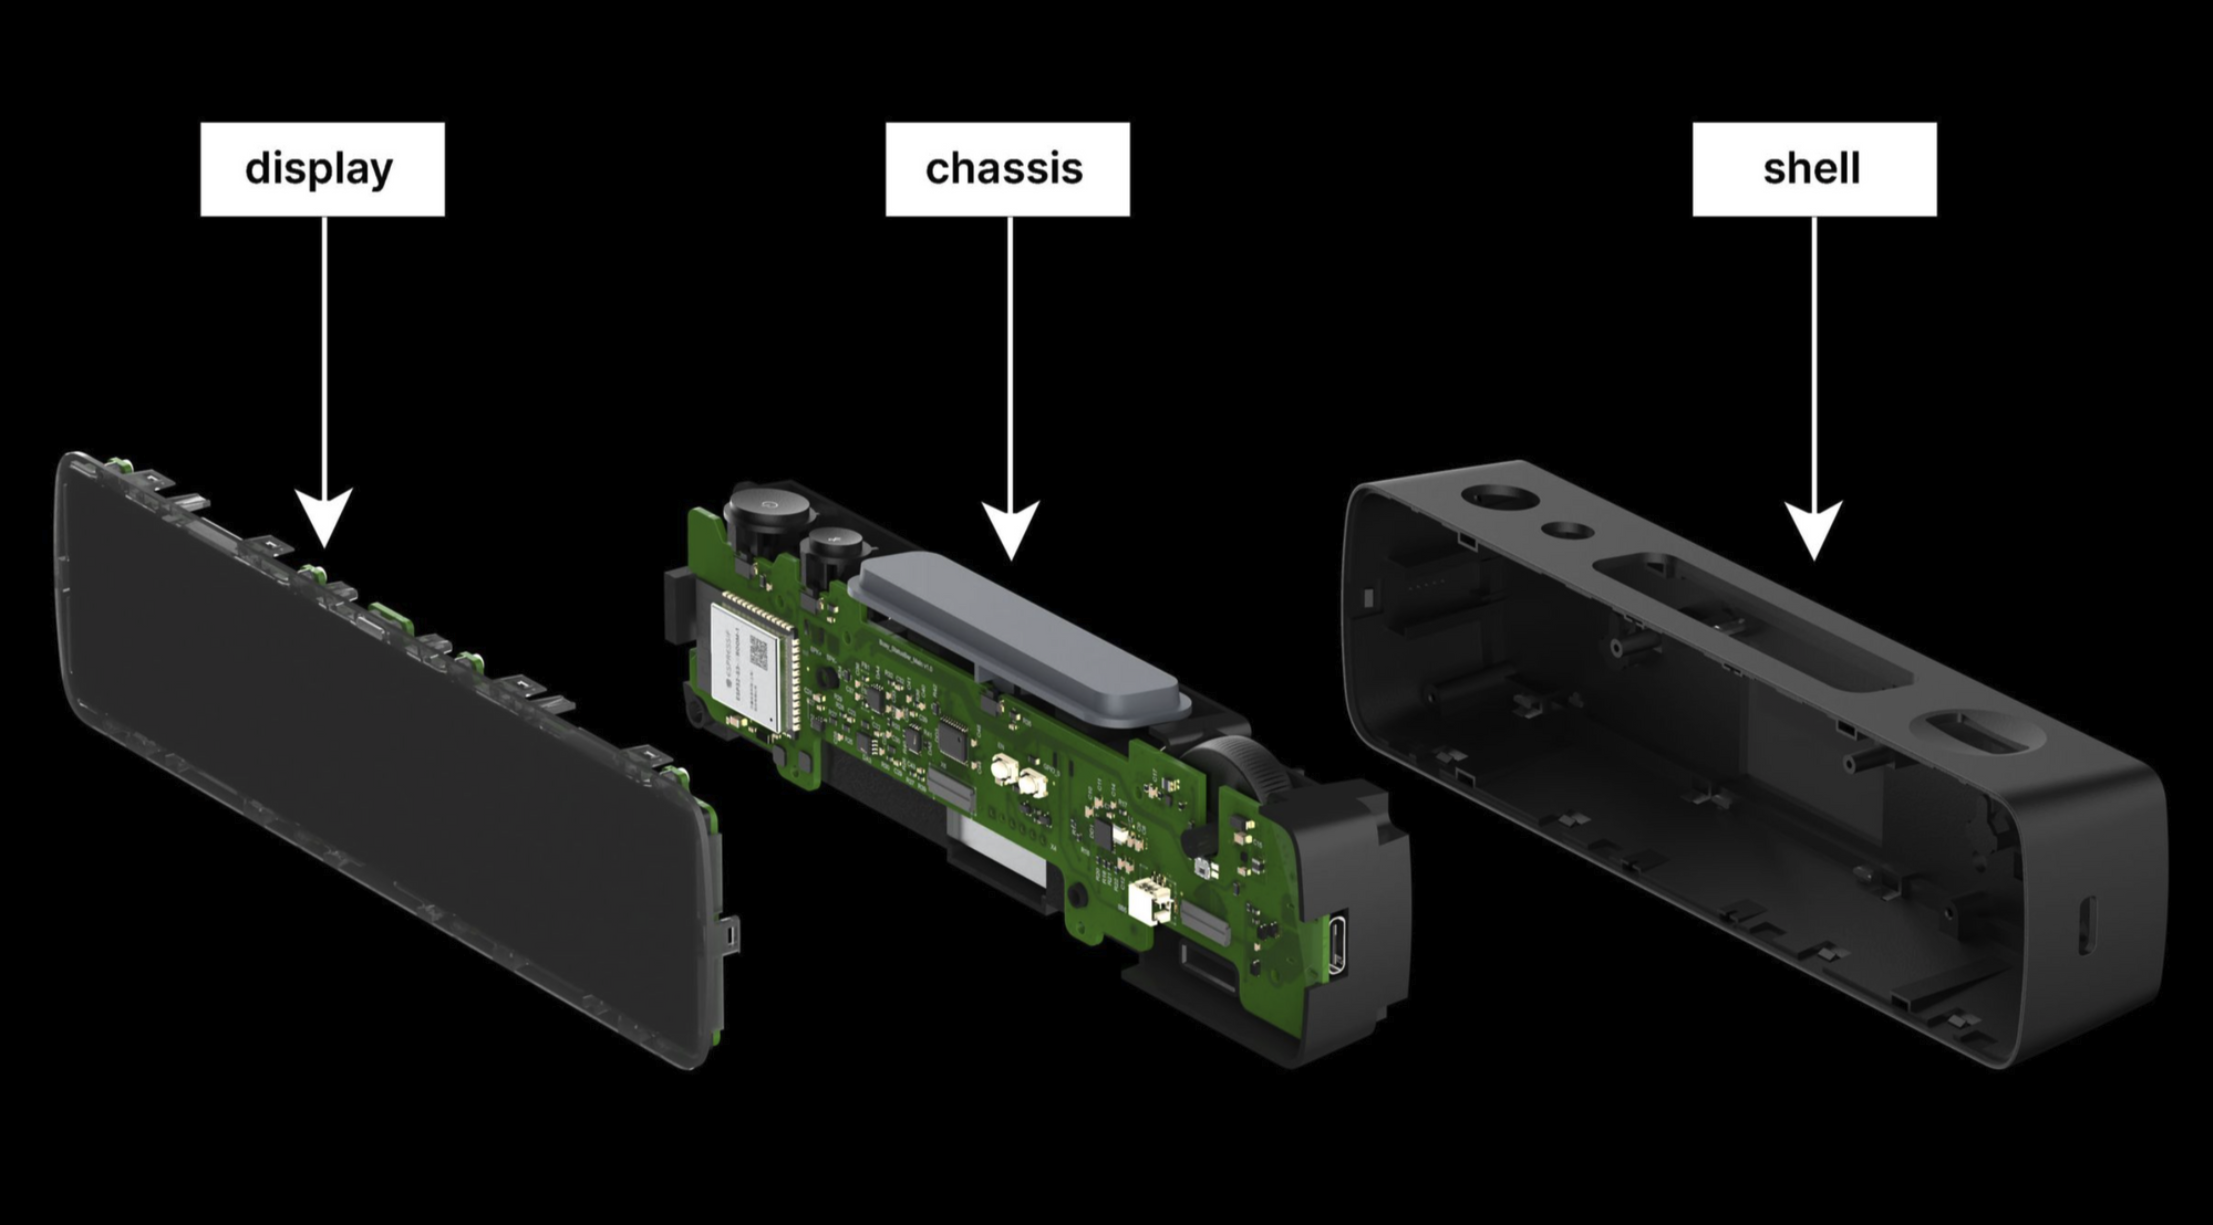
The central element of the device’s layout is the chassis, on which the buttons, two boards, the speaker, and the battery are attached. The assembly with the chassis is placed in the body and closed with the display assembly.
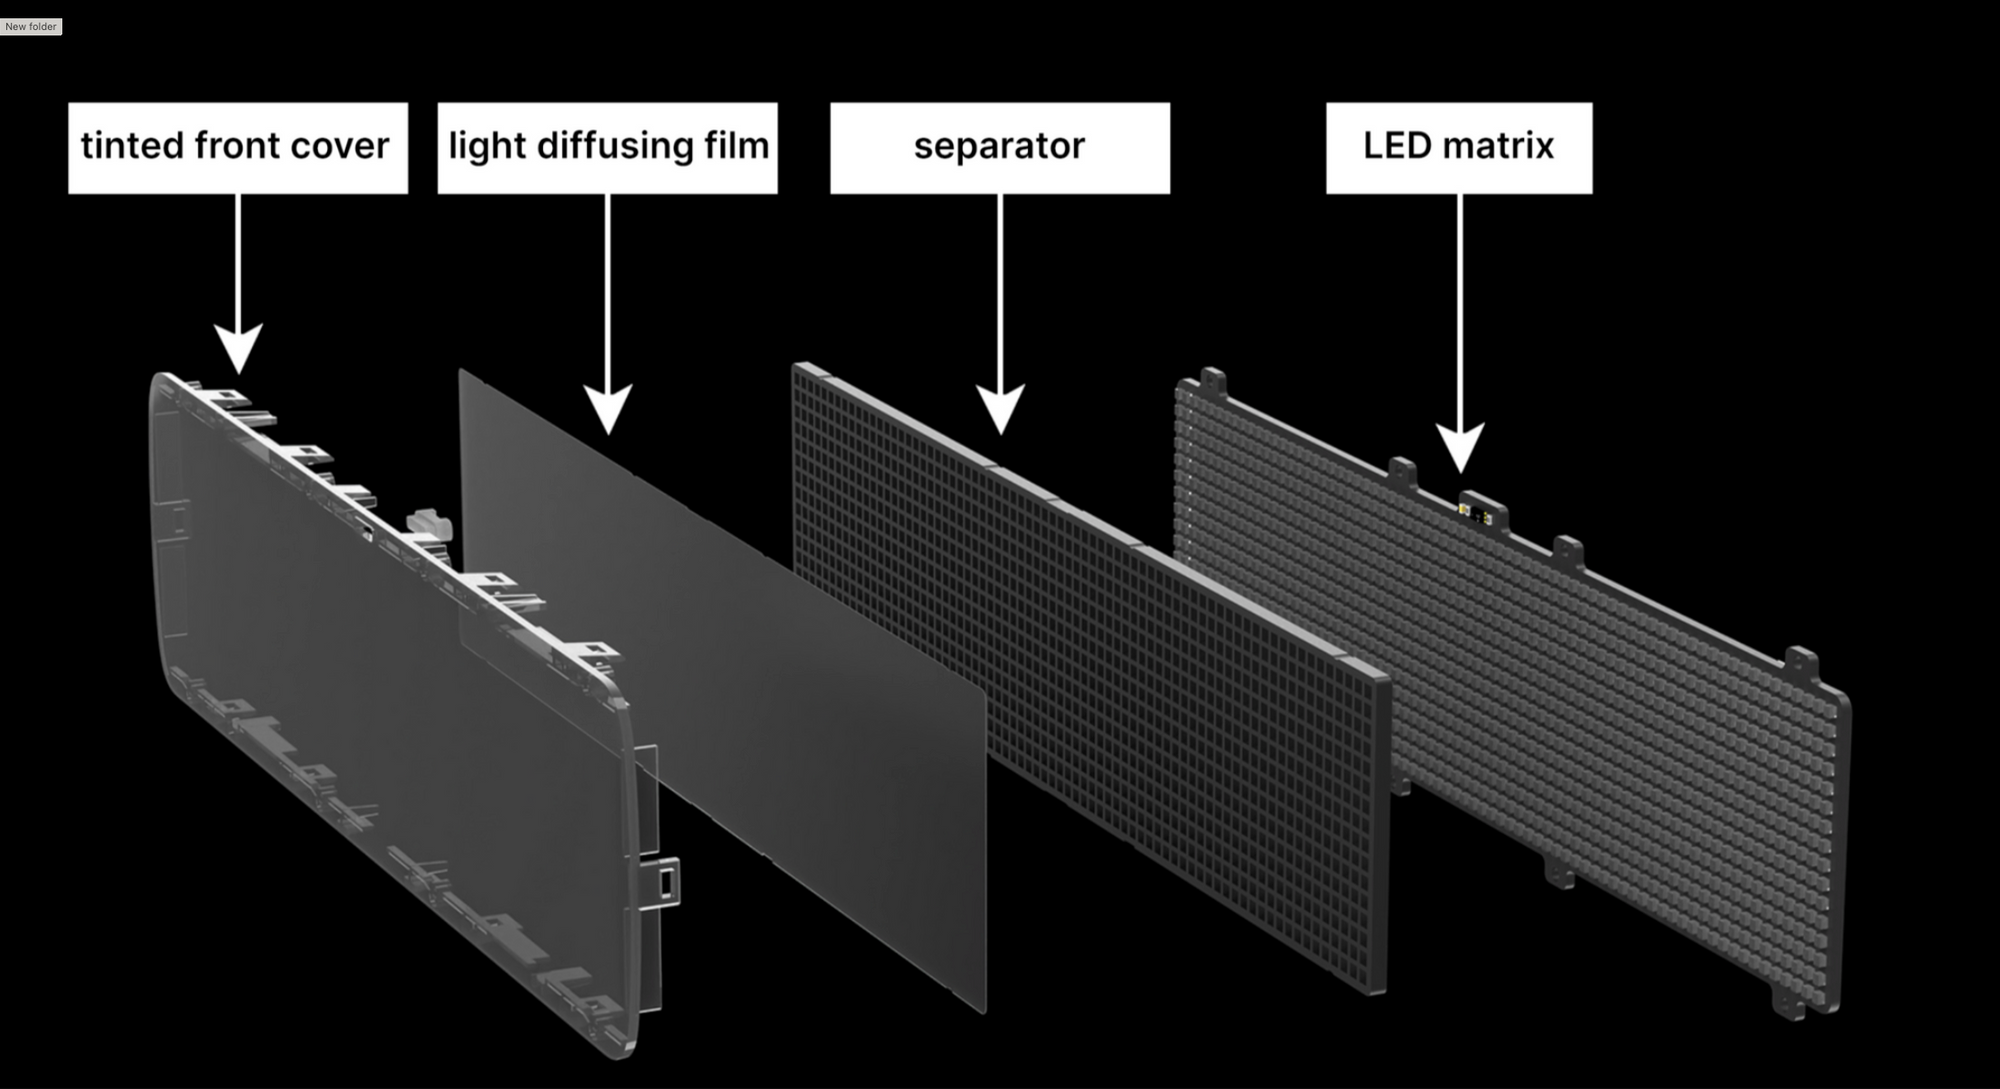
The display assembly
The display assembly includes the following components:
- LED matrix with a resolution of 16x72 pixels
- A plastic mesh separates pixels and isolates the light emitted by neighboring LEDs
- A diffusing film ensures consistent light distribution within each cell
- The tinted front cover creates a uniformly dark surface, concealing the internals of the device
In high-volume plastic molding production, achieving a thickness of the light-isolating grid’s walls below 0.6 mm can be challenging. The distance between the LEDs must be a minimum of 1 mm (a 0.6 mm mesh thickness and 0.2 mm tolerance to accommodate any errors around the LED). Knowing the size of the LEDs and determining the appropriate spacing between them, we were able to determine the final dimensions of the matrix and the device.
Mechanics of the controls
The device incorporates tactile buttons. To ensure uniform actuation of the large button, we have employed a principle inspired by the “spacebar” key on a keyboard: using a metal stabilizer, the button press is synchronized from all sides.
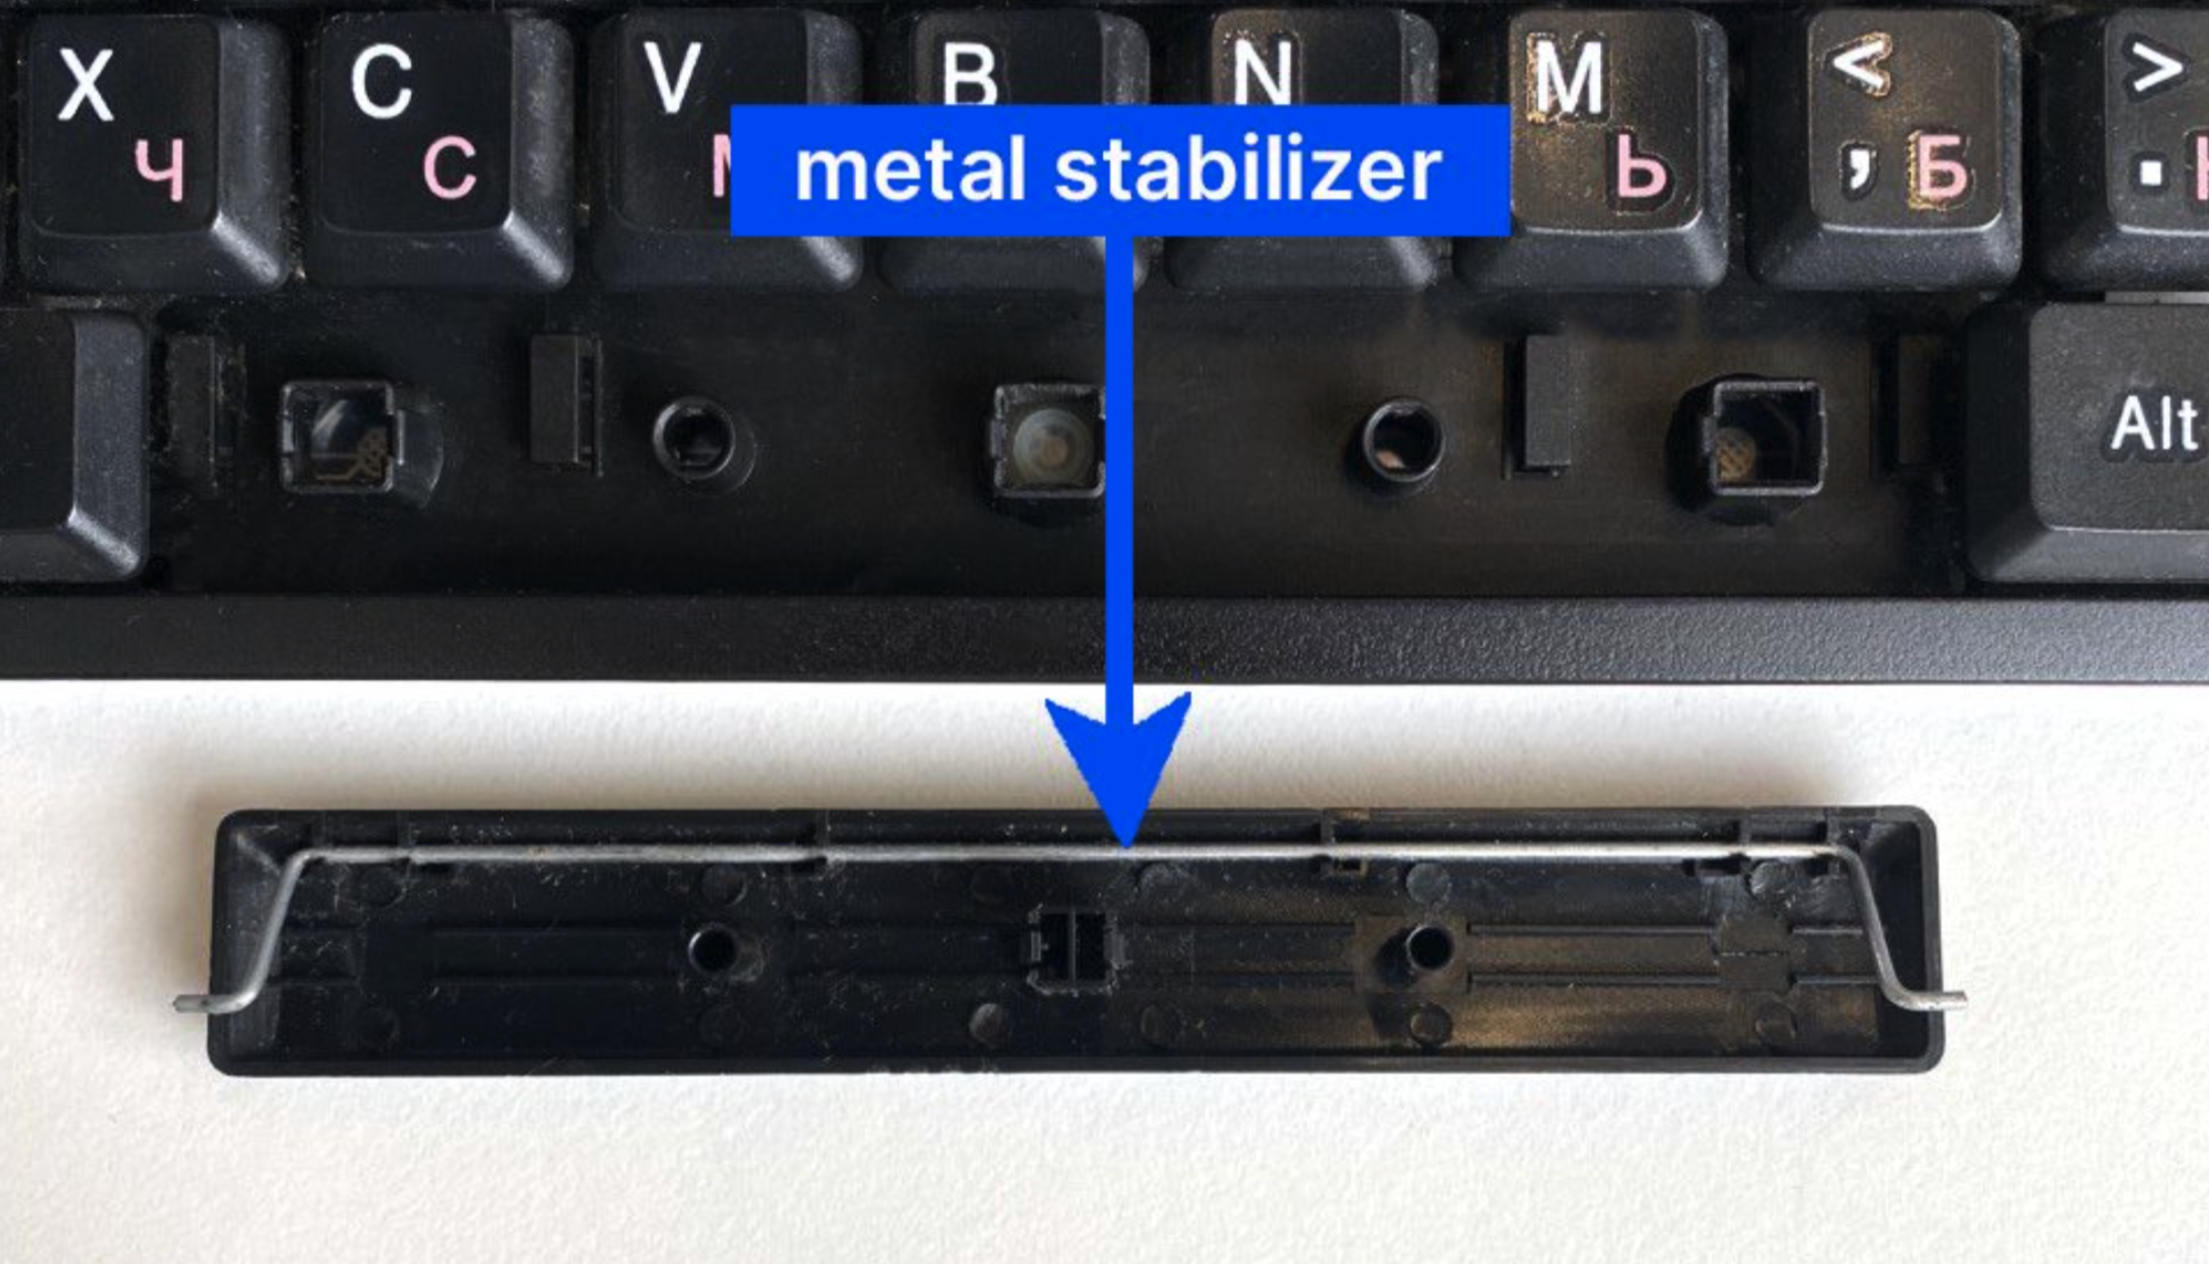
Our large button worked, although we encountered an issue caused by the friction of the components. The 3D-printed parts had a rough surface, but a brief filing session resolved the issue.
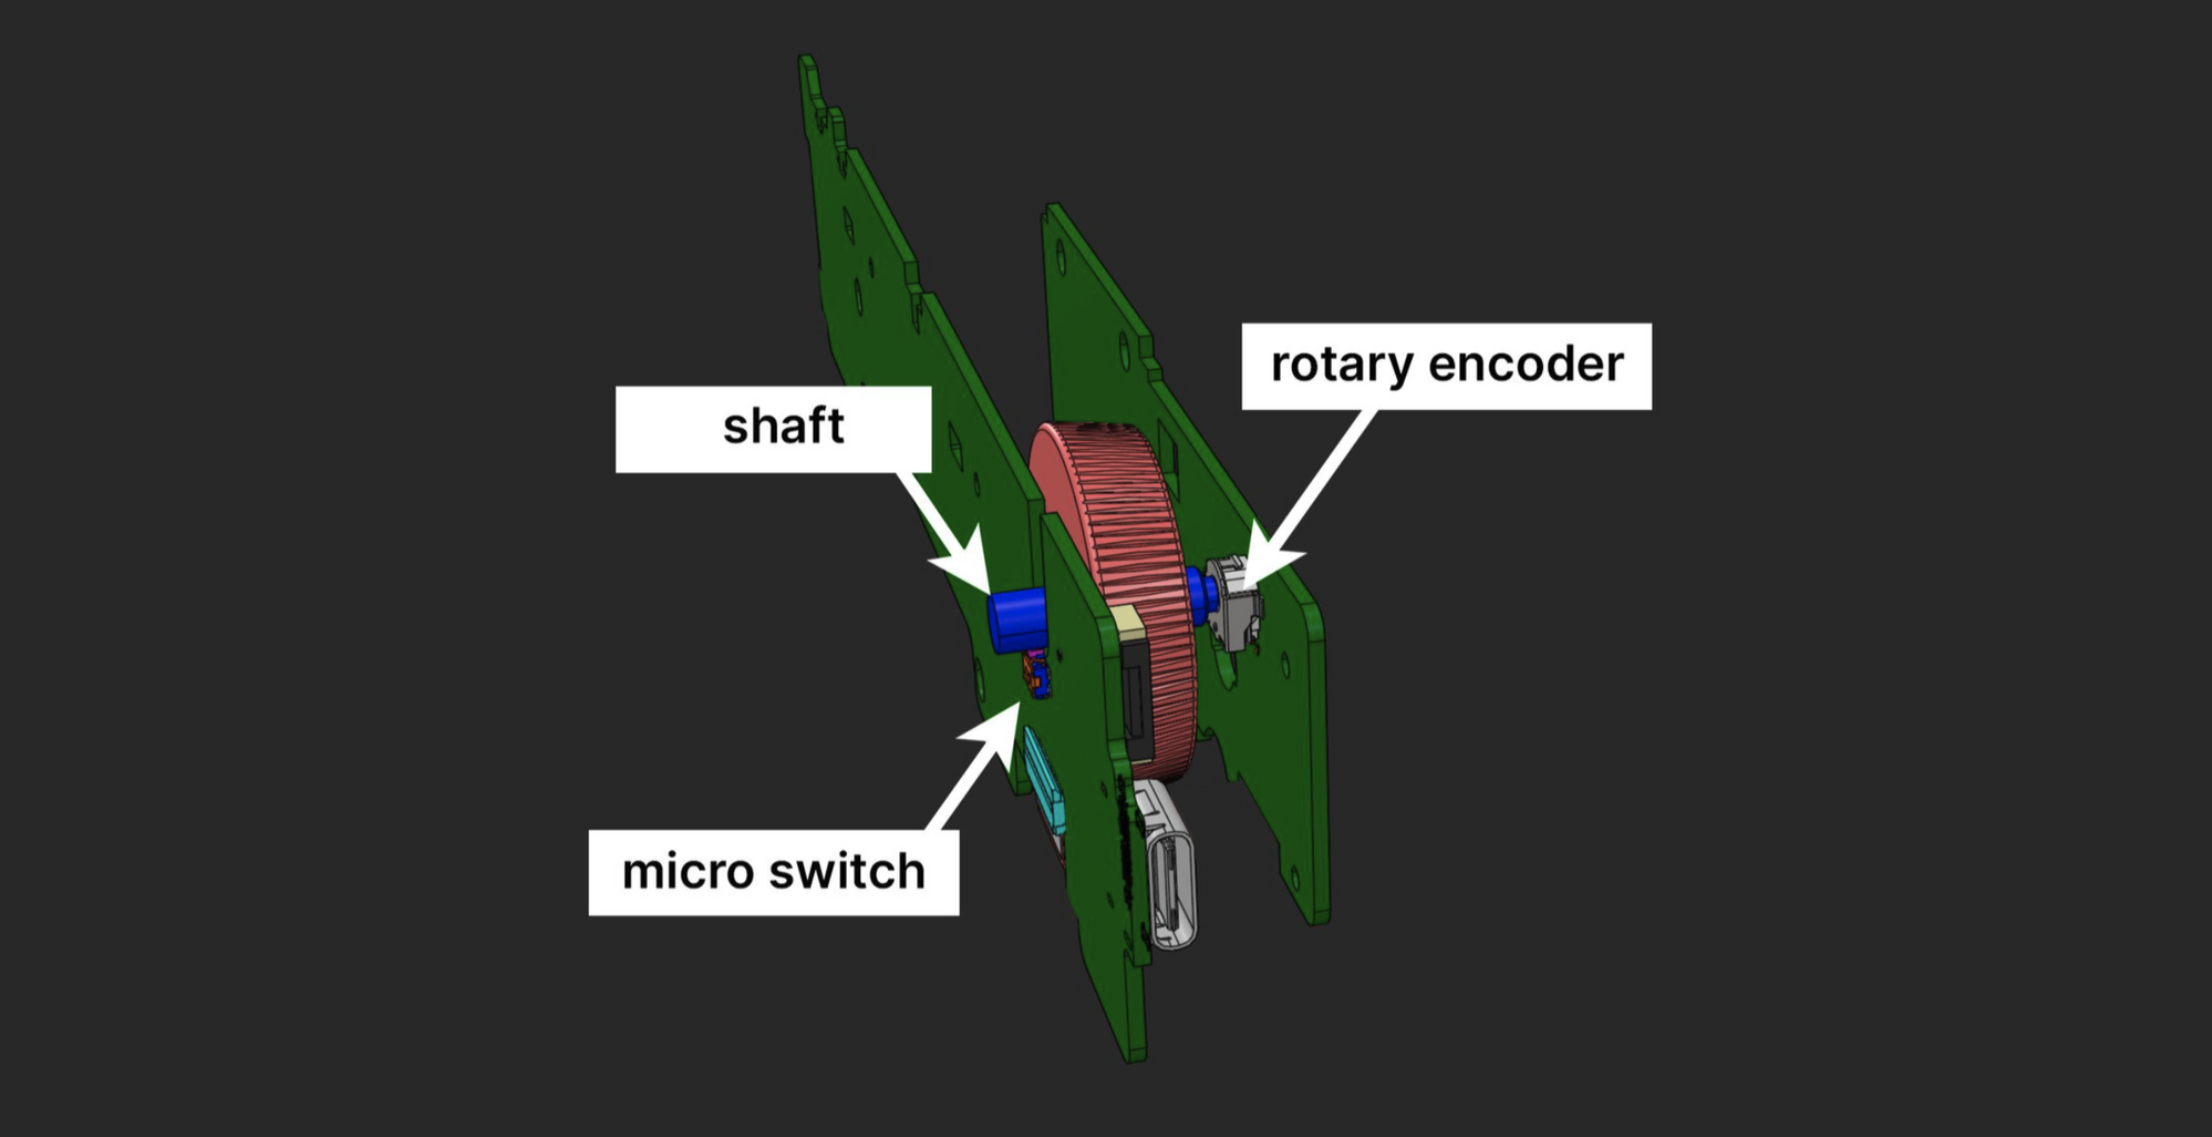
In addition to the buttons, the device also features an encoder wheel that requires pressing. We have incorporated a similar concept found in mouse wheels. On one side, the shaft is connected to the encoder, while on the other side, it rests on a micro switch that is triggered when the wheel is pressed.
Mounting on vertical surfaces
We added holes under the back cover to make it easier to hang the device on screws. This feature enables mounting the device on vertical surfaces, providing a stable and rigid installation.
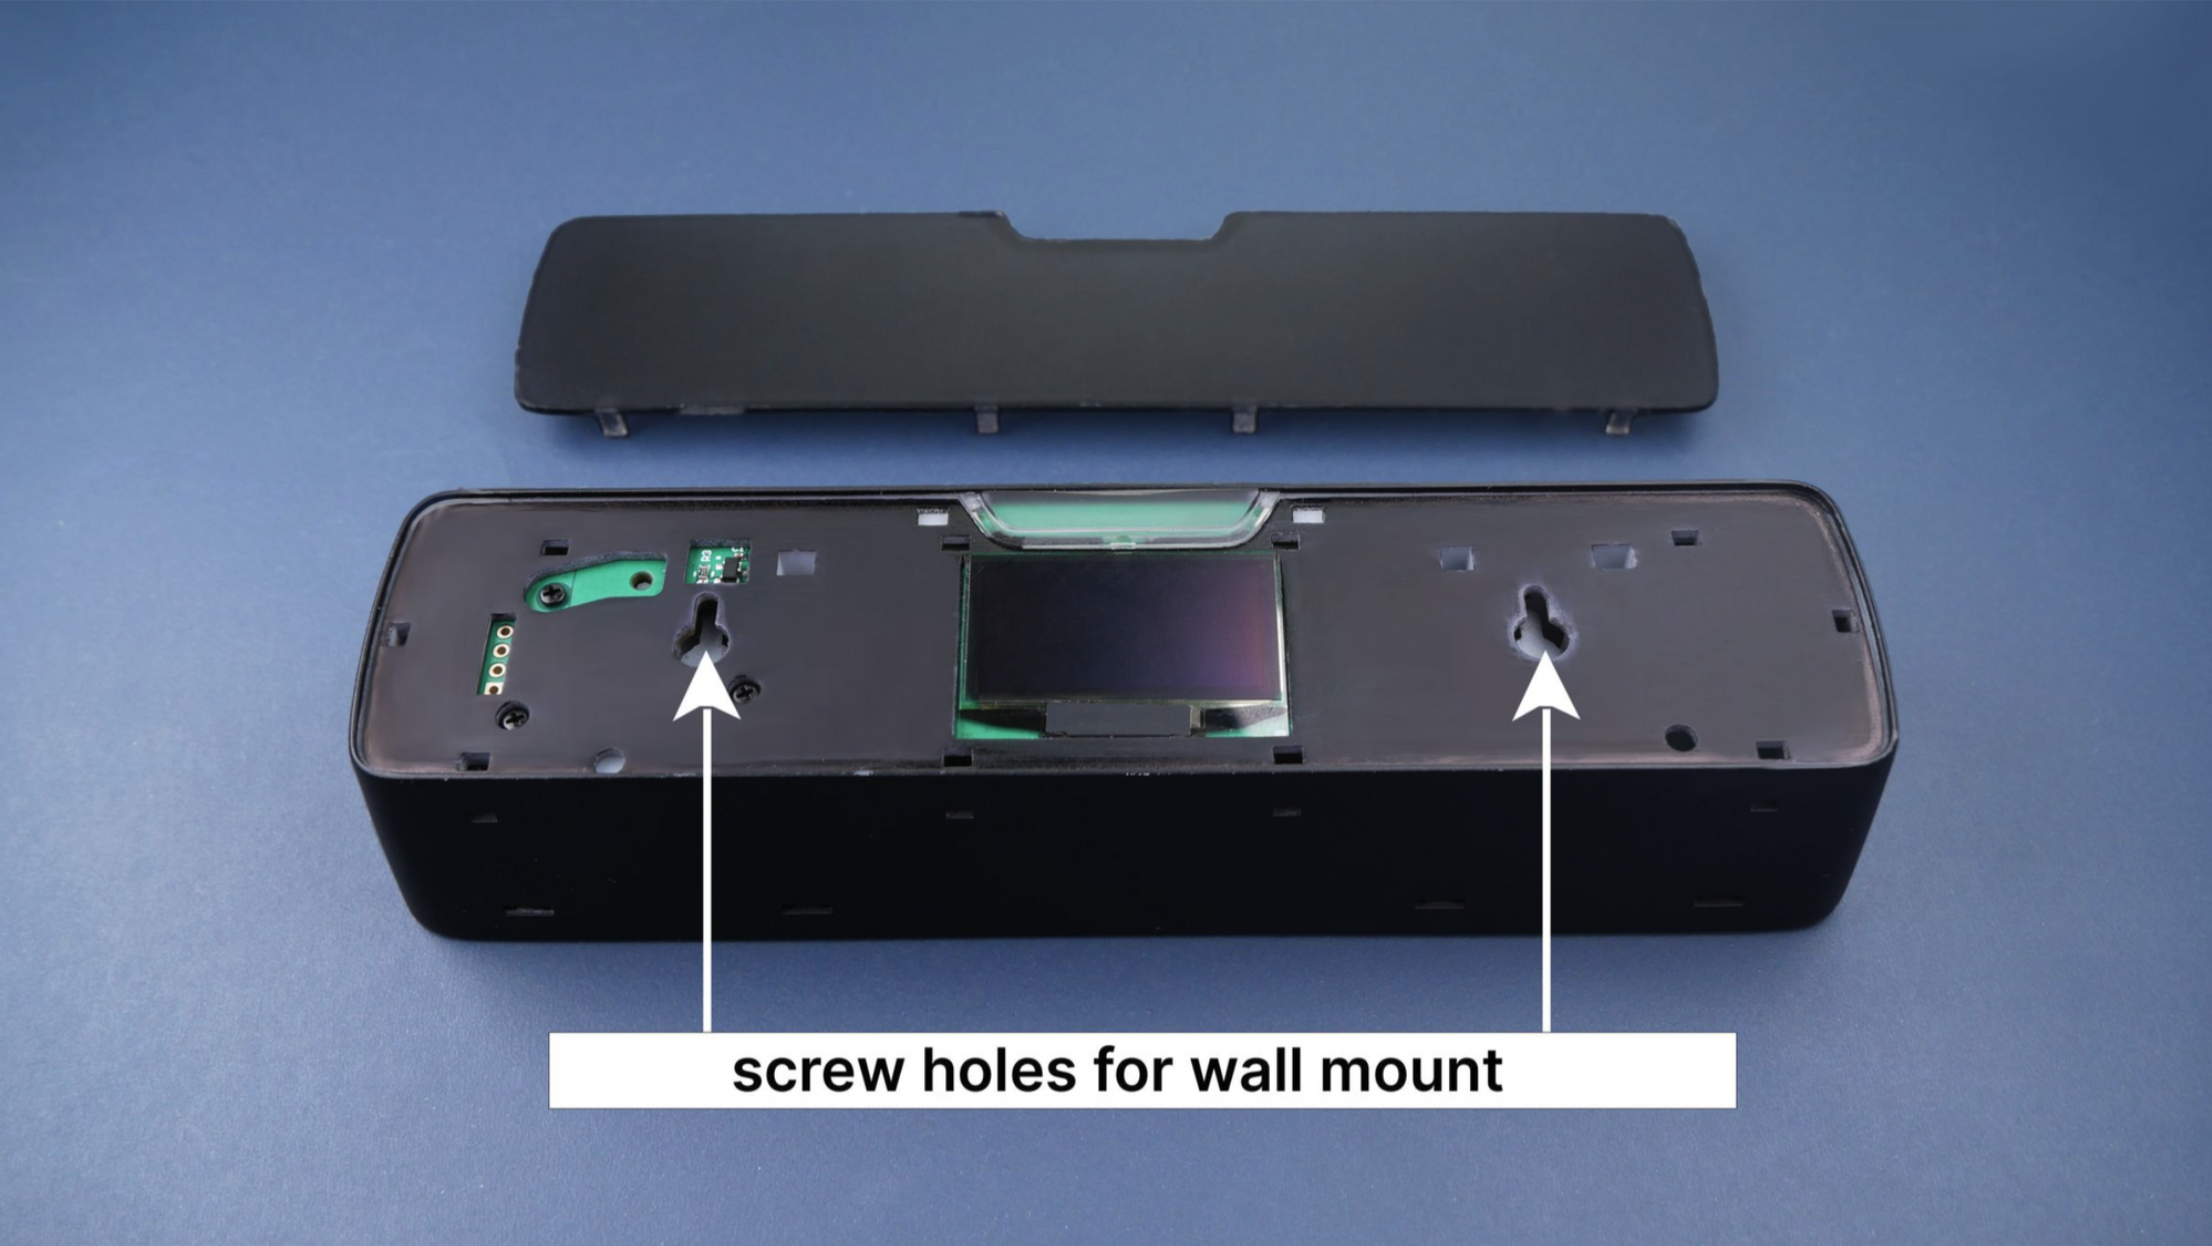
This solution works well, but comes with a few considerations:
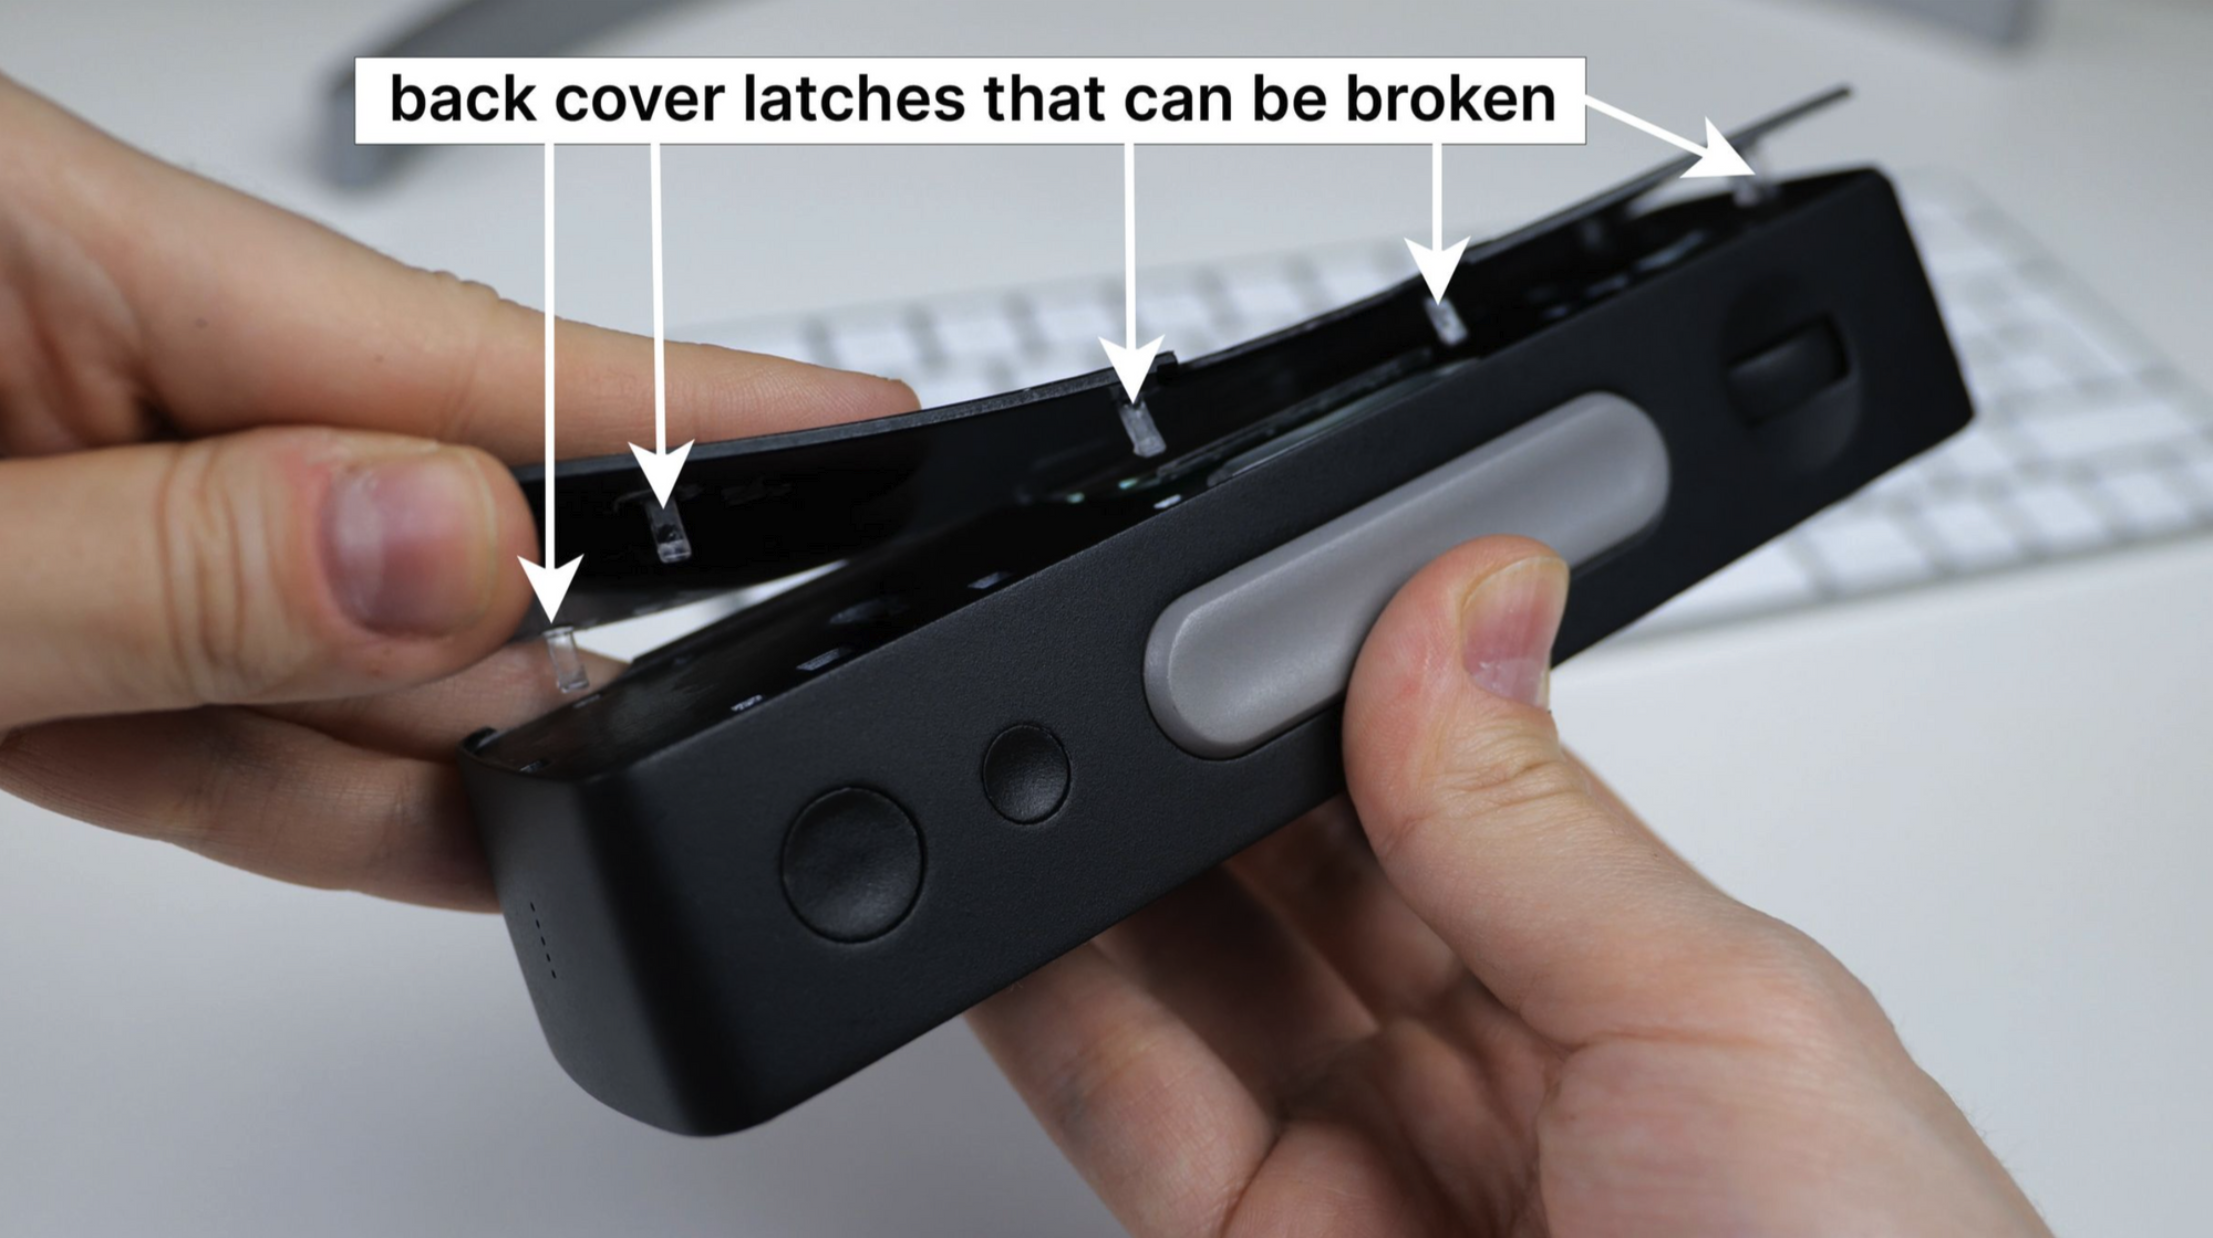
- You need to remove the back cover for access to the ports. Given that the cover is secured with clasps, there’s a slight risk of damage which could prevent the cover from fitting back in place.
- The OLED display is getting exposed which could potentially lead to its damage.
- The precision required to align the ports with the screws can sometimes lead to minor cosmetic damage to the device’s finish.
Our design engineers recommend eliminating the screw holes and preventing users from disassembling the device, an approach that can minimize potential damage. Alternatively, we could design through-holes in the back cover which would require external plugs. This option would impact the design integrity and require an additional component, consequently increasing the cost.
I consider incorporating magnets into the back of the device, enabling it to attach to a metallic surface. To make the magnet useful, we consider including a slim metal plate with double-sided tape in the package. The user would stick the plate onto any surface: door, monitor, or wall, and then attach the device to the plate. What do you think would be the better solution — the magnetic one or the one with holes?
For B2B segment, we might offer a version without the rear display and with open mounting holes in the body. Leave a comment if you’re interested in that.
Stay tuned
If you enjoyed this project and its development story, follow for the latest updates and feel free to share your feedback.
Discussions
Become a Hackaday.io Member
Create an account to leave a comment. Already have an account? Log In.