 Marco
MarcoOverview
An environment integrating system management and MicroPython for scripting with high level API for certain complex tasks.
The purpose is have a common core on which base specific applications:
System management managed tasks
- Wi-fi network connection (as client or access point)
- On-device user interface
- System setup by web UI or Micropython scripting
- Web user interface
- Log & events
- Components drivers and libraries (OLED, 4G modem, temperature sensor...)
- System health monitor
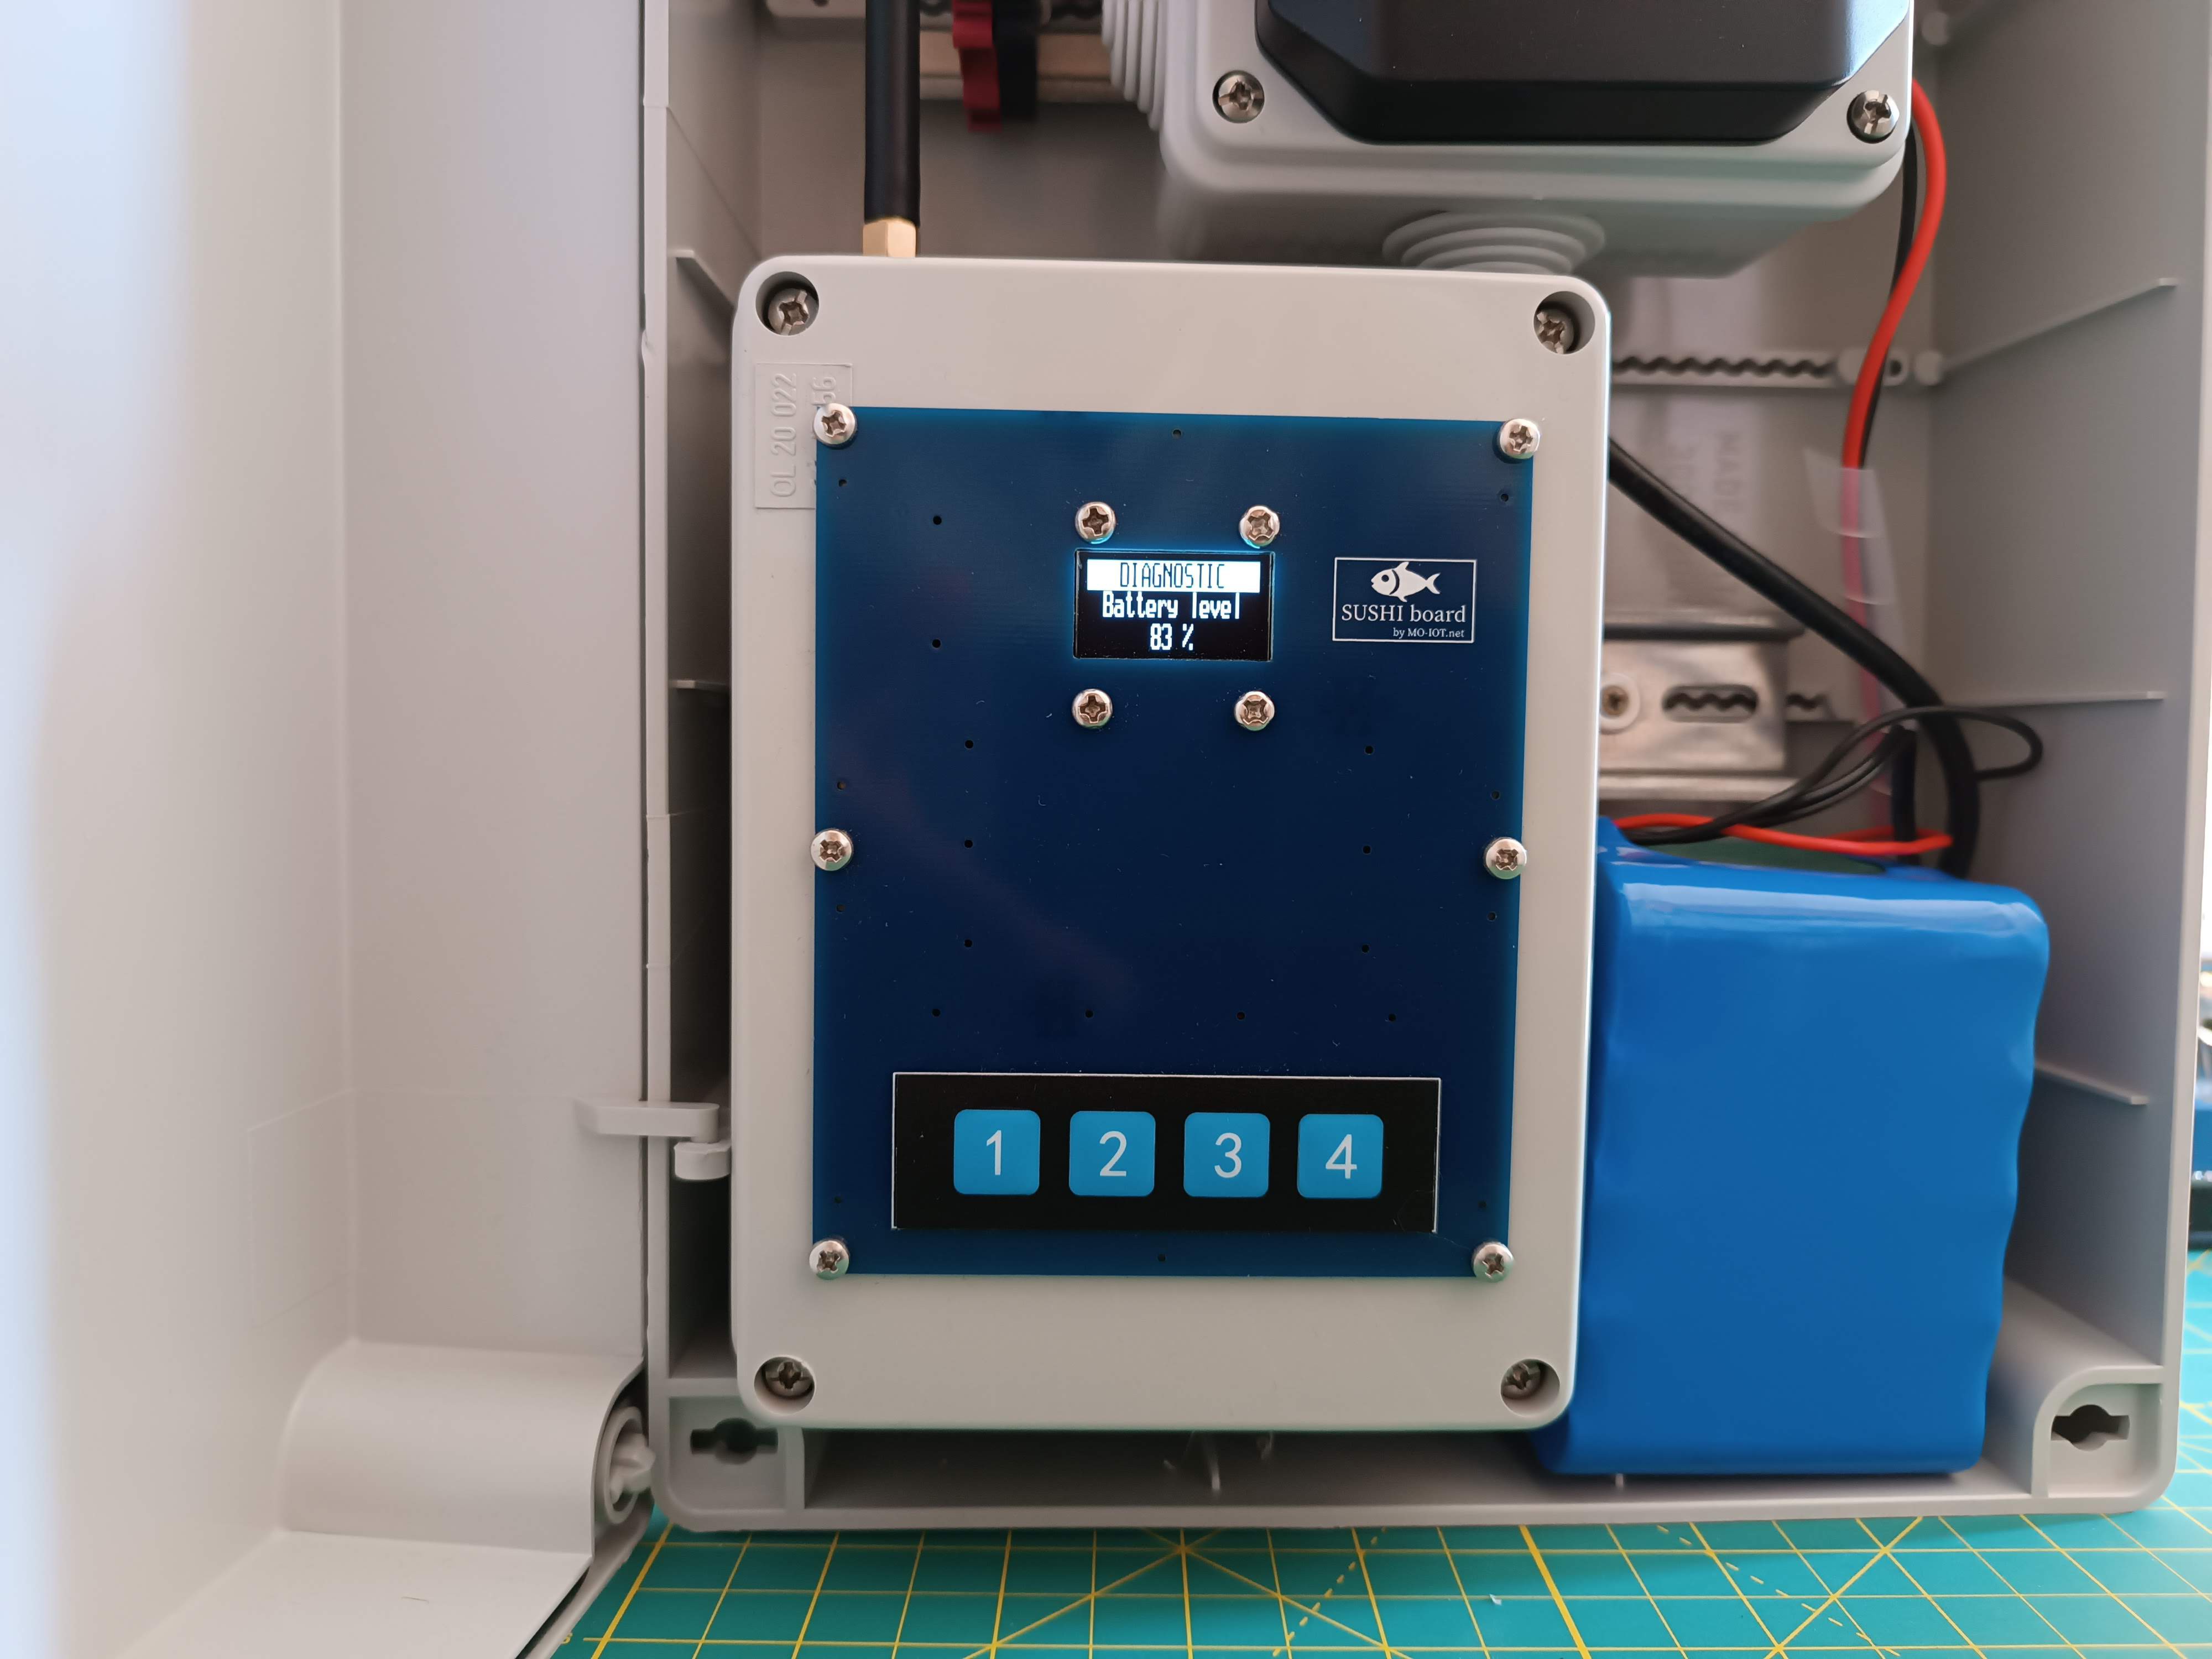
- Battery and power supply monitor
- ...
MicroPython standard enviroment
- USB/UART REPL
- WebREPL
MicroPython high level API
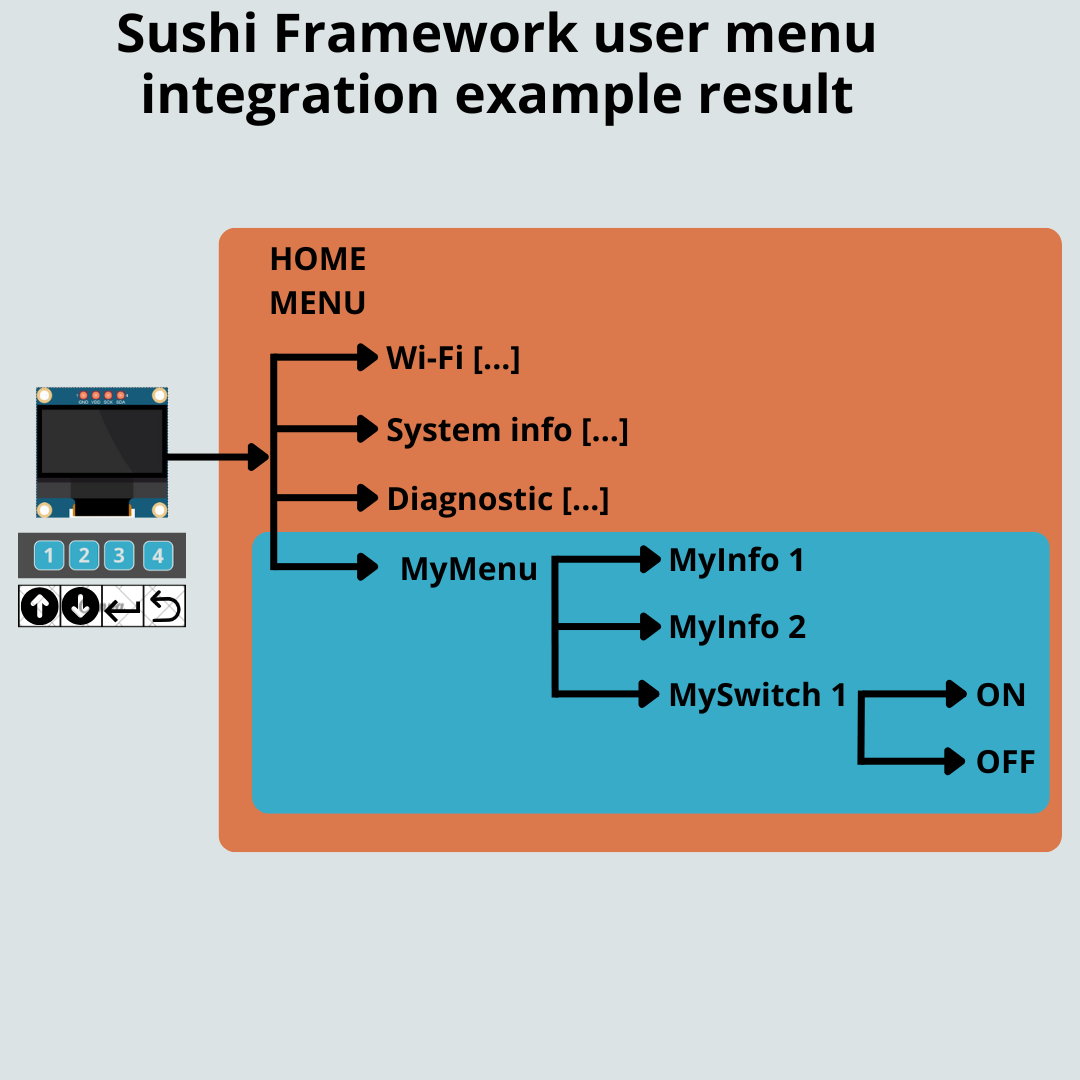
- Custom menu integration into UI
- Send/receive SMS
- manage http calls (by wifi & modem)
- ... continuous extension, see the reference
Features
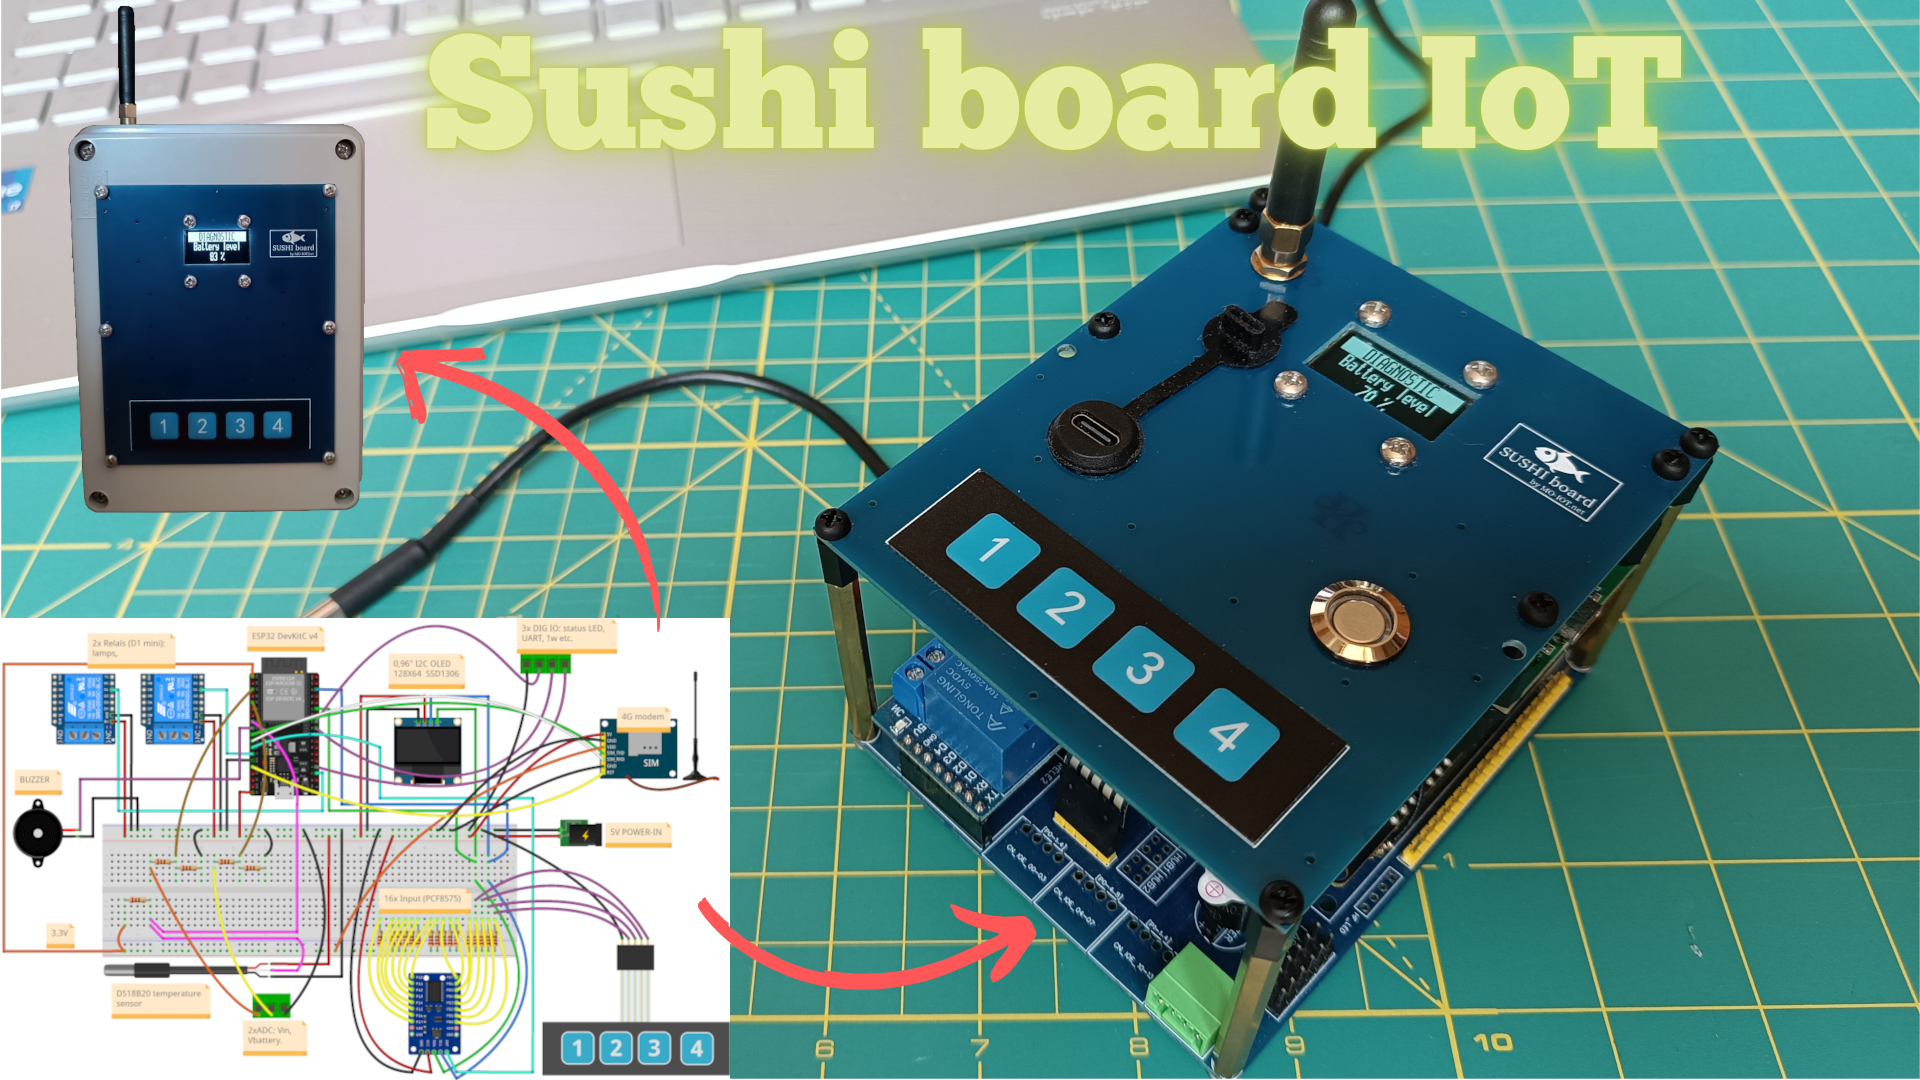
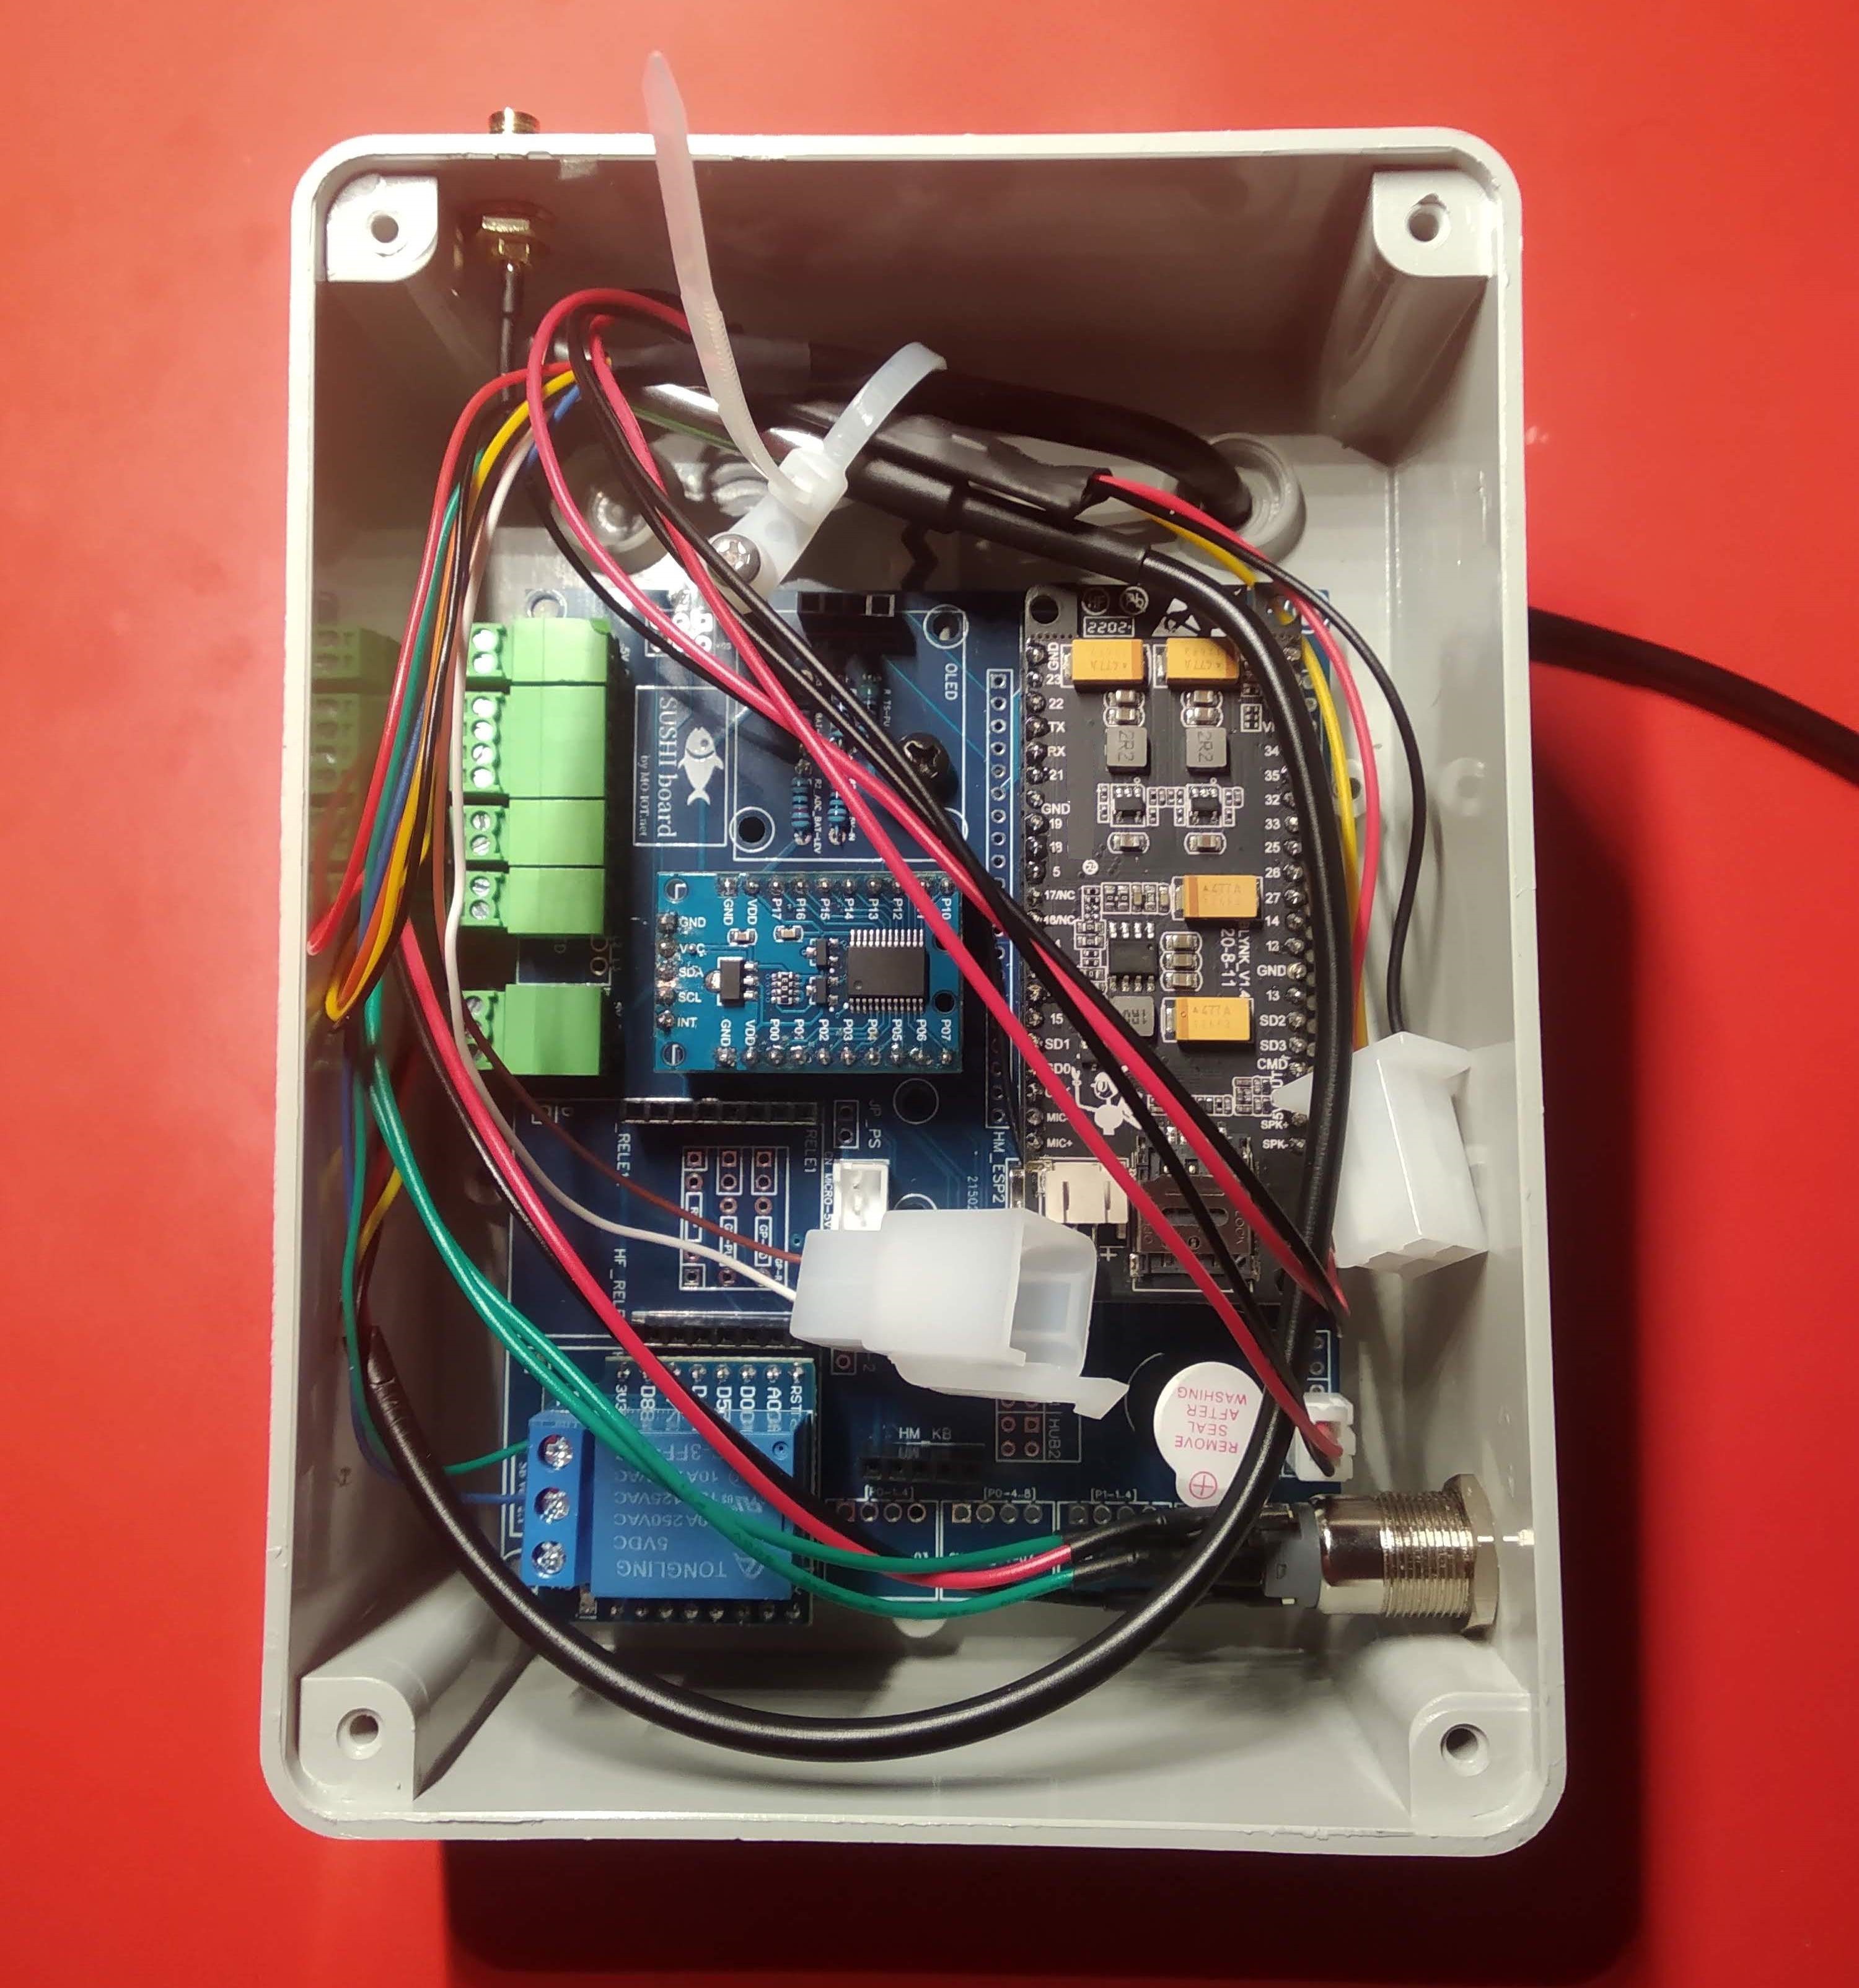
Works on very common commercial boards based on ESP32 SoC, widely available online for DIY electronics projects.
It simplifies development:
- Hardware management: Wi-Fi, LCD, keyboard, modem, I/O expansion, relays, power detection, battery level, buzzer.
- Software features: System management via web UI (network and system settings, logs, status, etc.) and a physical interface for on-device menus.
- Embedded MicroPython environment: Users can run their own scripts freely, while built-in libraries provide optional system management features.
- Embedded high-level MicroPython libraries for rapid access to hardware and software functions (custom menus, web pages, I/O expansion, SMS, HTTP requests, etc.).
Manages all essential components typically present in an IoT system, regardless of the specific application:
- Physical interface management (keyboard, display, status LEDs)
- Wireless connection as client or access point
- Drivers for all hardware components present on the board (I/O expander, modem, etc.)
- Web interface with user-level access (web server and UI)
- Modular menu management for physical interface
- High-level API for many typical functions: HTTP requests, SMS, GSM calls, web server extension, I2C communication, etc.
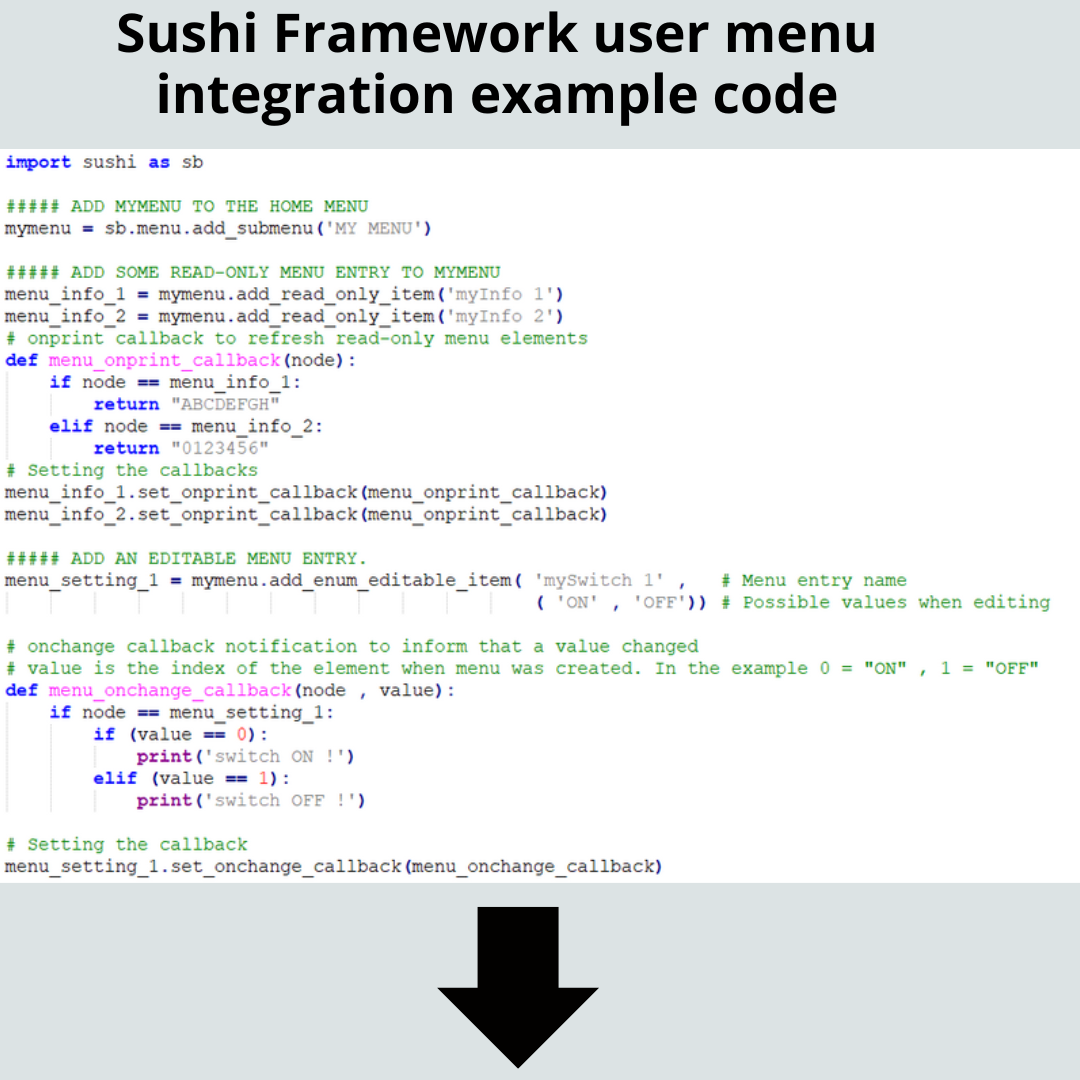
Code Demo
Manage relays via a custom menu
Custom menu integration
Workflow
Typical Sushi IoT Project Workflow


Credits
This project embeds MicroPython, a lean and efficient implementation of Python 3 optimized for microcontrollers. We acknowledge and thank the MicroPython developers and contributors for their outstanding work. MicroPython is released under the MIT License.
Next Steps Roadmap
- Extend MicroPython libraries with complete example projects showing real IoT applications.
- Add support for additional ESP32 boards and modules.
- Provide step-by-step tutorials for beginners and makers.


 cmbahadir
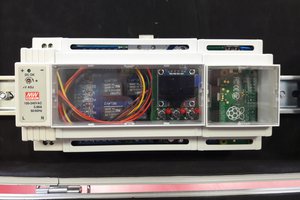
 Craig Hissett
 CiferTech
 Louis Irwin