Close
0%
0%

Talker

A speech generating device for kids with autism.

Similar projects worth following
Augmentative and Alternative Communication (AAC) Device for individuals with speech/language delay. Touch an icon on the screen to generate a spoken word.

The challenge: Many kids with autism have difficulty using spoken language to communicate. High tech assistive devices are available but they can be very expensive.

How this project addresses the problem: Making available a low-cost, open source version of the high-tech speech generating devices used in speech therapy for children with autism.

This project might be world changing: When I bought a speech generating device for my son, the sticker price was over $6,000 USD. It was difficult for us to acquire this expensive piece of medical equipment and required the generosity and help of many people to make it possible. Even though we now have the device, we do not take it everywhere because of concern of possible breakage or loss. Imagine a world where every child with language delay had a portable speech generating device that was inexpensive enough to be treated like toy! These devices would also be based on open source designs, so parents and autistic individuals themselves could repair or customize their device!

Use of this device consists of

  1. Touch screen
  2. Swipe to see next icon
  3. Press icon
  4. Hear spoken word

Touchscreen Options

I considered both resistive and capacitive touchscreen options for this project. According to the articles I read about this comparison, design considerations for capacative touch include: power consumption, noise reduction, and gesture recognition. I also had concerns about what libraries were available to use with a capactitive touchscreen.

The advantages of choosing a resistive touchscreen were: lower cost, 10 years of documentation, and that it dictates simplicity of user experience. The disadvantages of a resistive touchscreen were: possible loss of swipe, possibly requiring a stylus, and possibly frustrating for kids.

After much thought I have decided to proceed with a resistive touchscreen for this initial version of the prototype.

Possible implementations

I considered several platforms for this project including: Arduino, Raspberry Pi, Android Tablet, iOS app, web application, and single page application (SPA).

I am still intruiged by the idea of creating an Arduino version of this device someday because this implementation would be the most like a toy.

Also, so many people have suggested this project would be a good app that I am considering pursuing that in the future also.

For this initial version of the prototype I am choosing to move forward with the Raspberry Pi platform. The main reason I am making this decision is because of the option of a web interface and the option of expanded harddrive space for media files.

Talker - BOM.xlsx

Bill of Materials

Microsoft Office - OOXML - Spreadsheet - 62.41 kB - 10/15/2017 at 04:44

Download

talker_buscard_2_Business Card – Front.jpg

Business card front.

JPEG Image - 56.32 kB - 09/03/2017 at 13:02

Preview

TalkerBusinessPlan.docx.pdf

A three-year plan for taking "Talker" from prototype to mass market. Based on the lean start up business plan model from the Small Business Administration (SBA). Includes profit-and-loss projections for the first three years of operation, but does not include cash flow, balance sheet, or break even analysis.

Adobe Portable Document Format - 136.29 kB - 08/15/2017 at 03:19

Preview

View all 11 components

  • Goals

    Muriel Green09/06/2017 at 15:00 0 comments

    Now that I have a working prototype I am thinking about my goals for the future of Talker.

    • Write a start up script that runs when the device boots up to automatically launch the program in kiosk mode.
    • Source smaller speakers.
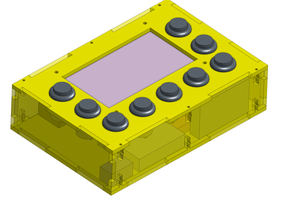
    • Design a 3D printed enclosure.
    • Fix safari javascript bug in the web app demo of the interface.
    • Add enhancement of "sentence builder" where user can press icons and they populate a sentence box with text. When a play button is pressed, the whole sentence is read aloud.
    • Add enhancement of "user uploads" for custom icons and custom audio files.
    • Work with an engineer to choose parts to build a slimmed-down version with only the necessary components. This will be a design that is mass-producible. The raspberry pi was great for building a prototype, but I want to bring down the overall cost and size.

  • Video of working prototype

    Muriel Green08/17/2017 at 22:18 0 comments

  • Interface version 1

    Muriel Green08/02/2017 at 03:18 0 comments

    I have a minimum viable product for the interface! http://murielg.pythonanywhere.com/

  • battery

    Muriel Green07/27/2017 at 08:16 0 comments

    I ordered this battery pack https://www.adafruit.com/product/1565

    I am nervous because it needs to power the board, the screen, and the speakers. 

    If it does not accomplish those tasks, I will have to spend $39 on the 10000 mAh version. It was a risk to get the cheaper 4000 mAh version, but I want to be as economical with power as possible so I want to try the smaller battery first!

    If I ever take this thing to mass market, I will need an EE for sure to help me figure out stuff like power consumption!

  • USB powered 3.5mm jack speakers

    Muriel Green07/27/2017 at 08:09 0 comments

    I am so excited that the accessibility portion of the contest has arrived!

    I am developing enhancements for the user interface.

    I'm still working on the stereo enclosed speakers, but I've ordered some USB powered speakers to use in the meantime for auditory feedback while I iterate versions of the software. https://www.adafruit.com/product/1363

  • Flite

    Muriel Green07/11/2017 at 20:49 0 comments

    I will have to check out Flite, the embedded systems version of Festival text-to-speech software.https://learn.adafruit.com/speech-synthesis-on-the-raspberry-pi

  • Stereo enclosed speakers + amp

    Muriel Green06/30/2017 at 00:37 0 comments

    Instead of paying for the external speakers, my husband salvaged a pair of 6 ohm stereo enclosed speakers from a broken smart TV. Since the raspberry pi has an amp built into the 3.5mm audio jack, I posted on stackexchange how to replace that with an amp suitable for stereo enclosed speakers. Someone kindly replied to my inquiry by recommending this product http://www.mcmelectronics.com/product/28-12812

    It comes in pieces, so I will solder it together this weekend. One step closer!!!!

  • External speakers used inside the enclosure

    Muriel Green06/07/2017 at 15:25 0 comments

    I found these external speakers and I am going to try them on the prototype chiefly because they use USB and no IO pins. These should work for the first generation prototype but will almost certainly be replaced in the second generation build. https://www.adafruit.com/product/3369

  • Speakers

    Muriel Green05/25/2017 at 20:01 0 comments

    Ok, I'm gonna need some speakers. I'm hoping this one will work, it looks like it uses a lot of pins, though, and the screen already uses a lot of pins! https://www.adafruit.com/product/3346https://www.adafruit.com/product/3346

  • Enclosure

    Muriel Green05/25/2017 at 19:54 1 comment

    I have started talks with someone who is going to help me design a custom enclosure for this project. The two main considerations I want to keep in mind are,

    • Heat management. Do we need to add a heat sink, vents, or fan?
    • Child proof the power button. Can we add a sliding panel or recessed cavity to make the power button difficult to access?
    • Speaker placement. Should the case have slots to let sound out? Where should those be placed and does it affect the way the speakers are attached on the inside?

View all 17 project logs

  • 1
    Step 1

    In step one you are going to download the operating system "Raspbian Jessie" and install it onto the Raspberry Pi. The download link is here,https://howtoraspberrypi.com/download/raspbian_latest.zip . You will need to unzip the download and copy it onto a micro SD card. You will insert this micro SD card into the slot on the Raspberry Pi and it will stay there indefinitely.

  • 2
    Step 2

    In step two you are going to install the touchscreen. The touchscreen we are using for this project is the Wave Share Spot Pear, which is only compatible with the operating system Raspbian Jessie. Installing the touchscreen requires several steps which are detailed here http://waveshare.com/wiki/3.5inch_RPi_LCD_(A)http://waveshare.com/wiki/3.5inch_RPi_LCD_(A) This step was the hardest part of this project for me, so hang in there. Once you're over this step it all gets easier!

  • 3
    Step 3

    In step three you are going to download source code for the project "Talker" and copy it onto your Raspberry Pi. The repository for this project is here https://github.com/amendment19/talker go to this URL and click on the green button labeled "Clone or Download" and choose "Download ZIP". Once the zip file is on your desktop, you will need to unzip it and transfer it to the Raspberry Pi (I used a USB drive for this which is why USB drive is listed in the parts list.)

View all 6 instructions

Enjoy this project?

Share

Discussions

hollyartmusic wrote 06/05/2017 at 23:18 point

looking forward to watching this progress! 

  Are you sure? yes | no

Muriel Green wrote 06/30/2017 at 00:45 point

Thank you!

  Are you sure? yes | no

David H Haffner Sr wrote 05/01/2017 at 10:30 point

This is quite a noble project, if I can help just let me know :)

  Are you sure? yes | no

Muriel Green wrote 05/01/2017 at 13:34 point

Thank you, David! I will be sure to message you if I hit any snags and need advice :)

  Are you sure? yes | no

Ulysse wrote 04/25/2017 at 20:15 point

hi Muriel, thank you  !

  Are you sure? yes | no

Muriel Green wrote 05/01/2017 at 13:34 point

Hi Ulysse! I'm excited to see how our projects develop over the next few months :)

  Are you sure? yes | no

Muriel Green wrote 03/21/2017 at 19:09 point

Thanks Haydn! This is along the lines of what I was thinking for my first generation version of the device! Eventually I want to make a version that runs MaryTTS, but maybe not for this contest.

  Are you sure? yes | no

haydn jones wrote 03/21/2017 at 16:30 point

An easy setup could be to use the pi with the official touchscreen and load straight into a web browser, and make the interface in html so it is a web site stored on the pi. You could even go on to fiverr.com and pay someone $5 to read a list of words for you :)

  Are you sure? yes | no

Muriel Green wrote 08/02/2017 at 03:17 point

Haydn! This was such a good idea, thank you! I have some work to do to get it fully pythonic, but the minimum viable product works! http://murielg.pythonanywhere.com/

  Are you sure? yes | no

Similar Projects

Does this project spark your interest?

Become a member to follow this project and never miss any updates