Close
0%
0%

DIY String Shooter

A fun little gadget that shoots a string with surprising speed — fully 3D-printed and super easy to use!

Similar projects worth following
0 followers
This 3D-printed String Shooter is a fun and powerful mini launcher designed for quick action and smooth firing. Built with a compact mechanism and durable parts, it shoots string projectiles with surprising accuracy. Whether for school projects, experiments, or just playful engineering, this little gadget is an exciting blend of creativity and mechanics.

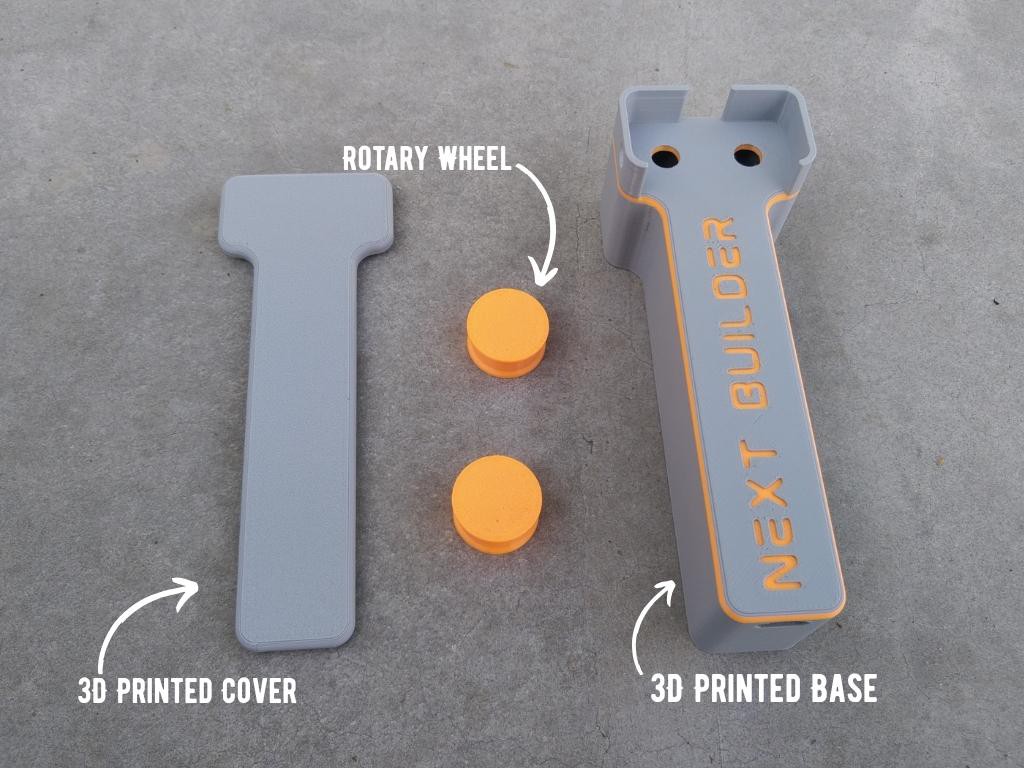
This is my DIY 3D Printed String Shooter—a fun little project I made using two micro dc toy motor. It’s a compact and easy-to-use tool that shoots a string using two rotating drums.

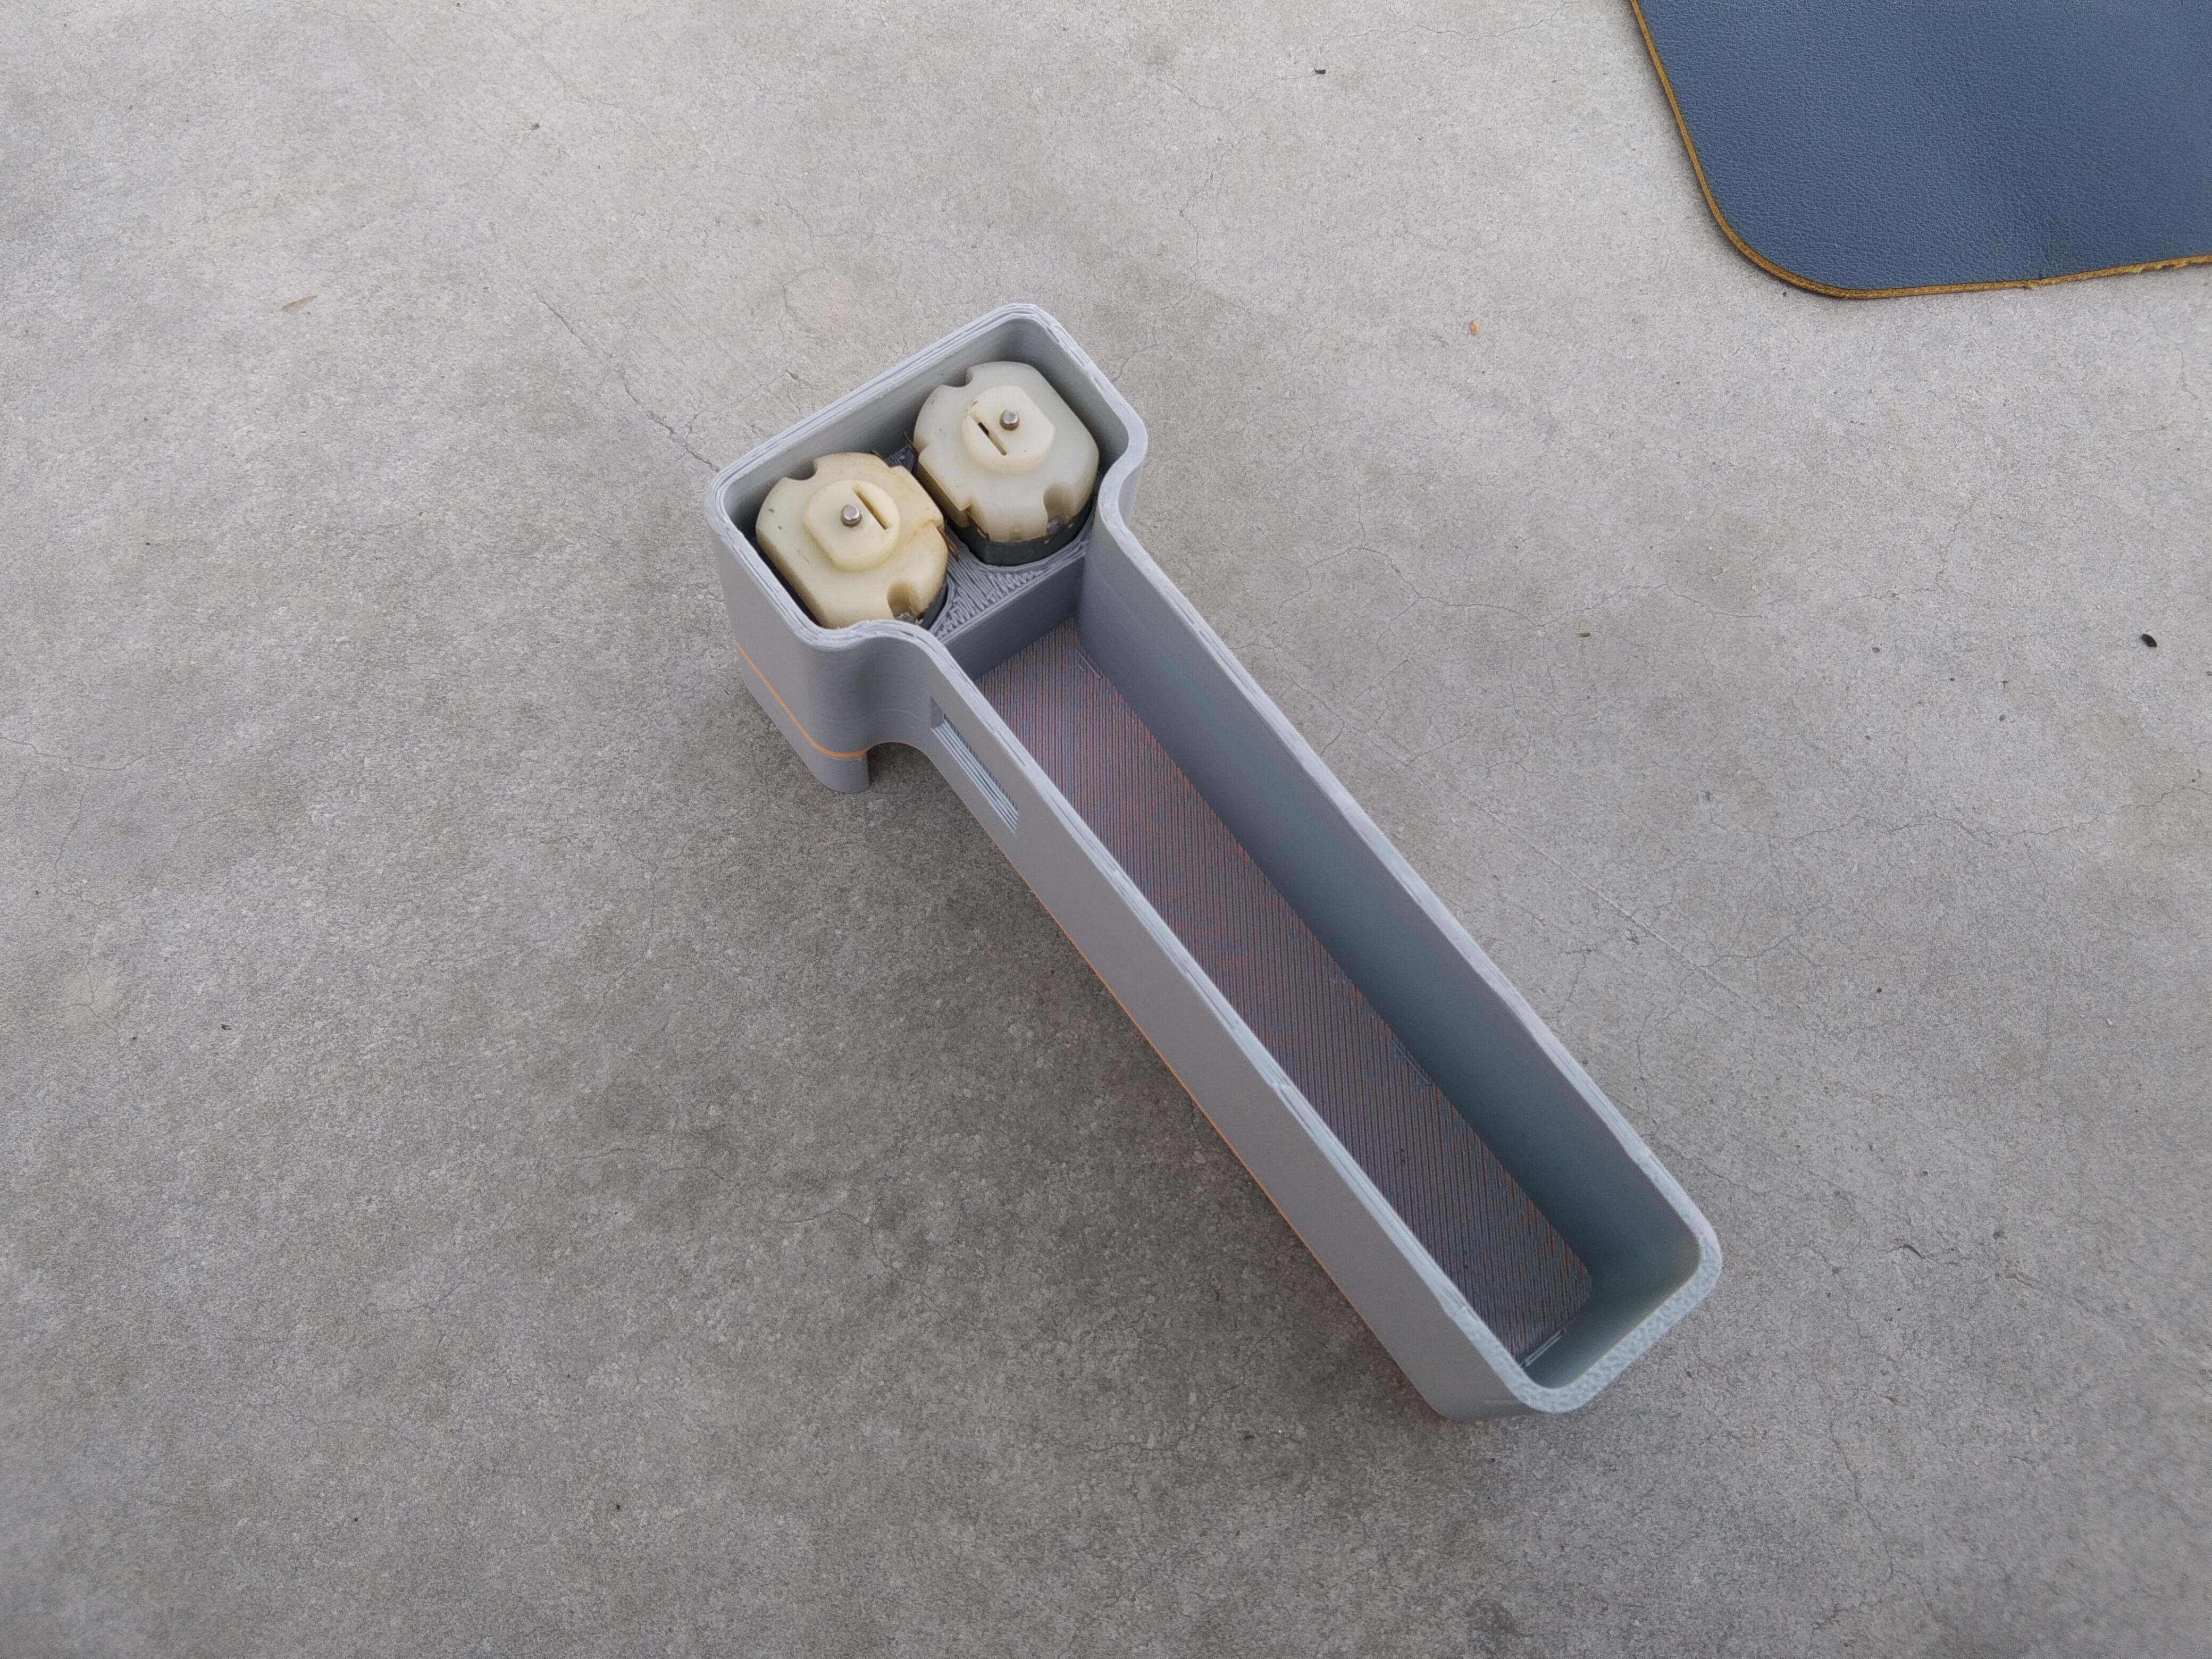
The idea behind this project was to create something playful but also useful for experiments, school demos, or just to enjoy as a creative weekend build. It doesn't use any complex electronics or mechanisms—just a simple twist-and-shoot system that works surprisingly well!

If you enjoy building cool stuff, this is a great project to try out. It’s beginner-friendly, quick to assemble, and works using common materials you probably already have.

Wheel.stl

For 3D Printing

Standard Tesselated Geometry - 71.18 kB - 12/11/2025 at 03:55

Download

Housing.stl

For 3D Printing

Standard Tesselated Geometry - 320.79 kB - 12/11/2025 at 03:54

Download

Cover.stl

For 3D Printing

Standard Tesselated Geometry - 116.78 kB - 12/11/2025 at 03:54

Download

  • 1 × 3.7v Rechargeable Battery
  • 1 × TP4056 Charging Module
  • 1 × ON/OFF SPST Switch
  • 2 × 130 Micro Toy Motor

  • 1
    Step 1: CAD & 3D Printing
    CAD & 3D Printing

    CAD & 3D Printing

    CAD & 3D Printing

    To start this project, I designed the DIY String Shooter using Fusion 360. It’s a simple and compact design that’s easy to print and assemble. If you’d like to view or edit the model, you can open it directly in your browser using the Fusion 360 web viewer. Feel free to customize it however you like.

    For 3D Printing, You can directly download the required STL files below:

    1. Housing.stl
    2. Cover.stl
    3. Wheel.stl

    For 3D printing, I used JLC3DP, a professional 3D printing service known for its high precision, affordable prices, and wide range of material options. They support advanced printing technologies like SLA, SLS, MJF, and FDM, delivering smooth, durable parts that are perfect for both prototypes and final builds.

    One of the best things about JLC3DP is their fast turnaround time and reliable global shipping, making it super convenient for hobbyists, students, and professionals alike. Whether you're just starting out or working on a serious engineering project, JLC3DP is a great choice.

    👉 Use the link to get an exclusive discount on your first order from JLC3DP!

  • 2
    Motor Assembly

    After getting the 3D printed parts, I started with assembling the DC toy motors. Place both motors into their slots on the base. They should fit perfectly in the spaces designed for them. Once placed, apply a small amount of super glue to hold them in position. Make sure not to get glue on the motor shafts, as that can stop them from spinning. Let the glue dry properly before moving on.

  • 3
    Charging Module Assembly

    Once the motors are securely in place, it's time to Secure the TP4056 charging module. Locate the dedicated slot for the module on the base. On the back side, you’ll see a cutout perfectly shaped for the Type-C port. Carefully align the port with the cutout so it fits nicely. Once aligned, use a small amount of super glue to fix the module in place. Make sure the port is straight and accessible from the outside. Let the glue dry completely before moving on.

View all 11 instructions

Enjoy this project?

Share

Discussions

Does this project spark your interest?

Become a member to follow this project and never miss any updates