 Doctor Volt
Core Components
For this build, the main components are:
- 7.5" Waveshare Black/Whitee-paper display
- Waveshare Universal E-Paper Driver Board (ESP32-based)
- Custom 3D-printed or hand-crafted enclosure
- Push Button and 10k resistor
If the device should run from a battery:
- Lithium-ion battery
- USB 5V 1A 18650 Lithium-Battery Charger Module
The display connects to the driver board using a flat-flex (FPC) cable, which makes he setup easy.
 GPIO 33 of the module must be connected to a push button, that pulls 3.3 Volt to ground, like shown in the pictures below:

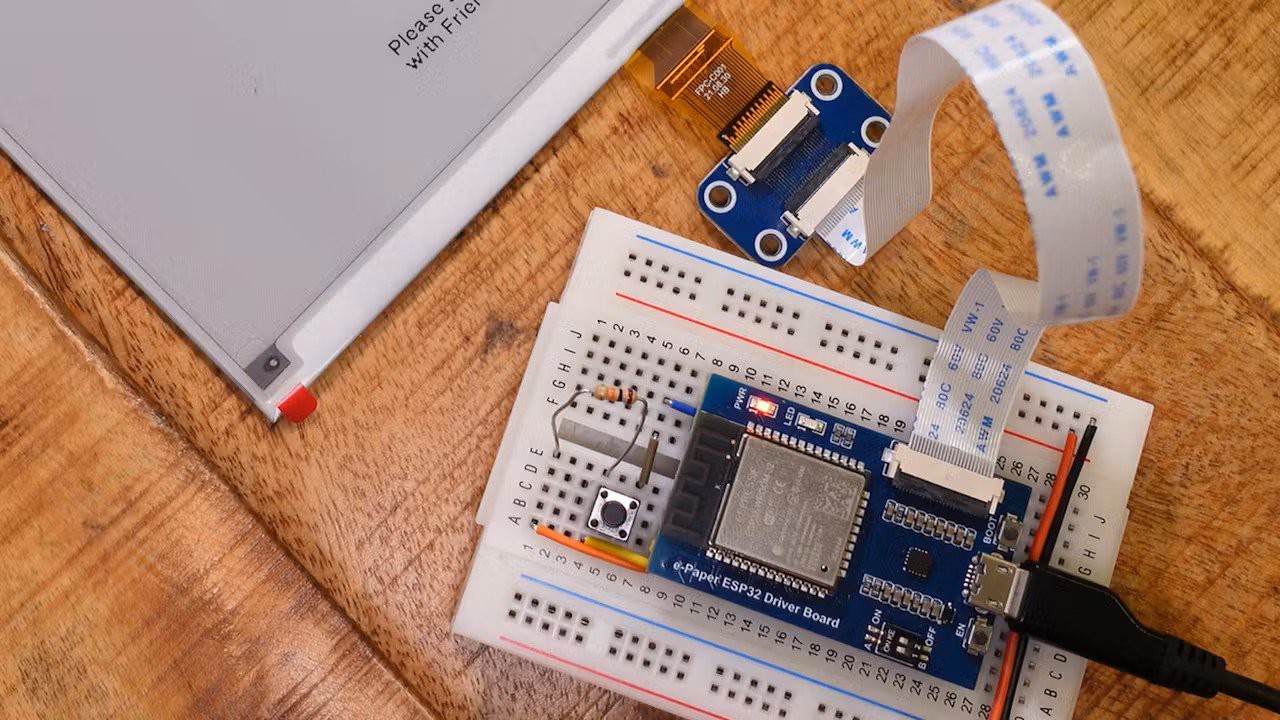
The button is used to switch between screens, reset the device, or trigger user-defined functions.
Build And Flash The Firmware
To build and flash the firmware, you’ll need:
- Visual Studio Code with PlatformIO extension
- Git command-line tools
Step 1: Cloning the Firmware
Clone the Terminal firmware repository and check out a stable release (v1.7.1 in this case):
git clone https://github.com/usetrmnl/trmnl-firmwarecd trmnl-firmwaregit checkout tags/v1.7.1
git clone https://github.com/usetrmnl/trmnl-firmware
cd trmnl-firmware
git checkout tags/v1.7.1
This ensures a known-good firmware version. ZIP downloads also work if you prefer not to use Git.
Once opened in VS Code, PlatformIO automatically detects the project and installs the required toolchains and libraries. This step can take a while—let it finish uninterrupted.
Step 2: Configure The Project in PlatformIO
- Open PlatformIO Home
- Go to Projects
- Select your Terminal project
- Choose the Waveshare ESP32 driver as the default environment
- Save the configuration
- Compile and flash the firmware on the module
Wi-Fi and Device Registration
On first boot, the ESP32 creates a temporary Wi-Fi access point with the SSID "TRMNL". Connect to it and enter your network credentials via the captive portal.
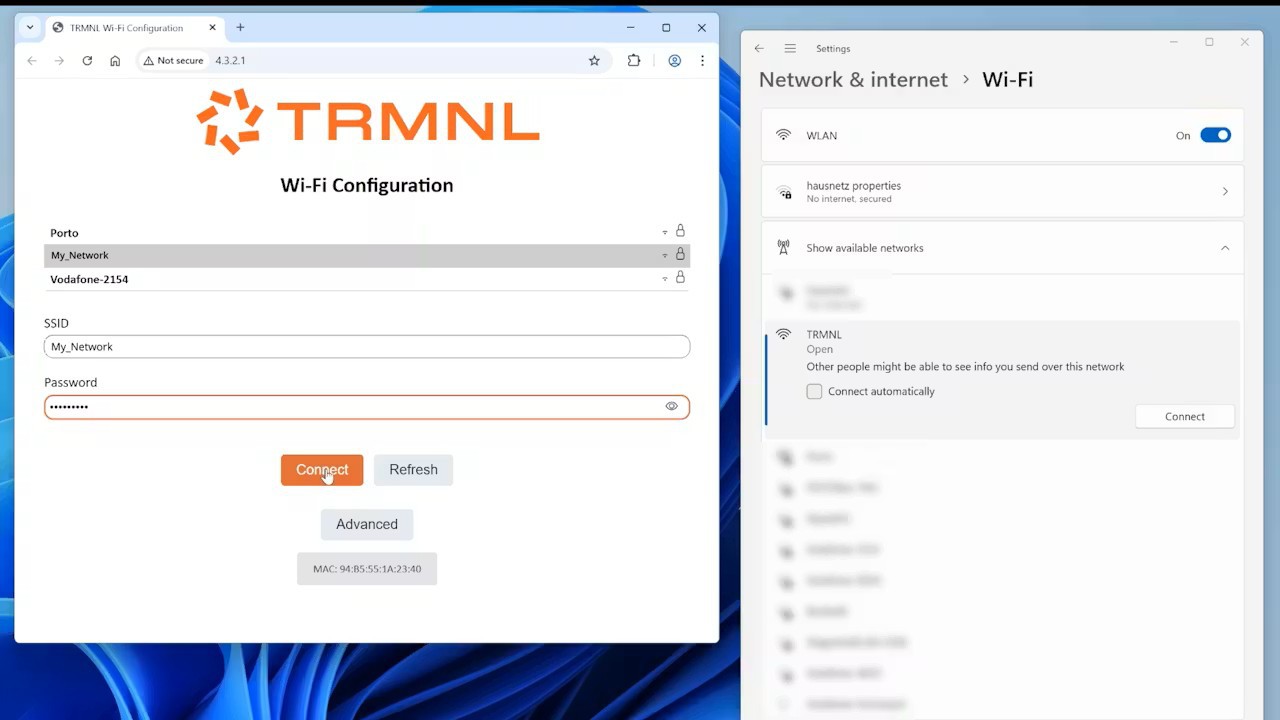
If the portal doesn’t open automatically, navigate to:
http://4.3.2.1
Device Registration
Once connected, you’ll see a registration screen. Terminal BYOD devices require a license, which you can order online here: https://shop.usetrmnl.com/products/byod. Enter your order number (which you will receive by email) and a nickname or email address into the registration form to obtain your Friendly ID—a six-character registration code.
 Use this Friendly-ID to link the device to your account.
Device Configuration
Once the device is registered, configuration is handled entirely through the Terminal dashboard. Here you can assign a human-readable device name and select the appropriate device model. Since Terminal supports a wide range of e-paper hardware, including repurposed e-book readers, the model selection is important. For this build, the Terminal OG 2-bit profile is a good match, as it enables black and white output along with two additional gray levels.
The dashboard also lets you define what happens when the physical button is pressed, including short and long press behavior. This can be used to cycle through pages, trigger refreshes, or perform resets, depending on your preferences and workflow.
Power-related settings are grouped under sleep and refresh options. Sleep mode allows the display to pause updates for a defined period, optionally showing a dedicated sleep screen. Refresh intervals determine how often new content is fetched and rendered, which has a direct and significant impact on battery life. Longer intervals dramatically reduce power consumption, making them especially important for battery-powered installations.
You can also choose between pure black-and-white rendering and grayscale output, depending on your display capabilities and visual preferences. Additional options include display mirroring, which allows multiple devices to stay in sync, and developer-specific settings such as registering the device’s MAC address for advanced features. Among all these parameters, refresh timing remains the most critical lever for balancing usability against power efficiency, so it’s worth spending some time fine-tuning...
Read more »