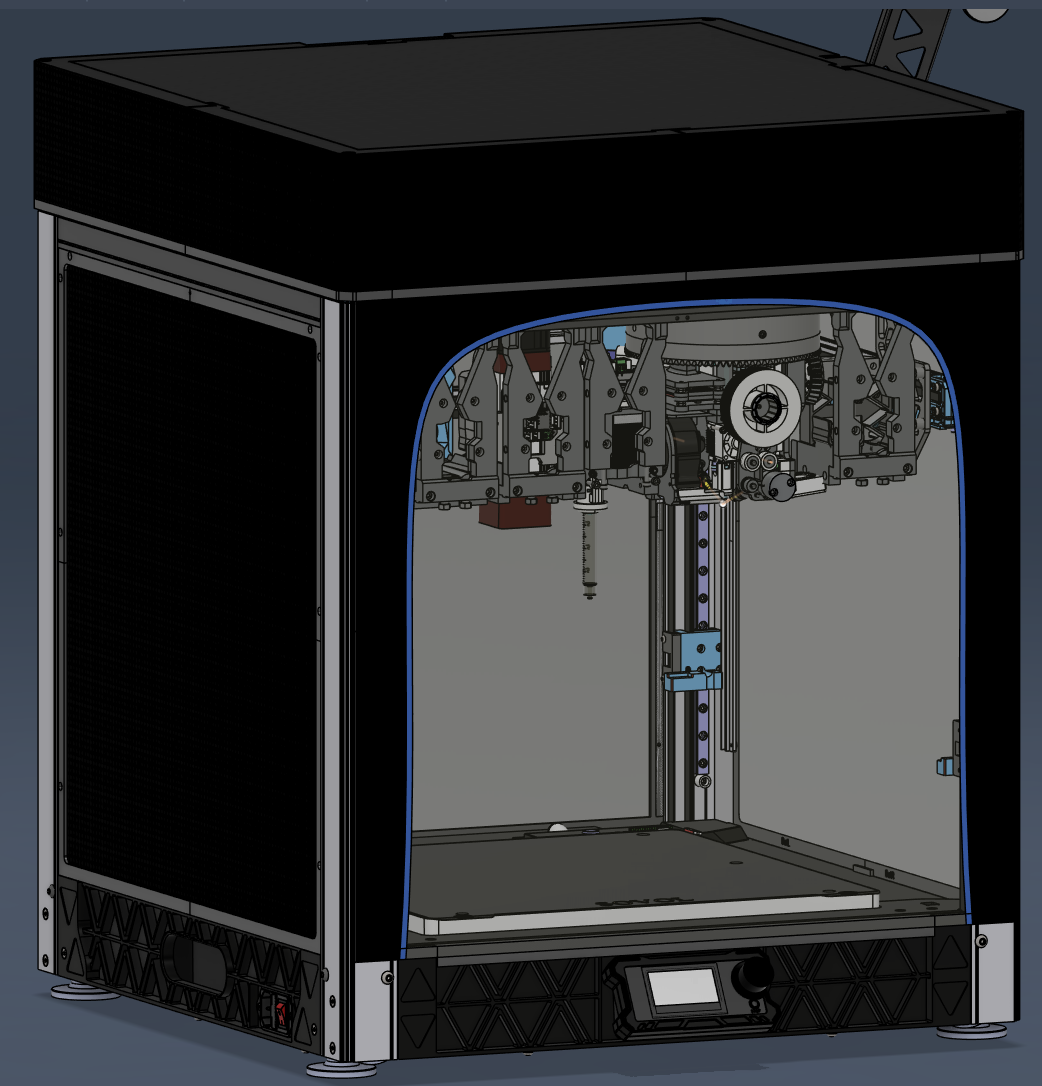
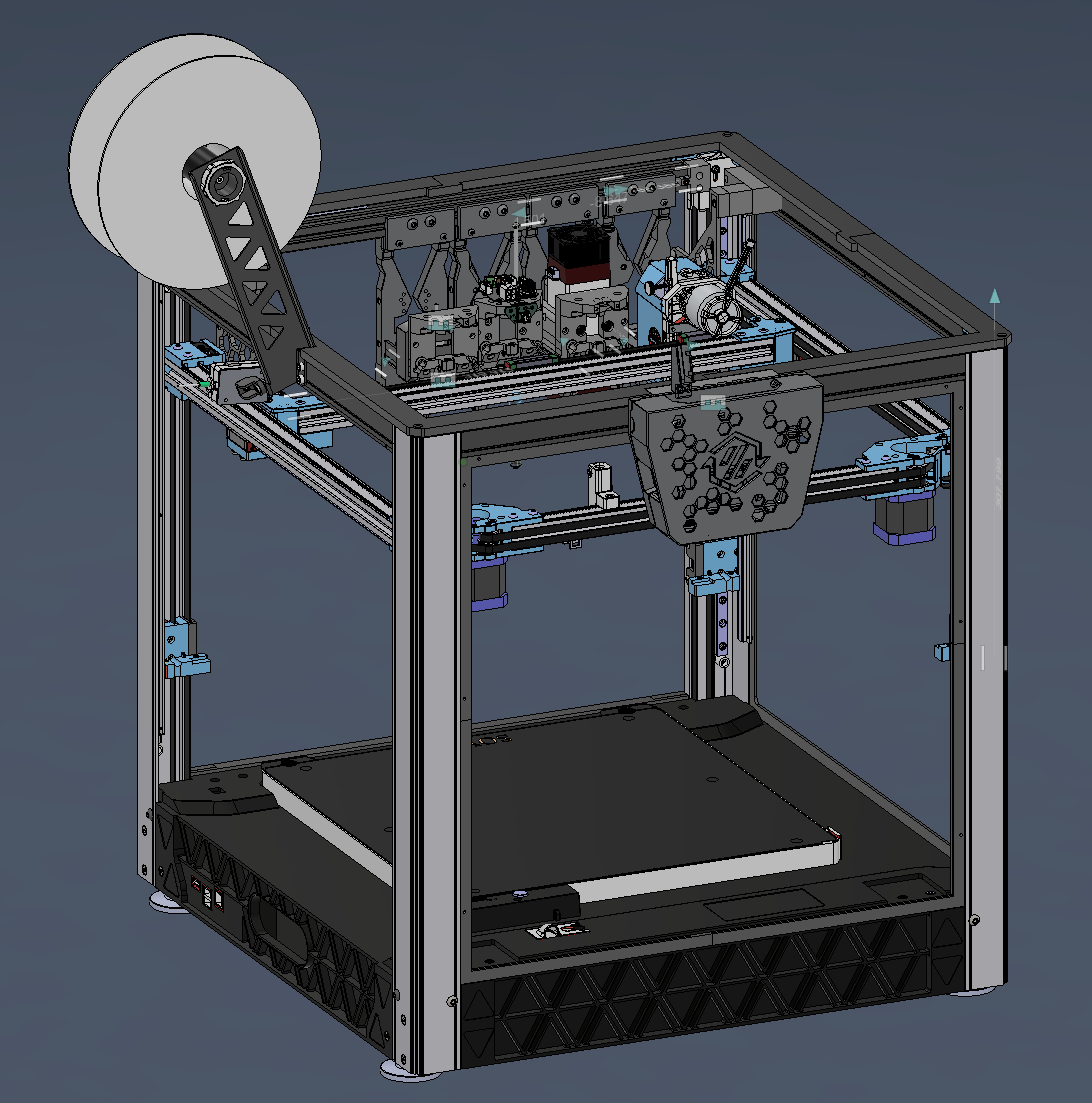
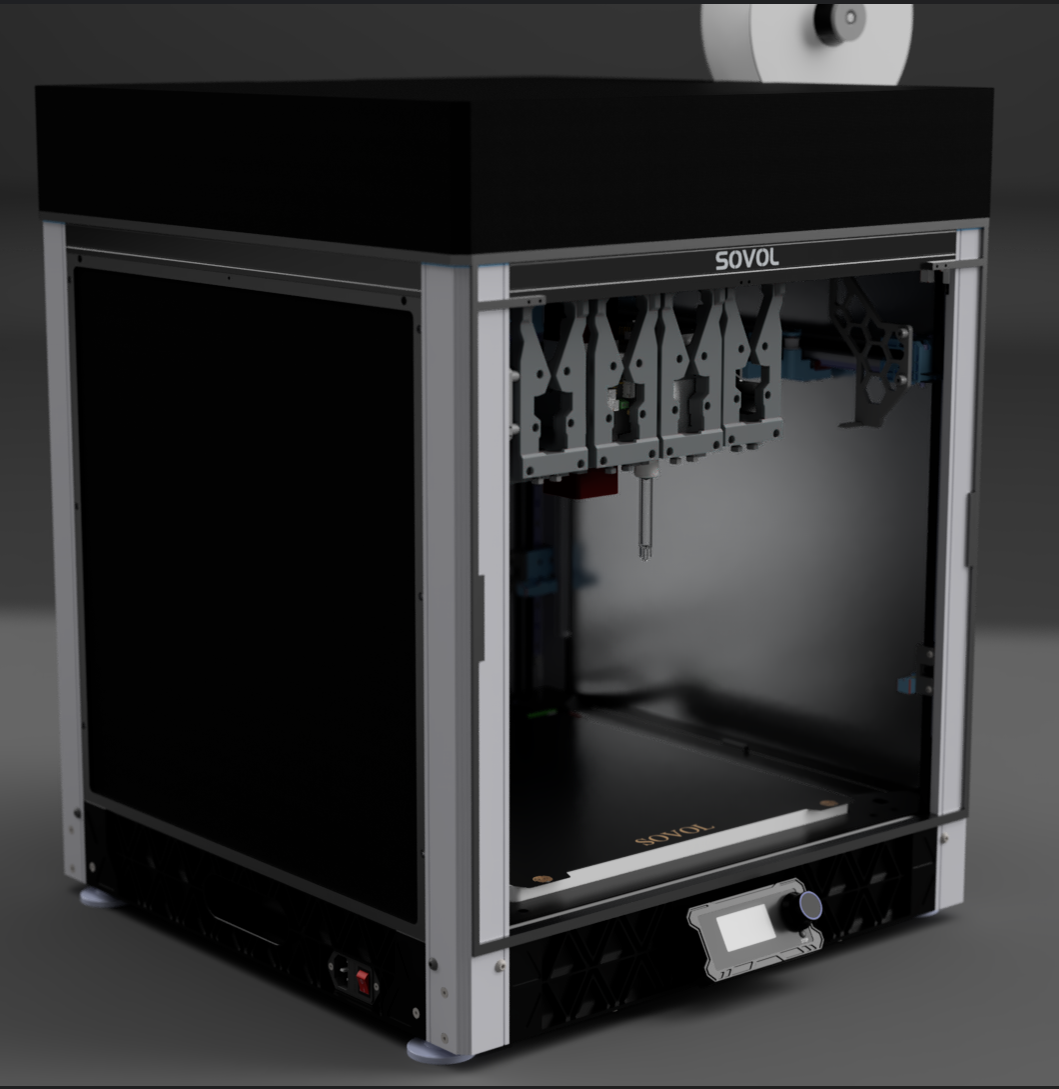
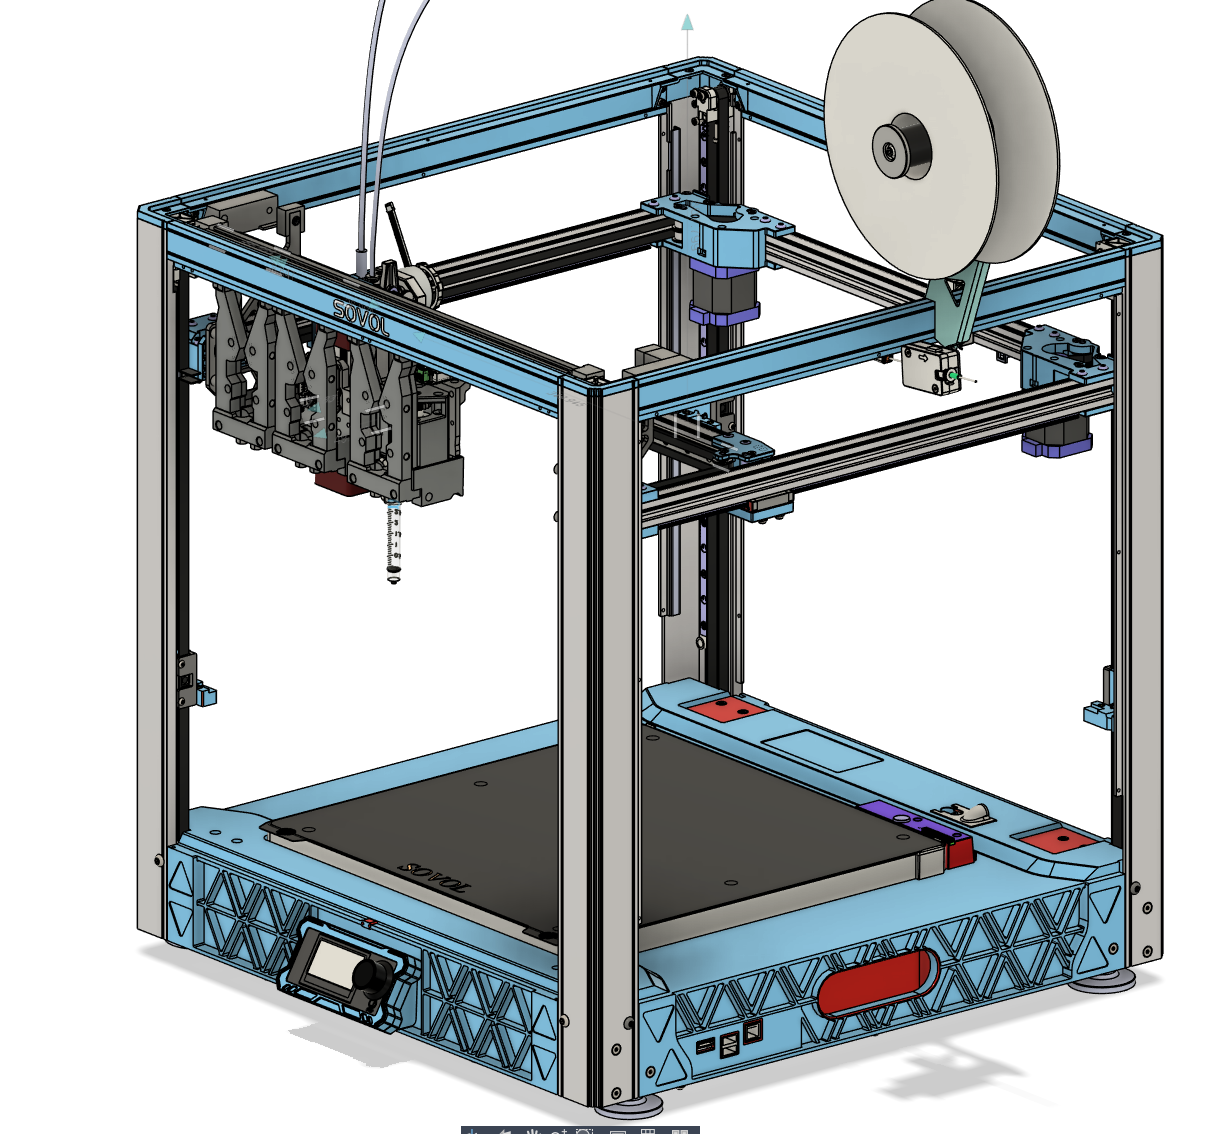
Hybrid Tool-Changing Platform
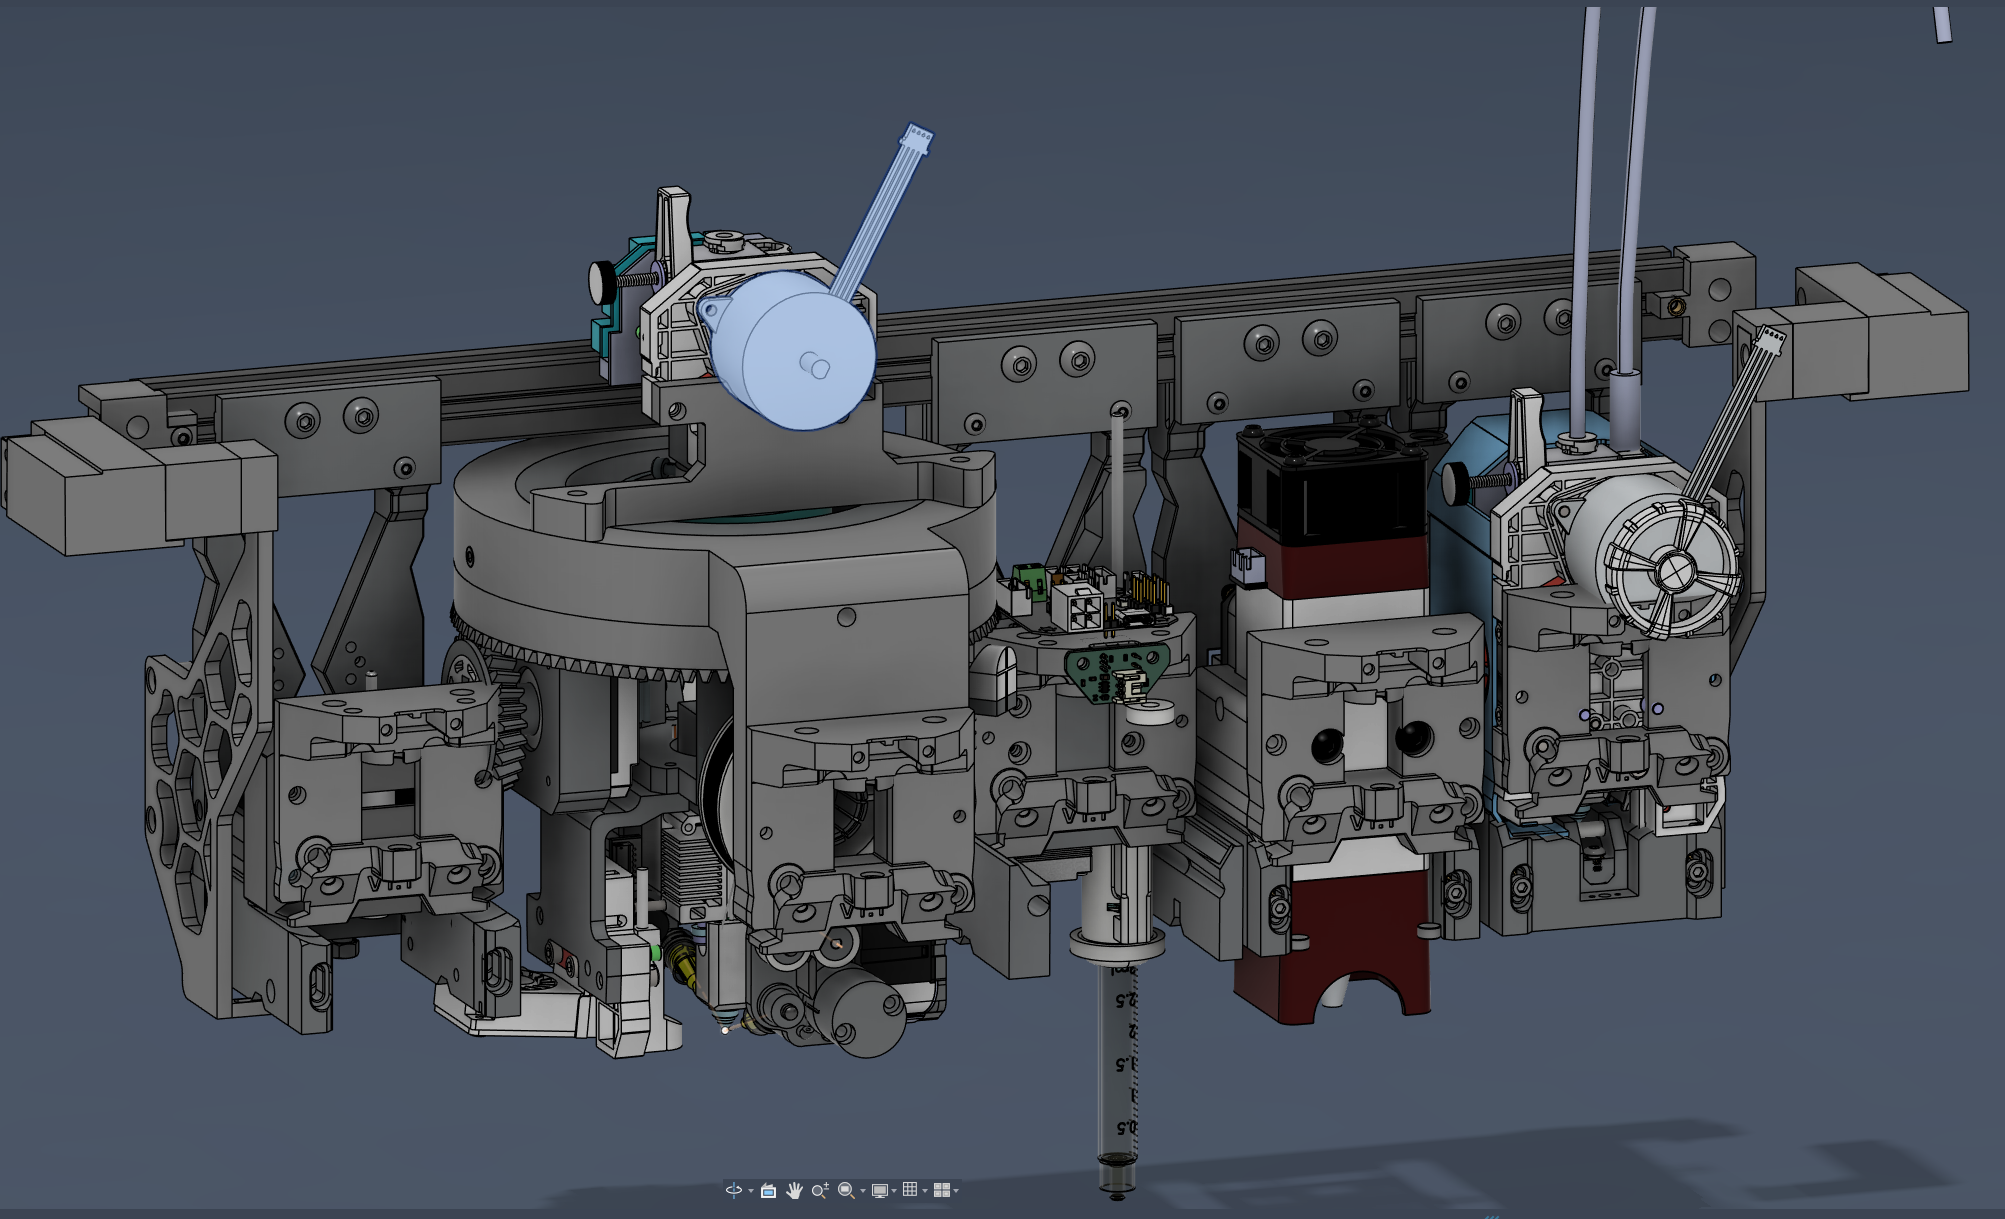
Consisting in a 3d printer that integrates six distinct manufacturing processes into a single automated workflow by using a toolchanger for printing/assembly electronic hardware:
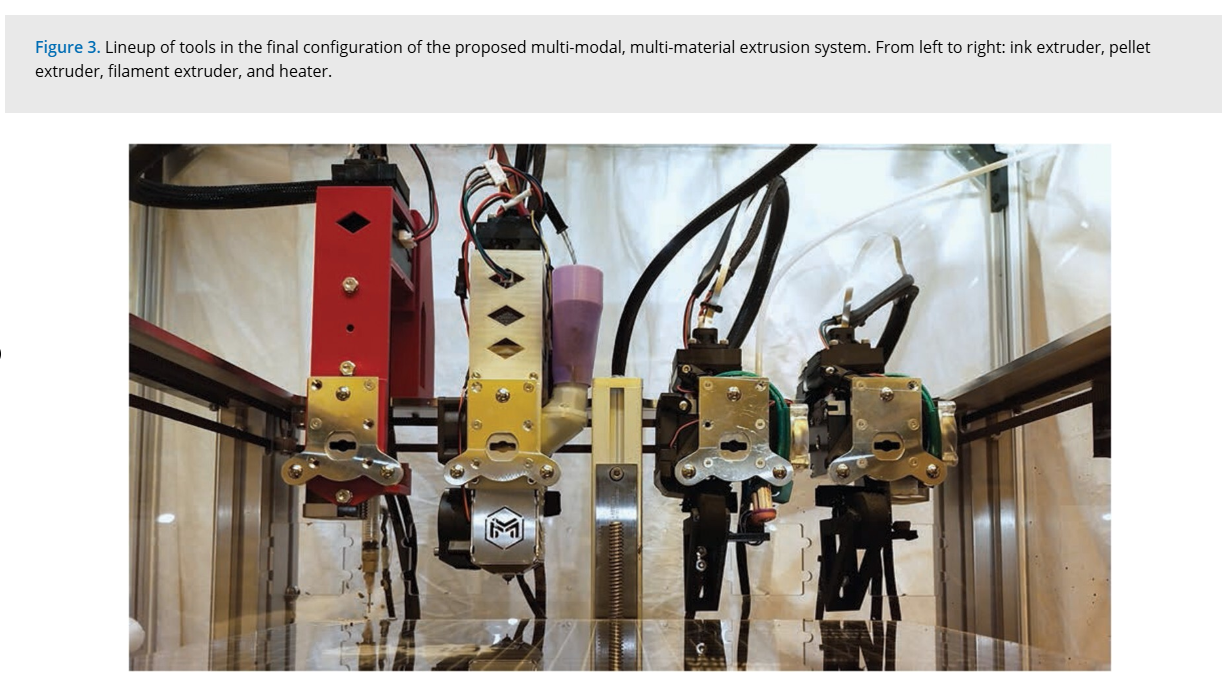
- Structural FDM 3d Printer extruder: High-temperature extrusion of engineering thermoplastics (ASA/PC) to create the chassis and dielectric layers..
- Laser Sintering (10W): used for the in-situ reduction of metal-oxide inks, synthesis of Laser-Induced Graphene (LIG), and precision cutting/engraving of masks.In-situ reduction of Copper Oxide inks and synthesis of Nickel-Graphene sensors (LIG), laser engraving and cut.
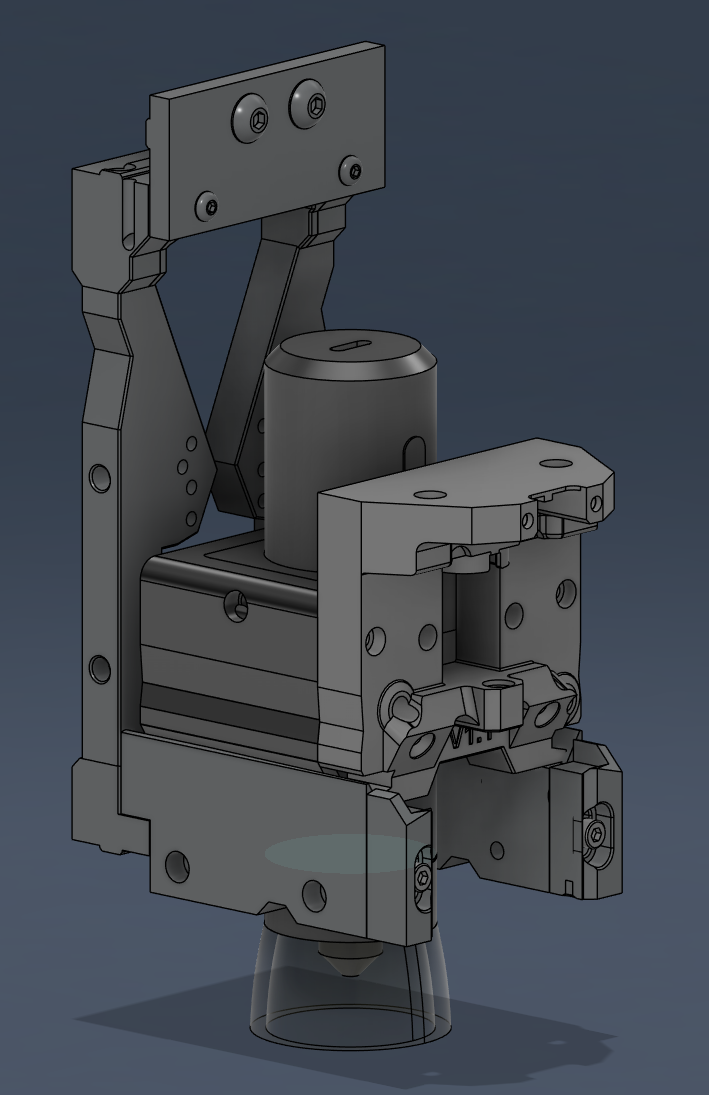
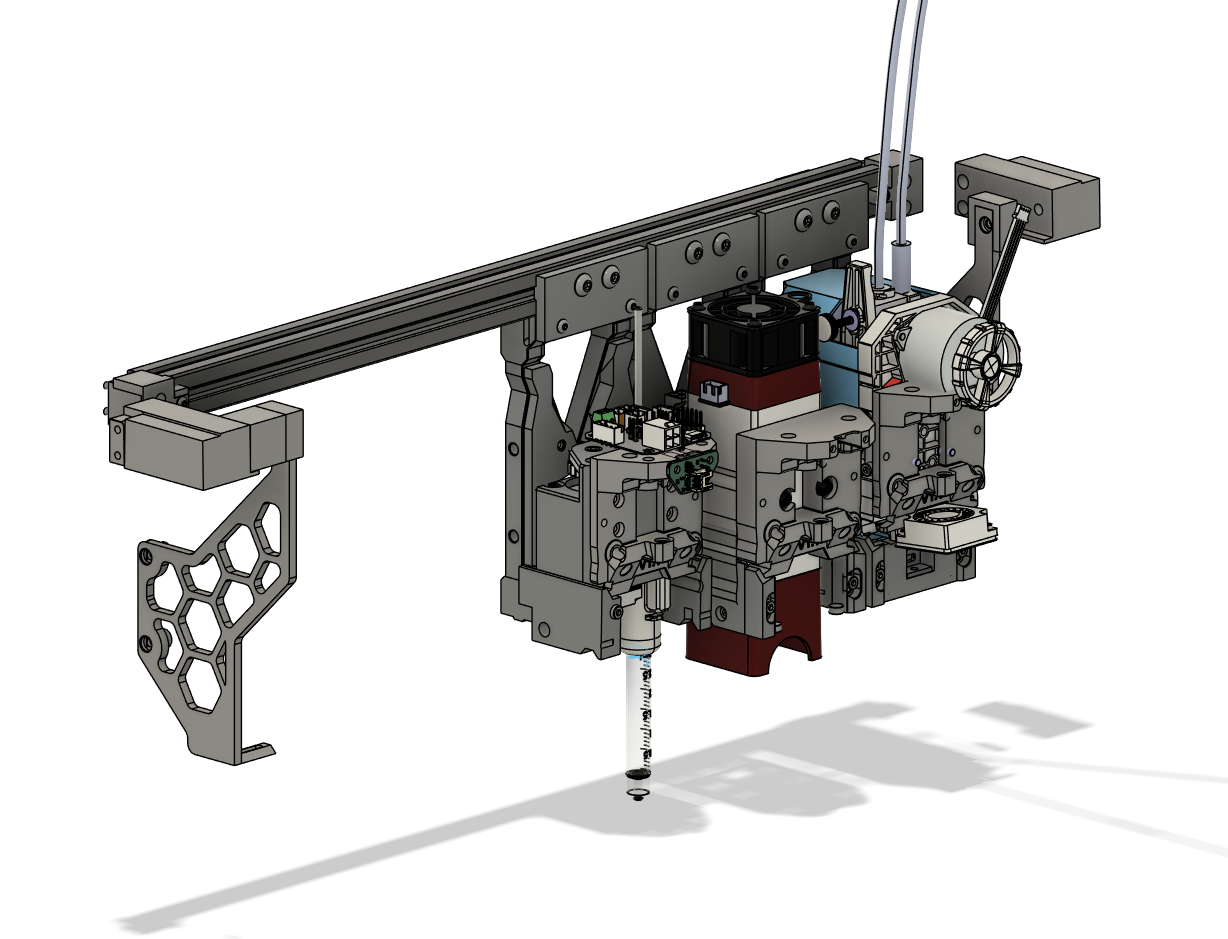
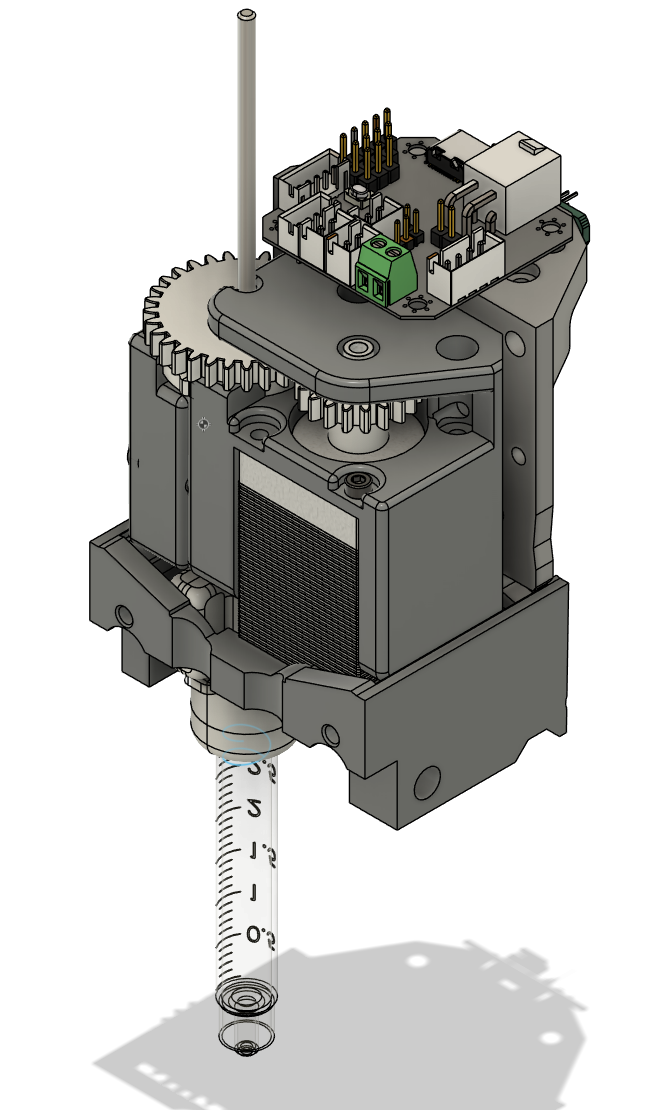
- (Future goal/ outscope / pending) Direct Ink Writing (DIW): Precision dispensing of conductive pastes using syringes or inkjet cartridges.
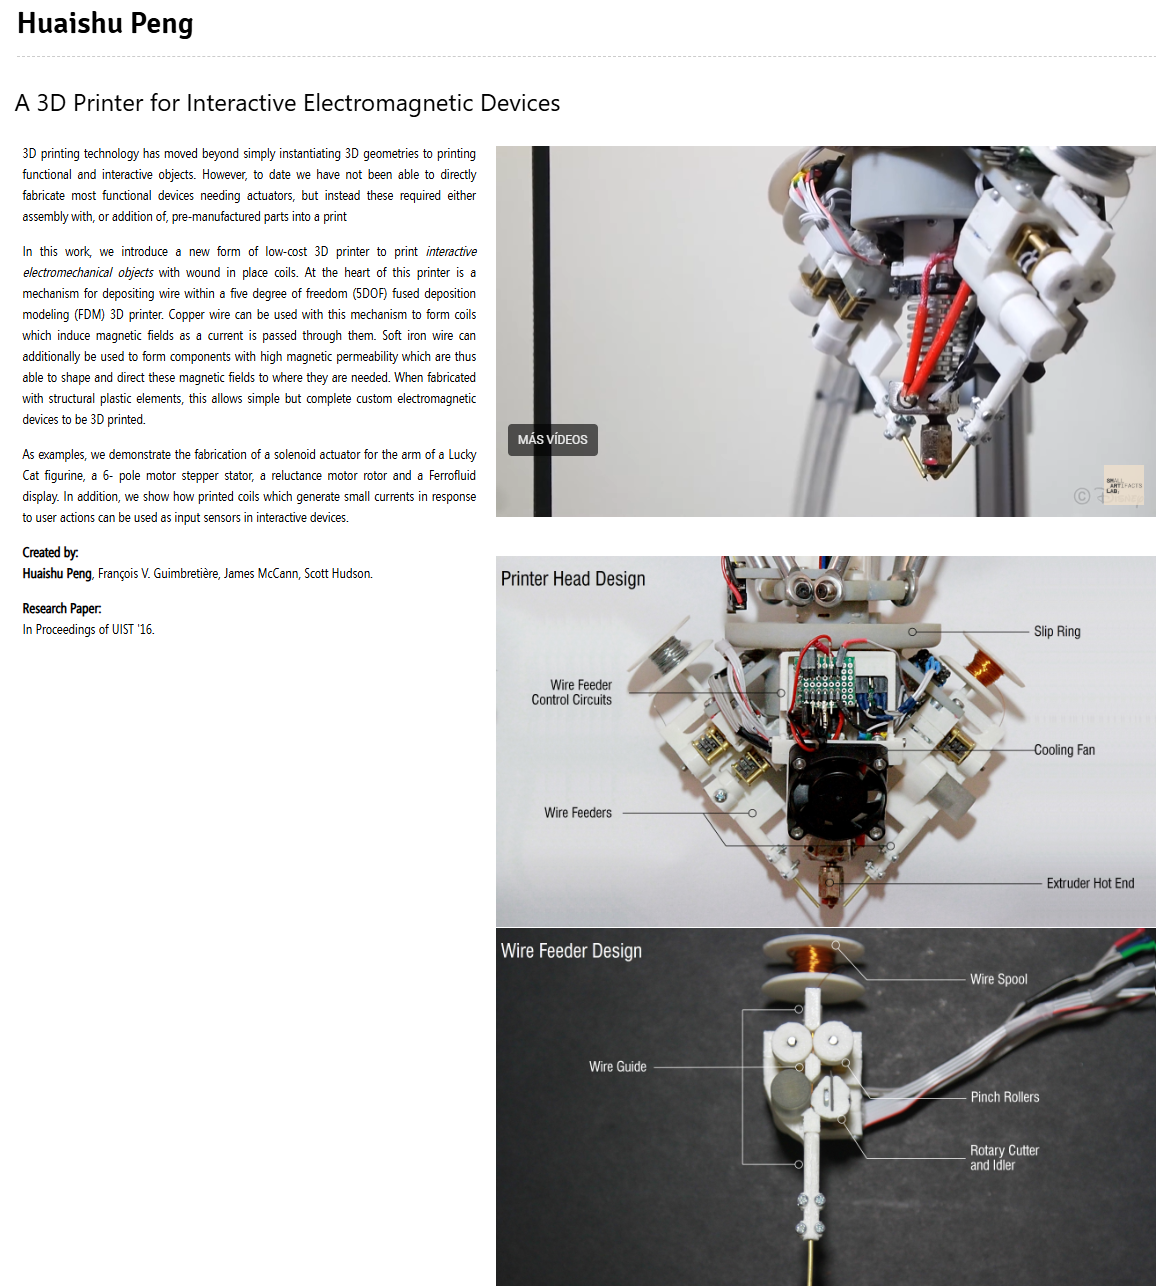
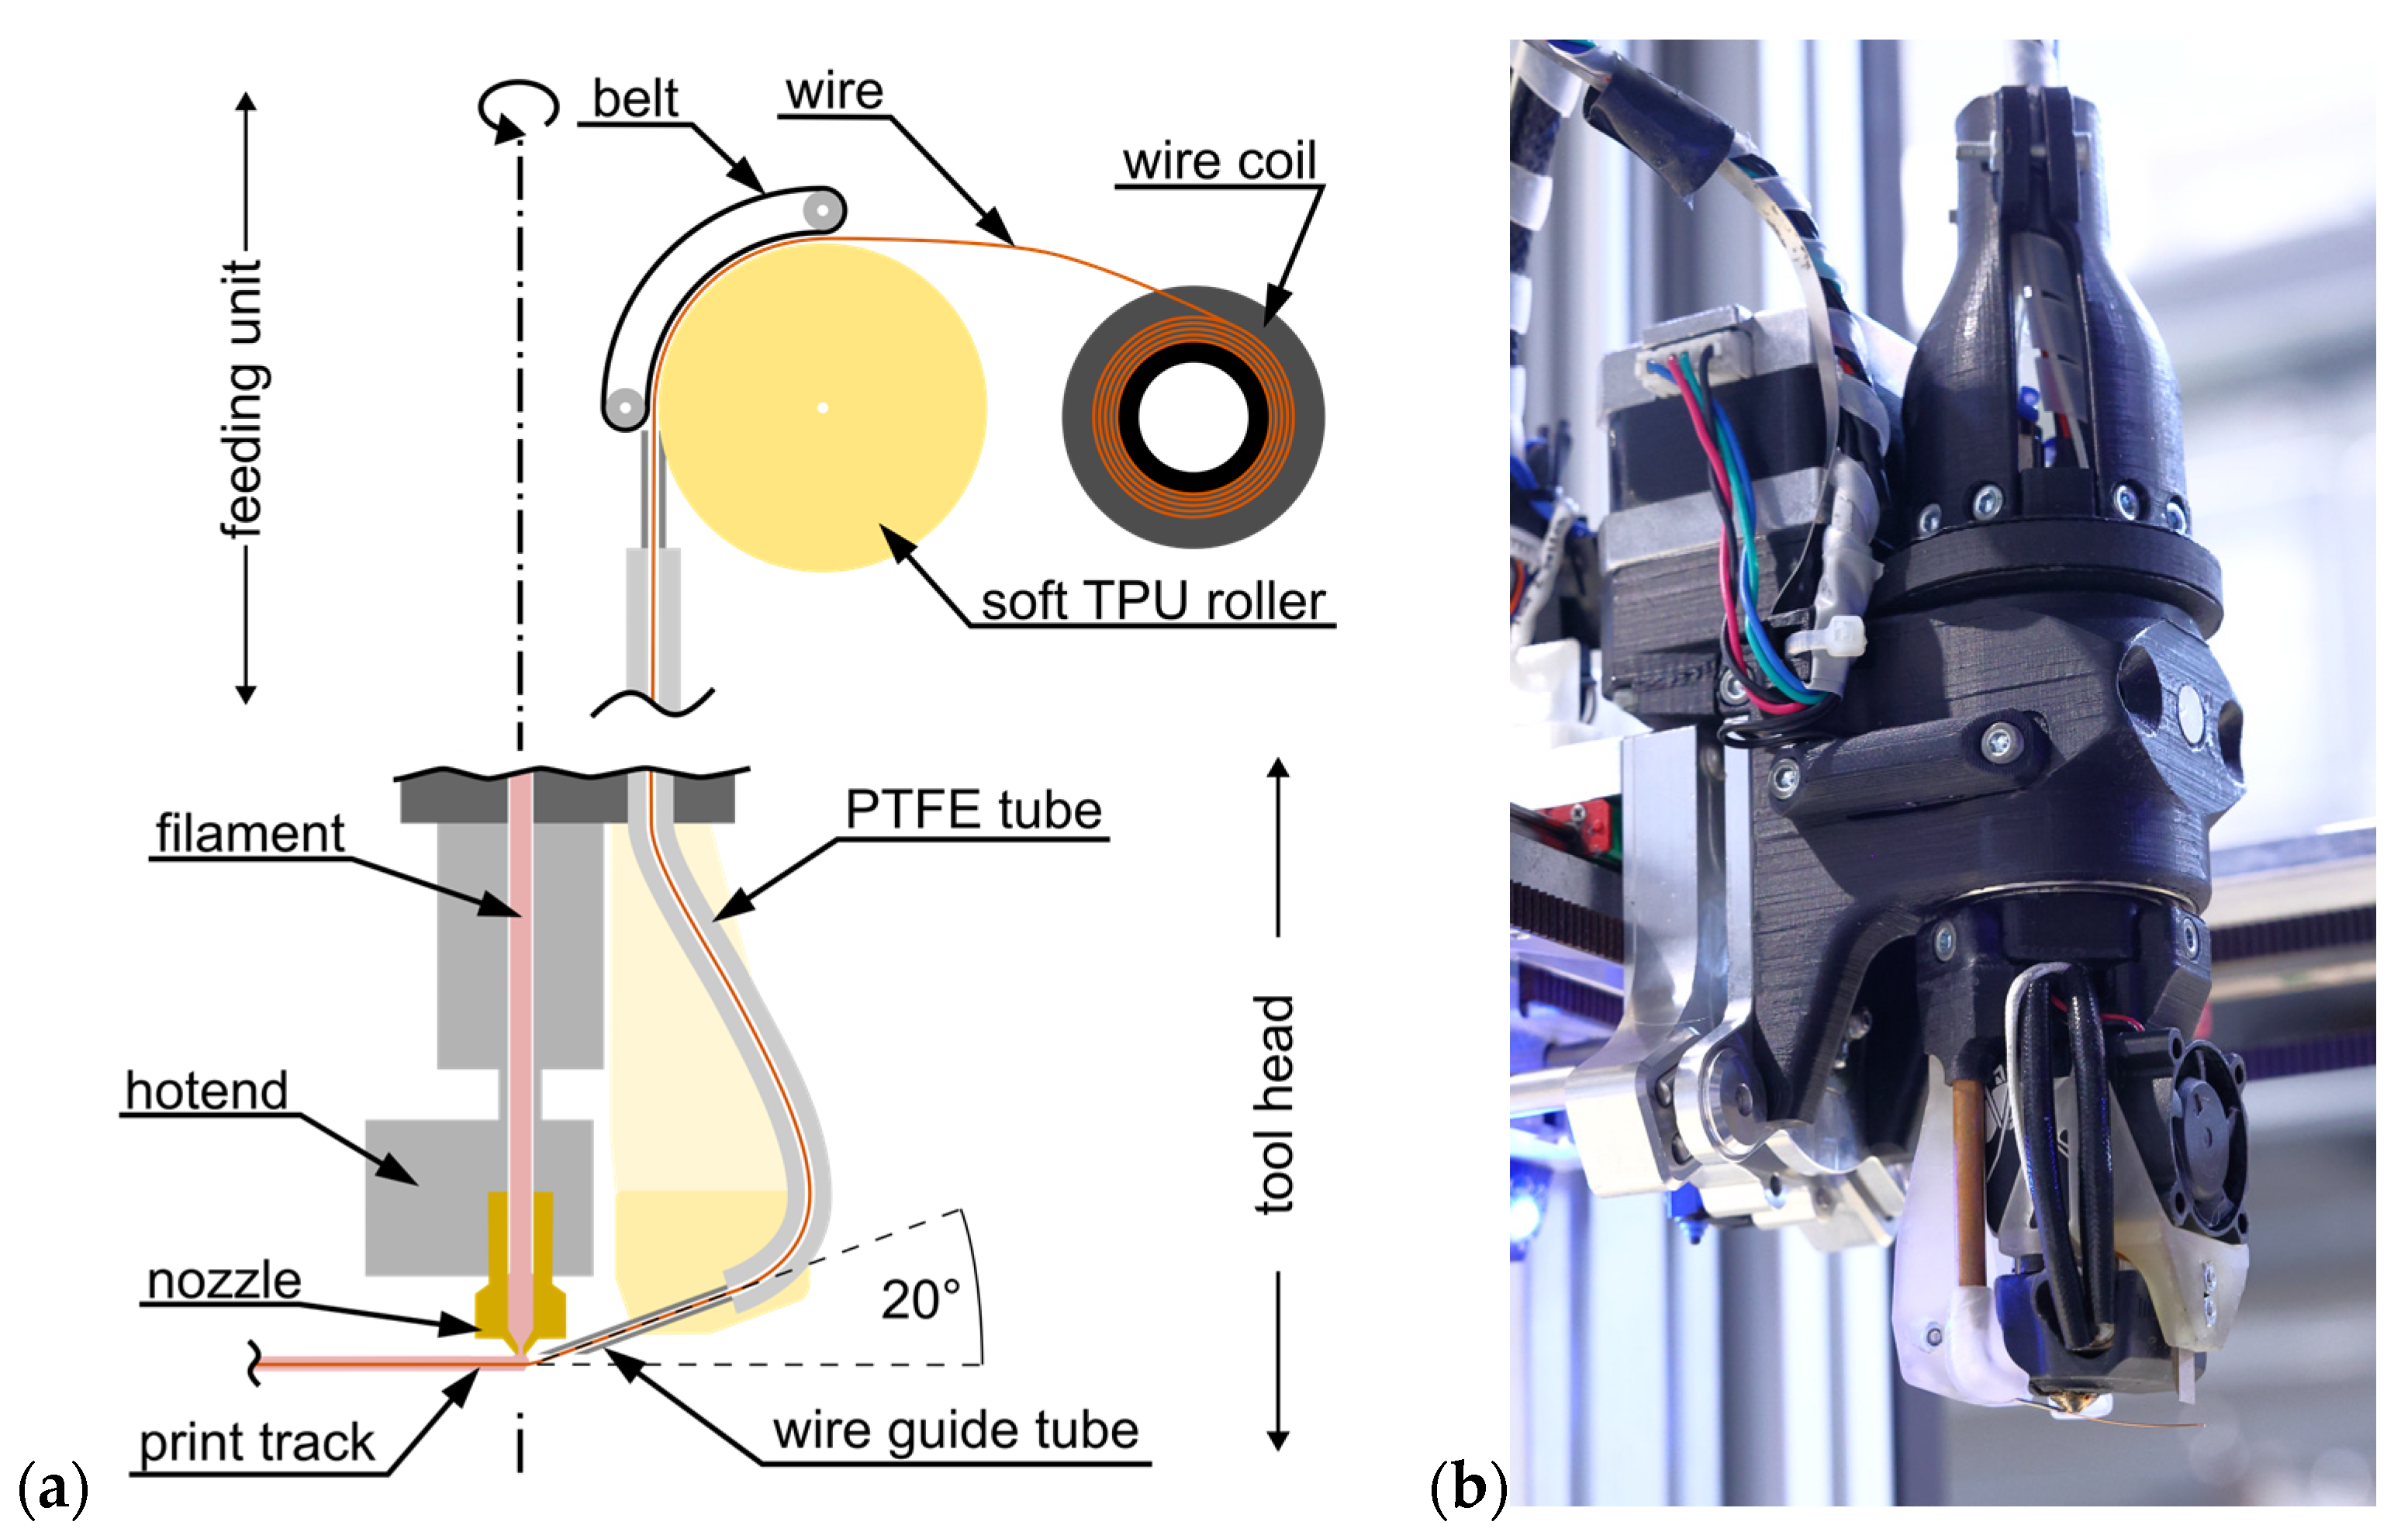
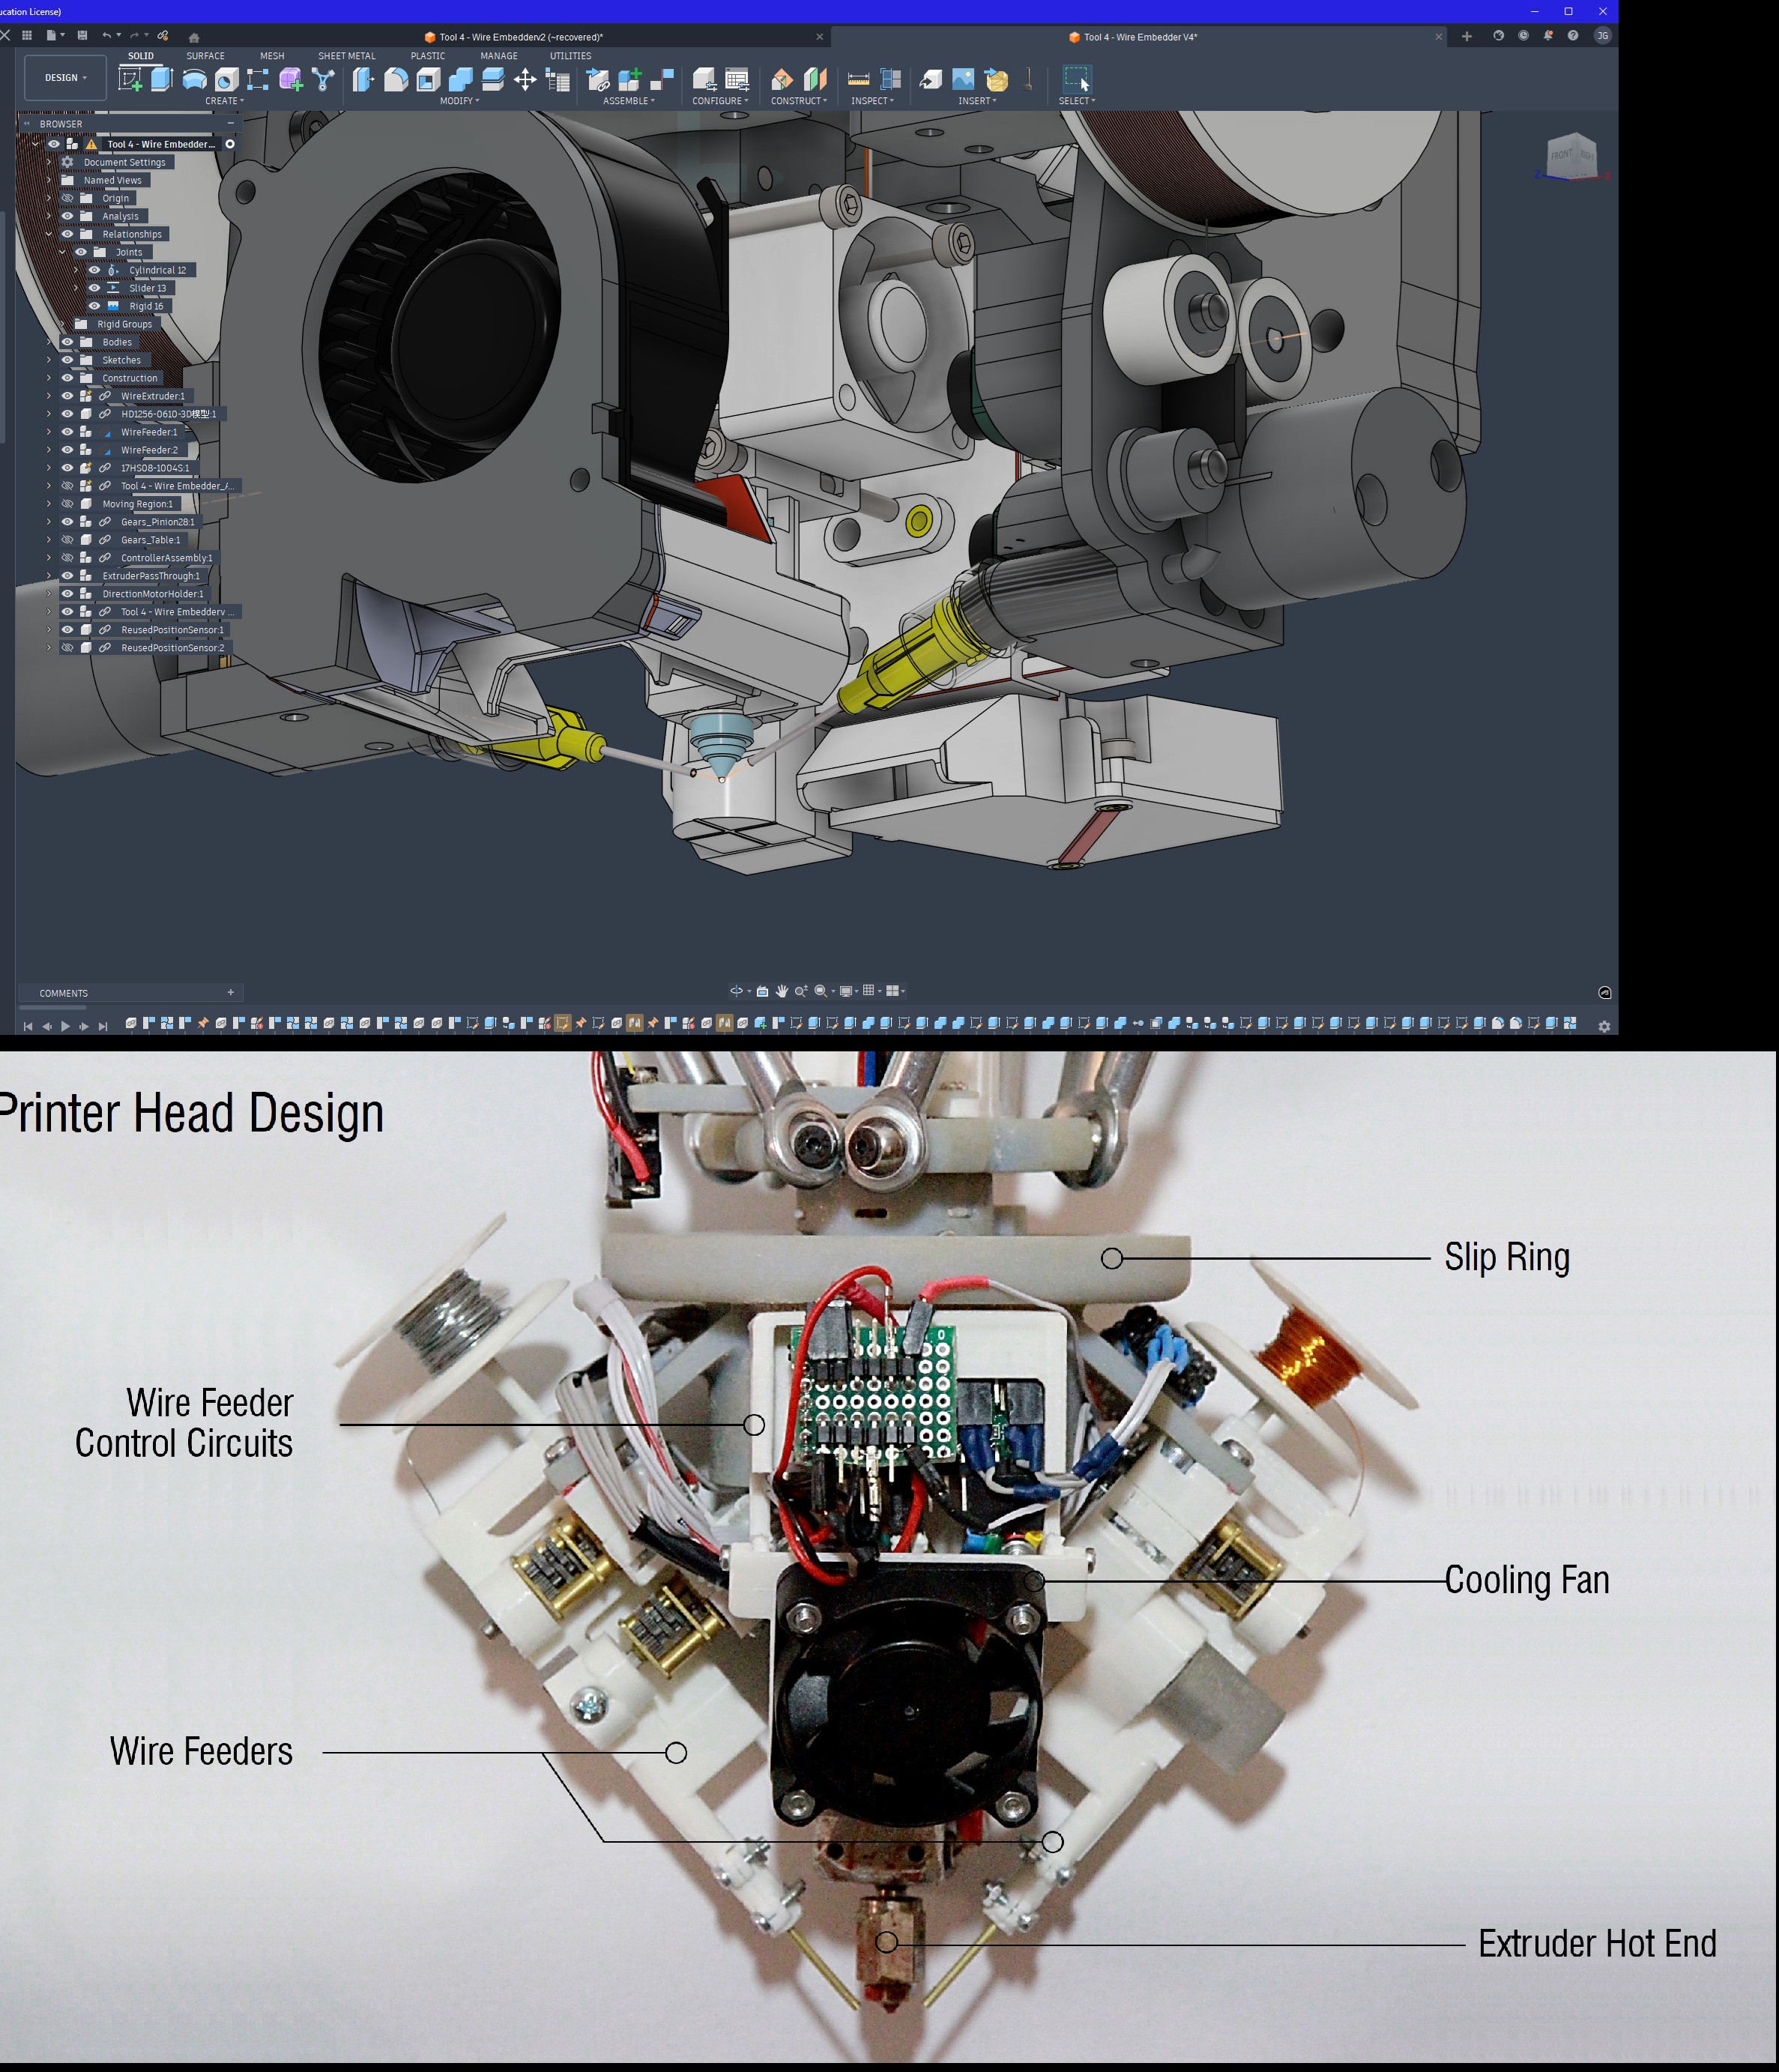
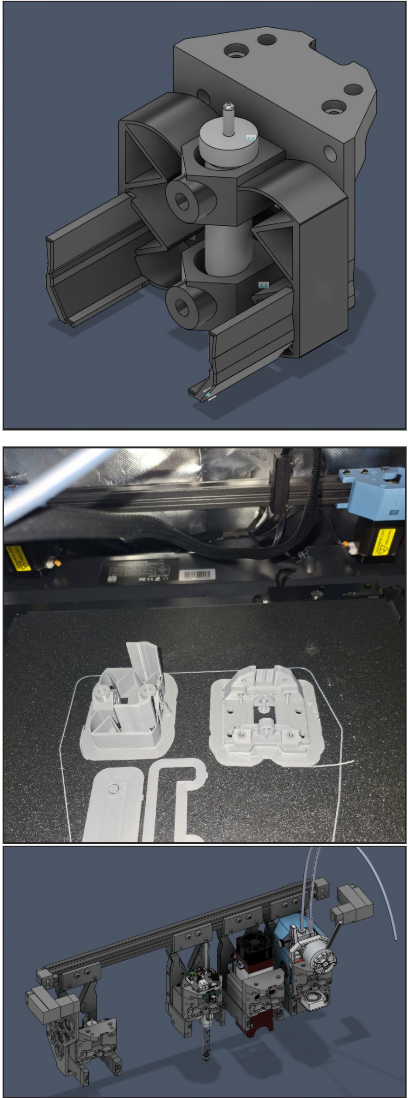
- Wire Embedding: Automating the embedding of twisted-pair copper wire for high-current power rails and data lines.
- (Future goal/ outscope / pending) Pick & Place: SMD placement of commercial silicon components.
- (Future goal/ outscope / pending) In-Situ Etching: Laser-masked acid etching for high-precision copper PCBs directly on the bed.
- Drag knife tool / Pen Holder: for cutting copper foil if used or painting silk mask over tracks.
Real-World Impact: Active Composite Structures
This platform brings a new idea to life: electronics where the circuit is the structure. It enables:
- Academic / Scientific Hardware: Printing multilayer PCBs, custom RF antennas, Graphene Oxide P-Bit arrays for Quantum emulation, electrodes for Hydrogen electrolysis, mems microfabrication and sensors.
- Consumer Goods: Creating prosthetics with intrinsic geometry motors and batteries embedded inside the plastic, or smart wearables with sensors printed on fabric.
Furthermore, this hardware lays the foundation for Generative AI to not just design, but physically manufacture complete electromechanical devices without human assembly. My goal is to deploy this technology at the INTEC University Mechatronics lab, creating a pilot Micro-Fabrication facility that allows students to bring unique designs to life immediately.
Material Science Innovation (The "Open Ink" Initiative)
A core component of this project is the development of open-source chemical recipes that replace expensive consumables with synthesized "Reactive Inks." These materials are designed specifically to interact with the machine's laser and dispensing architecture:
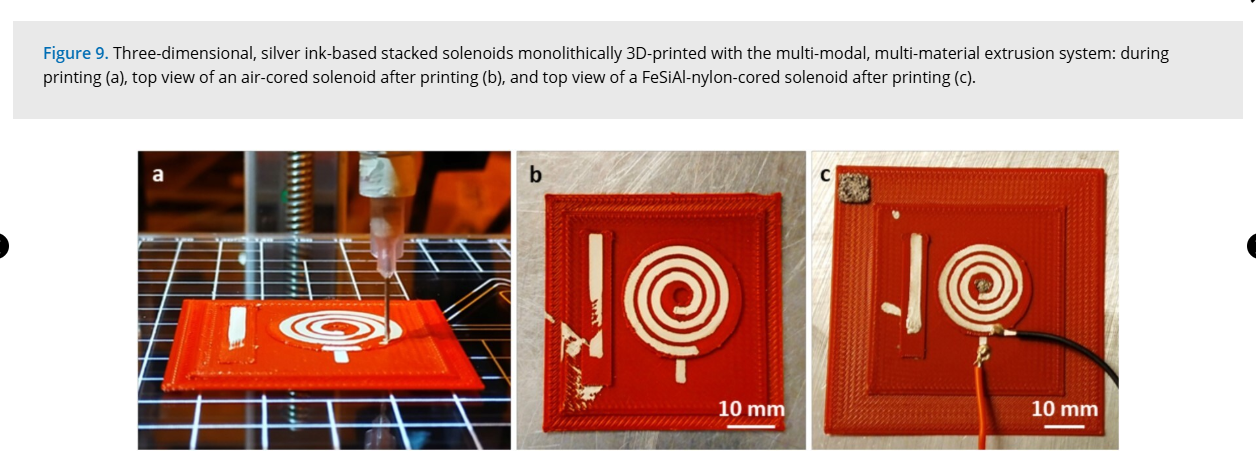
- Copper Oxide Ink (The "Liquid Wire"): A low-cost formulation of Copper(II) Oxide nanoparticles, Ascorbic Acid (Vitamin C), and binders. When exposed to the 450nm@10W laser, the Vitamin C reduces the oxide, instantly transforming the black paste into highly conductive Pure Copper traces.
- Nickel-Sugar Ink (The "Graphene Generator"): A composite of Nickel powder and Sucrose. Upon laser irradiation, the Nickel acts as a catalyst to convert the sugar into high-quality Graphitic Carbon/LIG. This material is optimized for printing sensors, supercapacitor electrodes, and thermal noise sources for quantum emulation.
- Graphene Oxide (GO) Ink (The "Digital Switch"): A specialized ink used for create memresistors, mosfets, diodes and transparent electronics.
- Etching Chloride Gel (The "Subtracter"): A modification of Ferric Chloride using Xanthan Gum. This transforms liquid acid into a stable, printable gel. It allows the printer to selectively etch copper foil directly on the build plate without risking damage to the motion system, enabling high-resolution subtractive manufacturing.
More info can be found in the following white paper in progress>
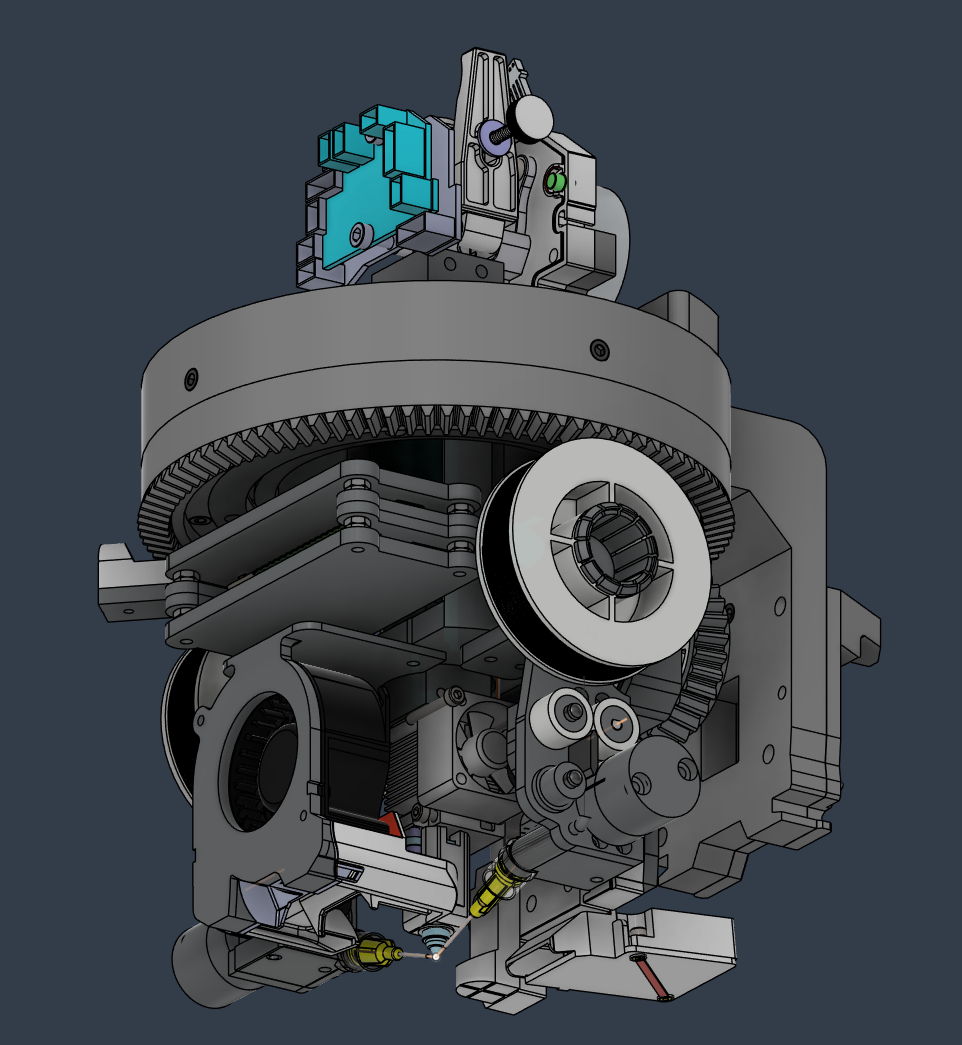
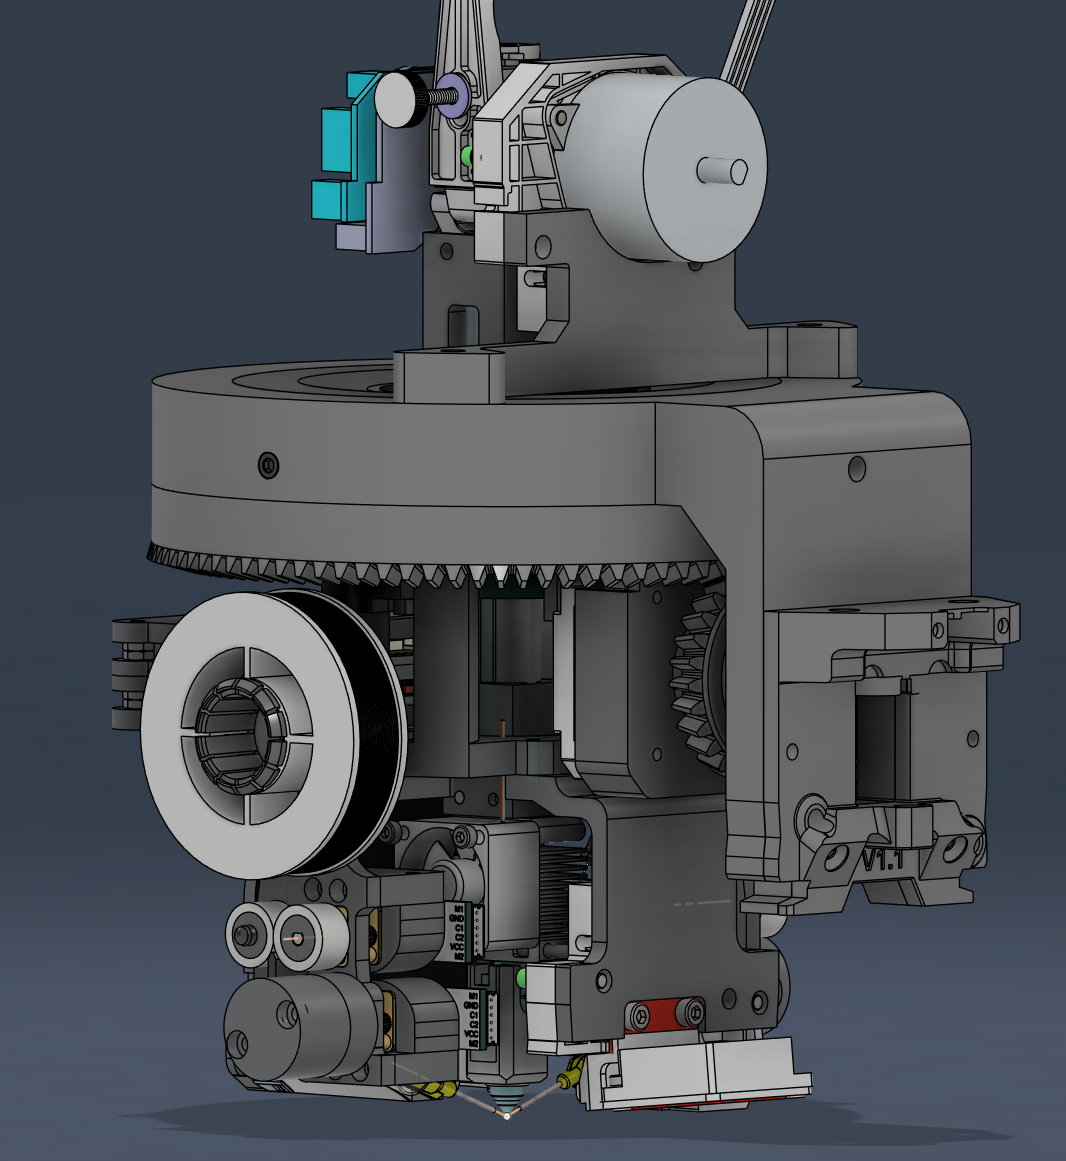
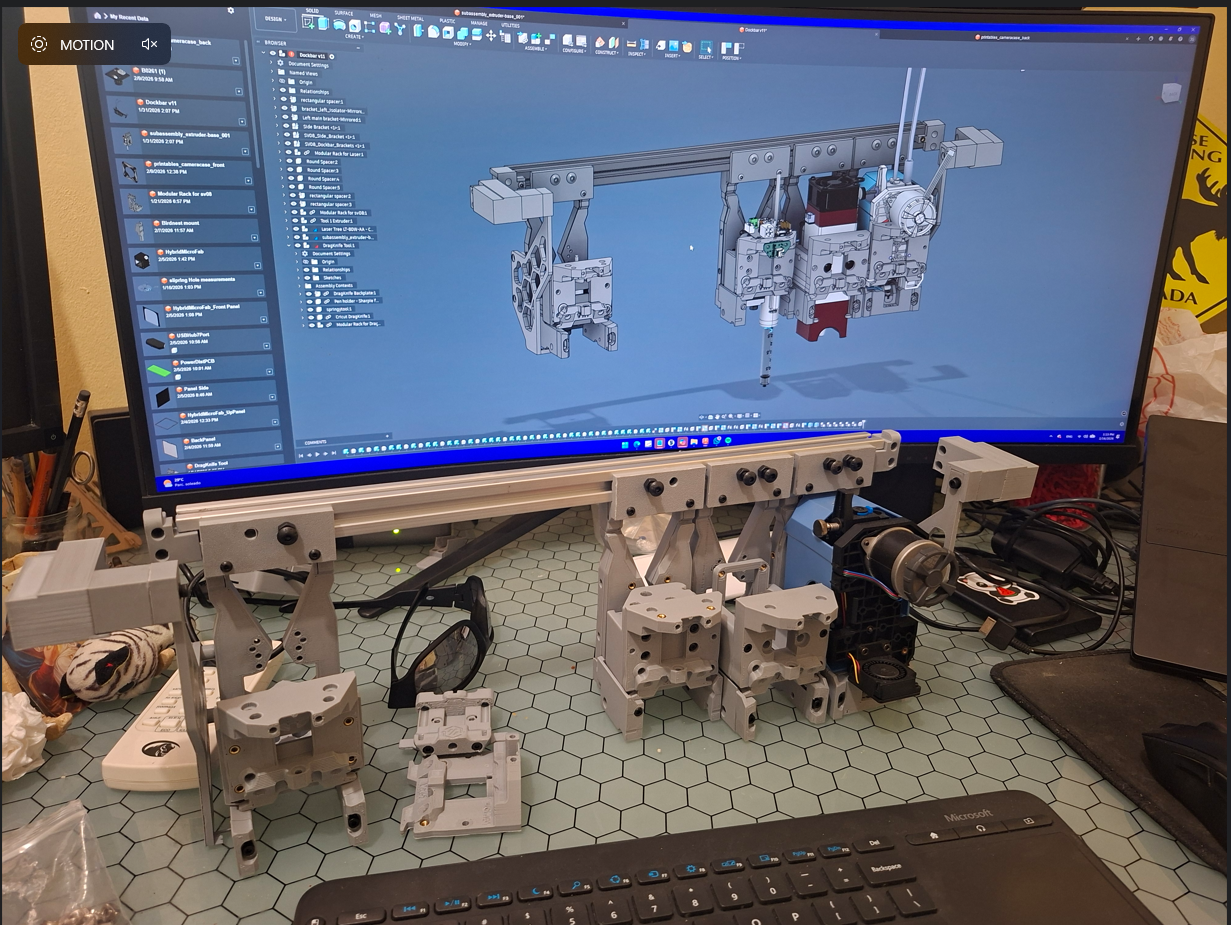
Fusion 360 file here> https://a360.co/4shNm0m
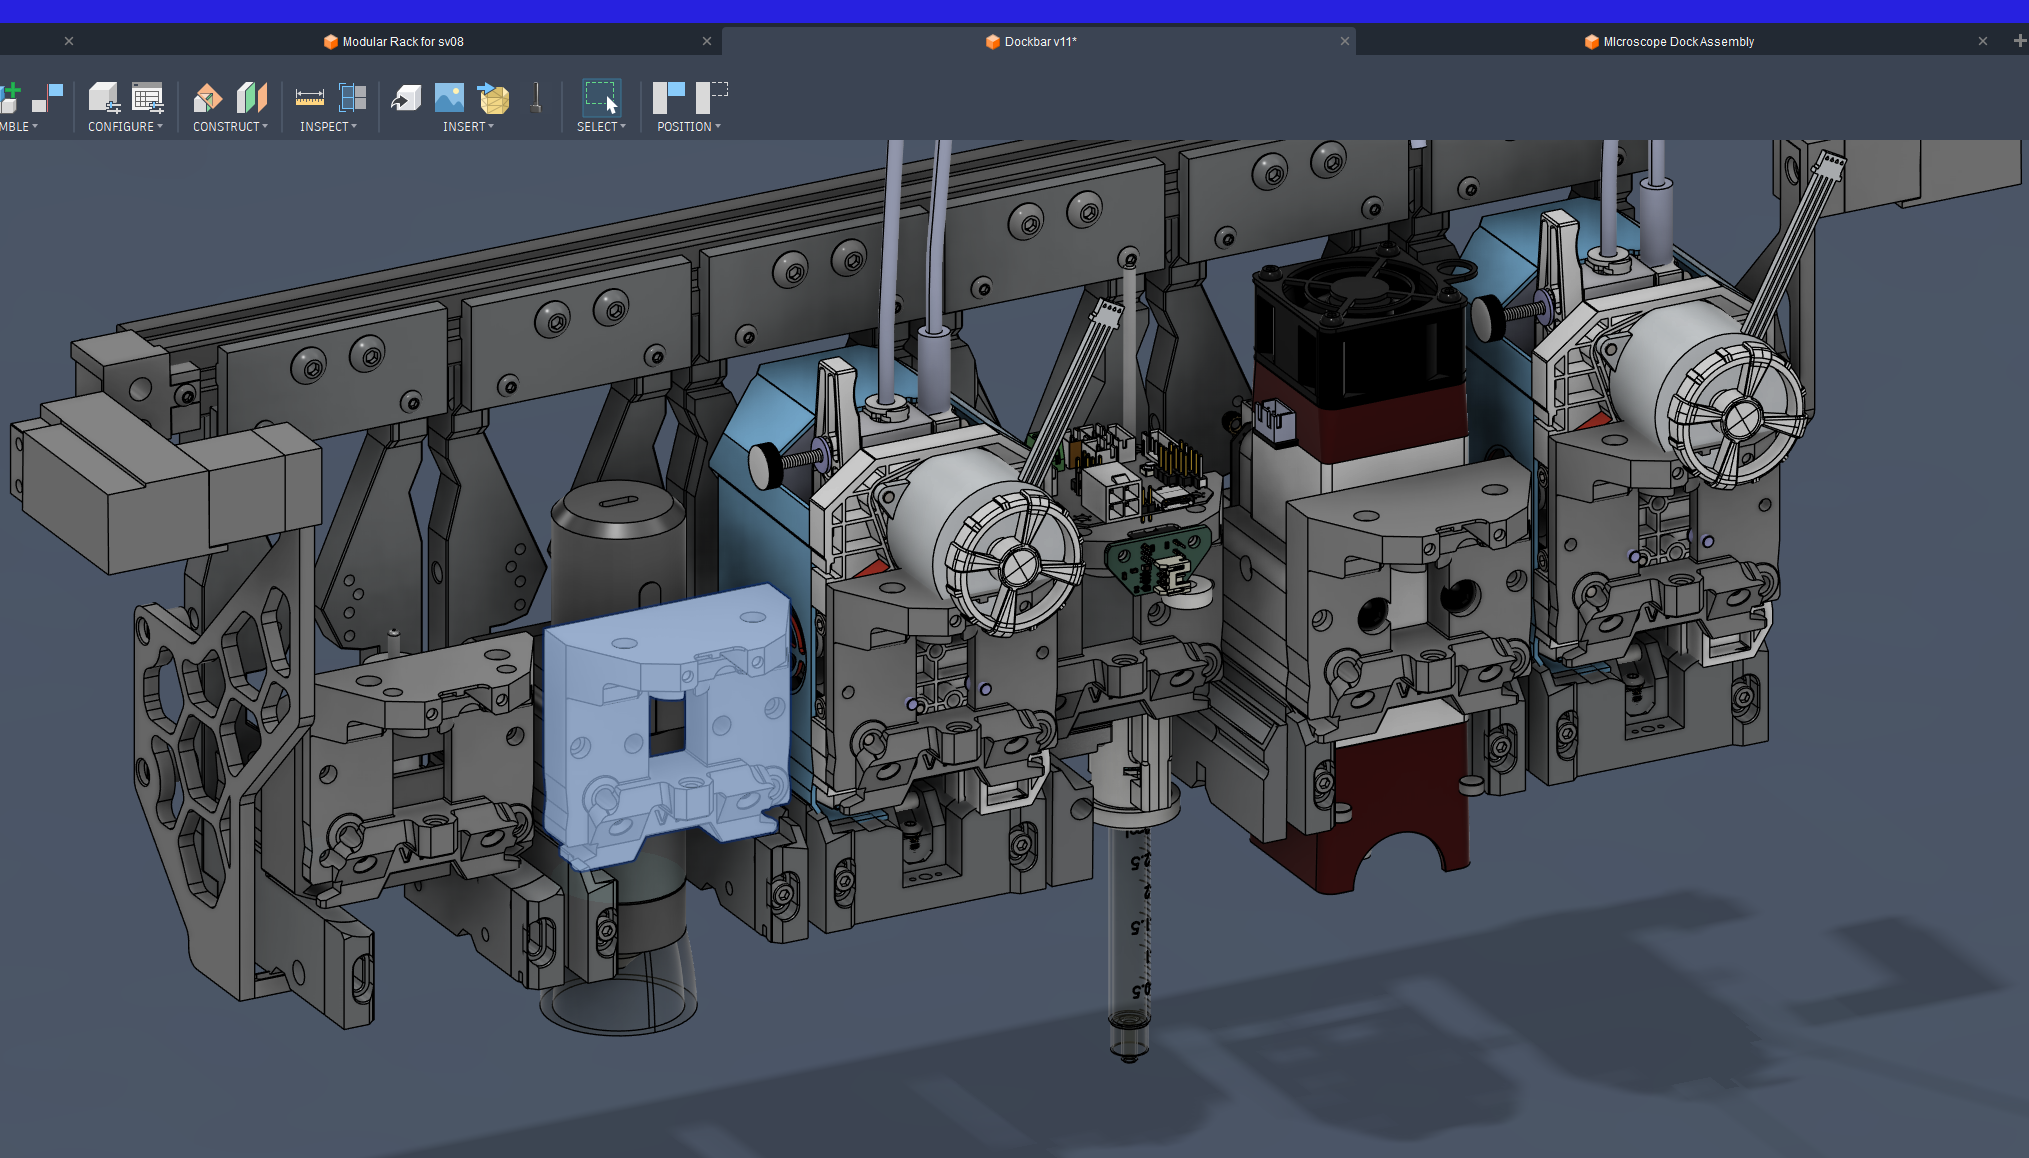
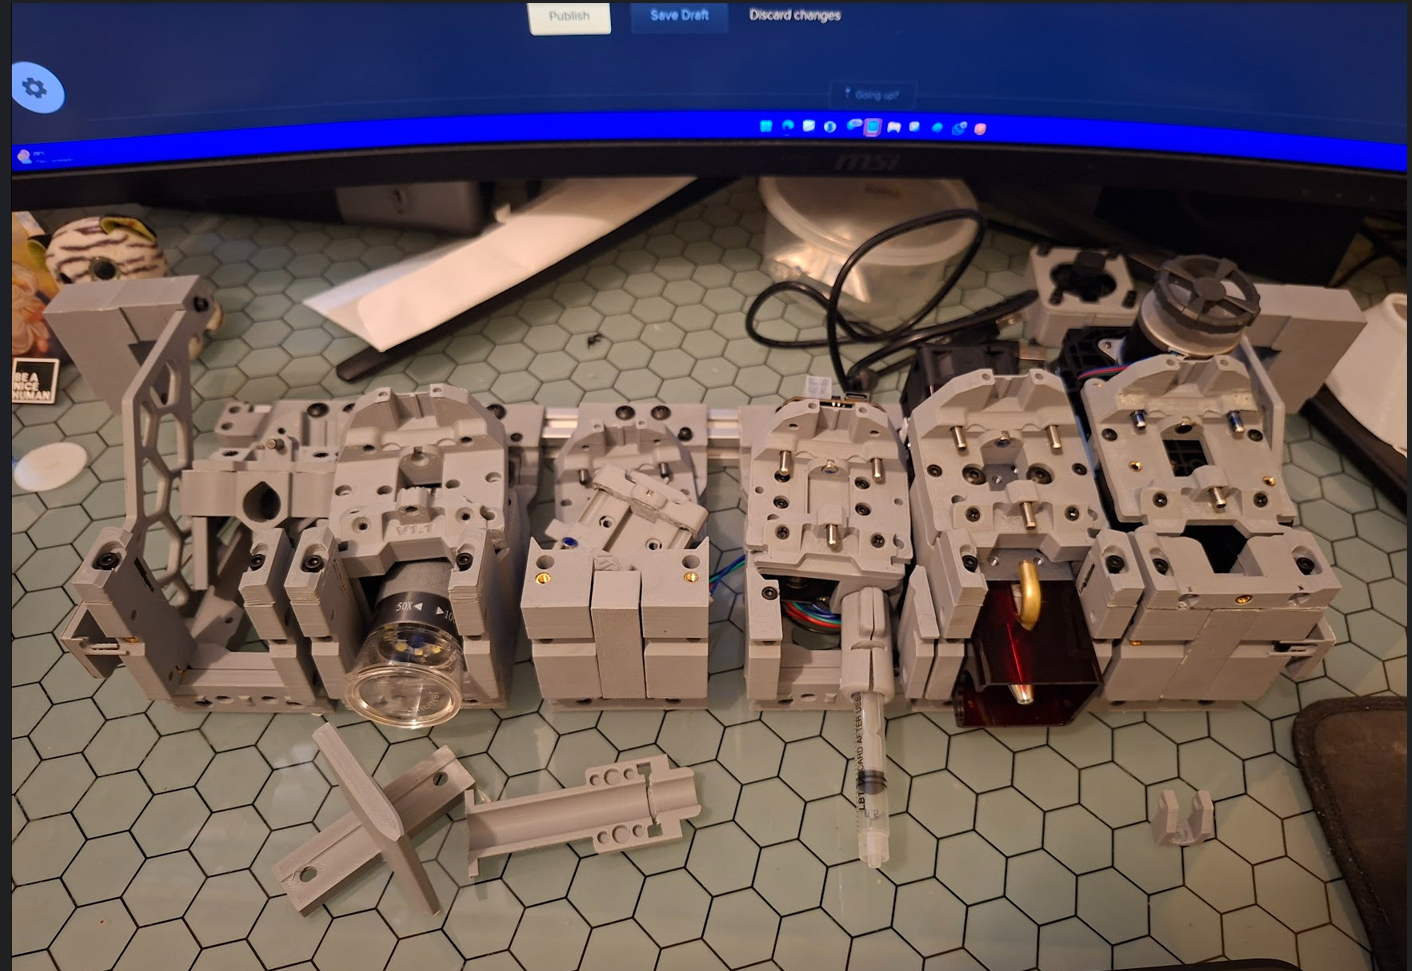
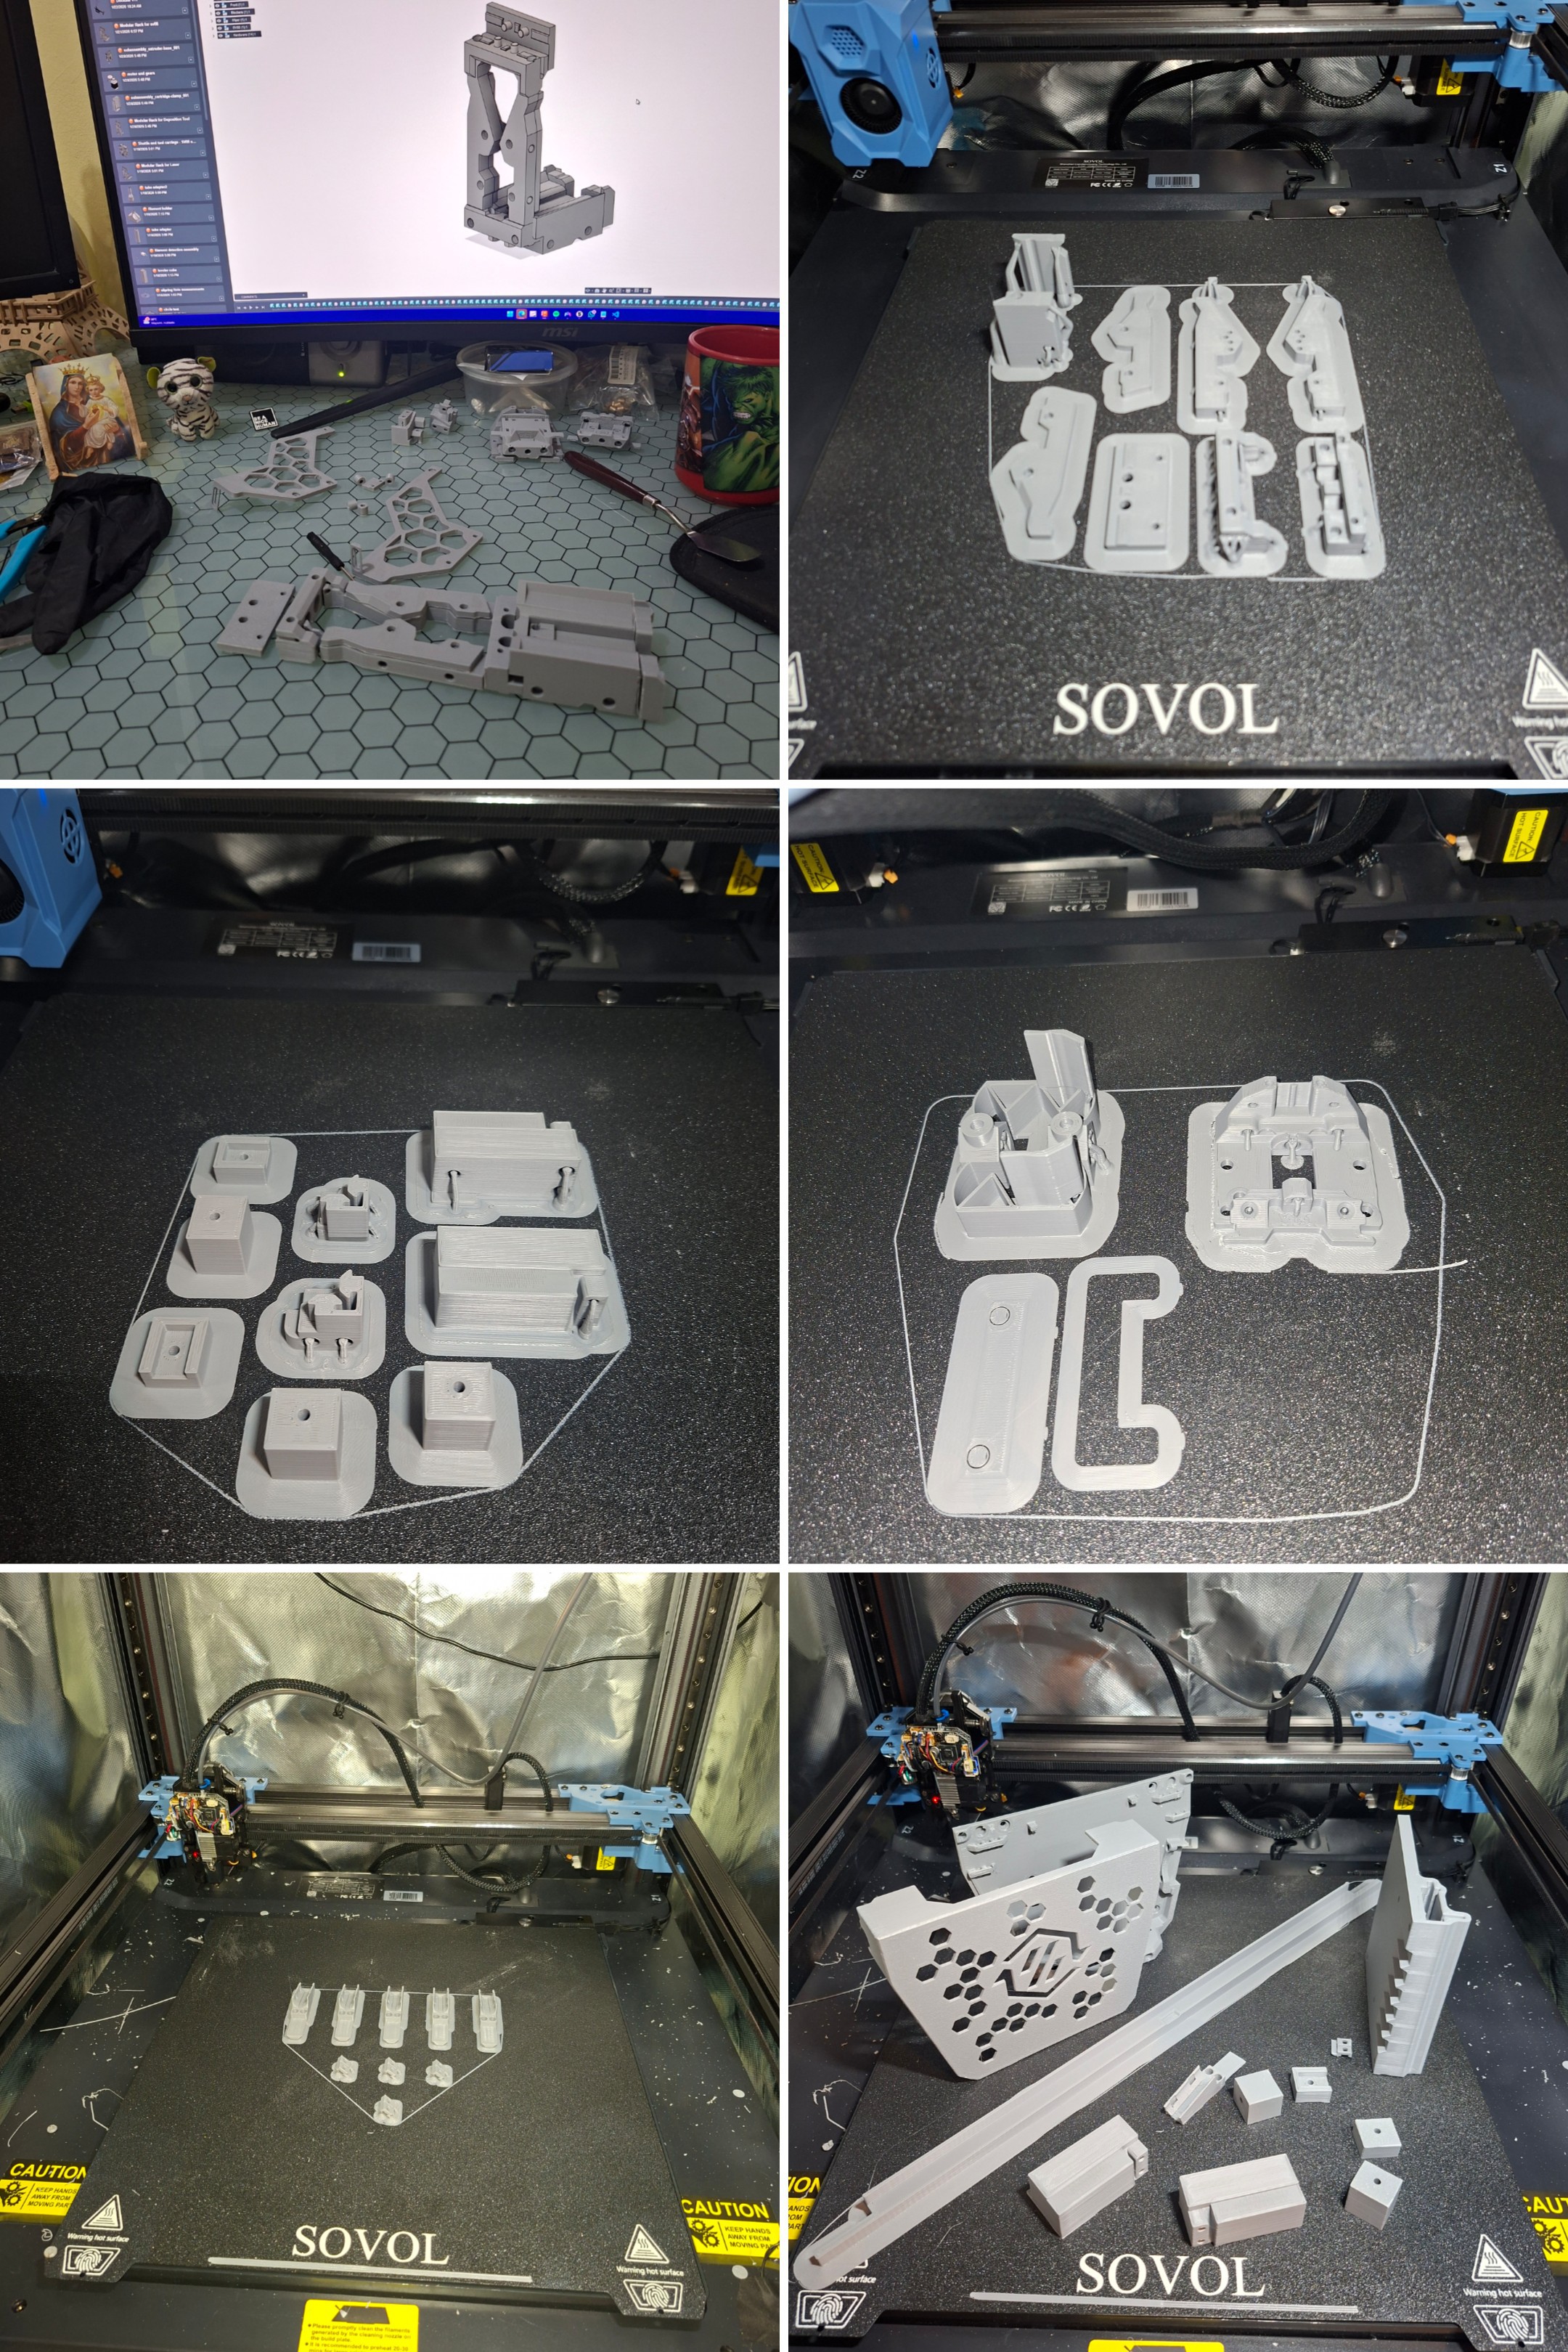
Modular Dock File here> https://a360.co/4rANtCX
This version is with the wire embedder, but the microscope dock and second extruder is hidden.
This version is> https://a360.co/4cQAOYY
Wire Embedder model here> https://a360.co/4bsdkH0

 Luke Brandon
 Alex Anderson
 Agustin Cruz