 ElectroScope Archive
Why Use Cloud-Based TTS with ESP32?
Text-to-Speech (TTS) is deceptively complex. It involves:
-
Text normalization — expanding numbers, abbreviations, and symbols into spoken words
-
Linguistic analysis — breaking text into phonemes and determining natural pacing
-
Prosody modeling — adding emphasis, pauses, and expressive tone
-
Audio synthesis — creating digital audio data for playback
Although the ESP32 is powerful for its size, it lacks the memory and processing power needed to run advanced speech synthesis locally. Instead, this project uses a cloud-based AI service (Wit.ai) to handle all speech generation. The ESP32 sends text over Wi-Fi, receives high-quality audio back, and plays it through an attached speaker — without overloading the microcontroller.
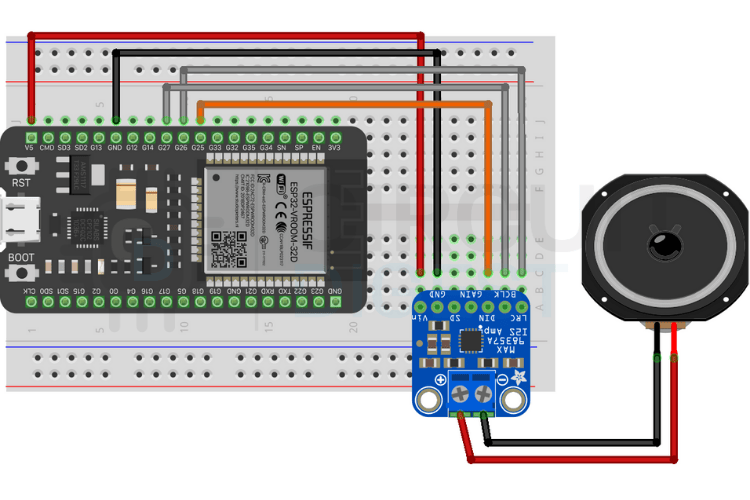
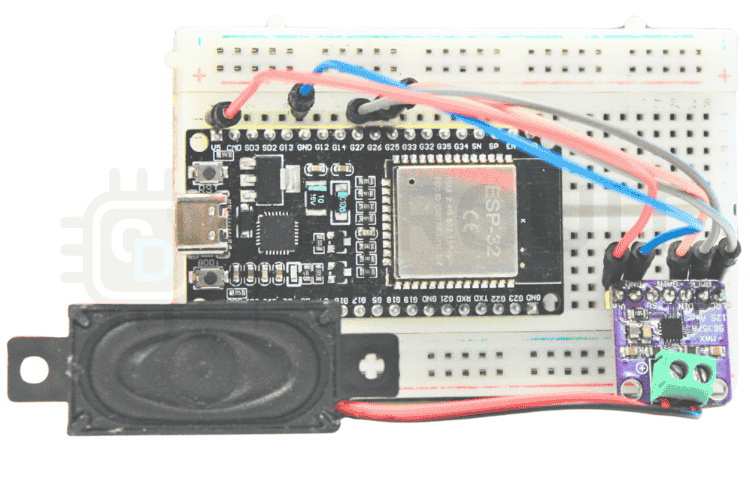
Wiring Overview
To produce audio, the ESP32 uses I2S digital audio to communicate with the amplifier:
-
GPIO27 → BCLK
-
GPIO26 → LRC
-
GPIO25 → DIN
-
5 V → VIN
-
GND → GND
Use quality jumper cables and ensure a solid ground connection to avoid noise or playback issues.
Step-by-Step: From Wit.ai to Voice Output
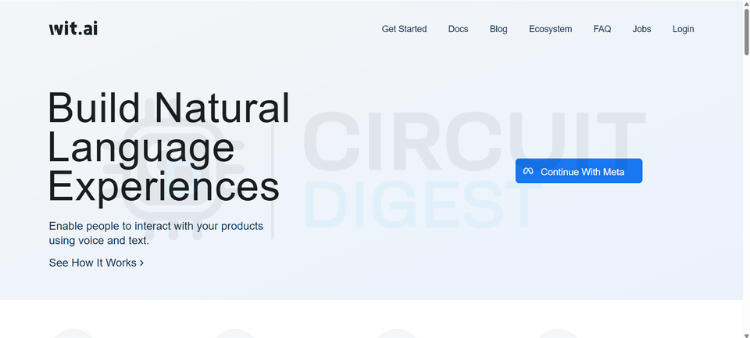
1. Create a Wit.ai Account
Sign in on the Wit.ai platform using an email or Meta account. Once logged in, create a new app and choose your language — this determines pronunciation rules. In the app’s settings, grab your Server Access Token (Bearer token) — you’ll need it in your code for authentication.
💡 Security tip: Don’t hardcode the token in source control. Use environment variables or secure config headers.
2. Install the TTS Library
In the Arduino IDE, open the Library Manager and install WitAITTS. This library wraps the Wit.ai API, making it easy to send text and stream audio without complex networking code.
Load the example sketch from Examples → WitAITTS → ESP32_Basic and configure:
const char* WIFI_SSID     = "YourWiFiSSID";
const char* WIFI_PASSWORD = "YourWiFiPassword";
const char* WIT_TOKEN     = "YOUR_WIT_AI_TOKEN_HERE";
Replace with your Wi-Fi credentials and Wit.ai token.
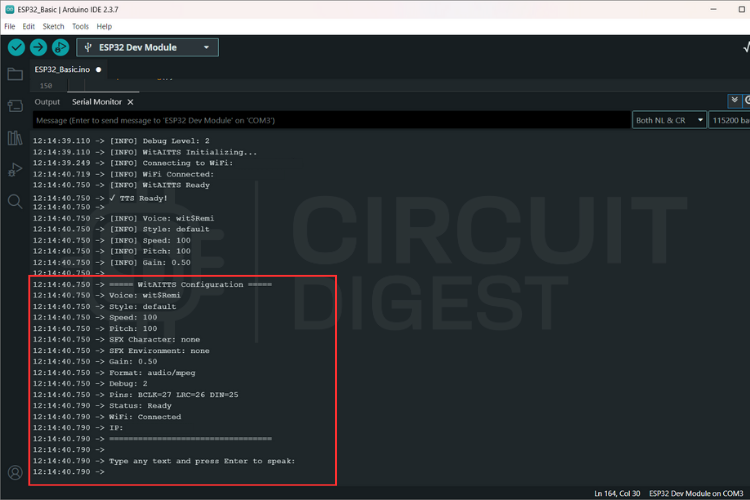
3. Build and Upload
Once the code is in place:
-
Compile and upload to your ESP32.
-
Open the Serial Monitor — set the baud rate to 115200.
-
Type a sentence and hit Enter.
You should see logs like:
Requesting TTS...
Buffer ready, starting playback
— and hear your ESP32 speak the text through the speaker!
How It Works (Behind the Scenes)
Instead of storing speech models locally (which would overwhelm the ESP32), this project streams audio in real time from the cloud:
-
The ESP32 connects to Wit.ai via secure HTTP
-
Text is sent as a request
-
The AI returns an MP3 audio stream
-
Using I2S, the ESP32 plays the audio as it arrives
This approach keeps memory use low and playback smooth even for long text strings.

Tips for Better Voice Quality
-
Strong Wi-Fi: Aim for ≥ –60 dBm signal strength
-
Stable power: Clean 5 V supply reduces distortion
-
Speaker choice: Mid-range drivers improve clarity
-
Network stability: Reduces gaps or stuttering during streaming
Real-World Usage Ideas
🔥 Smart notifications — verbally announce events, alarms, or sensor states
🤖 Interactive assistants — add personality to robots or kiosks
🔊 Accessibility tools — read messages, alerts, or status updates aloud
📡 IoT endpoints — give voice feedback from distributed sensors
This ESP32 Text to Speech Using AI project turns a tiny microcontroller into a device with voice. Whether you’re building gadgets for home automation or expressive interactive tools, this TTS template scales — and the AI backbone grows smarter without changing your ESP32 firmware. Learn real-world implementations through this curated list of ESP32 Projects and applications