 loudaslife
Now that Micro-Manager has provided me with several hundred individual frames, rather than the single composited image I would've liked, I have to process them myself. I'm not aware of any software that does both focus stacking and image stitching decently. (Actually, I never even found software that does either step as well as I would like.) That means we'll have to look at the two steps separately. I don't even remember half of the tools I tried, so we'll just look at the least terrible solutions I found for both.
The question is, which operation do we perform first?
Advantages of performing image stitching first:
- Focus stacking tends to produce blurring around the edges of the image. If we do image stitching first, this edge blurring would only be at the edges of the very final image, where it can easily be cropped out.
- Counterpoint: If you leave enough overlap between images, you can just crop this out of each intermediate image before stitching. And even if you don't bother to crop it, the interpolation between adjacent images during stitching largely ignores the very edges, so it usually doesn't matter.
Advantages of performing focus stacking first:
- The image stitching programs I've tried can struggle to match up edges even on perfectly sharp images. It's not even worth trying to stitch together an image where 80% of the frames are completely out of focus.
- Focus stacking is more likely to add blurry artifacts throughout the image as the number of frames in the stack increases. If you do focus stacking first, you have the opportunity to manually delete all the frames where no part of the image is in focus. This significantly reduces the severity of artifacts in flatter areas that only span a few frames in height.
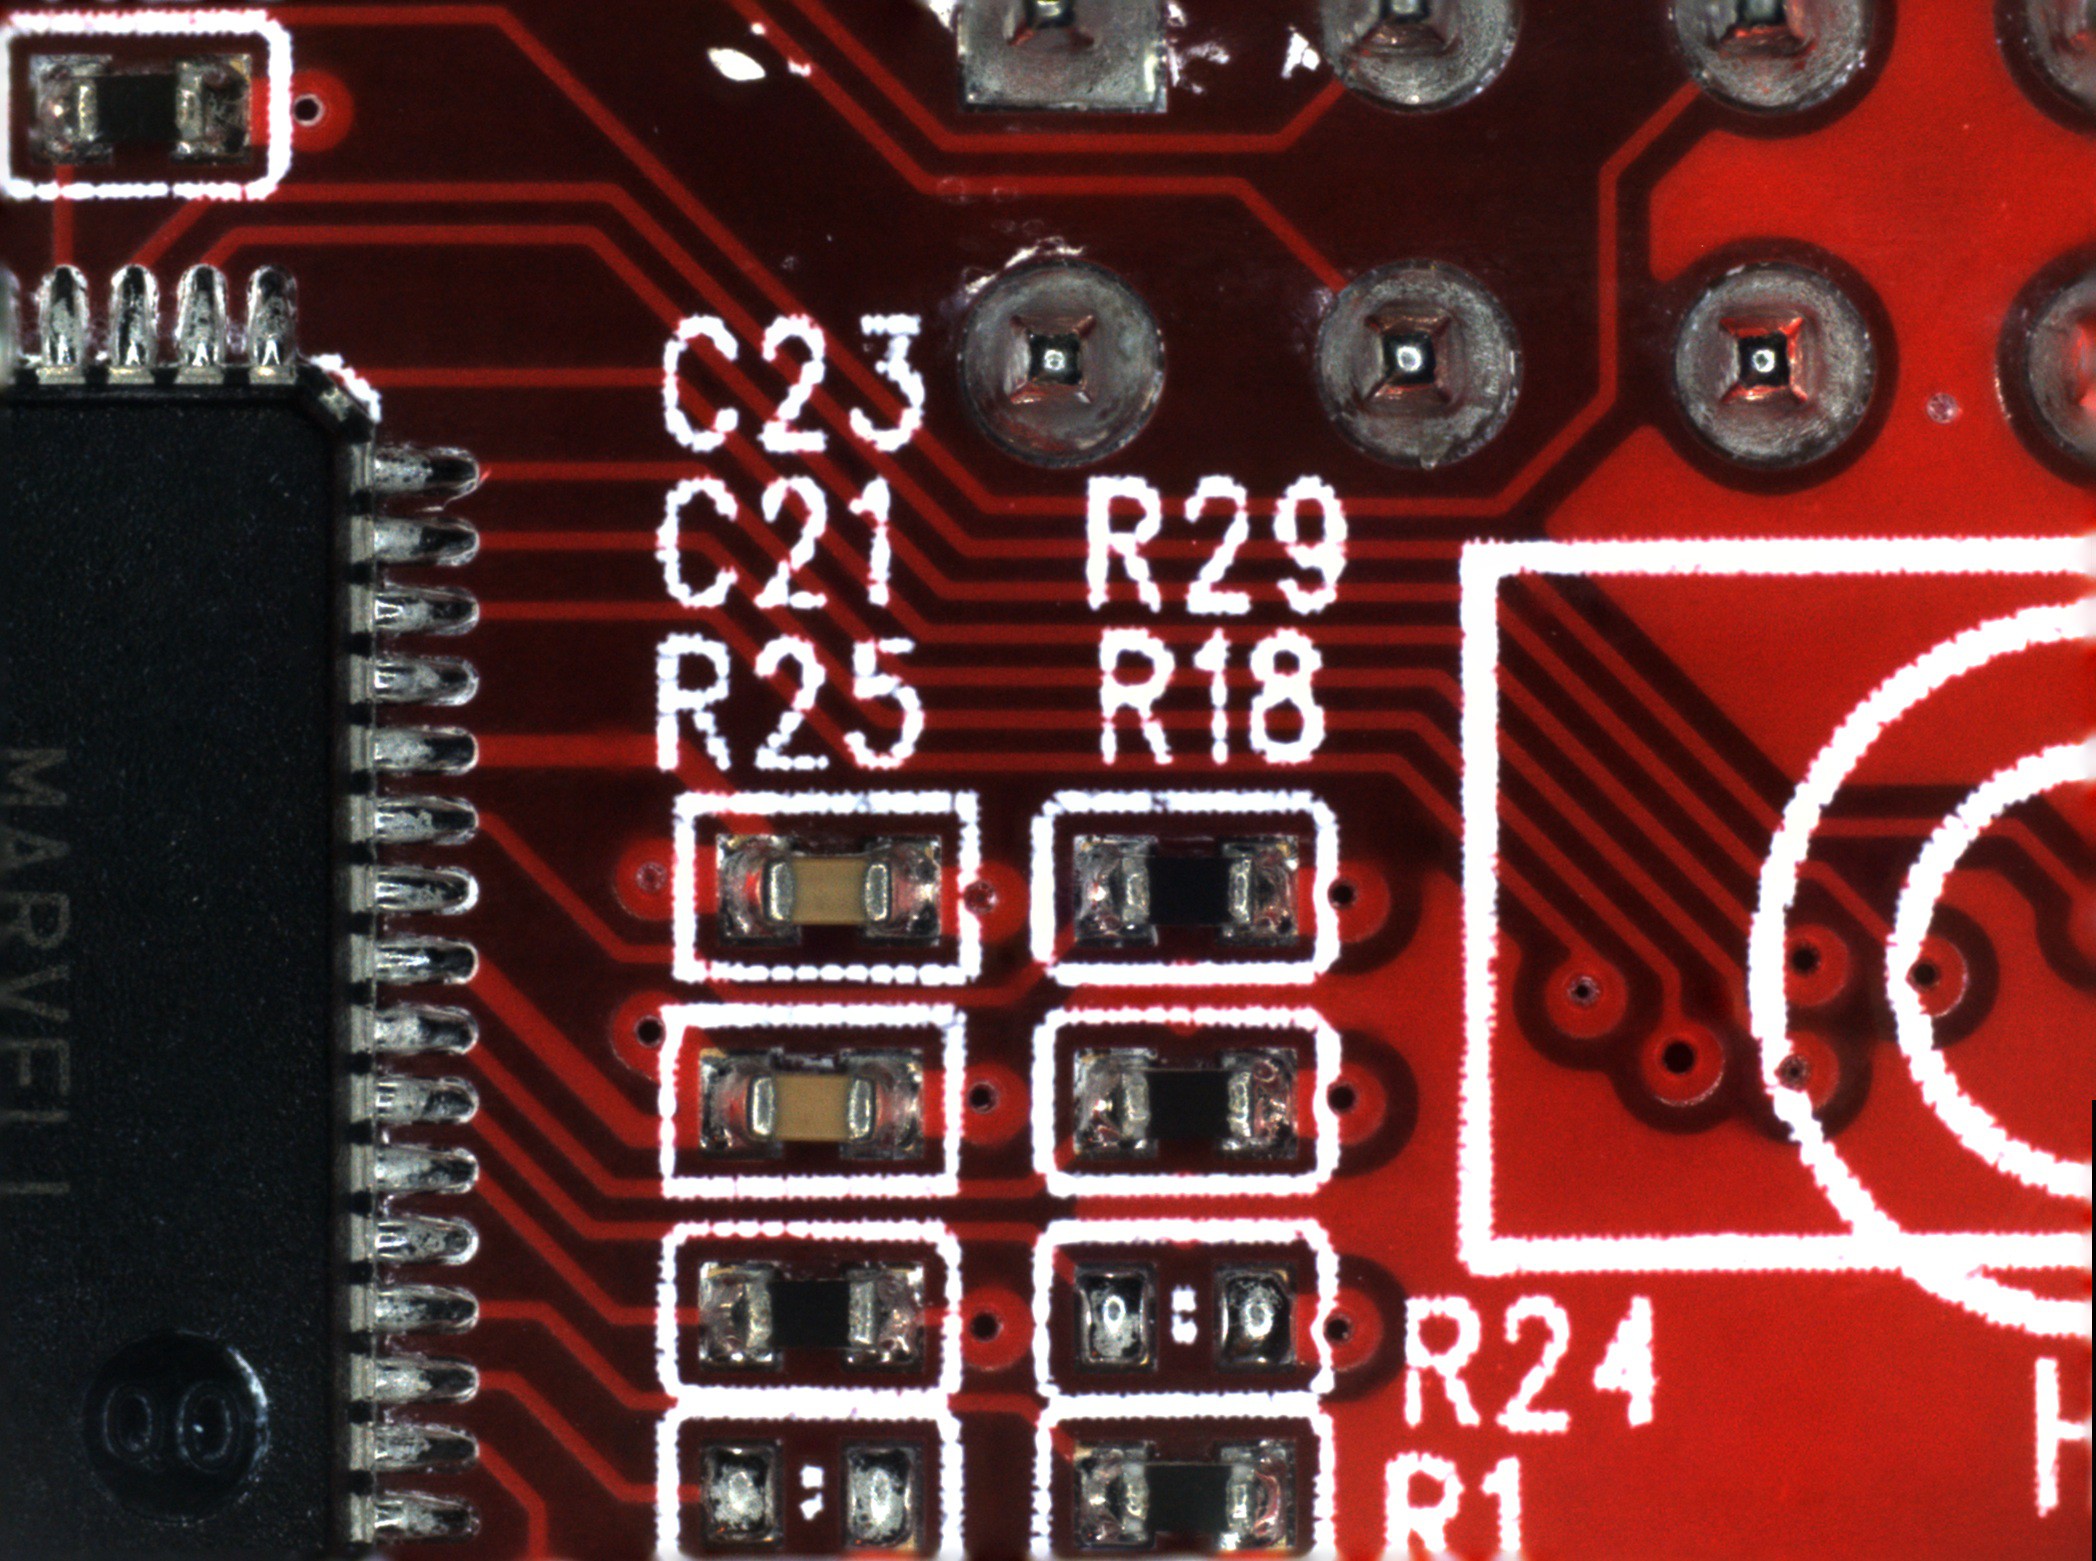

(Click images to view full size)
The first image (on the left) is focus stacked from all nine frames acquired in this area. There are strange blurry artifacts in a few of the traces adjacent to the high contrast of the silkscreen. You can also see the blurring around the edges of the image that I mentioned earlier. The second image (on the right) only uses the lowest three frames, which produces a cleaner image.
So, now that we've established that focus stacking is the first task:
Focus Stacking - Photoshop
Photoshop was the least terrible of the many tools I tried for this. My workflow ended up as follows:
- Go to "File > Scripts > Load Files into Stack..." then select all the images files to be stacked. This loads each file as its own layer.
- Go through the layers and delete the ones where nothing is in focus.
- Select all the layers and use the auto-align and auto-blend tools to do the actual focus stacking. Then merge the image back to one layer and trim the away the transparent edges that occasionally pop up. I made a macro to do all of this with one key press. It looks like this:
![]()
- Export the stacked image and move on to the next. Make sure the file names stay in sequential order so that the image stitching software can process them.
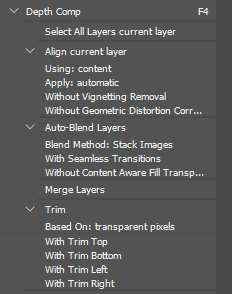
Image Stitching - Microsoft Image Composite Editor
Surprisingly, the least terrible tool I've found for this is a discontinued piece of freeware from Microsoft.
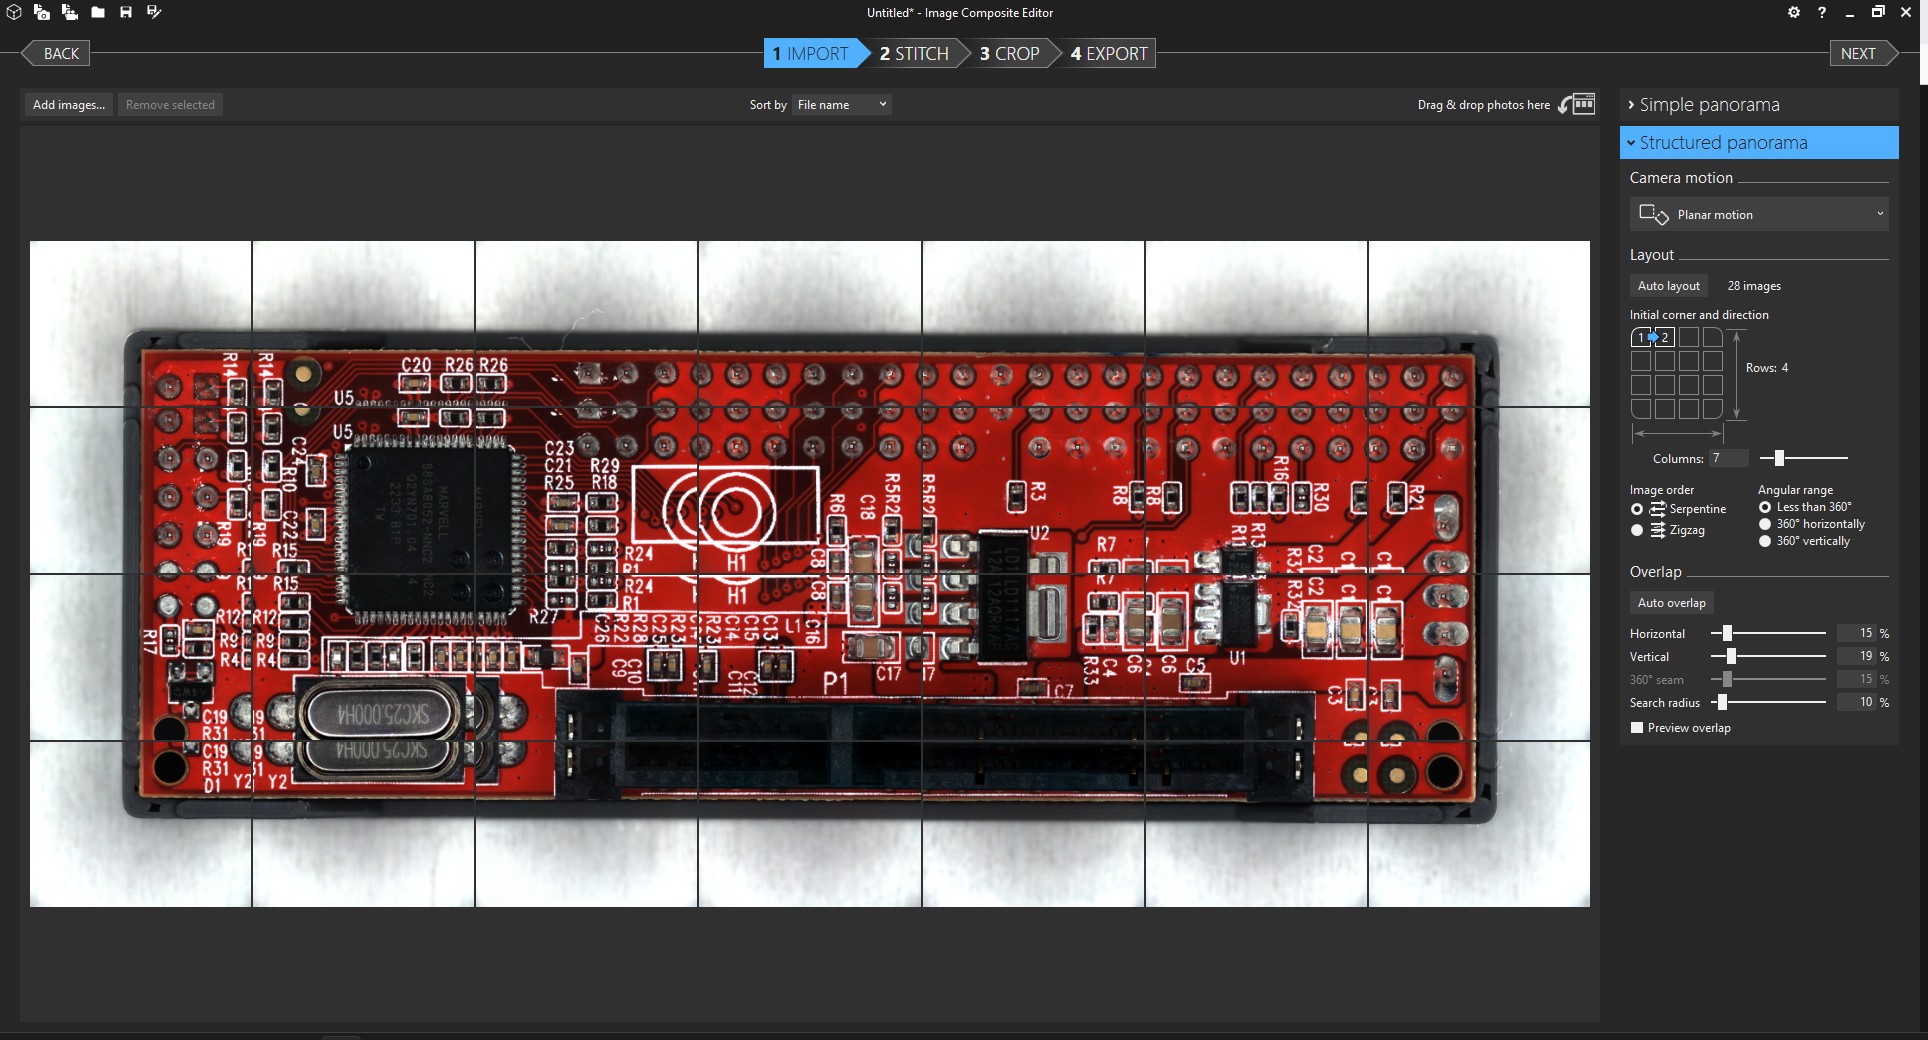
The process is quite straightforward. You'll want to select "Structured panorama" with the "Planar motion" option in order to give the software the fewest opportunities to screw things up. If the "auto layout" button doesn't come up with the correct tiling, you'll also have to also adjust the layout options until the images appear in the correct order.
I'm not sure if fine-tuning the overlap settings actually changes very much, but I usually do it anyway until the preview looks as good as I can get it.
Everything after that is self-explanatory. Just make sure you examine the final image carefully before relying on it for anything. I've had weird distortions pop up for no reason. I still don't trust the output of this whole process well enough to use as anything but a reference.
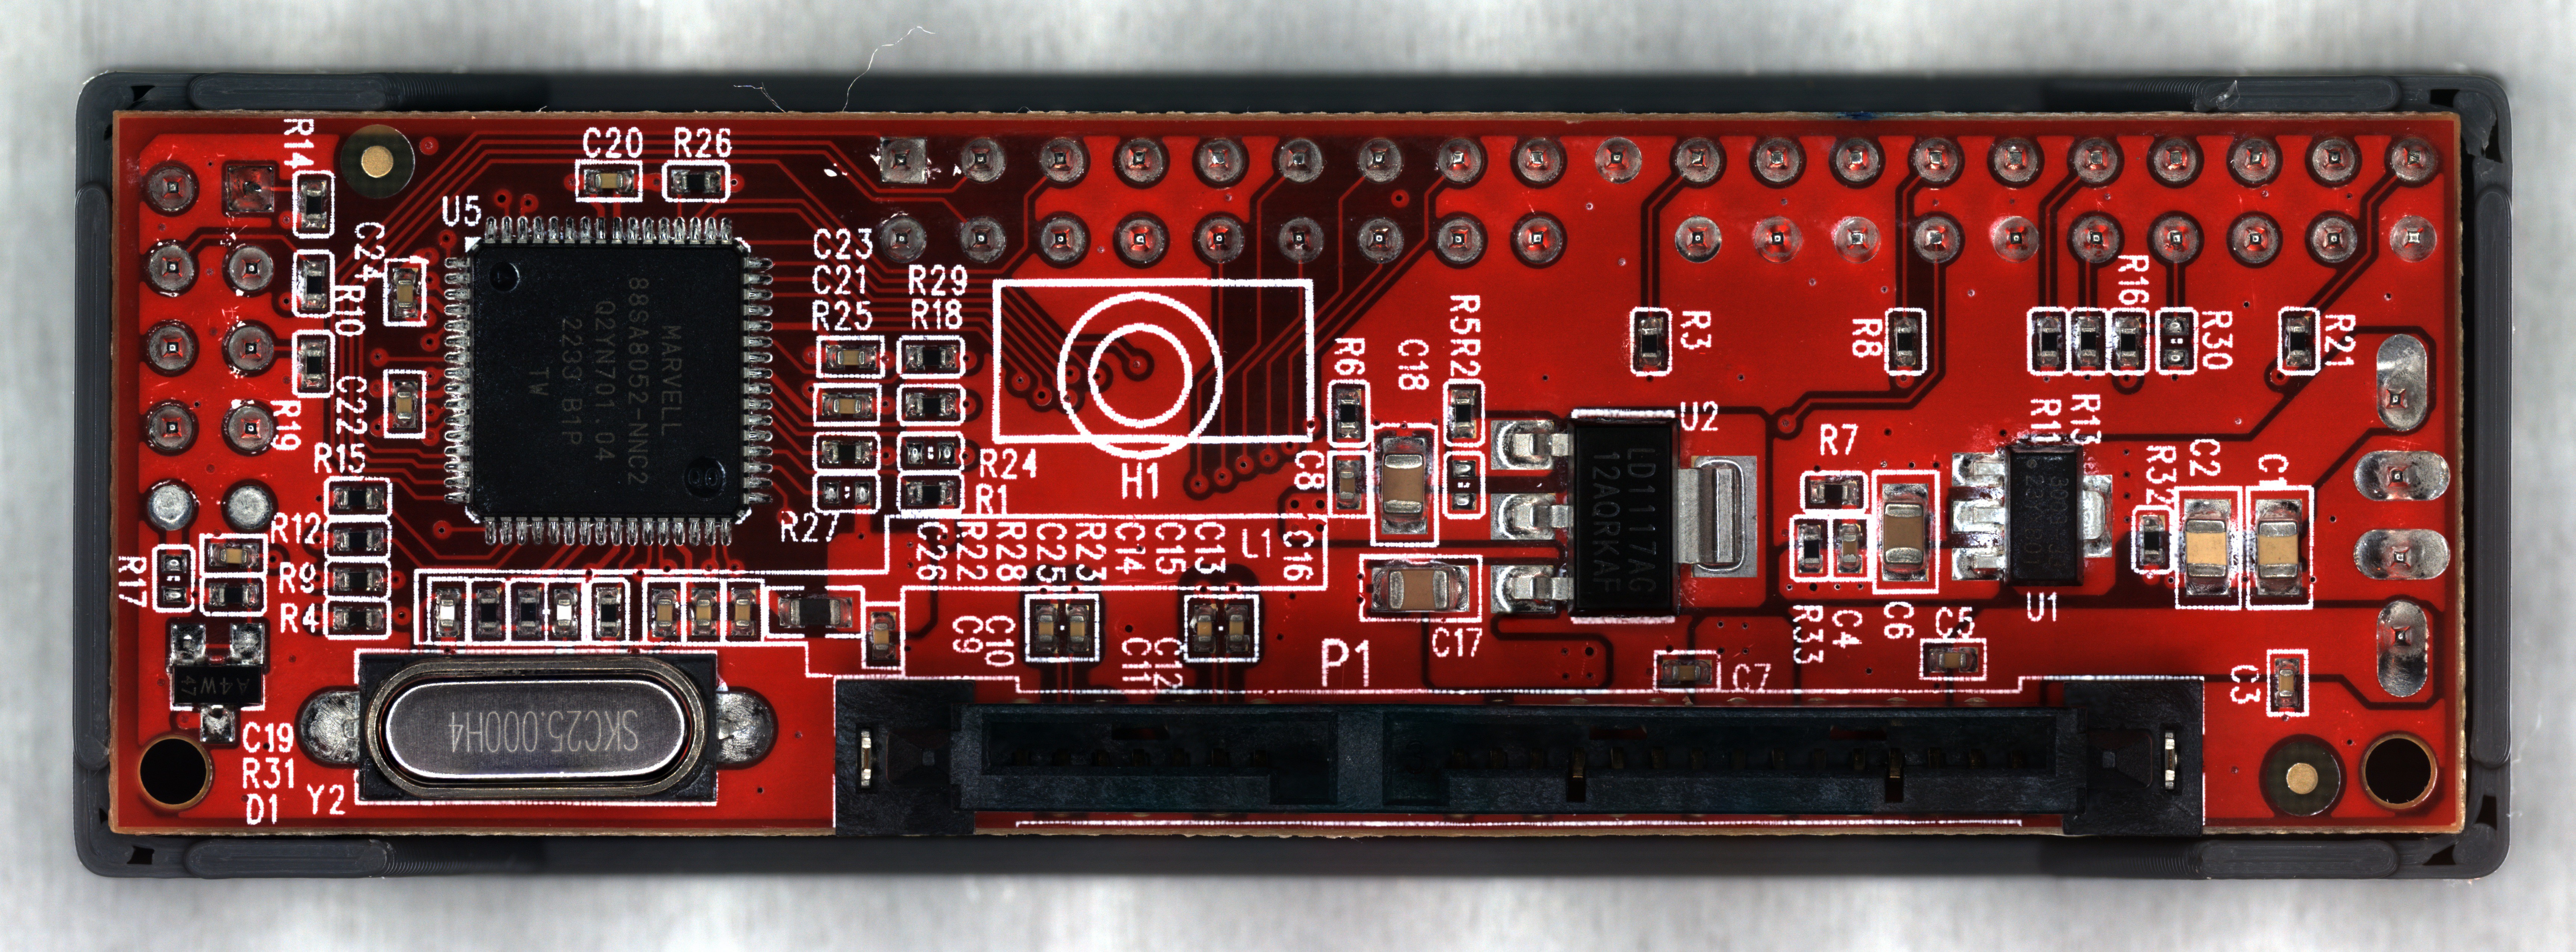
After all that, I'm reasonably happy with the final result. The full image is 48 megapixels, so the picture above is scaled way down. It's not phenomenal quality, but good enough for the reverse engineering work I plan to do.
Discussions
Become a Hackaday.io Member
Create an account to leave a comment. Already have an account? Log In.