ElectroScope Archive
🚀 Project Overview
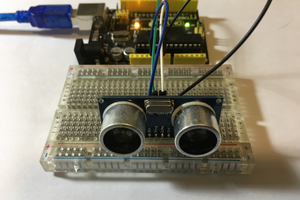
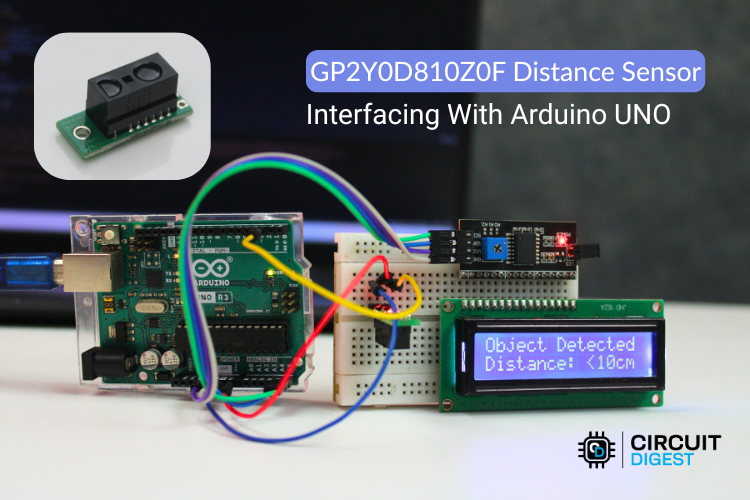
This project turns the GP2Y0D80Z0F digital infrared sensor into a rapid proximity detector with visual feedback on a 16×2 I²C LCD and serial console. It reports whether an object is within ~10 cm in real time, making it ideal for obstacles, presence sensing, interactive installations, or basic automation.
Unlike analog distance modules, the GP2Y0D80Z0F outputs a simple HIGH/LOW signal that your Arduino can read directly — no ADC or conversion math needed.
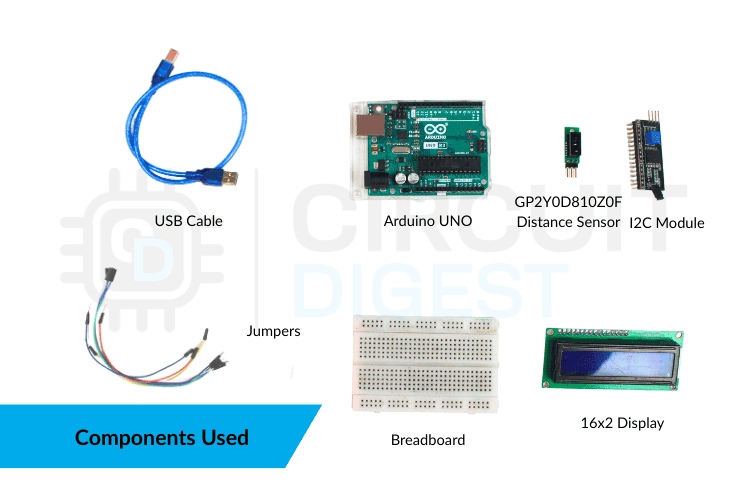
🔌 What You’ll Need
-
Arduino Uno — brains of the project
-
GP2Y0D80Z0F IR proximity sensor — detects objects < ~10 cm
-
16×2 I²C LCD display — for live status
-
Breadboard & jumper wires
-
USB cable for power + programming
📍 How It Works
The GP2Y0D80Z0F Distance Sensor with Arduino Uno emits infrared light and detects reflections from nearby surfaces. When an object enters ~10 cm range, its output goes LOW. When nothing is close, it stays HIGH. Your Arduino reads this digital pin and updates the display + serial output accordingly.
Quick tip: The sensor’s binary output means it can’t measure exact distance — only object present or not present.
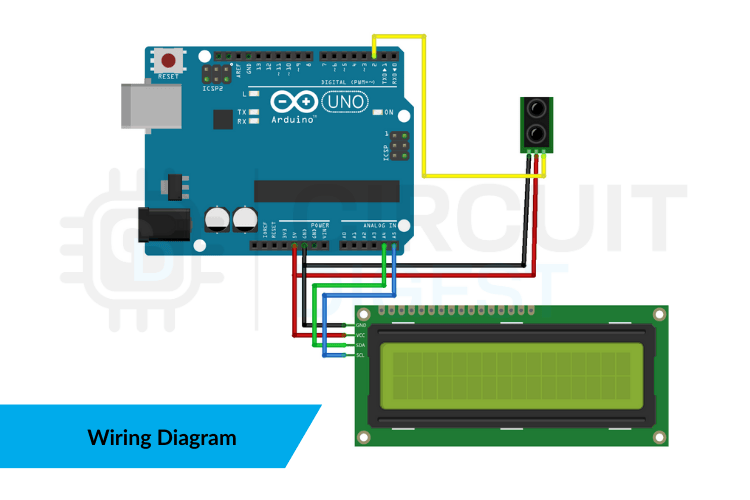
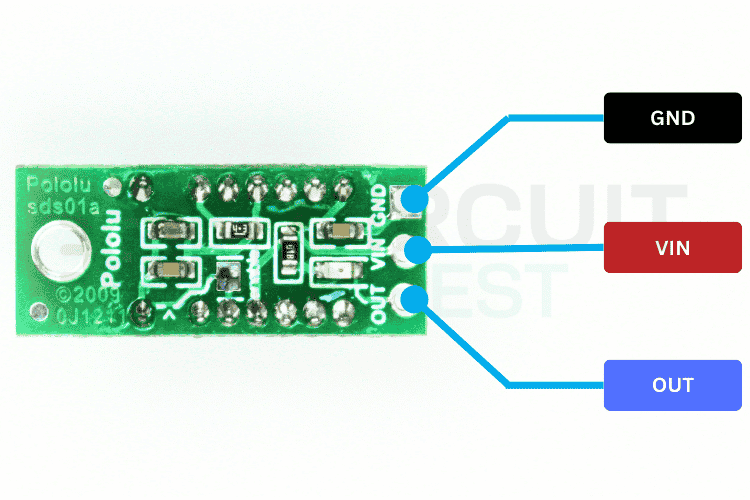
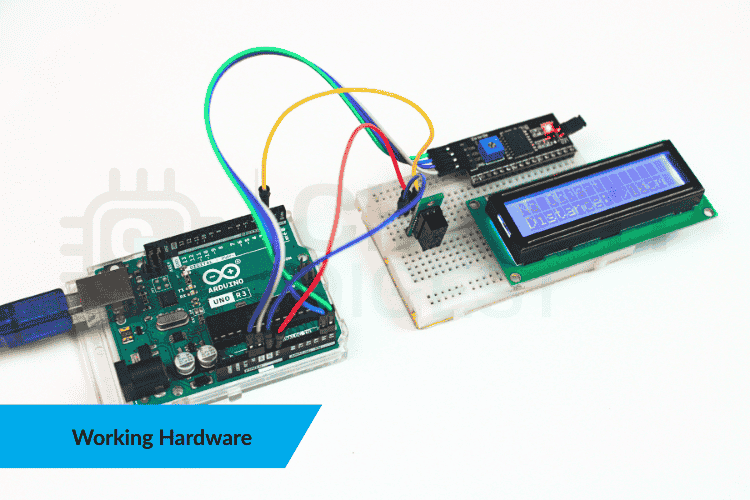
🔧 Wiring
GP2Y0D80Z0F → Arduino Uno
-
VIN → 5 V
-
GND → GND
-
OUT → Digital Pin 2
16×2 I²C LCD → Arduino Uno
-
SDA → A4
-
SCL → A5
-
VCC → 5 V
-
GND → GND
📦 Arduino Code
#include <Wire.h>
#include <LiquidCrystal_I2C.h>

const int SENSOR_PIN = 2;
LiquidCrystal_I2C lcd(0x27, 16, 2);

void setup() {  Serial.begin(9600);  pinMode(SENSOR_PIN, INPUT);
  lcd.begin();  lcd.backlight();  lcd.print("Proximity Sensor");  lcd.setCursor(0,1);  lcd.print("Initializing...");  delay(2000);  lcd.clear();
}

void loop() {  int state = digitalRead(SENSOR_PIN);  lcd.clear();
  if (state == LOW) {    lcd.print("Object Detected");    lcd.setCursor(0,1);    lcd.print("Distance <10cm");    Serial.println("Object close <10cm");  } else {    lcd.print("No Object");    lcd.setCursor(0,1);    lcd.print("Distance >10cm");    Serial.println("No object in range");  }  delay(200);
}
🛠 Tips & Enhancements
-
Debounce output: filter quick transitions to stabilize readings.
-
Interrupt-driven detection: use hardware interrupts for faster triggers.
-
Multiple sensors: expand to create detection zones.
-
Actuators: drive buzzers, relays, or LEDs for alerts.
Troubleshooting Tips
-
Nothing on the LCD? Try alternative LCD addresses (0x27 ↔ 0x3F).
-
Flashing or unstable text? Only redraw on state change, or increase the loop delay.
-
Sensor always reads one state? Check wiring, pull-ups, and reflectivity of the object.
-
Unresponsive Serial Monitor? Ensure baud rate is set to 9600.
Explore 500+ detailed Arduino projects with code and circuit diagrams on CircuitDigest to kickstart your next maker build.
 Lithium ION
 Akshay Jain
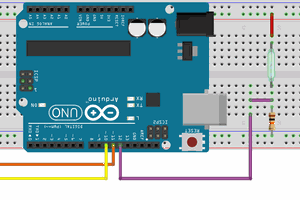
 Silícios Lab