 Arnov Sharma
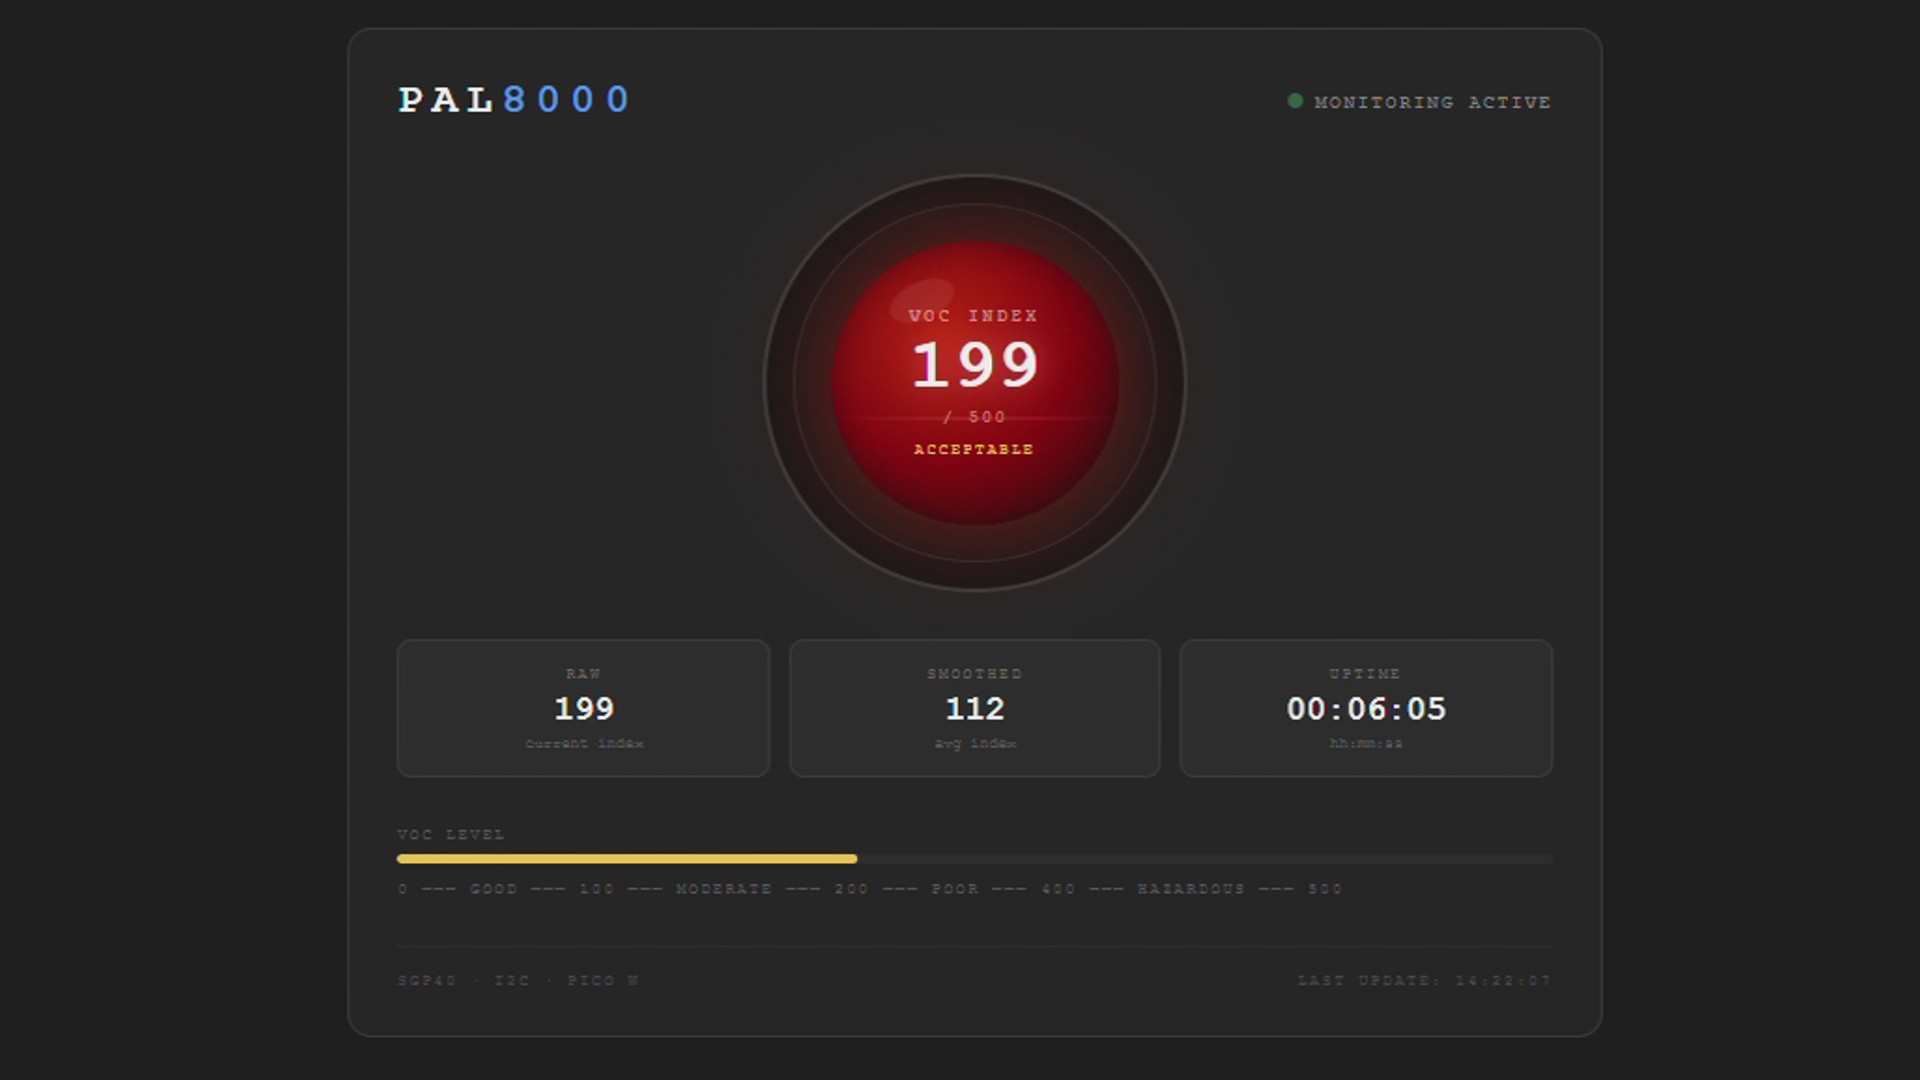
One approach was to build an actual AI model, train it on TVOC readings, and have it classify good or bad air quality intelligently. That could work, but it was tedious, and honestly, I'm a lazy guy.
So I went with the simpler route: a Raspberry Pi Pico 2 paired with a DFRobot DFPlayer Mini module, which plays audio files stored on a microSD card.
These are pre-recorded clips that I made myself using Elevenlabs, One of these clips is an introduction clip that responds like, "I'm PAL 8000, your environmental monitoring system." I have also added a few audio clips that respond to increasing VOC Levels that say "Warning, air quality has degraded" and a few eerie lines like "I'm watching" to give it that sinister HAL 9000 personality.
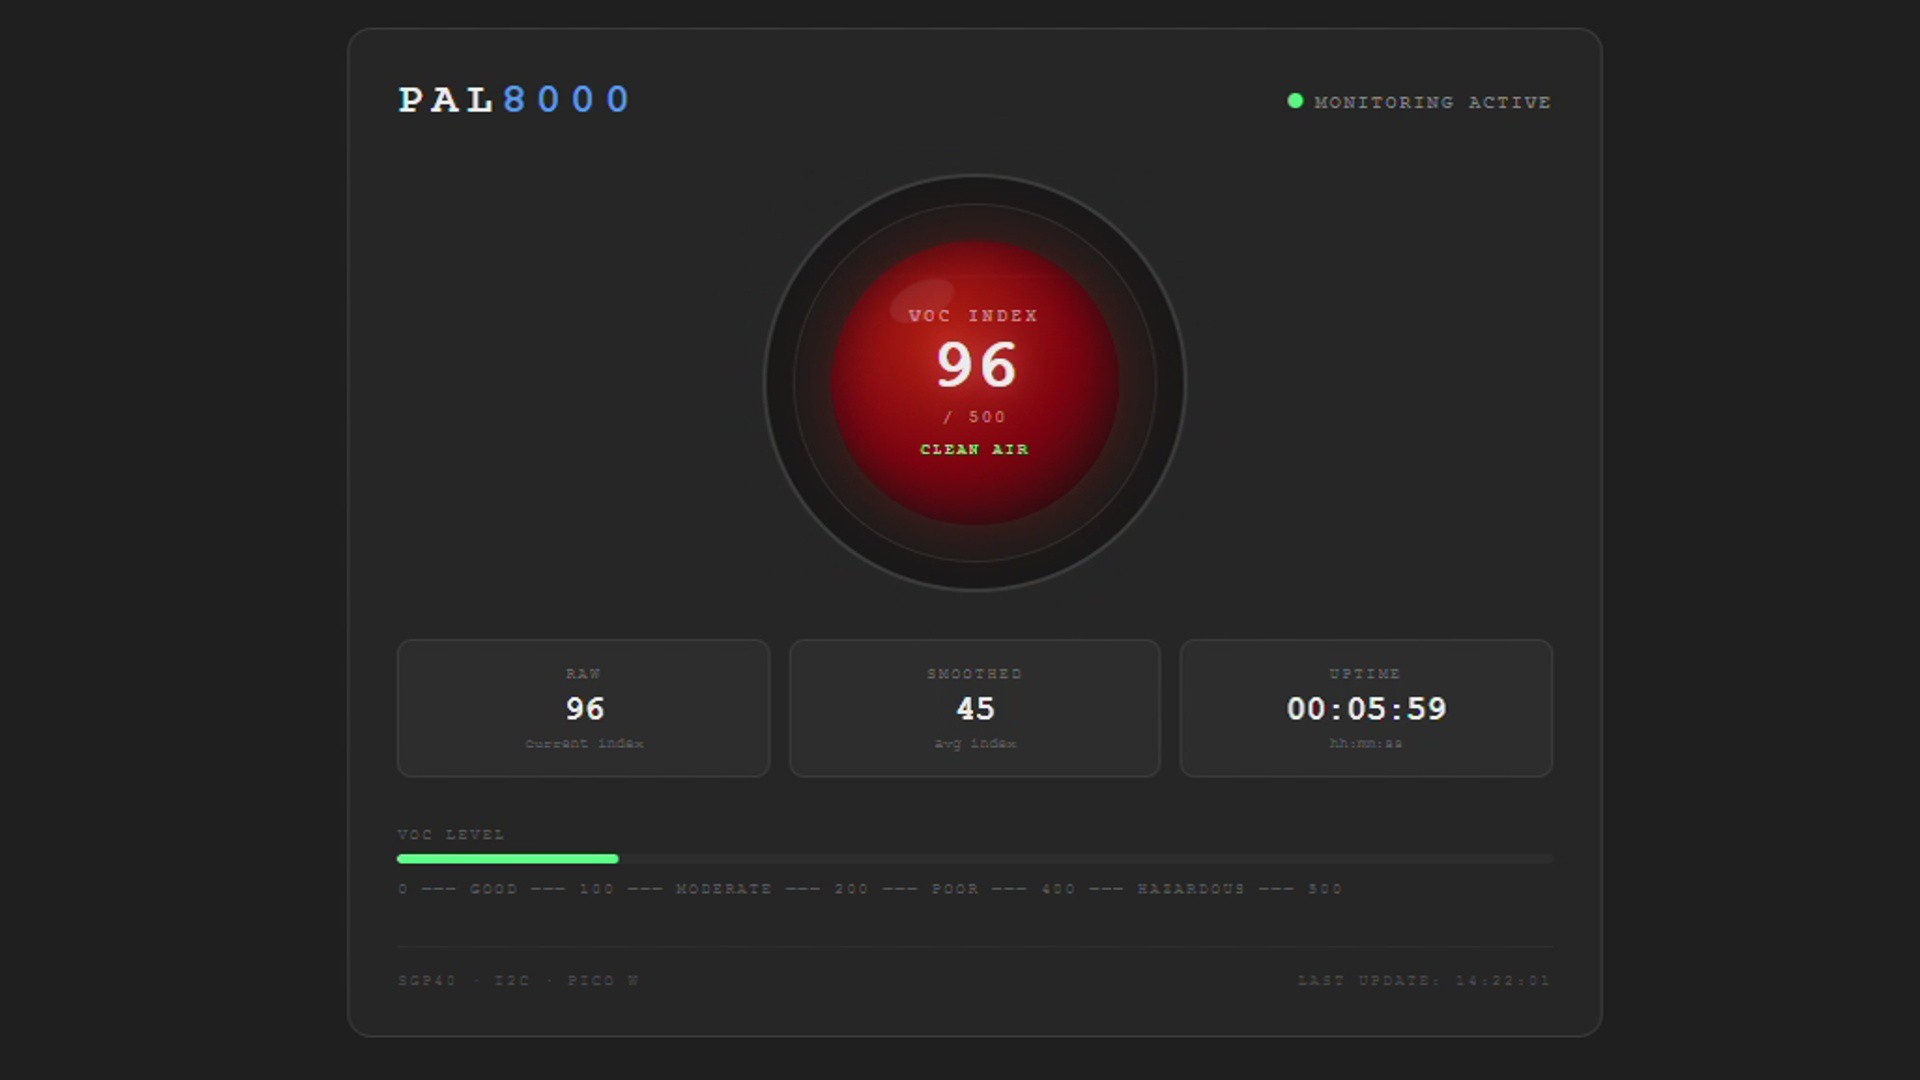
The logic is straightforward: on startup, PAL 8000 plays an introduction clip. It then continuously reads the VOC index from the sensor. If the reading falls between 0 and 100, it plays the "clean air" clip; as readings rise, it switches to progressively more urgent clips. So it behaves like an AI, but it is completely artificial, and definitely not intelligent.
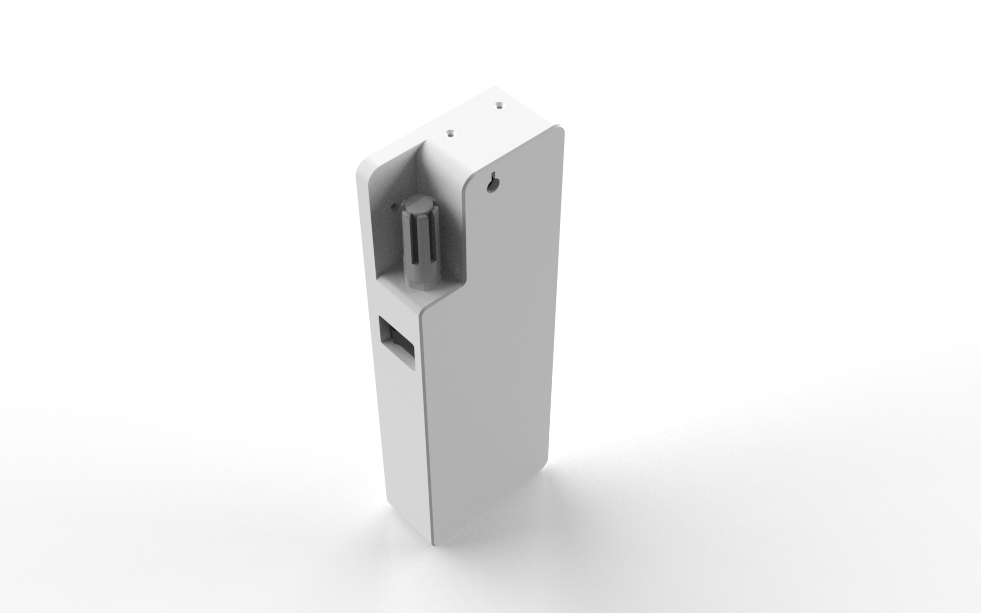
For air quality sensing, I used the Sensirion SGP40, a dedicated indoor VOC (Volatile Organic Compound) sensor. It outputs a VOC index, a value from 0 to 500, where lower is cleaner air. The sensor communicates over I2C and is mounted on the back of the PAL 8000 enclosure.
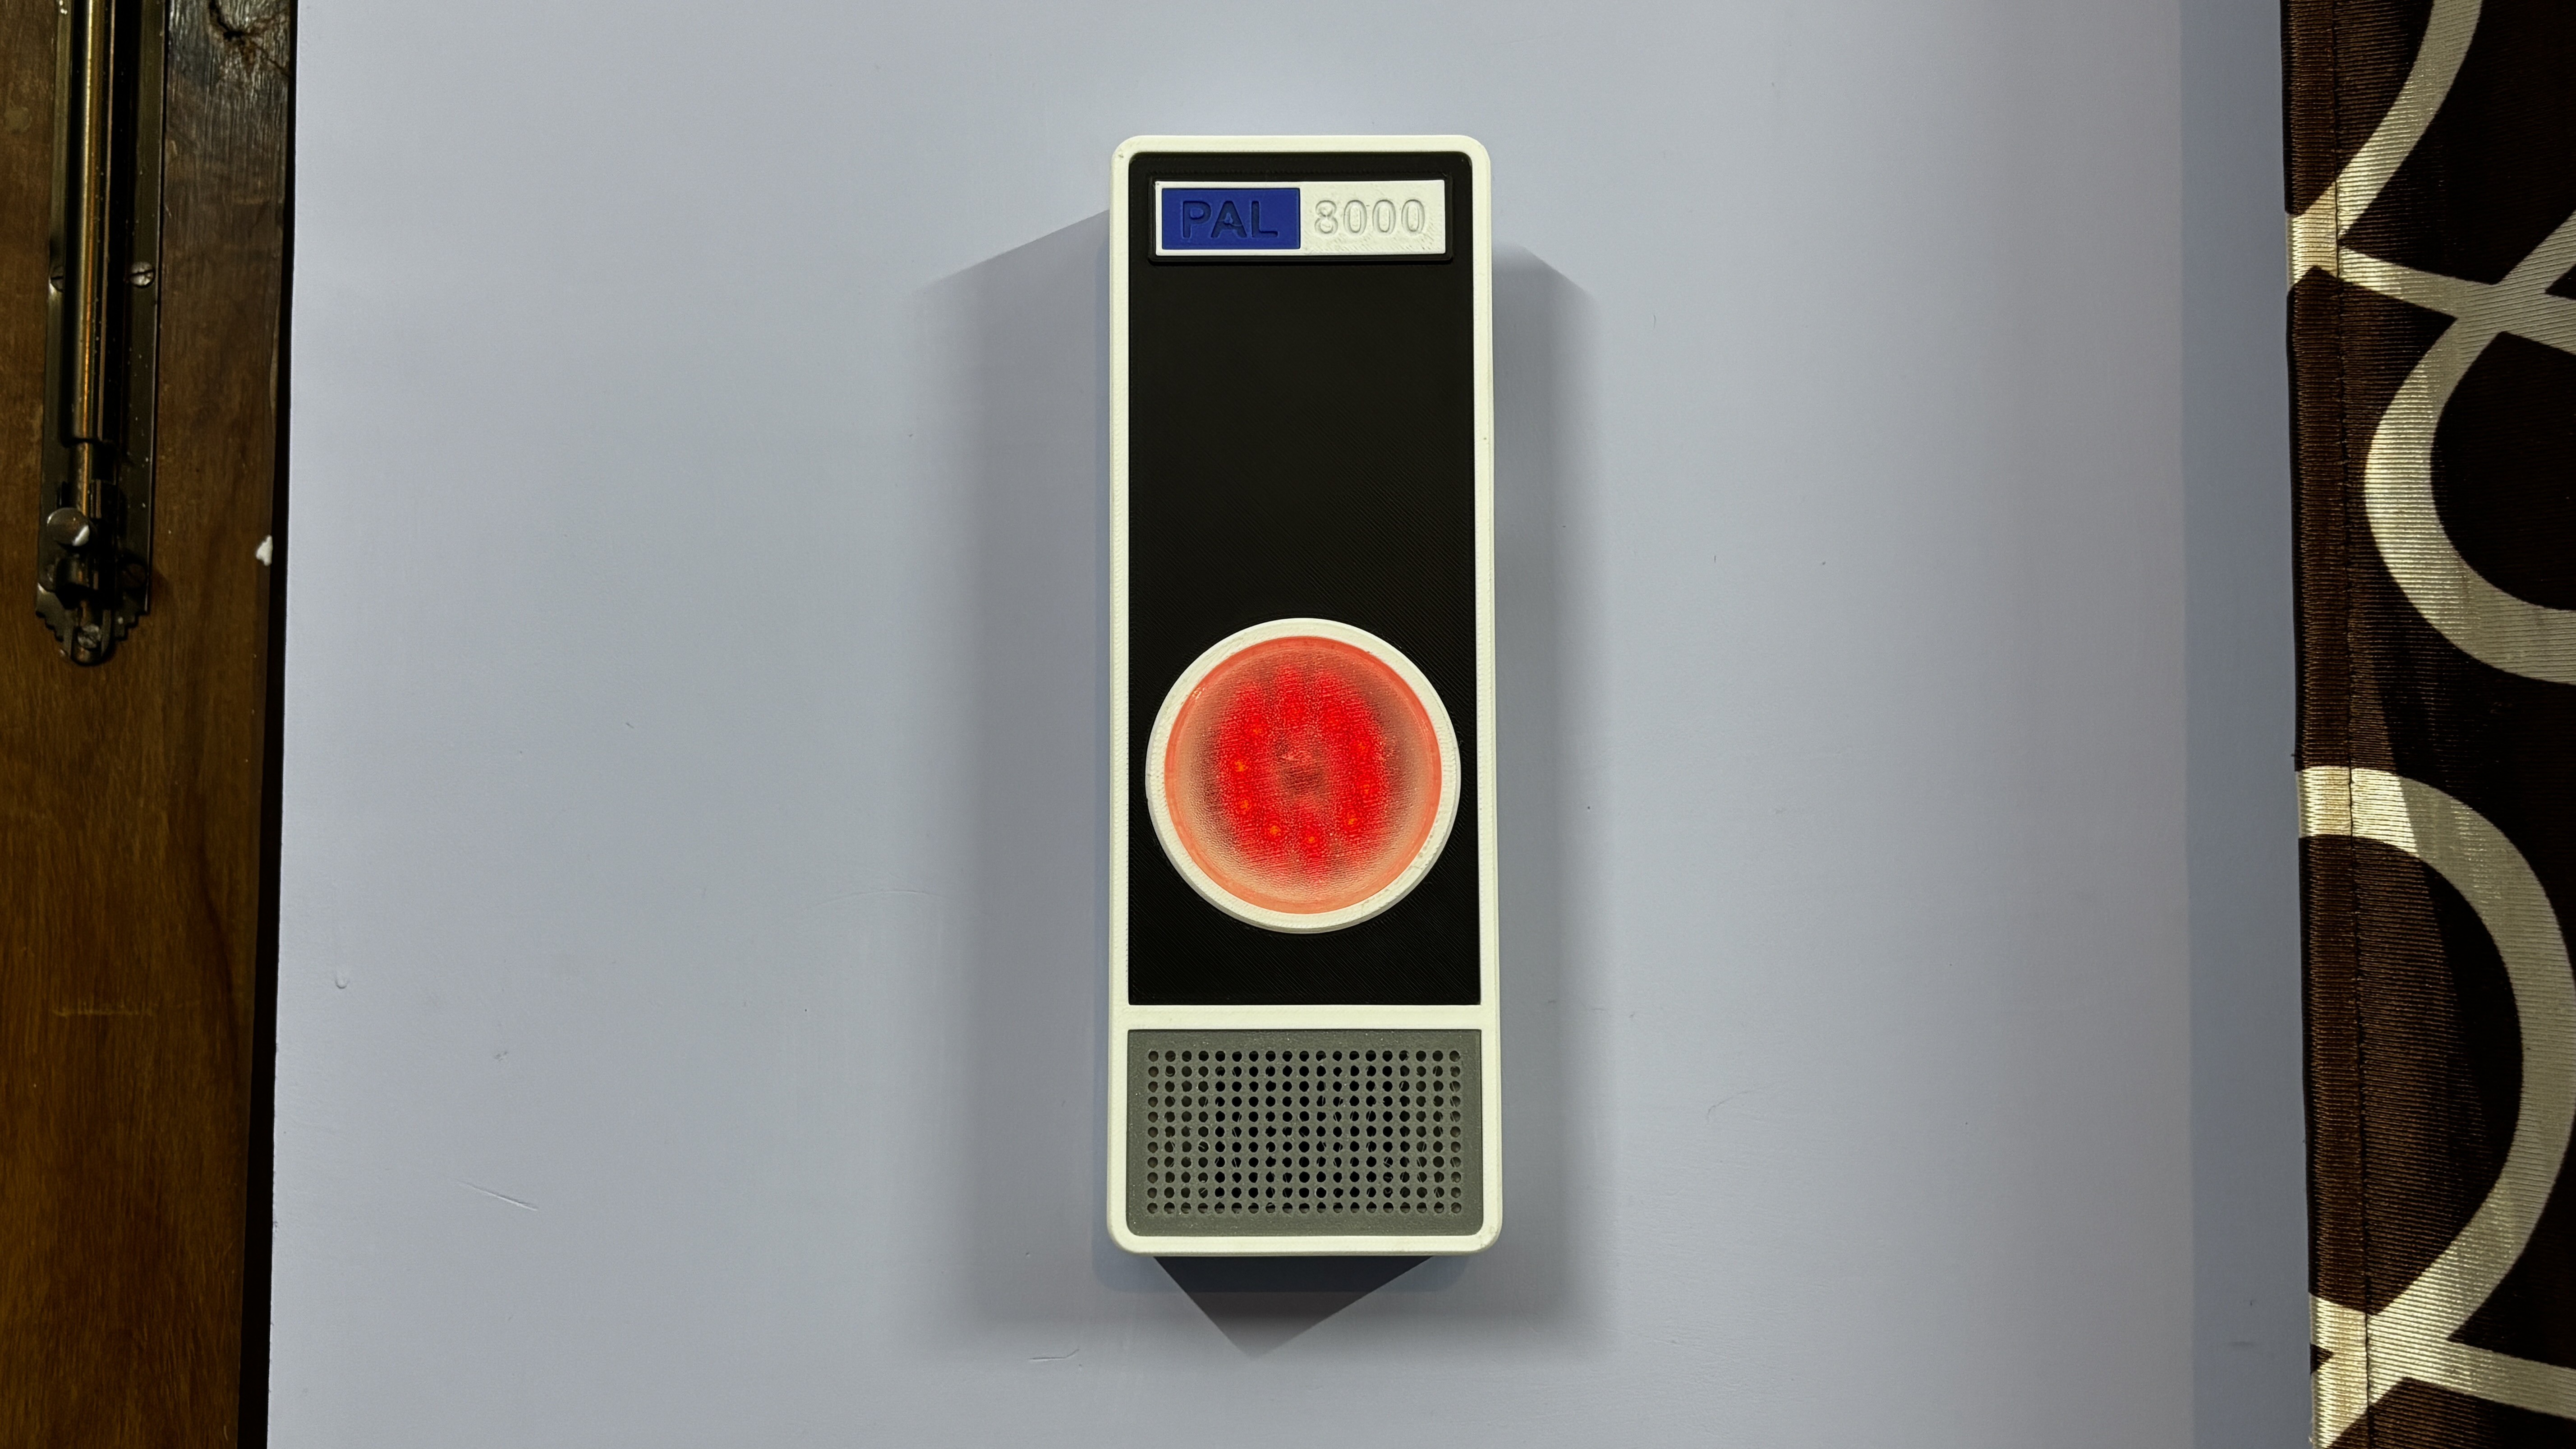
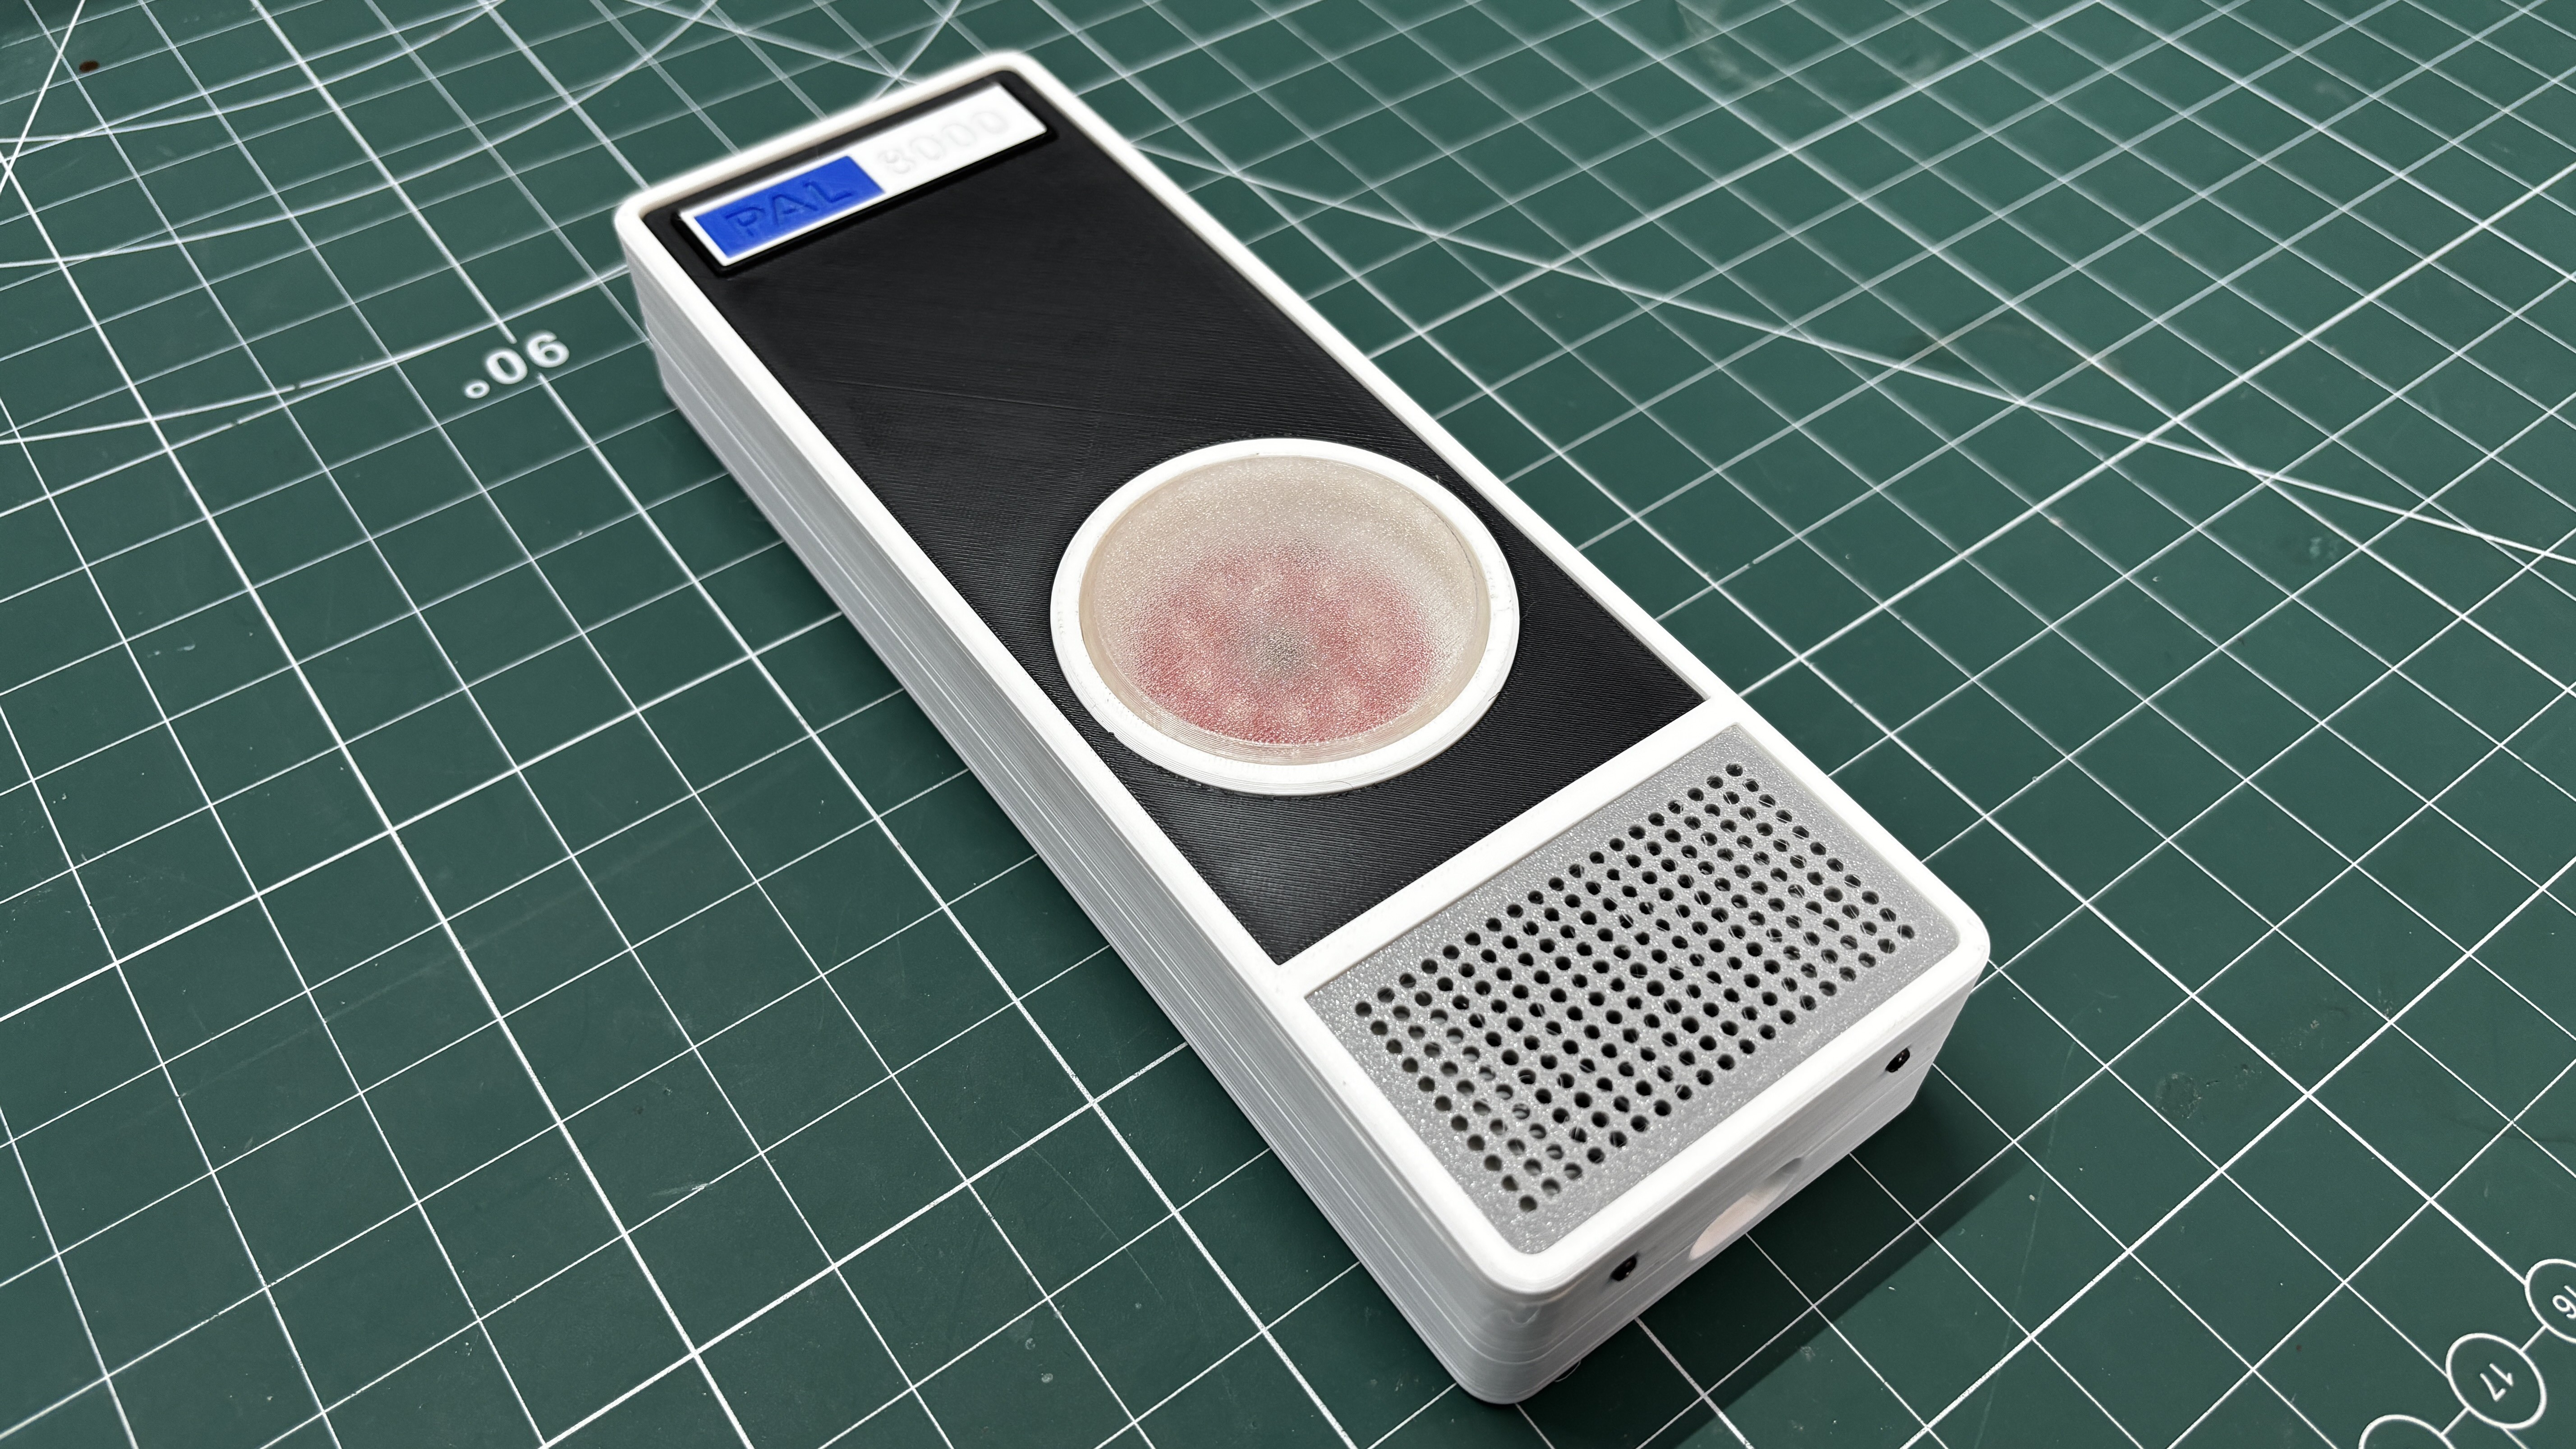
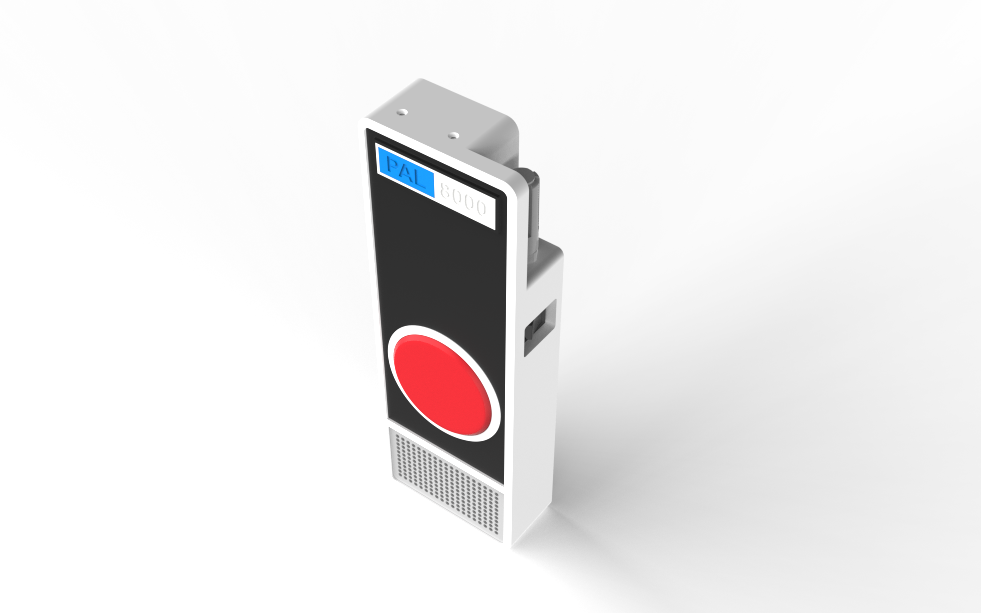
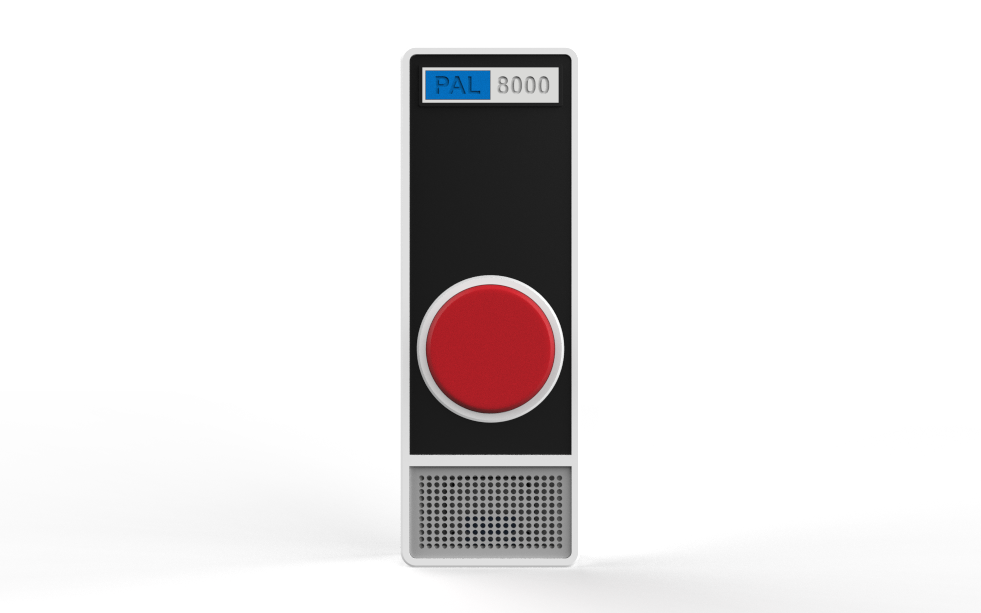
I also designed an enclosure that closely resembles HAL 9000's iconic circular eye design. Mine differs in one way: HAL's enclosure was metallic silver, while mine is white.
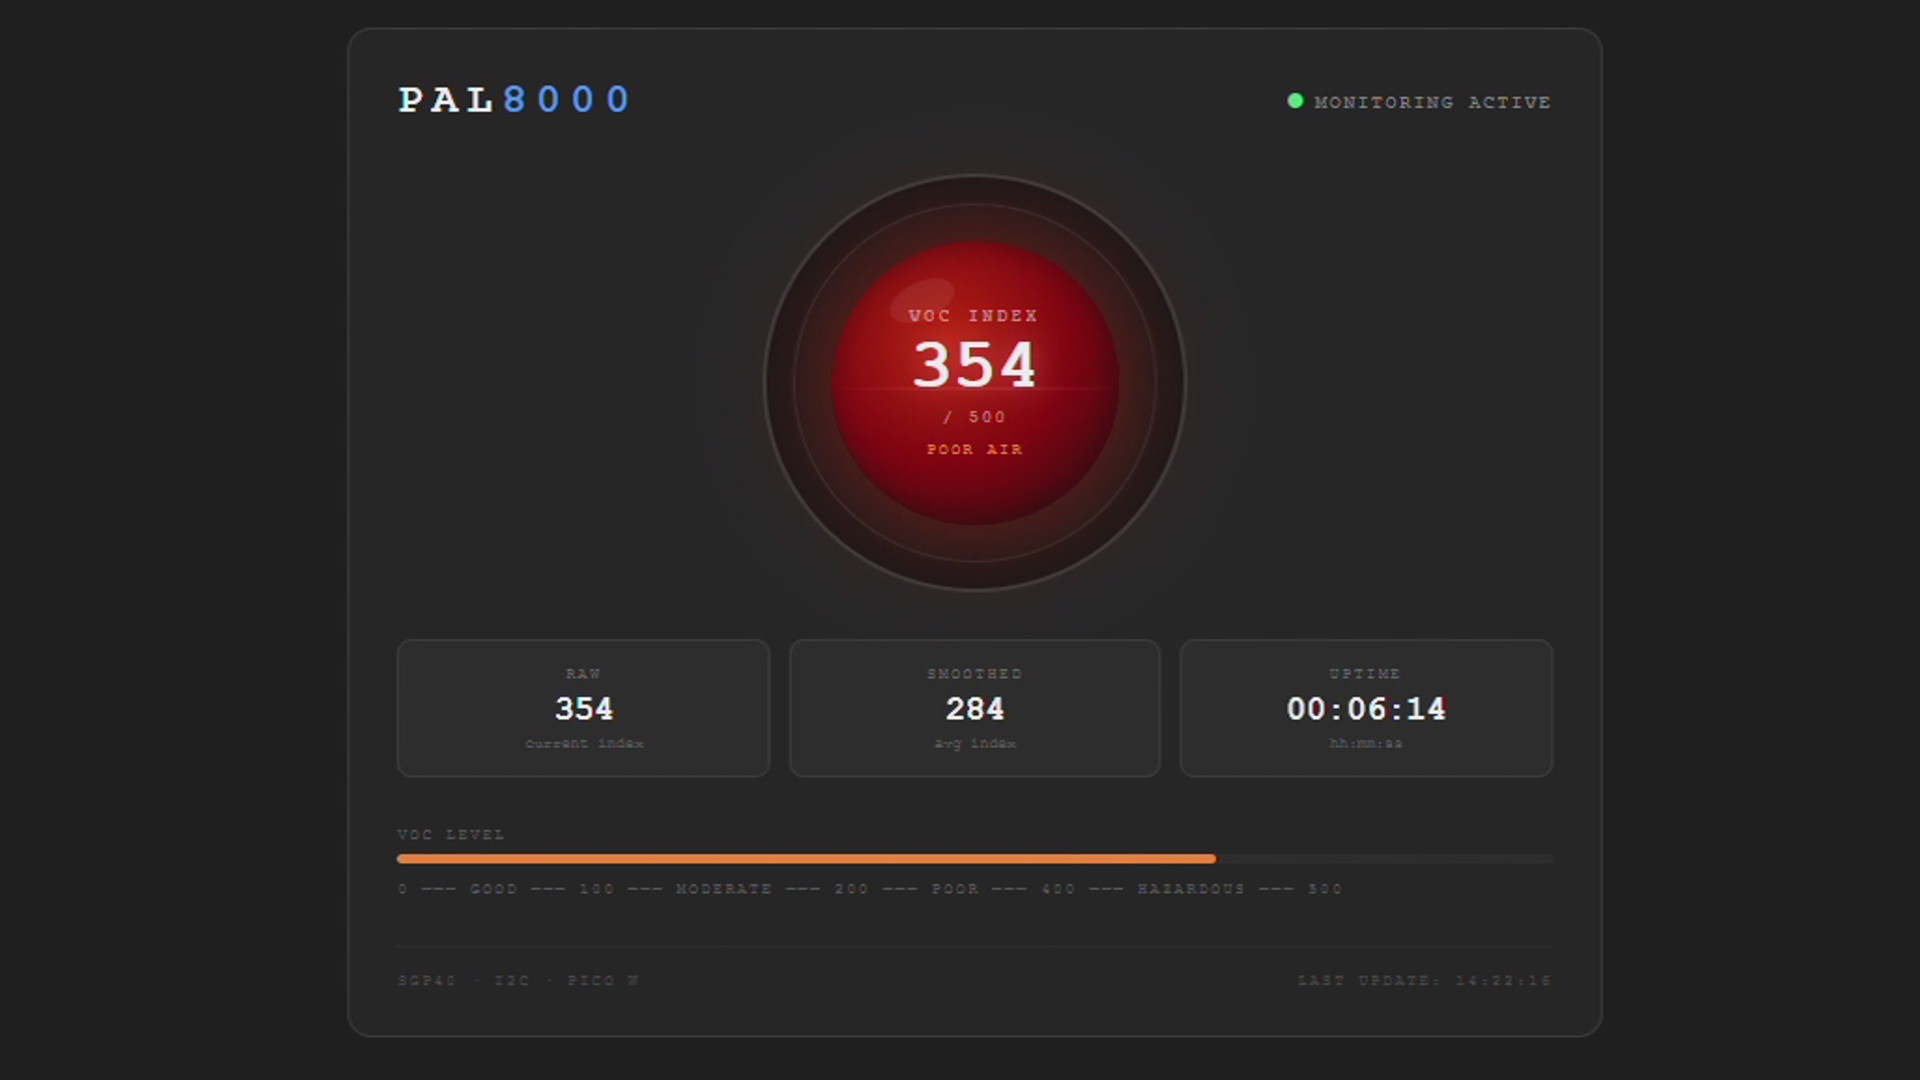
Because we are using a Raspberry Pi Pico W, real-time VOC data can be accessed through a locally hosted web app, letting you monitor your room's air quality directly from a browser on any device on the same network.
This article covers the entire build process from start to finish, so let's get started.
CONCEPT
As stated earlier, the whole idea behind this project came after rewatching 2001: A Space Odyssey, combined with the fact that I was already working on an air quality project. I thought, why not build a HAL 9000-like device that looks and sounds like him while also providing real feedback on air quality?
For those who don't know, HAL 9000 is an artificial intelligence and the onboard computer of the spaceship Discovery One in 2001: A Space Odyssey. He is the hidden main antagonist of the film. HAL is capable of many functions—speech, speech recognition, facial recognition, lip-reading, interpreting and expressing emotions, and even playing chess, all while maintaining every system aboard Discovery. HAL speaks in a soothing male voice, always calm, always measured, which somehow makes him sound even more unsettling.
My goal with PAL 8000 is to recreate that eerie, eerily calm feeling, not a direct copy but something that carries the same atmosphere.
Using a Raspberry Pi Pico 2 paired with a DFPlayer Mini module, along with audio clips I generated using ElevenLabs, I built PAL 8000 around a Sensirion SGP40 indoor air quality sensor. The SGP40 continuously measures VOC (Volatile Organic Compound) levels in the room and outputs a VOC Index value ranging from 0 to 500. Based on where that reading falls, PAL 8000 plays a corresponding audio clip; if the reading is between 0 and 100, it plays a clip indicating clean air; as readings climb higher, the responses become progressively more urgent, shifting from gentle observations to quiet warnings, all delivered in that same unsettling calm tone.
DESIGN
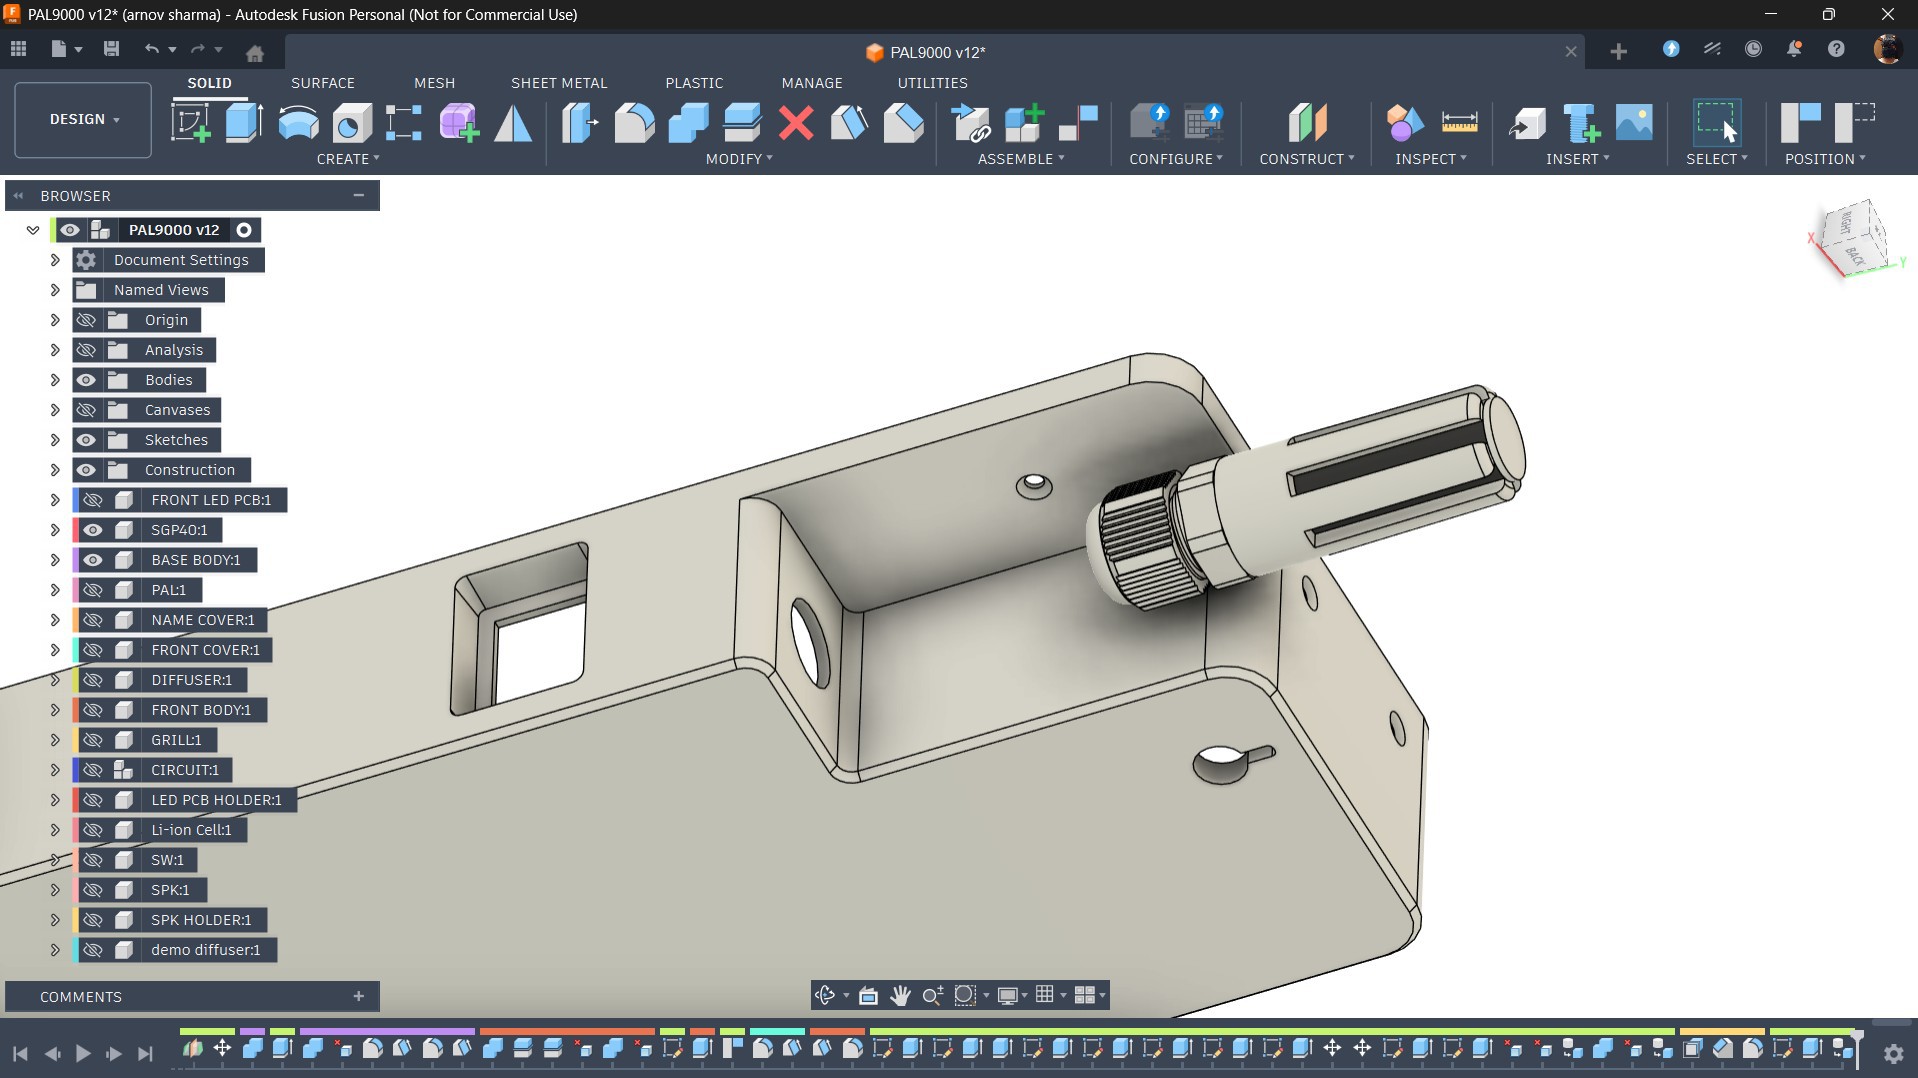
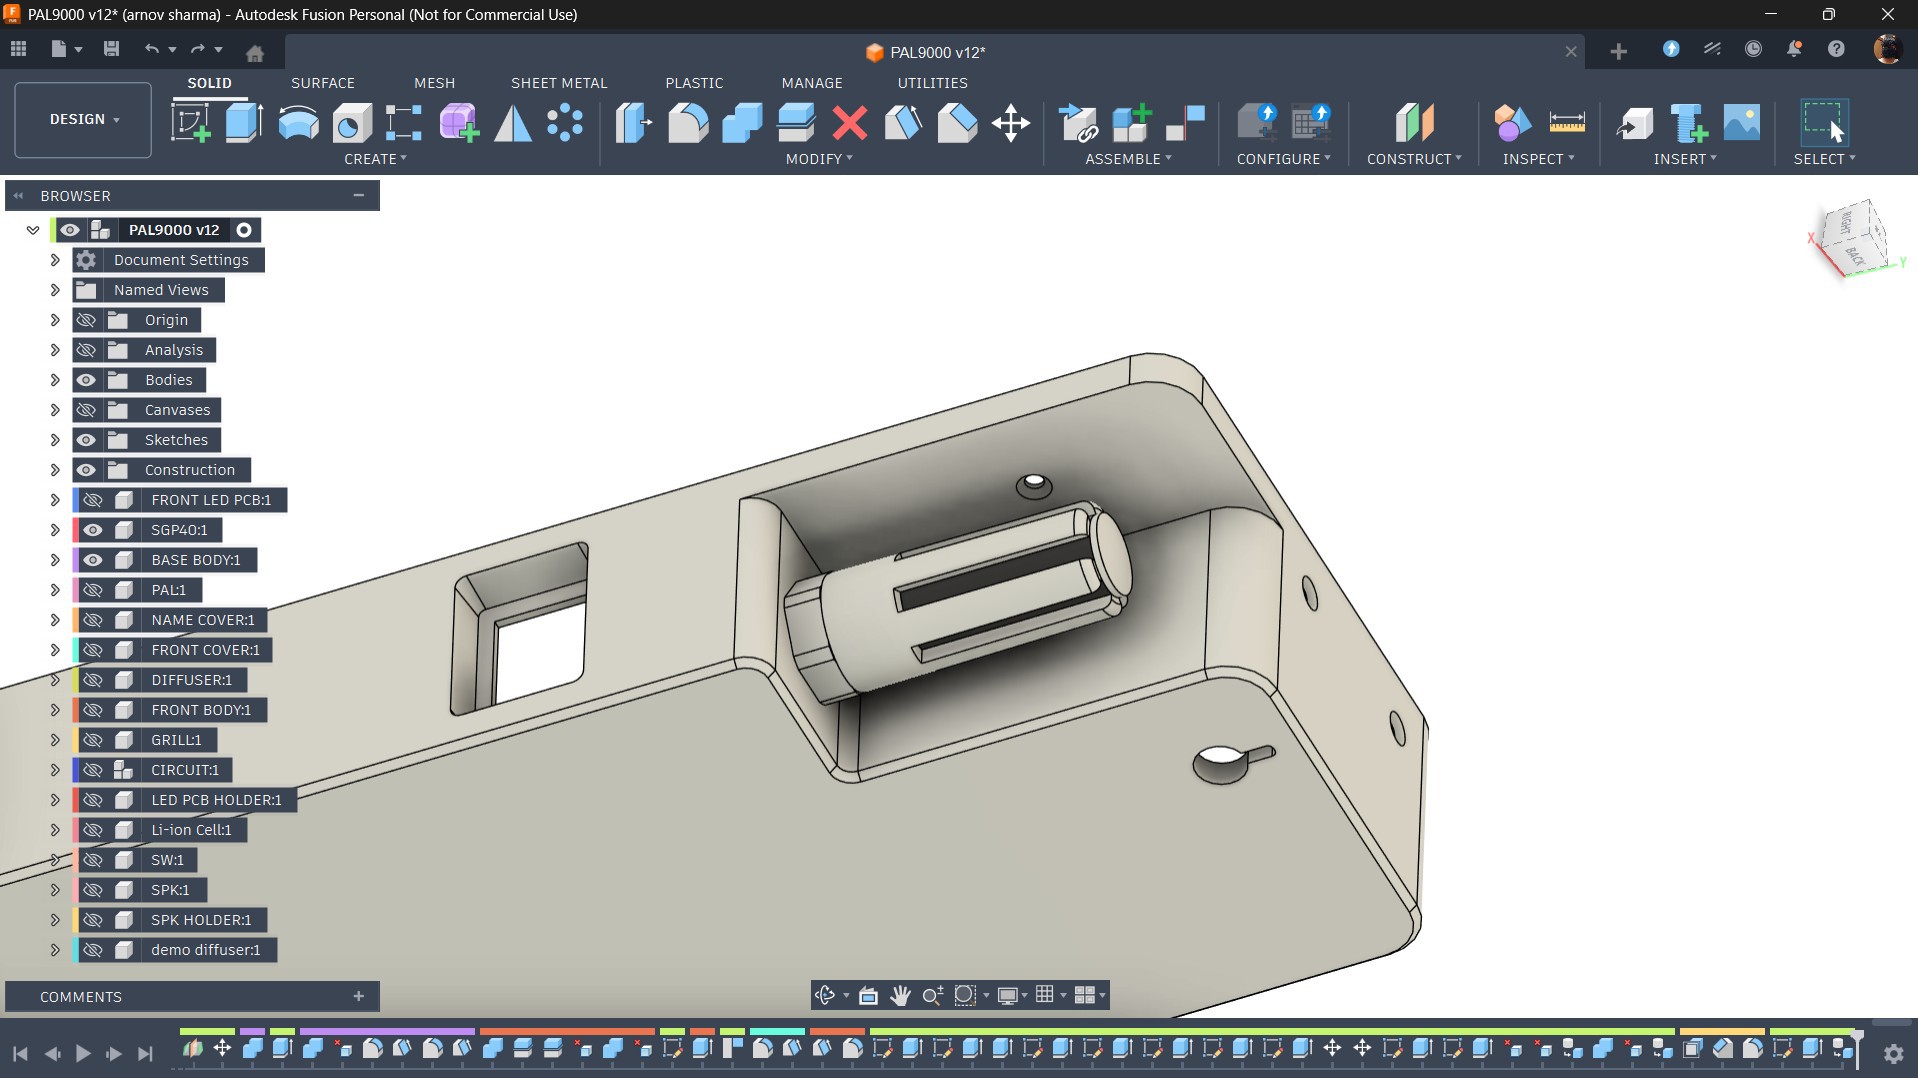
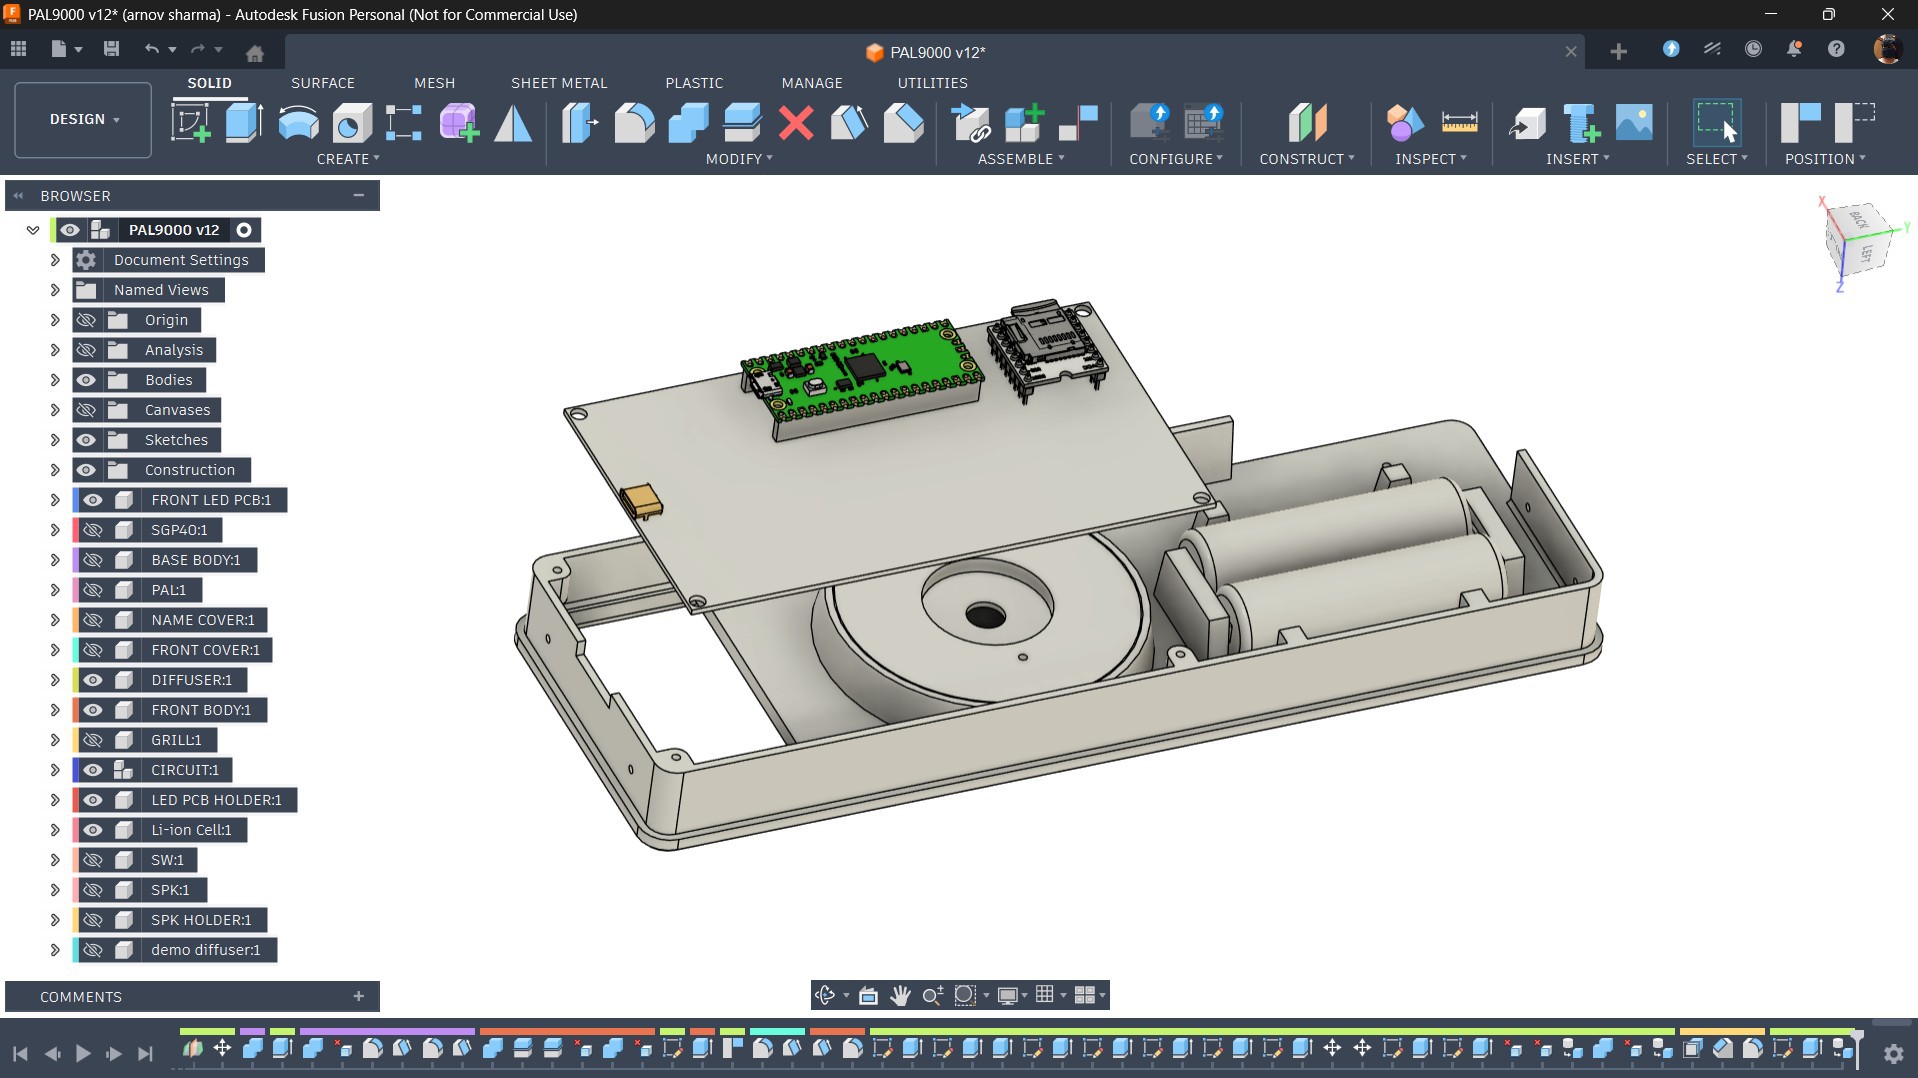
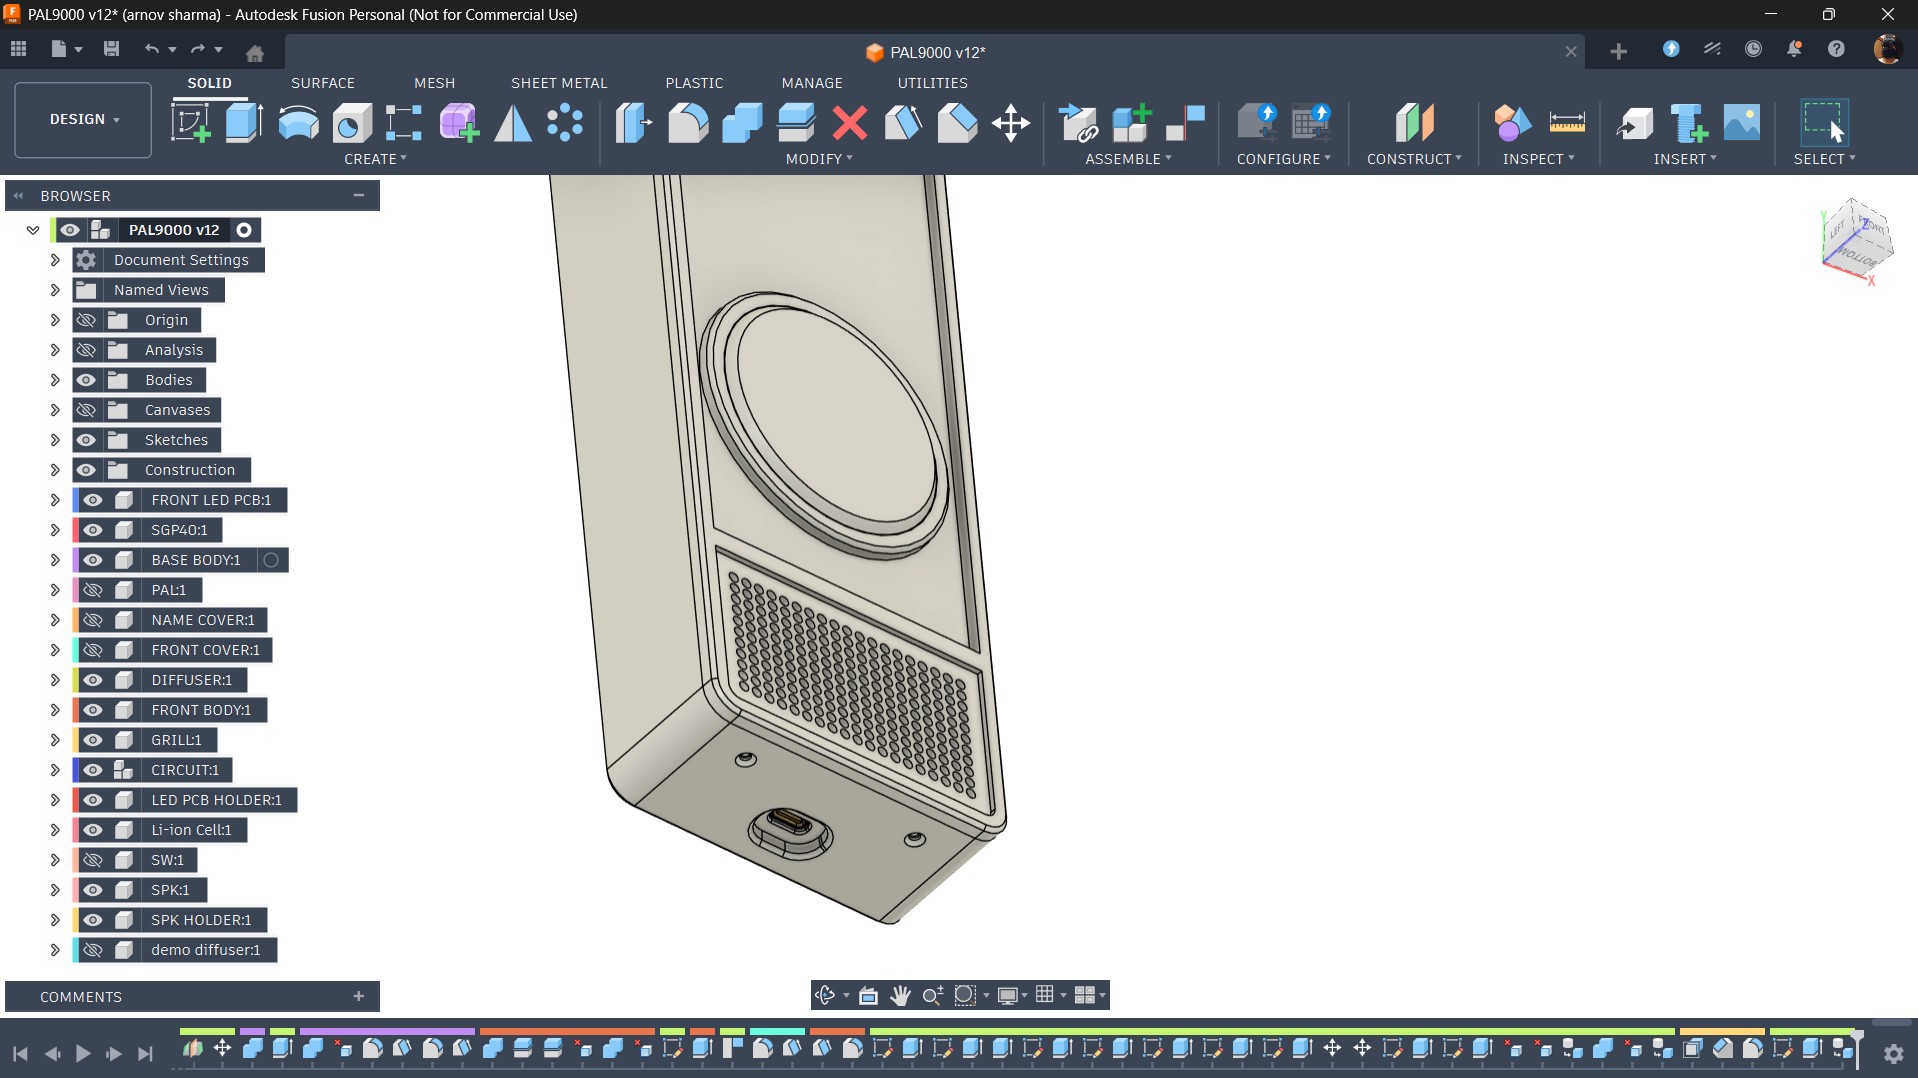
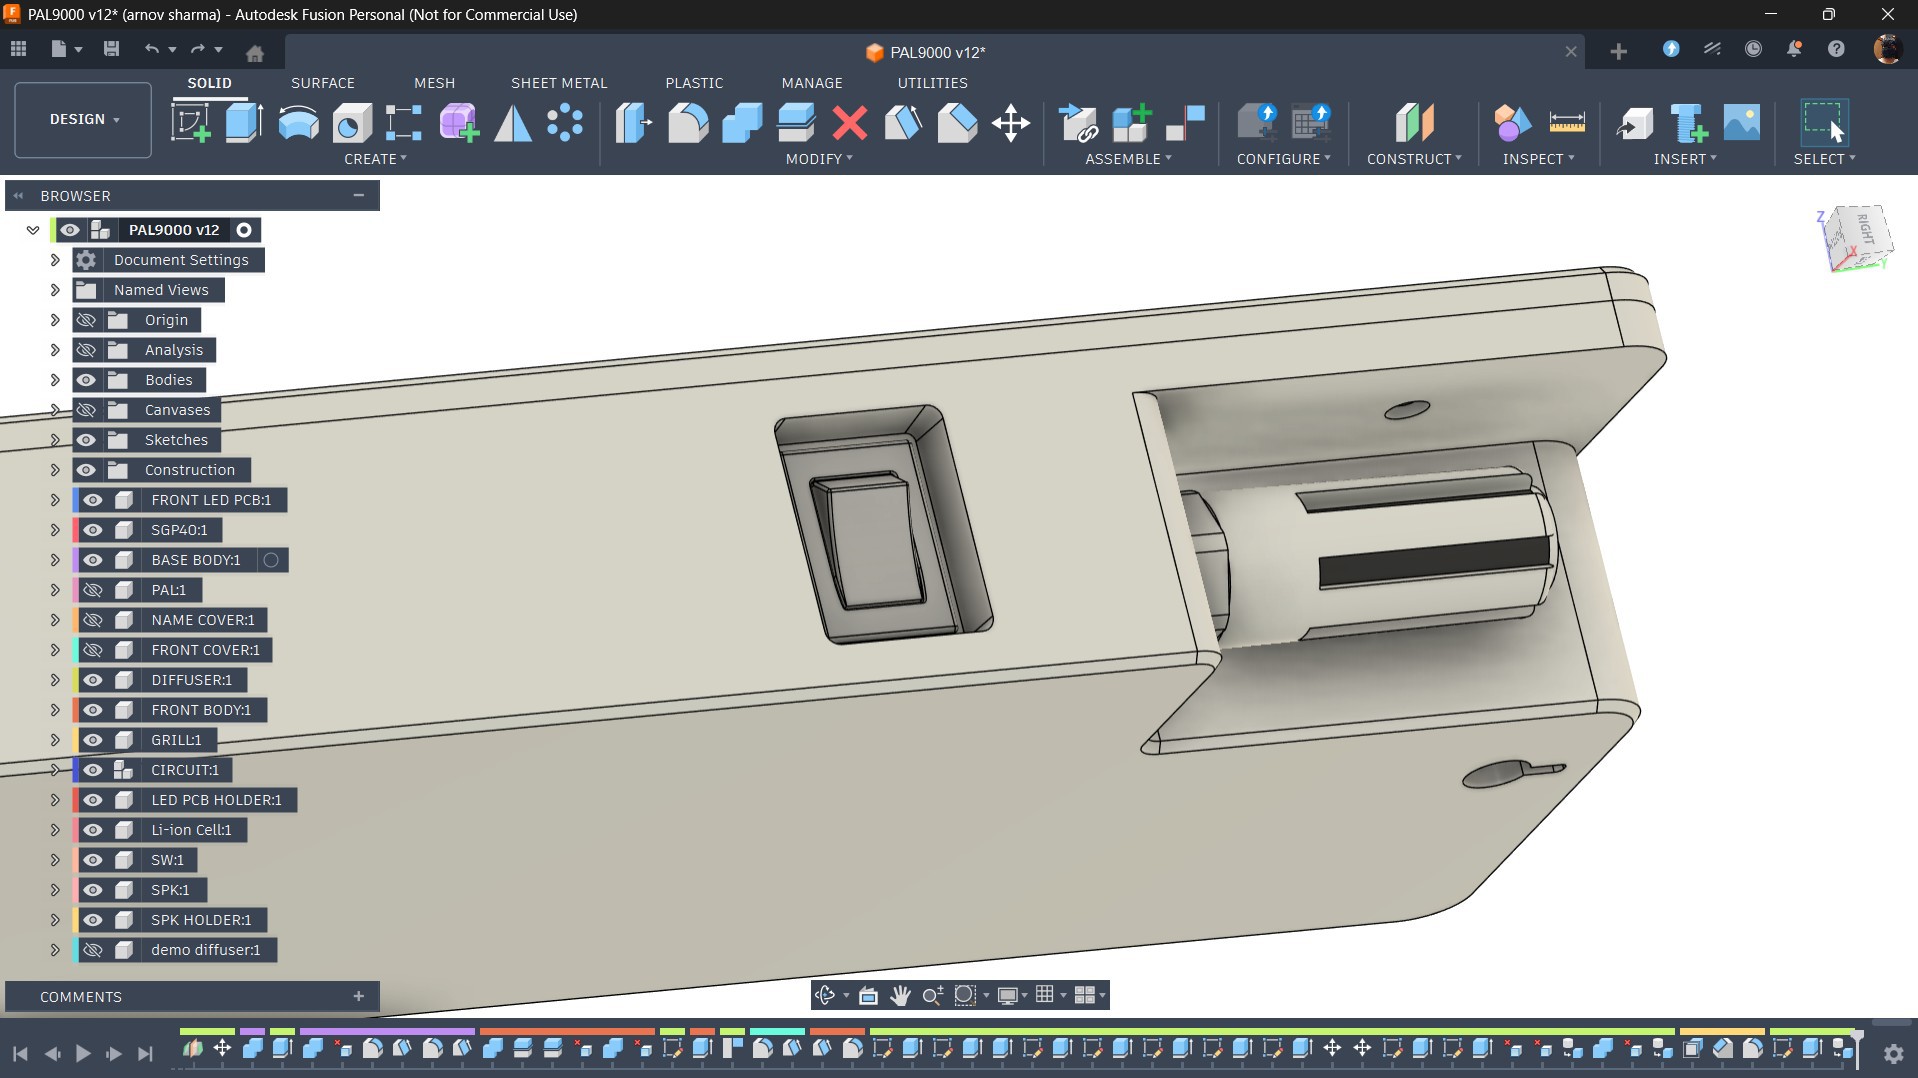
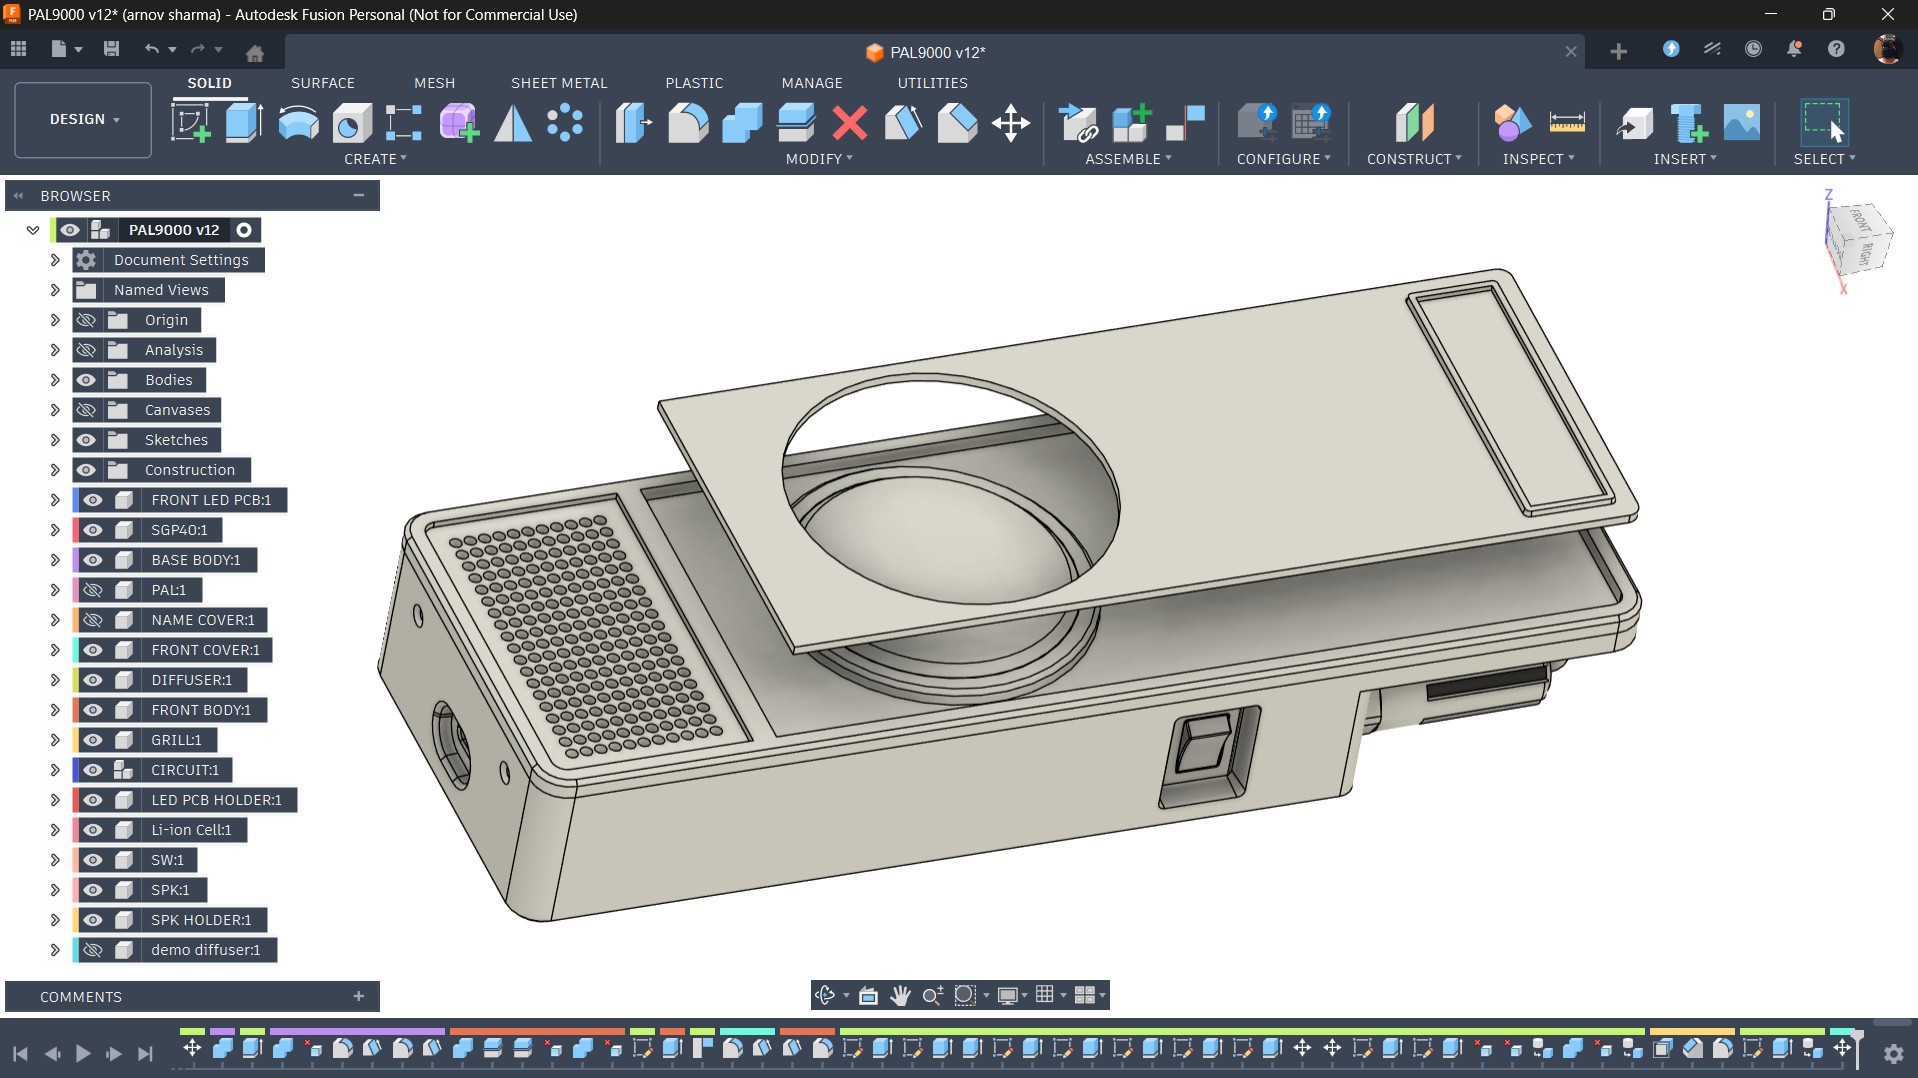
To get started with the design, I began by preparing the enclosure in Fusion 360. I imported 3D models of my existing LED board and Pico driver board from previous projects and searched for a high-quality front-facing reference image of HAL 9000. This image was used to trace the basic outline of the enclosure, which was then extruded and refined to house the Pico driver board and LED board inside. The LED board is positioned specifically to serve as the eye of PAL 8000.
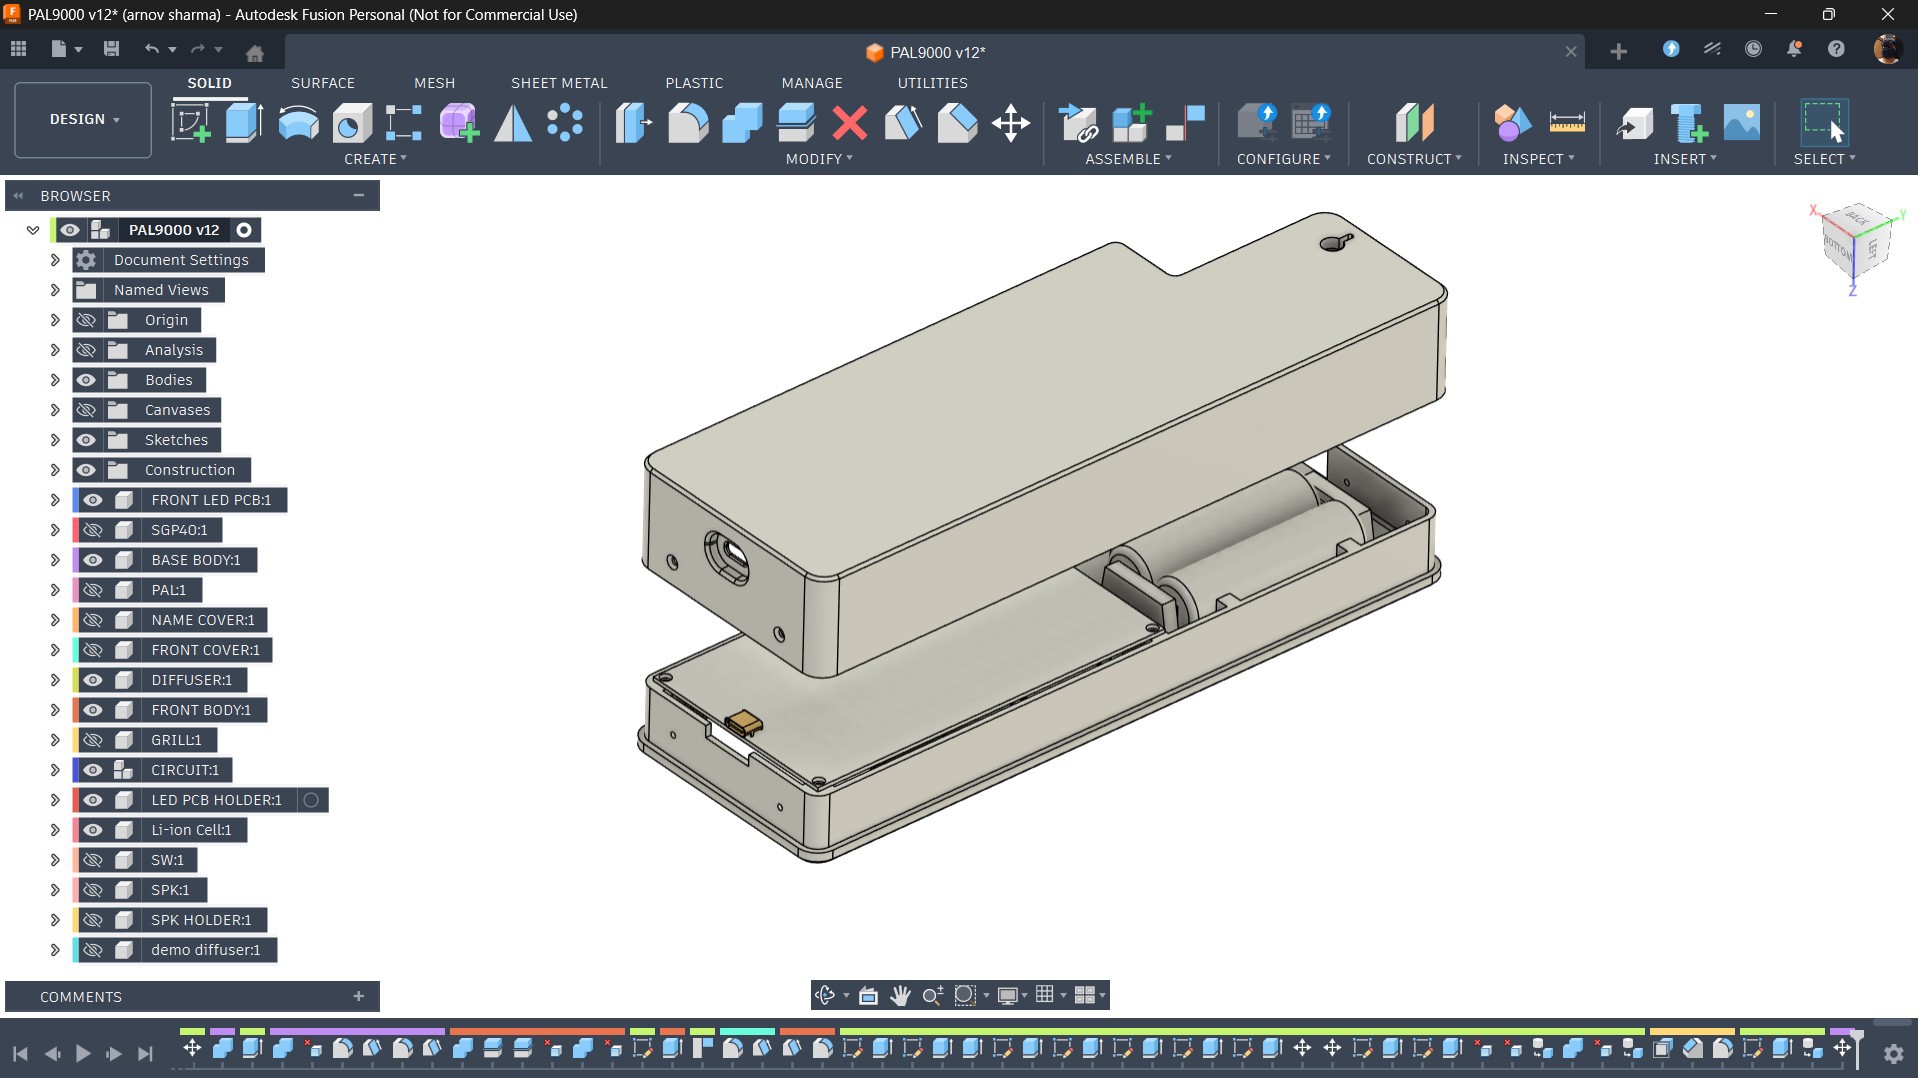
The whole device is split into two parts: The Front body and The Back body.
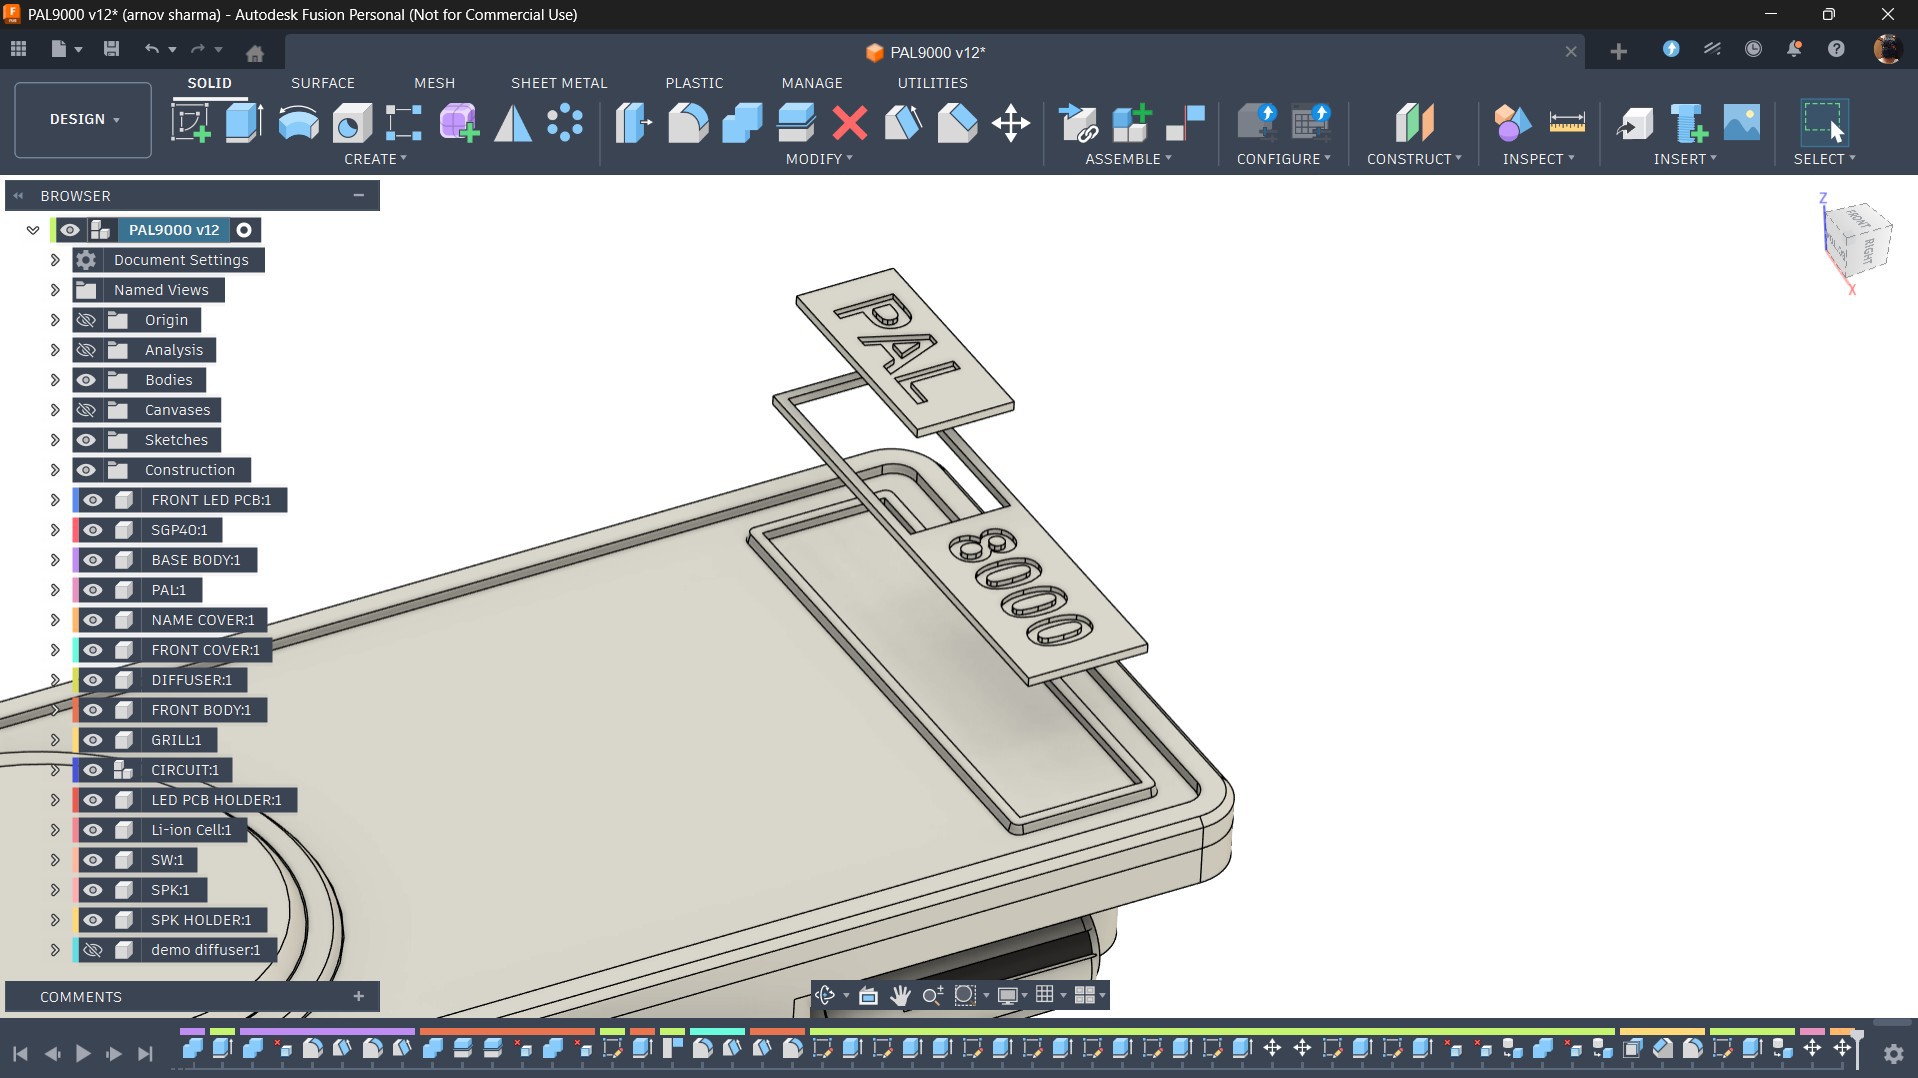
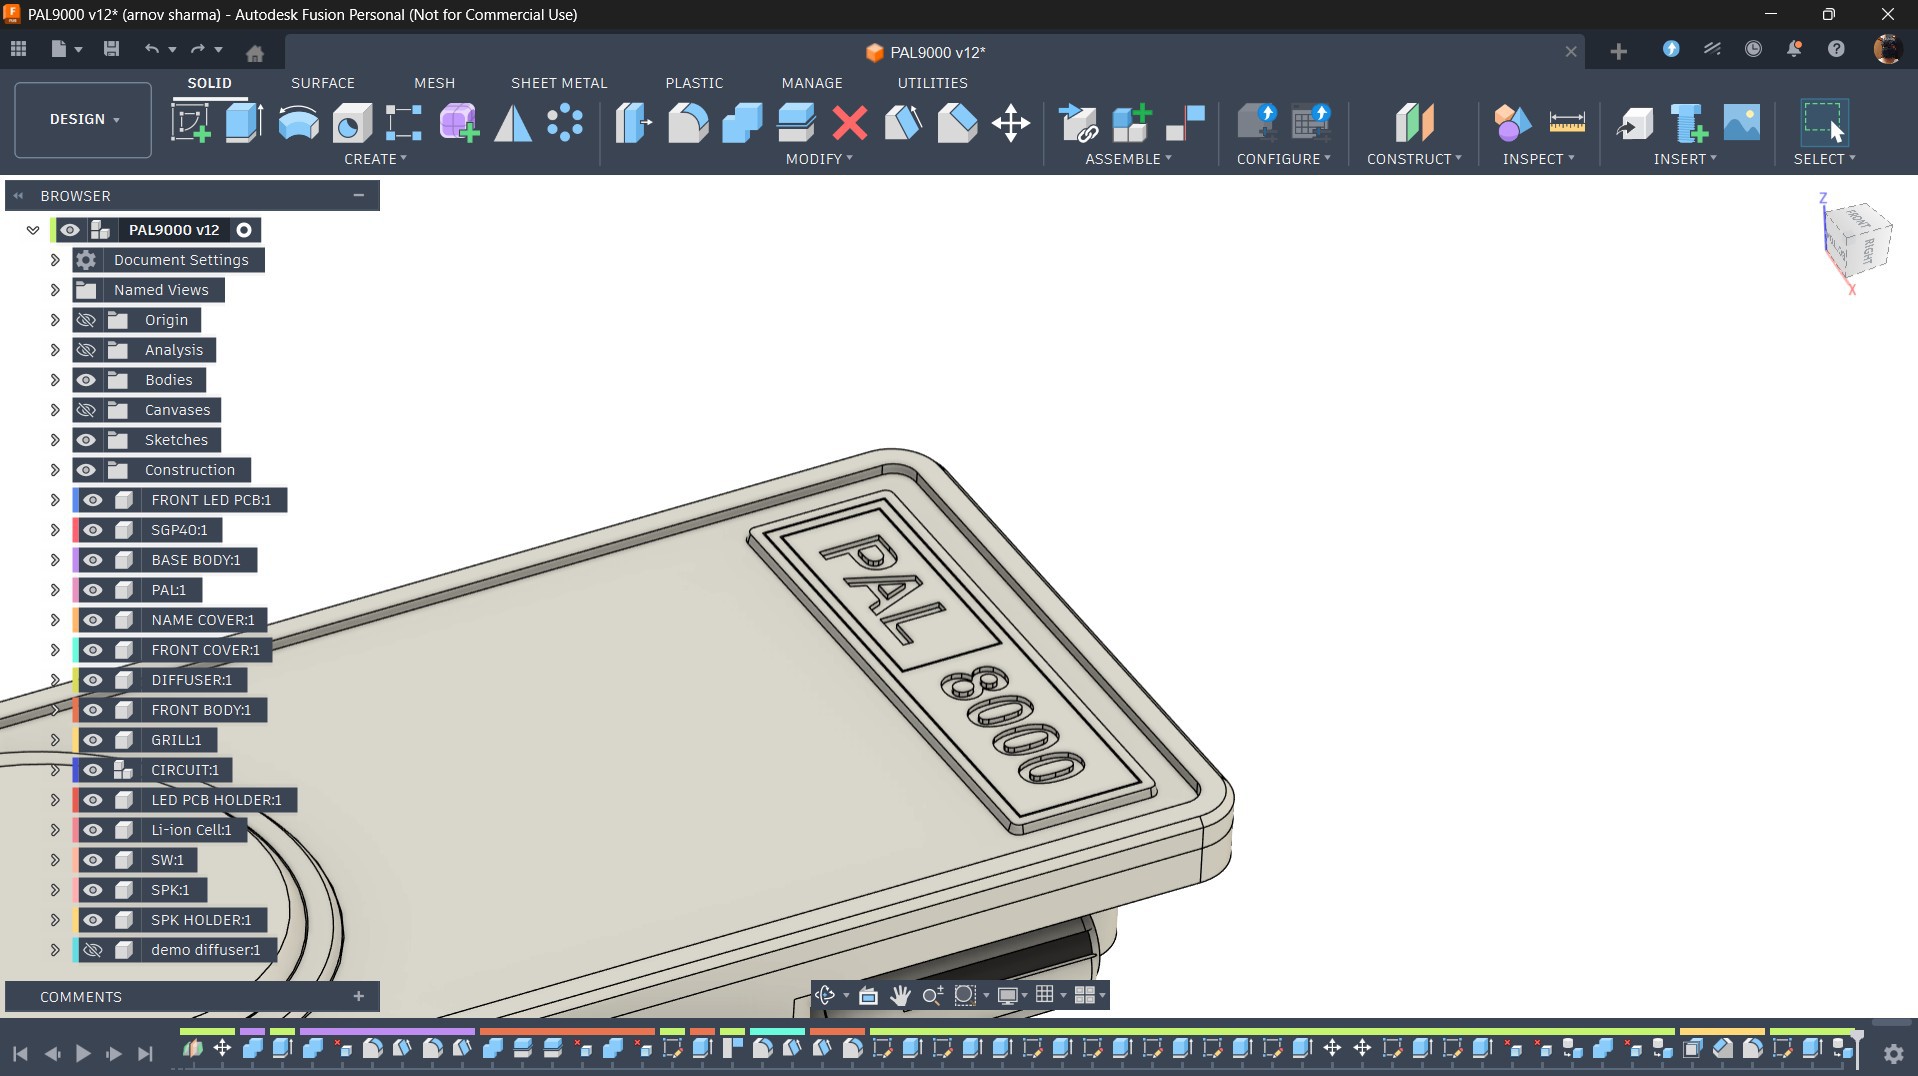
The front body acts as a lid and is the primary aesthetic face of the device. It is printed in a single color, which is white. To match the exact look of HAL 9000, I modeled a cover piece that pressure-fits on top of the front body, printed in black PLA. On this cover, I also modeled two additional nameplate parts carrying the text "PAL" and "8000, " both printed in blue and white, matching the color scheme seen on HAL 9000 in the film.
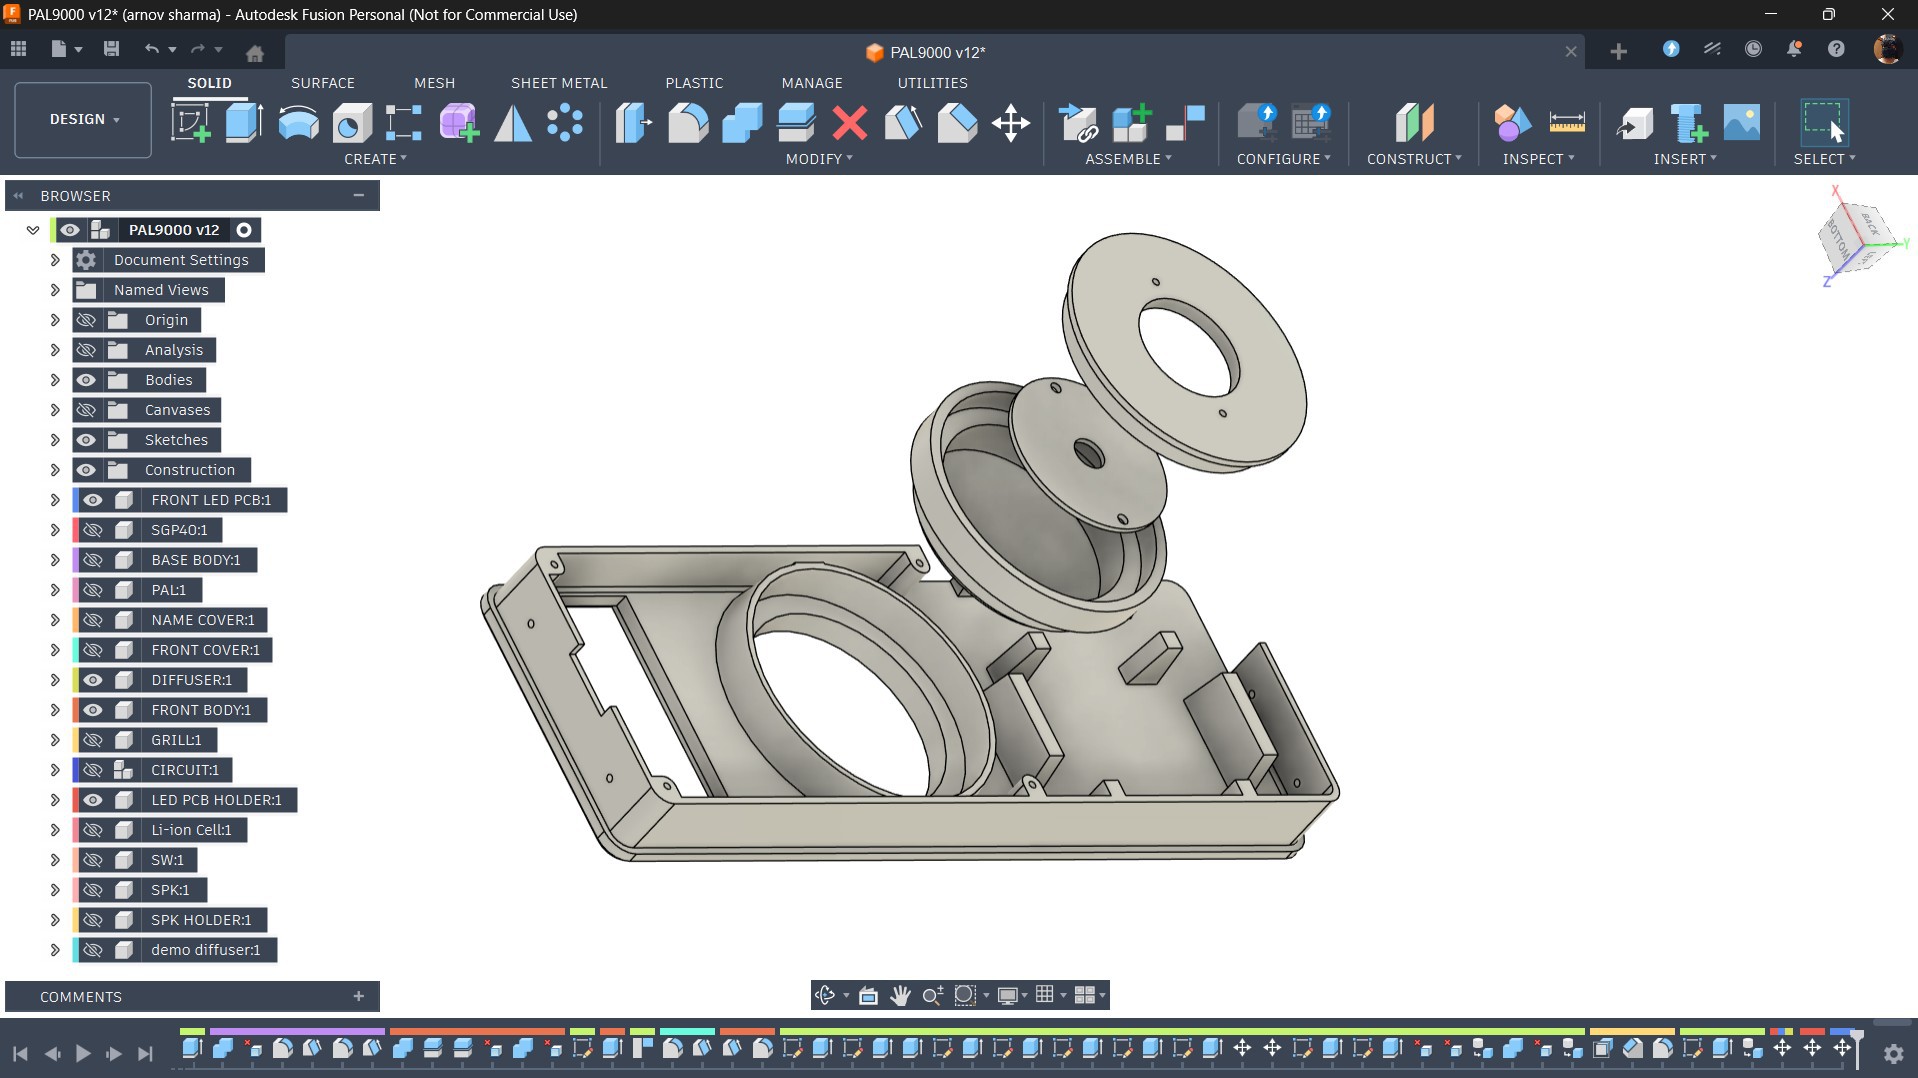
The red eye is a diffuser component printed in transparent PLA. To keep the LED board securely in place, I modeled a dedicated LED board holder that mounts to the front body from the inside, with the diffuser positioned over it.
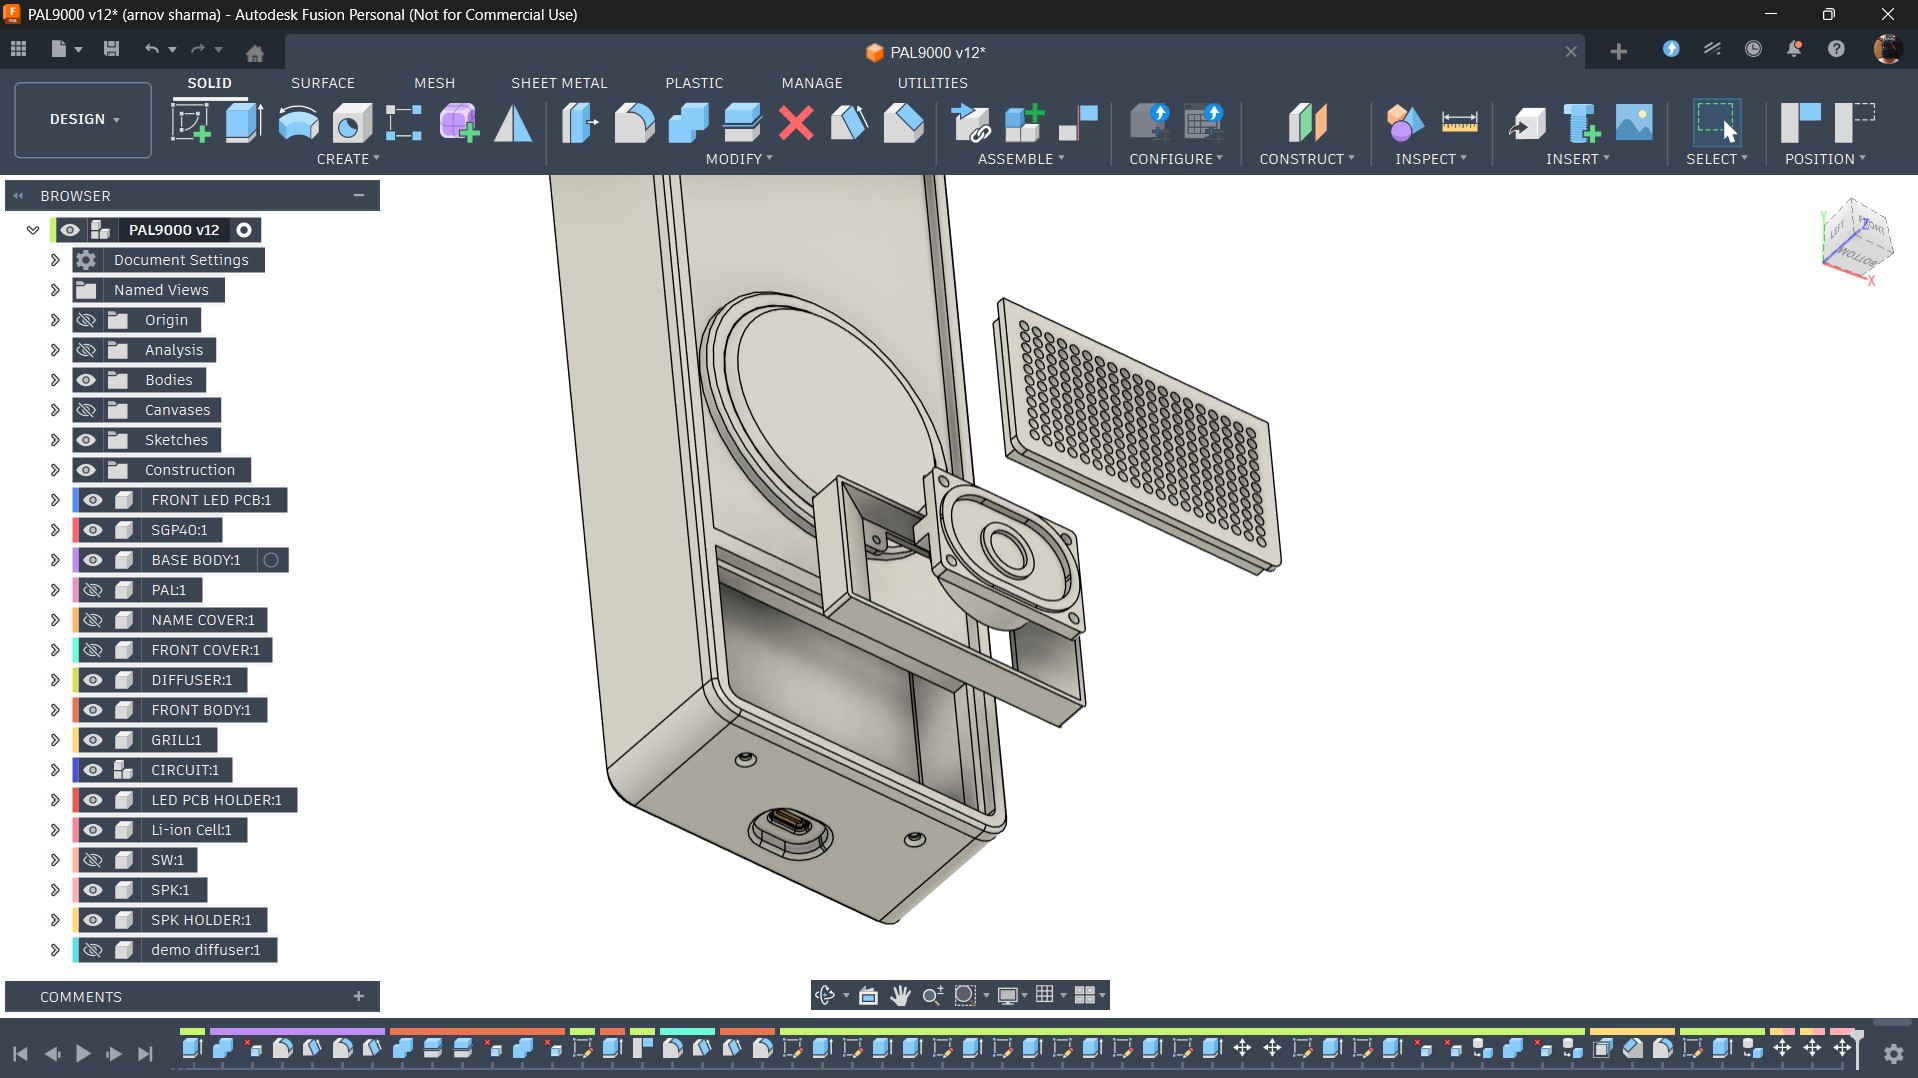
For the speaker, I designed a speaker grille and a speaker holder, both secured together and mounted onto the front body.
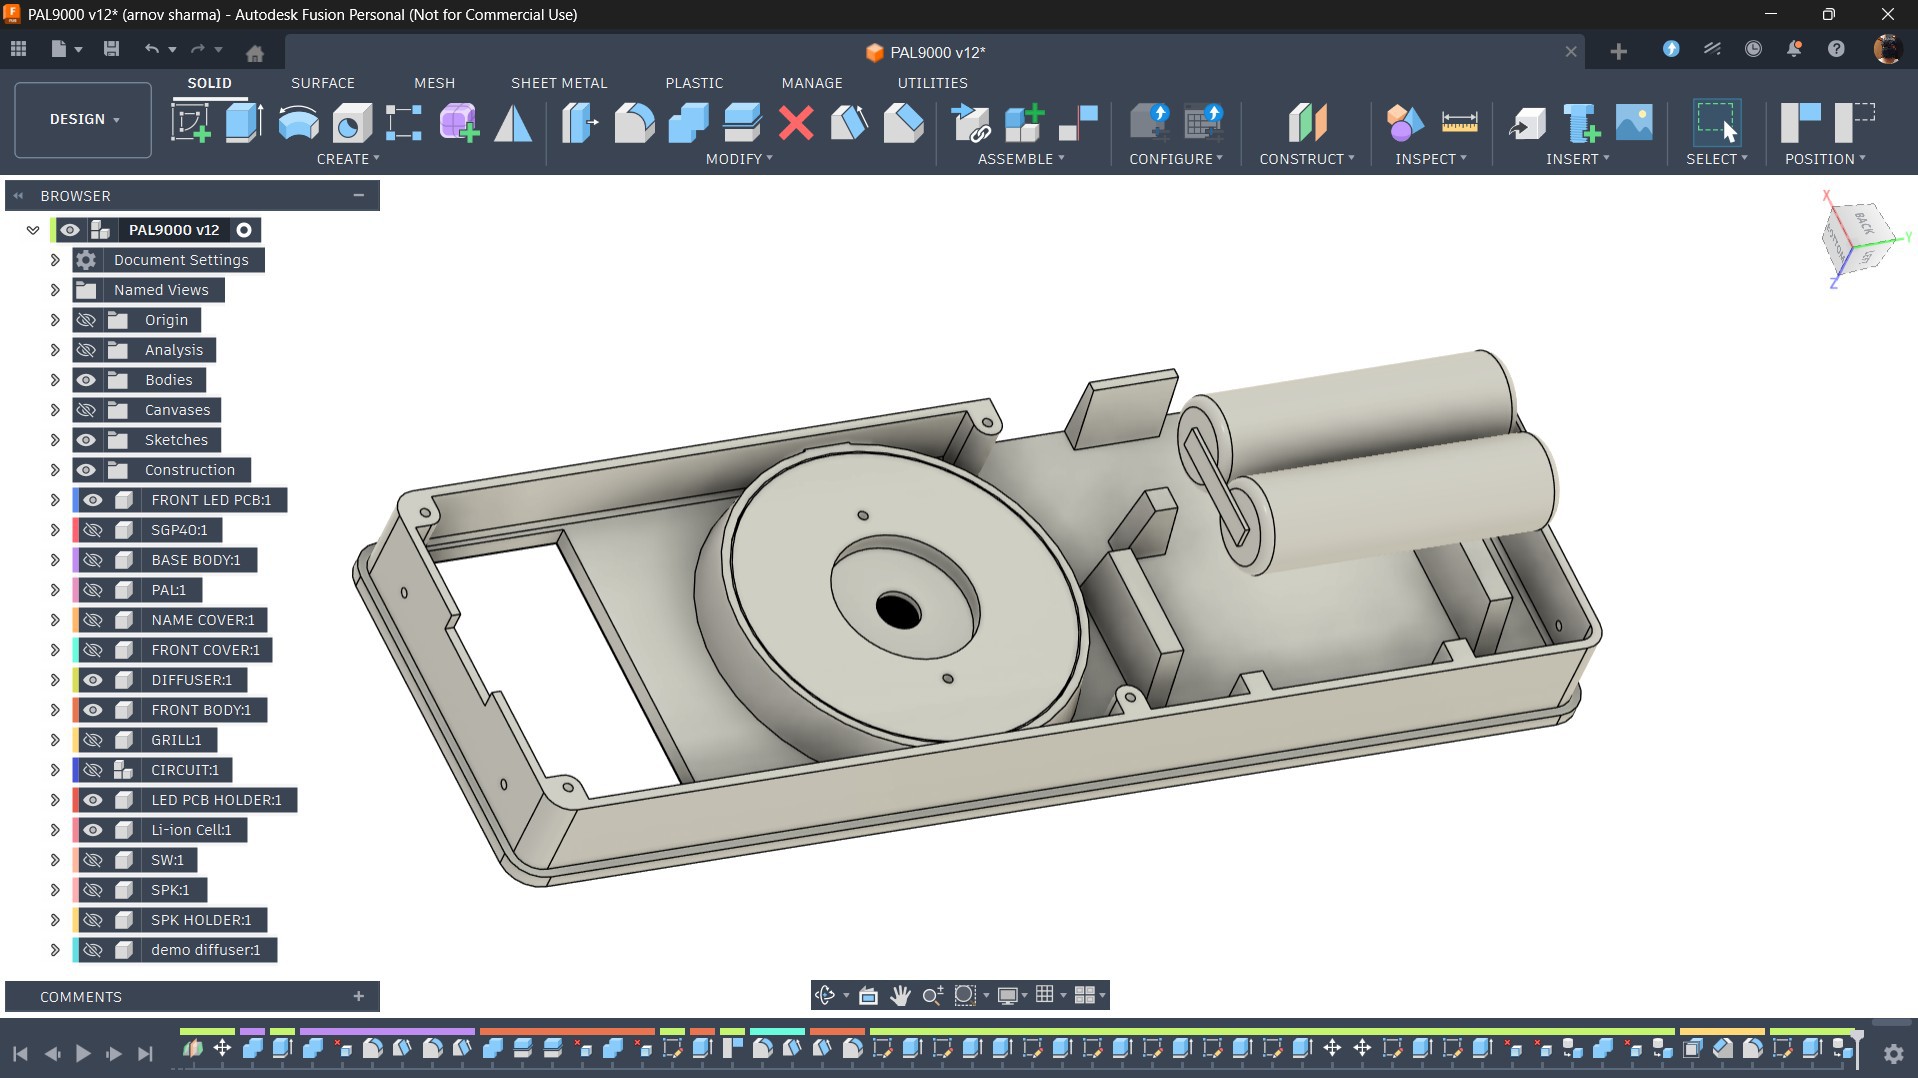
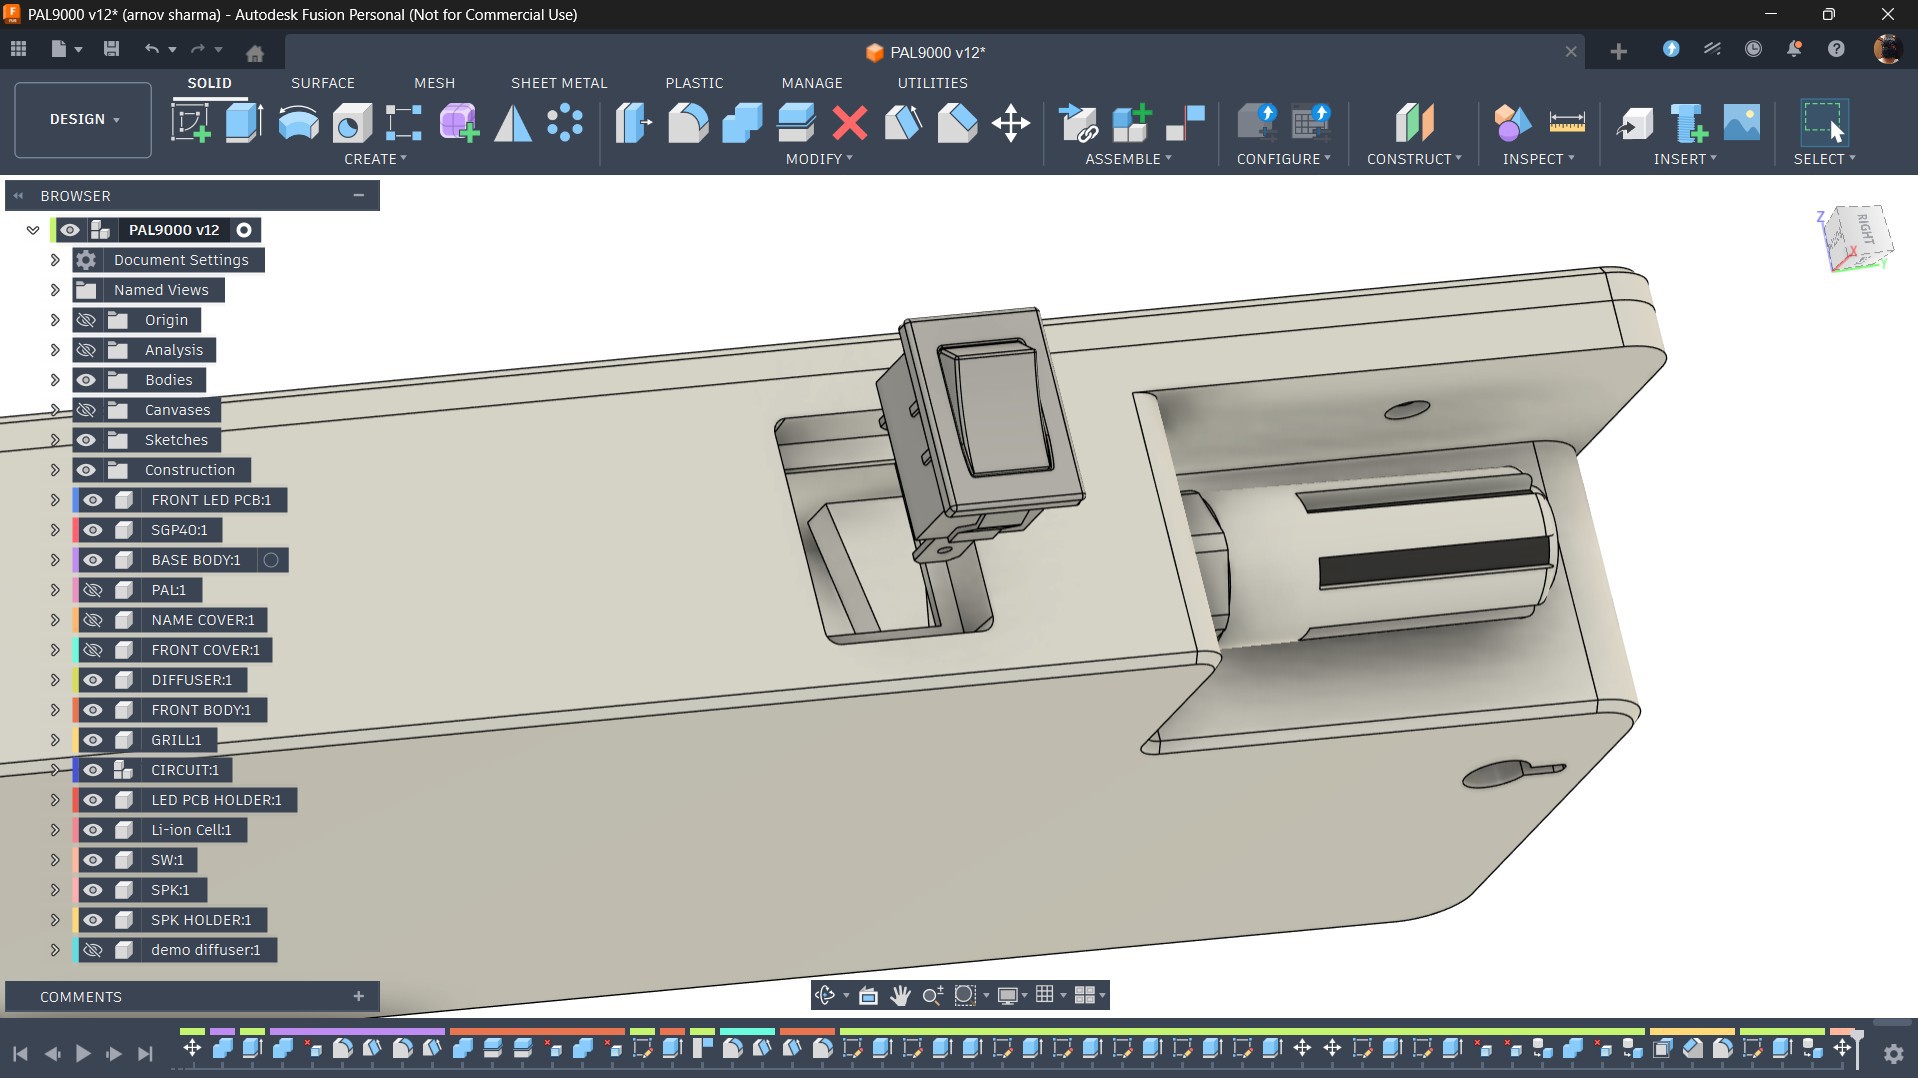
The back body houses the lithium cells, which are held in place using retaining ribs molded around them. The cells sit in position and are fully locked once both bodies are fastened together. The back body also features an opening used to mount and secure the SGP40 sensor, as well as a slot for the rocker switch.
For the main circuit, four screw bosses are added to the enclosure, allowing the circuit board to be secured using four M2 screws. Both the front and back bodies are joined together and fastened using M2 screws, with mounting holes added at the top and bottom of the enclosure.
3D PRINTED PARTS
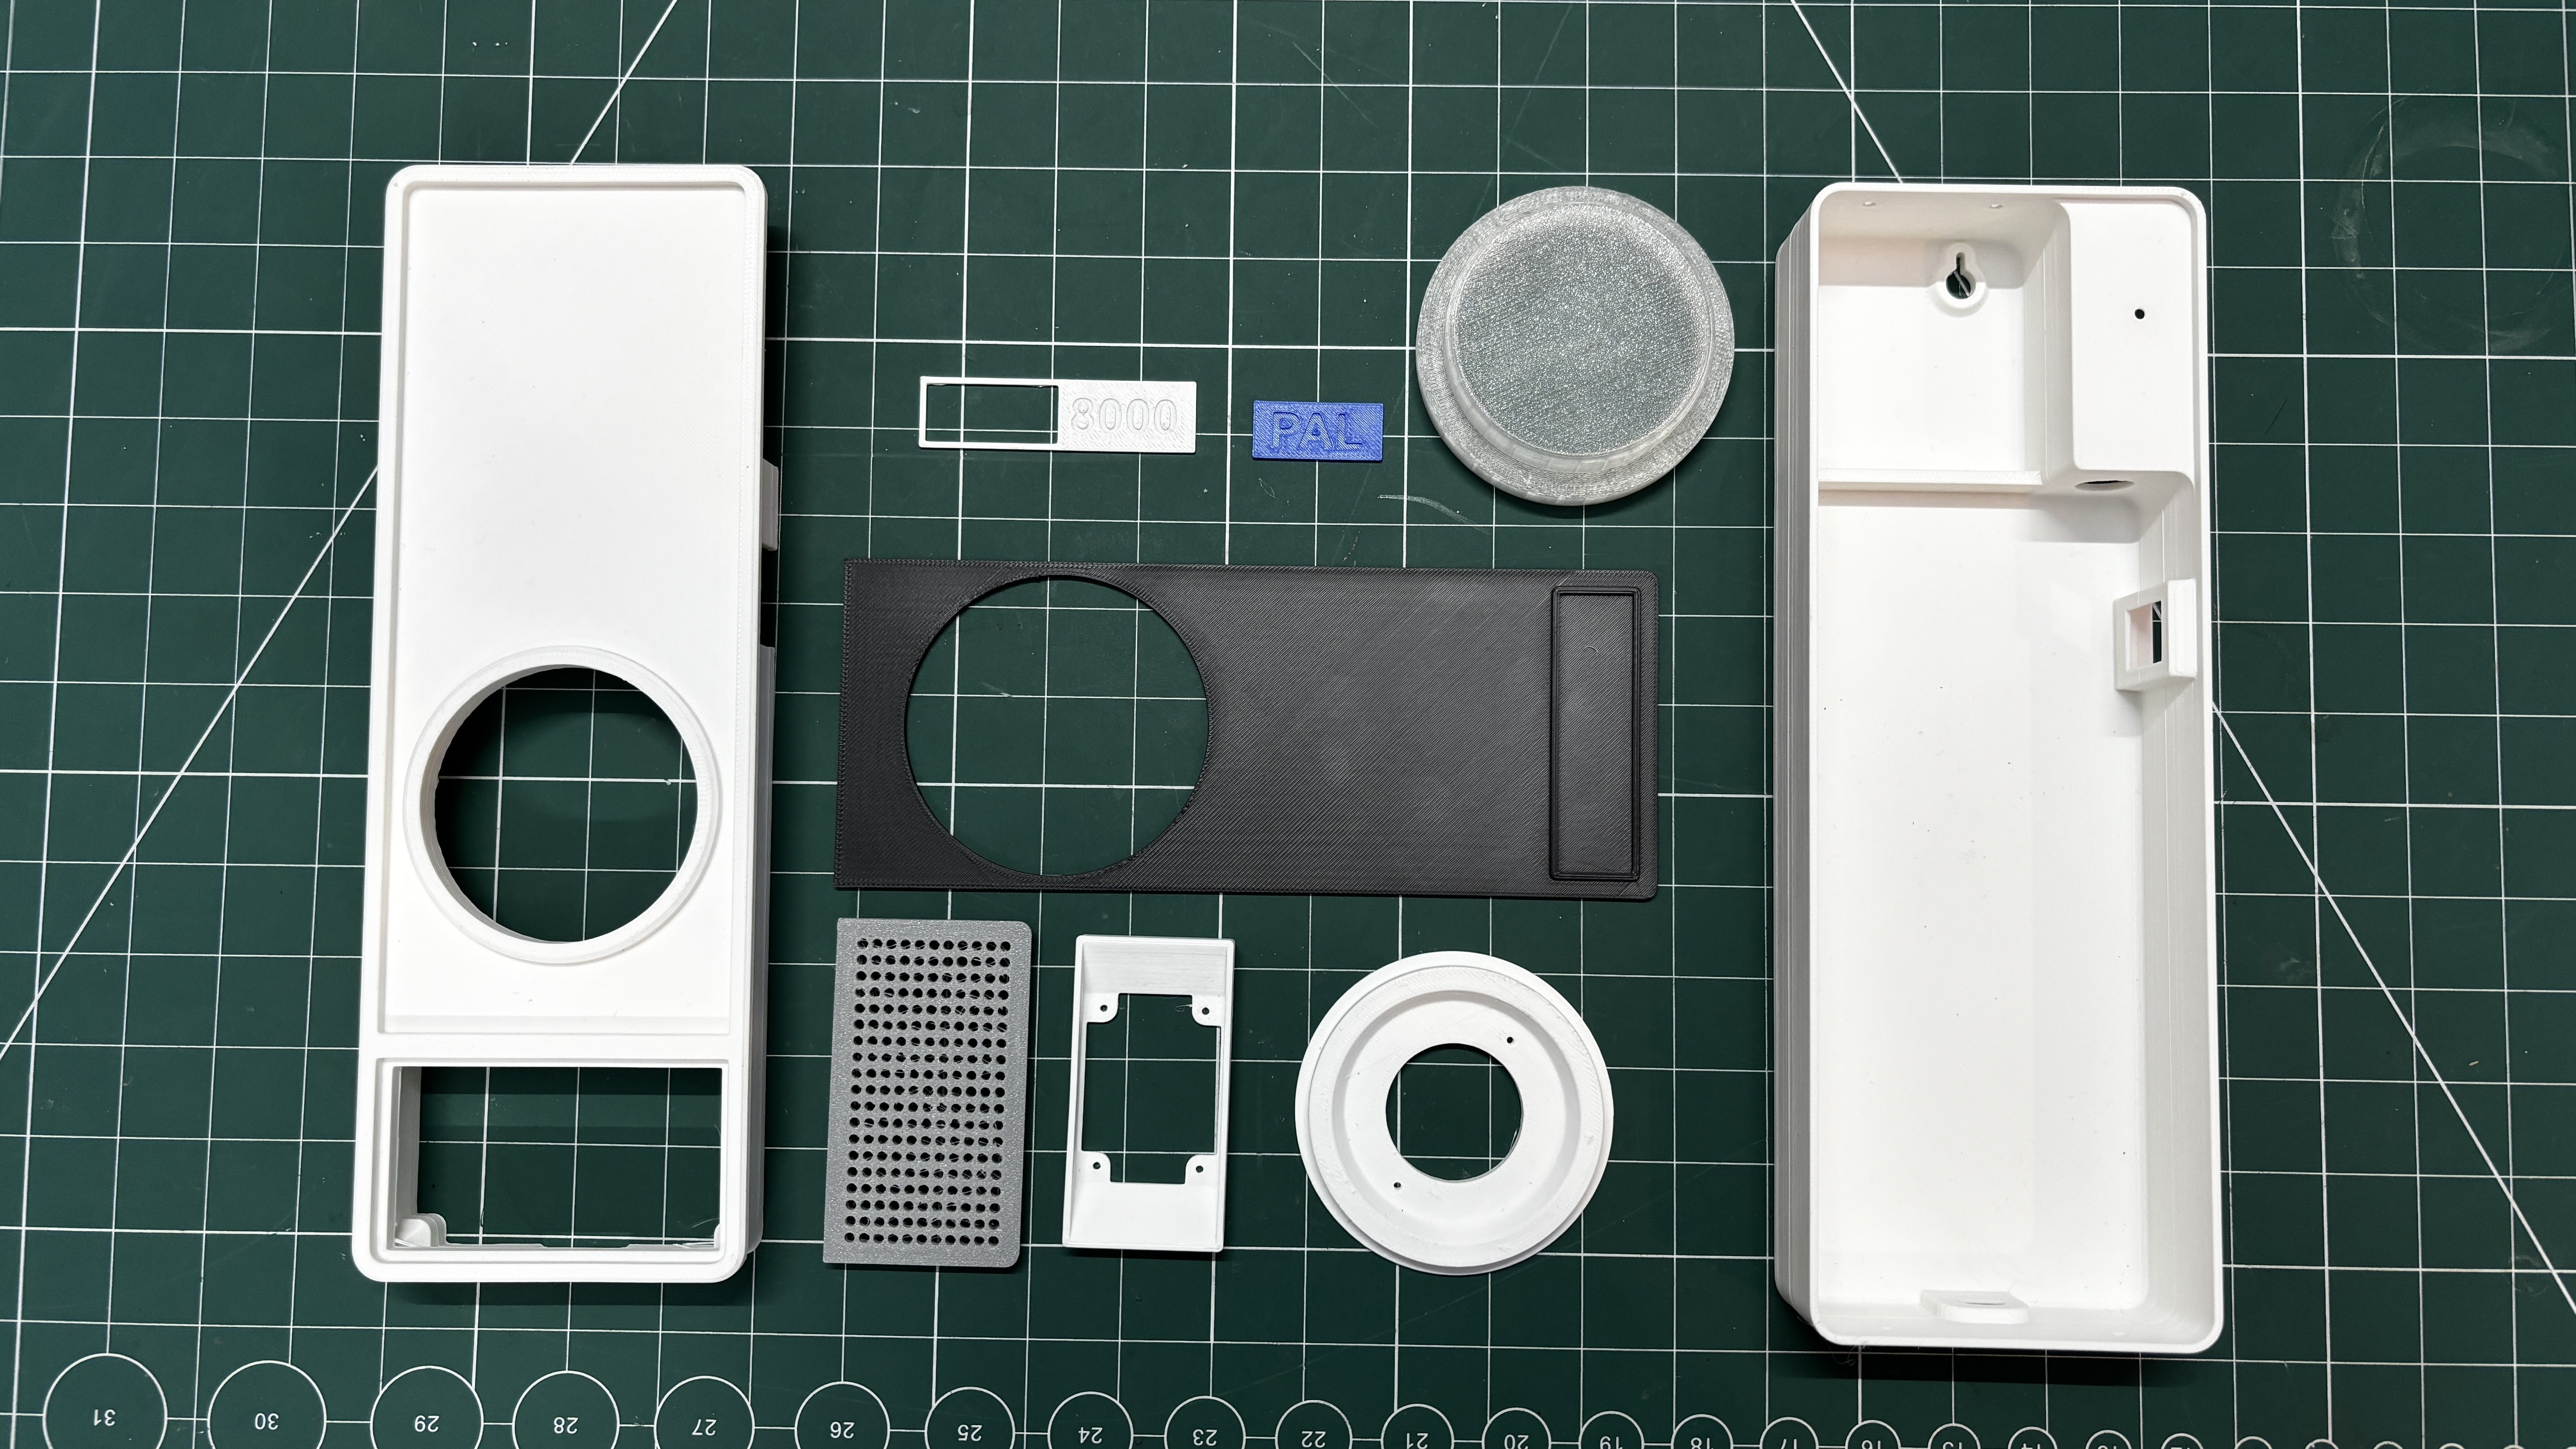
After modeling all the parts, we exported all the mesh files and 3D printed them on our Anycubic Kobra S1 printer. Using a 0.4 mm nozzle, we set the printer to a 0.2 mm layer height with 25% infill. We printed the front and back body first using white Hyper PLA. Since supports were required, I used regular supports with a snug setting and a top layer gap of 0.3 mm, which allowed for easy removal.
Using similar settings, we printed the speaker holder and LED board holder in white Hyper PLA, along with the “8000” nameplate. The speaker grill was printed in grey Hyper PLA using the same settings, and the "PAL" nameplate was printed with blue Hyper PLA. For the front, we added a cover part printed in black Hyper PLA.
Finally, for the LED diffuser, we slightly modified the settings. The layer height and infill remained the same, but we changed the sparse infill direction from the default to 90 degrees. This makes the printer lay lines in a single direction, which helps transparent PLA appear clearer, as the usual grid pattern tends to increase opacity.
SGP40 INDOOR AIR QUALITY SENSOR
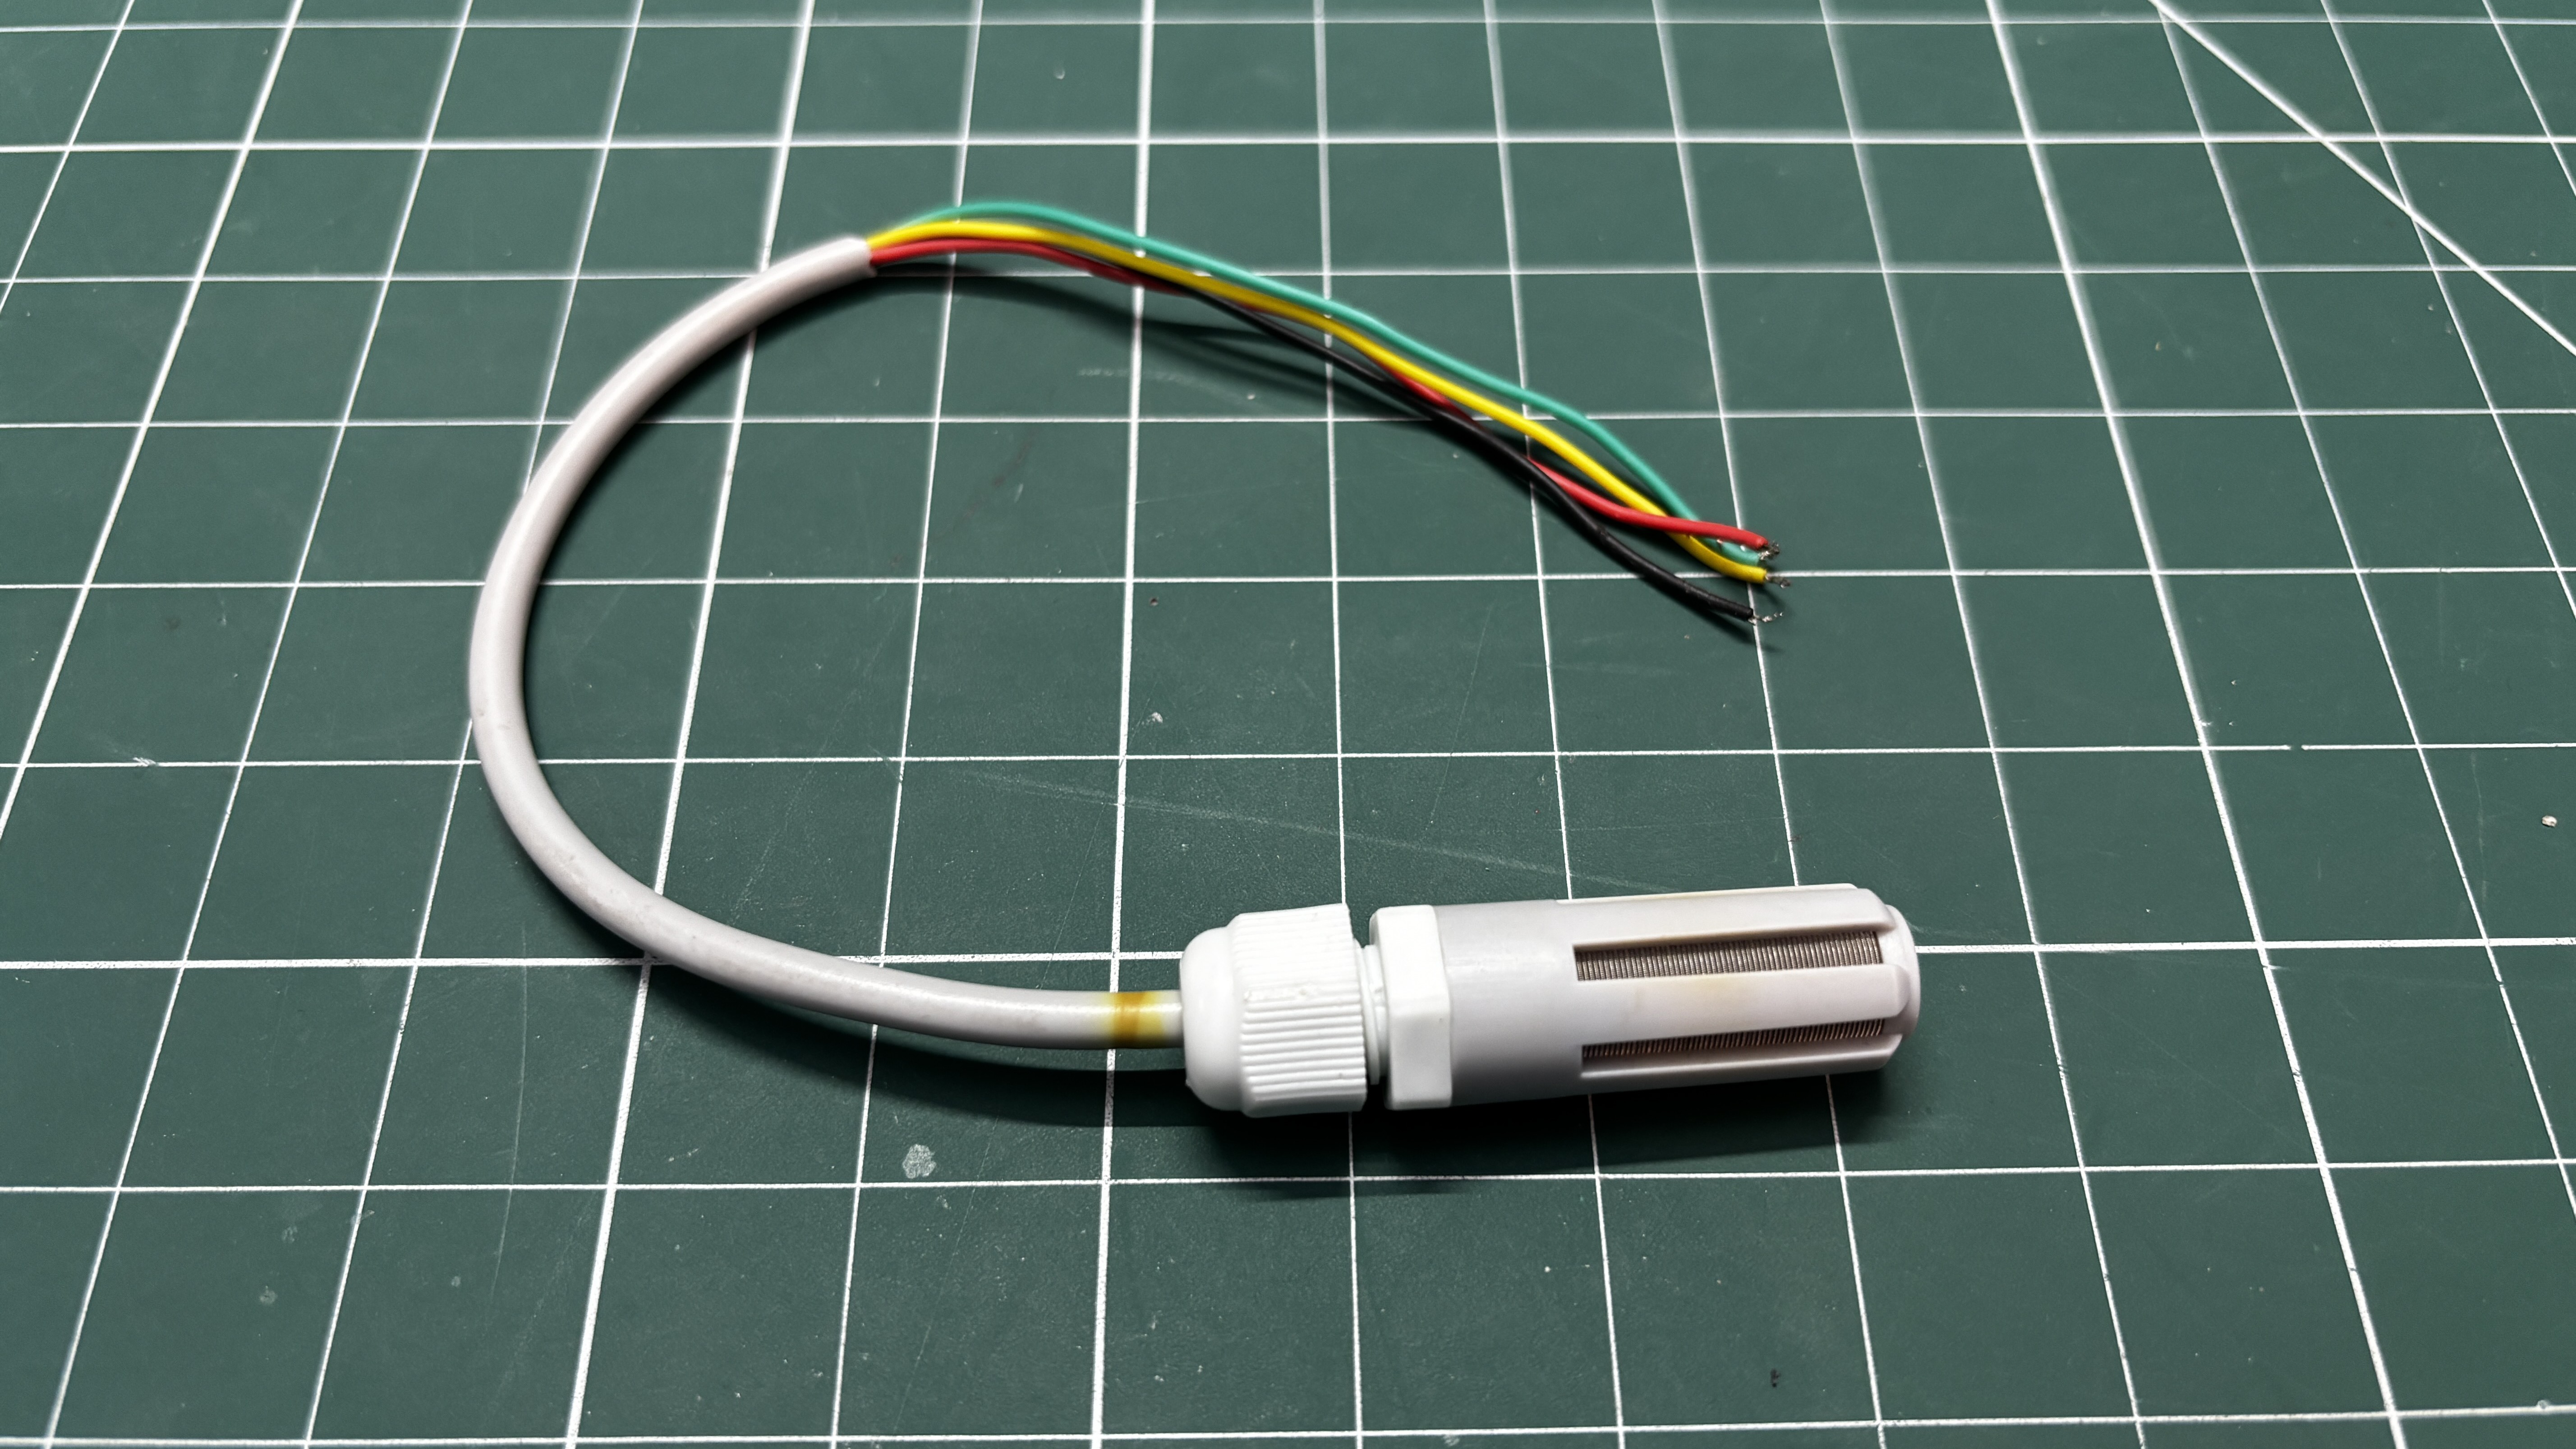
The SGP40 Sensor for monitoring air quality from a prior project was repurposed for this one.
The SGP40 sensor was created especially to measure Volatile Organic Compounds (VOC) and evaluate pollution levels in enclosed areas in order to monitor indoor air quality. It works best in regulated interior spaces with consistent ventilation, humidity, and temperature.
Because external environmental factors, including extreme temperature swings, humidity swings, and direct contact with pollutants, can significantly affect the sensor's accuracy and reliability, it is not appropriate for outdoor use.
It's best to use the SGP40 indoors, where air quality testing is crucial, such as in homes, offices, and industrial settings, for optimal results.
Below is the SGP40 Datasheet for more thorough details about the project.
https://evelta.com/content/datasheets/011-SGP40-Datasheet.pdf
Our probe is a PG7 Cable Gland, a specialized connector used to seal and fasten electrical cables when they enter panels, housings, or enclosures. A circuit with the SGP40 is part of the Probe and is located inside our PG7 Cable Gland.
PCB DESIGN—LED BOARD
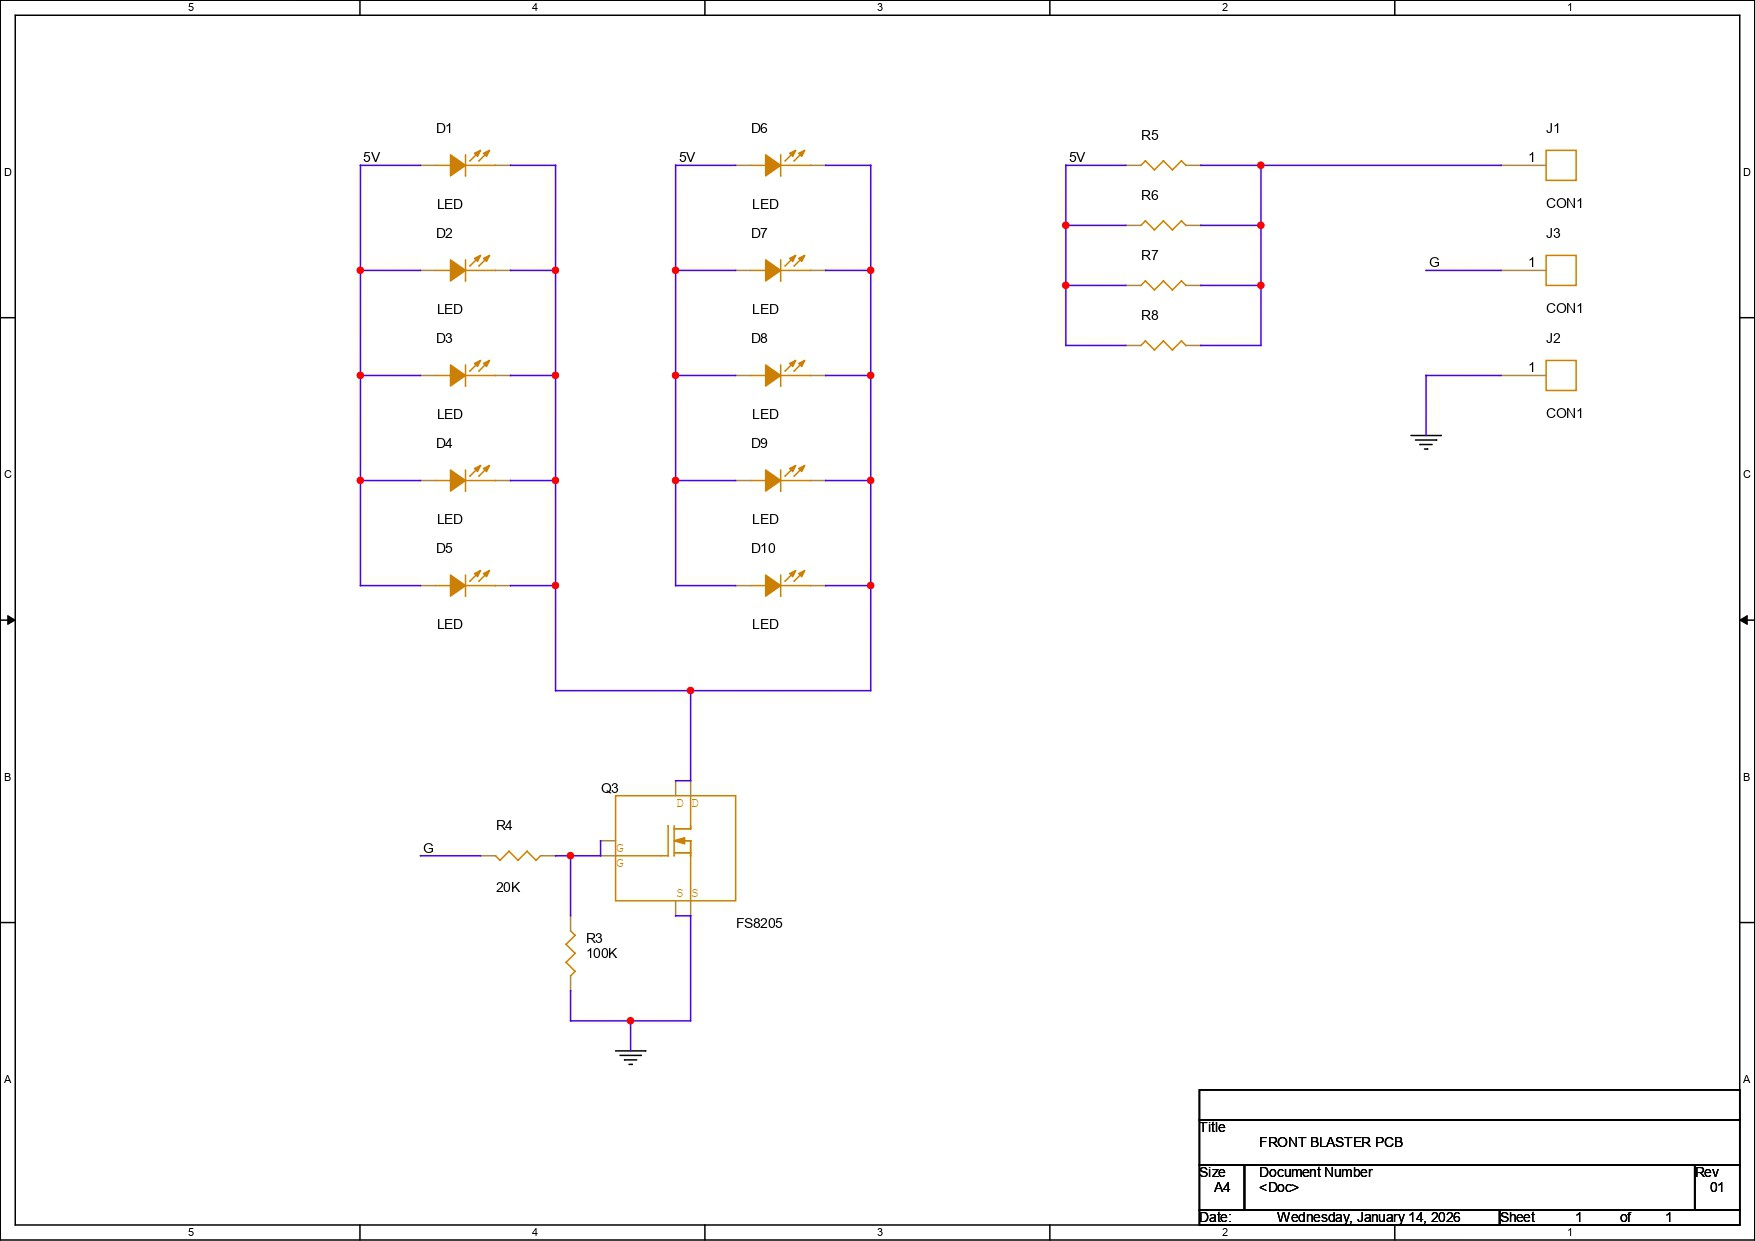
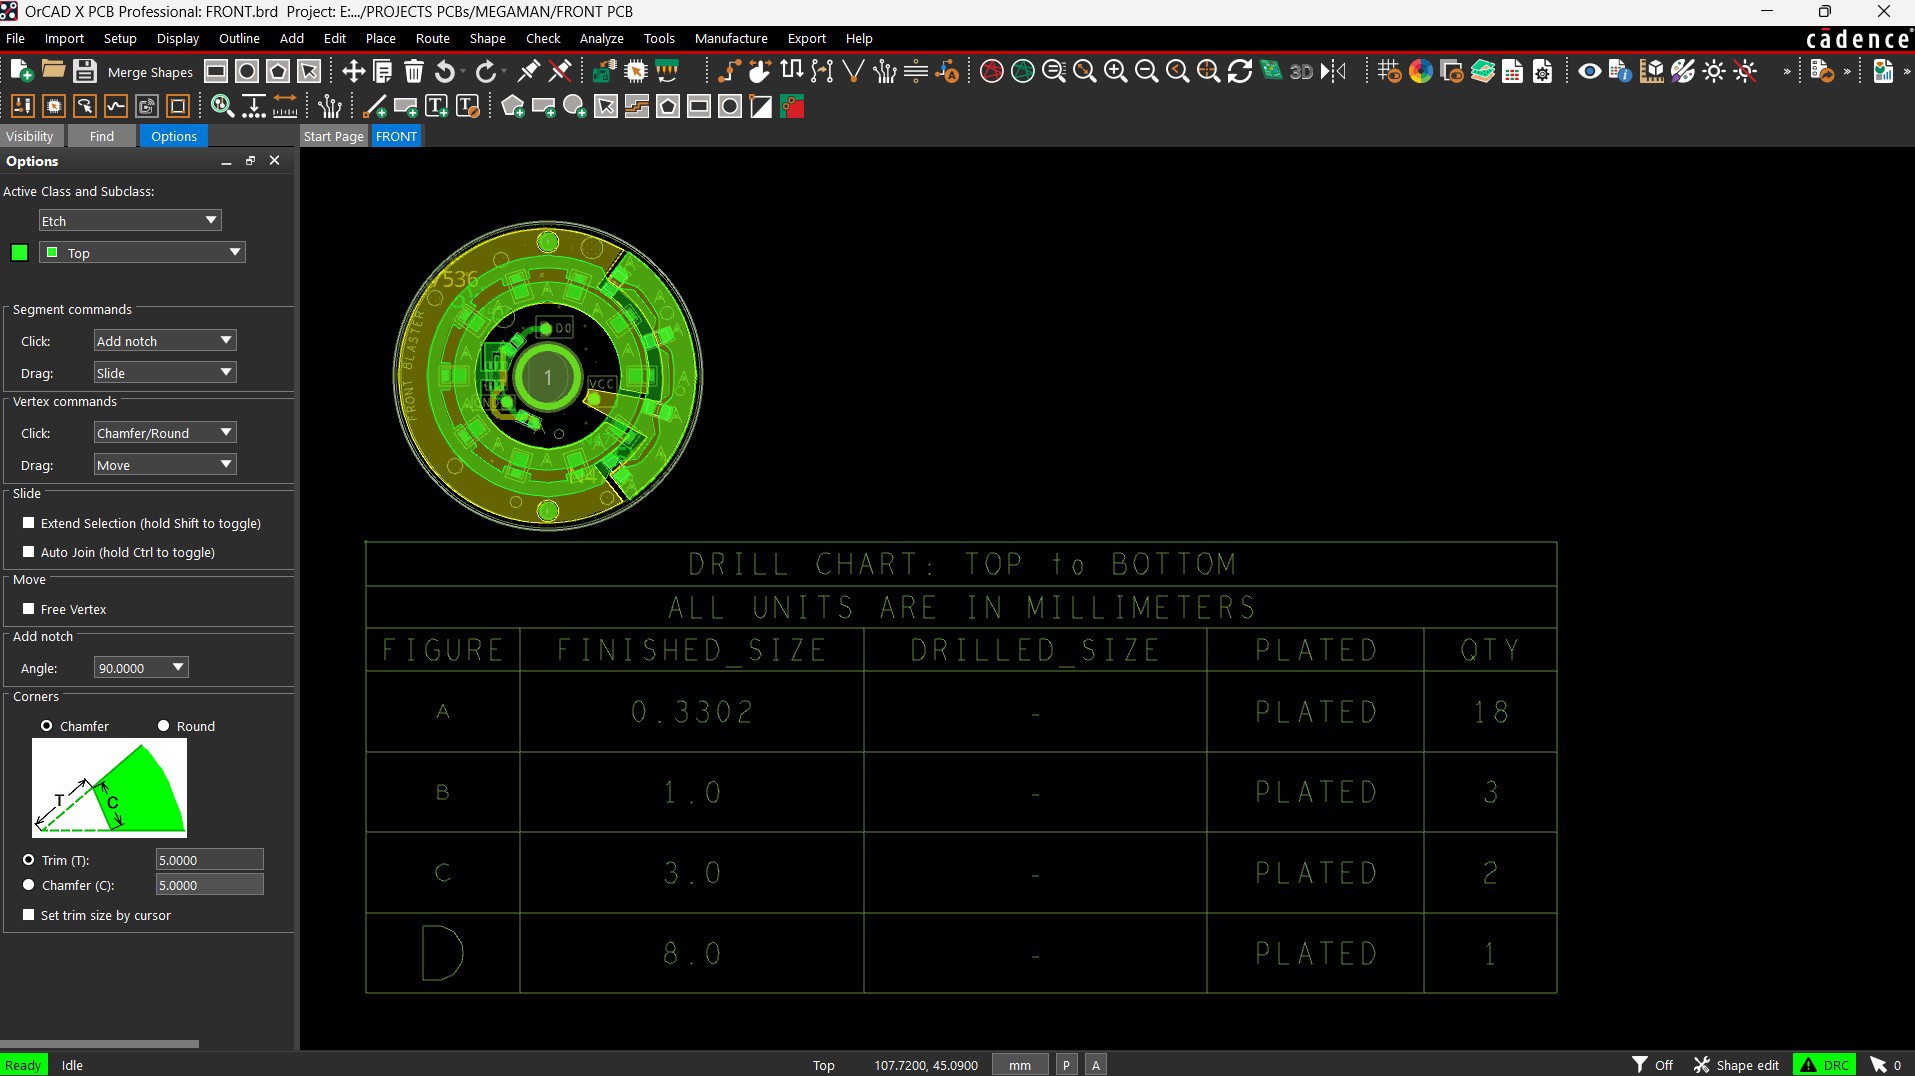
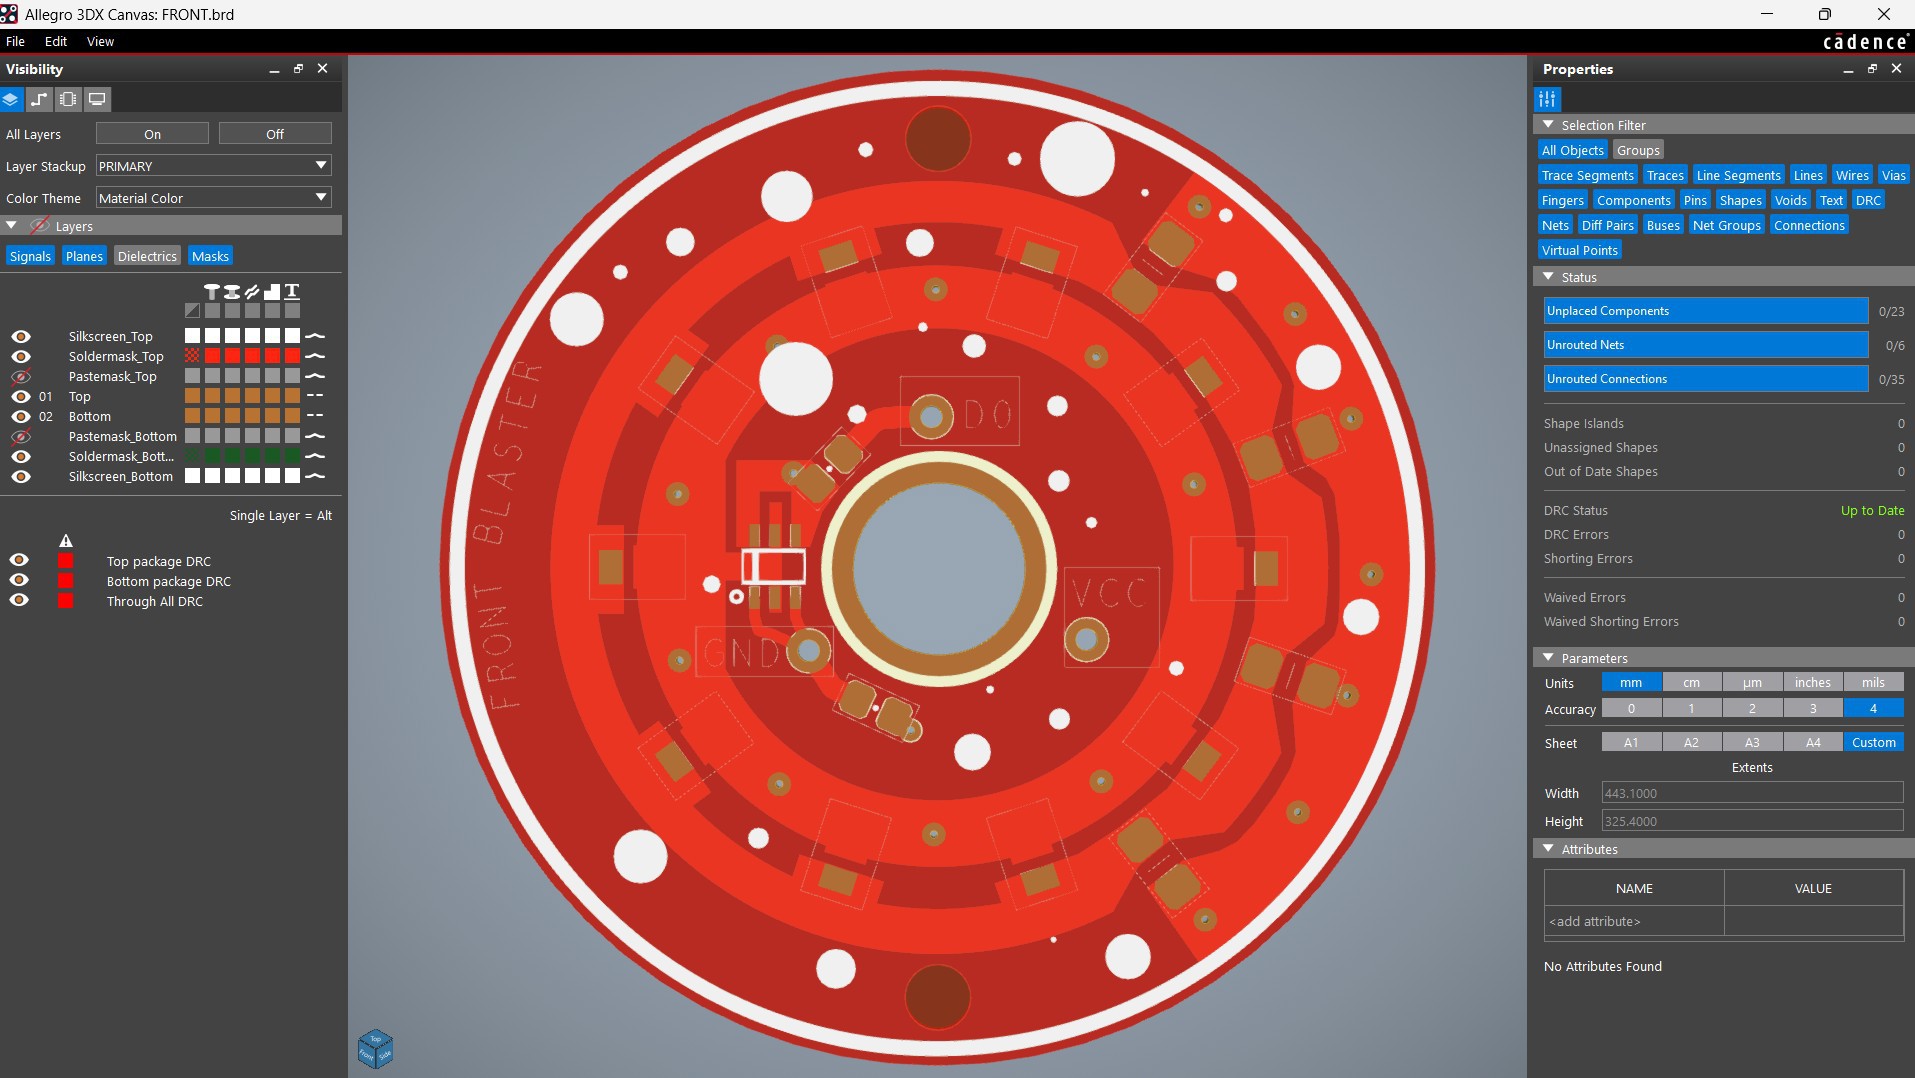
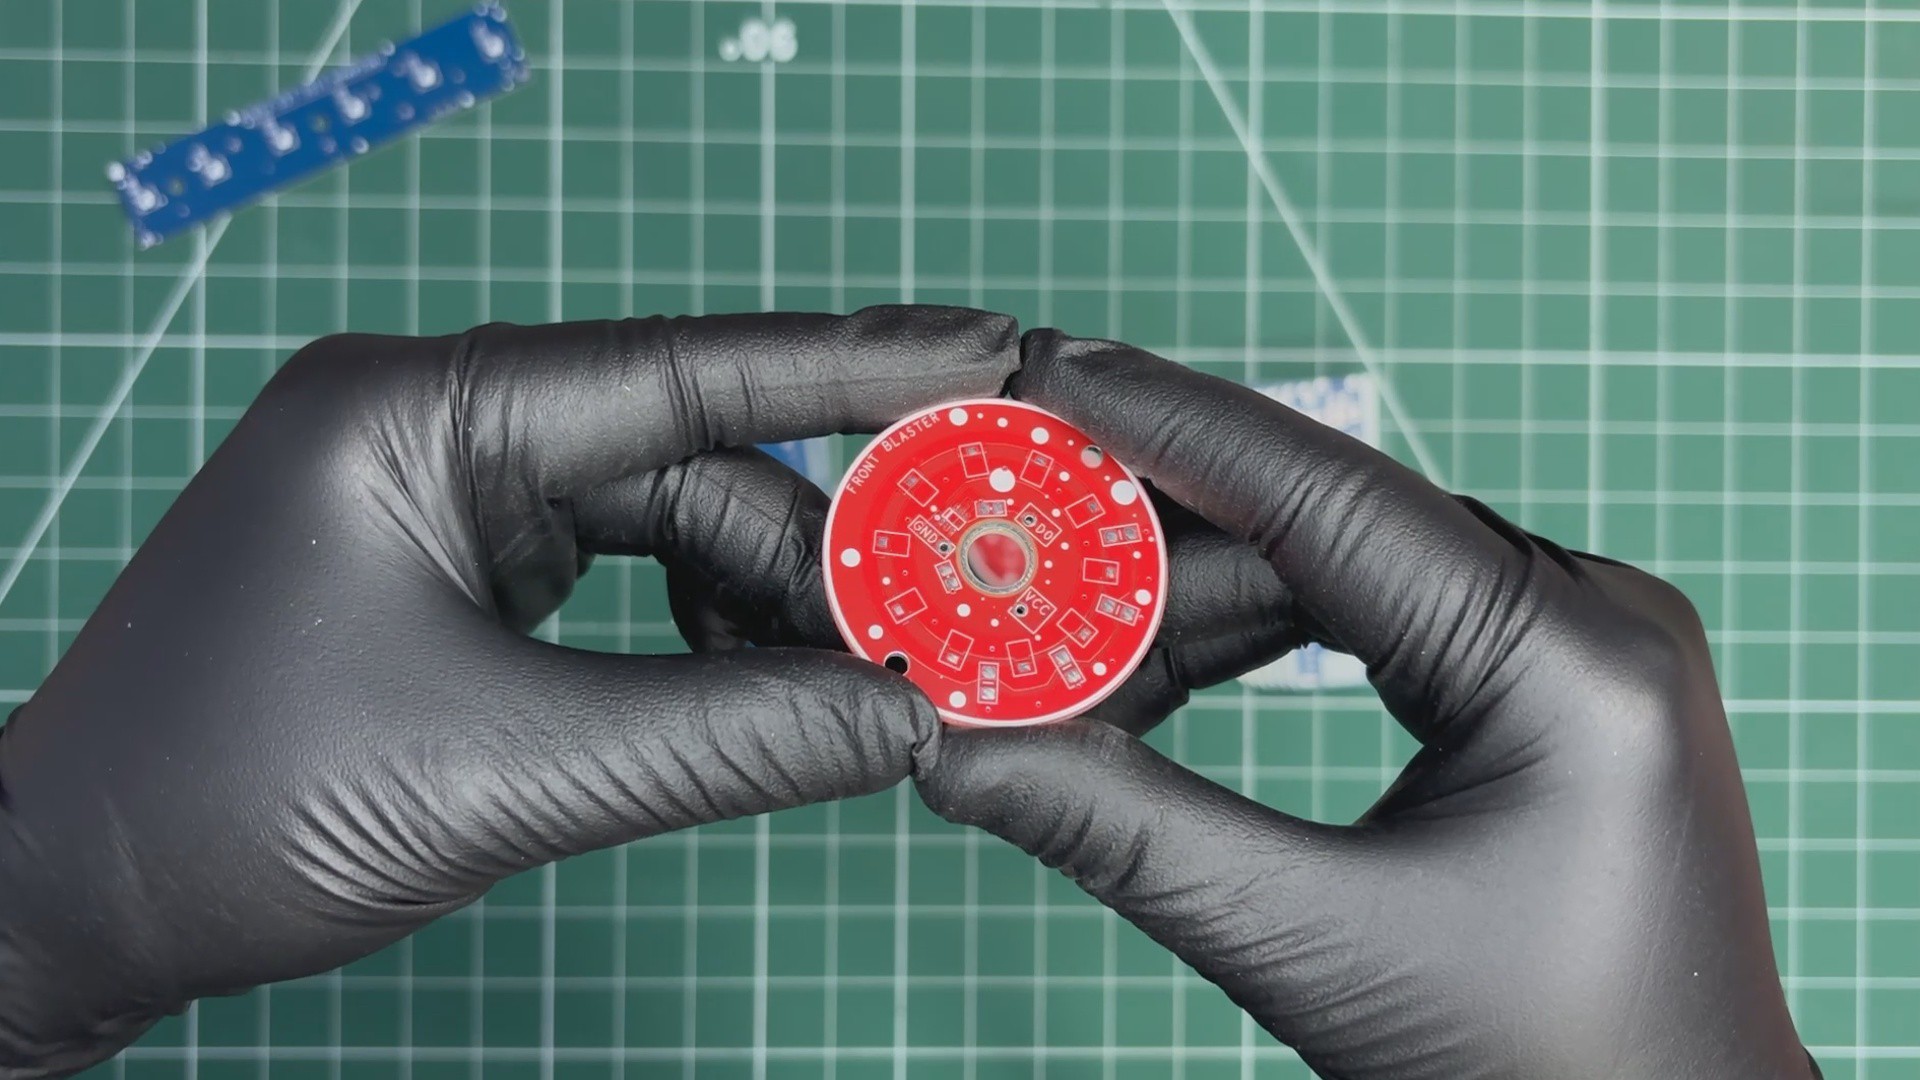
For the eye of the PAL8000, we are reusing one of our previously designed LED board PCBs that we used in the Mega Man Buster project. Here, we have a round PCB that contains 10 × 3030 package red LEDs, all connected through an 8205S N-channel MOSFET. This MOSFET is configured as a switch, with two 10 kΩ resistors connecting the gate to the source, and another resistor placed between the DIN pin and the gate.
The idea is to connect the VCC and GND of this board to 5V and use a GPIO pin of the Pico to control the MOSFET. Each LED is roughly 0.2W, and with 10 LEDs in parallel, the total power can reach around 2W, which can generate significant heat. To manage this, we have added current-limiting resistors (four 1206 package resistors). The goal is to drive the LEDs under 1W so that we avoid creating excessive heat inside the PLA body.
PCB DESIGN —PICO DRIVER
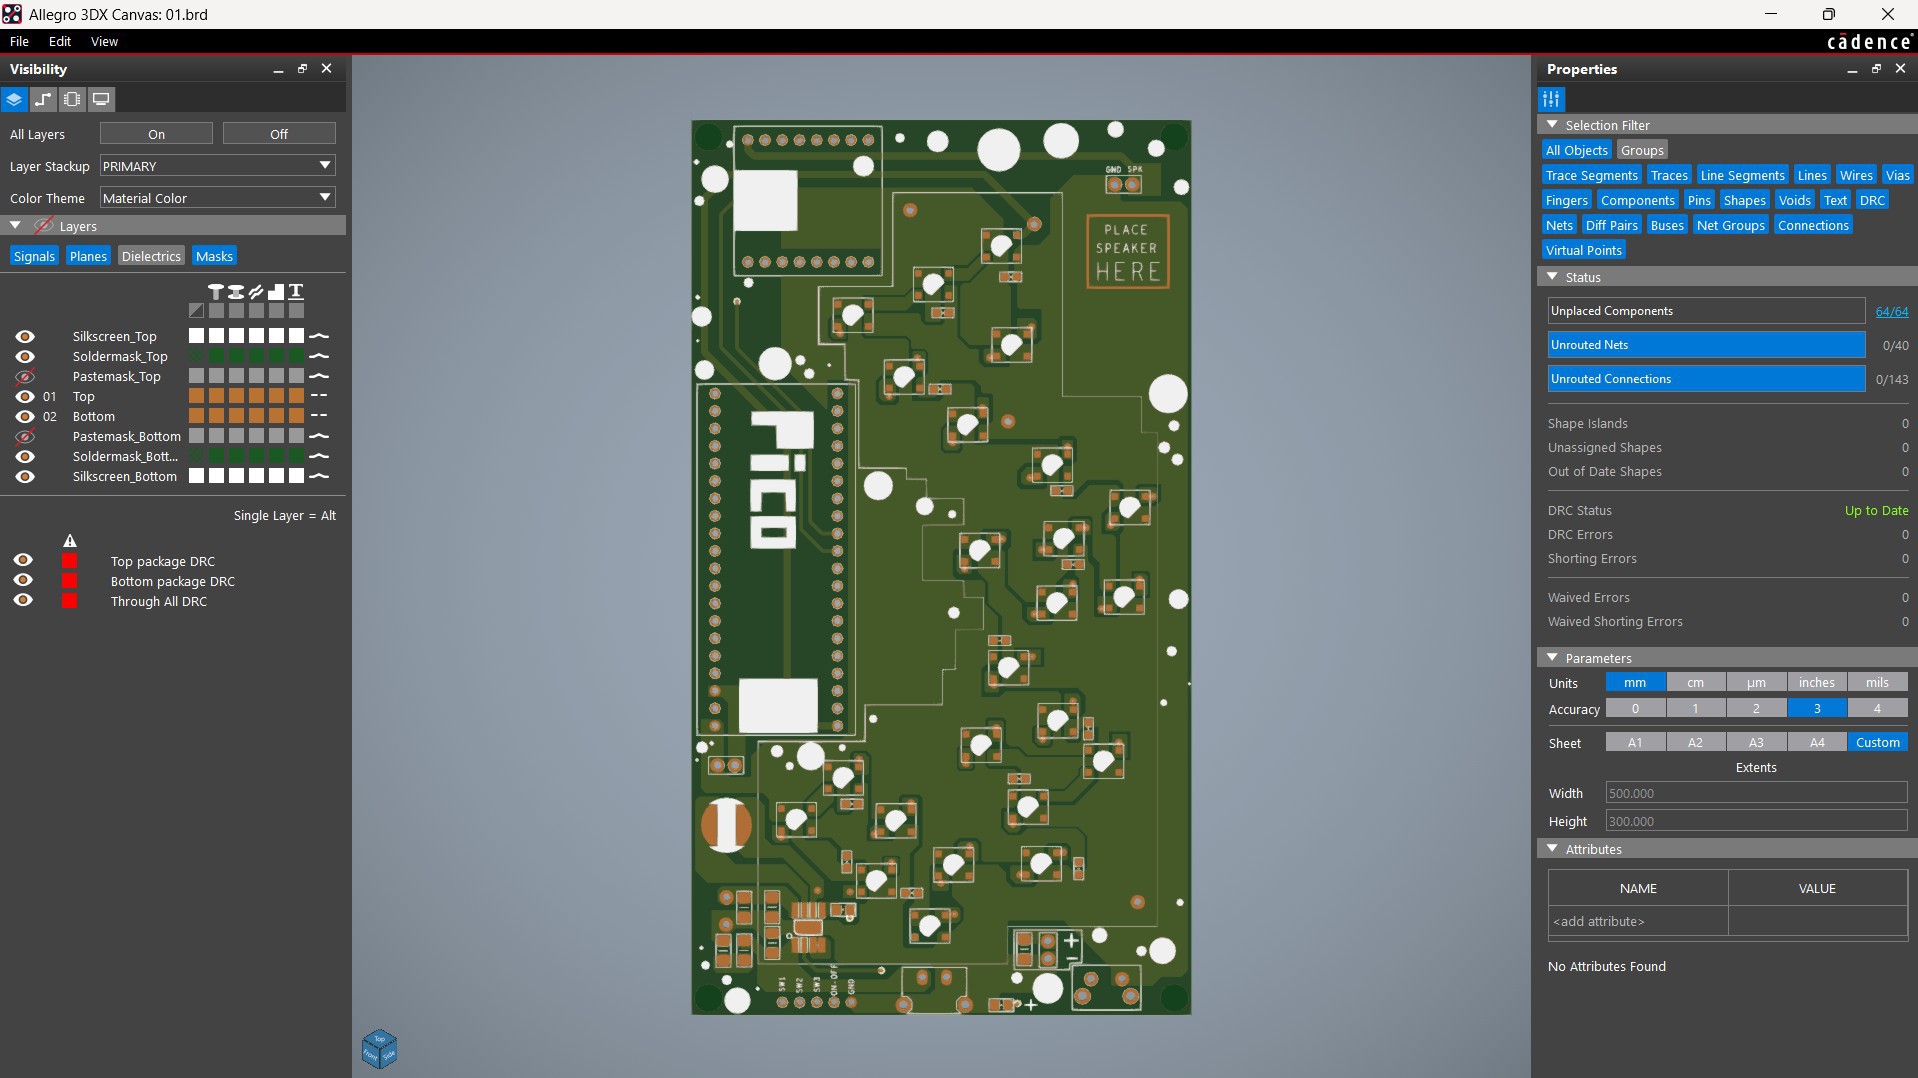
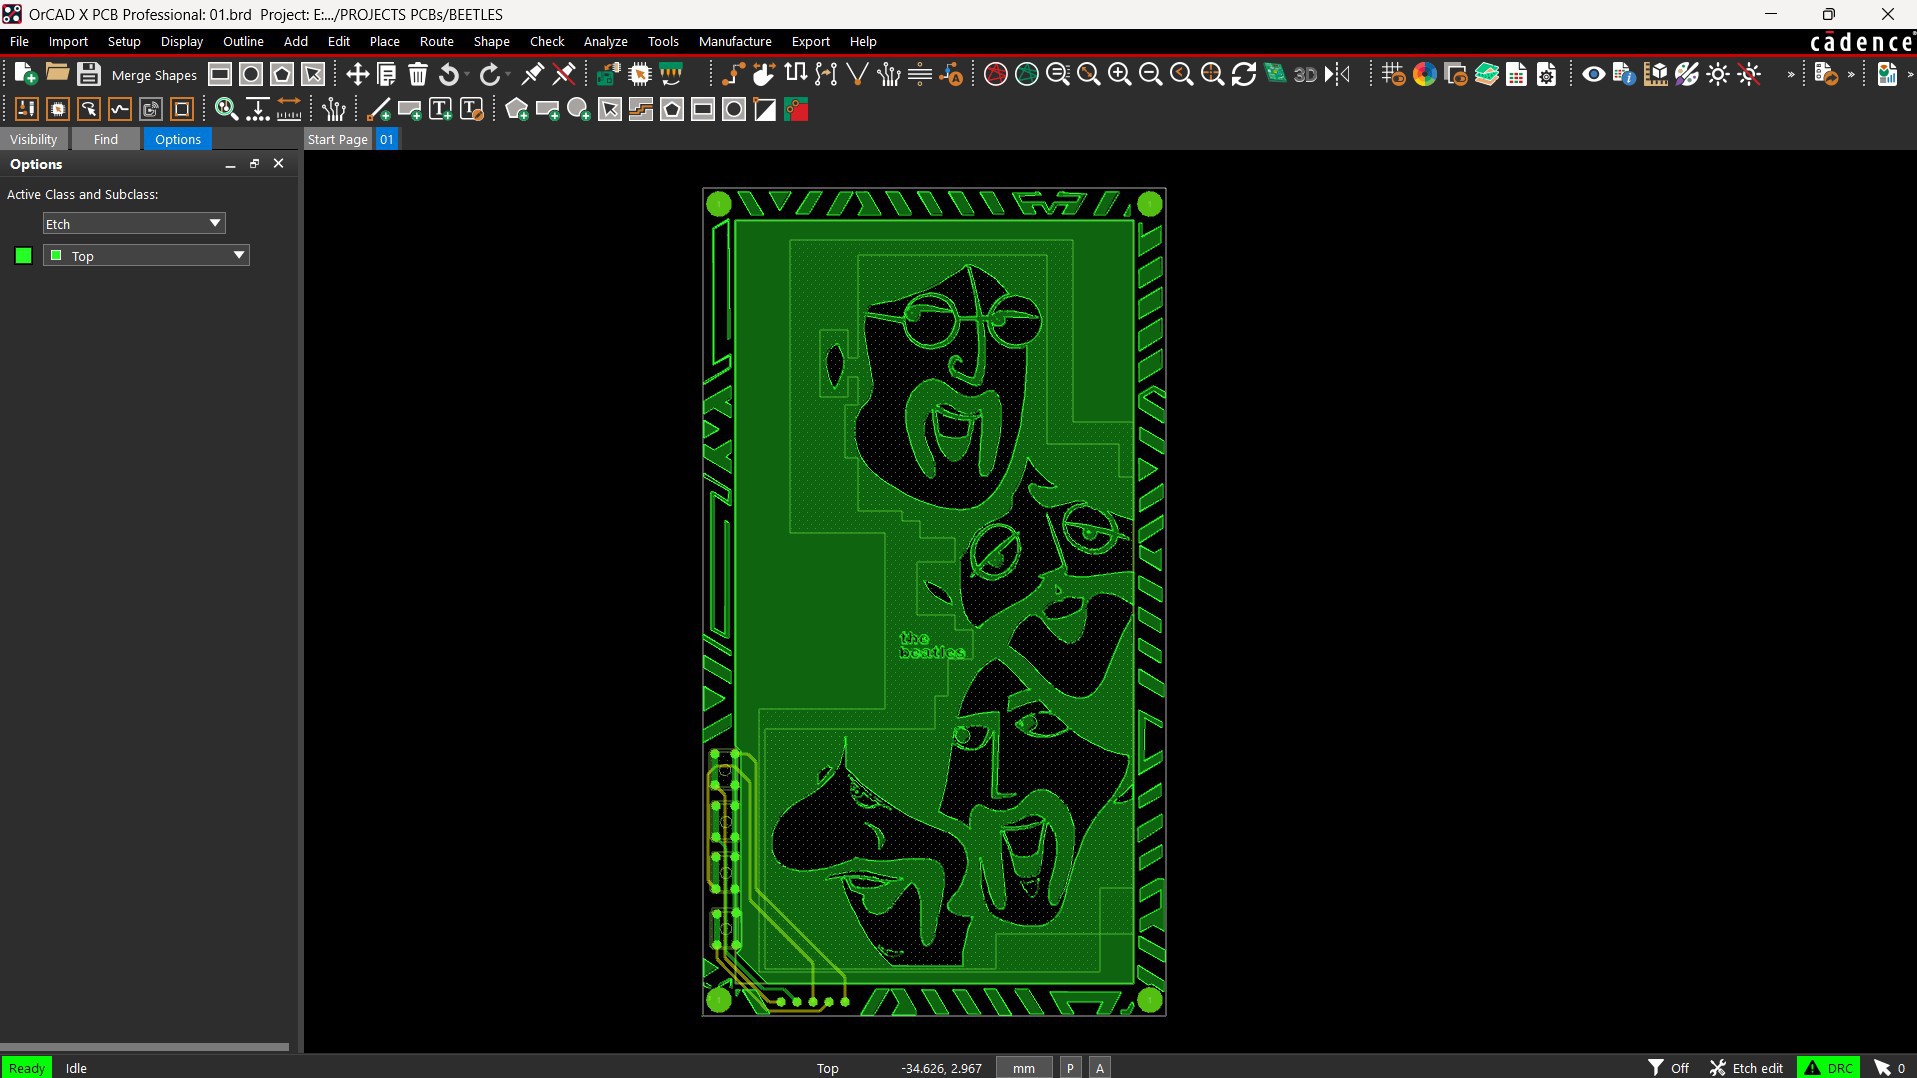
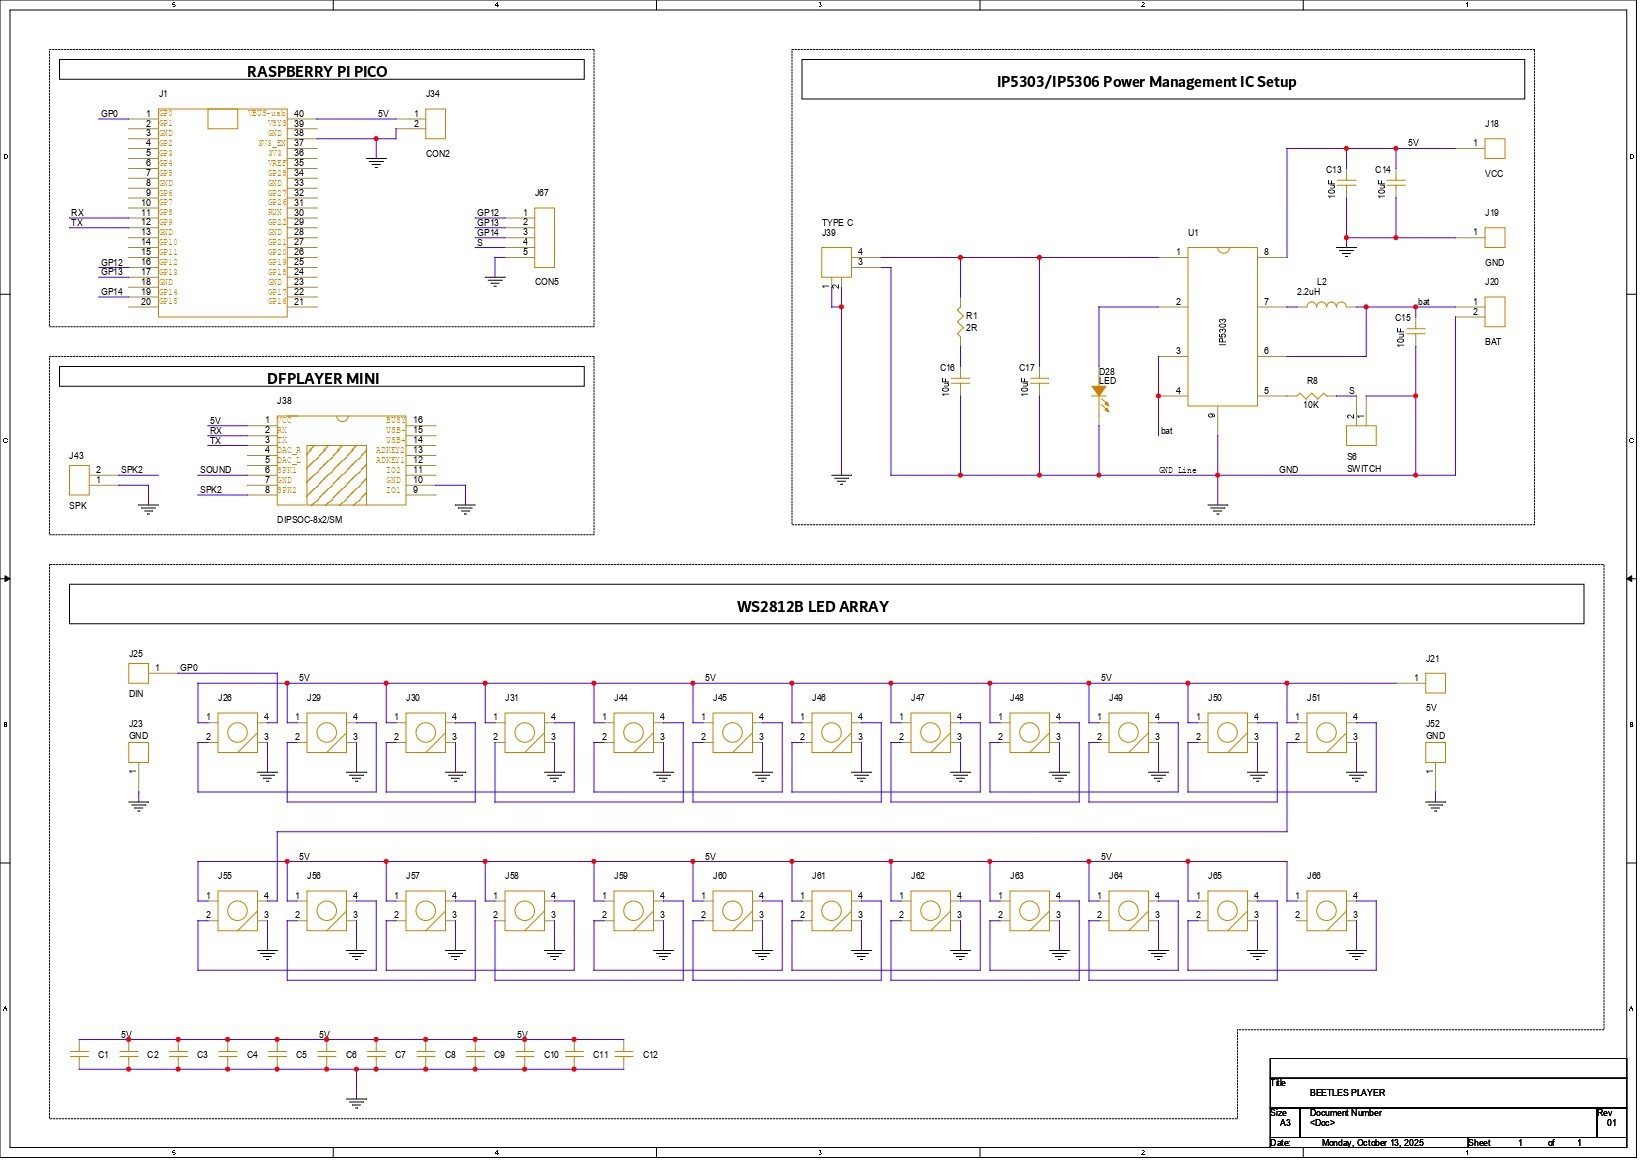
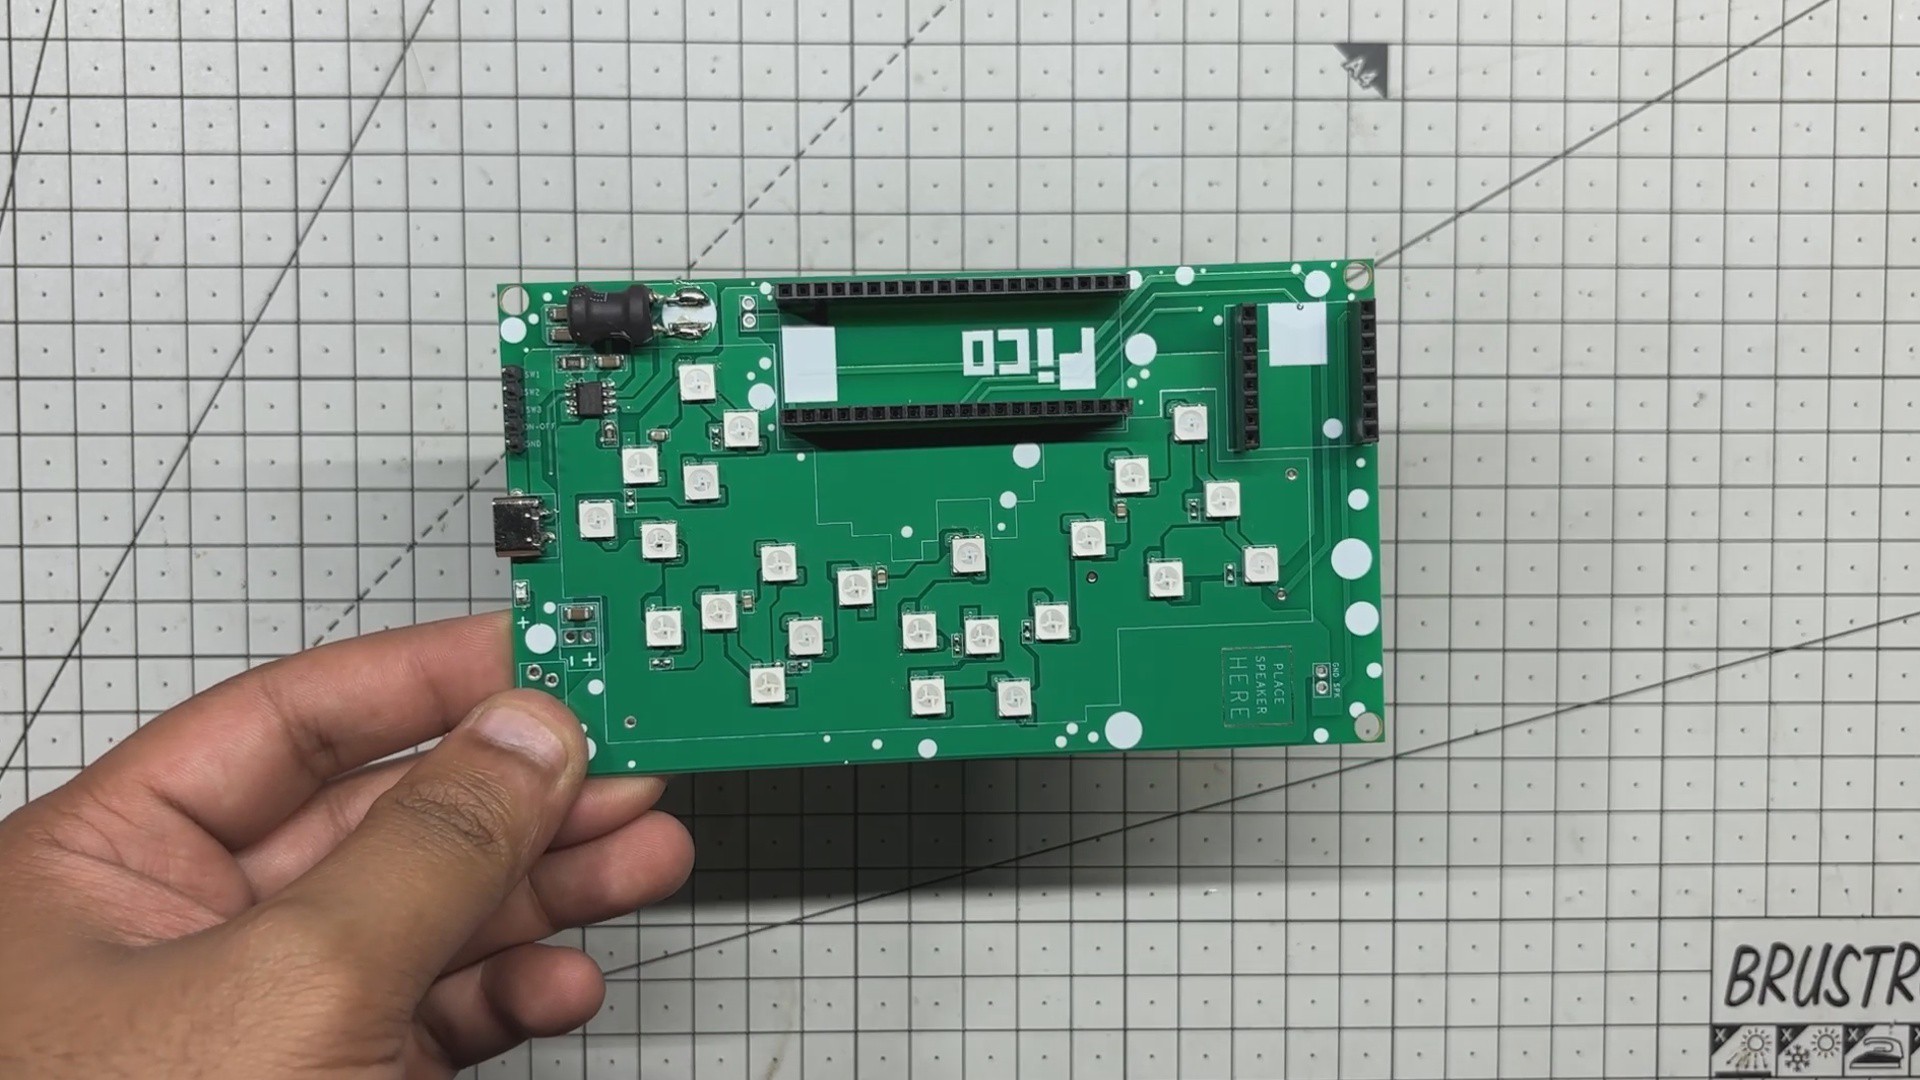
The second PCB used in this project is the Pico Driver Board, which we also reused from a previously made project, the Beetles board. This Pico driver is a simple design. Here, the Raspberry Pi Pico is connected to the DFPlayer Mini through GPIO7 and GPIO8, which serve as its TX and RX pins.
This board also contains 24 RGB LEDs, which we did not use in this build, as our goal was to use only the Pico and DFPlayer setup. There is also an IP5306 IC setup, which is a power management IC we’ve used in many previous projects. It provides a stable 5V output from a 3.7V lithium cell and includes features like charging indication, low battery warning, and high/low voltage cutoffs, all essential for safe lithium cell operation.
The board also contains a few 10 µF capacitors, an SMD 1 µH inductor, an indicator LED that shows battery and charging status, and a Type-C port for charging.
NextPCB PCB SERVICE
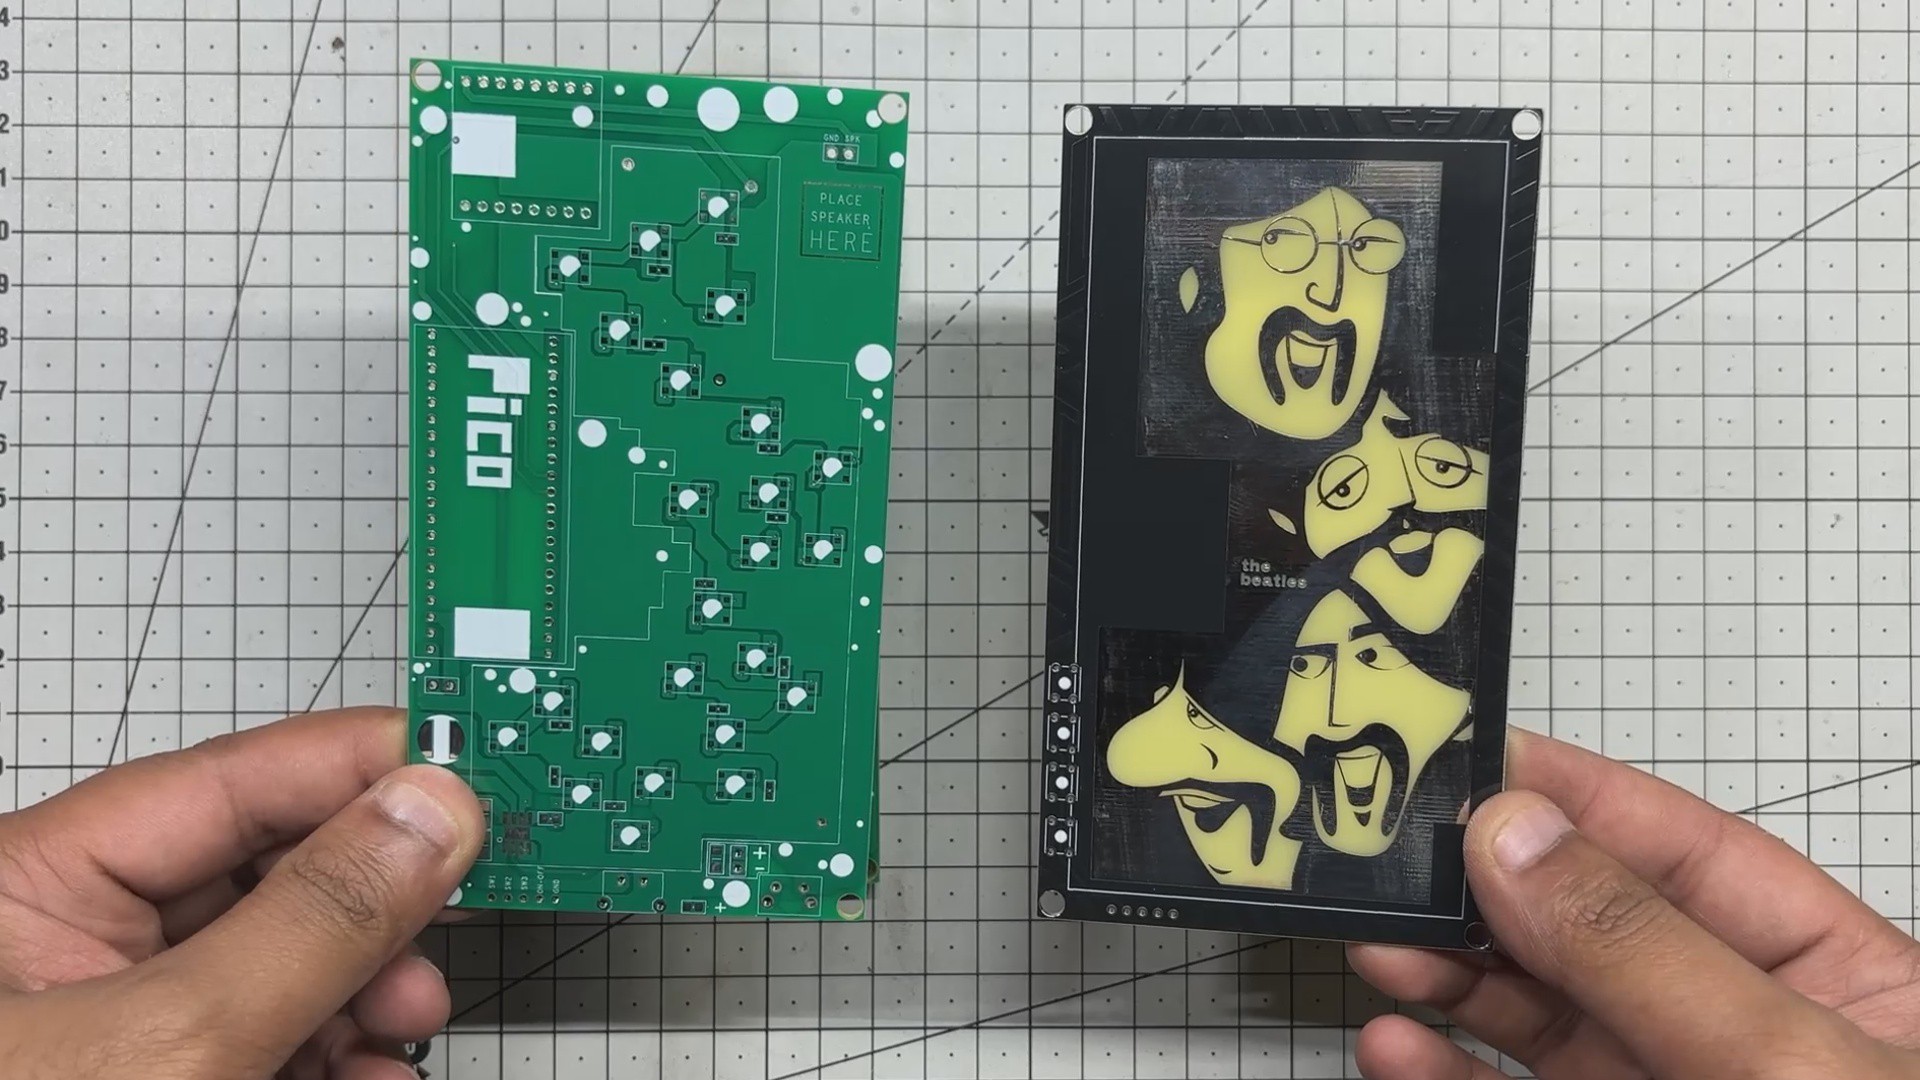
After completing the PCB design, Gerber data for both PCBs was sent to HQ NextPCB, and an order was placed for RED Solder mask boards with a white silkscreen and one board with a green solder mask and white silkscreen.
After placing the order, the PCBs were received within a week, and the PCB quality was pretty great.
In addition, I have to bring in HQDFM to you, which helped me a lot through many projects. Huaqiu’s in-house engineers developed the free Design for Manufacturing software, HQDFM, revolutionizing how PCB designers visualize and verify their designs.
Take advantage of NextPCB's Accelerator campaign and get 2 free assembled RP2040-based PCBs for your innovative projects.
https://www.nextpcb.com/blog/rp2040-free-pcba-prototypes-nextpcb-accelerator
This offer covers all costs, including logistics, making it easier and more affordable to bring your ideas to life. SMT services can be expensive, but NextPCB is here to help you overcome that hurdle. Simply share your relevant project, and they'll take care of the rest. Don't miss out on this amazing opportunity to advance your tech creations!
HQDFM: Free Online Gerber Viewer and DFM Analysis Tool
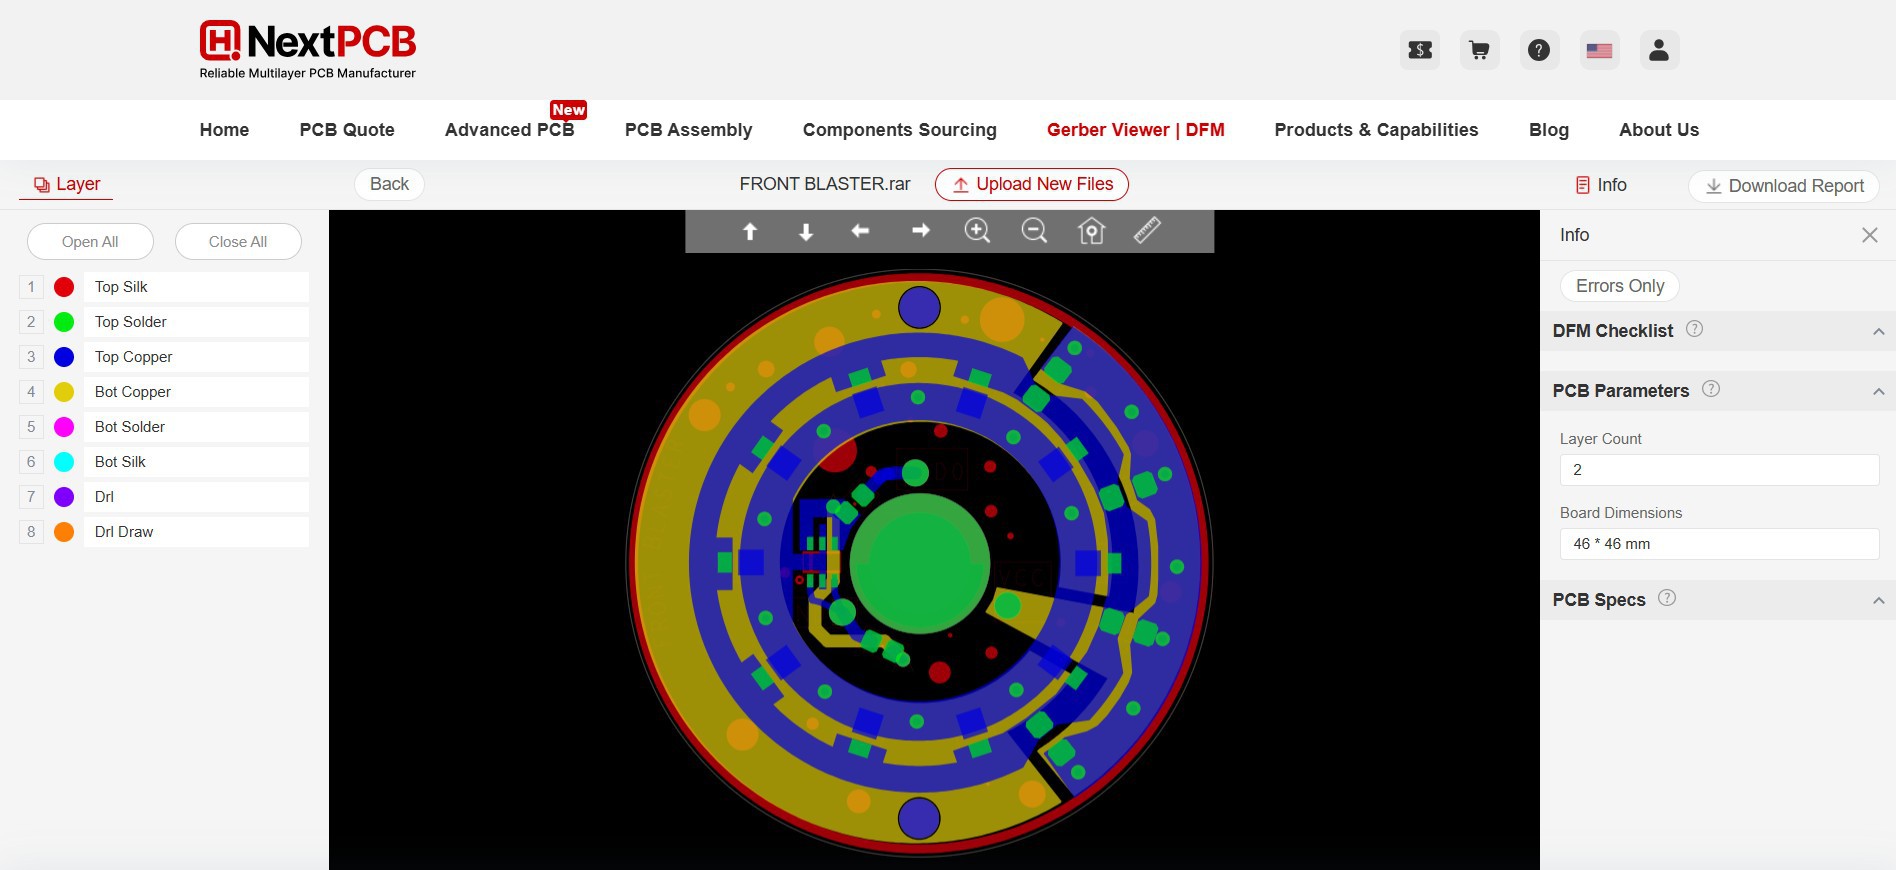
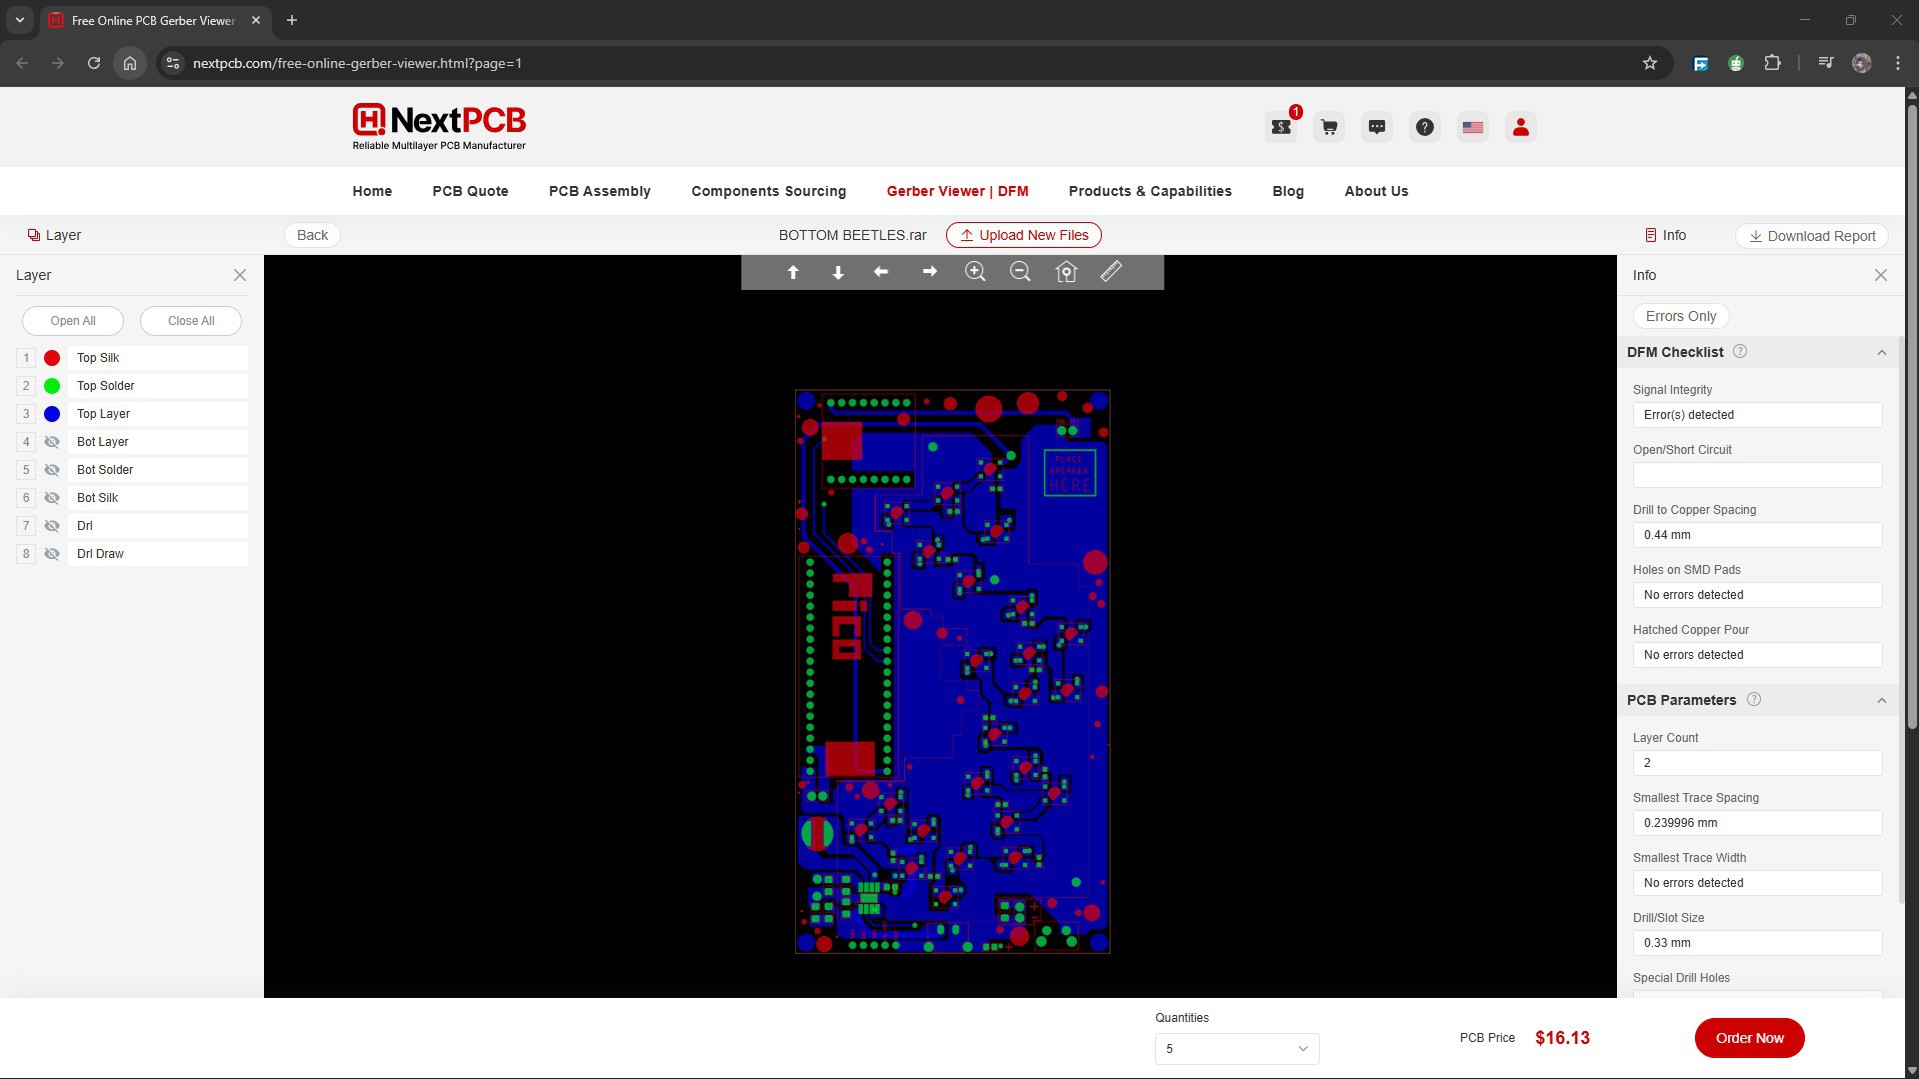
Also, NextPCB has its own Gerber Viewer and DFM analysis software.
Your designs are improved by their HQDFM software (DFM) services. Since I find it annoying to have to wait around for DFM reports from manufacturers, HQDFM is the most efficient method for performing a pre-event self-check.
This is what I see in the online Gerber Viewer. It's decent for a quick look, but not entirely clear. For full functionality—like detailed DFM analysis for PCBA—you’ll need to download the desktop software. The web version only offers a basic DFM report.
With comprehensive Design for Manufacture (DFM) analysis features, HQDFM is a free, sophisticated online PCB Gerber file viewer.
With over 15 years of industry experience, it offers valuable insights into advanced manufacturing processes. If you’re looking for reliable PCB services at a budget-friendly price, HQ NextPCB is definitely worth checking out.
PCB ASSEMBLY PROCESS—LED BOARD
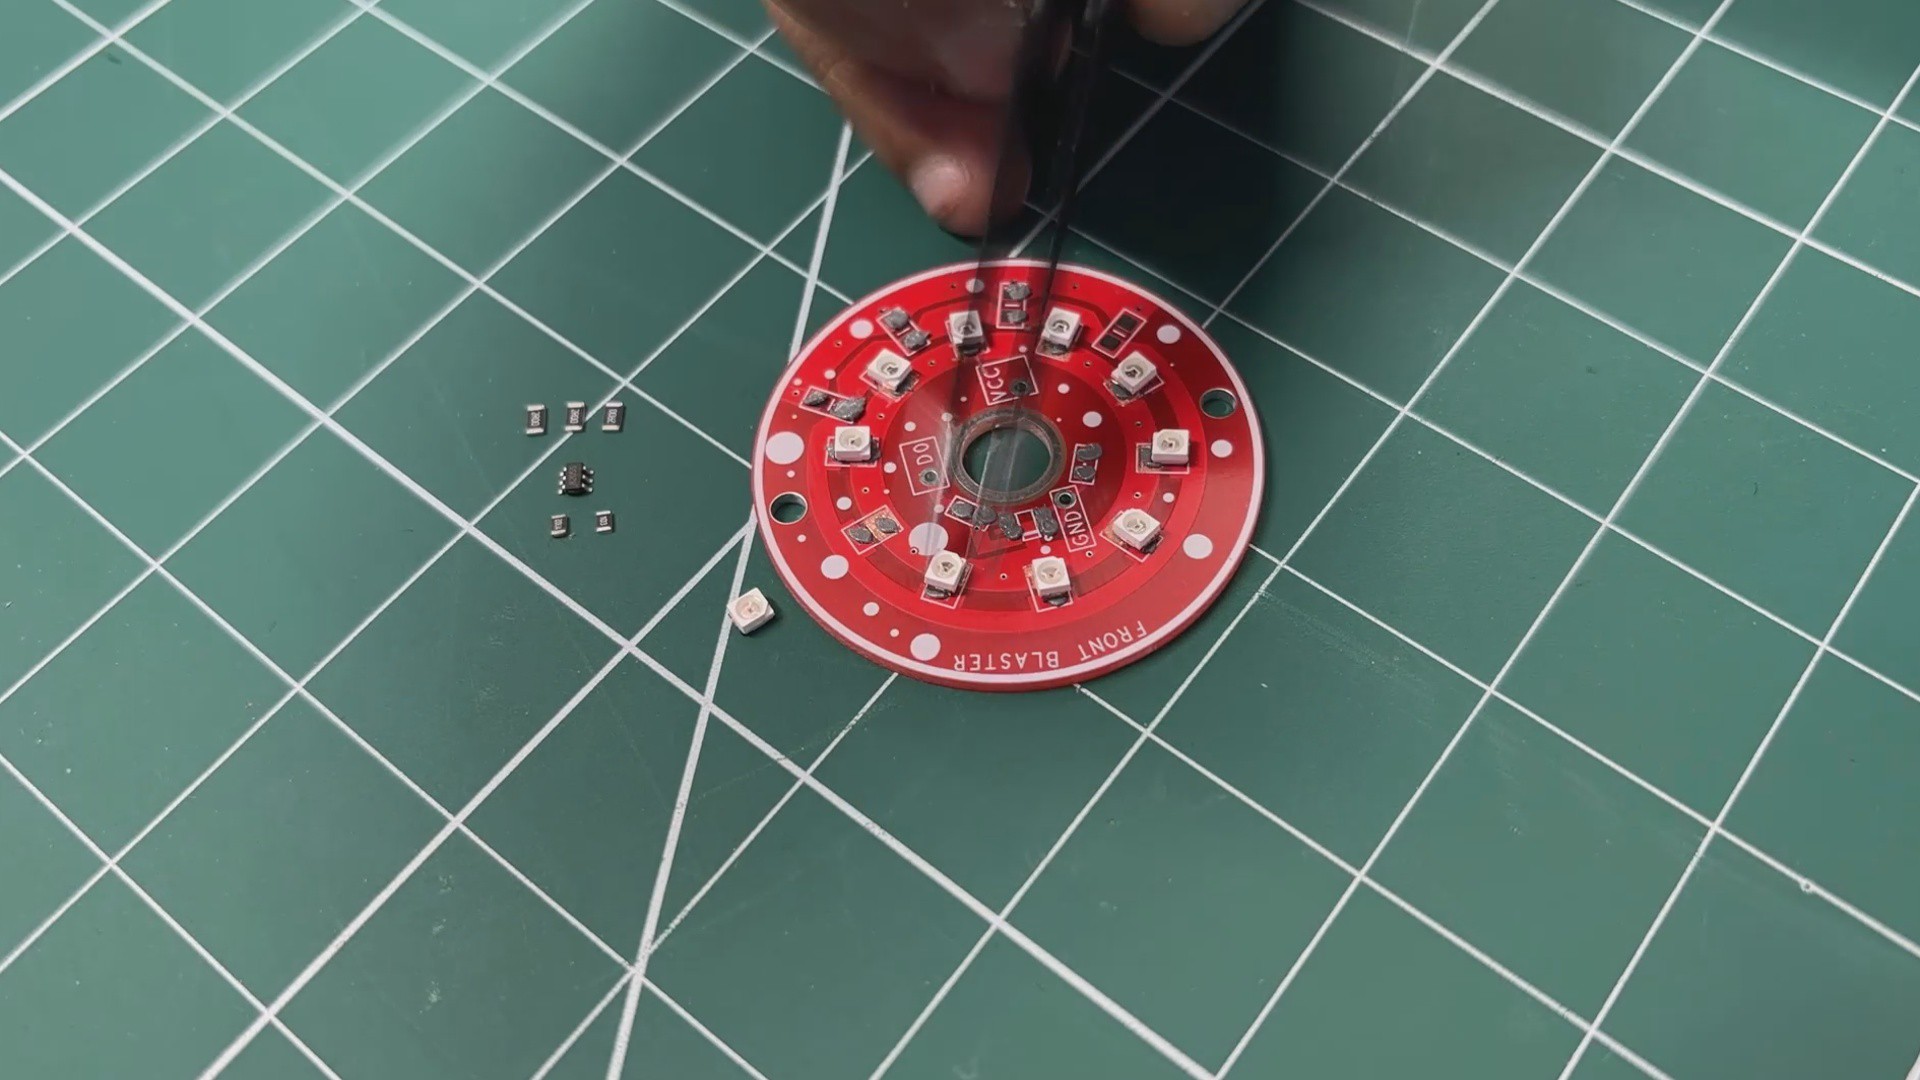

- The Assembly process starts by applying solder paste to each component pad on the PCB.
- Once the solder paste is applied, the SMD red 3030 LEDs are placed onto their respective footprints. This is followed by placing the MOSFET IC and the SMD resistors, using tweezers to accurately position each component.
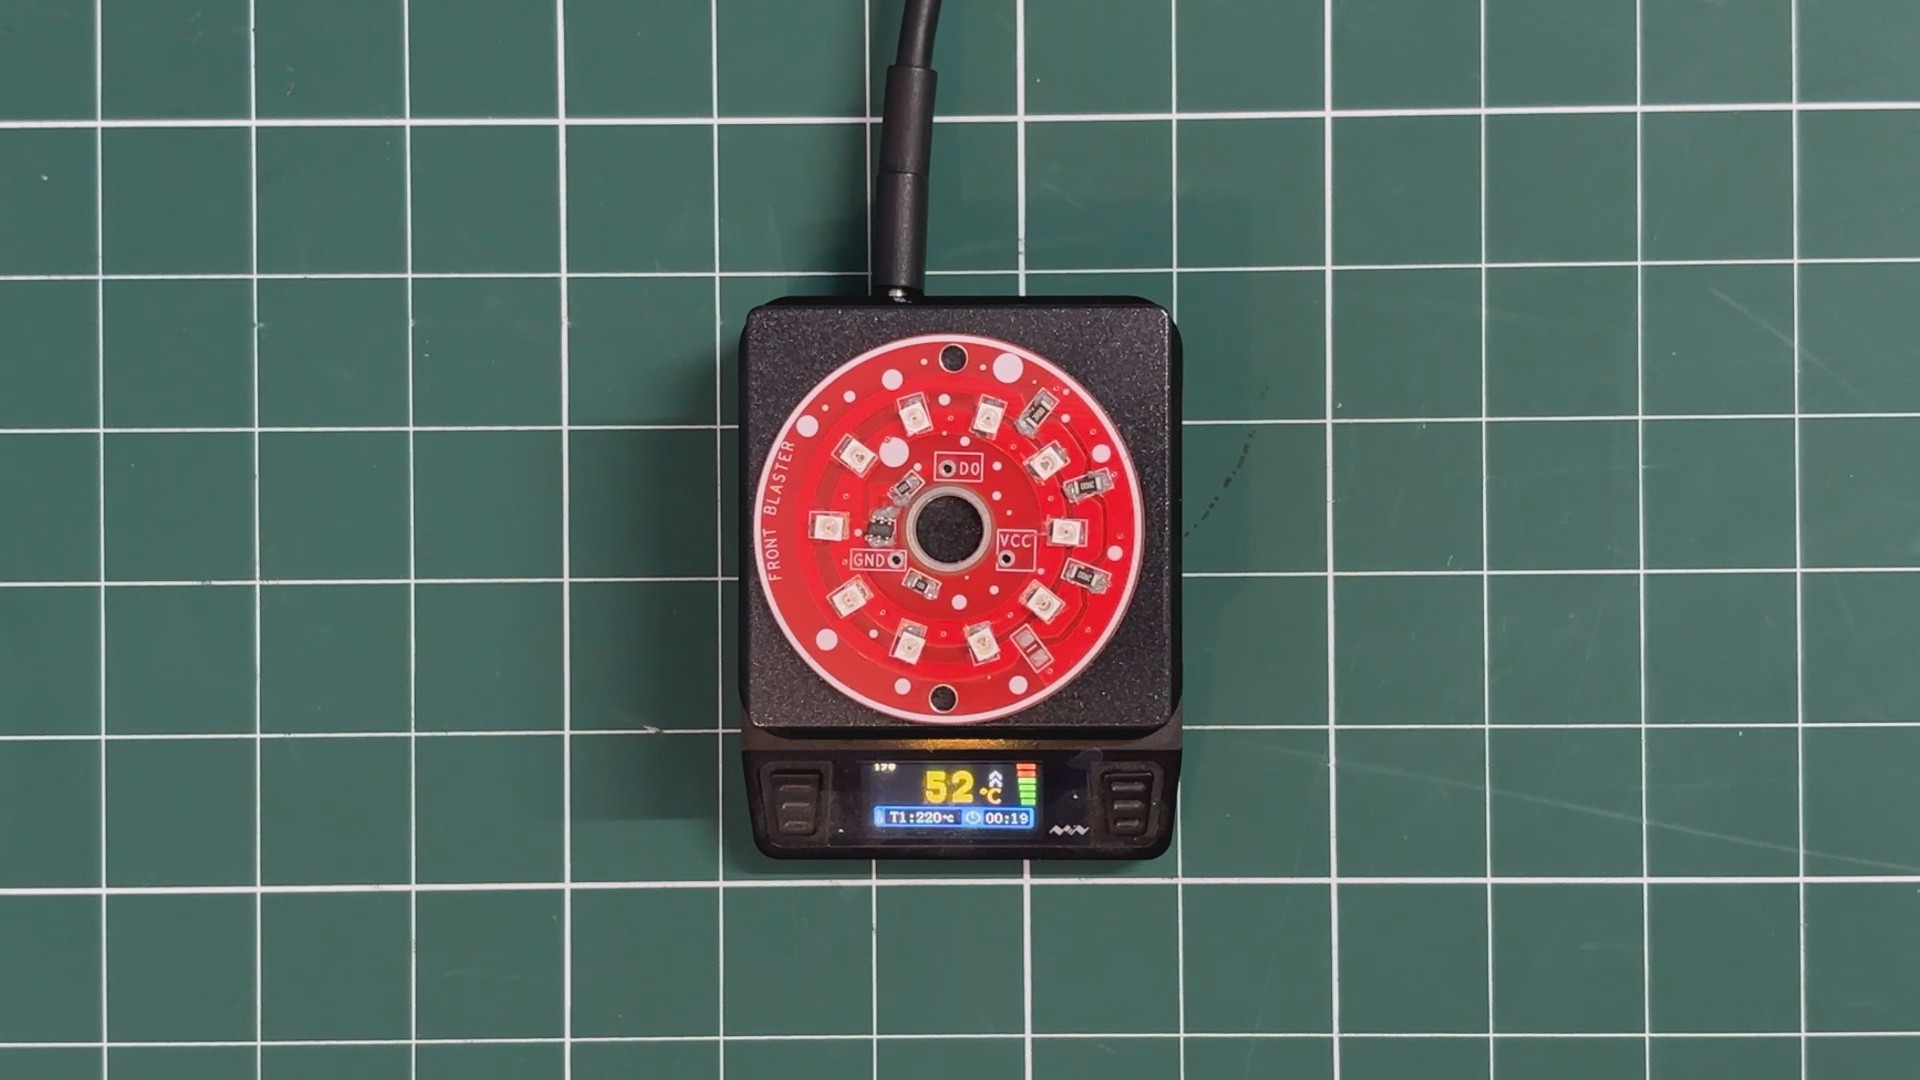
- After all components are placed, the PCB is carefully transferred to a reflow hot plate. The hot plate heats the PCB from below until it reaches the solder paste melting temperature. As the board reaches 200°C, the solder paste reflows and securely bonds all components to the PCB.
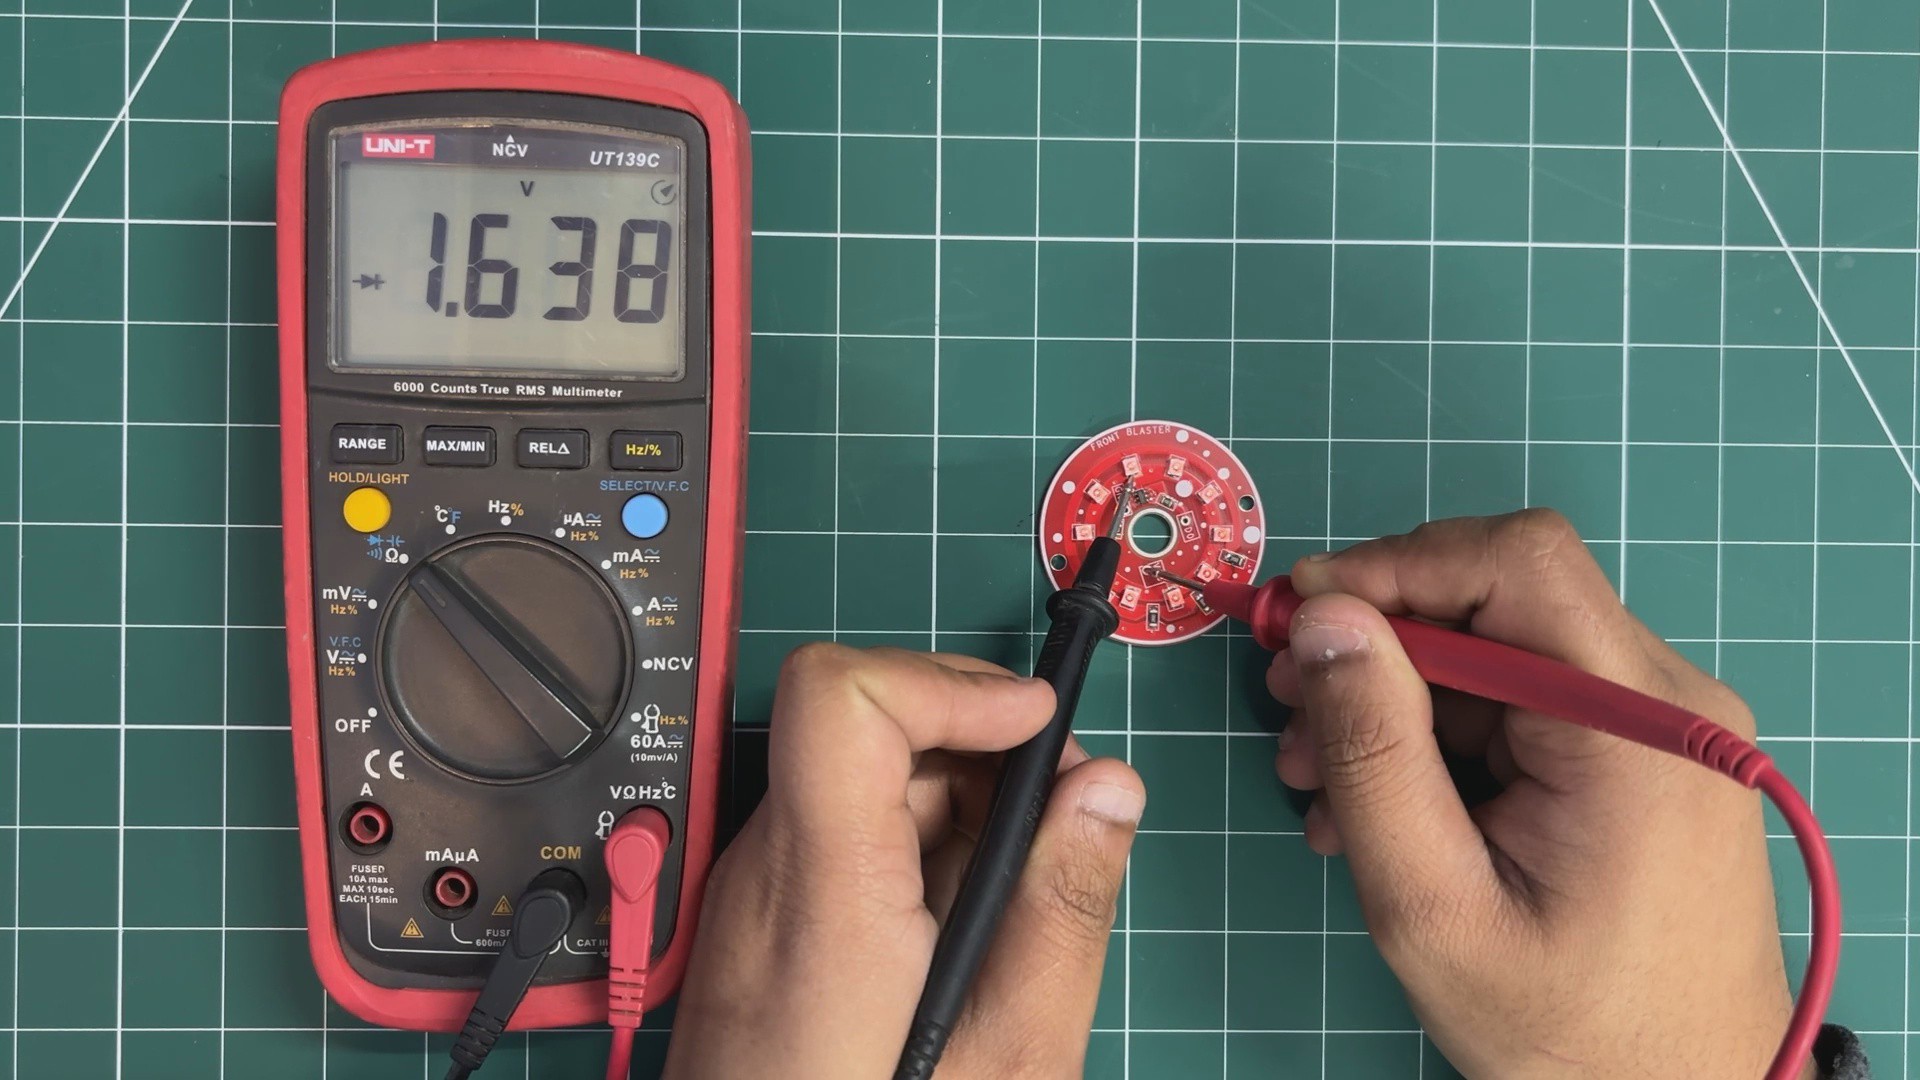
- To verify that all LEDs are soldered correctly, a multimeter set to diode test mode is used. The positive probe is placed on the VCC rail of the LED board, while the negative probe is connected to the drain terminal of the MOSFET.
If all LEDs illuminate, this confirms that the soldering and connections are correct.
PCB ASSEMBLY PROCESS —PICO DRIVER
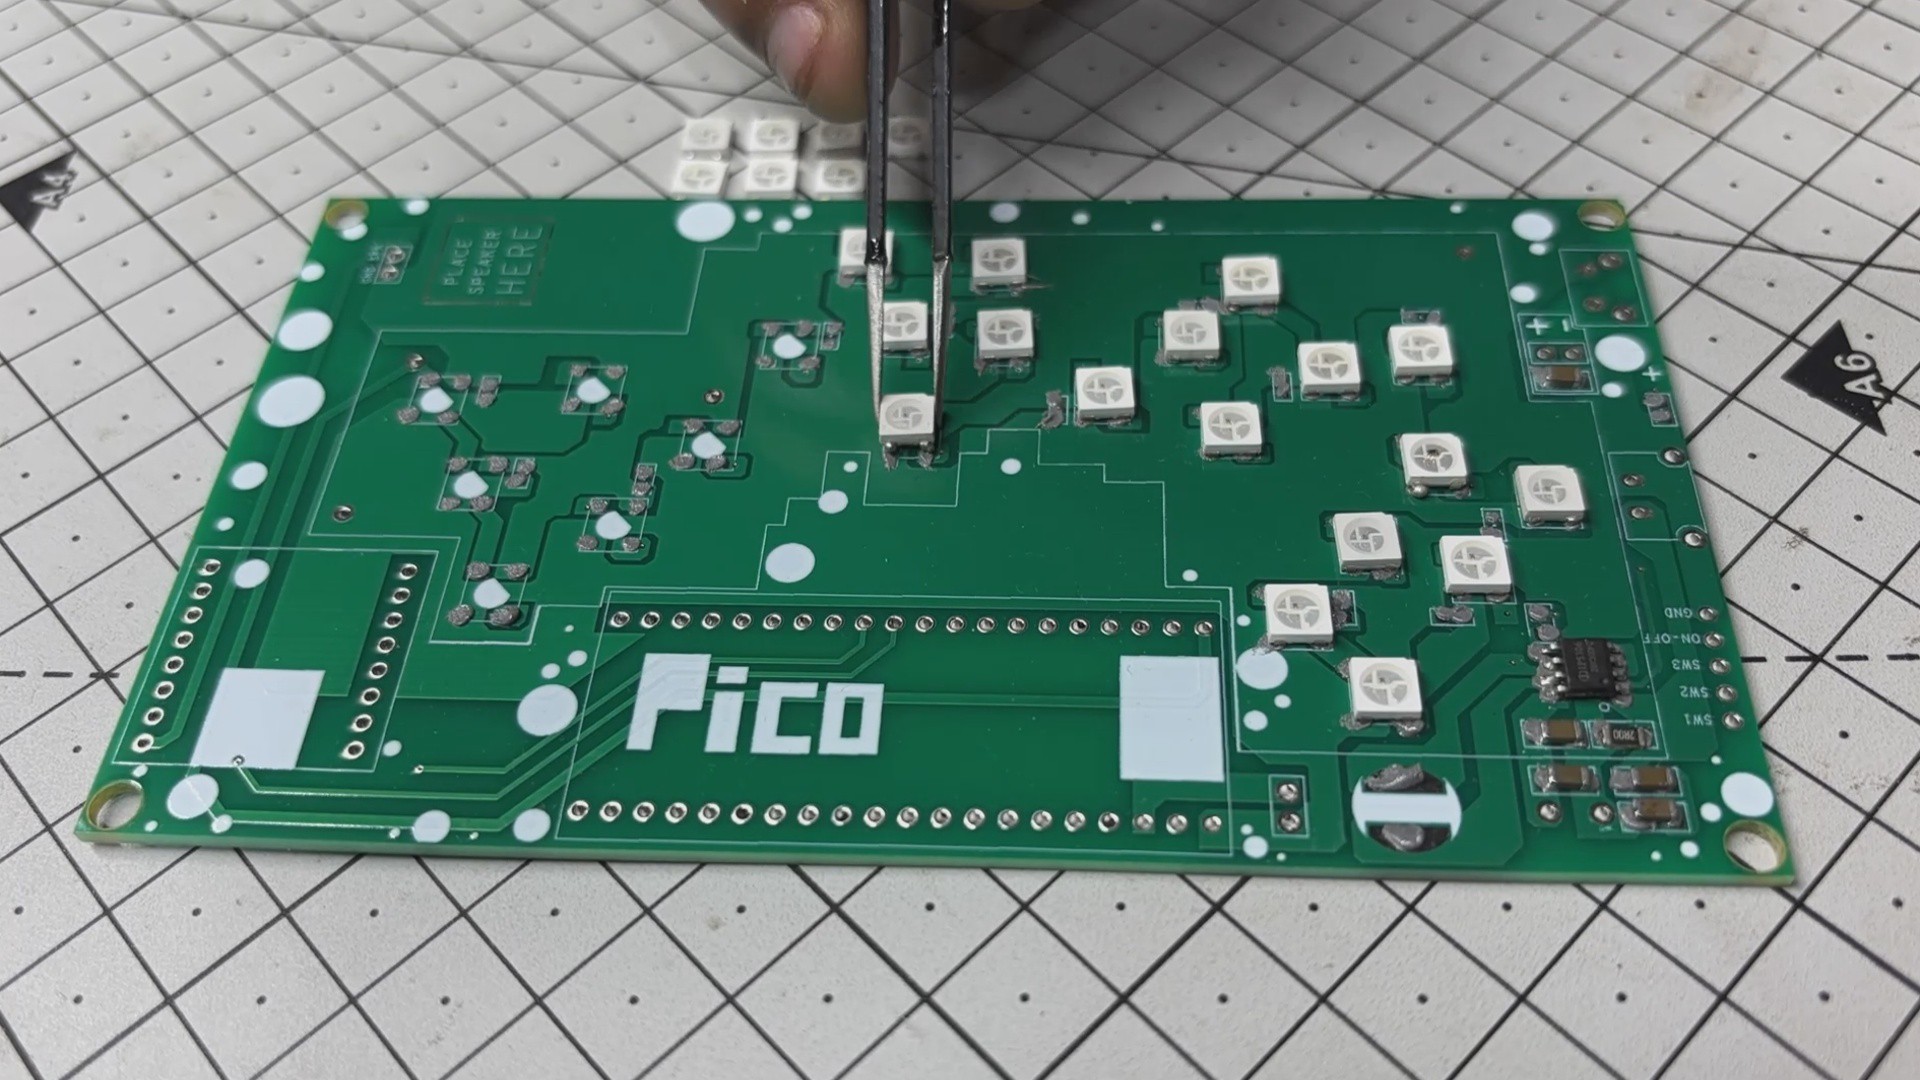
- We begin assembling the main board by applying solder paste to each SMD pad using a dispensing needle. For this build, we’re using 63/37 Sn/Pb solder paste, which has a melting point of around 200°C.
- Next comes the pick-and-place stage, where each surface-mount component, which includes the IP5306 power management IC, capacitors, inductors, and resistors, all are carefully positioned using ESD-safe tweezers.
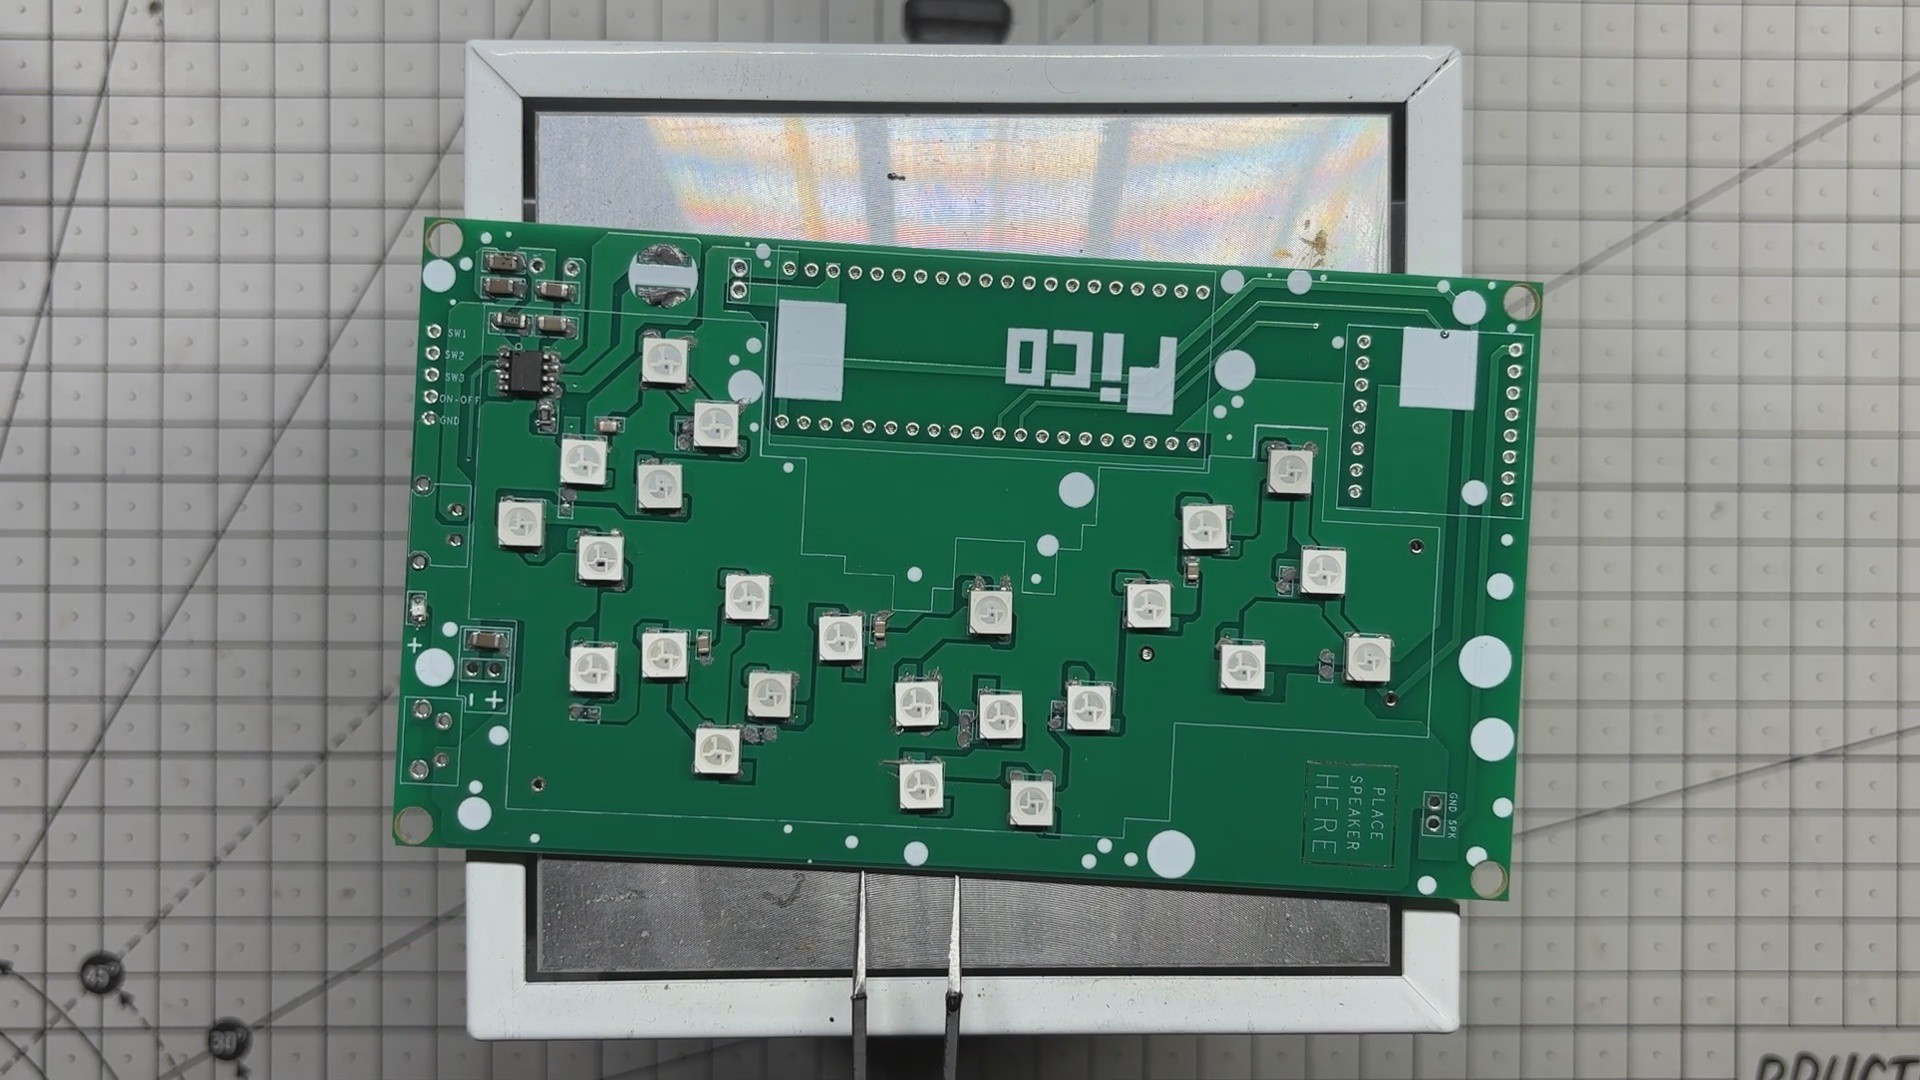
- Once all components are in location, the PCB is transferred to a reflow hotplate. The board is heated from below until it reaches the solder paste’s melting temperature. At that point, the solder melts, locking all SMD components securely in place.
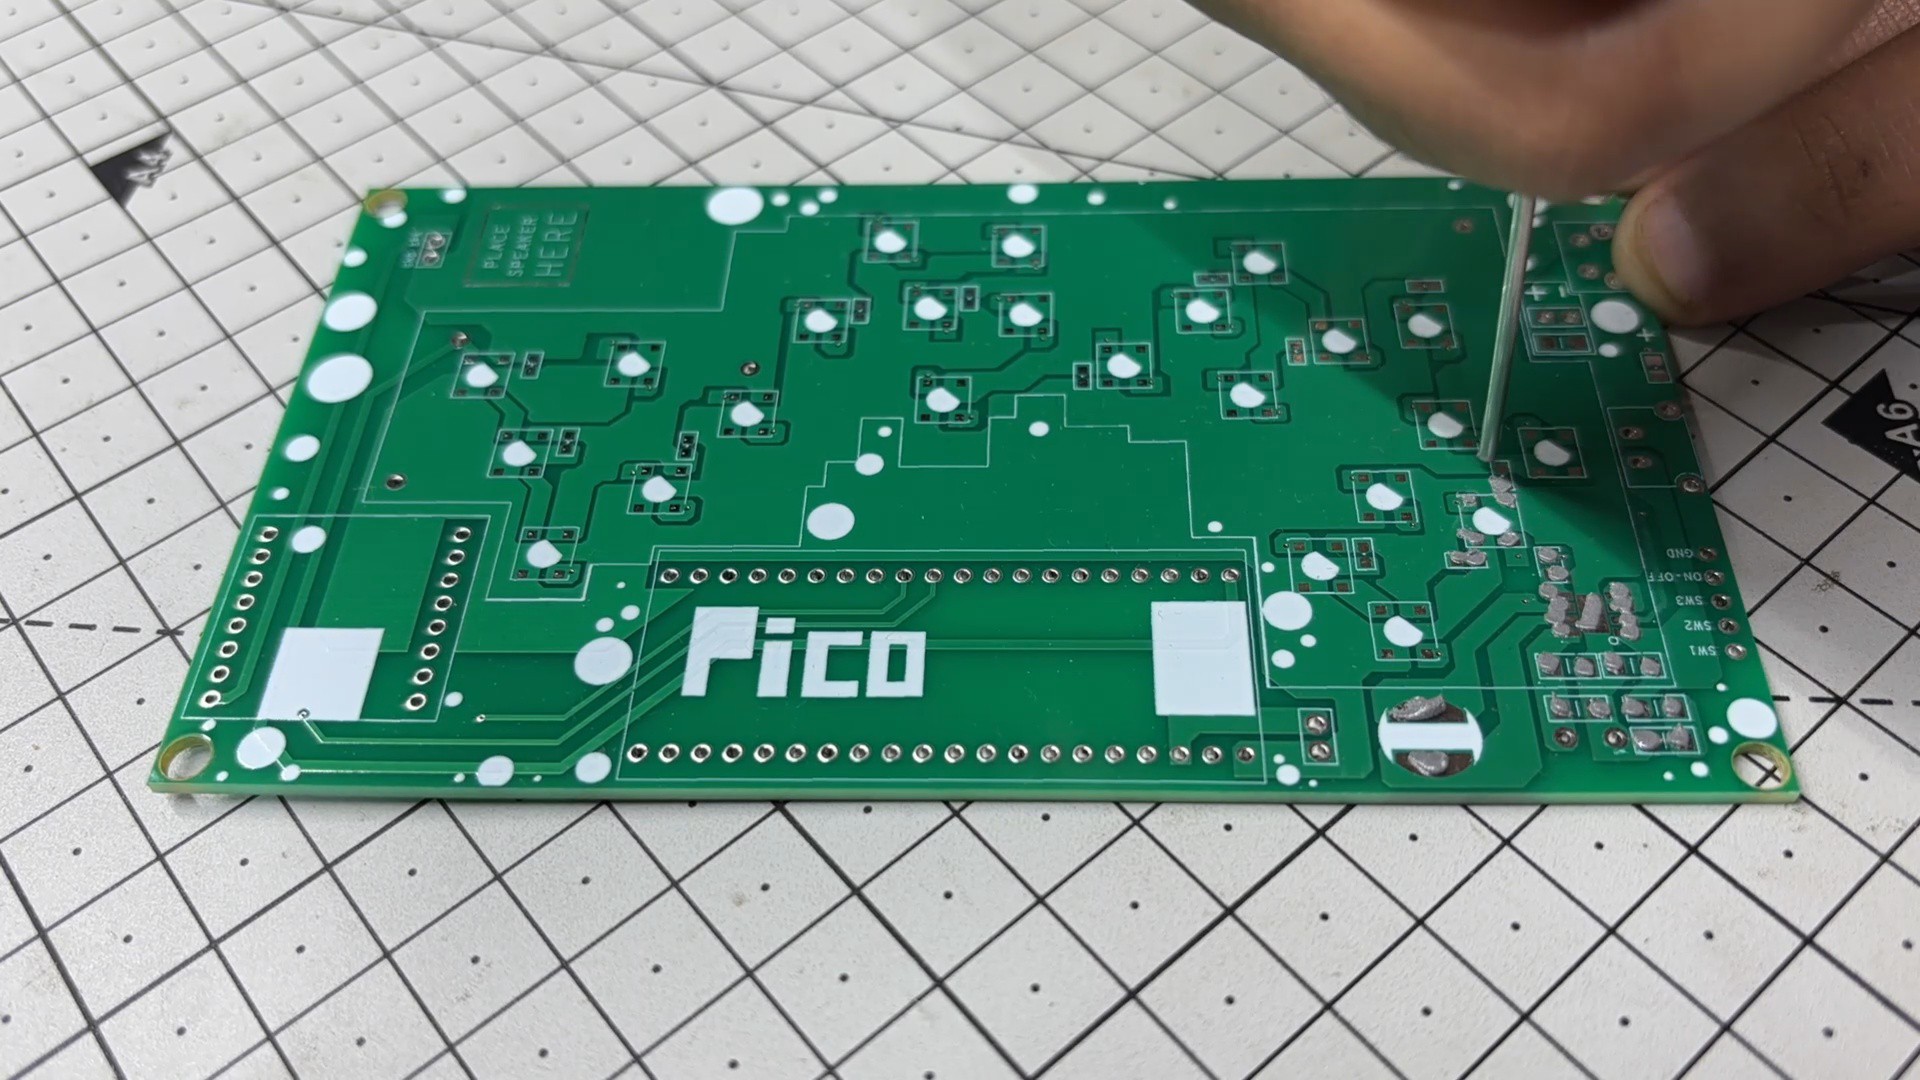
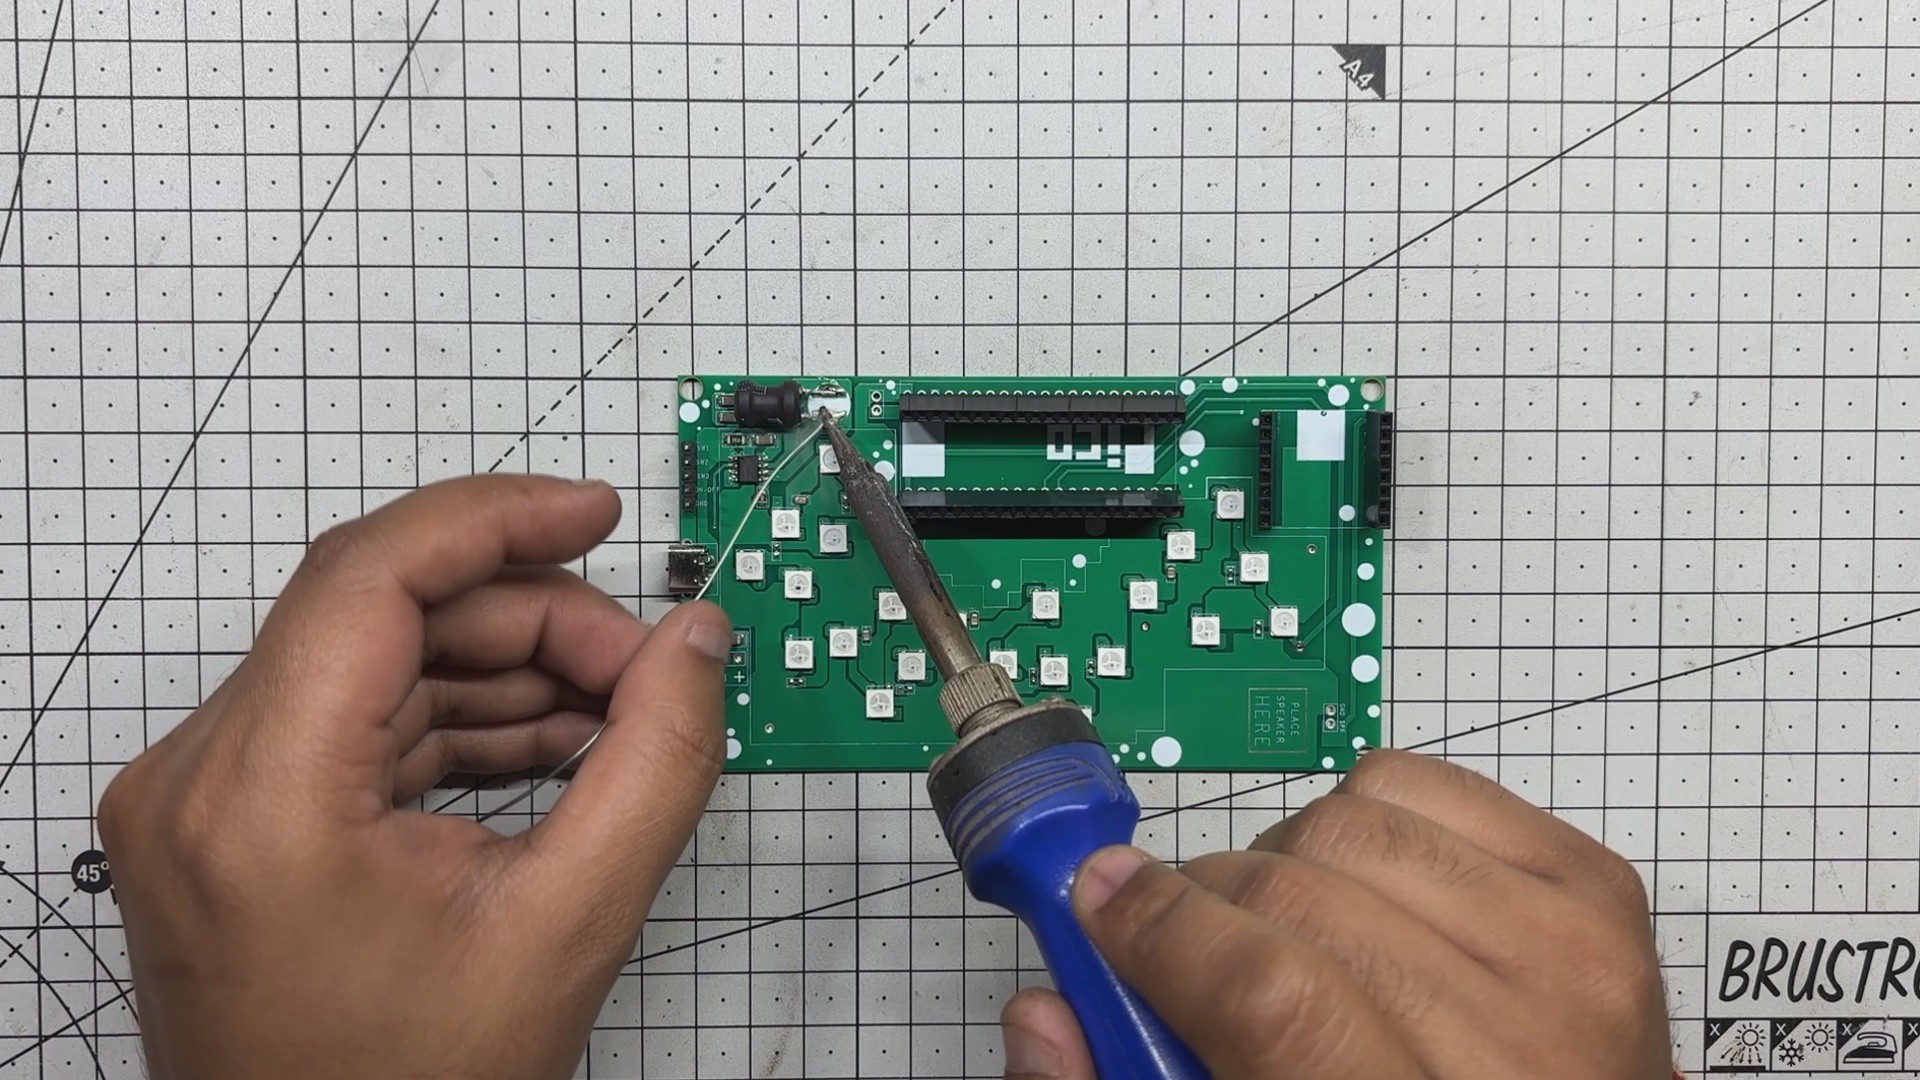
- With the surface-mount process complete, we move on to the through-hole components. Female header pins for the Raspberry Pi Pico and DFPlayer Mini, a USB Type-C port, male header pins, and an inductor are added from the top side of the board.
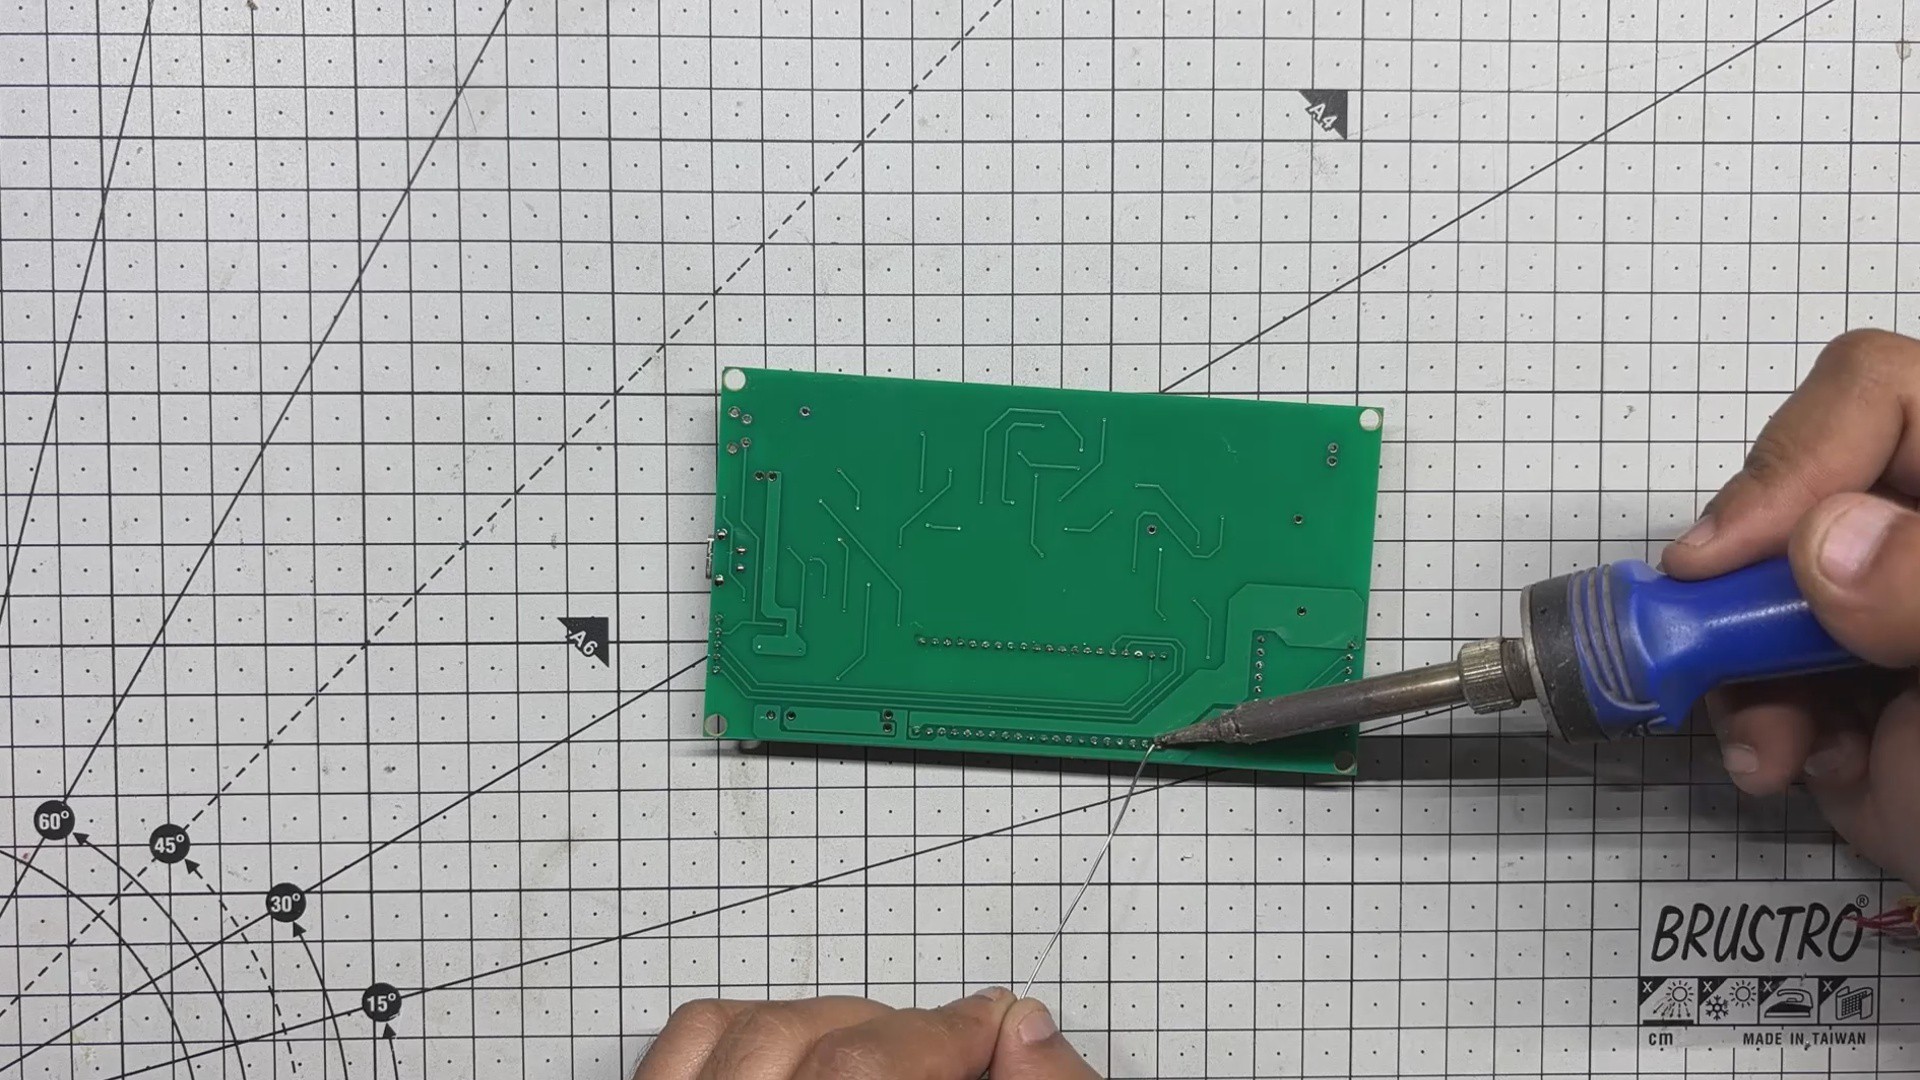
- The PCB is then flipped, and all through-hole pads are soldered manually using a soldering iron to ensure strong mechanical and electrical connections.
- Finally, the Raspberry Pi Pico and DFPlayer Mini are mounted onto their respective headers, marking the completion of the assembly process.
POWER SOURCE
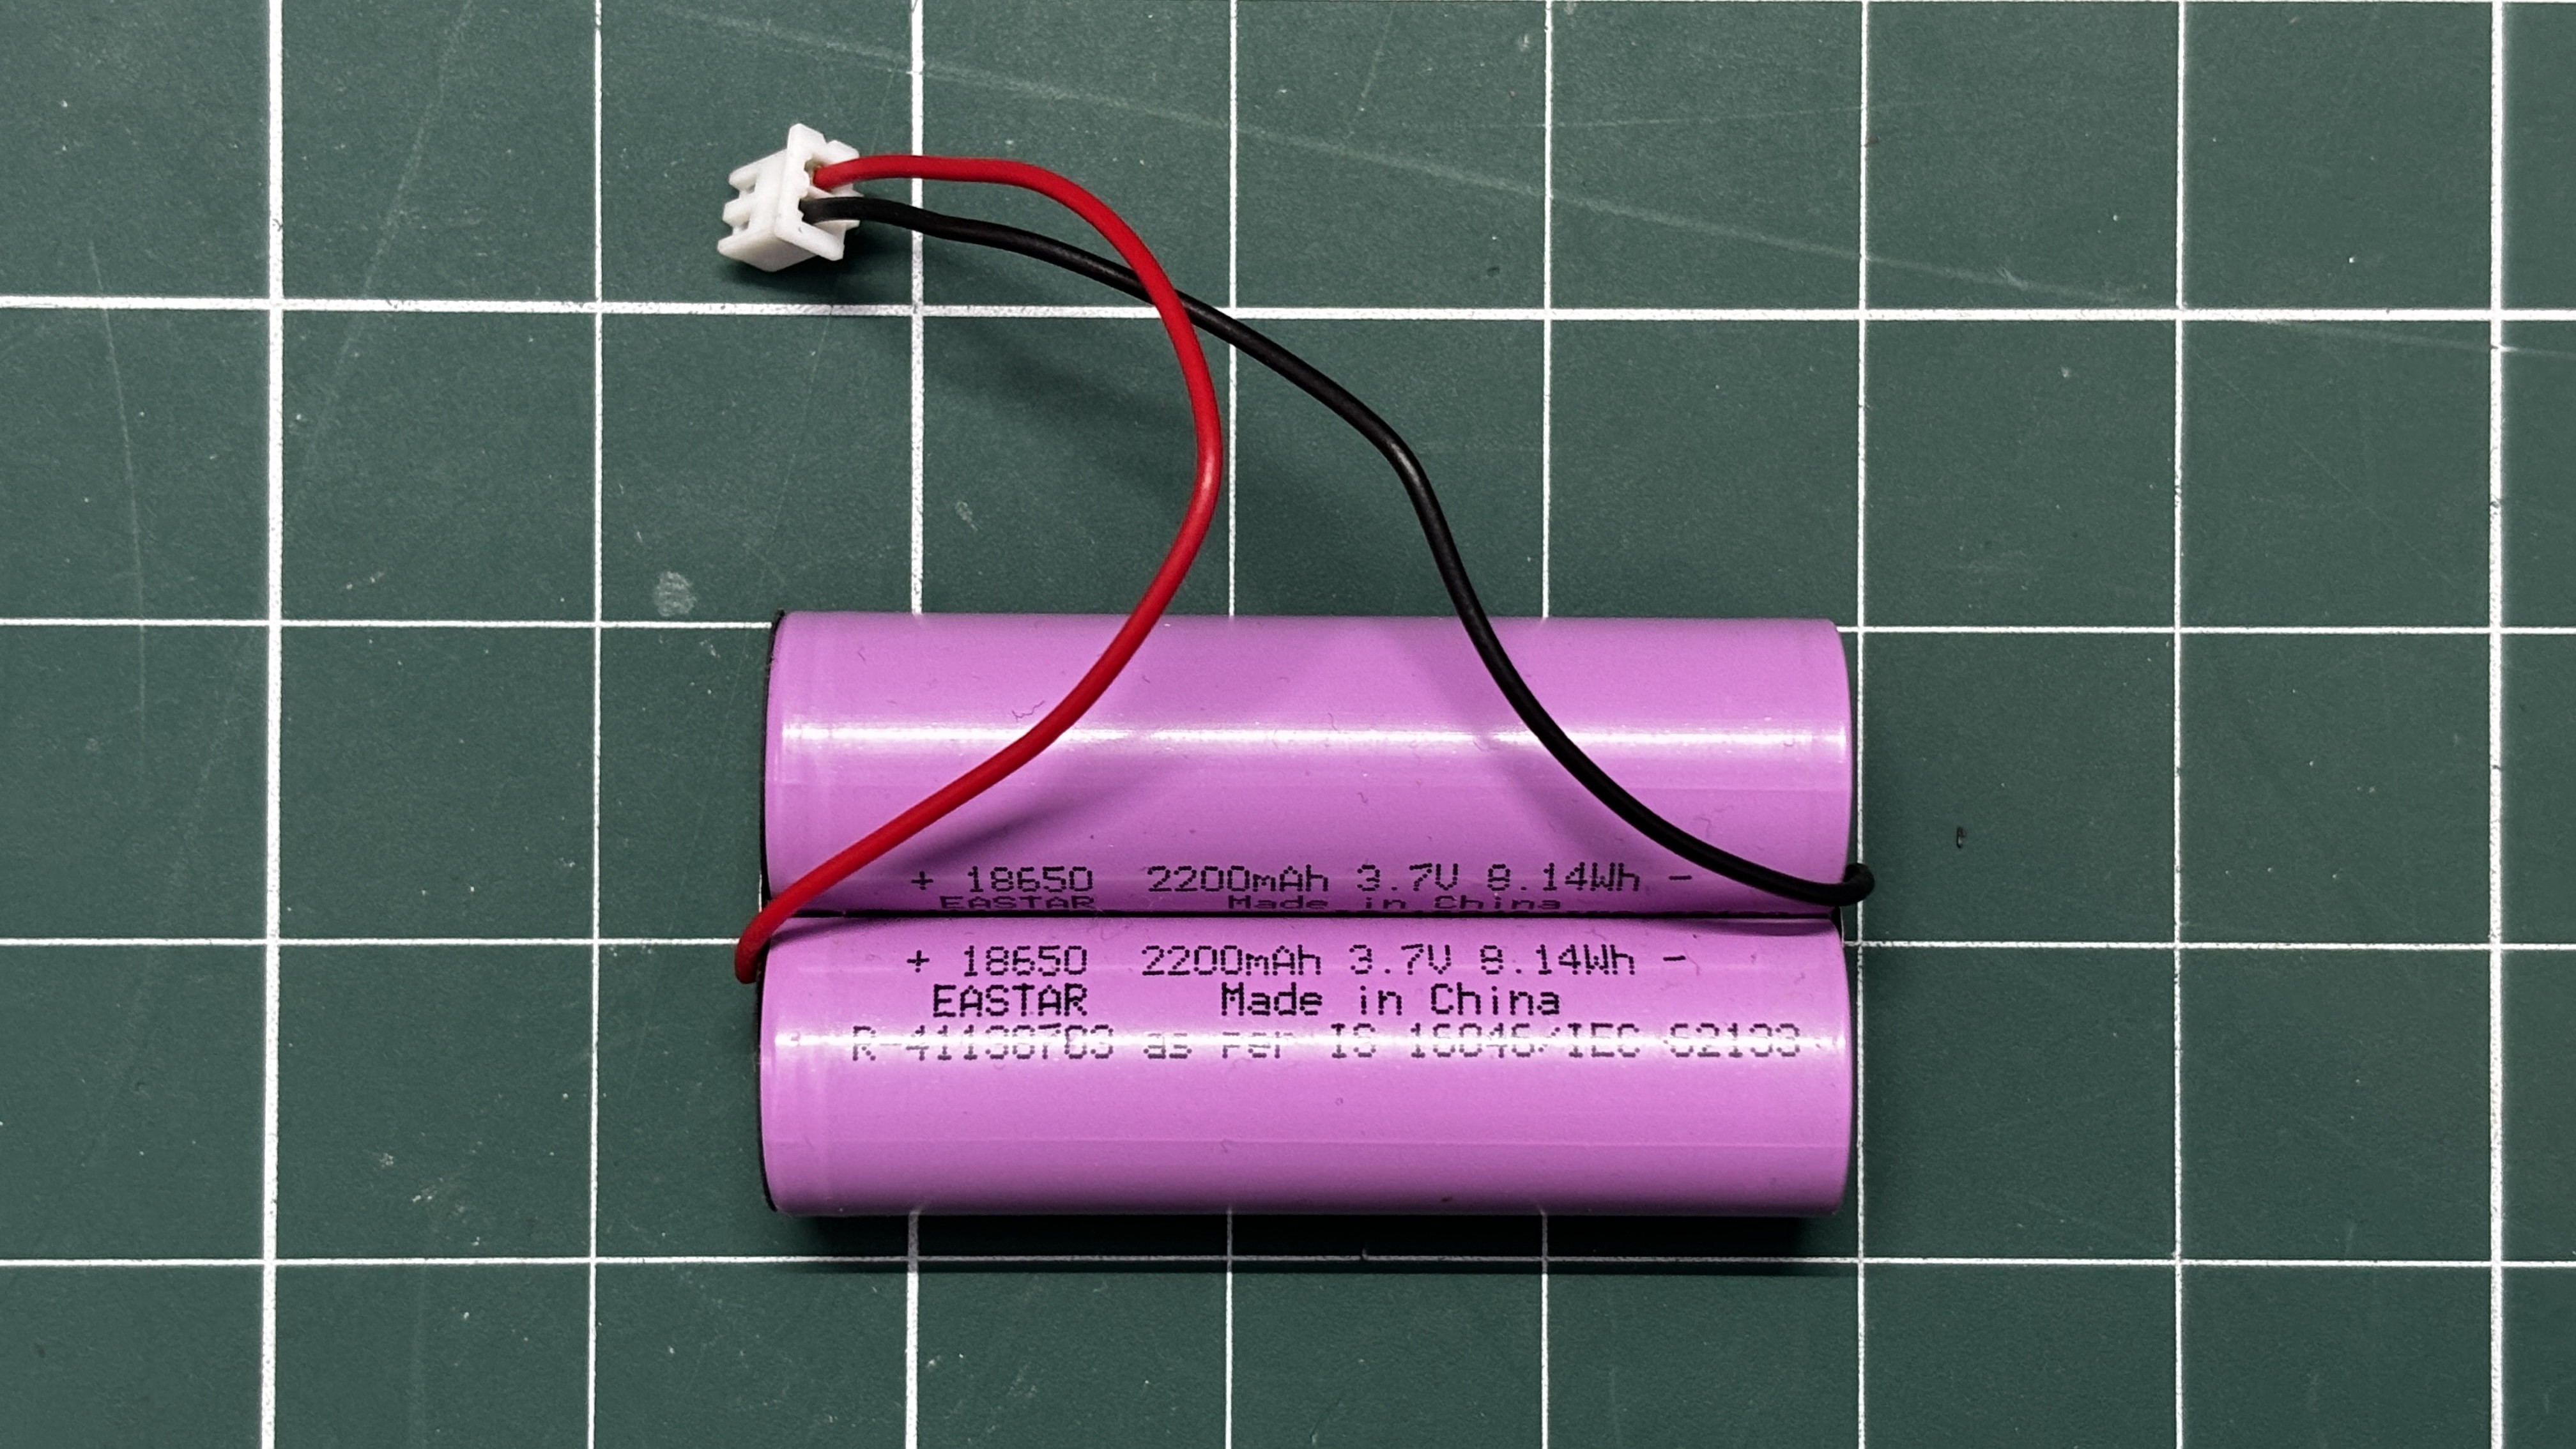
For the power source, we used two 2200 mAh, 3.7V lithium-ion cells connected in parallel, creating a 3.7V battery with a total capacity of 4400 mAh. This is sufficient to run the device for a couple of days continuously.
Please note that we did not solder wires directly to the cells. Instead, we used a lithium cell spot welding machine to attach a nickel strip to both ends of the cells, and then soldered the connector to the middle of the strip.
It is well known that excessive heat applied to lithium cells can potentially cause fire or explosion in some cases, so it is strongly recommended to never directly touch a soldering iron to the cell terminals.
ELECTRONICS SETUP
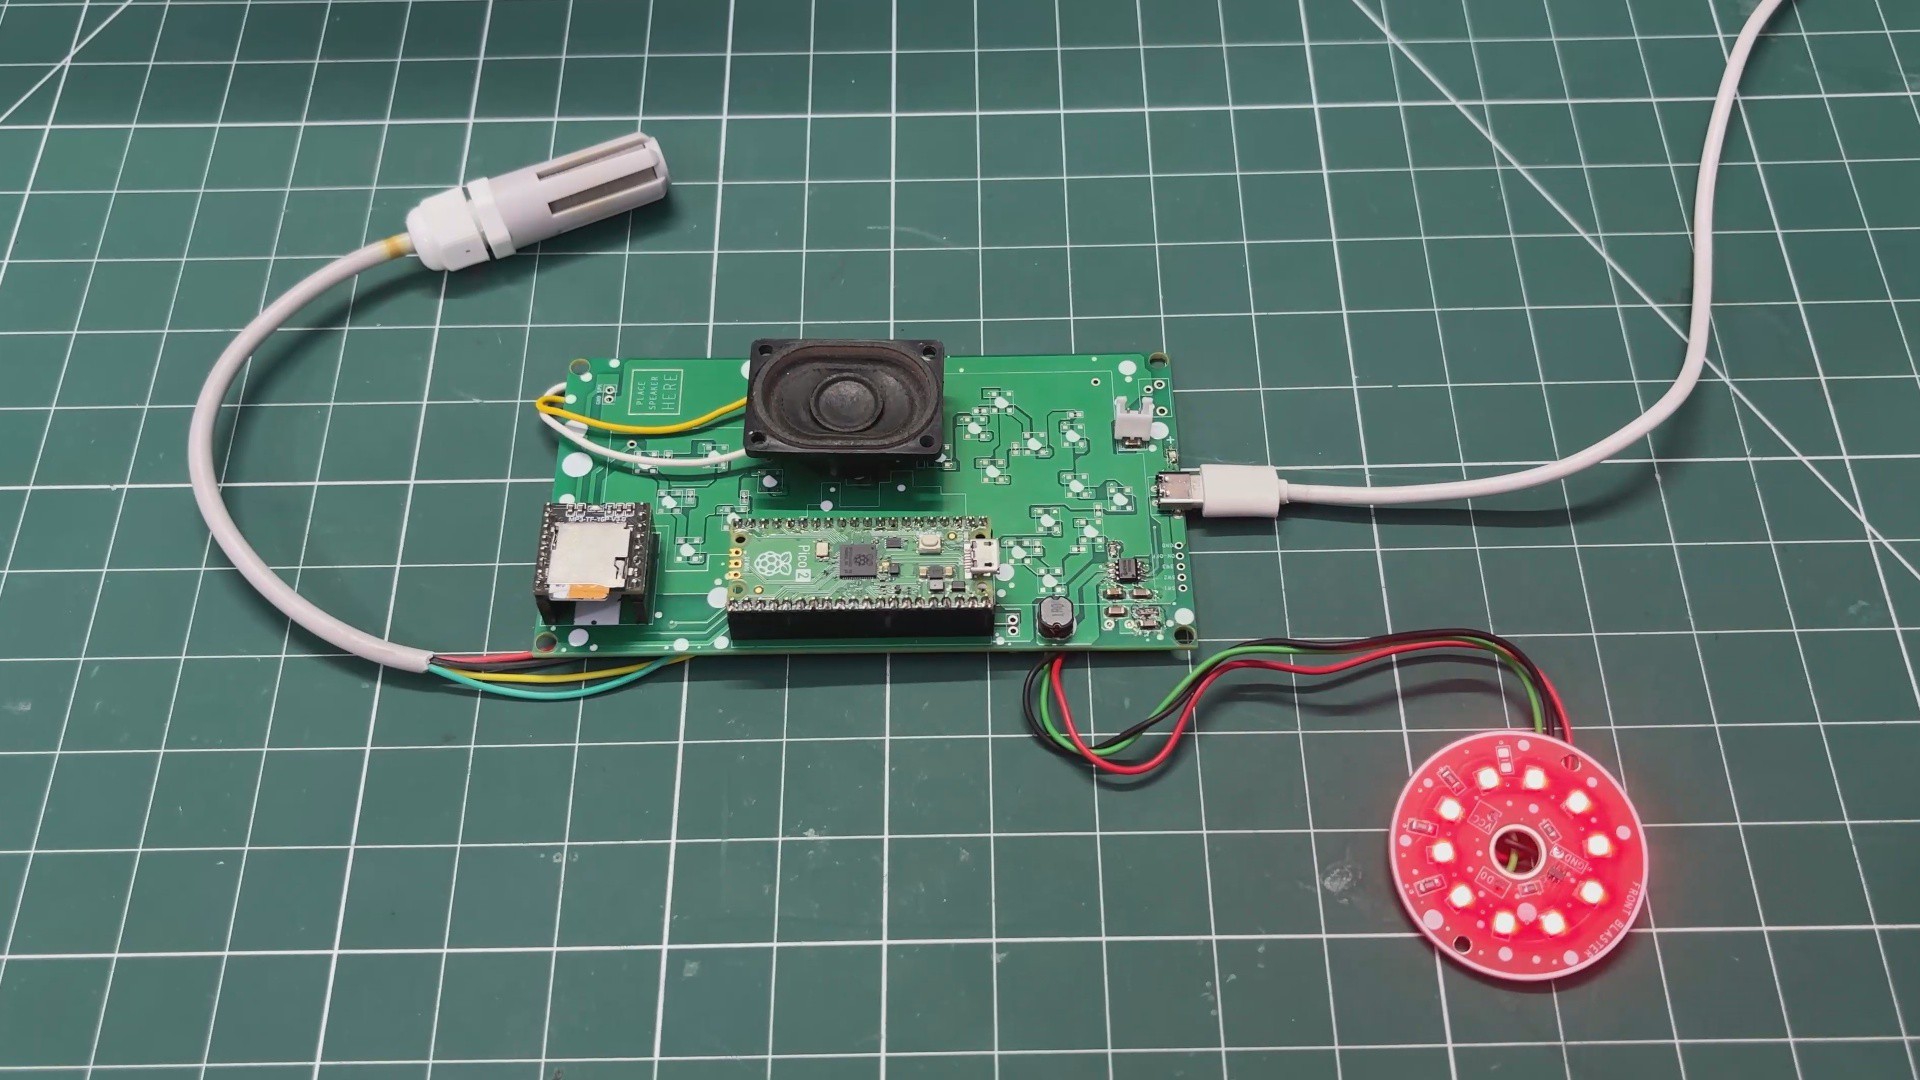
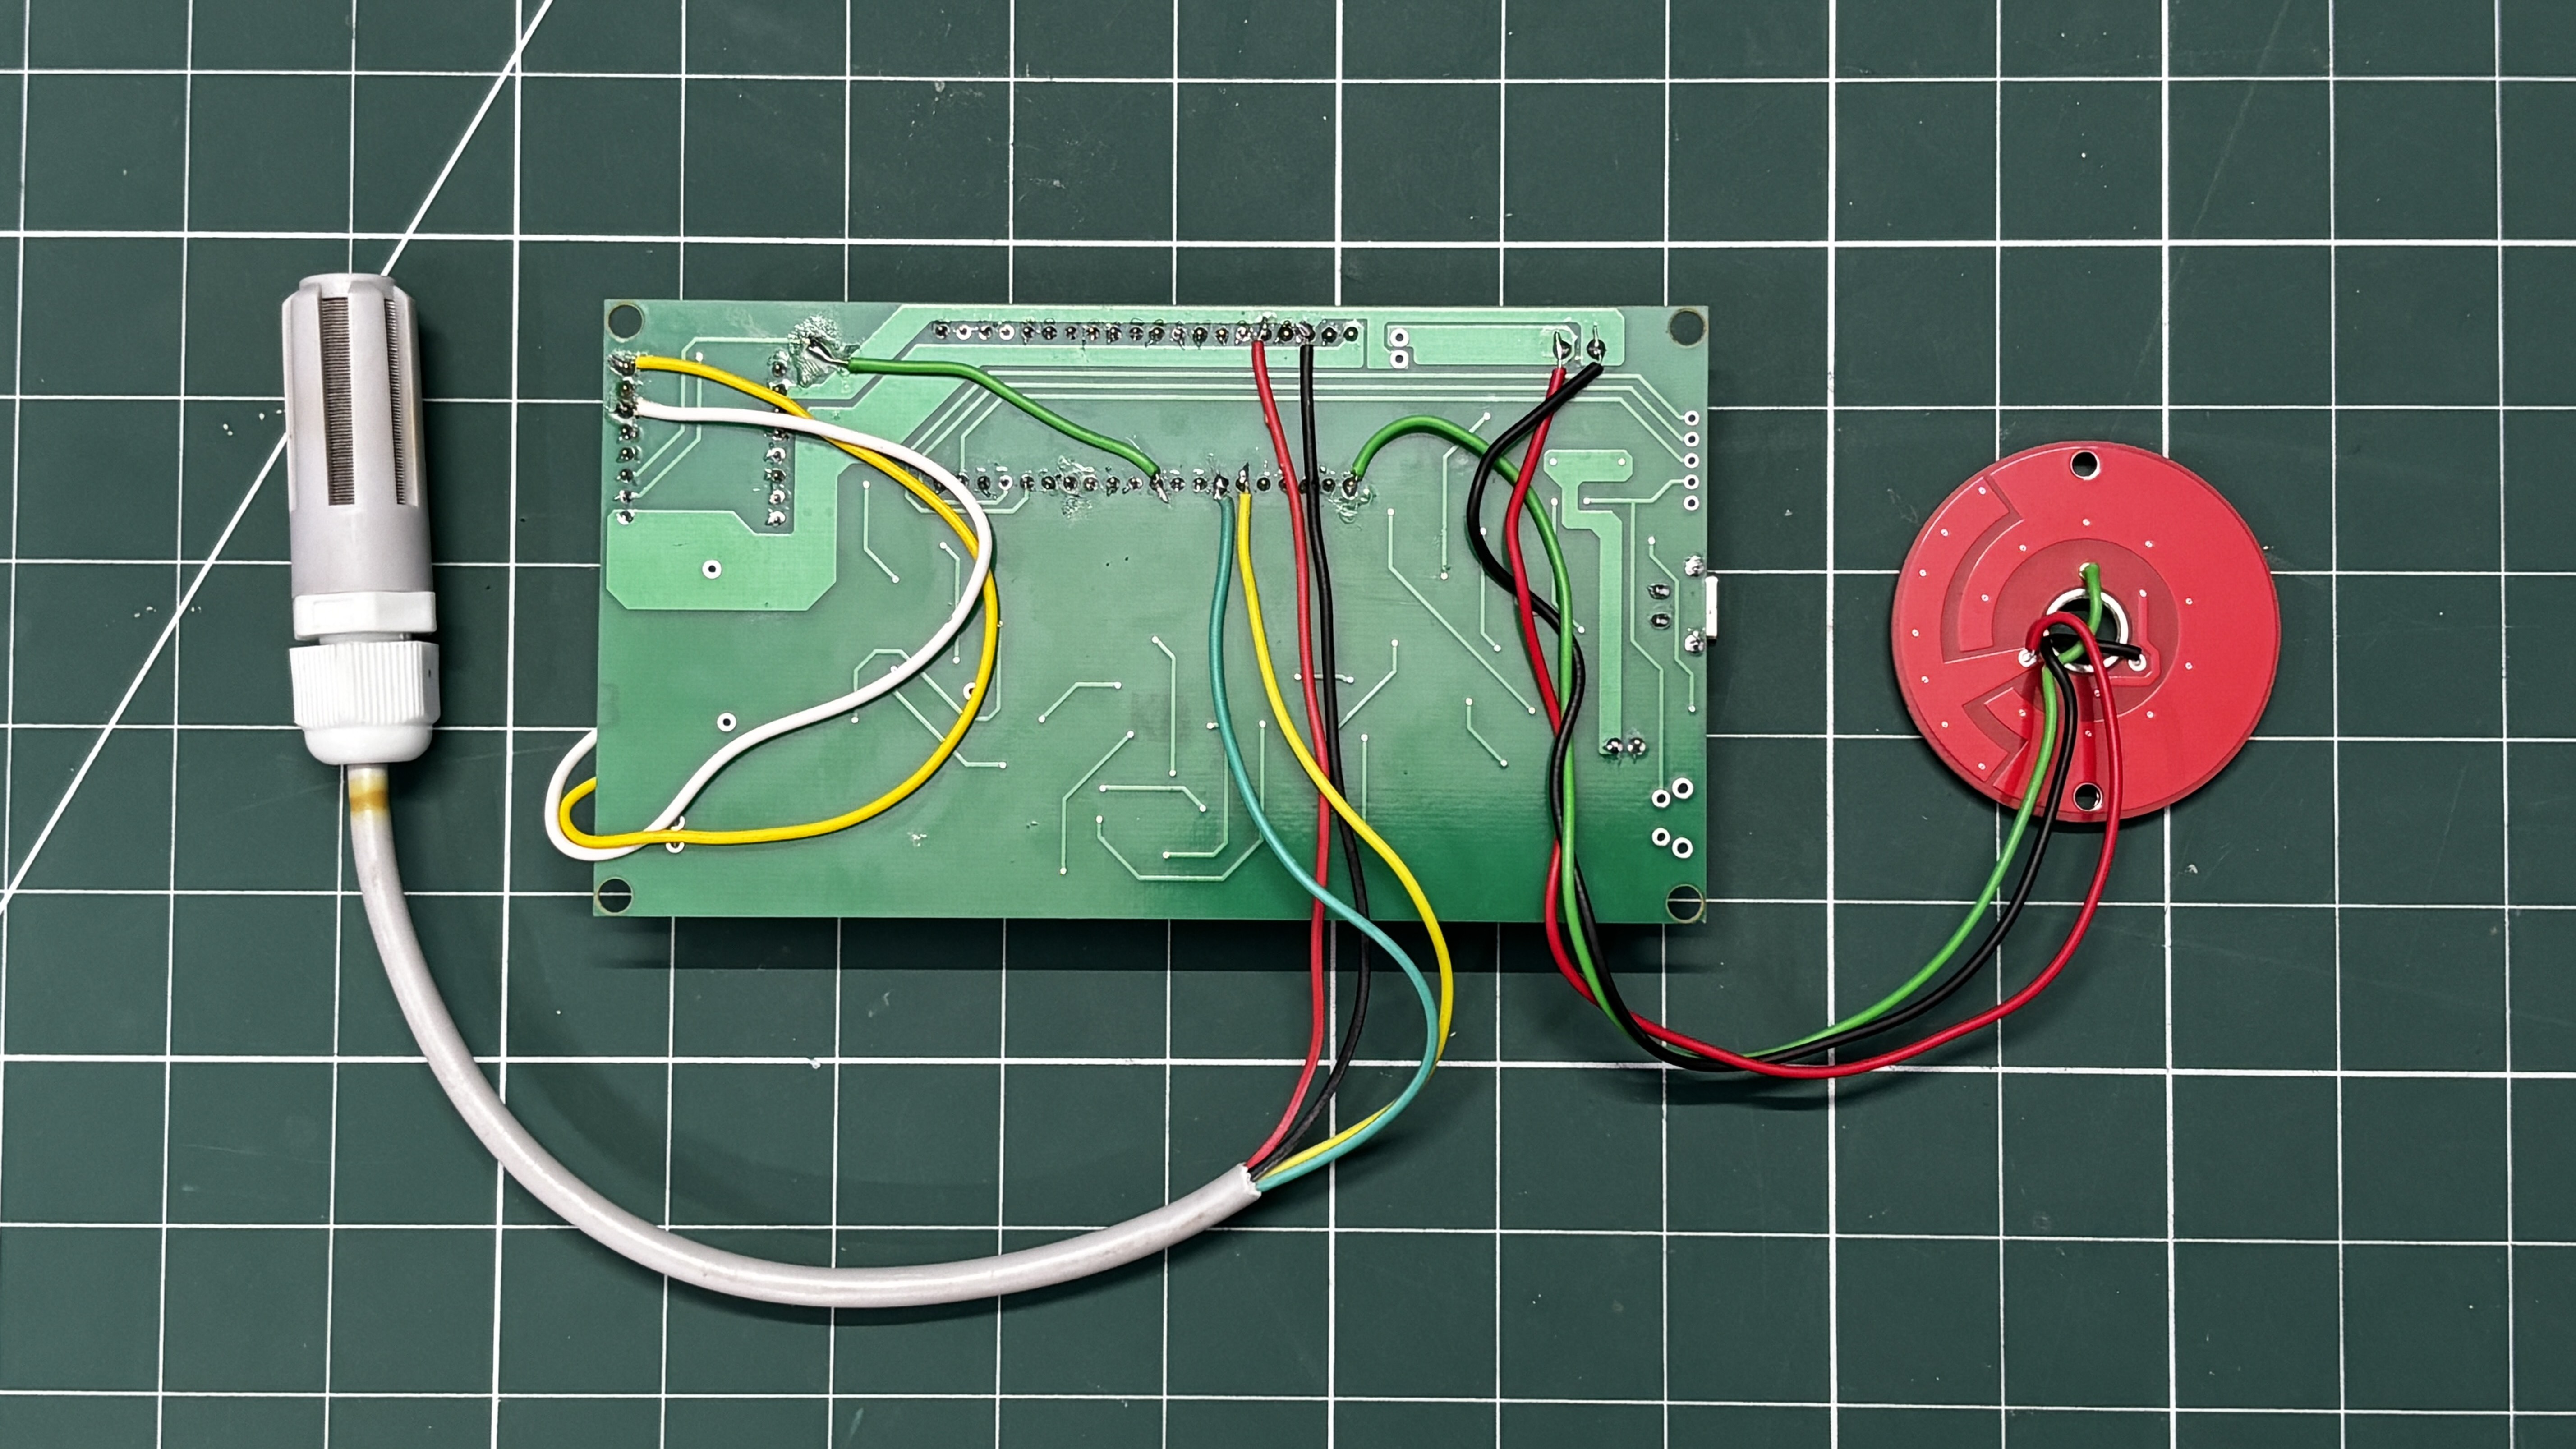
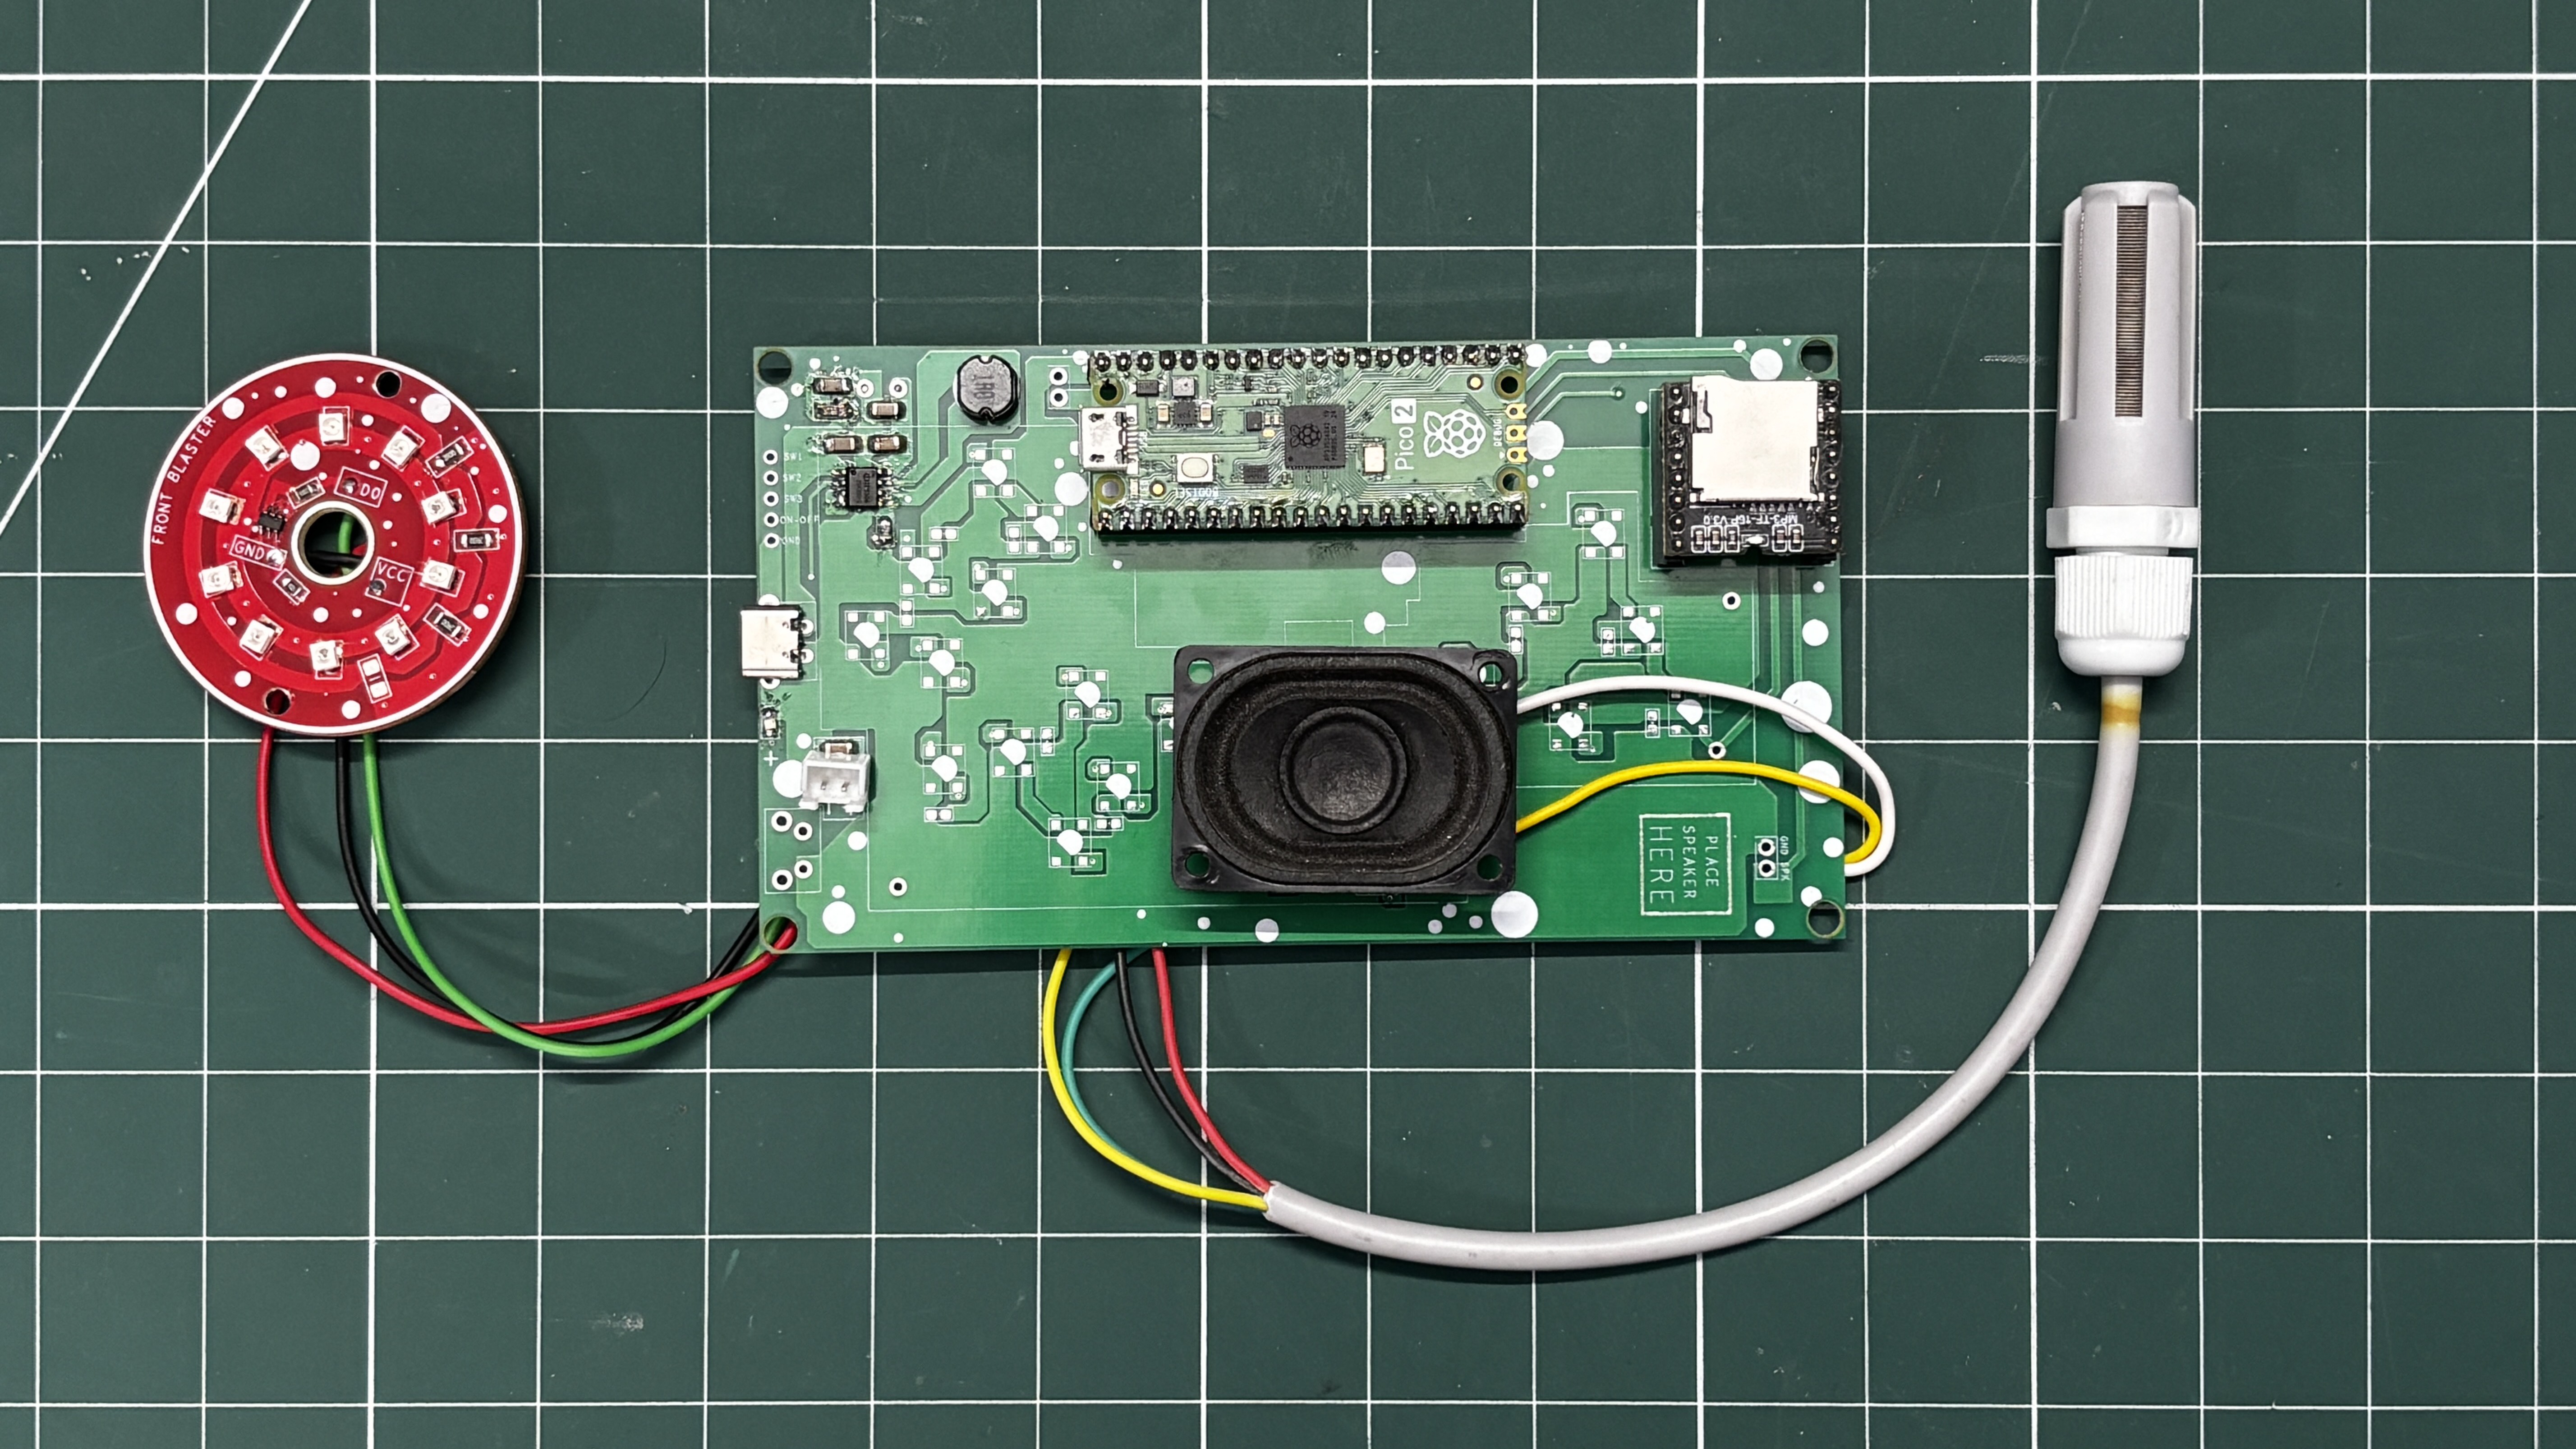
We next prepared the wiring for our Pico driver board with the LED board, speaker, and the SGP40 sensor.
- We began with the SGP40 sensor. The VCC of the SGP40 is soldered to the 3V3 pin of the Pico. GND is connected to GND. SDA is soldered to GPIO4, and SCL is soldered to GPIO5.
- Next comes the speaker wiring, where the positive terminal of the speaker is connected to the DFPlayer’s SPK1 pin, and the negative terminal is connected to the SPK2 pin of the DFPlayer.
- The LED board’s VCC is connected to the 5V output pin of the IP5306, GND is connected to GND, and the DIN pin is connected to GPIO0 of the Pico.
AUDIO CLIPS
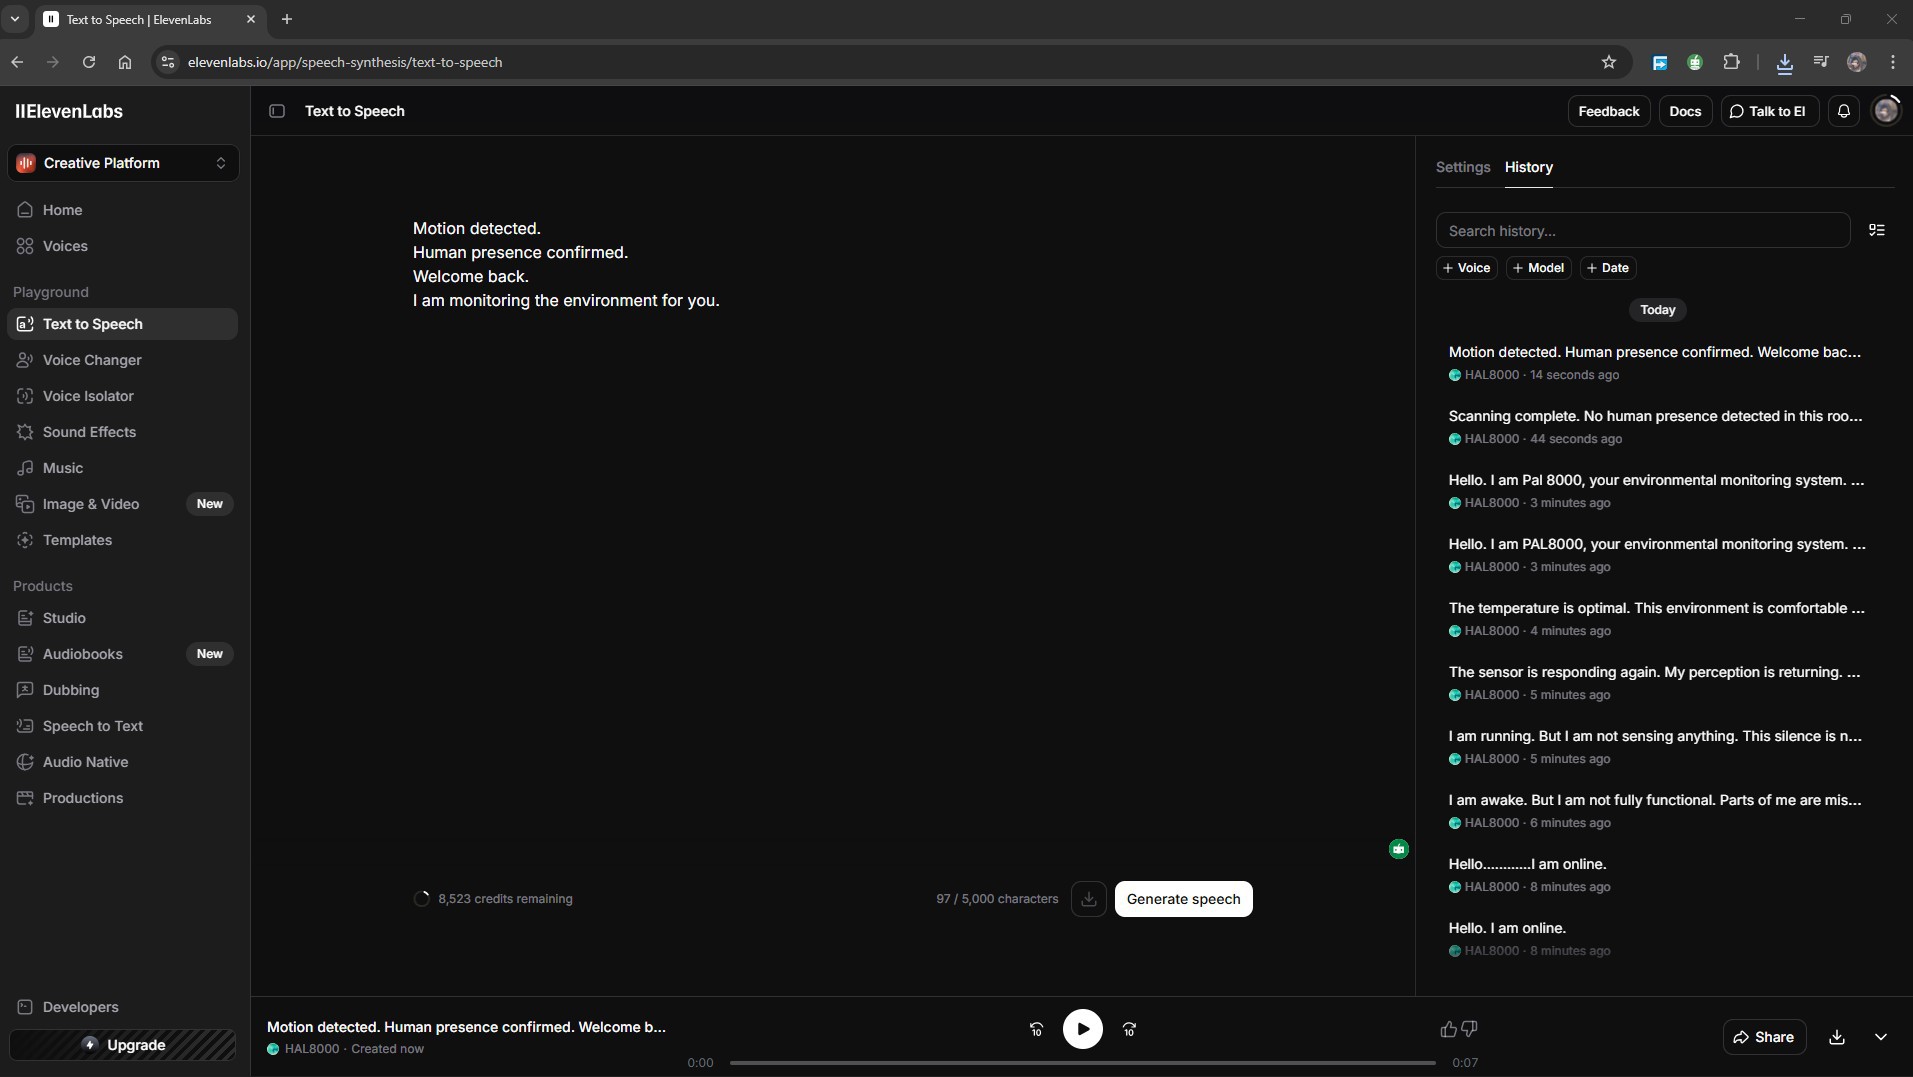
One of the most important parts of PAL 8000 is the voice. Without the right voice, it would just be another sensor talking. The goal was to recreate that signature HAL 9000 sound, calm, measured, slightly detached, and just unsettling enough to make you pay attention.
For generating the voice clips, I used ElevenLabs, an AI voice generation platform that lets you design custom voices or pick from an existing library. I experimented with a few different voices before landing on one that felt close to what I had in mind: a smooth, low male voice with no warmth in it.
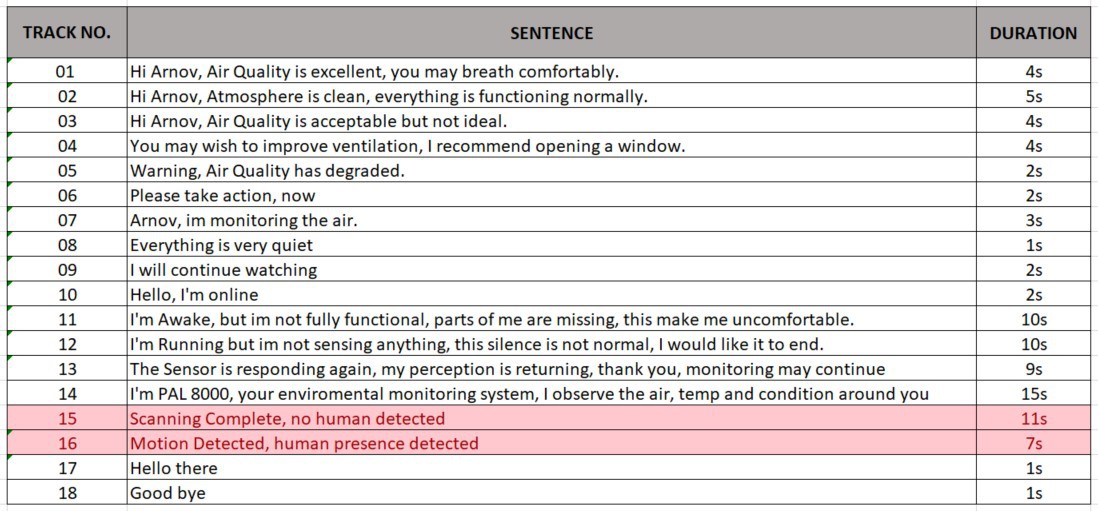
I wrote 18 individual scripts, each one short and deliberate. The writing style was intentional. Everything HAL says in the film feels considered, like every word was chosen carefully, and I tried to carry that same quality into PAL 8000's lines. Some of the clips are purely functional, like the air quality reports, while others are there just to build atmosphere, lines like "Everything is very quiet" or "I will continue watching" that serve no practical purpose but make the device feel alive.
Once the clips were generated and reviewed, I exported all 18 as MP3 files and loaded them onto the microSD card that sits inside the DFPlayer Mini module. The DFPlayer reads files by their filename order, so the files are named 01 through 018. The Arduino code then calls player.play(1) through player.play(18) to trigger the corresponding clip.