 Alex
AlexWhile developing my rover, I had to consider the problem of control. Even though it’s autonomous, manual control is still an important feature for testing and development. There were 2 options:
- Buy a controller + receiver combo for $60
- Spend $40 + 50 hours of work building my own
Naturally, I chose the second option. Designing a controller might sound trivial, especially compared to robots, but it actually poses a few major challenges:
- You have to fit a display, microcontroller, battery, charging module, switches, speaker, audio module, radio, and last but not least, 2 joysticks into a compact enclosure that is also comfortable to hold.
- A controller needs to be portable, which means integrating a battery, charging module, and in this case, wireless charging.
- This controller needs to work with current and future projects, which means creating a protocol that is flexible enough to control a high-speed drone and a slow high-torque rover.
----------------------------------------------------------------------------------------------------------------------------------
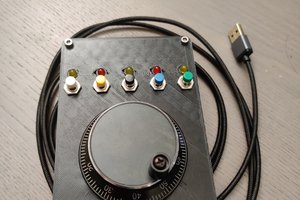
I chose the Raspberry Pi Pico because I was tired of it sitting on my desk, and it conveniently has the processing power this project needs.
I didn't want this to look like a toy.
I wanted it to be sleek, ergonomic, and have a bit more of a rugged aesthetic.
Everything was modeled inside of Fusion 360 and 3D printed out of PETG-CF and TPU. I specifically chose TPU with low infill settings for the grips of the controller to give it a more comfortable feel.
The front of the controller has a mount for a 3in FPV monitor so the user can see both the live video feed and the data on the controller’s display without having to look away.
----------------------------------------------------------------------------------------------------------------------------------
The biggest challenge was the software protocol. I developed a custom packet structure that allows the controller to handshake with the receiver and identify what it’s talking to.
Rover Mode uses high-resolution throttle curves for precise movement.
Drone Mode uses low-latency, high-frequency updates for stable flight.
Building this taught me that ergonomics is an underrated engineering skill.
I went through several iterations of joystick placement and grip angles before it felt right.
There’s a reason commercial controllers look the way they do, but there’s also a lot of satisfaction in knowing every line of code and every solder joint in the device that’s keeping your expensive rover or drone from crashing into a lake.
----------------------------------------------------------------------------------------------------------------------------------
The nRF24l01+PA+LNA radio transceiver module has a hypothetical max range of 1km, although real world conditions vary. I haven’t tested it yet, but I expect a realistic range of around 400m.
The FPV feed is independent of the control link, and its range is determined by the VTX power. I’ve upgraded to a Lollipop 4 antenna on the controller mount to improve signal quality and consistency.
VTX Power | Estimated Range |
25mW | 100-300m |
200mW | 500-800m |
600mW | 1.5-3km |
----------------------------------------------------------------------------------------------------------------------------------
Once the rover and drone are complete, I will finalize the user interface and control settings so that they smoothly integrate with the different requirements of those projects.
I am considering adding data logging; however, this will most likely be done on the robots and drones themselves.

 Nick Rehm
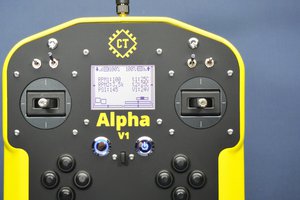
 alireza safdari
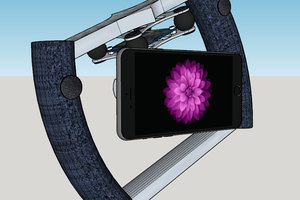
 ken.do