When I designed DevPocket around the ESP32-WROOM-32UE, I made a deliberate choice: pick the UE (external antenna) variant instead of the standard E variant with a built-in PCB trace antenna. The reason is simple — DevPocket is a universal tool. It goes into a magnet-ringed plastic enclosure, gets mounted to phones, placed near other electronics, and used in wildly different environments.
By routing the antenna connection to a standard U.FL/IPEX connector, I leave the door open: you can install a short stubby antenna for desktop use, a high-gain directional antenna for range testing, or a flat flex antenna if you're tight on space. The hardware doesn't dictate the RF strategy — you do.
What I Actually Chose For the reference build I needed an antenna that was:
Cheap (this is a hobbyist open-hardware tool)
Compact enough to fit inside or flush against the enclosure
Tuned for 2.4 GHz (Wi-Fi b/g/n + Bluetooth)
Available widely (AliExpress, LCSC, Mouser)
I settled on a small 2.4 GHz PCB antenna with an IPEX MHF1 connector — the kind that costs $1–2 and is commonly used in routers and IoT devices. The real question was: how well does it actually perform once it's inside a plastic enclosure surrounded by a PCB and a LiPo battery?
That's where the NanoVNA comes in.
A Quick Primer: What is SWR and Why Does It Matter? SWR (Standing Wave Ratio), is a measure of how well an antenna is matched to the transmission line (in our case, the 50Ω trace from the ESP32's RF output to the antenna).
When RF energy travels down a transmission line and hits an antenna with a different impedance, some of that energy reflects back toward the source instead of radiating into the air. These forward and reflected waves create a standing wave pattern. SWR quantifies this mismatch:
SWR = 1.0 — perfect match, 100% of power is radiated (theoretical ideal)
SWR = 1.5 — about 4% of power reflected — excellent for real-world use
SWR = 2.0 — about 11% reflected — acceptable
SWR = 3.0 — about 25% reflected — poor, noticeably degrades range
SWR > 3.0 — the antenna is significantly detuned
For Wi-Fi at 2.4 GHz, a target of SWR ≤ 2.0 across the band (2400–2500 MHz) is the practical goal. The NanoVNA measures this directly by injecting a swept RF signal and measuring the reflection coefficient (S11).
Why measure in three conditions? An antenna doesn't exist in a vacuum — it exists inside an electromagnetic environment. Its resonant frequency and impedance are affected by everything nearby:
The enclosure — even plastic changes the effective dielectric constant around the antenna element, shifting its resonant frequency
The PCB ground plane — a large copper pour beneath the antenna acts as a reflector and can detune it
The battery — a LiPo pouch is essentially a lossy dielectric slab that absorbs and scatters RF
This is why antenna datasheets are largely useless for embedded designs — they measure the antenna in free space on a reference board. Your actual SWR will be different. Testing in three progressive conditions lets you see exactly how much each layer of the design degrades (or shifts) the antenna's performance.
Measurements
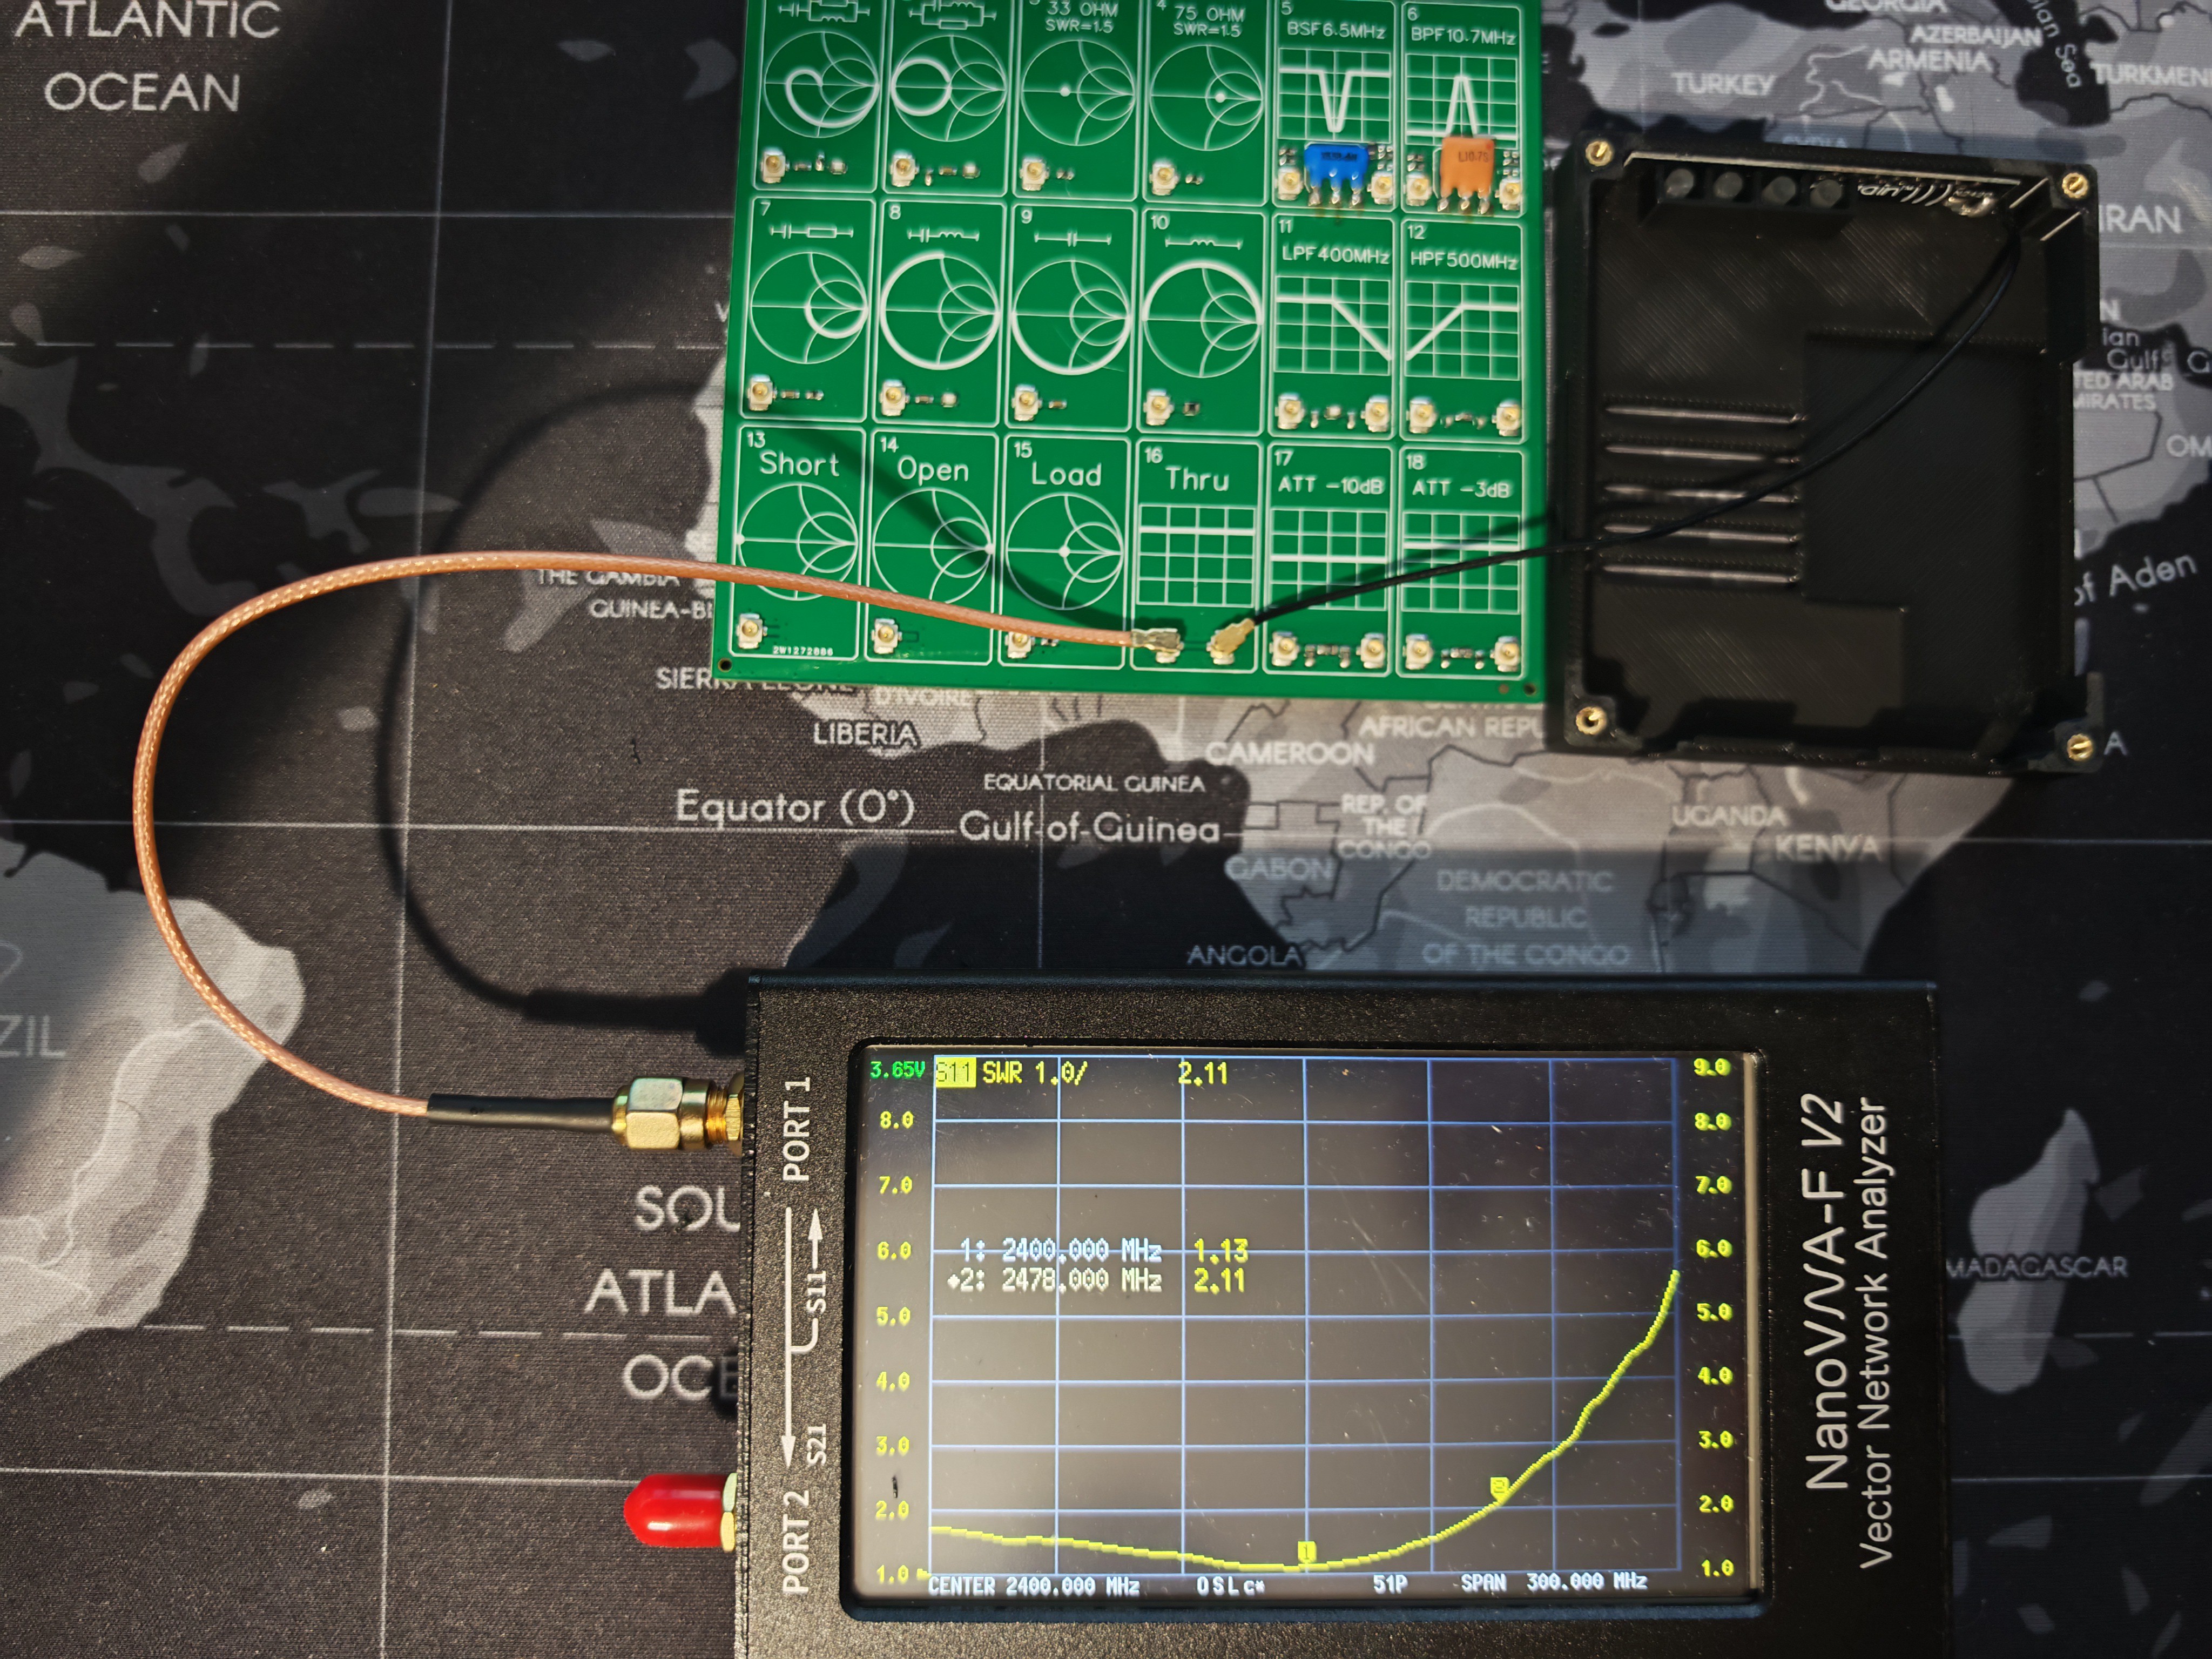
All measurements taken with a NanoVNA (calibrated with the SOLT standard at the U.FL reference plane). Frequency sweep: 2000–2600 MHz.
Antenna alone, no enclosure
SWR(2400MHz) - 1.61
Antenna in enclosure, no PCB
SWR(2400MHz) - 1.13
Antenna in enclosure with full PCB + battery
SWR(2400MHz) - 1.56
Takeaways The NanoVNA is an indispensable $50 tool for any embedded project with RF. Even if you're not designing the antenna yourself, verifying that the chosen antenna still works inside your specific enclosure with your specific board .
What's Next Antenna verified. Time to apply power for the first time.
In Log #2 I'll walk through the first boot of DevPocket: flashing firmware through the CP2102 bridge, what micro-REPL looked like on first connect from an Android phone, and the first scripts. I'll also cover the first real-world use case where DevPocket did exactly what it was designed for: untethered, on battery, magnetically clipped to a phone.
Stay tuned — and follow the project so you don't miss it.
 Ilya Egorov
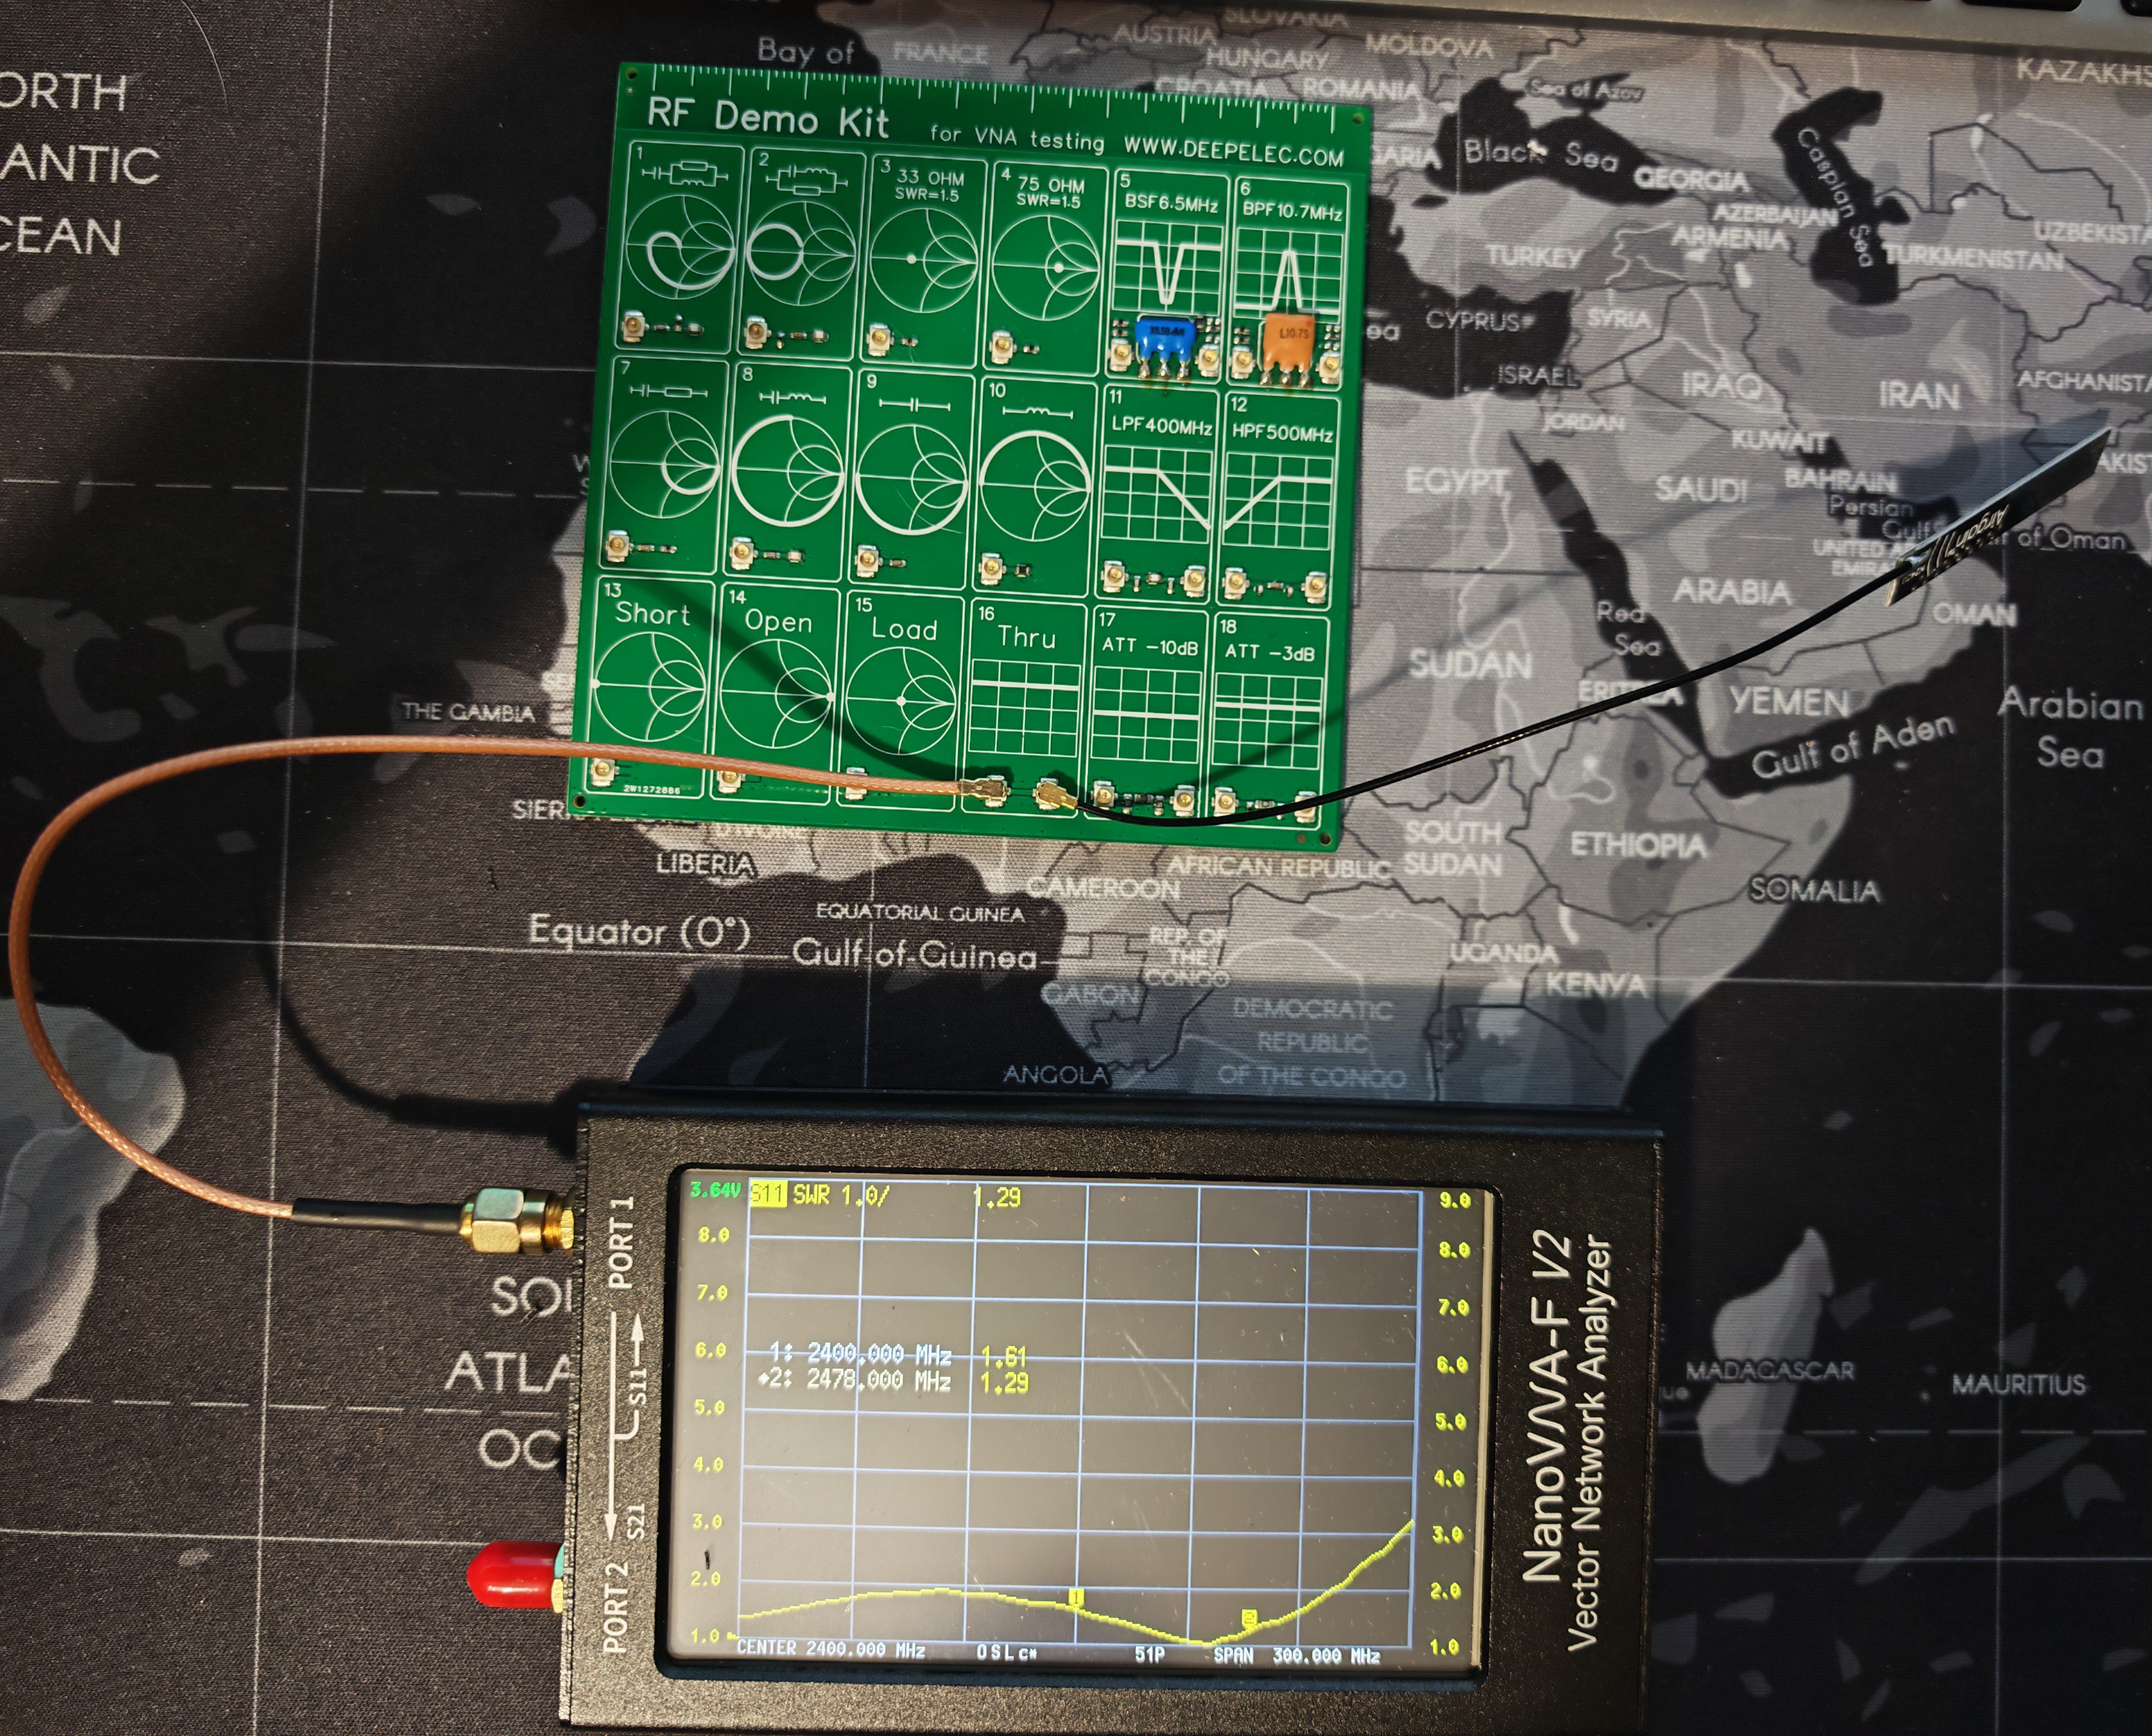
 SWR(2400MHz) - 1.13
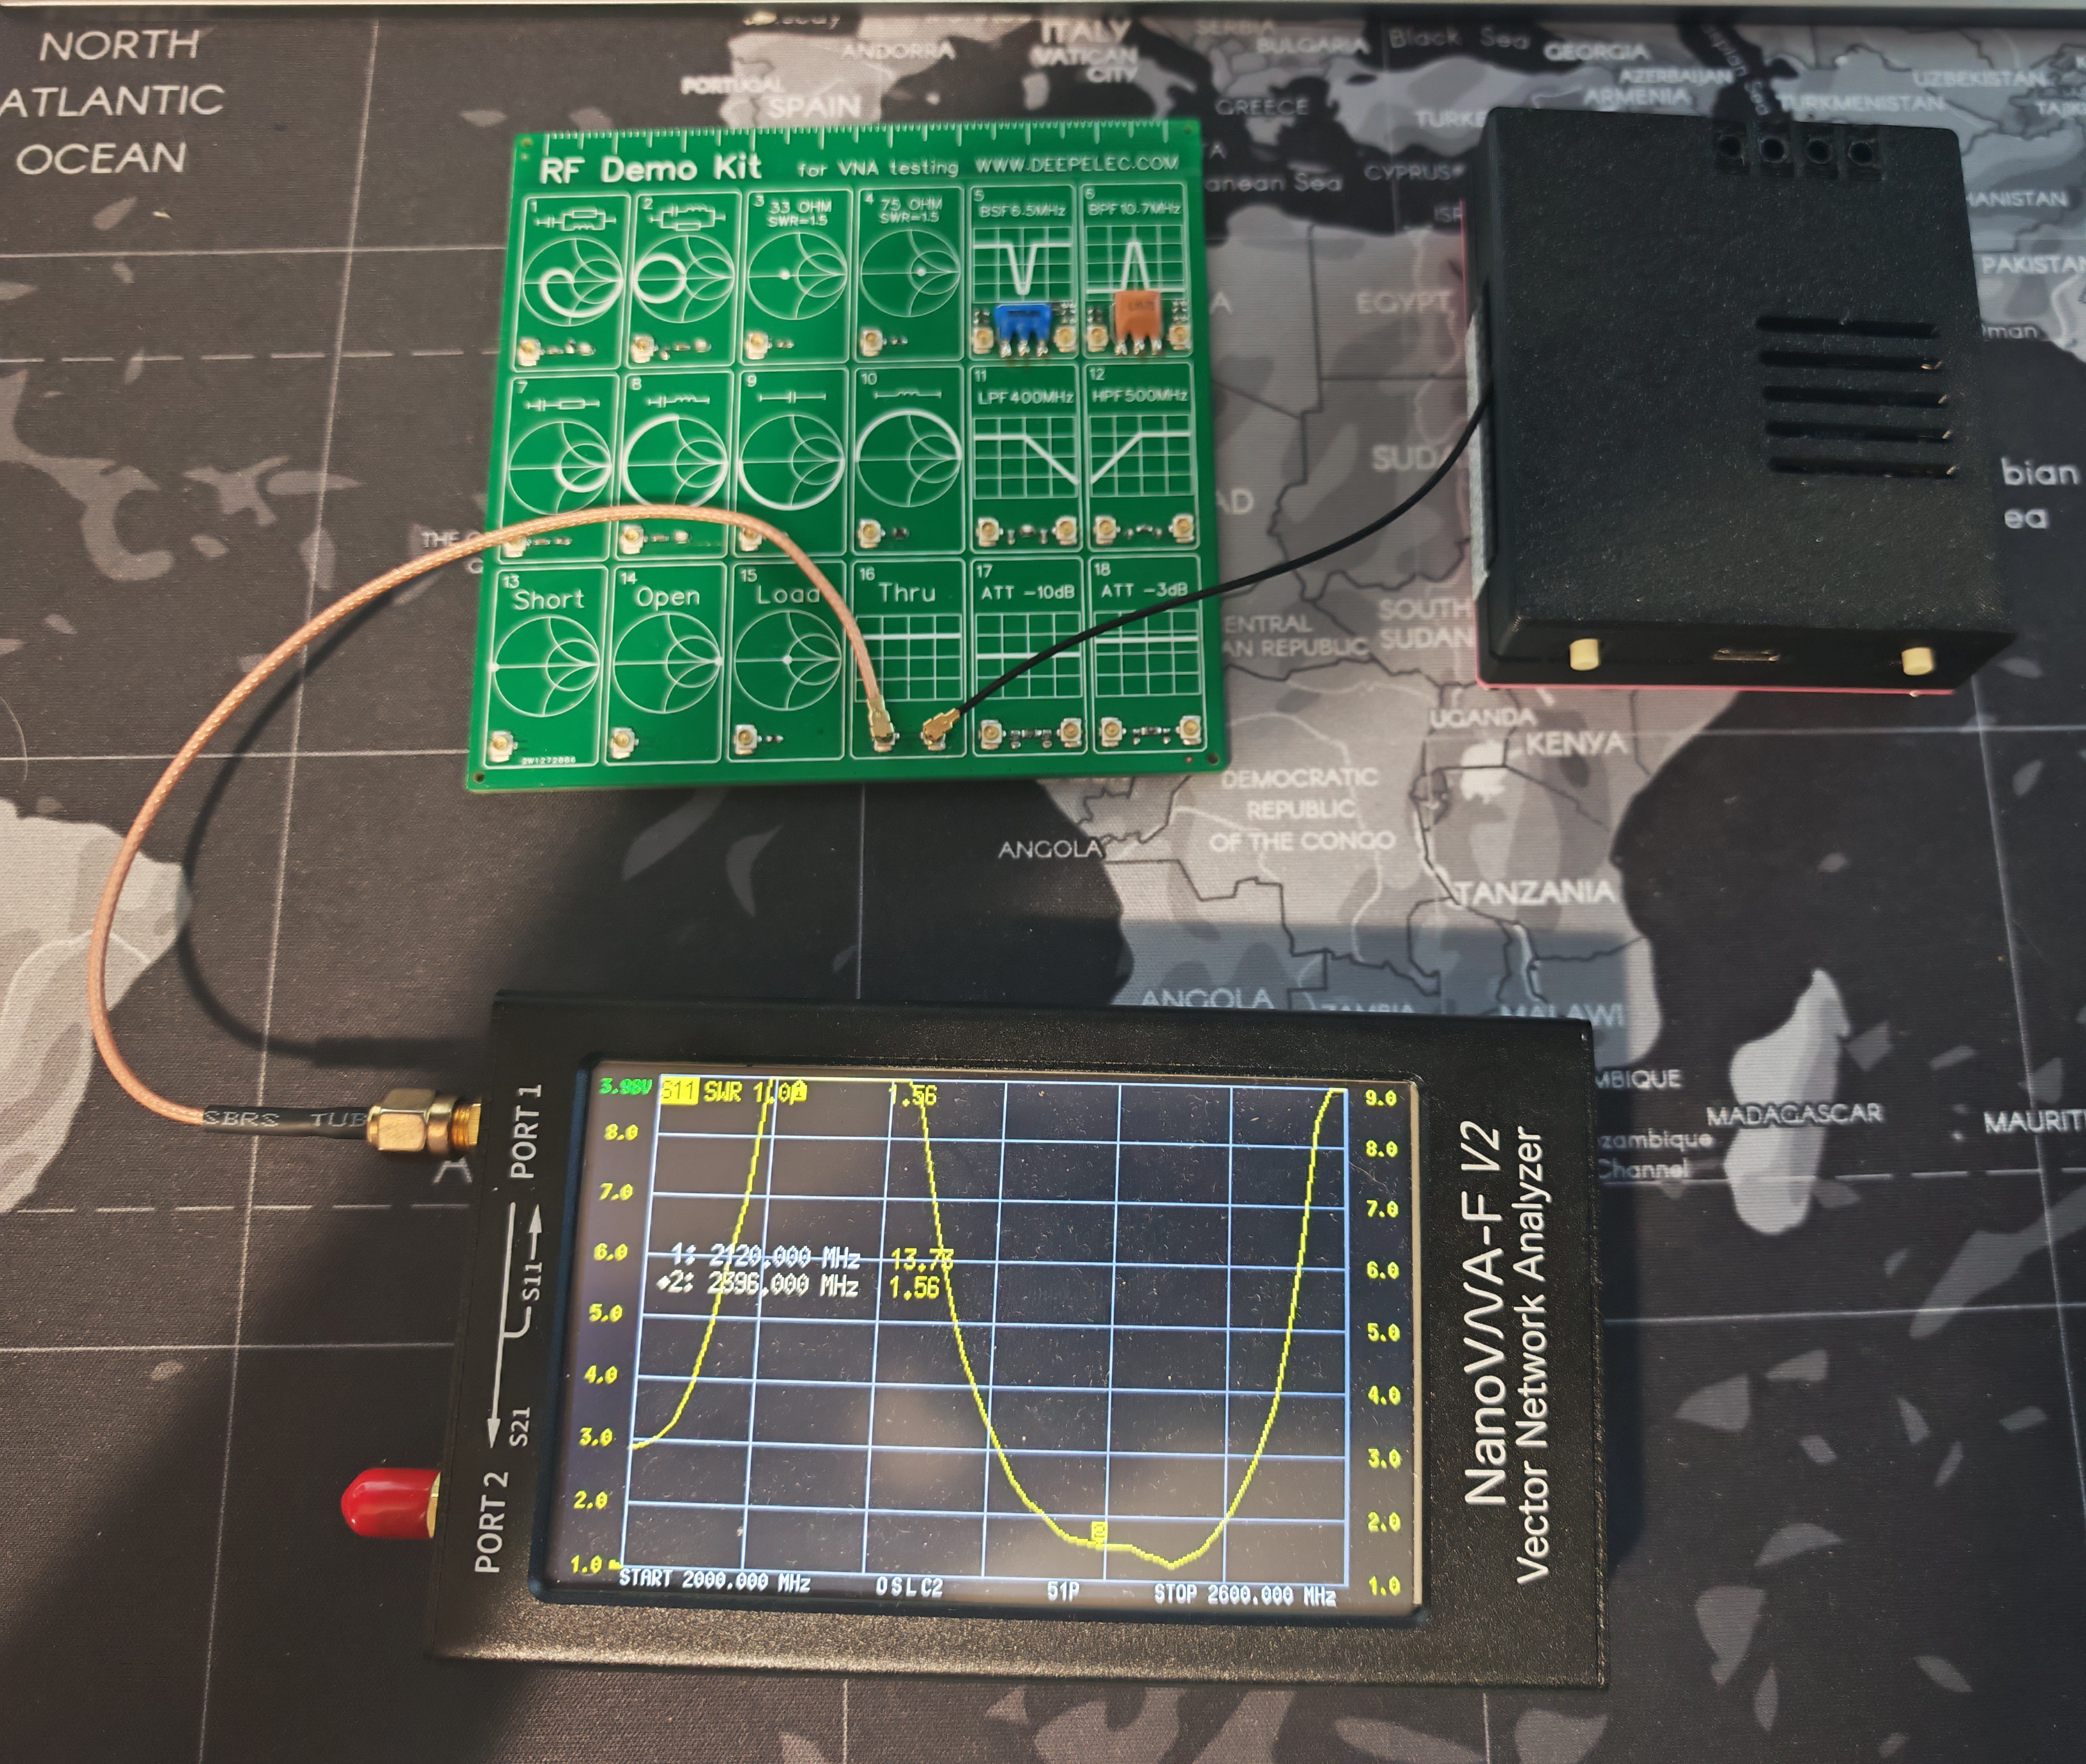
Discussions
Become a Hackaday.io Member
Create an account to leave a comment. Already have an account? Log In.