 ElectroScope Archive
Pocket Arcade: A DIY Handheld Console Built with Arduino
What started as a simple idea, playing classic games on an Arduino, turned into a fully portable handheld console with ten retro-inspired games, onboard sound, and rechargeable battery power.
This project uses the Arduino UNO R4 WiFi as the core platform and combines it with a small OLED display, tactile buttons, and a buzzer to create a pocket-sized gaming system. Every game was coded from scratch in Arduino C++, making this build both a fun electronics project and a practical lesson in embedded game development.
The original project was published on CircuitDigest as “DIY Handheld Arduino Game Console – Full Build Guide + 10 Games.”

Why Build a Game Console with Arduino?
Most Arduino projects focus on sensors, automation, or robotics. This one is different.
By building a handheld game console, you learn:
- Graphics rendering on monochrome OLED displays
- Button scanning and debouncing
- Sound generation with a buzzer
- Menu systems and game state management
- Battery-powered hardware design
- Modular code architecture
And when you are done, you have something genuinely fun to play.
Features
- 10 retro-style games
- 128×64 SSD1306 OLED display
- Four-button control scheme
- Piezo buzzer for sound effects
- Rechargeable LiPo battery
- Power switch and boost converter
- Modular firmware for easy expansion
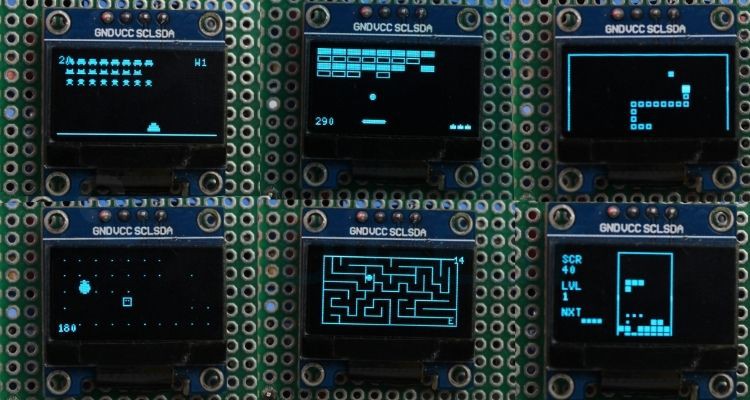
Included Games
This console ships with ten games inspired by arcade classics:
- Snake
- Pong
- Tetris
- Breakout
- Flappy Bird
- Dino Runner
- Pac-Man
- Space Invaders
- Asteroids
- Maze Runner
These are optimised for the limited memory and processing power of the Arduino platform.
Hardware Overview
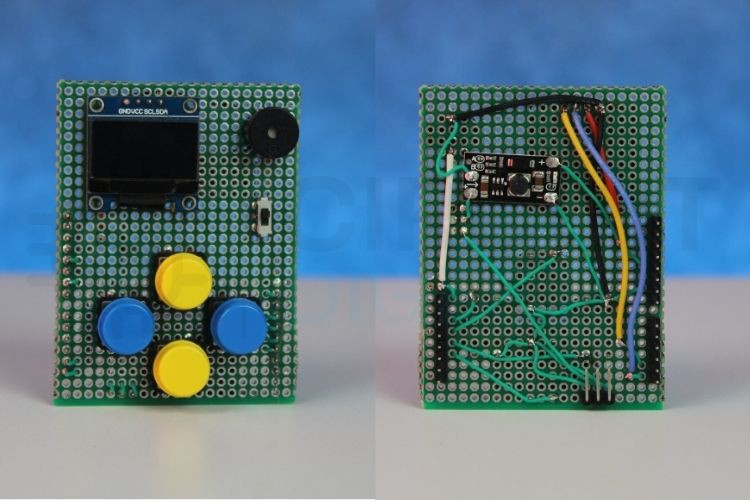
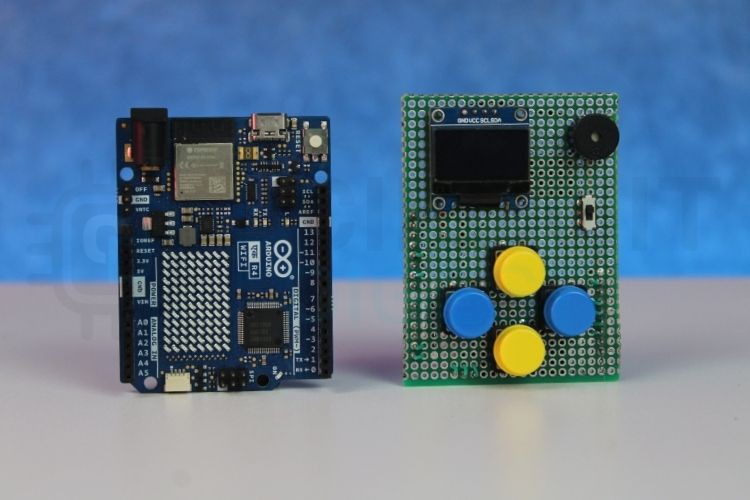
The design is built around a custom perfboard “HAT” that plugs directly onto the Arduino UNO R4 WiFi. This approach keeps the wiring compact and makes the console sturdy enough for everyday use.
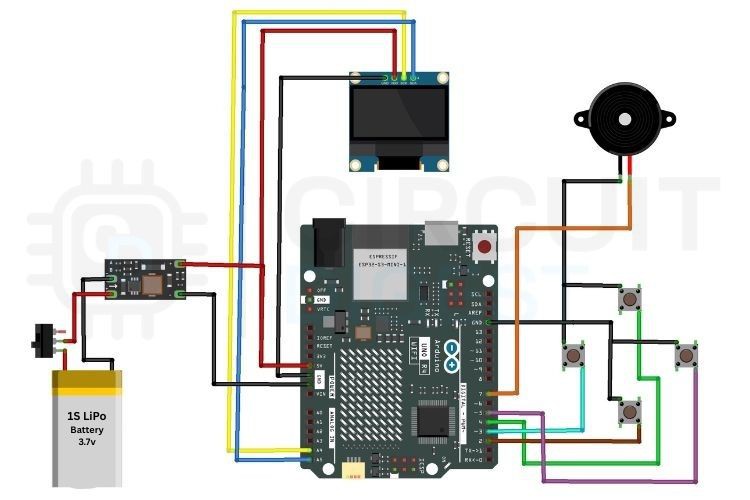
Main Components
- Arduino UNO R4 WiFi
- SSD1306 0.96-inch OLED Display
- Four tactile push buttons
- Active buzzer
- 3.7V LiPo battery
- 5V boost converter
- Slide power switch
- Perfboard
Controls
The four buttons are mapped to directional and menu actions:
- Up / Down - navigate menus or move in games
- Left / Right - select options or perform actions
A software debounce routine filters out mechanical switch noise for reliable input.
Display and Audio
The console uses the U8g2 library to drive the OLED display. This library offered better compatibility with the UNO R4 than the more commonly used Adafruit GFX stack.
A simple buzzer adds sound effects for menu clicks, collisions, and scoring events.
Power System
To make the console fully portable:
- A single-cell LiPo battery supplies 3.7V.
- A boost converter raises this to a stable 5V.
- A slide switch controls power.
This setup allows several hours of gameplay in a compact package.
Software Architecture
Each game is stored in its own header file.
The main firmware handles:
- Splash screen
- Game selection menu
- Button input
- Launching and exiting games
This modular structure makes it easy to add new games without rewriting the core system.
Development Challenges
OLED Library Compatibility
Initial tests with Adafruit GFX produced inconsistent behavior on the UNO R4. Switching to U8g2 solved the issue and improved rendering performance.
Button Bounce
Mechanical switches can generate multiple unintended presses. A 40 ms debounce routine eliminated false triggers.
Memory Management
Game logic and sprites had to be carefully optimized to fit within available resources.
Build Notes
A custom perfboard layout was used instead of a breadboard to keep the design portable and durable.
Helpful assembly tips:
- Use female headers for easy removal
- Verify the boost converter outputs exactly 5V
- Insulate battery connections with heat shrink
- Keep wires short to reduce noise
Future Improvements
Planned...
Read more »