 ElectroScope Archive
Why This Project Matters
Most people only see their electricity consumption as a single number on a monthly bill. That makes it difficult to understand:
- Which devices consume the most power
- When current spikes occur
- How voltage fluctuates throughout the day
- Whether motors or power supplies are operating efficiently
By collecting and visualising real-time measurements, this project makes electrical systems easier to understand and troubleshoot.
Potential applications include:
- Home energy monitoring
- Solar system analysis
- Lab instrumentation
- Industrial load tracking
- Preventive maintenance
- Smart building automation

Hardware Requirements
| Components | Purpose |
| Arduino UNO R4 WiFi | Main controller with built-in Wi-Fi |
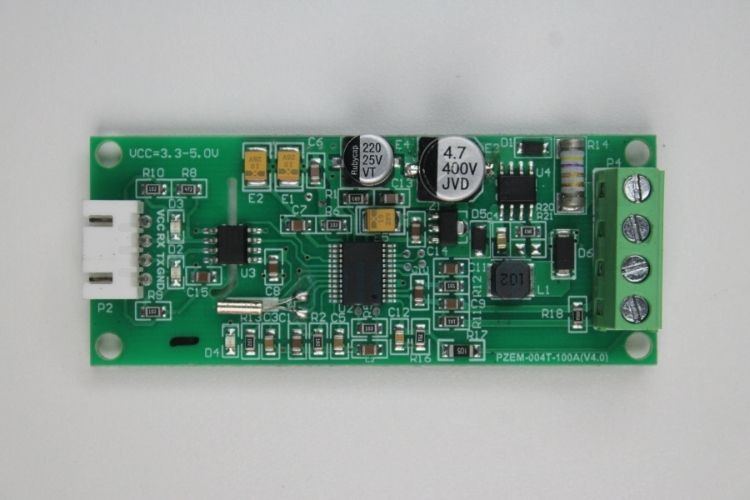
| PZEM-004T v3.0 | AC energy meter with Modbus interface |
| Current Transformer (CT) | Non-invasive current measurement |
| SSD1306 OLED Display | Local readout |
| Push Button | Display mode selection |
| ThingSpeak | Cloud dashboard |
| 3D Printed Enclosure | Safe and clean packaging |

The project follows a simple edge-to-cloud architecture.
- The PZEM-004T measures electrical parameters directly from the mains.
- The Arduino UNO R4 WiFi reads those values over Modbus RTU.
- Data is displayed on the OLED.
- The same values are uploaded to ThingSpeak using Wi-Fi.
- Historical graphs are generated automatically.
This provides both instant local feedback and long-term cloud logging.
System Architecture
AC Mains
   │
   ▼
PZEM-004T + CT Clamp
   │  (Modbus UART)
   ▼
Arduino UNO R4 WiFi
   ├── OLED Display
   └── ThingSpeak Cloud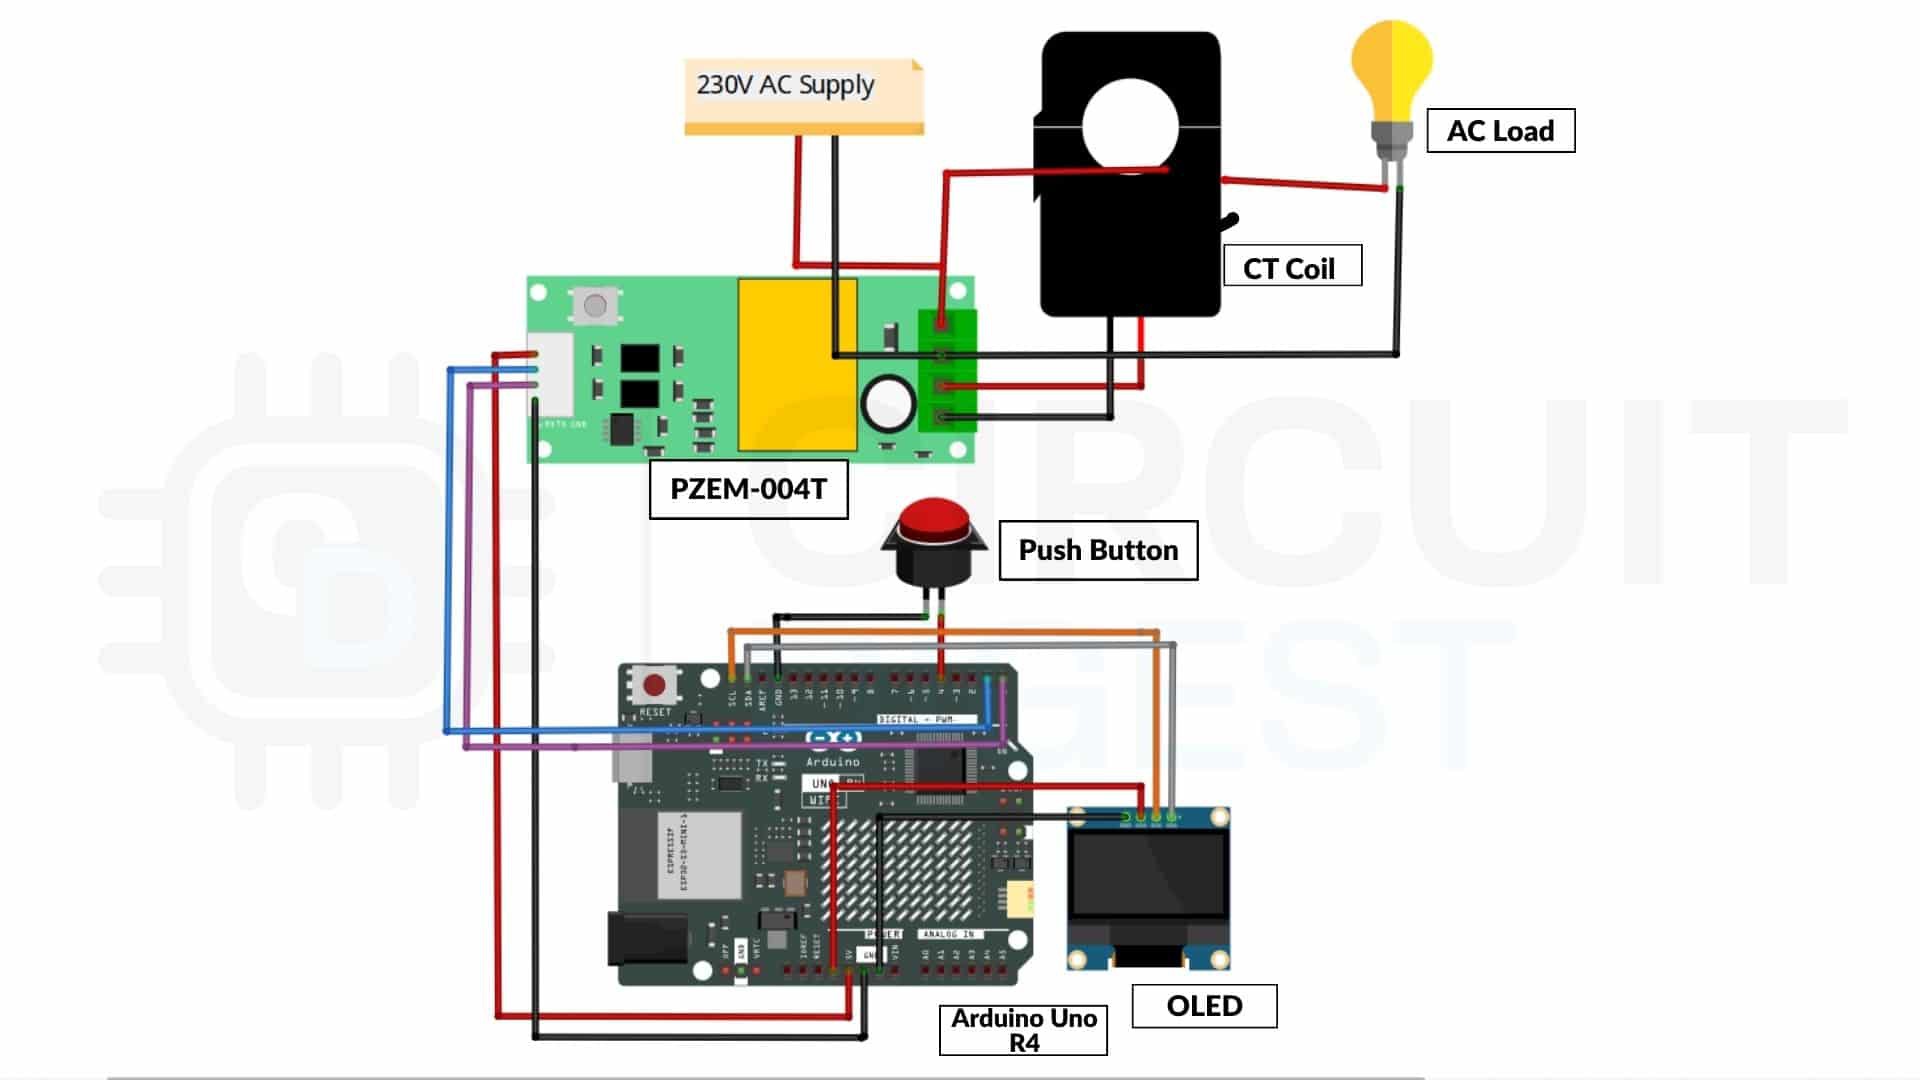
Key Features
- Real-time energy monitoring
- Wi-Fi cloud connectivity
- OLED dashboard
- Non-blocking firmware architecture
- Automatic graph generation in ThingSpeak
- Expandable to multiple circuits
- Custom 3D printed enclosure
Measured Parameters
| Parameter | Description |
| Voltage | Supply health and stability |
| Current | Instantaneous load demand |
| Power | Real power consumed |
| Energy | Accumulated usage over time |
| Frequency | Grid frequency |
| Power Factor | Electrical efficiency |
Why Arduino UNO R4 WiFi?
The UNO R4 WiFi is ideal for this project because it combines:
- Built-in Wi-Fi
- More memory than classic UNO boards
- 32-bit processing power
- Native hardware UART for reliable Modbus communication
That means the firmware can read the meter, refresh the display, and upload to the cloud simultaneously without timing issues.
Firmware Design
The code uses a non-blocking timing structure based on millis().
Independent tasks run at different intervals:
- Read PZEM data every second
- Update OLED display every 500 ms
- Upload to ThingSpeak every 16 seconds
- Handle button input continuously
This approach keeps the system responsive and easy to extend.
Local OLED Display
The OLED provides immediate access to the latest readings.
The push button cycles through:
- All parameters summary
- Voltage screen
- Current screen
- Power screen
- Energy screen
- Frequency screen
- Power factor screen
This makes the monitor useful even without an internet connection.
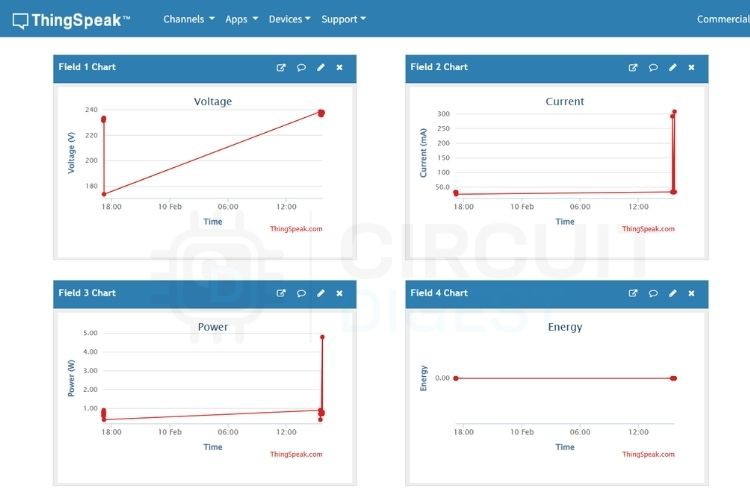
Cloud Dashboard
ThingSpeak stores the uploaded data and plots it automatically.
This enables:
- Daily and weekly energy trends
- Voltage fluctuation analysis
- Startup current spike observation
- Efficiency monitoring
Viewing the graphs over time reveals patterns that are impossible to spot from a single utility bill.
Real-World Observations
Testing the project on household loads produced some interesting results:
- Refrigerators showed sharp inrush current spikes
- Power supplies caused noticeable power factor changes
- Voltage dipped slightly during heavy load switching
- Energy usage increased exactly as expected over time
These observations make the project both educational and practical.
Safety Notes
This project interfaces with mains voltage.
Important precautions:
- Use insulated enclosures
- Never touch exposed AC terminals
- Verify wiring before powering up
- Use properly rated components
- Test with caution
If you are not experienced with AC systems, seek assistance from someone qualified.
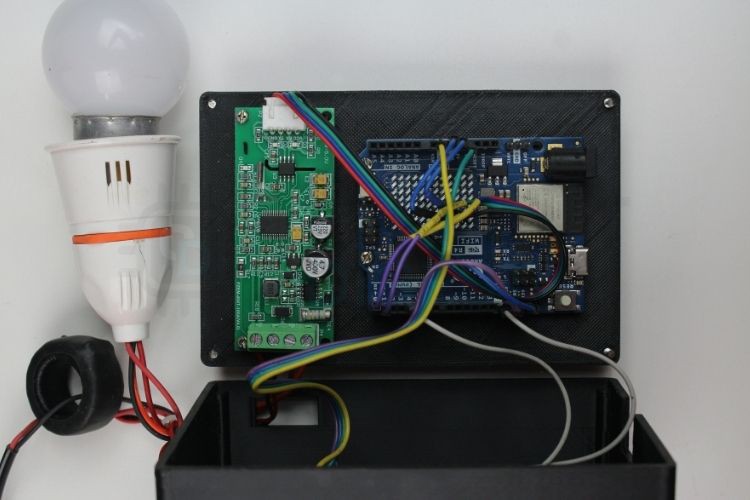
Enclosure Design
To make the project deployment-ready, all electronics were installed inside...
Read more »