Close
0%
0%

Tiny MM Phono Preamp, Li-Po Powered, USB-C Charged

PHONO-EQ-100: a compact, cased MM phono preamp designed to run on a Li-Po battery, over 180 hours per charge, charged over USB-C.

Similar projects worth following
79 views
0 followers
The PHONO-EQ-100 is a finished, cased MM phono preamp measuring about 58 mm x 53 mm x 24 mm. It is designed to run on a Li-Po battery, charged over USB-C, so playback is free of the supply noise that mains power brings. A single 800 mAh cell keeps it running for over 180 hours, long enough to make battery operation genuinely practical, not just a party trick. And while it's priced to be affordable, we didn't cut the corners that matter for sound. There are a handful of deliberate choices inside that you don't usually find at this size, or in this class.

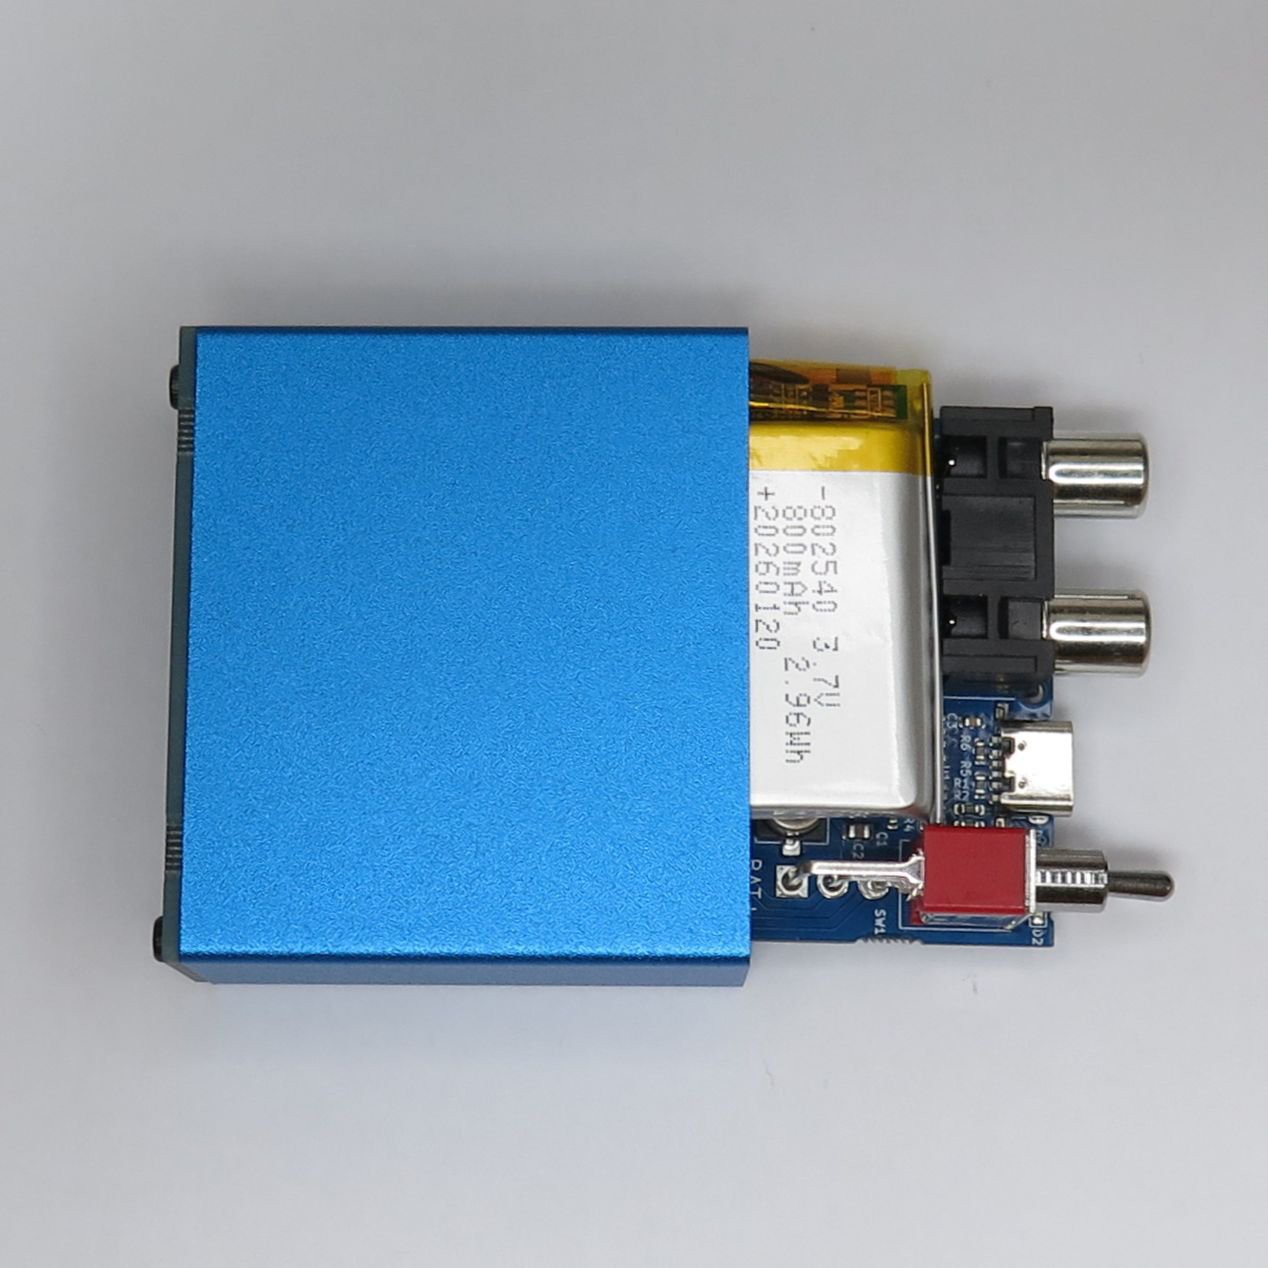
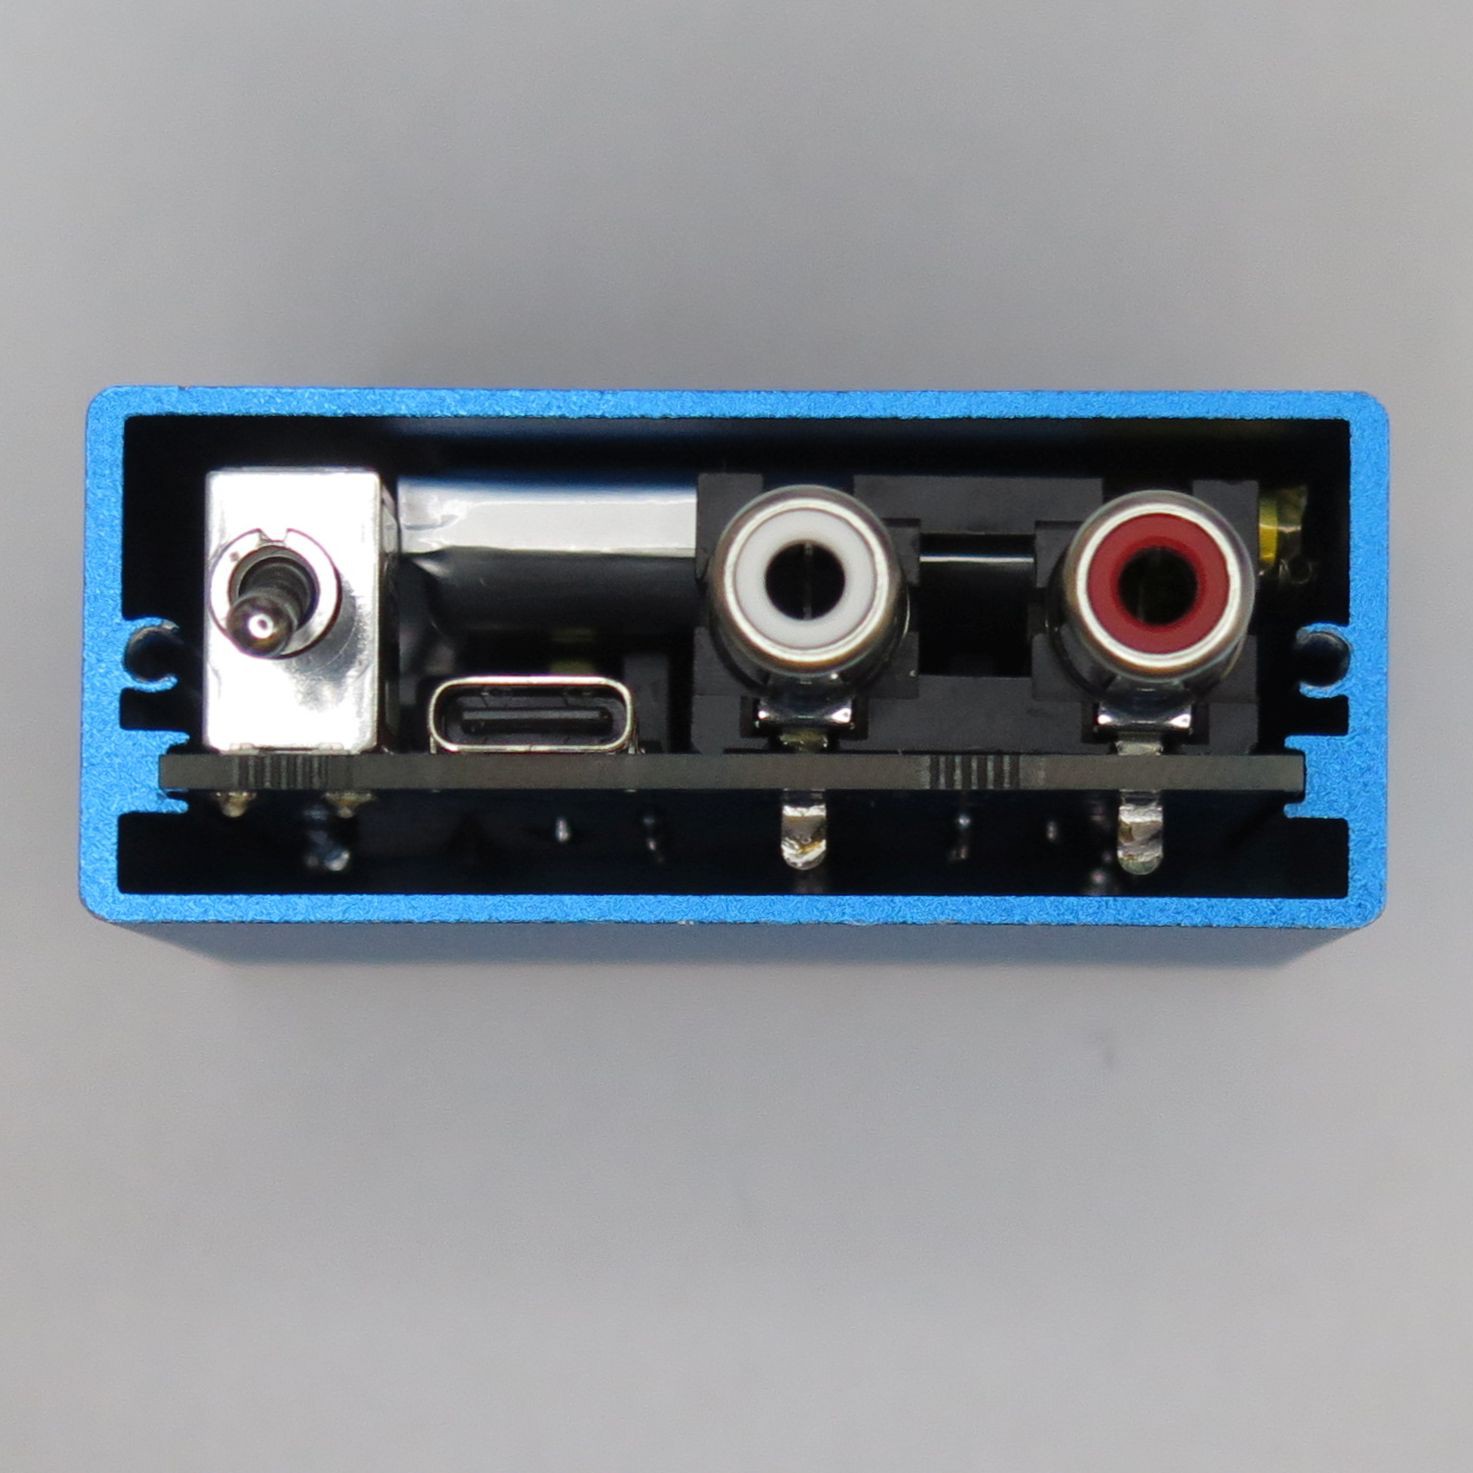
The EQ-100 sets out to close two gaps at once. The first is size. A turntable is already a large thing on the desk, so it’s natural that the size of the phono preamp simply stops being a concern, and most preamps reflect that. Wanting a genuinely tiny one is really a matter of taste, not necessity. But push the size far enough and a clear practical advantage appears: a preamp this small can disappear behind the turntable, or anywhere out of sight, in a setup where the music, not the gear, is meant to be the star.

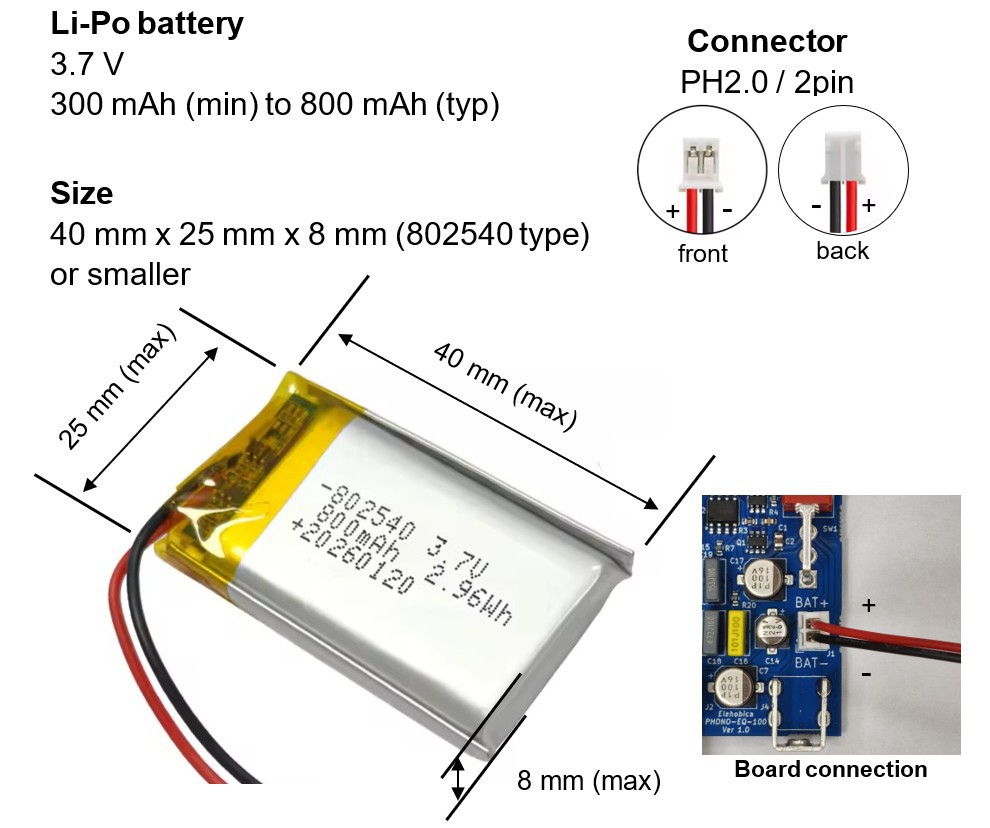
The second is power. As covered above, battery operation is a long-running theme in DIY phono builds, but far less common in something you can buy off the shelf, especially in a small, affordable form that runs on a rechargeable Li-Po and charges over USB-C. That modern middle was the part we wanted to fill.

Small and battery-powered: that combination is the whole idea behind the EQ-100.

The EQ-100 didn’t start life as a product. Back in February 2021 we posted a project here on Hackaday.io called Mini Phono EQ, not a product but an idea: could you hand-build a proper RIAA phono equalizer in a genuinely miniature size? The trick was mounting SOP-8 op-amps on 1.27-to-2.54 mm pitch-conversion boards, squeezing the whole RIAA stage (built around the LME49721 reference circuit) into roughly the footprint of the RCA connector board itself. It worked. But it was very much a builder’s one-off, assembled by hand, wired for our own bench, and never really meant to leave it.

The EQ-100 is what happened when we took that idea seriously as something other people could actually own and use. A proper PCB replaced the hand-mounting. A real enclosure replaced the bare board. USB-C and Li-Po charging went in. And the power scheme was rethought from the ground up. The 2021 build used a rail splitter, and there’s a story in why we deliberately moved away from it (more on that below). Four years on, the core idea is unchanged. Almost everything around it is different.

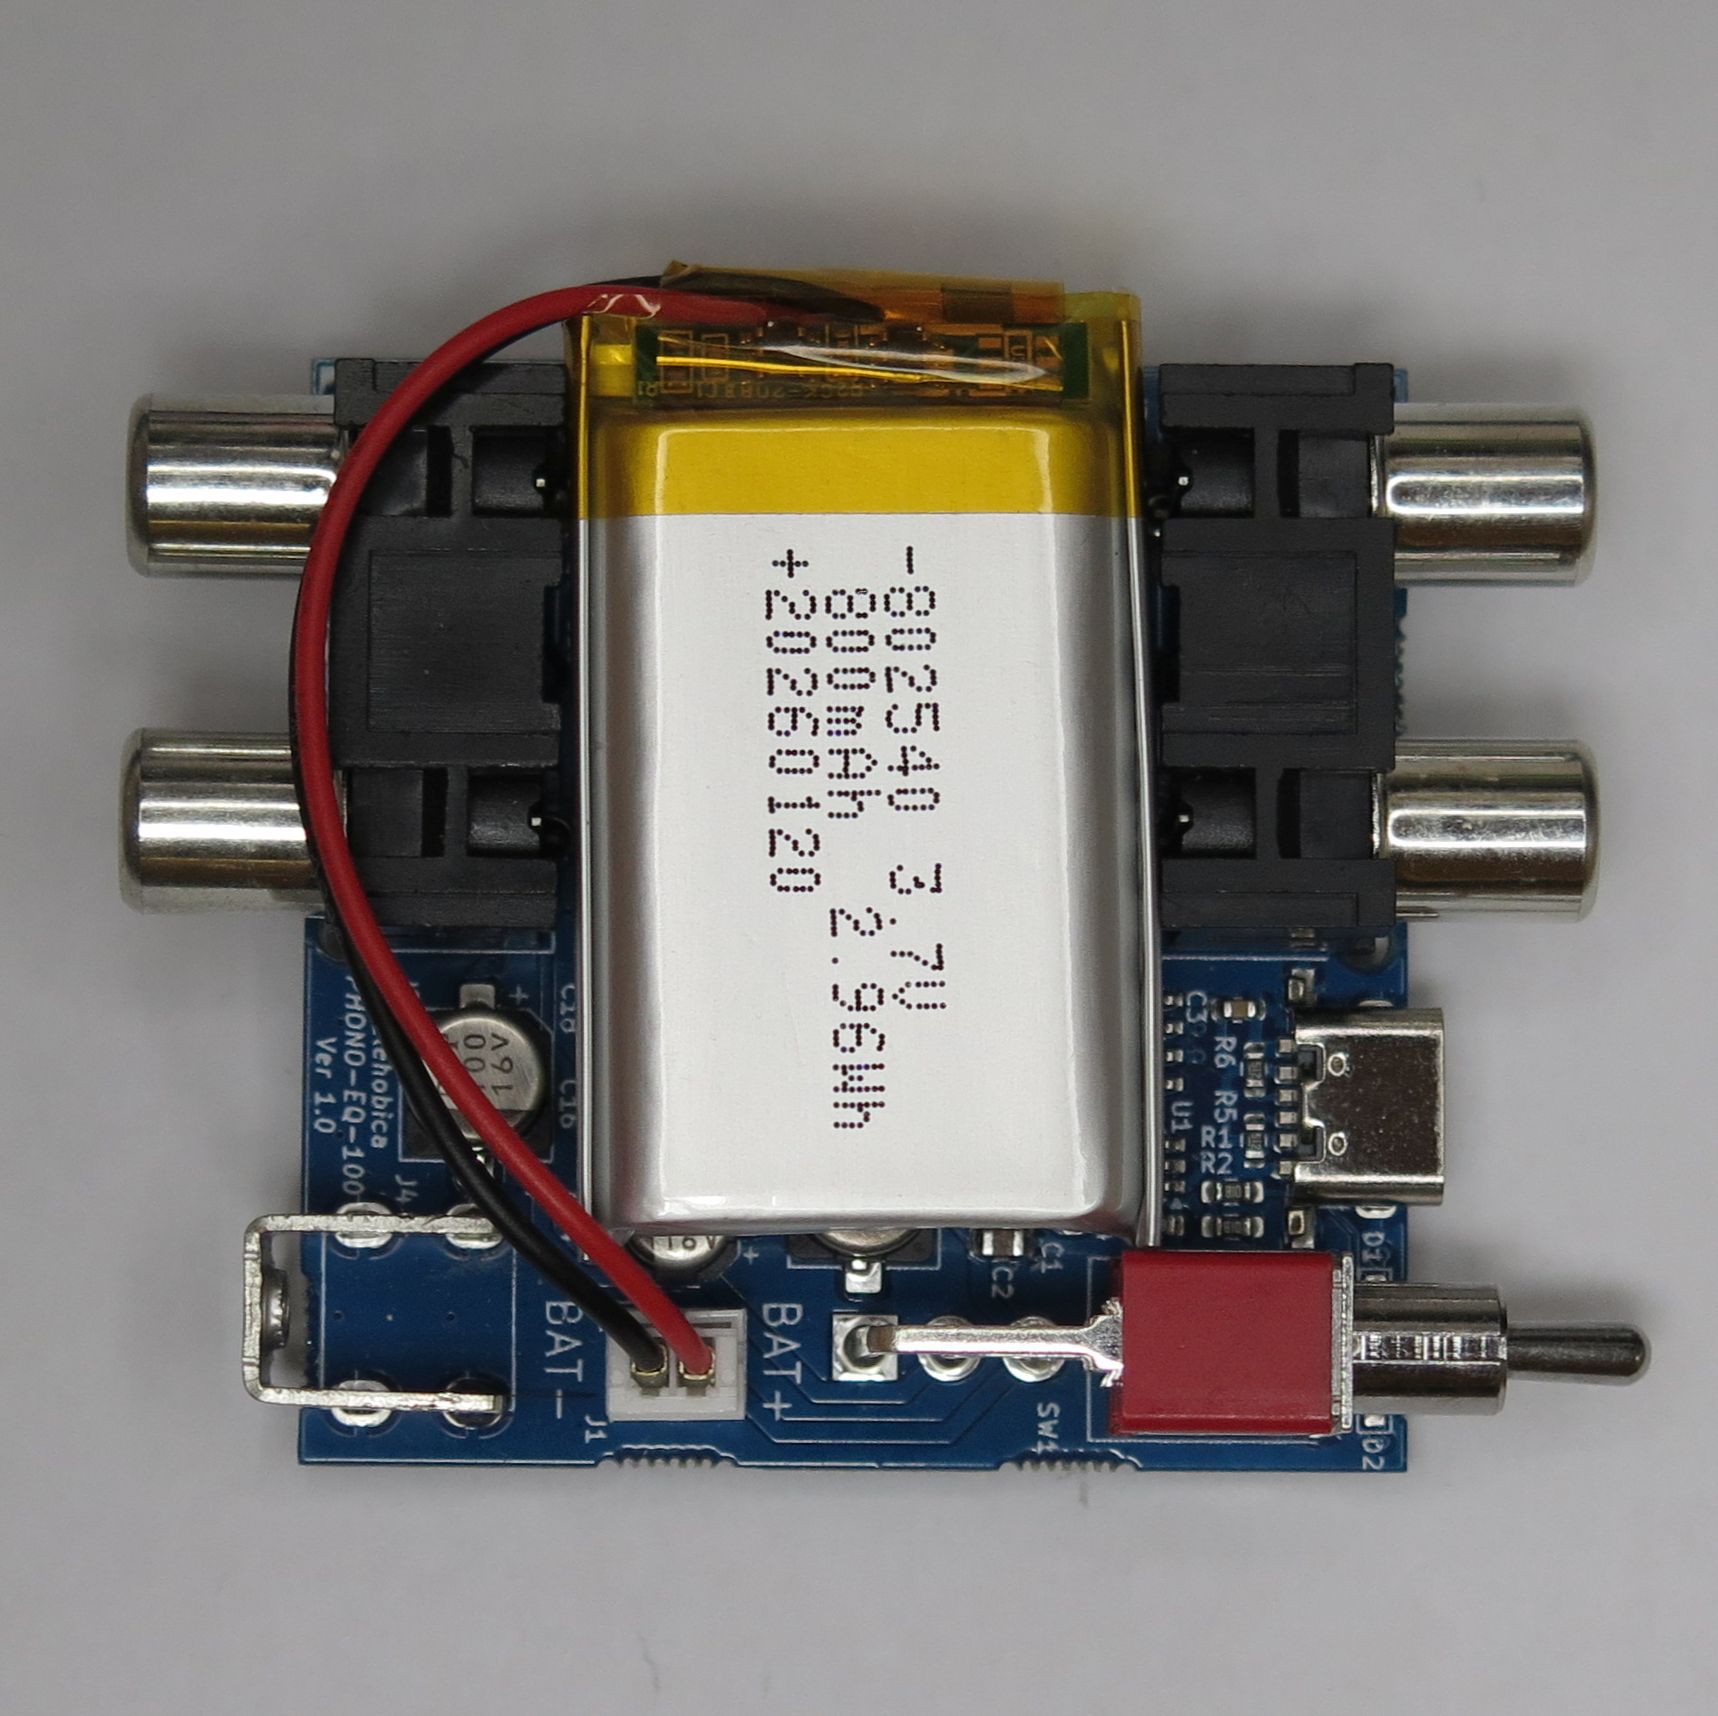
At the heart of the EQ-100 is the LME49721, driving an RIAA equalization stage based on the reference circuit from its datasheet. It’s a clean, steady starting point, and the reason it earns its place here is specific. The LME49721 is a low-voltage op-amp, with a supply range of 2.2 V to 5.5 V, and it has a solid reputation for sound quality within that range. That low-voltage operation is exactly what makes the rest of the design possible.

A Li-Po cell sits at around 3.7 V and only sags to roughly 2.9 V as it nears empty, comfortably inside the LME49721’s range, right up to the point you’d want to recharge. The whole signal path runs on what the battery actually delivers, with margin to spare.

We know some listeners are wary of running op-amps at low voltage, and that’s a fair instinct. The obvious alternative would be to swap in a higher-voltage op-amp and feed it from a boost converter that steps the battery up: a perfectly valid approach. On the other hand, a boost converter is a switching circuit, a small noise generator sitting right next to a stage that exists to amplify millivolts, and dealing with that noise is a project in itself. For this product, we wanted the simplest path, so we kept the boost converter out of it and run the LME49721 directly from the battery.

Once the circuit topology is settled, what’s left is the parts. Within what makes sense for a preamp in this class, we used good ones wherever they reach the signal.

The capacitors that set the RIAA curve are film types. These are the parts that actually shape the equalization, so they have a direct hand in how the preamp sounds. The input and output coupling capacitors are Japanese electrolytics, again chosen for the sound. In the power supply, smoothing is handled by a Japanese electrolytic for the low frequencies paired with a multilayer ceramic for the high frequencies, a common and sensible split that keeps the ceramics out of the audio path. The signal path is physically laid out as...

Read more »

PHONO-EQ-100_battery_guide_ver1.3.jpg

Battery selection guide

JPEG Image - 126.80 kB - 06/06/2026 at 01:12

Preview

  • 1
    Battery Selection Guide

    The EQ-100 is designed to run on a Li-Po battery, but the battery itself isn't included. Shipping a product with a battery already installed runs into strict transport regulations. A battery is also a safety-critical part, so instead we explain exactly what kind of battery to look for, allowing you to understand the requirements fully and choose the right one yourself.

    With a battery connected, the power feeding the audio circuit stays clean, whether the unit is charging over USB-C or running on the battery alone. The preamp was designed around battery operation, so running without a battery is not recommended: some ripple will remain on the supply rail. For the cleanest playback, keep a battery connected.

    What the battery needs to be A rechargeable Li-Po cell, 3.7 V nominal. It has to fit inside the case, so 802540 (40 mm x 25 mm x 8 mm) is the largest that goes in, and anything smaller in each dimension is fine. Capacity should be 300 mAh or more, with around 800 mAh being a practical upper size. The connector must be PH2.0 / 2pin, and only PH2.0 / 2pin. Note that PH2.0 also comes in a 3pin version, which will not work here, so check the pin count, not just the connector name.


    Check the polarity (important) First, the connector itself must match. If the battery’s connector is not PH2.0 / 2pin and does not fit the connector on the board, never force it in or try to connect it in any way. Beyond that, polarity is the one thing you must get right. Even with the correct PH2.0 / 2pin connector, the red and black wires are not always wired the same way from one supplier to the next. The plug can fit perfectly and still have reversed polarity, which will definitely cause damage to the battery or the board. Before connecting, check the polarity by its wire color, and if it is reversed, never connect the battery to the board. Do not try to swap the wires by hand: that risks a short circuit. The only rule you follow is to obtain a battery whose polarity is already correct.


    Finding one Stock comes and goes, so it’s better to search by the requirements than to chase a single product. Search terms like “802540 3.7V lipo PH2.0 2pin” are a good starting point. When it arrives, check it once more against the size, capacity, connector shape (PH2.0 / 2pin), and polarity described above.

    Opening the case To reach the battery connector, you need to open the case. First, remove the ground terminal screw on the back panel. Then remove the two fixing screws on the sides of the front panel using a 2 mm hex wrench. The front panel then comes off, and you can pull the board out to reach the battery connector inside.

    Connecting it Once the polarity is confirmed, plug the PH2.0 / 2pin connector into the battery terminal on the board with the power switched off. Before use, double-check that the BAT+ and BAT- silkscreen markings on the board correspond to the red and black wires of the battery respectively. If the battery is connected correctly, the red LED will light when charging over USB-C, and the green LED will light when fully charged over USB-C. If instead the LED is blinking, the battery is not connected correctly: check it again, and if the problem is not resolved, disconnect the battery from the connector and stop using it.

    We accept no responsibility whatsoever for any damage or accident to the product or surrounding equipment caused by incorrect connection or misuse of the battery.

View all instructions

Enjoy this project?

Share

Discussions

Does this project spark your interest?

Become a member to follow this project and never miss any updates