Florin Costa

Chapter 1: DIN Pi Case Assembly - DIN Rail case for Raspberry Pi
The DIN Pi Case is a modular, stackable DIN rail enclosure system that turns a Raspberry Pi and its HATs into cabinet-ready automation equipment:
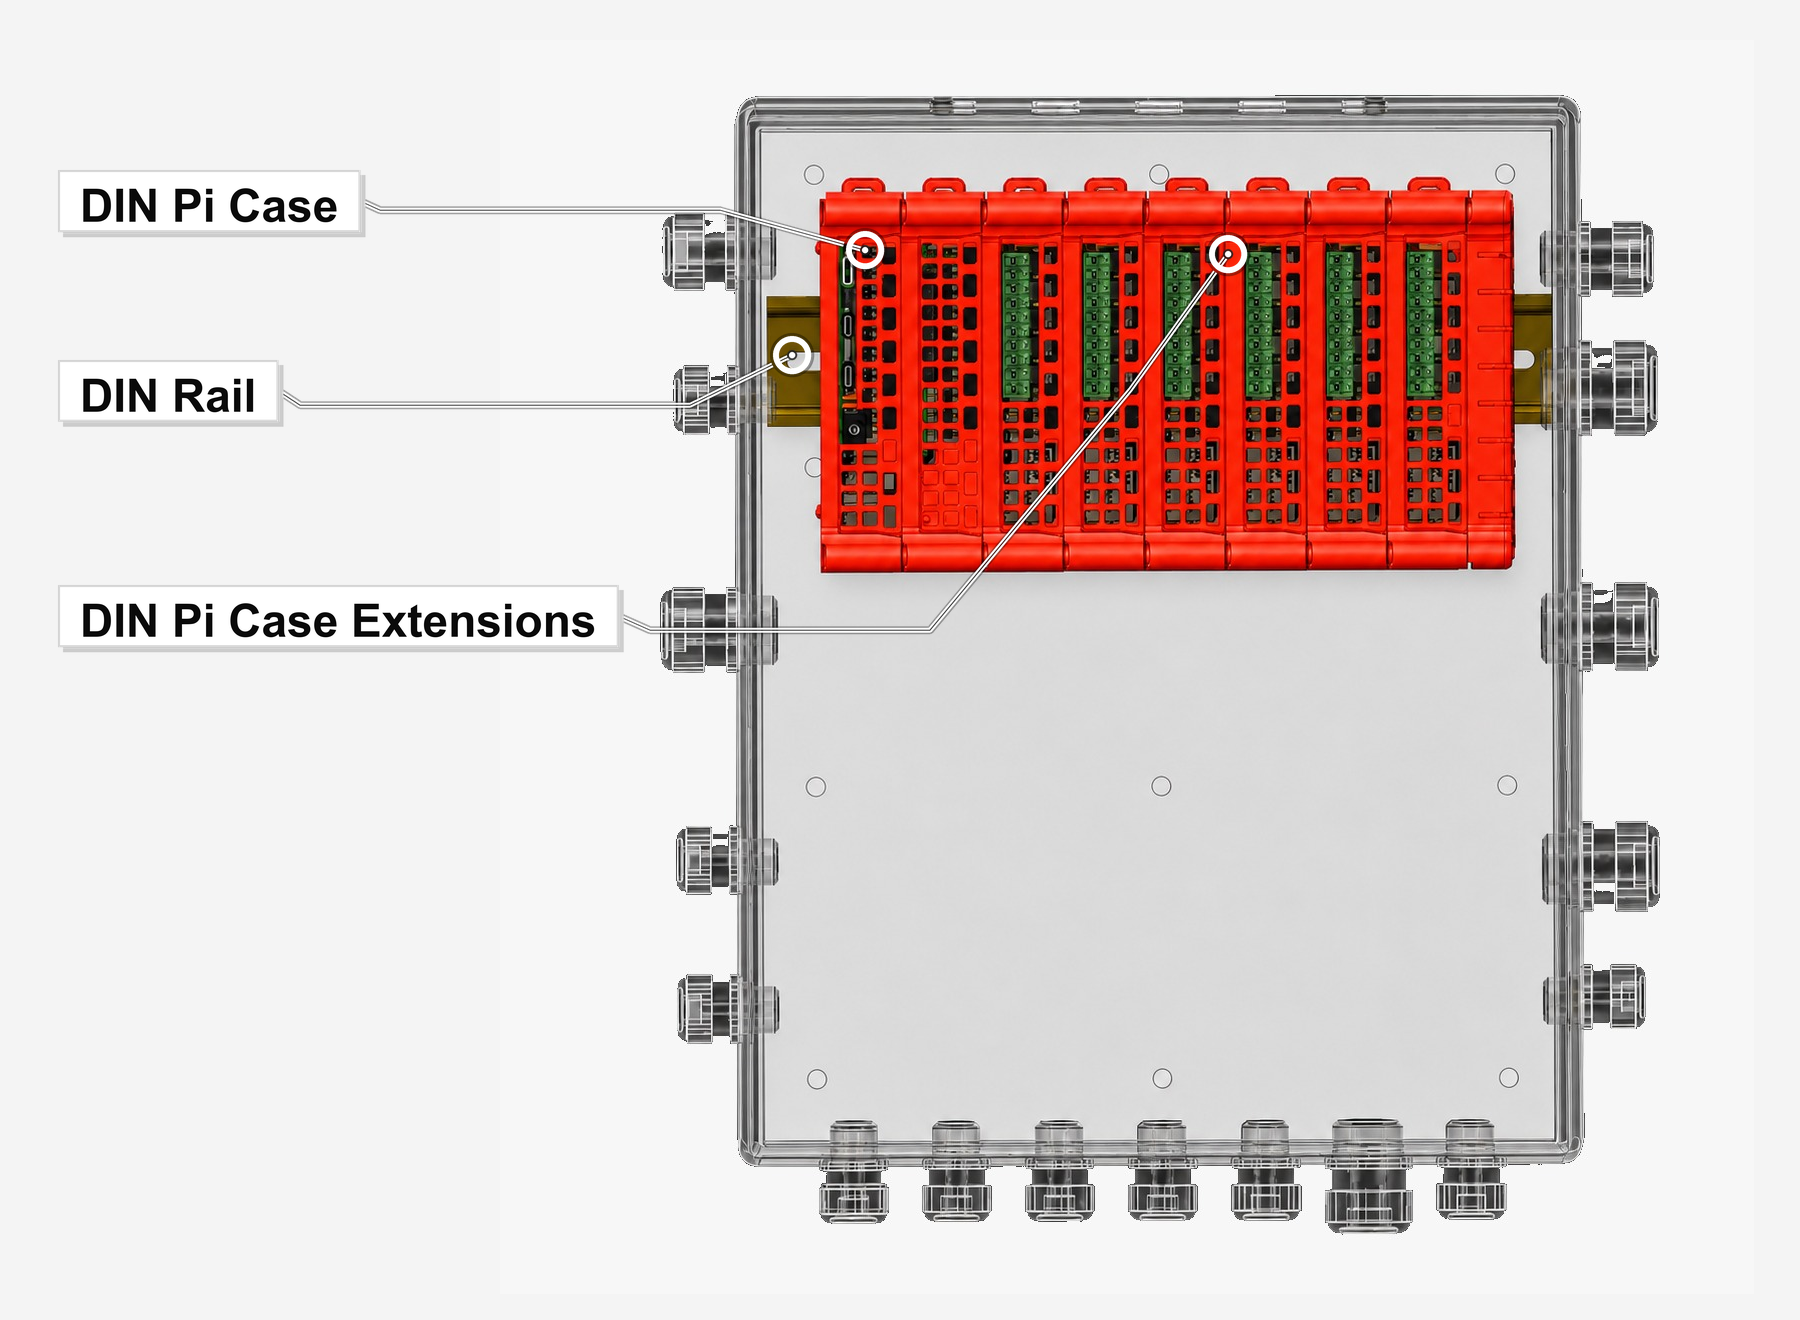
This assembly shows the DIN Pi Case as a complete stackable DIN rail solution for Raspberry Pi-based automation projects. Stackable design also improves serviceability. Modules can be organized in a predictable order, wiring can be routed more cleanly, and the system remains easier to inspect, upgrade, or adapt later. This is especially useful for automation panels, monitoring systems, data logging, gateways, home automation cabinets, test benches, and industrial prototypes.
Key advantages of the stackable assembly:
- Modular Raspberry Pi and HAT integration
- Standard DIN rail mounting
- Clean cabinet layout
- Expandable stack for multiple HATs
- Better protection for the electronics
- Easier wiring and inspection
- Professional appearance inside automation panels
- Suitable for PLC-adjacent projects: home automation panels, monitoring, gateways, test benches, and industrial prototypes
The goal of this design is to make Raspberry Pi-based projects easier to integrate into real control cabinets: organized, expandable, serviceable, and mechanically aligned with the way professional automation hardware is installed.
The goal is not to replace a PLC where a PLC is the correct tool. The goal is to make Raspberry Pi-based automation projects easier to integrate into the same professional environment: mounted on DIN rail, protected, organized, stackable, and ready to live inside a real electrical cabinet.
System Modules
- DIN Pi Case (base) — houses Raspberry Pi 3 / 4 / 5 Model B
- DIN Pi Case Extension — for the HATs we manufacture
- DIN Pi Case Extension (incl. header) — for third-party HATs; includes the required 40-pin header, height 26.5 mm
Modules align with press-fit pins, snap securely together, and can be separated for maintenance without damage.
Chapter 2: Development Journey in Brief
This project has been evolving for several years.
1. The Tinkercad Prototype
The first version was designed in Tinkercad. It proved the core idea: a modular Raspberry Pi enclosure that mounts on DIN rail. The stackable concept worked, but the printed alignment pins had a serious weakness. Because the pins were printed vertically, they often sheared or delaminated during disassembly:
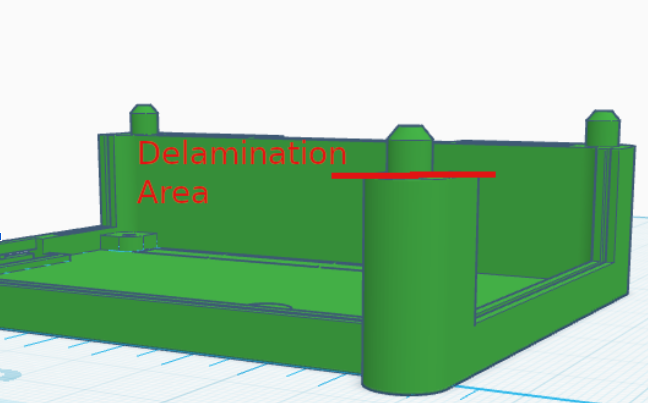
That single mechanical issue stopped the project for nearly two years.
2. The Injection Molding Attempt
I later worked with a mechanical engineer experienced in automotive plastic parts.
- We redesigned the case for injection molding:
Draft angles, wall thickness, snap fits, ribs, tolerances, moldability.
- The design became more professional, but the mold cost was too high. Tooling plus the first production run was quoted at more than $30,000 USD.
- For a side project, that was not realistic.
3. The Crowdfunding Dead End
- Crowdfunding looked like a possible way to finance the tooling.
- Kickstarter was not directly available for creators from Romania at the time.
- Indiegogo was possible, but launching without an existing audience would have been a major risk.
- Without a community, mailing list, or media coverage, the campaign would have started from zero.
- The project was paused again.
Chapter 3: The Elegant 3D-Printing Fix
A few months ago, after years of thinking primarily about injection molding, I decided to revisit the original 3D-printed design one last time.
Instead of accepting the weakness of vertically printed pins, I asked a different question:
What if the pins didn’t have to be printed vertically at all?
The solution turned out to be surprisingly simple:
 |
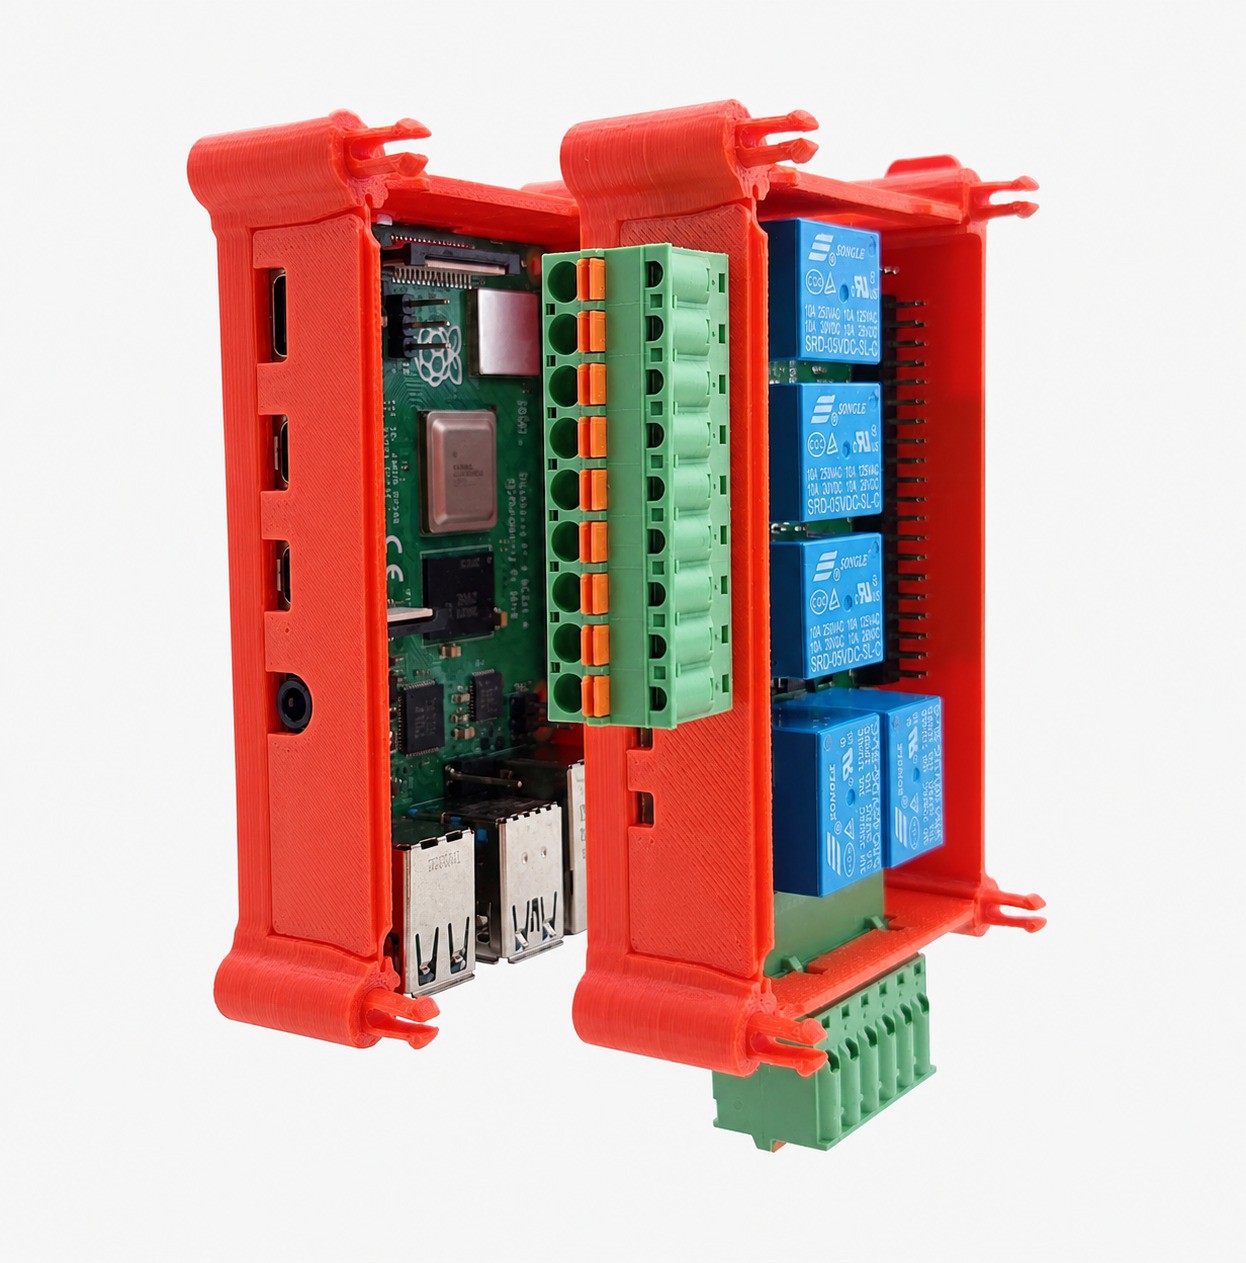 |
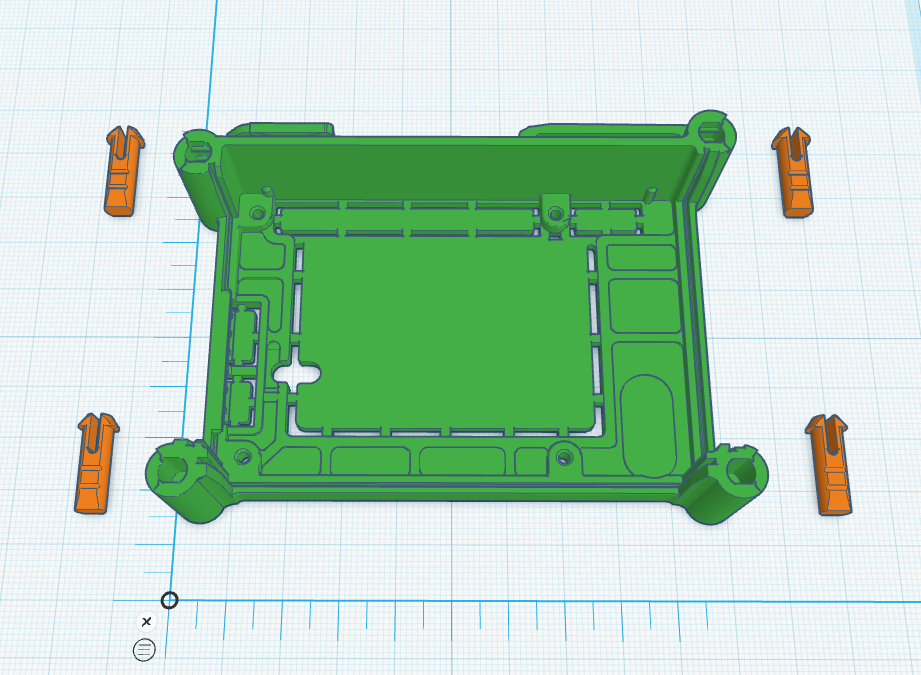
Instead of printing the alignment pins as part of the enclosure, I redesigned them as separate components. They are now printed horizontally, where the layer orientation gives them dramatically higher mechanical strength. The enclosure itself...
Read more »
 Maksim Surguy
 AlfredC
 Sabas
Sabas