 Rohan Barnwal
Introduction
Thermal printers are everywhere.
Whether you're printing shopping receipts, restaurant bills, parking tickets, shipping labels, or queue tokens, chances are you've interacted with a thermal printer at some point. Unlike traditional inkjet or laser printers, thermal printers produce text by selectively heating special thermal paper, eliminating the need for ink cartridges or toner.
Because of their speed, reliability, and low operating cost, thermal printers have become one of the most popular output devices in embedded systems and IoT applications.
If you've ever wanted to add a printer to your Arduino or ESP32 project, you'll be happy to know that it's much easier than it might seem.
In this tutorial, we'll interface a QR204 Thermal Printer with the ESP32-S3-BOX-3. Rather than building a complicated billing system or receipt printer, we'll start with the simplest possible example.
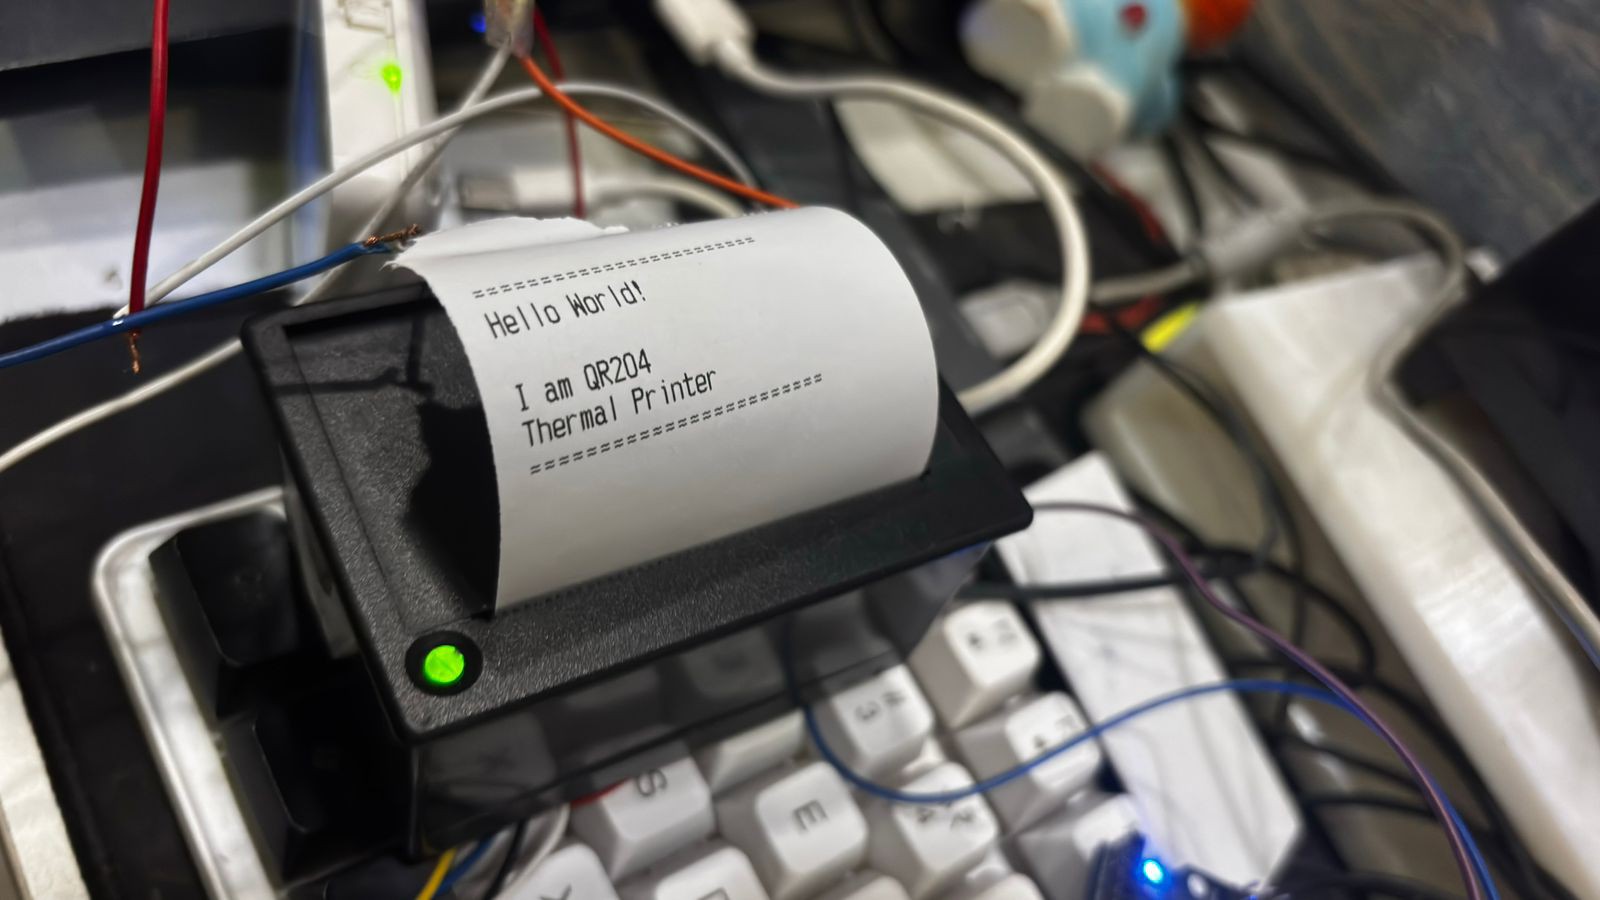
Whenever the on-screen Print button is pressed, the ESP32 sends text to the thermal printer over a UART serial connection. The printer immediately prints:
Hello World!I am QR204Thermal Printer
Although this example is intentionally simple, it introduces one of the most important concepts when working with embedded printers—serial communication.
Once you understand how text is transmitted to the printer, you'll be able to create much larger projects, including:
- Point-of-Sale (POS) systems
- Billing machines
- Restaurant ordering systems
- RFID attendance receipts
- Inventory labels
- Visitor passes
- Smart ticketing systems
- Medical reports
- IoT data loggers
- Portable receipt printers
Think of this project as the first building block toward professional thermal printing applications.
Why Use the ESP32-S3-BOX-3?
The ESP32-S3-BOX-3 is much more than a standard ESP32 development board.
It combines a powerful dual-core ESP32-S3 processor with a high-quality touchscreen display, USB Type-C connectivity, wireless networking, and excellent graphics support, making it an ideal platform for Human Machine Interface (HMI) projects.
Instead of relying on external buttons and displays, the touchscreen allows us to build interactive interfaces with very little hardware.
For this project, the touchscreen acts as our print button. A single touch triggers the printing process, making the demonstration clean, intuitive, and beginner-friendly.
Why Thermal Printers?
Thermal printers offer several advantages over conventional printers.
- Fast printing speeds
- Quiet operation
- No ink or toner required
- Low maintenance
- Compact size
- Low power consumption
- Easy UART communication
- Widely used in commercial applications
Since most embedded thermal printers communicate using simple serial commands, they are incredibly easy to interface with microcontrollers such as the ESP32.
Project Overview
The overall workflow of the project is extremely straightforward.
User TouchesPrint Button │ ▼ESP32-S3-BOX-3 │UART SerialCommunication │ ▼QR204 Thermal Printer │ ▼PrintsHello World!I am QR204Thermal Printer
The ESP32 continuously monitors the touchscreen.
As soon as the Print button is pressed, it sends standard ESC/POS initialization commands followed by the text that we want to print.
The printer receives the serial data and immediately begins printing.
Because thermal printers internally interpret standard ASCII characters, printing text is almost identical to writing data to the Serial Monitor.
This makes thermal printers one of the easiest peripherals to integrate into an embedded project.
Features
This project includes:
- Interactive touchscreen interface
- One-touch printing
- UART communication
- ESC/POS printer initialization
- Beginner-friendly Arduino code
- Compatible with QR204 thermal printers
- Easy to expand for larger applications
- Fast printing
- Low hardware complexity
- Perfect starting point for embedded printing projects
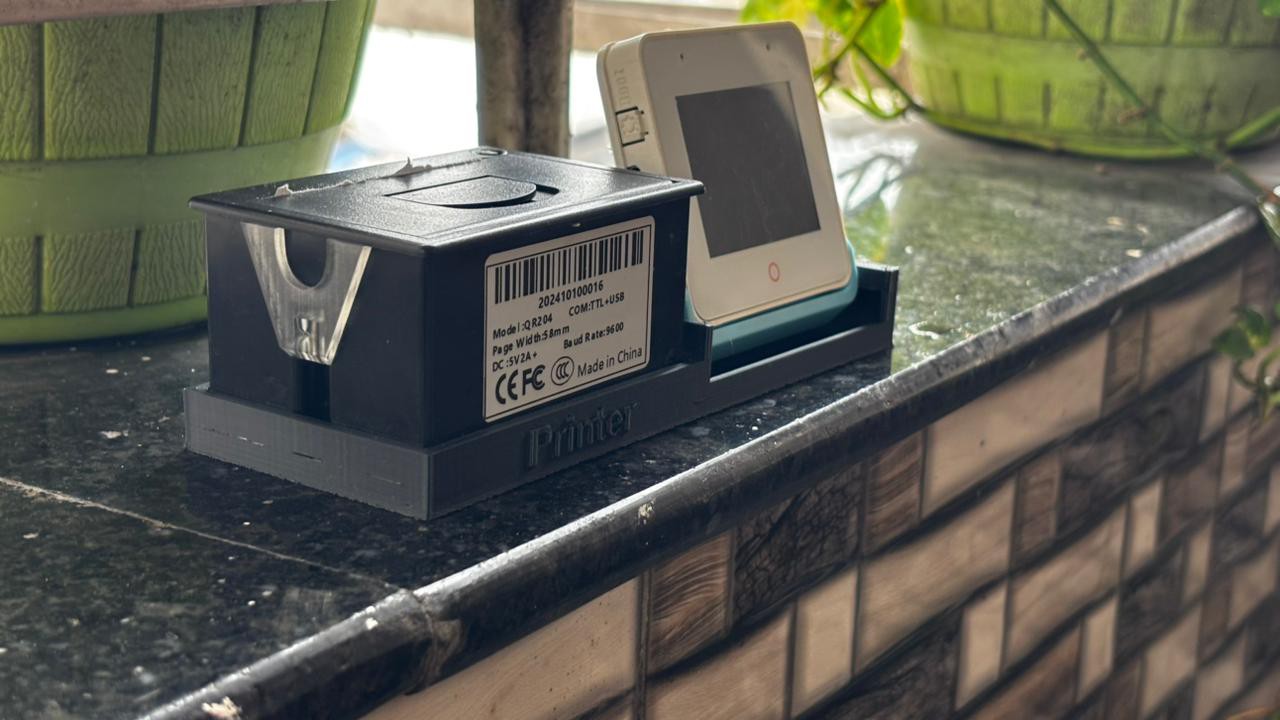
Understanding the QR204 Thermal Printer
Before connecting any wires, it's useful to understand how the printer works....
Read more »