 Andrew Garvin
WHY I BUILT BEACON
I built Beacon because of how slow and frustrating the usual options for finding a misplaced phone or tablet can be.
If I know the device is nearby, it's annoying to have to track down another device or log into your computer, open the right app or website, wait for it to load, log in if needed, and then finally be able to click the button that makes the phone ring. And what do you do if the internet is out? Simply calling the phone doesn't always work either, since it might be on silent or there might not be cell service (or you don't have another phone to call with). And you can't call a tablet.
This all adds too much friction to something so simple that should only take a few seconds, especially when you're in a hurry and just need to find your phone.
Beacon is my solution to this problem.
WHAT BEACON DOES
Beacon is a dedicated Bluetooth device for finding nearby phones and tablets. The idea is simple: keep one small device in a fixed location, press a button, and your phone or tablet rings.
It works locally, so it does not need internet access or cell service, and it doesn't have any accounts or subscriptions to worry about. It works on both iOS and Android and can individually find up to 16 nearby devices by using 4 groups of 4 buttons/channels.
DEMO
Here's a quick demo before diving a little deeper into the details of how I made it
EARLY PROTOYPES
The project went through a few different iterations before I landed on the final architecture.
My first thought was to use a Raspberry Pi Pico, but I quickly moved on from that once I realized how much work it would be to get Bluetooth working on it. So I started looking at some other options to find something that had easy access to Bluetooth support.
I found an inexpensive ESP32 dev board that seemed like a good fit. I was able to get it running a Bluetooth server and updating a characteristic on button press, which was enough of a proof of concept to keep going. At the time, I hadn't written any Bluetooth code in the apps yet, so I was relying on the nRF Connect app to see that my ESP32 code was working.
At this point I was able to move on to getting Bluetooth working on the Android app, completing the first functional prototype. I also found the much smaller XIAO ESP32C3 and built a second prototype using that, and even put it on a PCB.
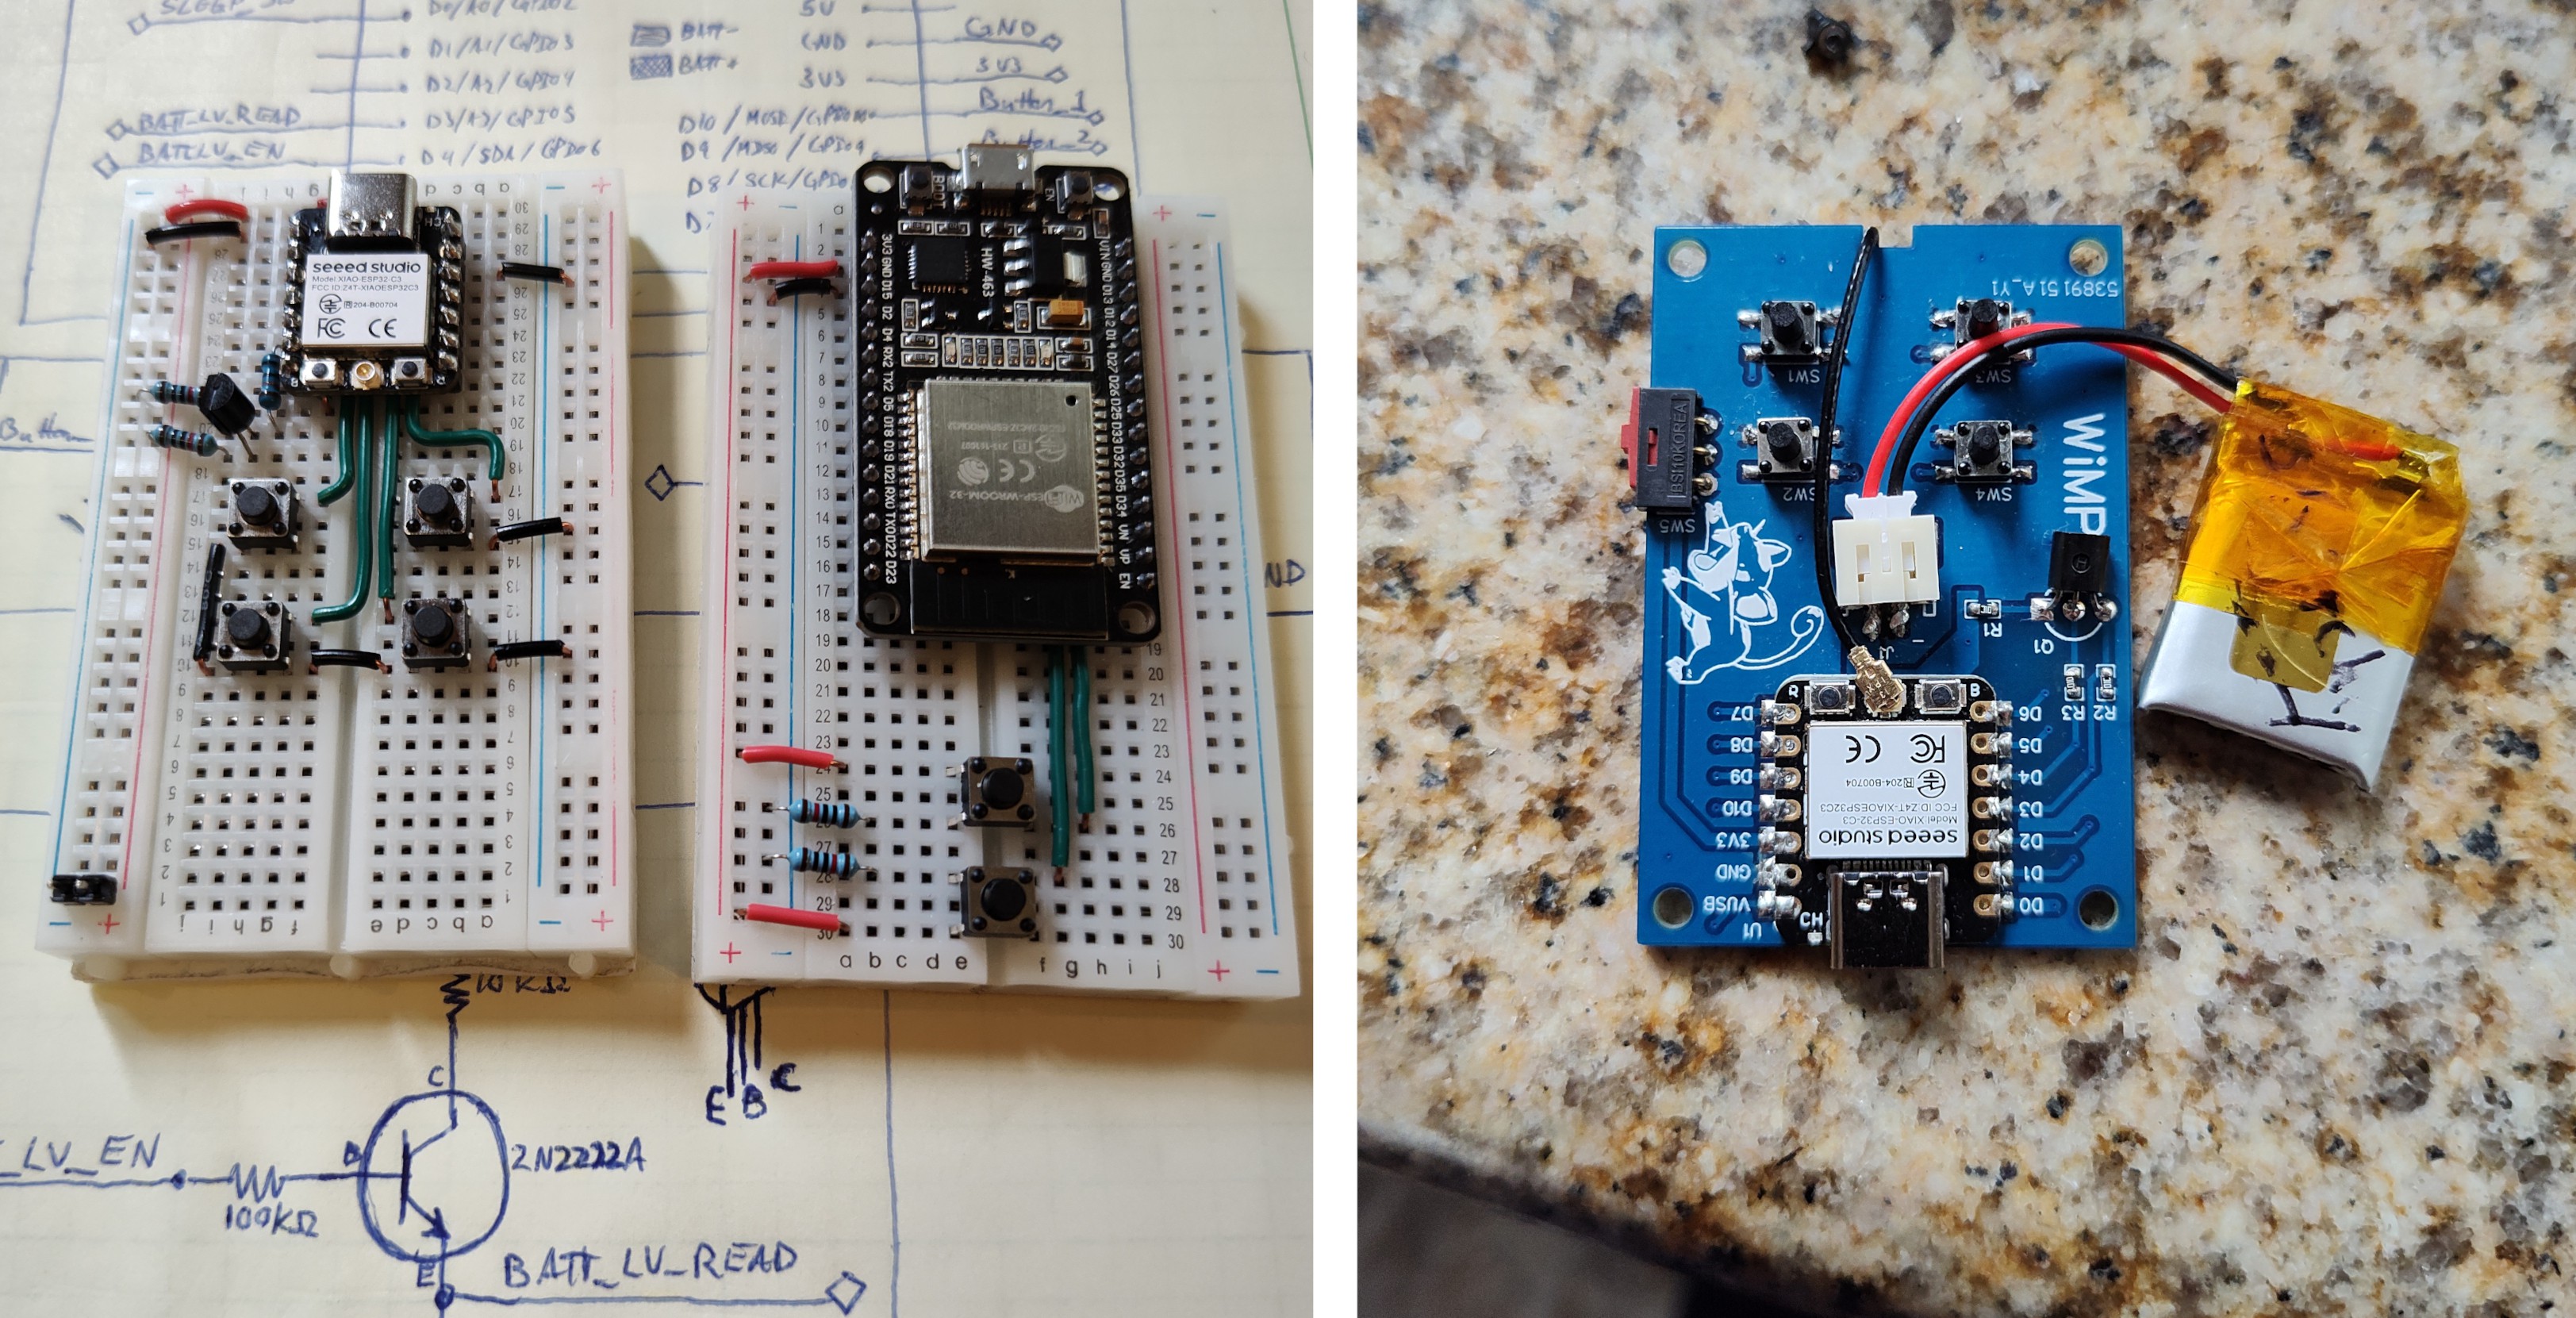
It functioned well enough, and I was thrilled to get something working, but it just wasn't good enough. For starters, it used way too much power, even in sleep mode. And I didn't like the idea of having to use a rechargeable battery. Another issue was that it took far too long to wake up from sleep, causing it to feel unresponsive. So I started looking for something more suited to my needs and came across Nordic's nRF52 series of chips.
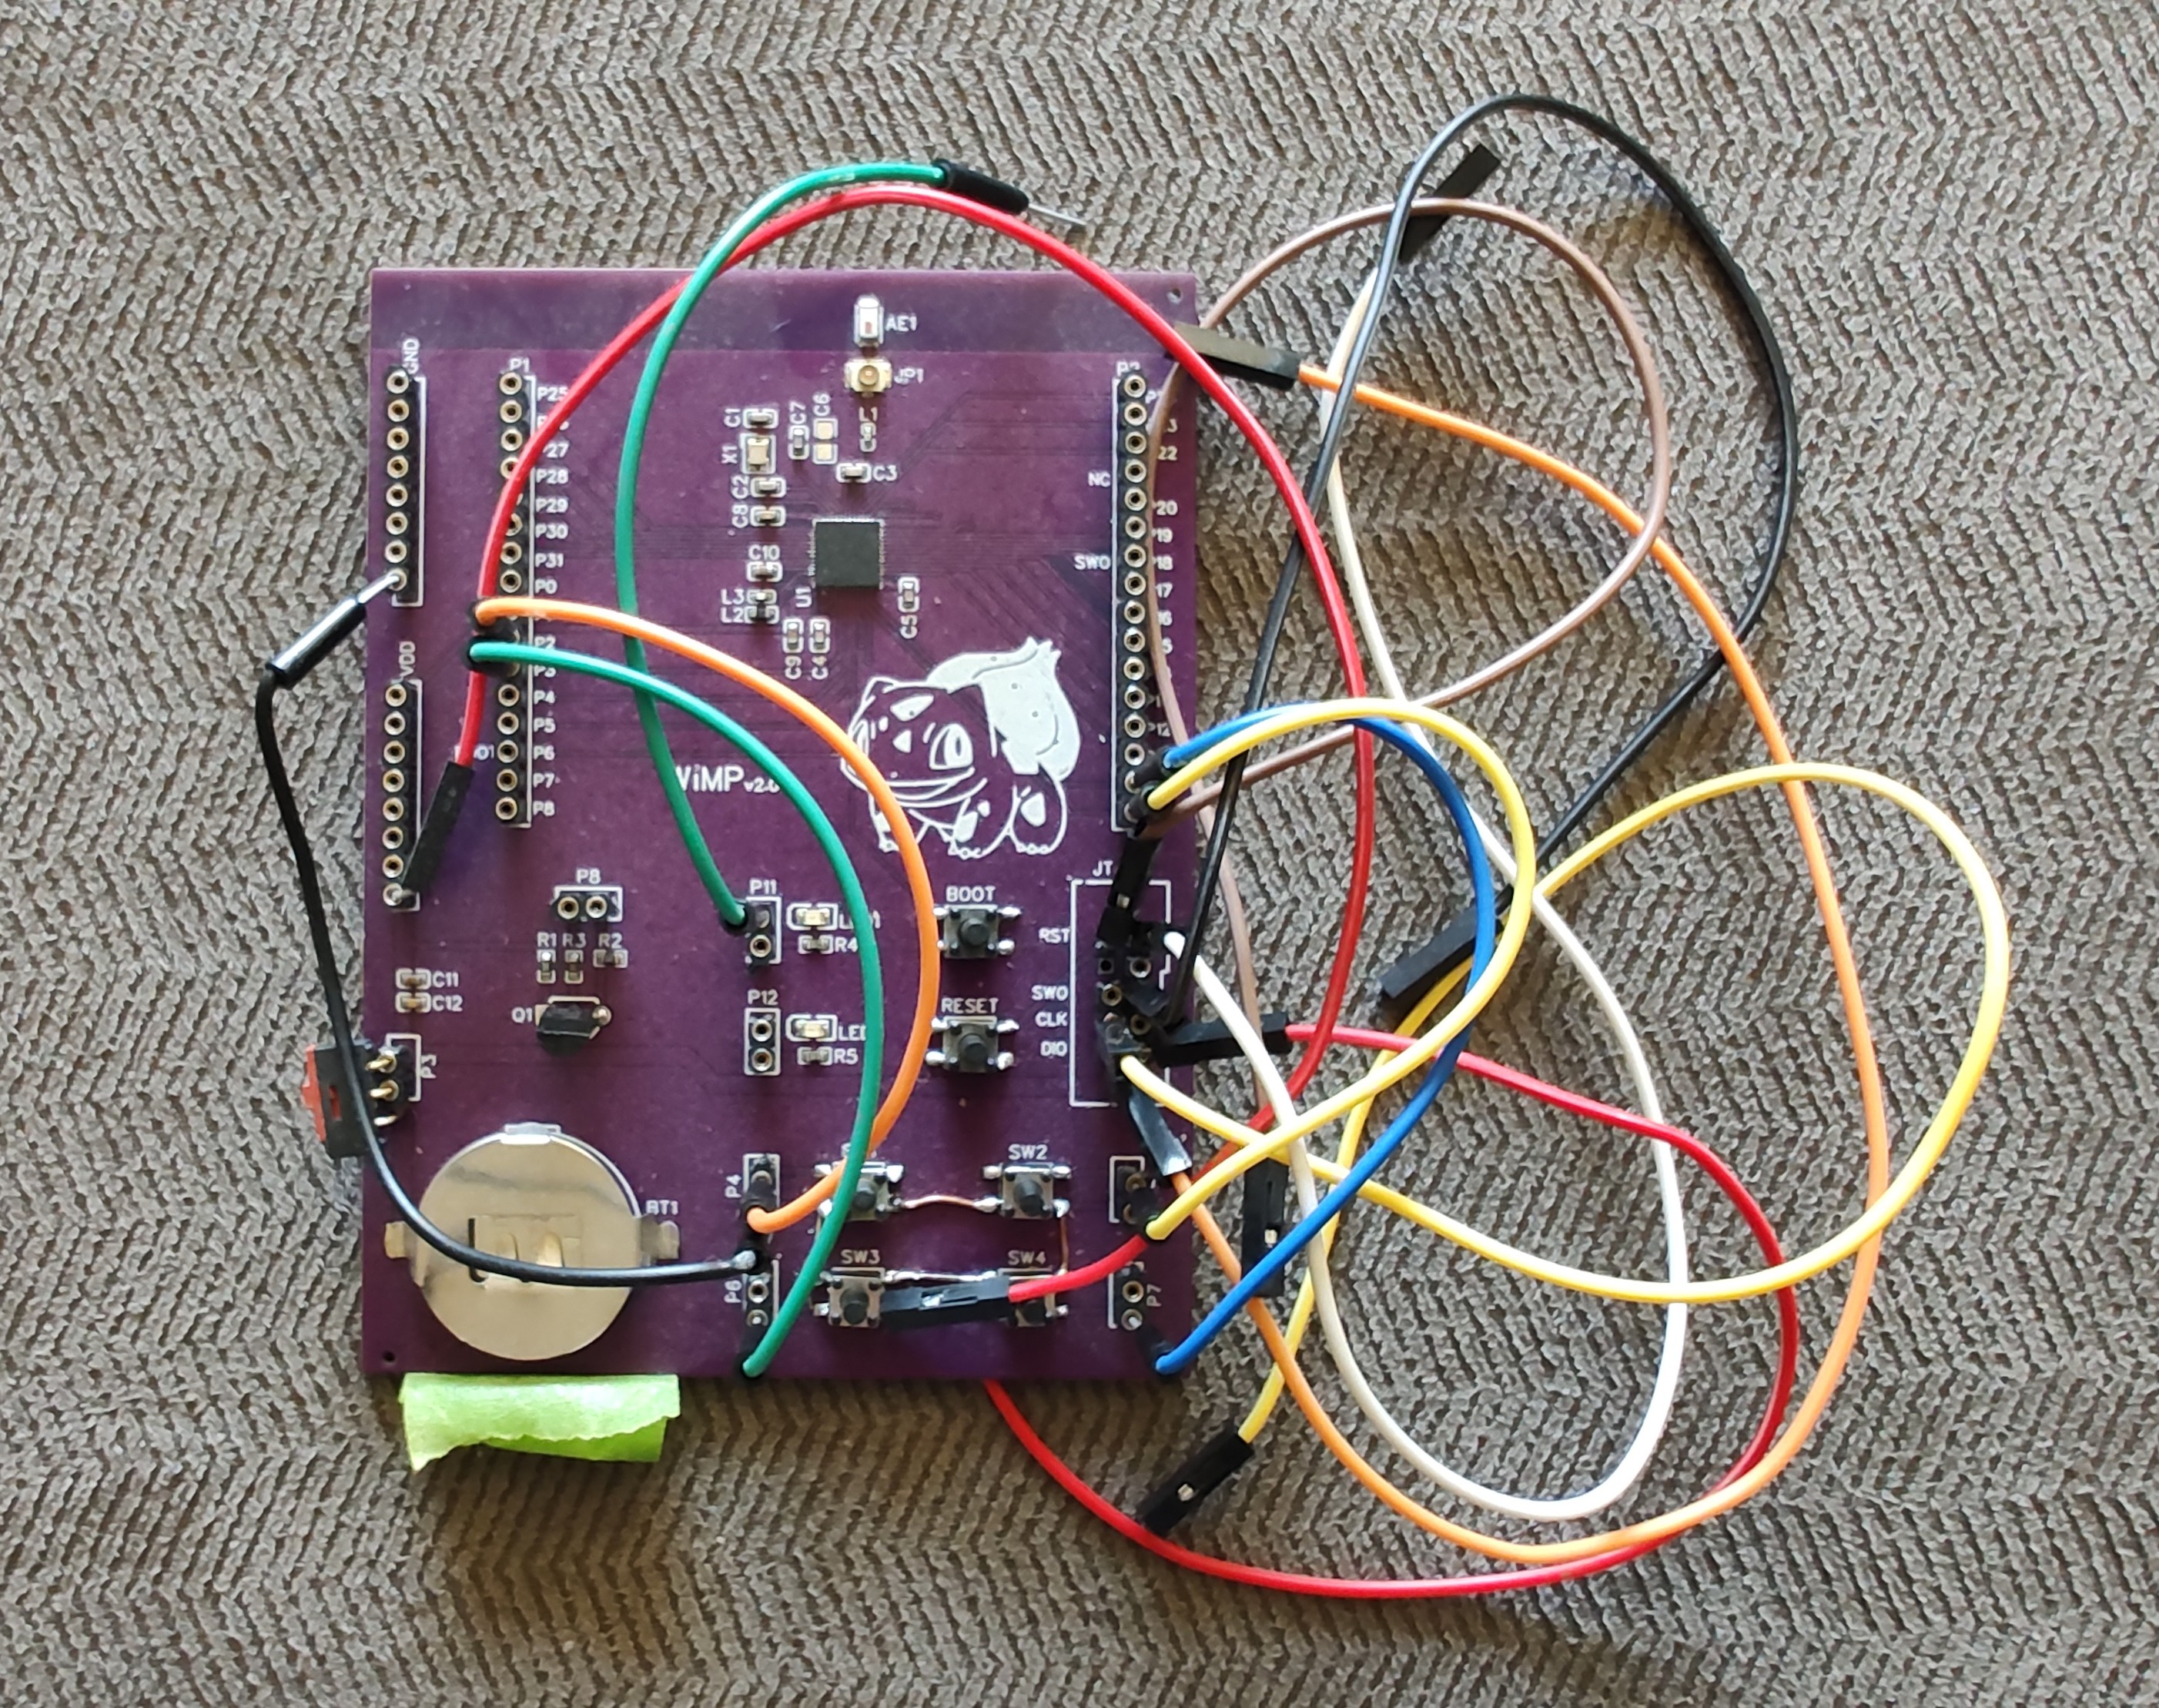
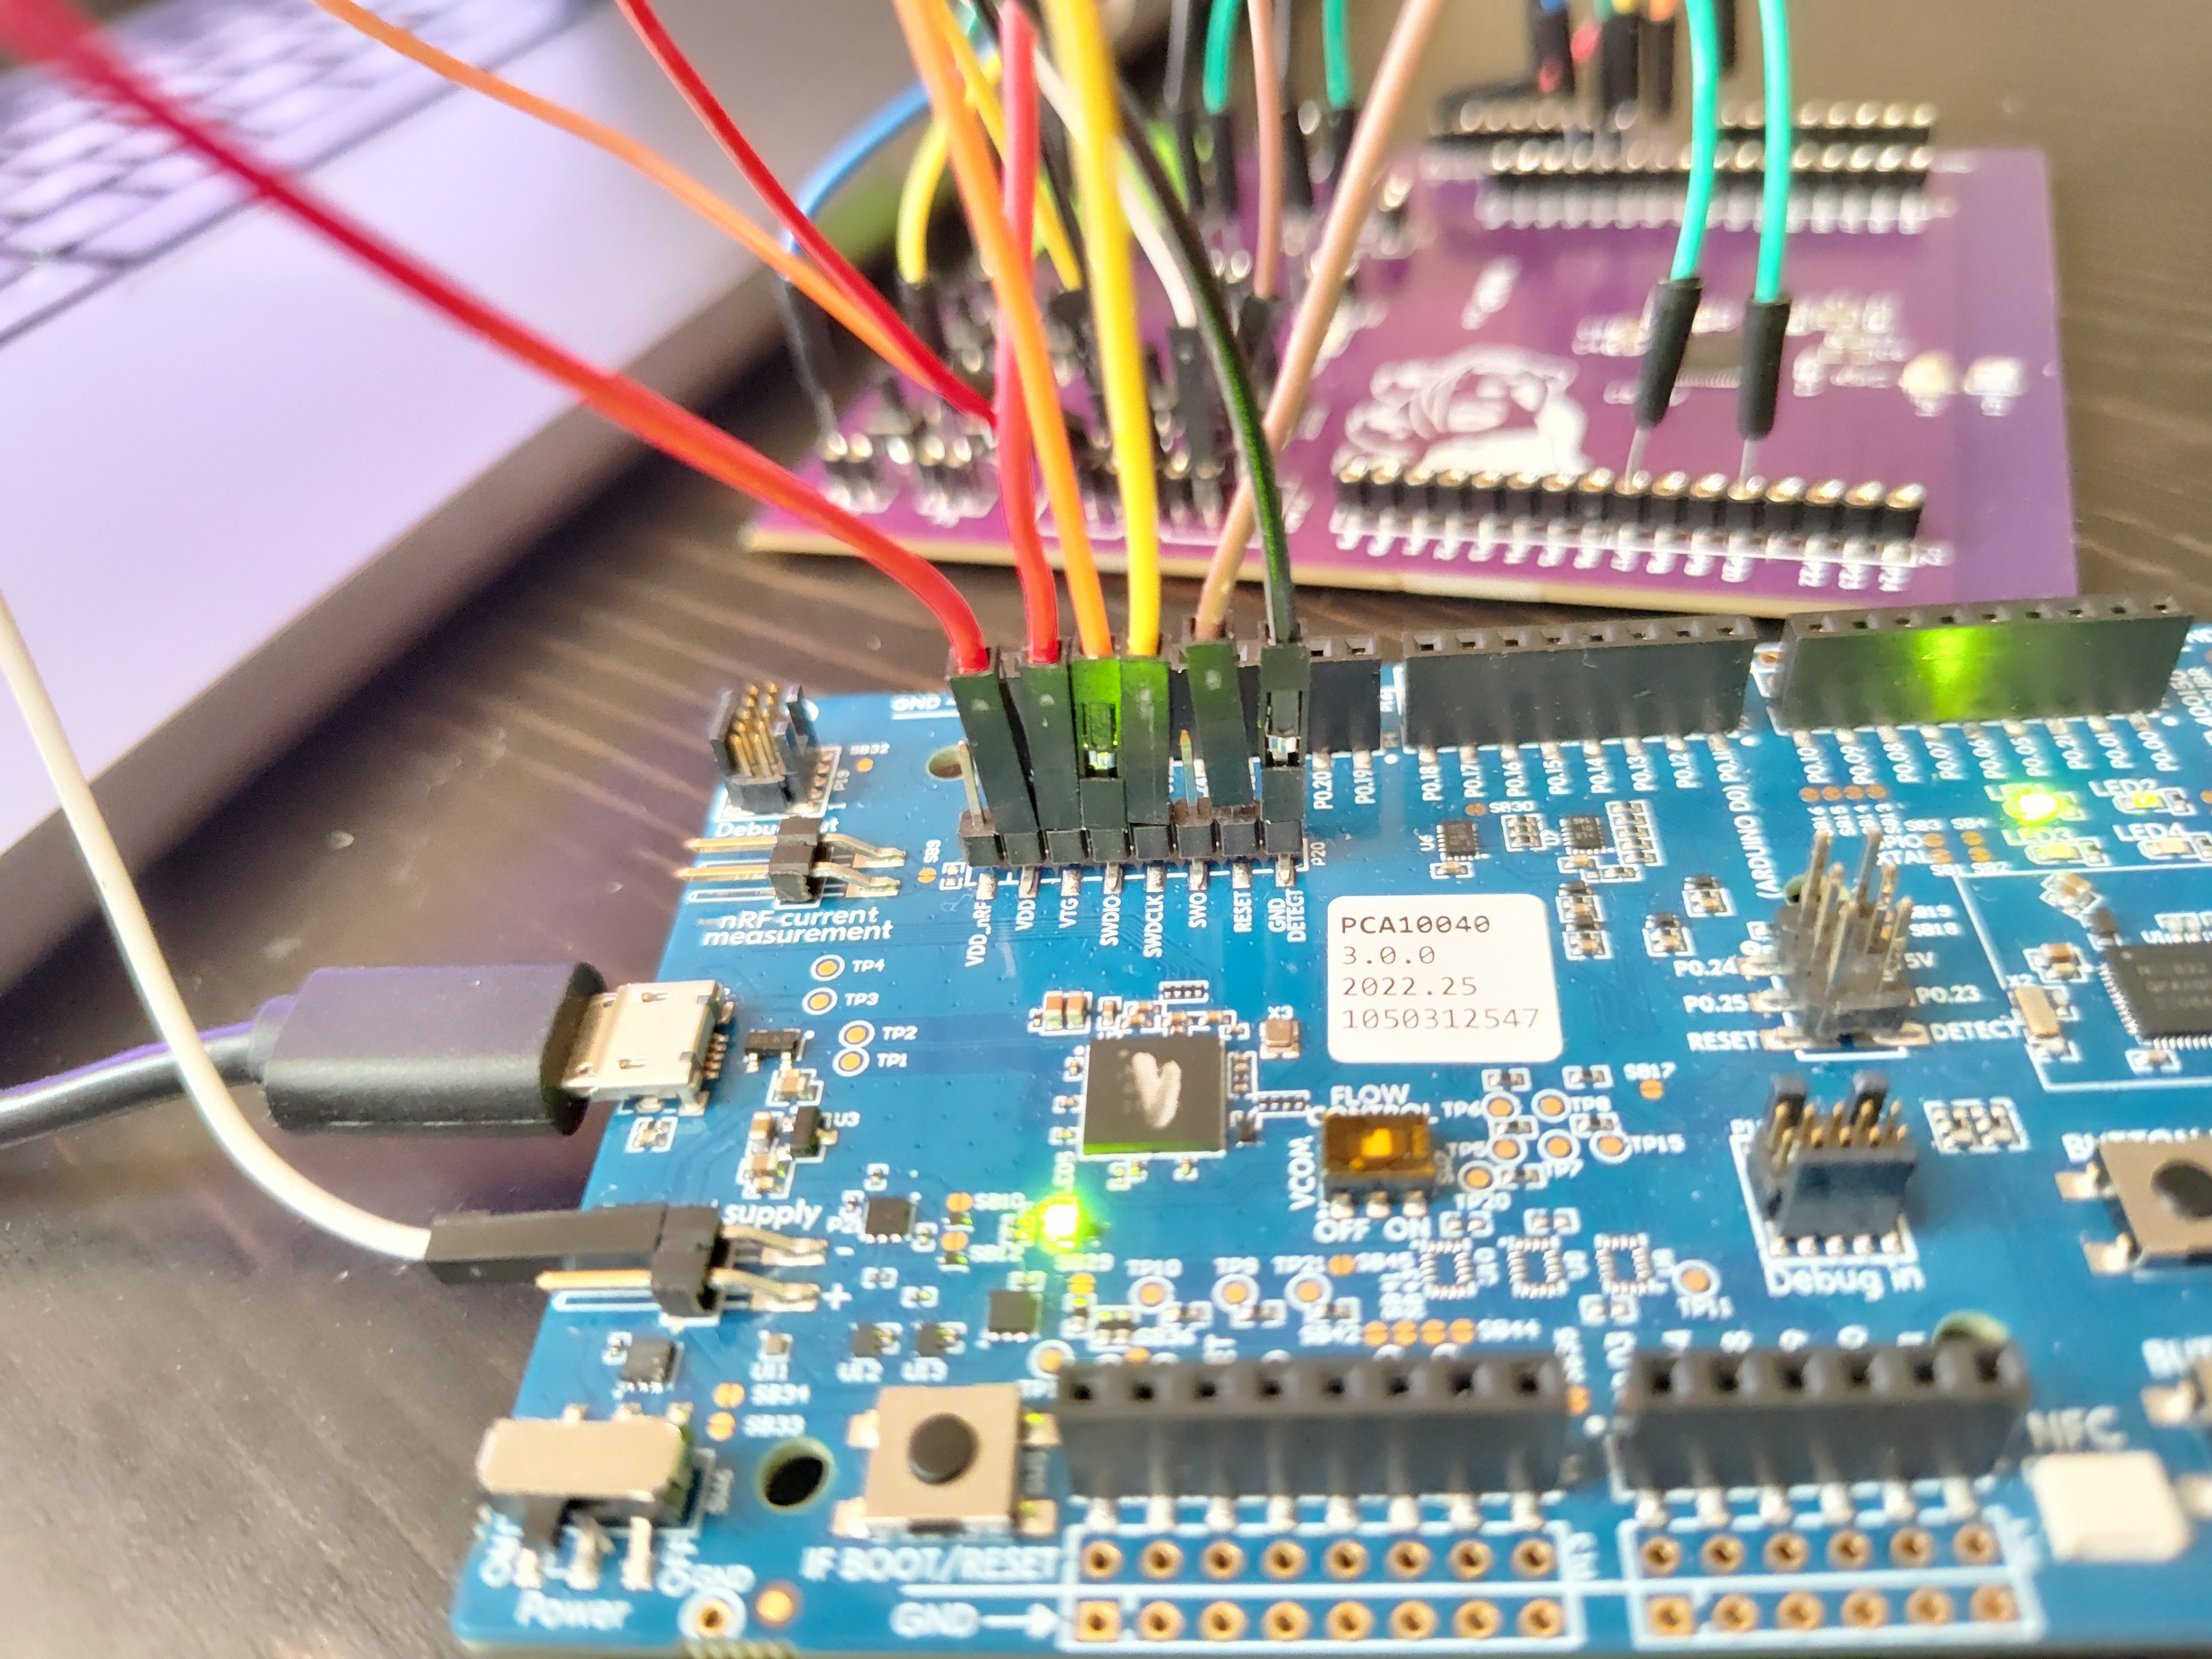
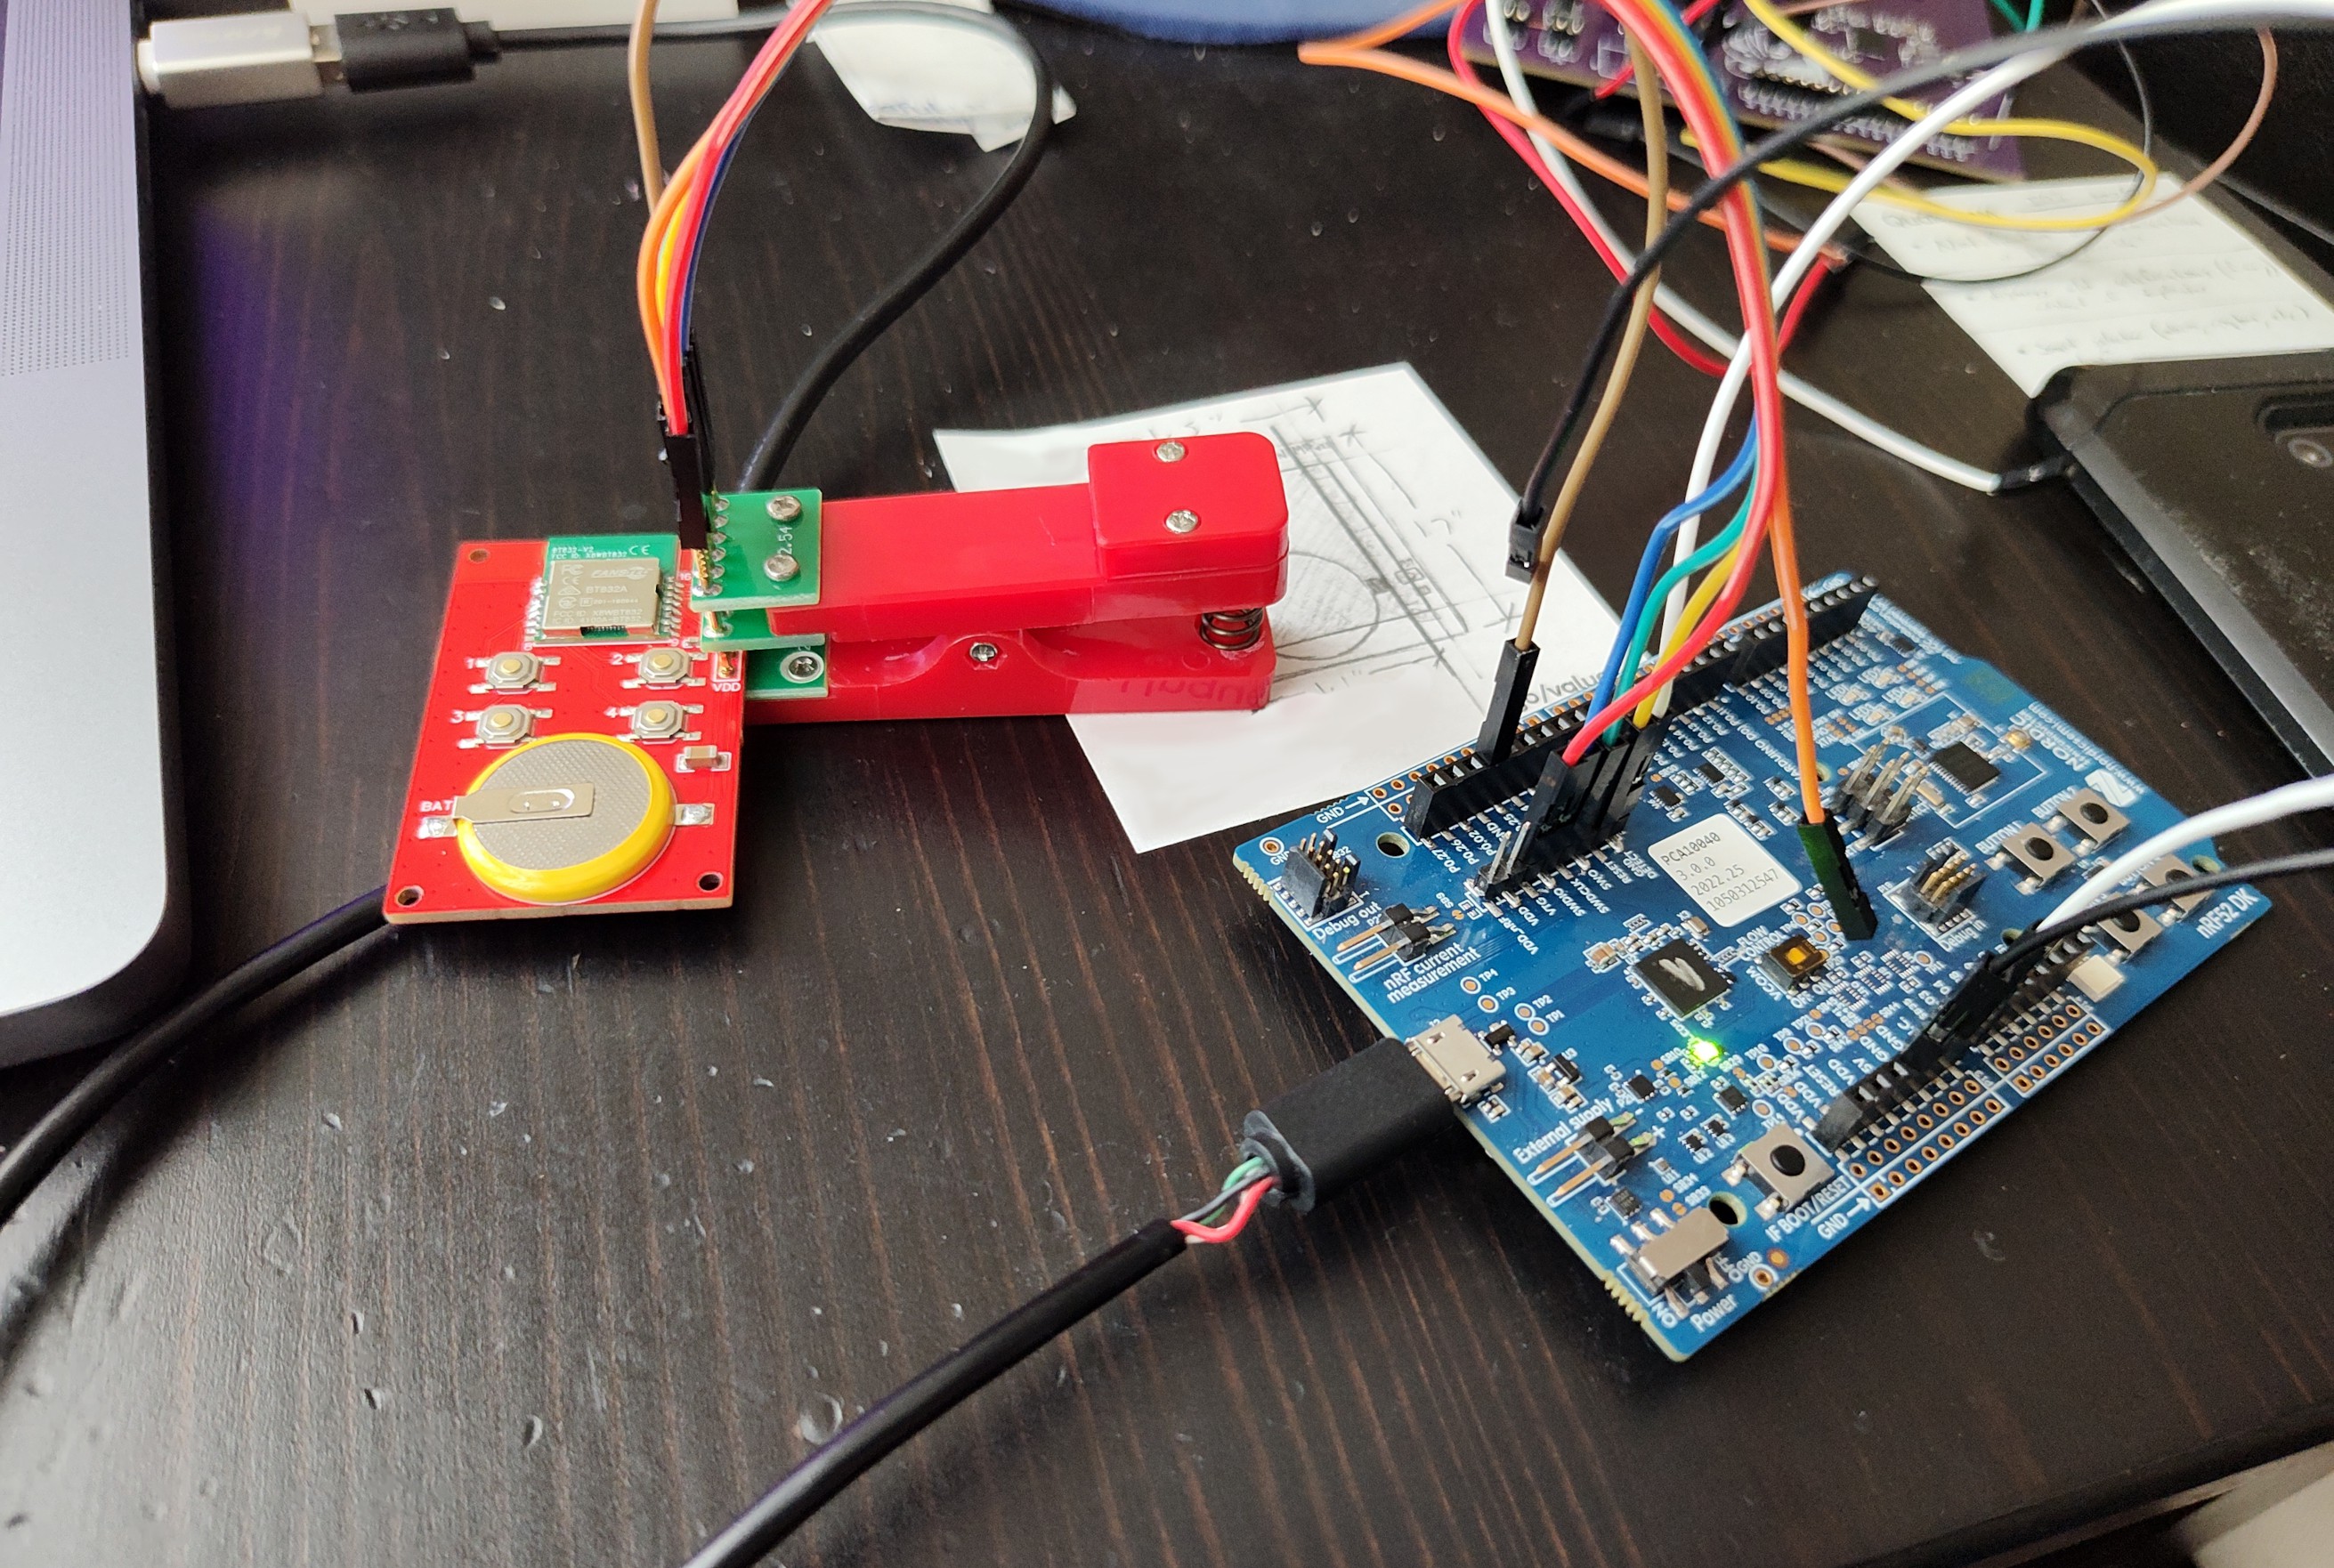
I decided on the nRF52810. It solved all the issues I had with the previous design, including being able to run on a coin cell battery. I ordered a new PCB for testing and got to work. In order to program this new chip, I had to use the SEGGER IDE and wire it up to the nRF52 Dev Kit. It was a bit of a pain learning all the new things that were required, but with some perseverance I was able to determine that it was the right choice.
FINAL HARDWARE DESIGN
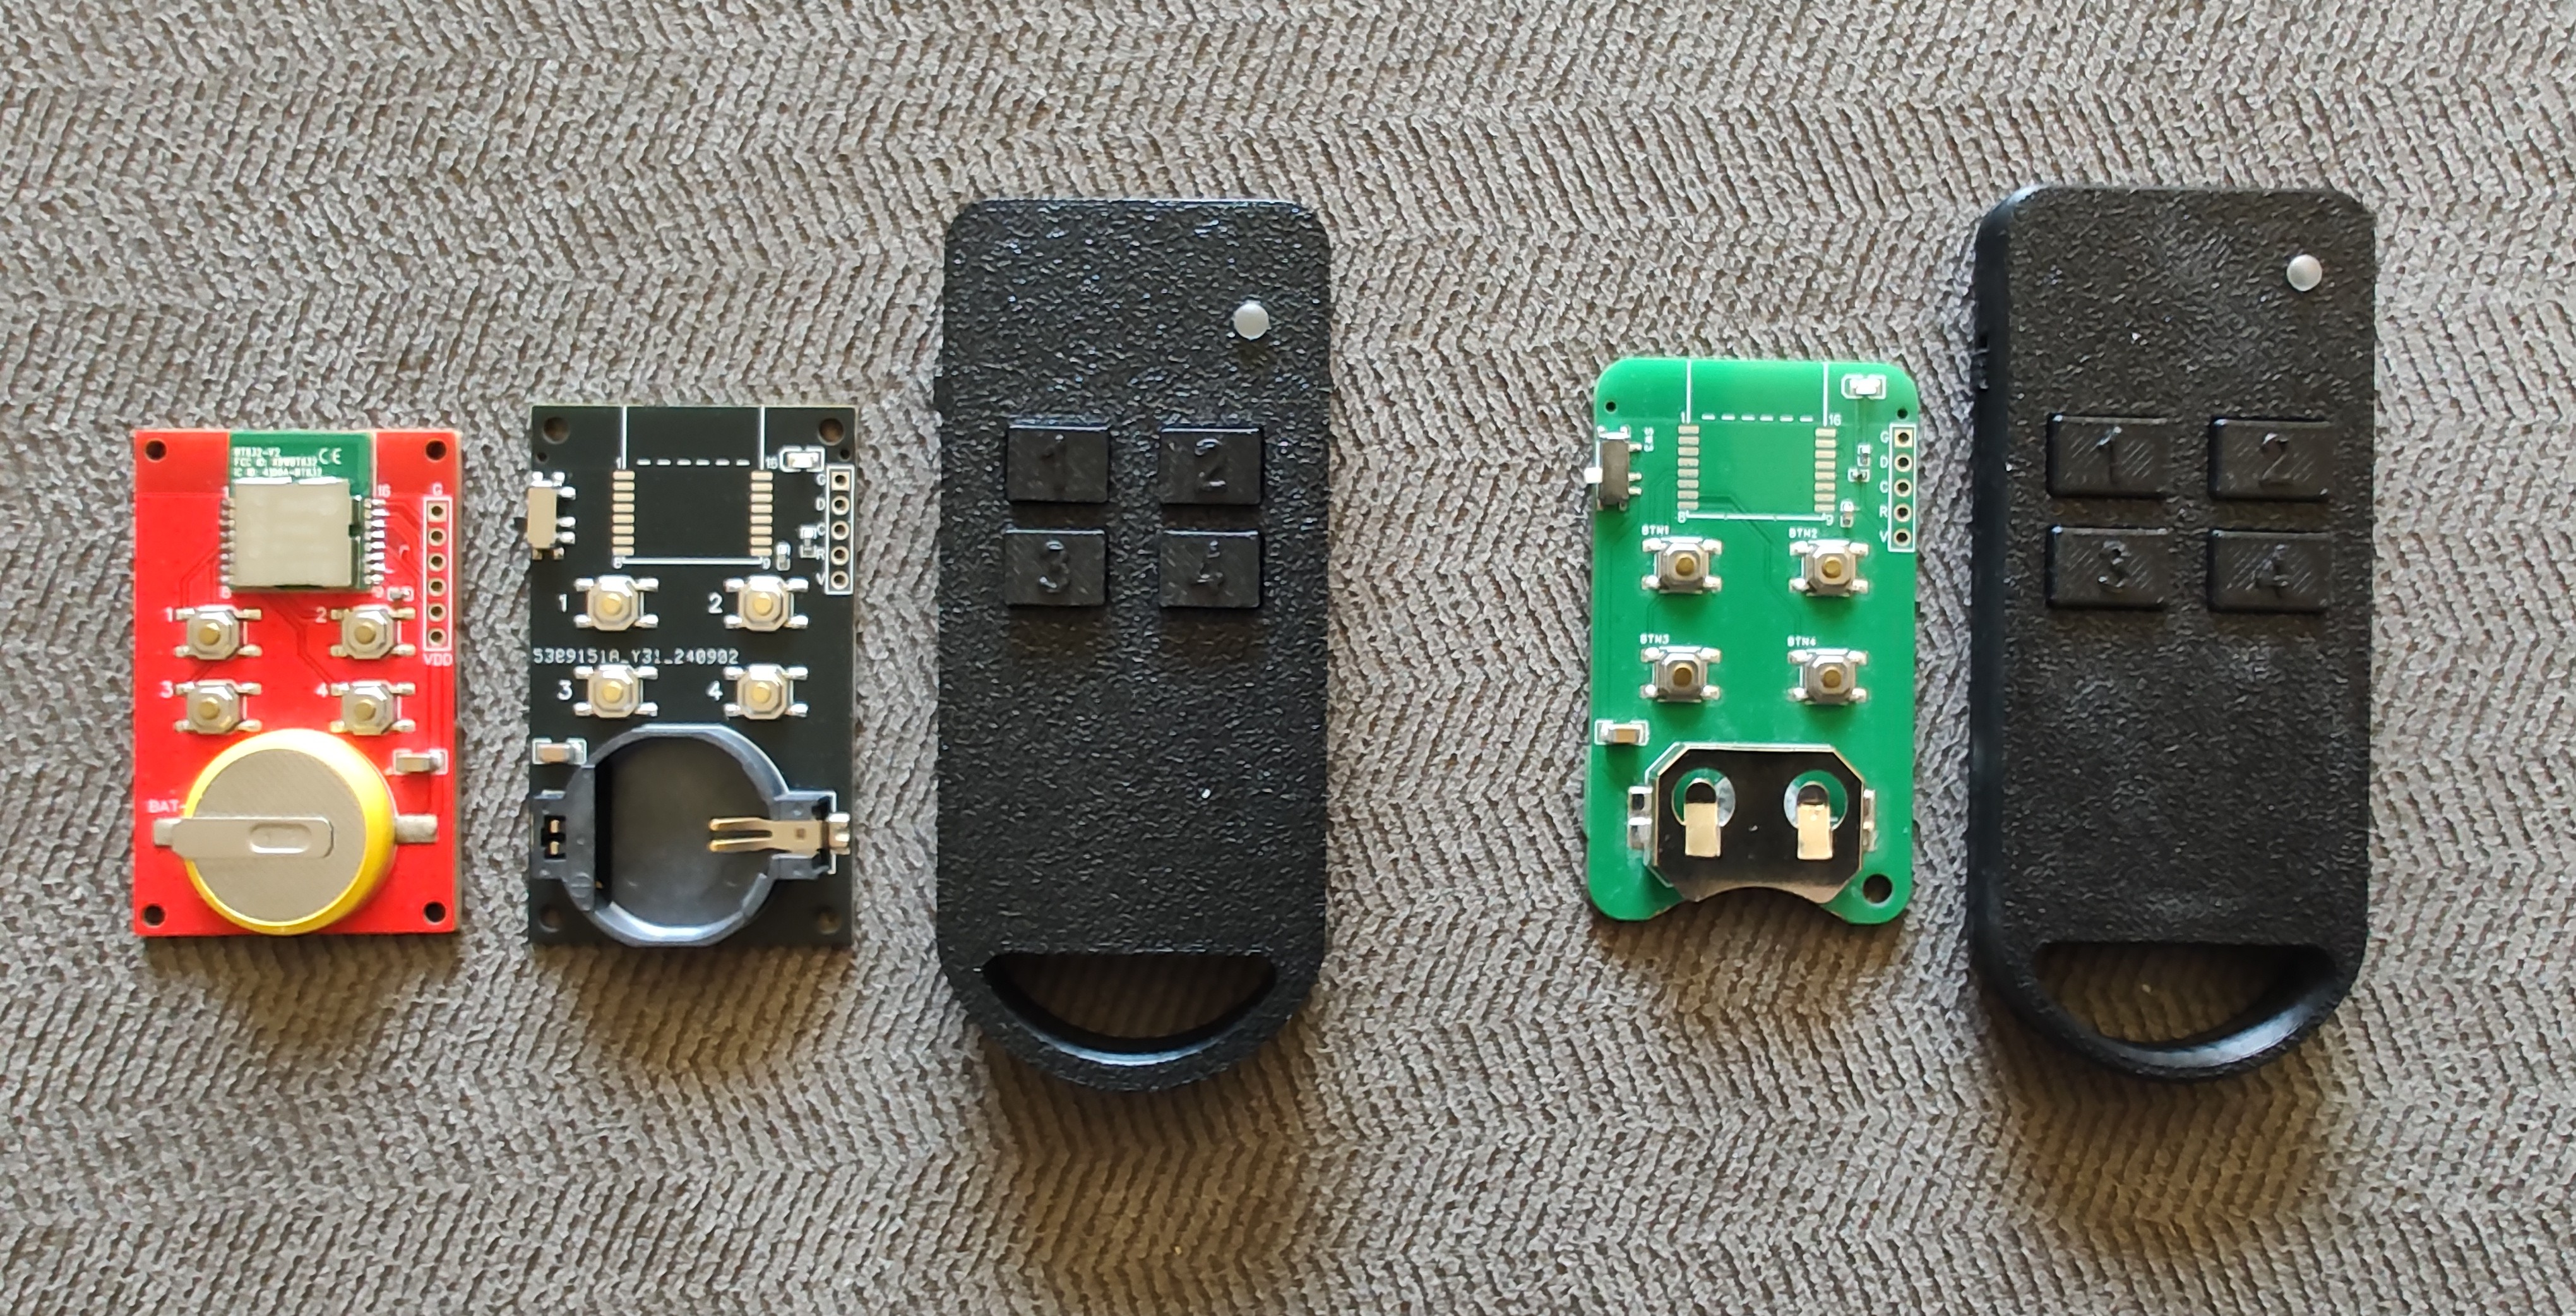
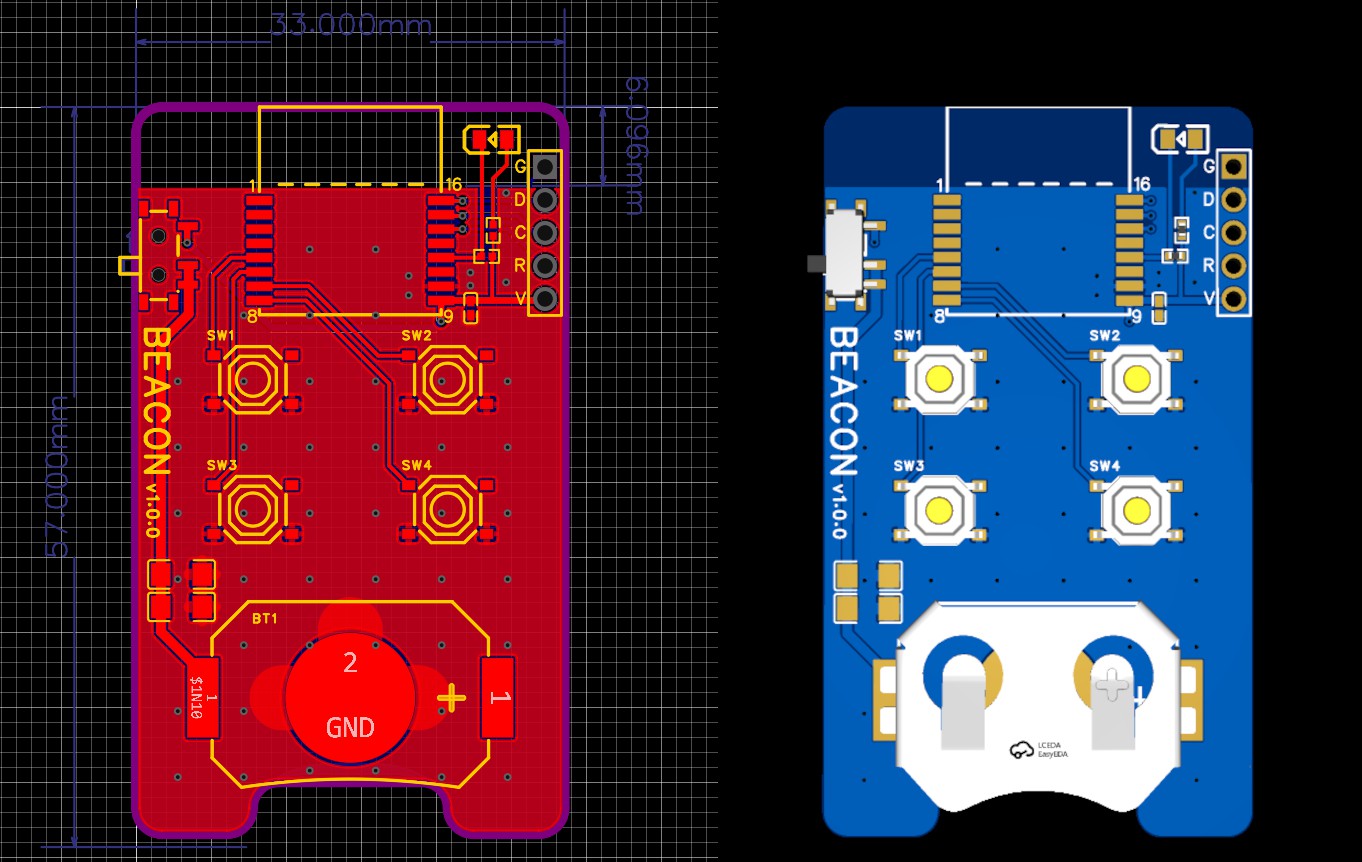
It turns out there are pre-made modules for lots of different chips, saving me the trouble of laying out the circuit by hand. I found Fanstel's BT832A, which is an nRF52810 module that includes all the components and a trace antenna in a small package, and it also comes with certification, which was a nice bonus. Since I'm no antenna expert, and since the price of the module is nearly identical to the cost of all the components added together, it was an easy choice to go with this for the next iteration.
FIRMWARE
The firmware had to go through some major changes before Beacon reached its final form.
Early on, I was using a more traditional Bluetooth connection-based approach where Beacon was acting as a Bluetooth server. Any device that was interested could freely connect to Beacon and see the characteristics of it. Pressing a button would change a characteristic so connected devices could be notified and act accordingly (wake up and ring or ignore it).
That worked well enough for initial testing, but it had some serious drawbacks. The hardware only allowed up to 4 simultaneous connections, and establishing a connection caused an additional delay. It also created an awkward limitation where a third party device could potentially occupy one of those connection slots, which is not what you want for a product that is supposed to be simple and dependable.
I eventually moved to a different approach based on iBeacon-style advertising, which turned out to be a much better fit for the project. Instead of setting up and maintaining active Bluetooth connections, Beacon advertises compact identifiers that the mobile app can monitor for. This makes the system faster, lighter, and much easier to scale. It also avoids the connection limit problem, which means Beacon is not limited to only handling a few devices at a time.
If you aren't familiar with iBeacon, it's an advertising format introduced by Apple for broadcasting small packets of identifying data without requiring an active connection. Beacon uses the iBeacon advertising format as a lightweight signaling protocol rather than just a static identifier. In a normal iBeacon packet, you get a 128-bit UUID (Universally Unique IDentifier) plus two 16-bit fields called major and minor. Most beacon applications use those as simple identifiers, but Beacon repurposes them to carry multiple pieces of information at once.
Instead of broadcasting one fixed UUID, Beacon uses 17 different UUIDs: one for the idle state, plus one for each of the 16 possible group/channel combinations. That means the UUID itself immediately tells the app which logical button/group slot is active.
The major field is fully dedicated to Beacon’s unique ID, and the upper bits of minor extend that ID further. That unique ID is programmed into each unit during flashing and is incremented automatically from one Beacon to the next, so no two Beacons share the same identity. This is important because it ensures a phone or tablet only responds to the specific Beacon it has been paired with, rather than to any Beacon nearby.
The remaining bits in minor are used for additional runtime data. Part of the field is reserved for group/channel information (which is somewhat redundant, but it's useful for filtering in Android), and the last 7 bits carry battery voltage in 0.01 V steps. In other words, a single advertising packet tells the app which Beacon is transmitting, which logical control slot is active, and what the battery level looks like, all without needing a live BLE connection.
Minor field layout
| Bits | Label | Description |
| 15-12 | Beacon ID | Most significant 4 bits of ID. Combined with the full 16 bits from Major, this gives over 1 million unique Beacon IDs. |
| 11-10 | Group | Values 0–3 (mapped in the app as Groups 1–4) for bulk organization. |
| 9-7 | Channel | "Idle" state (000) plus channels 1-4 (001 - 100) |
| 6-0 | Battery | Battery voltage offset in 0.01 V steps, used to calculate the current voltage (1.80 V + offset). |
PROGRAMMING AND PRODUCTION
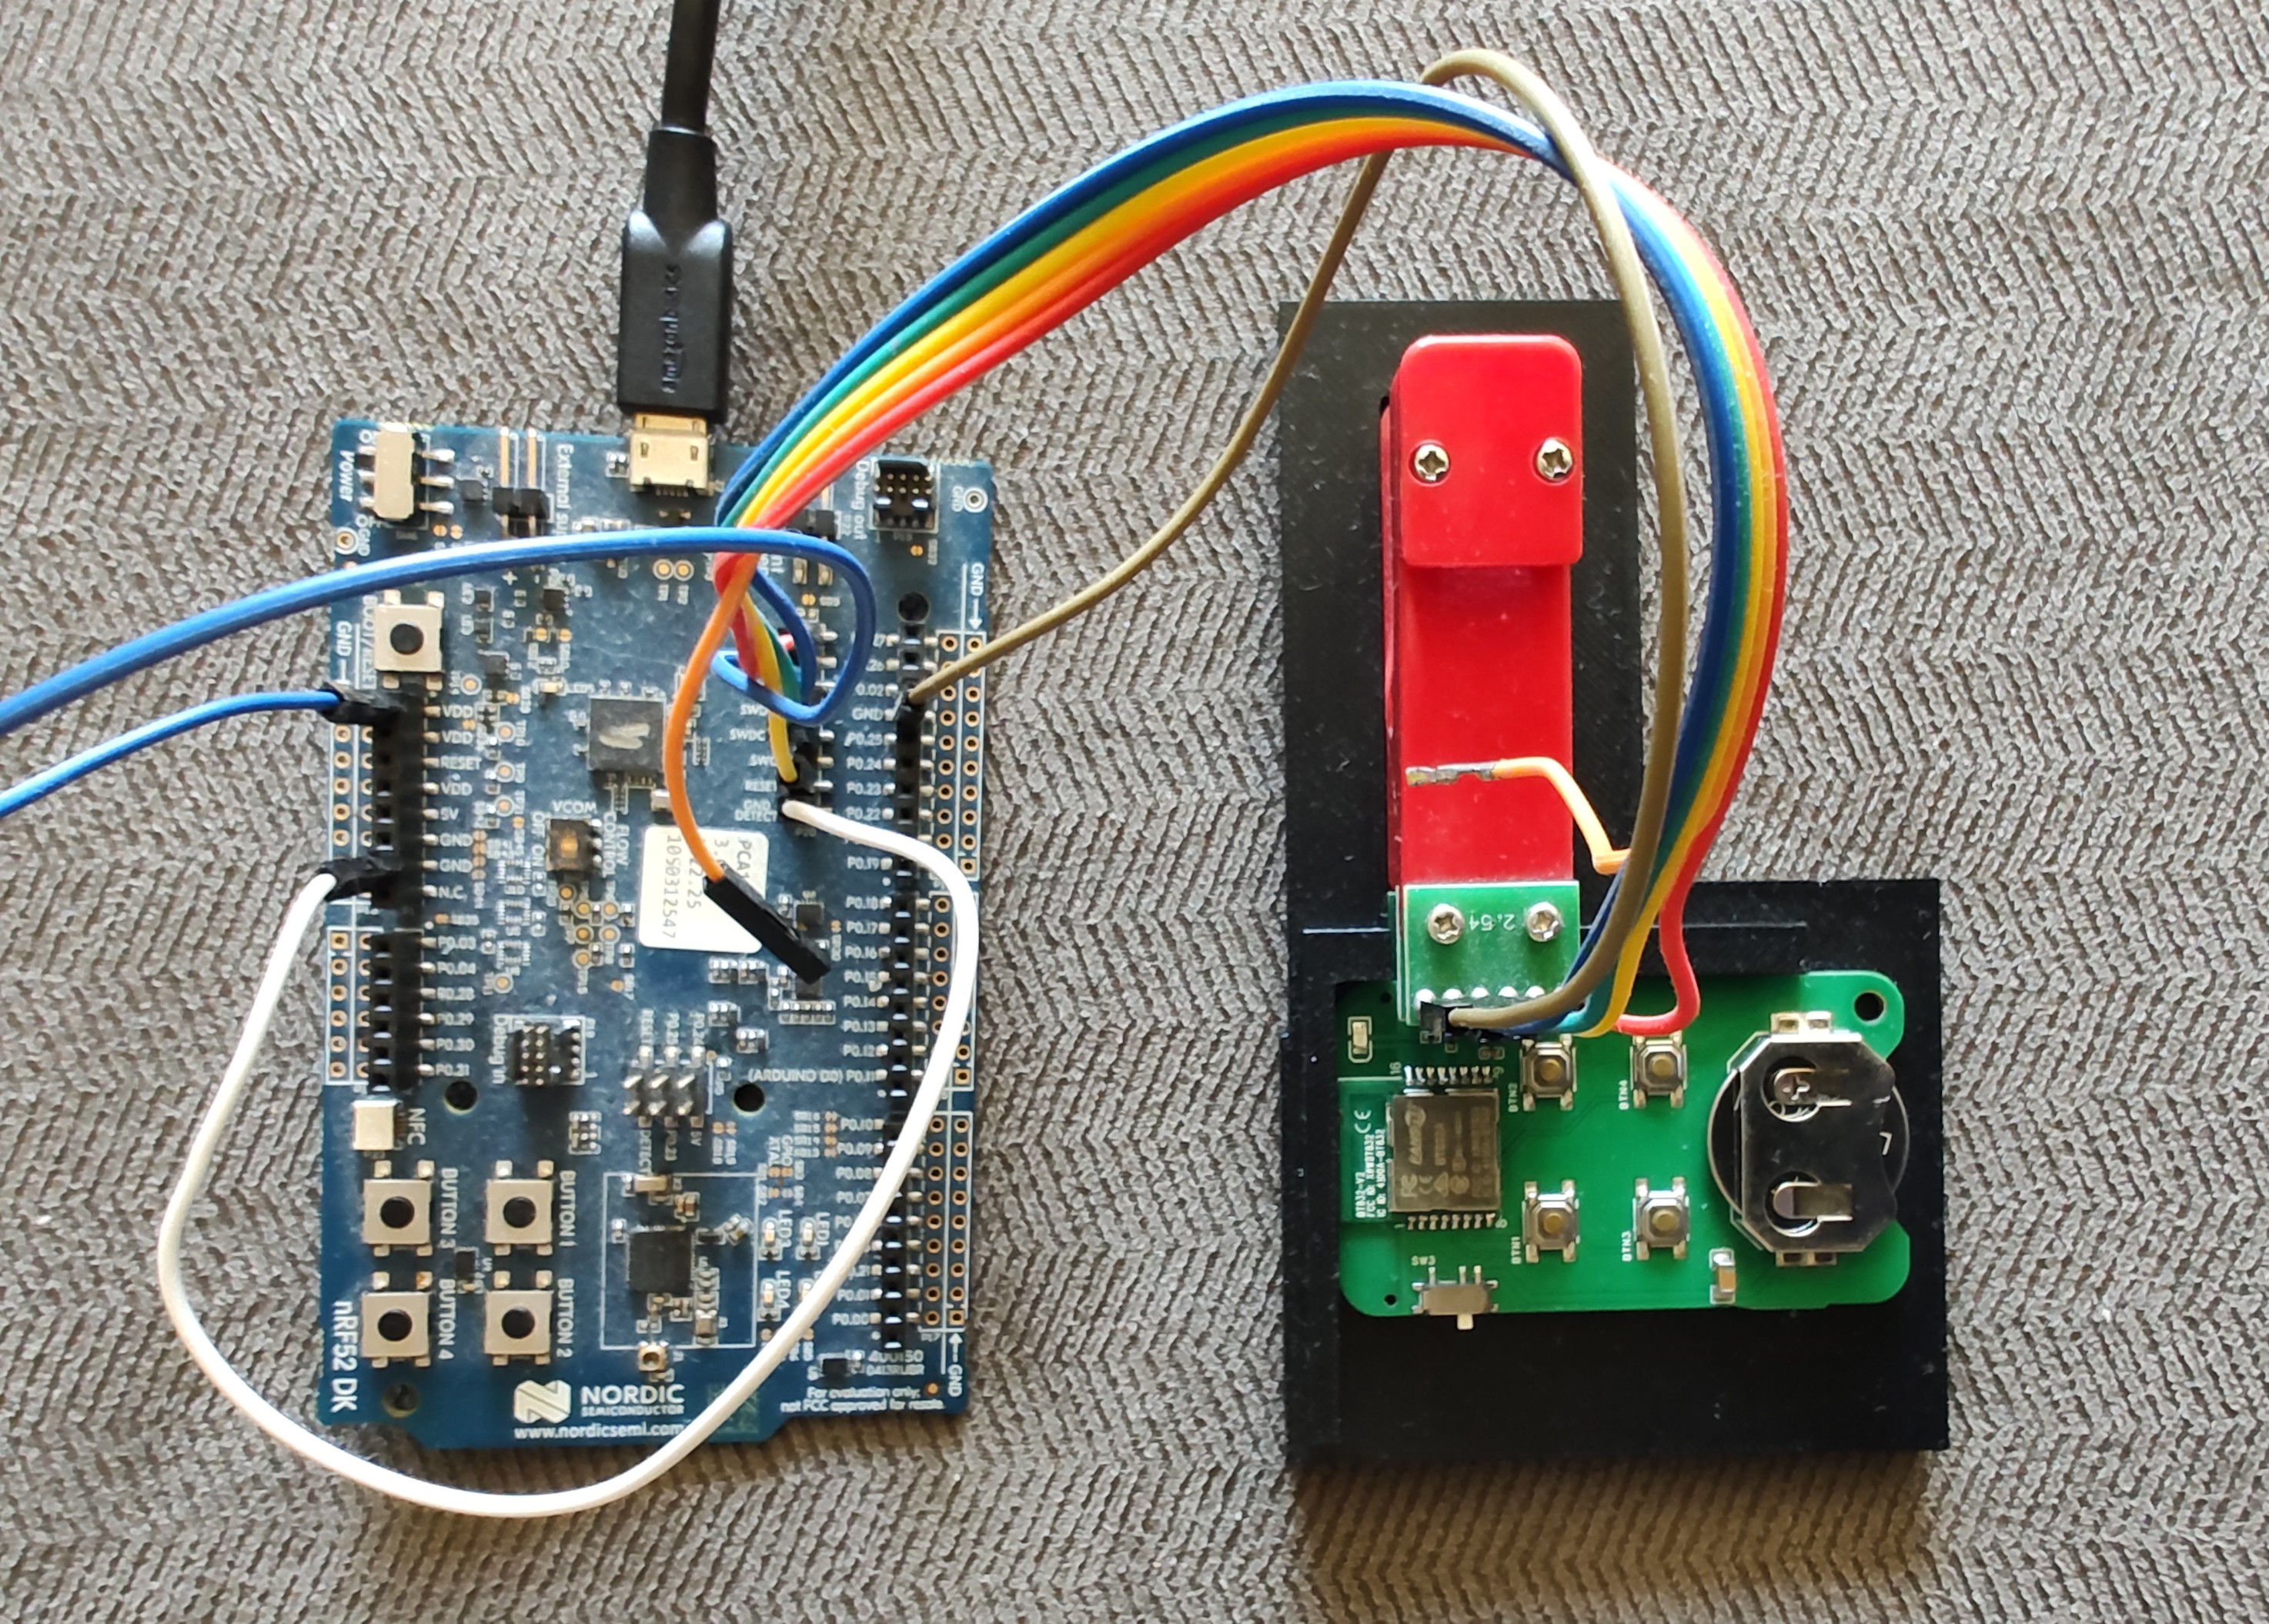
To make manual programming practical, I used a pogo-pin clip instead of adding a permanent programming connector to the board. I also designed and 3D printed a small jig that holds the clip in the correct position and aligns the PCB underneath it. That makes the process much more repeatable and also prevents fatigue from having to constantly squeeze and reposition the clip during flashing (it's fairly easy to squeeze, but gets very tiring after just a few dozen repetitions).
I mentioned the unique Beacon ID earlier, but this is also where that gets assigned. During programming, a small Python script handles the flashing process and automatically increments the ID for each new unit. The script keeps track of the current value in a text file, then updates it after each successful flash. That way every Beacon ends up with its own distinct identity without me having to manage the numbering manually.
ANDROID AND iOS APPS
The mobile apps were a significant part of the project, both technically and from a product-design perspective.
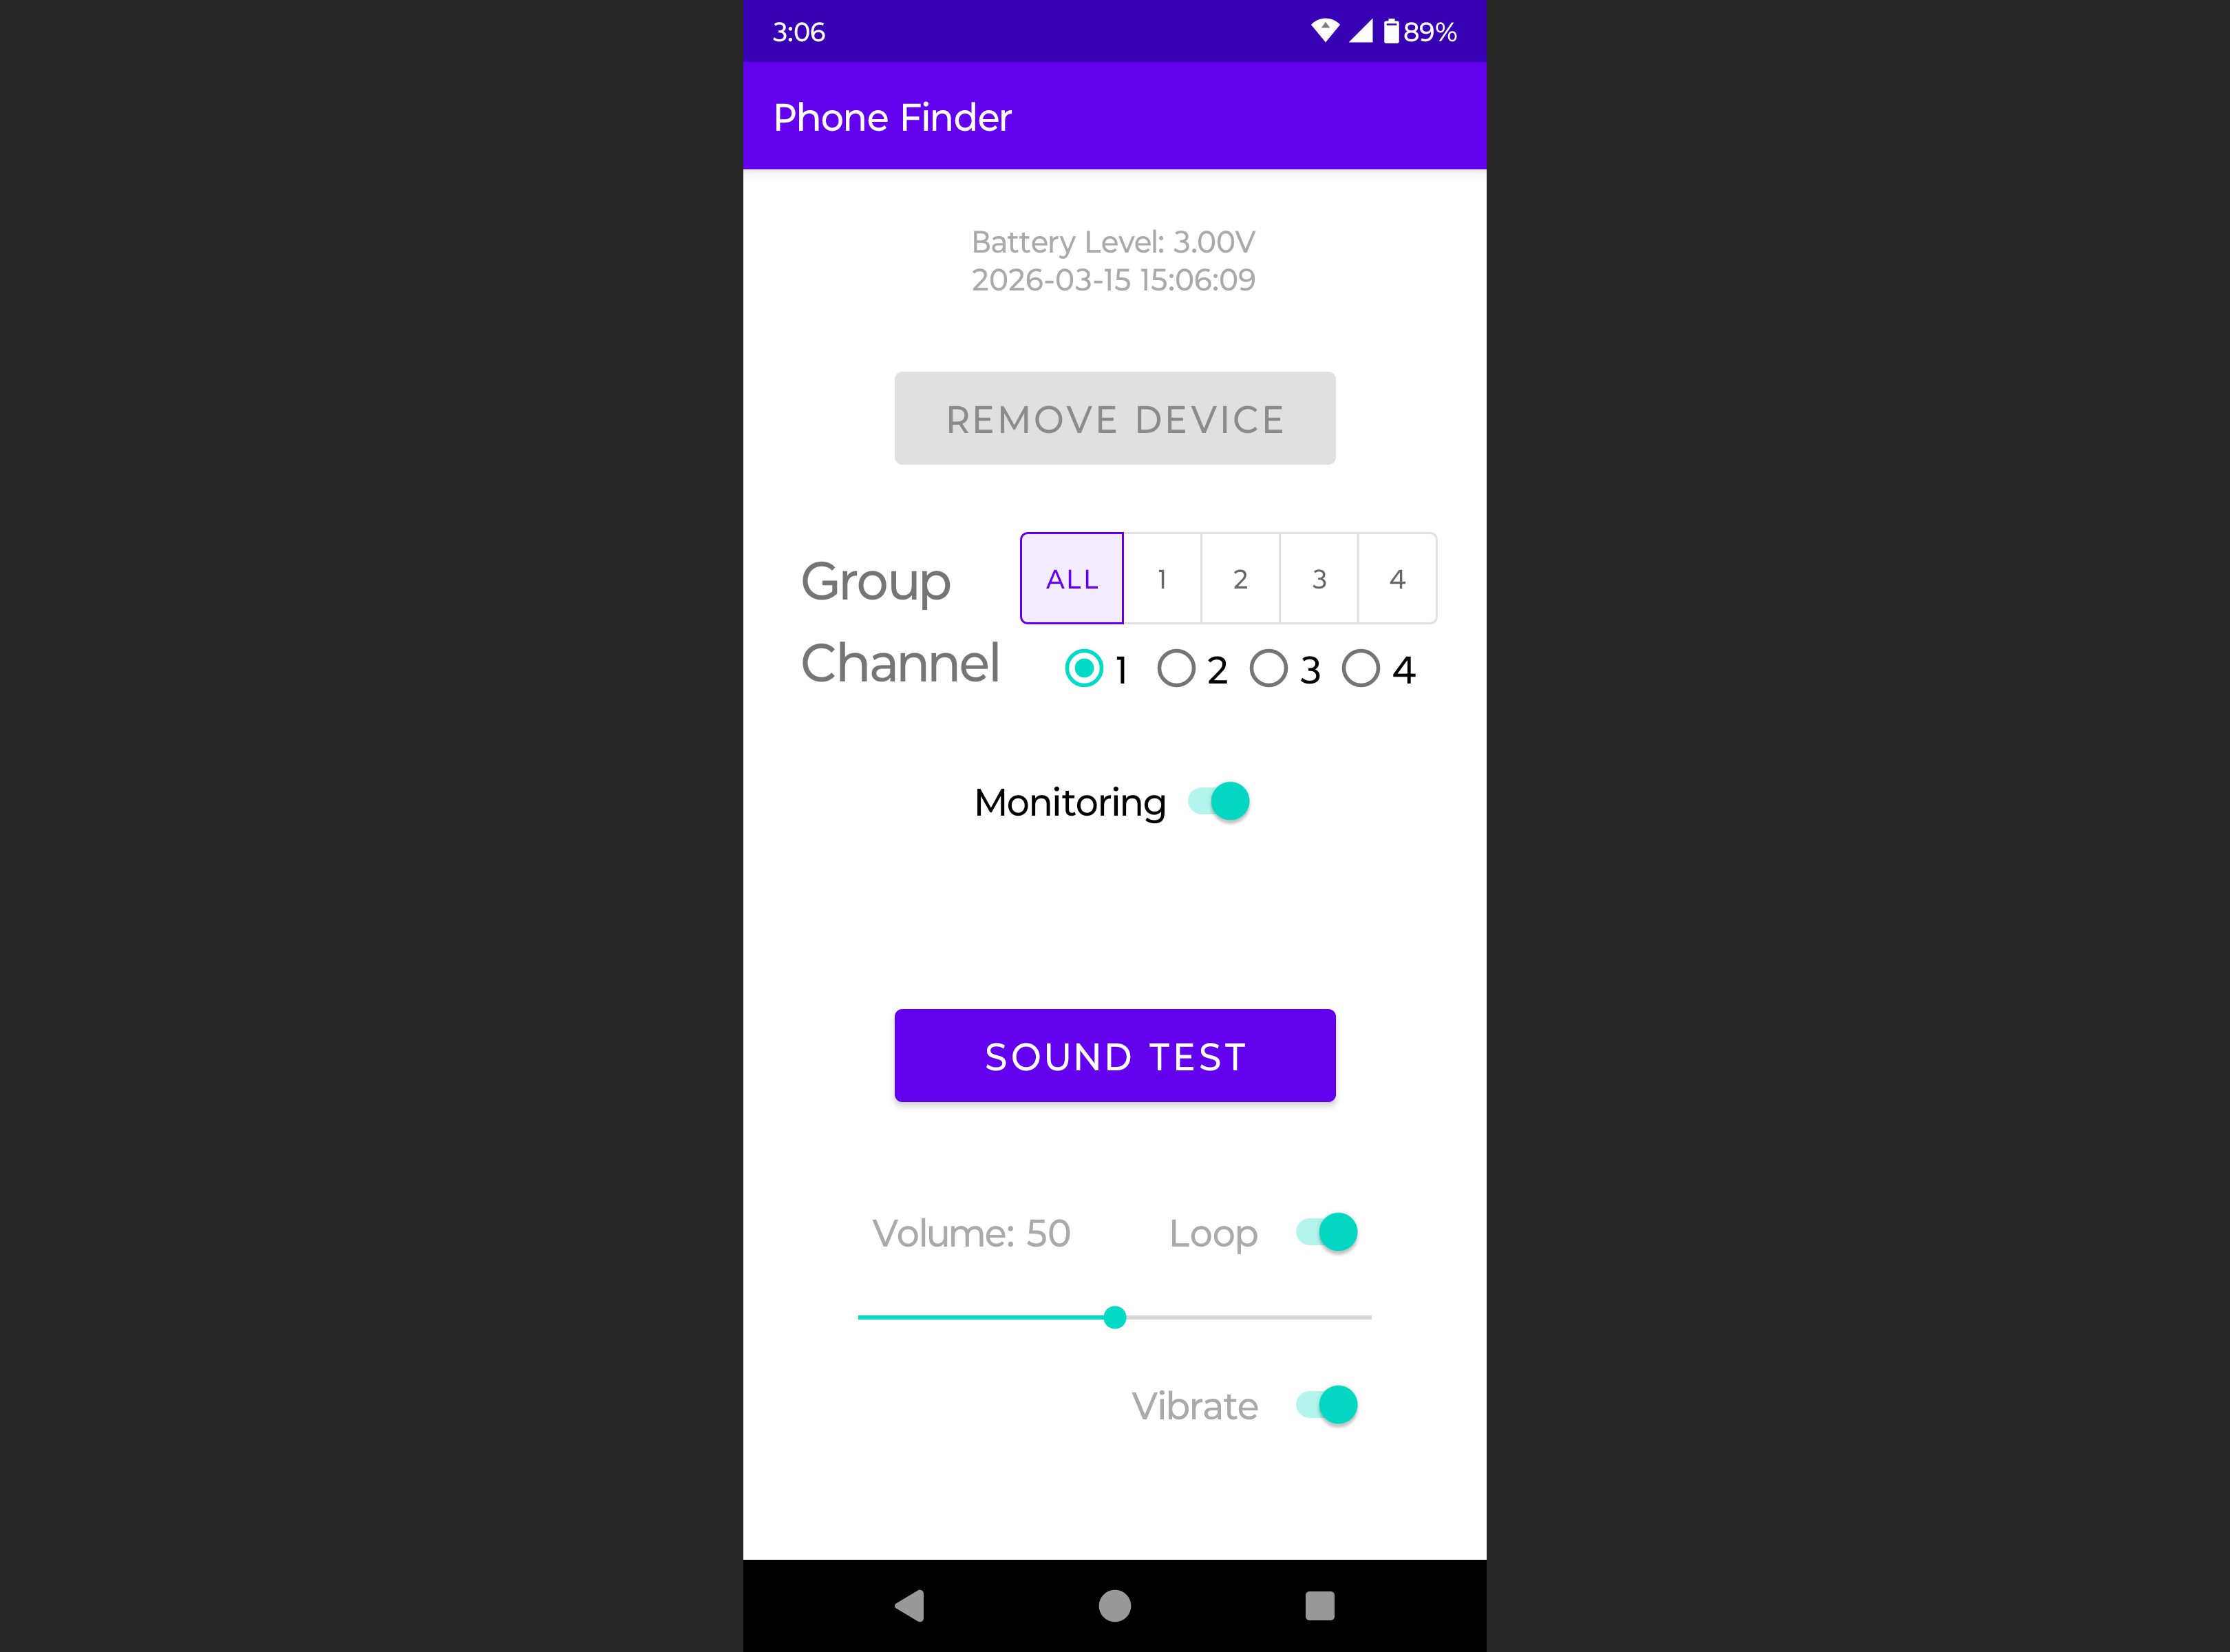
Beacon needs an app for setup and configuration, but I wanted to keep it as simple and local as possible. The idea of forcing account creation or subscription services doesn't sit well with me, so I wanted to avoid that and make the apps completely free. Their job is to pair each phone or tablet to a specific Beacon, set the desired group/button slot, and configure the response behavior (how loud to ring, whether or not to vibrate, whether or not to replay audio when it ends if not yet found), and keep track of battery data.
Android was the natural starting point for me, since I didn't have an iPhone at the time. I didn't have much app development experience, but I was able to iterate fairly quickly on it to get to the first working prototype. Not long after that I got my hands on an old 2016 iPhone SE and immediately noticed how much more restrictive Apple's ecosystem is. Simple things like playing the default ringtone are trivial on Android but impossible on iOS due to restrictions. After banging my head against the wall long enough, I did eventually figure out how to get the iOS app on par with the Android one.
The differences between Apple and Android ended up shaping some of the overall system design, because the hardware and advertising format had to be built around something both platforms could reliably support. This was responsible in part for leading me to the decision to switch to the iBeacon format (which, again, was a really good thing for the project).
The final app design is intentionally simple. It lets you pair phones and tablets to a specific Beacon, configure how each one responds, and monitor things like battery status without adding unnecessary friction. That simplicity was a big part of the project from the beginning: the hardware is supposed to save time, so the app should not create extra hassle just to make the system usable.
CASE ITERATIONS
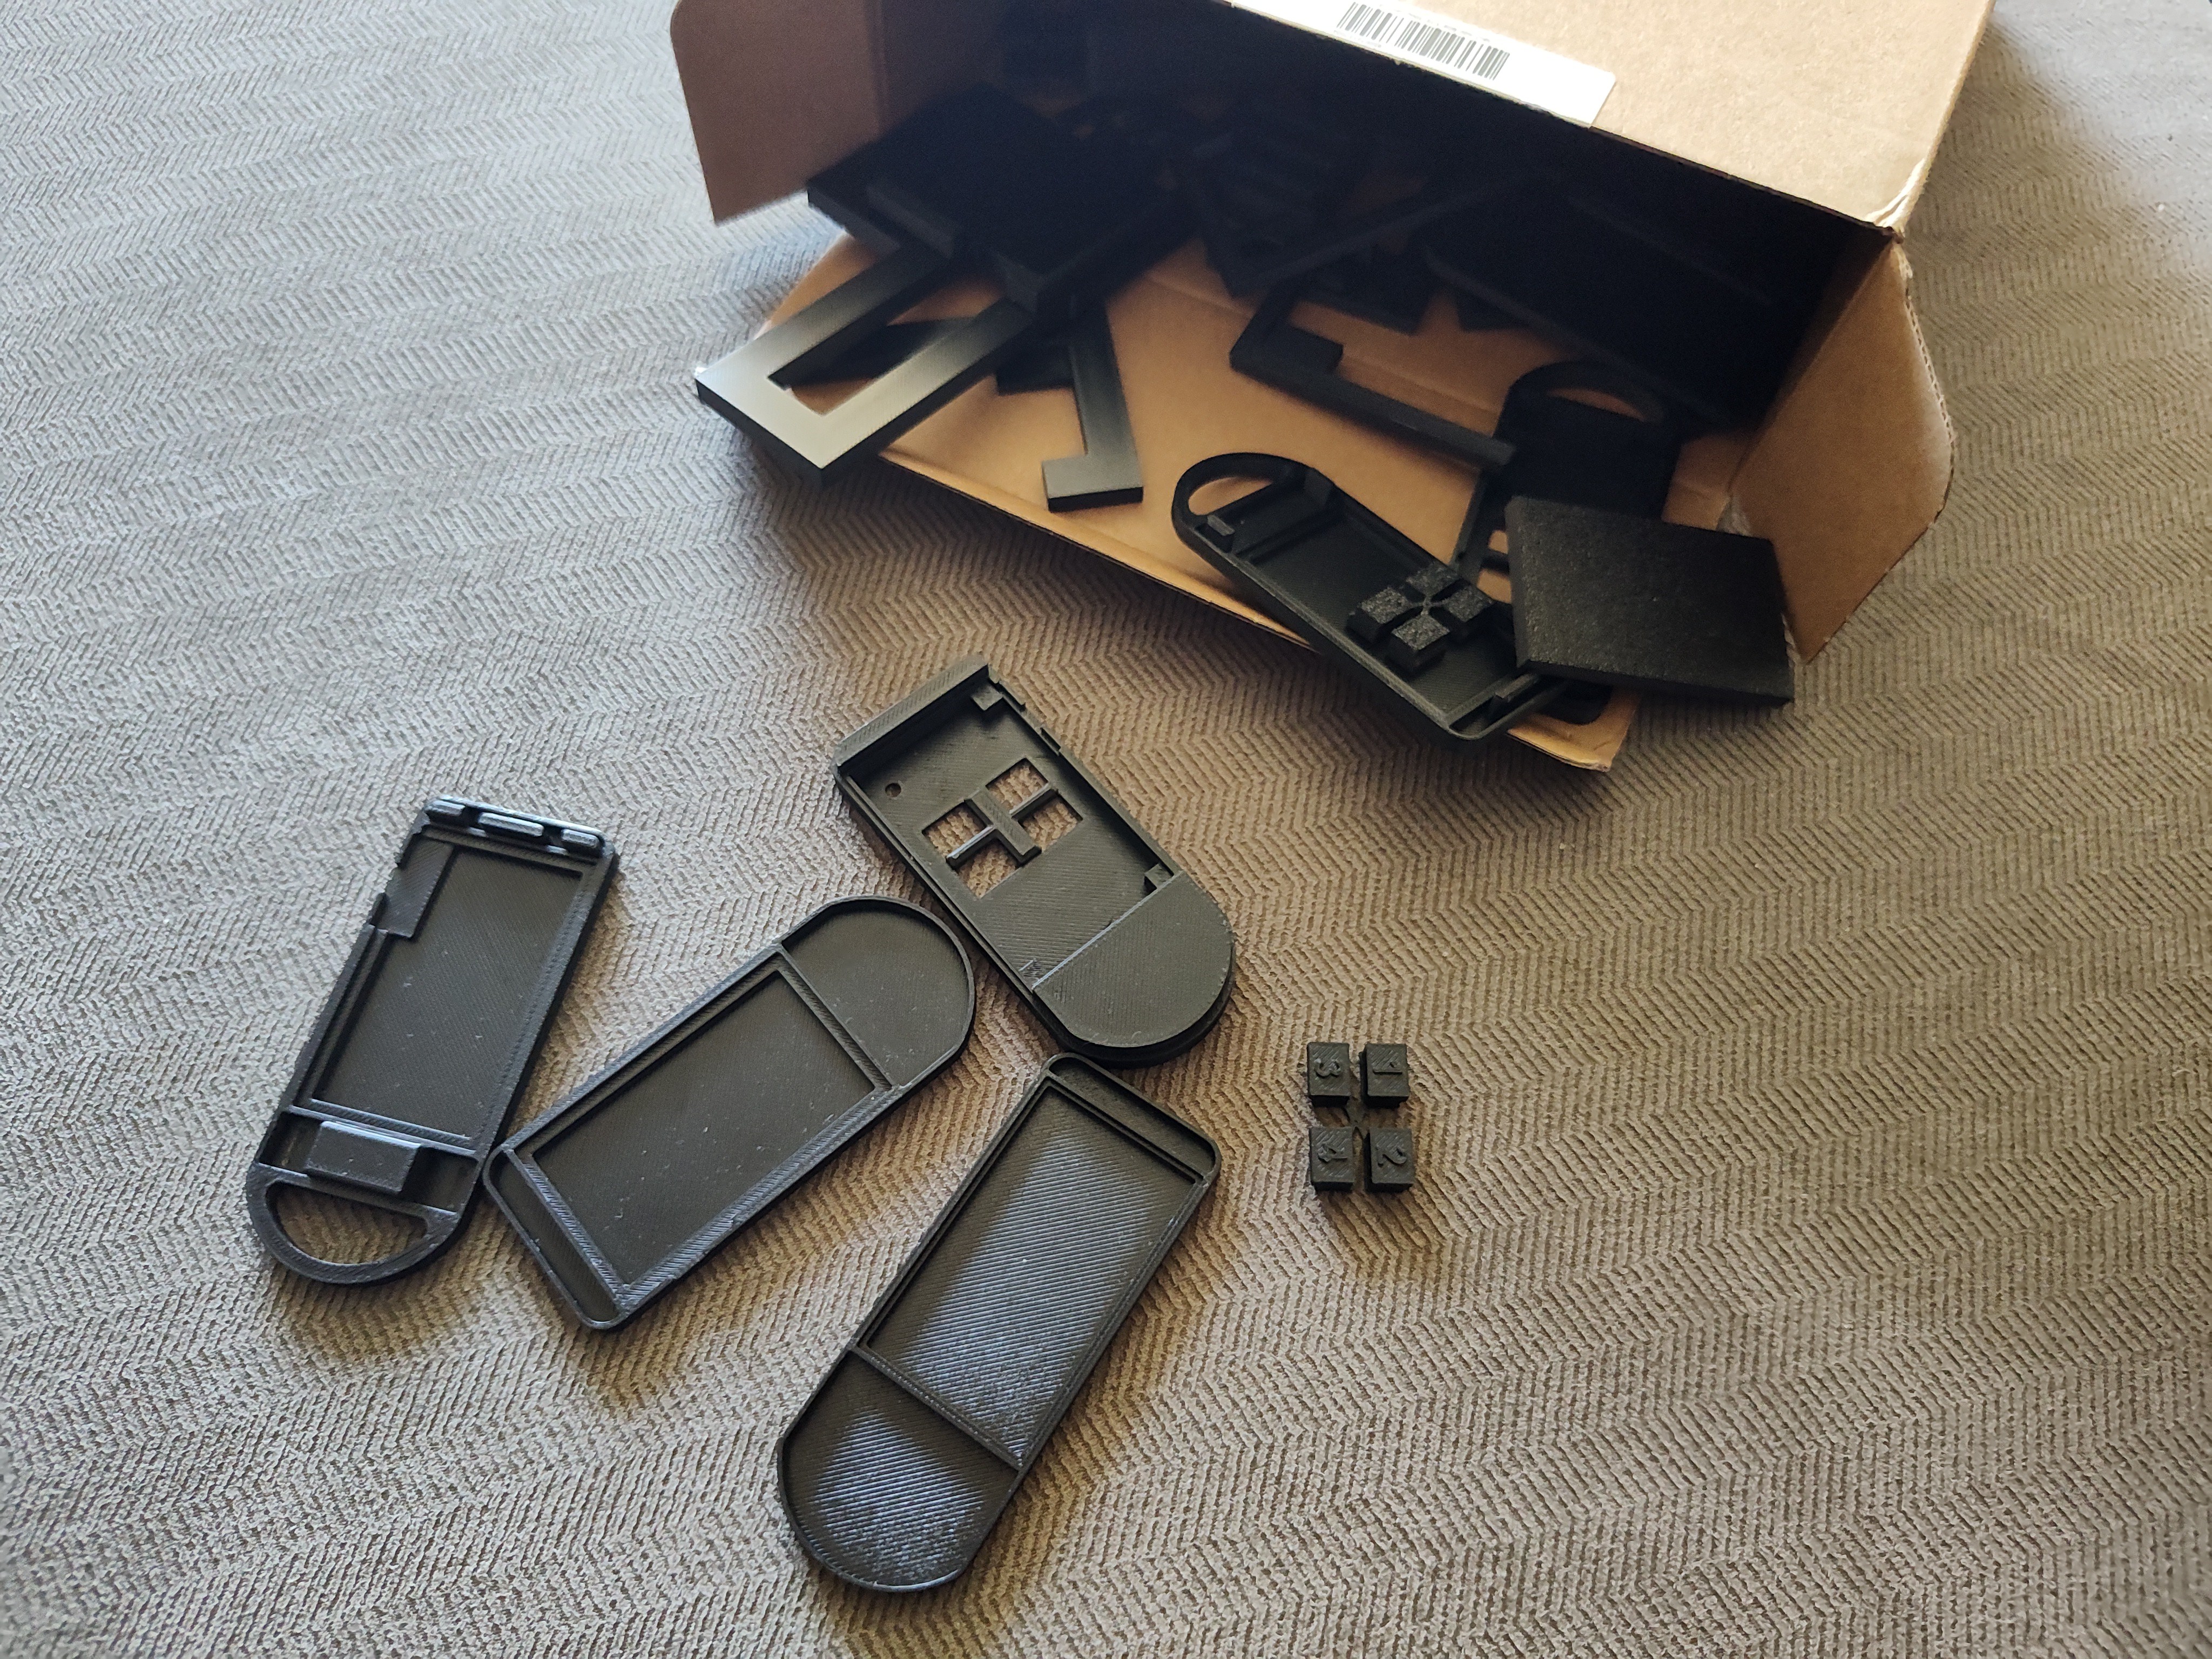
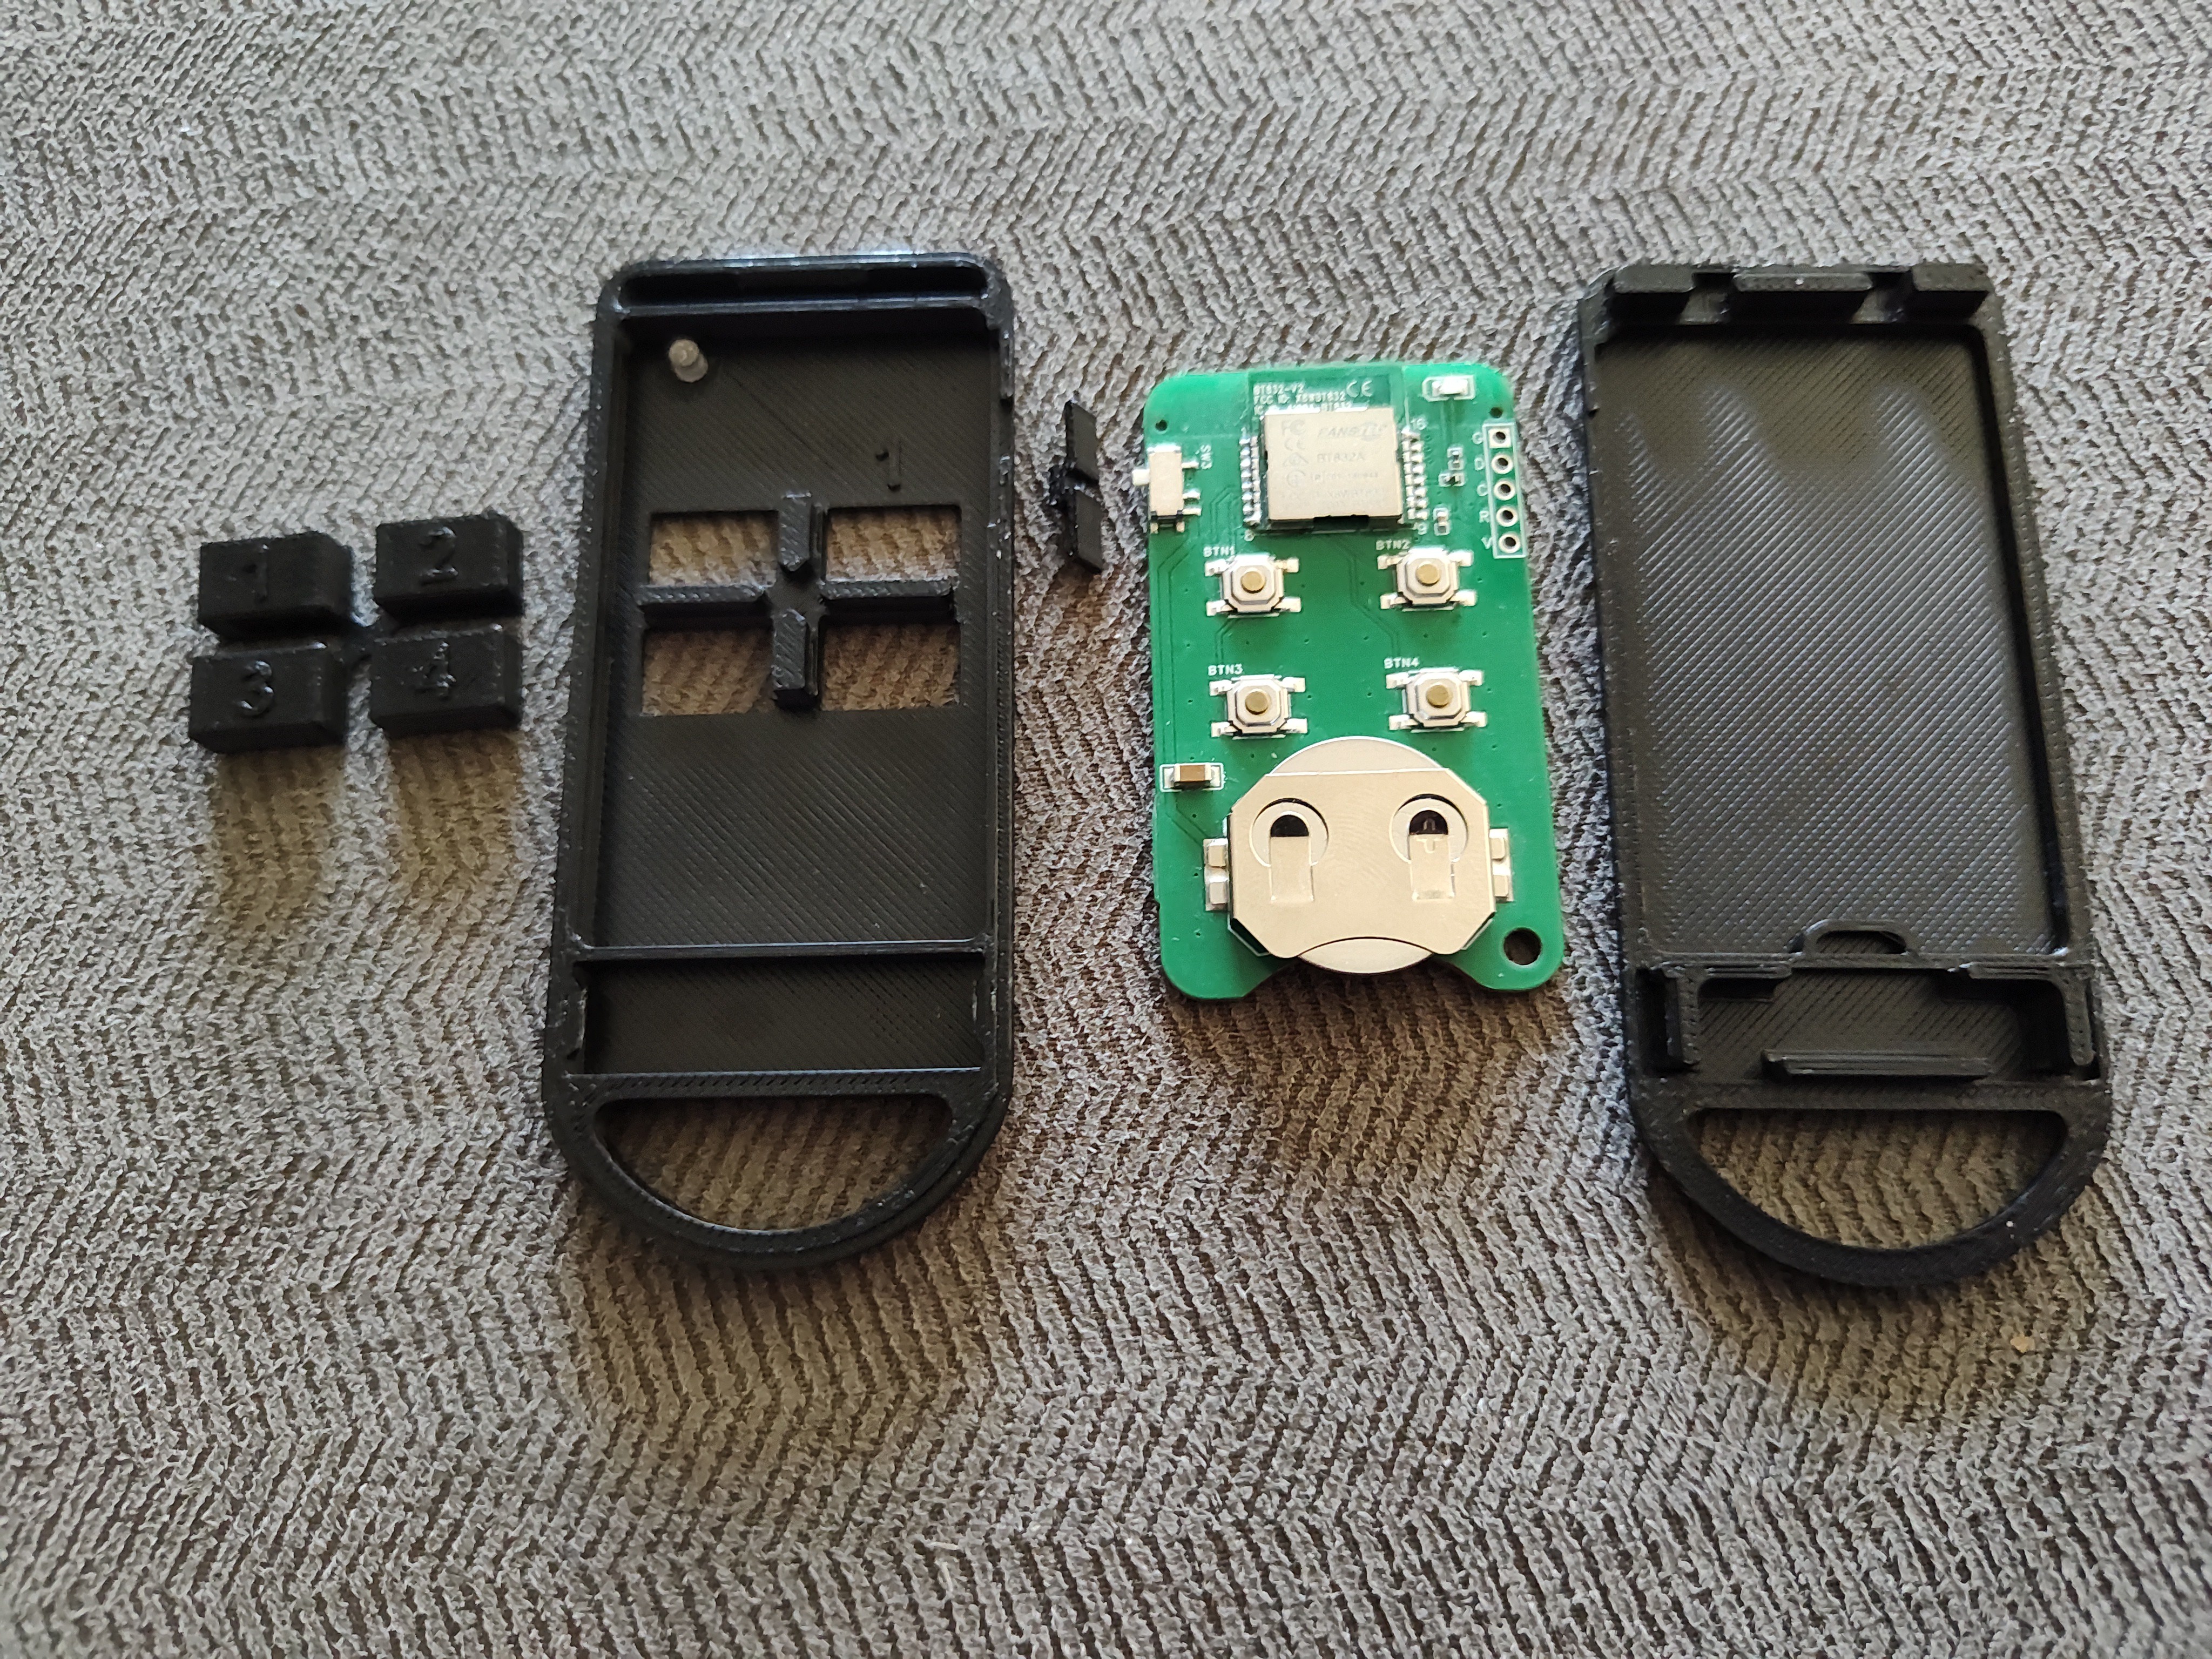
The enclosure took a lot of iteration, because I wanted it to do several things at once. It needed to be comfortable to hold, easy to assemble and open, and inexpensive to produce.
I didn't have much 3D printing experience before designing the case, so the earliest test prints were extremely simple rectangular shells whose main job was just to check PCB fit and tolerances. Once I got that dialed in, I moved on to the snap-fit design and dialed in details like wall thickness, latch behavior, and button hole sizing. After that, most of the effort went into slimming the case down and improving how it feels in the hand.
The final shape is about as thin as I could reasonably make it while still being sturdy enough to survive a decent drop (I actually tested it by tossing it at the walls and ceiling). The rounded edges make it comfortable to hold, and the button placement was chosen to feel natural during use rather than forcing your hand into an awkward position. Even the rounded lower section serves two purposes: it helps the case sit more comfortably in the hand, and it also creates a convenient loop for hanging Beacon on a hook.
Another goal was to keep the enclosure easy to assemble and service. The two halves snap together cleanly, so no tools are needed for assembly or disassembly. That makes manufacturing simpler now, and it also means replacing the CR2032 battery years later should be straightforward. I also added an optional magnetic version of the case, which I’m especially happy with because it works very well and makes it easy to keep Beacon on the fridge (that's where I like to keep it).
The LED indicator got similar attention. I wanted it to be placed where it would make intuitive sense during use, and I used a light pipe so it stays visible from a variety of angles while also giving the finished product a cleaner, more polished look.
Finally, an added benefit of 3D printing the case is that makes replacement parts and case customizations cheaper and easier.
CURRENT STATUS
At this point, the hardware, firmware, apps, and enclosure have all gone through multiple iterations, and I now have a working pre-production unit that demonstrate the full system in action.
The project has reached the stage where the main challenge is not proving that the concept works — it is getting enough support to manufacture the first production run. As such, that is why Beacon is currently on Kickstarter. The campaign is live now, and because Kickstarter is all-or-nothing, it needs to reach its funding goal before the deadline or it will not move forward.
If you’d like to check out the campaign and help bring Beacon to life, you can find it here:
https://www.kickstarter.com/projects/andrewgarvin/beacon-find-all-your-devices-in-seconds