 Yash Mulgaonkar

Features:
I designed the UI to be highly visual and interactive, giving you the feel of an ATC scope with the utility of a desk clock.
- Tactical Radar Sweep: A smooth, non-blocking radar animation complete with range rings and compass rose. Aircraft appear as TRACON-style blips oriented to their actual live headings.
- Dial-Driven Zoom: Rotate the physical knob it to set your radar radius through 2, 4, 6, and 8-mile presets.
- DetailedFlight Data: See an interesting blip? Tap the touchscreen to pull up the aircraft's callsign, speed, altitude, ICAO type, route, and even the airline's logo.
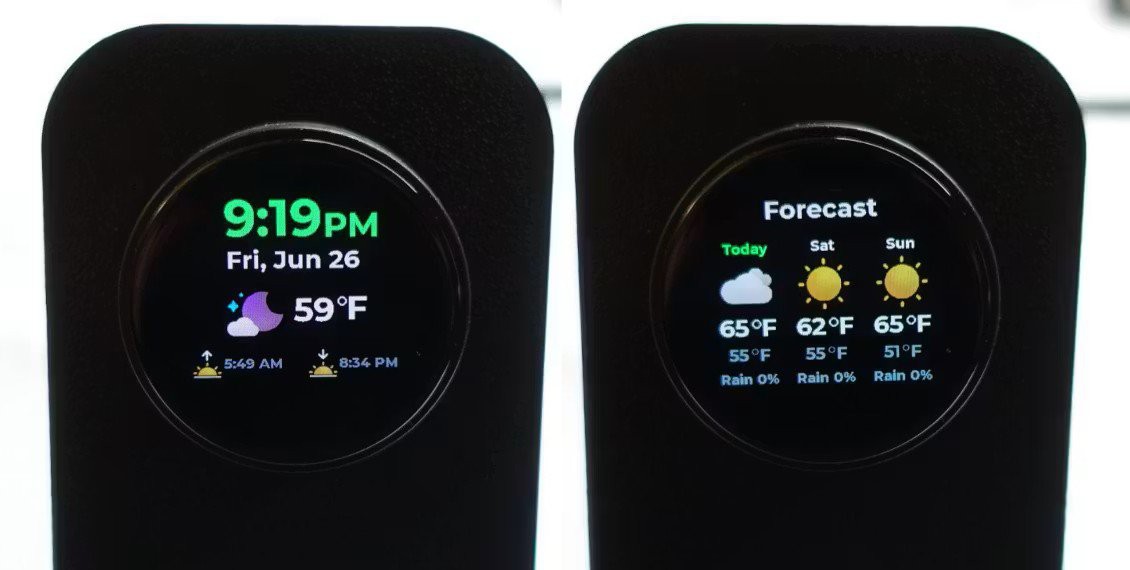
- Clock/Weather: When the skies are empty, FlightScnr transitions into a desk dashboard showing a digital clock, live current weather, and a 3-day forecast.
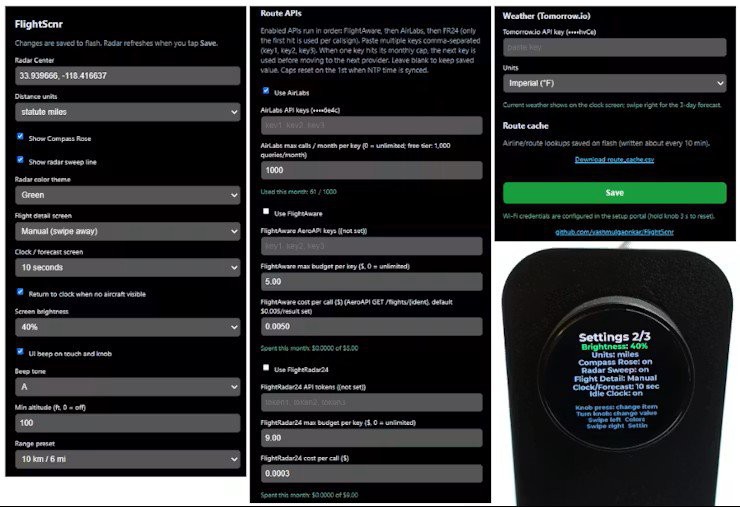
- Customization: You can adjust settings directly on the device via the settings menu, or via the locally hosted web portal to configure your API keys, set distance units or set the color theme without ever needing to re-flash the board.
What You Need:
This is a straightforward, beginner-friendly build based on a LilyGO T-Encoder Pro that requires absolutely no soldering. All you will need in addition to this is a USB-C cable and the custom, screw-fit 3D printable case available on my MakerWorld page [Model Link]. I have provided three options to suit your setup: a standalone desktop stand, or brackets to mount the display either above or below your monitor. For the brackets, use small strips of 3M/VHB tape.
How to Set It Up:
I wanted the deployment process to be as frictionless as possible. Whether you want a plug-and-play experience or want to dig into the code, you have options.
- The Quick Way (Browserbased WebFlasher): You do not need to install an IDE or compile anything. Plug the T-Encoder Pro into your computer, open Google Chrome, and navigate to the FlightScnr WebFlasher. Hit "Connect, " select your device, and click "Install." The pre-compiled binary will load directly onto your board.Be sure to select "Full Install" if you are installing the software for the first time.
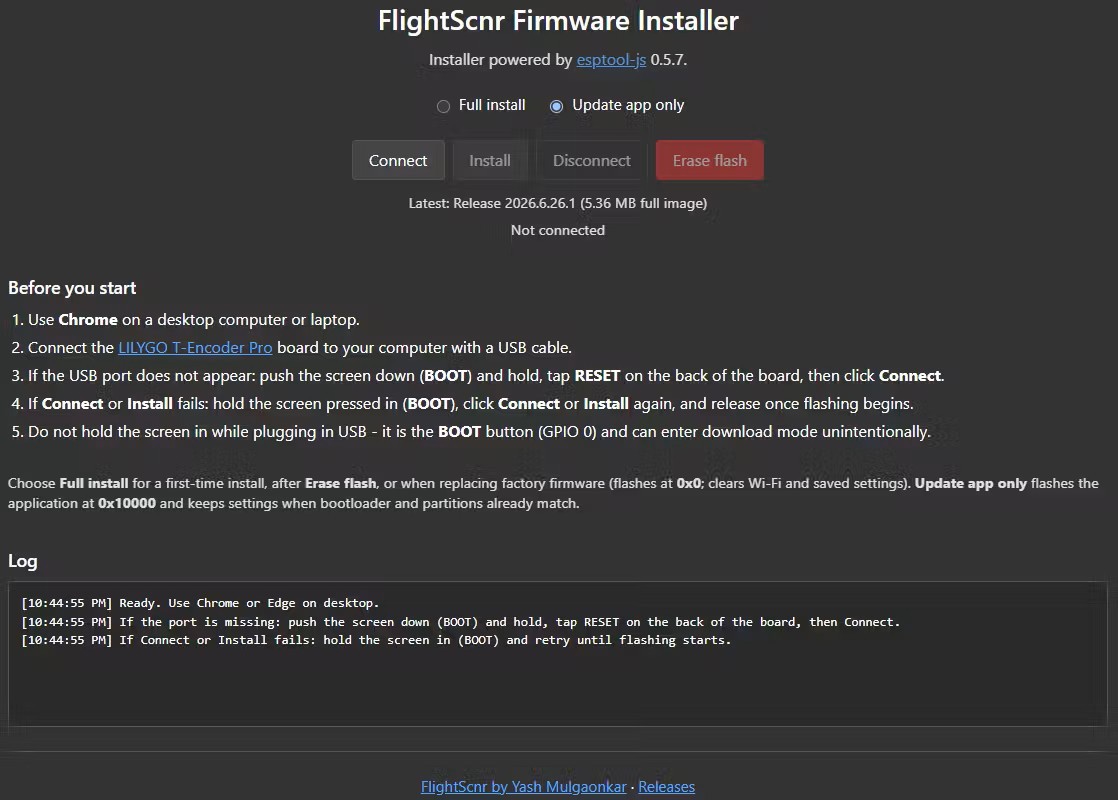
- Building from Source(PlatformIO): For those who want to tweak the source code, clone the repository and hack away! The firmware is smart enough to auto-detect whether you have the older DXQ120 or the newer TFD12 display panel on boot, meaning one binary handles both hardware variants.
Once the board reboots, use your phone or laptop to connect to the FlightScnr-AP captive portal to input your home Wi-Fi credentials. Finally, load up the local web interface to drop in your free API keys (for weather data, routes, and airline logos) so the device can pull in all that rich information. Available options include AirLabs, FlightRadar24, FlightAware's Aero API and Tomorrow.io.
Open Source and Always Evolving:
FlightScnr has completely replaced my phone for casual plane spotting from my desk, but the project is far from finished.
All the code is fully open-source (under the CC BY-NC-SA 4.0 license) and available on my GitHub repository. The firmware is always evolving, so be sure to star the repo and check back frequently for new features, UI improvements, and firmware updates!
Happy tracking, and let me know if you build one!