 CiferTech

🔩 The Hardware
ESP32-DIV comes in three configurations. v1 is the original. Compact, all-in-one, good entry point. v2 is the current main board. Better layout, more reliable connections, and it supports the shield expansion system. This is what I'm using throughout this guide. CYD Cheap Yellow Display is a pre-made ESP32 development board with a built-in touchscreen. If you want to try the firmware without building your own hardware, the CYD is the easiest and cheapest way in.
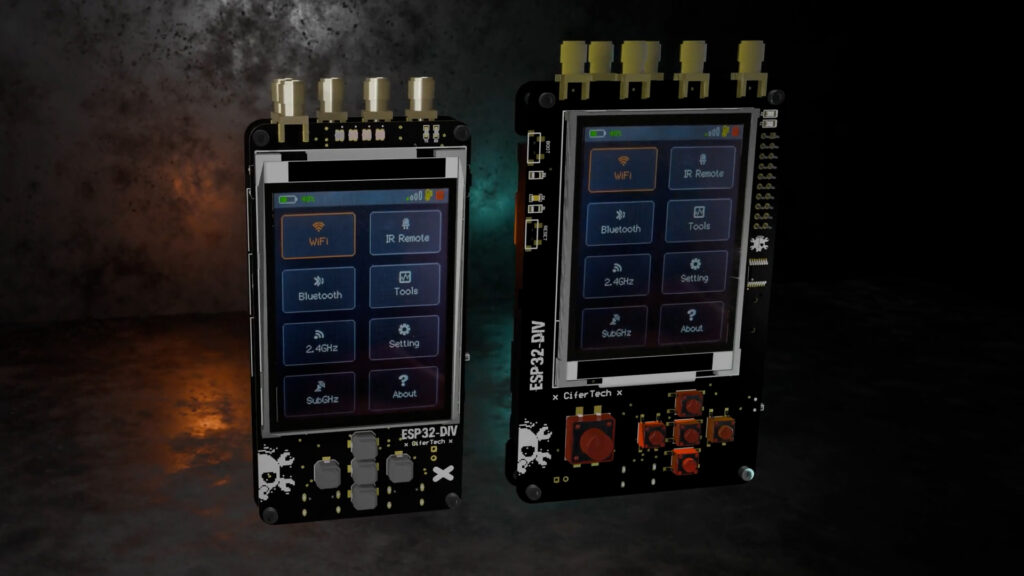
Main Board
The core is the ESP32-S3 dual-core, plenty of flash, handles WiFi and Bluetooth natively. On top of that:
- ILI9341 TFT with XPT2046 touch the display and touch controller
- IP5306 battery charging and protection
- CP2102 USB to serial for flashing and debugging
- PCF8574 I/O expander for the physical buttons
- WS2812 NeoPixels status LEDs
- External antenna connector and buzzer
The Shield
The shield connects underneath the main board and adds the RF hardware:
- 3x NRF24L01 modules 2.4GHz scanning and spoofing
- CC1101 Sub-GHz capture, replay, and jamming
- IR transceiver capture and replay remote control signals
- PN532 RFID and NFC (added in the new hardware revision)
- NEO-6M GPS module (also new)
- Multiple antennas for extended range
The new shield design comes in two versions. The first is straightforward solder the modules in place, files are already on GitHub. The second is more complex and still in progress, but it opens the door for a lot of new features down the line.
⚡ Flashing the Firmware
Three ways to get the firmware on the board.
Web Flasher (recommended)
Go to cifertech.github.io/ESP32-DIV in Chrome or Edge. Select your board version, plug in via a USB data cable (not a charge-only cable, that's the most common problem), click Flash, select your serial port, and watch the progress bar. About 30-60 seconds and you're done. No drivers, no IDE, no terminal. If nothing shows up in the port list: try a different cable first, then install the CH340 or CP2102 driver for your OS.
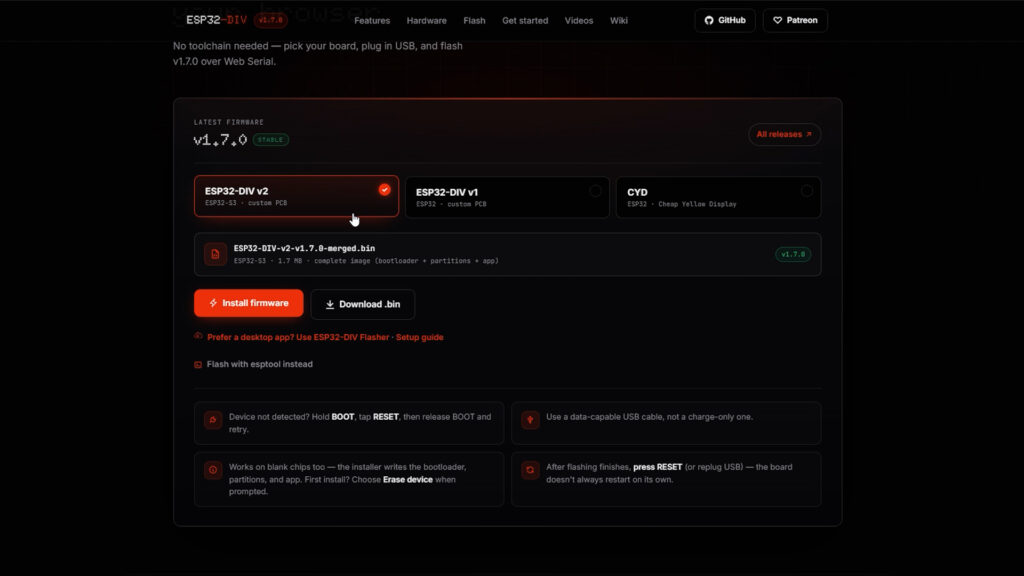
DIV Flasher Desktop App
A Windows GUI app built specifically for this project. Download it from the repo and run ESP32-DIV-Flasher.bat. Select your COM port and board preset, hit Refresh List under the Toolbox tab, pick your firmware version, and click Download Release. It pulls the .bin straight from GitHub and fills the path in automatically. Check Erase entire flash before write on first install, then hit Flash Firmware. The activity log shows everything in real time. Ctrl+Enter to flash.
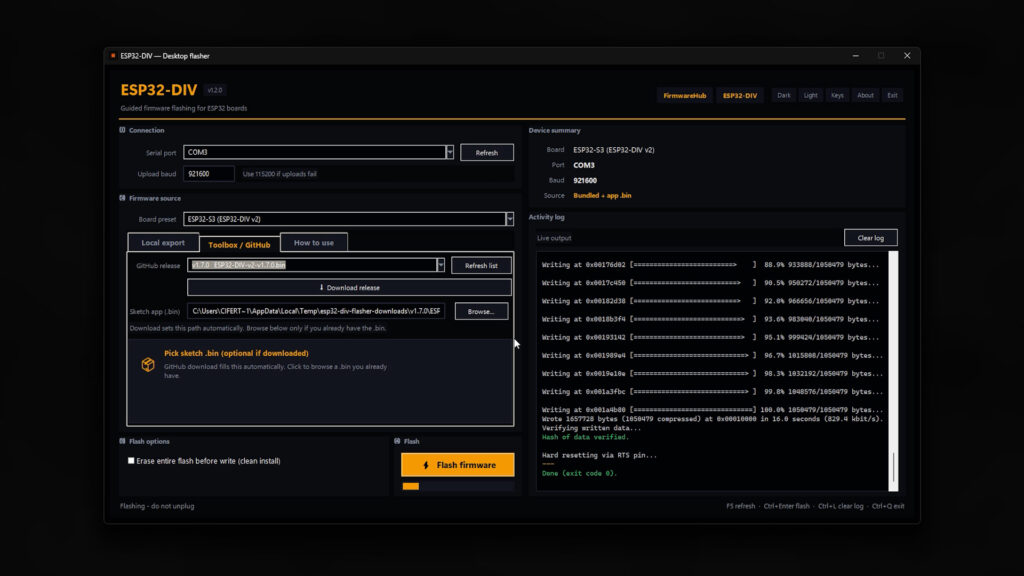
Arduino IDE
Full walkthrough is in the wiki. Short version: install Arduino IDE, add the ESP32 board package at v2.0.10 specifically, replace platform.txt with the one from the repo's Flash File folder, and copy the Libraries folder from the repo into your Arduino libraries directory. Do not use the Library Manager versions, they will not work correctly with DIV. Select ESP32 S3 Dev Module, Partition Scheme: Minimal SPIFFS, upload speed 921600. Hold BOOT and press RESET if it does not enter download mode automatically.
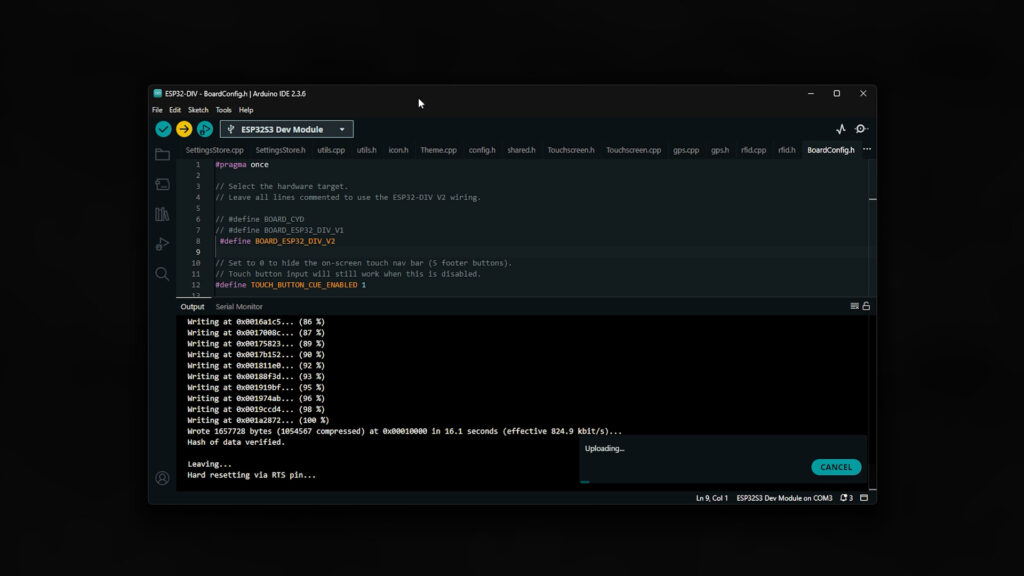
🗺️ Navigation
The menu is organized by protocol WiFi, Bluetooth, 2.4GHz, Sub-GHz, IR, RFID, GPS, System. Status bar at the top shows WiFi state, BLE state, SD card presence, and battery.
📡 WiFi
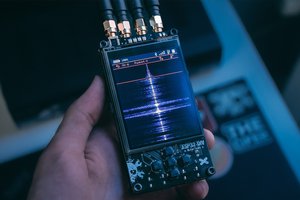
Packet Monitor live waterfall graph of wireless traffic across all 14 channels. WiFi Scanner lists nearby networks with SSID, signal strength, encryption type, and channel. Beacon Spammer floods the air with fake SSIDs. Load a custom list from SD or go random. Deauth Attack sends disconnect frames to kick clients off a network. Broadcast mode hits all clients, targeted mode goes after one device. There's also a Deauth Detector that flips it around and alerts you if someone is running a deauth near you. Captive Portal clones a network name and serves a fake login page to anyone who connects. Probe Flood hammers access points with probe requests.
... Read more »

 Geoffrey Wells
 Mark Feldman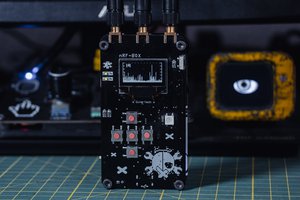
Nice Work!