 iliasam
First step is building "main plate" - it is the part that holds ball bearing, motor, and some other parts. This part can be cut from some flat plastic plate. I have used 5mm acrylic glass:

Drilling 42 mm hole for bearing was a little tricky.
This part can be printed at 3D printer.
Next step is assembling everything.
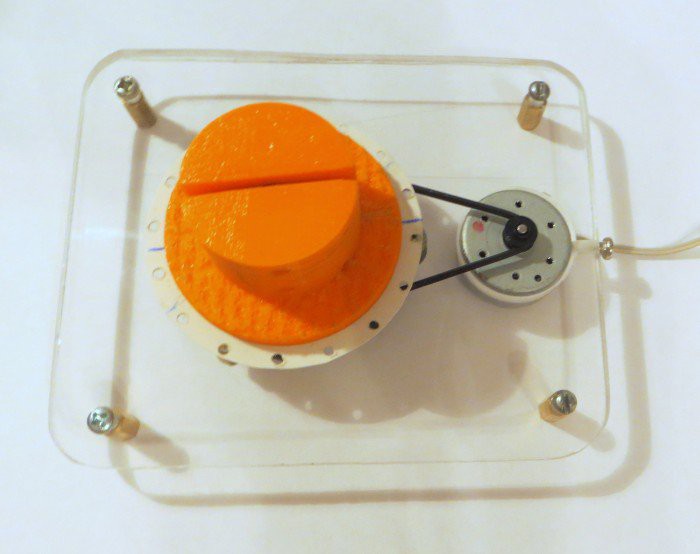
Photos of assembled mechanics (top view):
Side view:
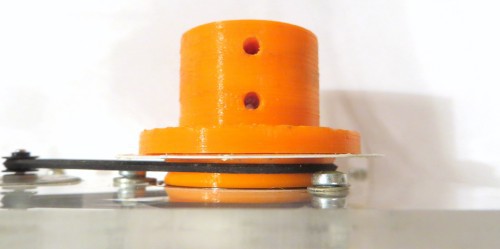
Motor is connected with the PCB holder with rubber belt.
Down view:
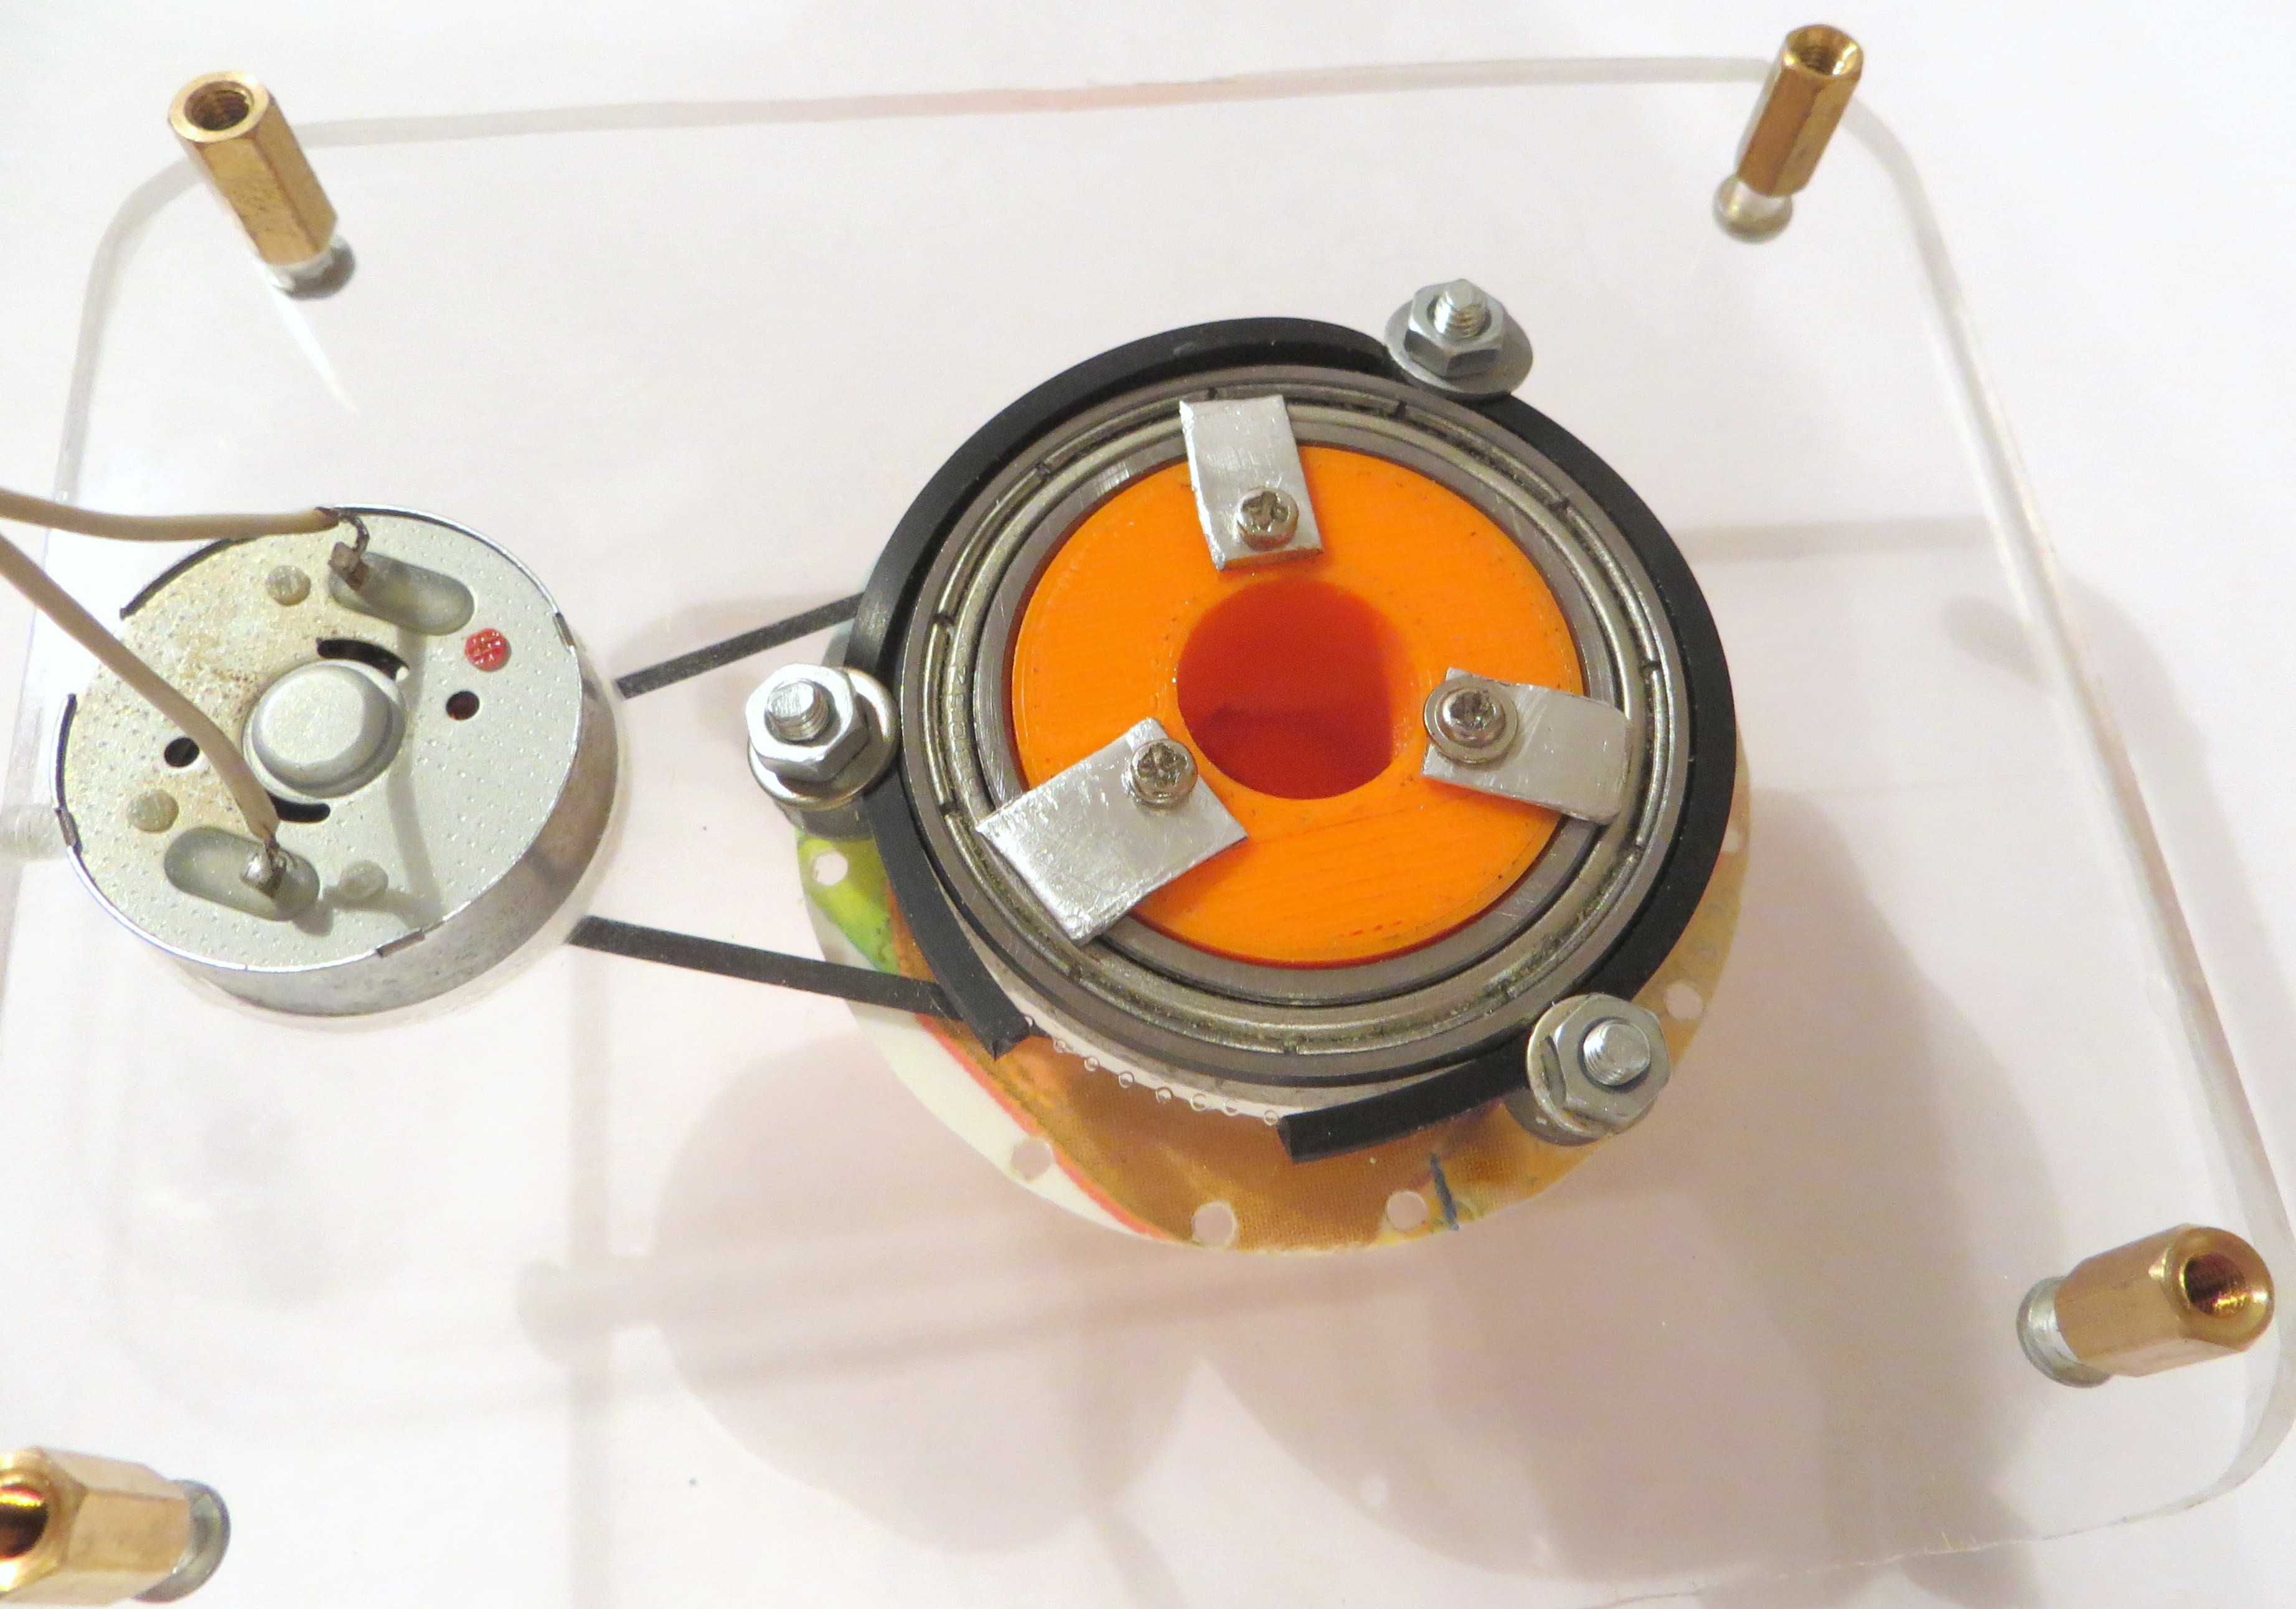
Here it can be seen method of fixing the PCB holder to the ball bearing.
Next step is to fix encoder at the "main plate" and to test it.
Discussions
Become a Hackaday.io Member
Create an account to leave a comment. Already have an account? Log In.