Close
0%
0%

A pest nest identification AI agent

Inspired to develop this local AI agent after failing to remove a yellowjacket nest with my custom bee vacuum due to my lack of knowledge :)

Similar projects worth following
0 followers
If you are familiar with my project tutorials, you may know that I enjoy developing multidisciplinary proof-of-concept research projects that focus on solving real-world problems. Usually, it takes a long time for me to complete a project since I prefer designing custom mechanical parts, PCBs, and firmware from the ground up to be able to control all experiment parameters. Nonetheless, this project was an impromptu idea born out of a failed solution while I was trying to get rid of a pest infestation on my balcony. In this project, I wanted to showcase how a lack of knowledge and experience may lead to a painful and costly mistake, and how employing AI-oriented assistance can help prevent mistakes by providing educated guesses on potential culprits and emphasizing contacting experts for nest removal.

Nearly two months ago, I noticed bee-like pest activity near a small opening outside the wall insulation in my balcony. After some superficial research on species that prefer wall insulation and seeing a bumblebee flying over the flowers on my balcony, I falsely deduced that the pest nest belonged to a bumblebee colony. Thus, I did not give much credence to the increasing colony size and decided to design a custom 3D-printable bee trap, inspired by honey bee vacuums, to safely relocate the nest. As I thought I could create an easily replicable device to help people facing a similar problem, I decided to design my bee trap as an add-on accessory to my Samsung cylinder vacuum cleaner. In this regard, I gradually worked on my bee vacuum and designed it to be attachable between the cleaner hose and the hose connection adapter. I heavily focused on the device's modularity and redirecting the negative pressure and airflow (suction) to safely collect bees.

However, I have made a huge mistake by focusing on the results and ignoring my lack of knowledge about pest species. I realized my mistake as I was searching for bumblebees' airflow resistance to design a safe bee vacuum inner frame. Thanks to a random but lucky article inspection, I came to the conclusion that the flight patterns of the species residing in my balcony do not correspond to those of bees but rather to those of wasps. Considering the wall insulation nest, they were more likely yellowjackets. Once I went out to investigate the nest up close to confirm my new assumption, I could not even get near it; the colony had become too aggressive. The only thing I could do was to squeeze a plastic bag near the opening via a broom to protect myself. Since I utilized this balcony area as storage and only inspected the nest behind a window, I did not notice this aggressiveness and threat.

After realizing this was a pest infestation, I decided to speed up developing my bee vacuum and remove the nest immediately. I even purchased a beekeeping hoodie :) Unfortunately, again due to my lack of knowledge and experience, I made colossally wrong assumptions about the nest population and size. Once I tried to remove the pest nest with my bee vacuum, hundreds of yellowjackets swarmed and stung me three times. Thankfully, I was wearing the hoodie and did not show any allergic symptoms. Thus, my experiment did not cause any serious health issues; the only positive result I got from this experiment was a funny video documenting how yellowjackets successfully repelled me :)

At this point, this infestation stopped being an experiment on a custom bee vacuum and became a dangerous threat to me and my neighbours. Thus, I immediately contacted a professional firm to eliminate the yellowjacket infestation. They applied chemical treatment and needed to break the wall insulation to remove the whole nest. Little did I know, the insulation company left a huge void between the panels, throwing all of my nest size estimations out of the window.

After this painful yet enlightening experience, I still wanted to publish my 3D-printable bee vacuum since it can work perfectly for more docile species such as bumblebees, in the case that the user has the appropriate protection gear and attire. Nevertheless, I also wanted to examine and share how I could employ AI to develop a simple solution to safely investigate potential pest species and their threat levels, leading the user to take action early and contact experts with scrutinizing articles not by chance but by contrivance. After mulling over different AI-oriented solutions, I decided to develop a VLM-enabled AI agent and assign a simple web interface to the agent for user interactions.

The web interface allows the user to upload videos of outside nest activity, select frames from the video, and pass the selected frame to the AI agent. The web interface also lets the user enter assumptions about pest species based on the monitored nest activity. Then, the...

Read more »

STL.zip

Mechanical components (STL)

x-zip-compressed - 971.21 kB - 10/03/2026 at 01:21

Download

  • 1 × Qualcomm Dragonwing IQ-9075 EVK
  • 1 × Bambu Lab A1 Combo
  • 1 × M2 Screws, Nuts, and Washers
  • 1 × Samsung VC07T35 Cylinder Vacuum Cleaner

  • 1
    Designing and printing the cleaner-compatible bee vacuum

    #️⃣ First, I deliberately took measurements of the hose and the hose connection adapter of my Samsung VC07T35 cylinder vacuum cleaner. There are multiple versions of this cleaner with slightly different dust container designs; nonetheless, the bee vacuum parts should fit since all versions share the same hose and connector dimensions.

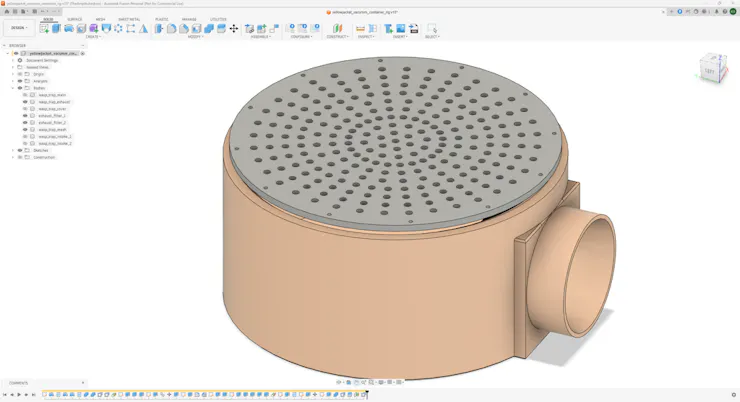
    #️⃣ The main body of the bee vacumm consists of three parts: the intake cover (top), the bee trap (middle), and the exhaust container (bottom). To make the main body assembly effortless, I designed these parts with mating threaded screws.

    #️⃣ To connect the cleaner hose to the intake cover, I designed a two-part case for the hose end, securing the hose via its plastic ring. The case parts can be connected via self-tapping M2 holes. Once the parts are connected, they reveal the male mating threaded screw, enabling the case to be attached to the intake cover via the corresponding female threaded screw.

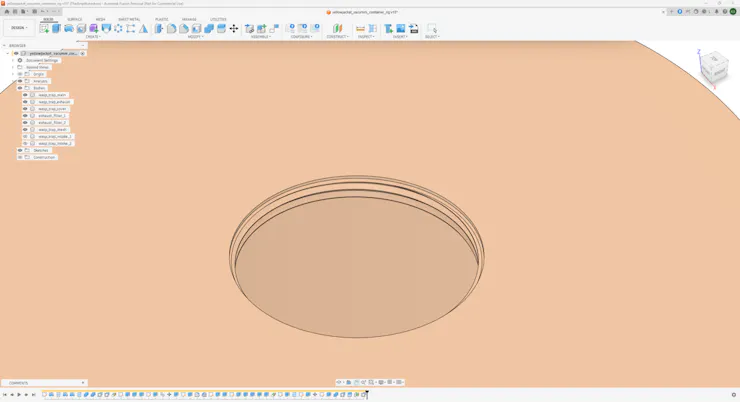
    #️⃣ I designed a mesh with a specific shape to disperse negative pressure (suction) as the air moves from the bee trap to the exhaust container. The mesh is attachable to the bottom of the bee trap via self-tapping M2 holes. As mentioned, I designed the mesh to soften the applied pressure since I falsely deduced that I was dealing with a bumblebee nest due to my faulty assumptions.

    #️⃣ I added a friction-fit cylindrical joint to the exhaust container that connects to the hose connection adapter of the vacuum cleaner. To avoid any debris from falling into the cleaner's dust container, I designed a two-part exhaust filter frame, which works by adding a filter medium or cloth between the frame parts while attaching them to the cylindrical joint via self-tapping M2 holes.

    As a frame of reference for those who aim to replicate or improve this bee vacuum gadget, I shared the STL files of all components individually as open source in the project GitHub repository.

    🎨 I sliced all the exported STL files in Bambu Studio and printed them using my Bambu Lab A1 Combo. In accordance with the bee theme, I utilized these PLA filaments while printing 3D parts:

    • eSun ePLA-HS Grey
    • eSun PLA+ Beige

    #️⃣ For all parts, I enabled tree support with critical regions only to prevent sagging on connection points.

    #️⃣ Since the bee trap has a cylindrical bottom and does not have enough surface area to provide sufficient adhesion considering its height, I enabled 2-layer raft and increased the raft size (initial layer expansion) to 10 mm.

    #️⃣ Other than these modifications, I utilized the default settings for all components.

  • 2
    Assembling the cleaner-compatible bee vacuum

    #️⃣ First, I attached the mesh to the bottom of the bee trap via M2 screws. In addition to softening the negative pressure produced by the vacuum cleaner, the mesh also stops the captured pests from entering the exhaust container.

    #️⃣ Since a yellowjacket worker can pass through 4 mm holes in diameter, I specifically designed the mesh to have 3.50 mm holes to trap yellowjackets safely. Yellowjackets are one of the smallest wasp species and are similar to honey bees. Thus, in theory, the bee trap should work on most bee-like pests. Of course, please conduct proper research if you want to utilize this bee vacuum on pests.

    #️⃣ Then, I secured a fine cloth between the two parts of the exhaust frame and connected the frame to the cylindrical joint of the exhaust container via M2 screws.

    #️⃣ I fastened the hose connection adapter of the vacuum cleaner to the exhaust container via its friction-fit cylindrical joint.

    #️⃣ I attached two parts of the hose case to the cleaner's hose end, securing its plastic ring via the built-in grooves. Then, I reinforced the case connection with M2 screws, revealing the male mating threaded screw.

    #️⃣ I fastened the hose case to the intake cover via the built-in mating threaded screws.

    #️⃣ Then, I combined all parts of the main bee vacuum body (the intake cover, the bee trap, and the exhaust container) using the corresponding mating threaded screws.

    #️⃣ Finally, I affixed the hose connection adapter to the VC07T35 cylinder vacuum cleaner.

  • 3
    Continue reading the project tutorial

View all 3 instructions

Enjoy this project?

Share

Discussions

Kutluhan Aktar wrote 2 days ago • point

Inspect the full project instructions on Hackster:

https://www.hackster.io/kutluhan-aktar/a-pest-nest-identification-ai-agent-from-a-failed-bee-vacuum-66edfd

  Are you sure? yes | no

Does this project spark your interest?

Become a member to follow this project and never miss any updates