 Arnov Sharma
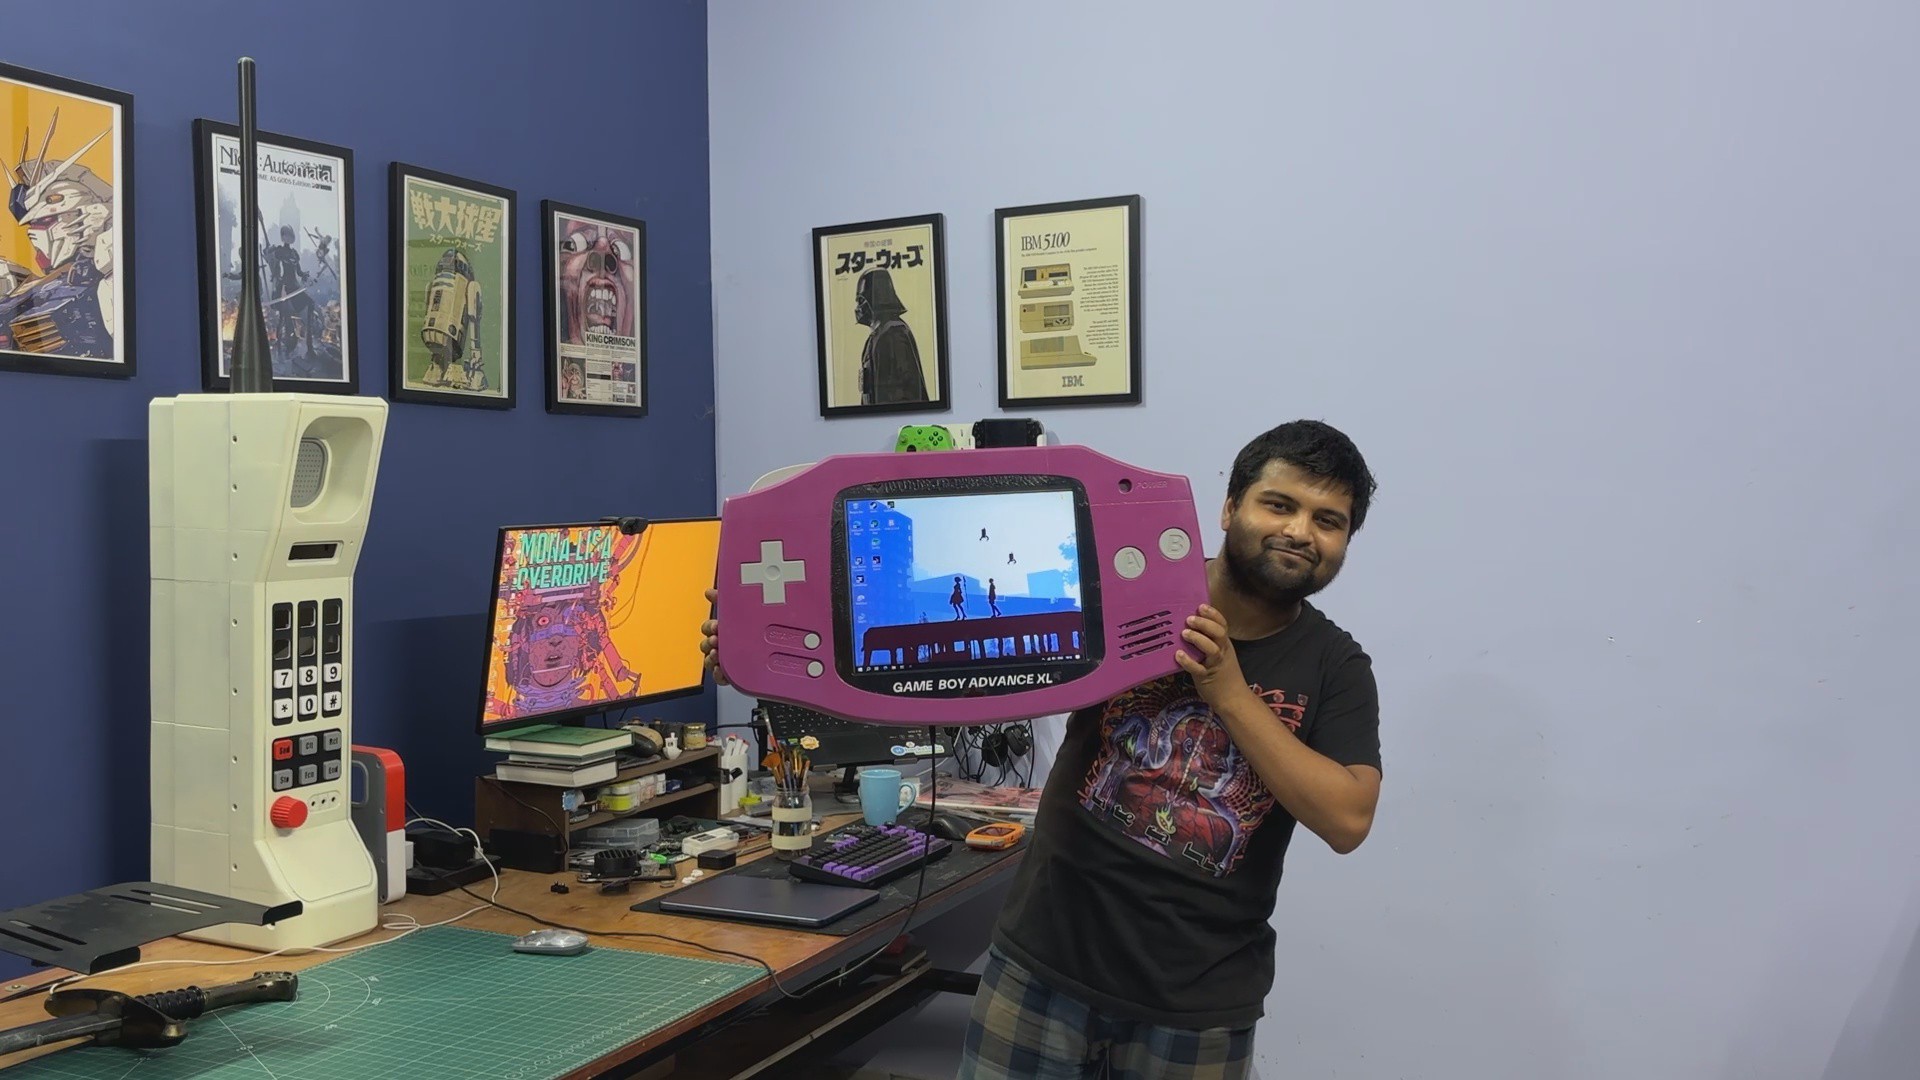
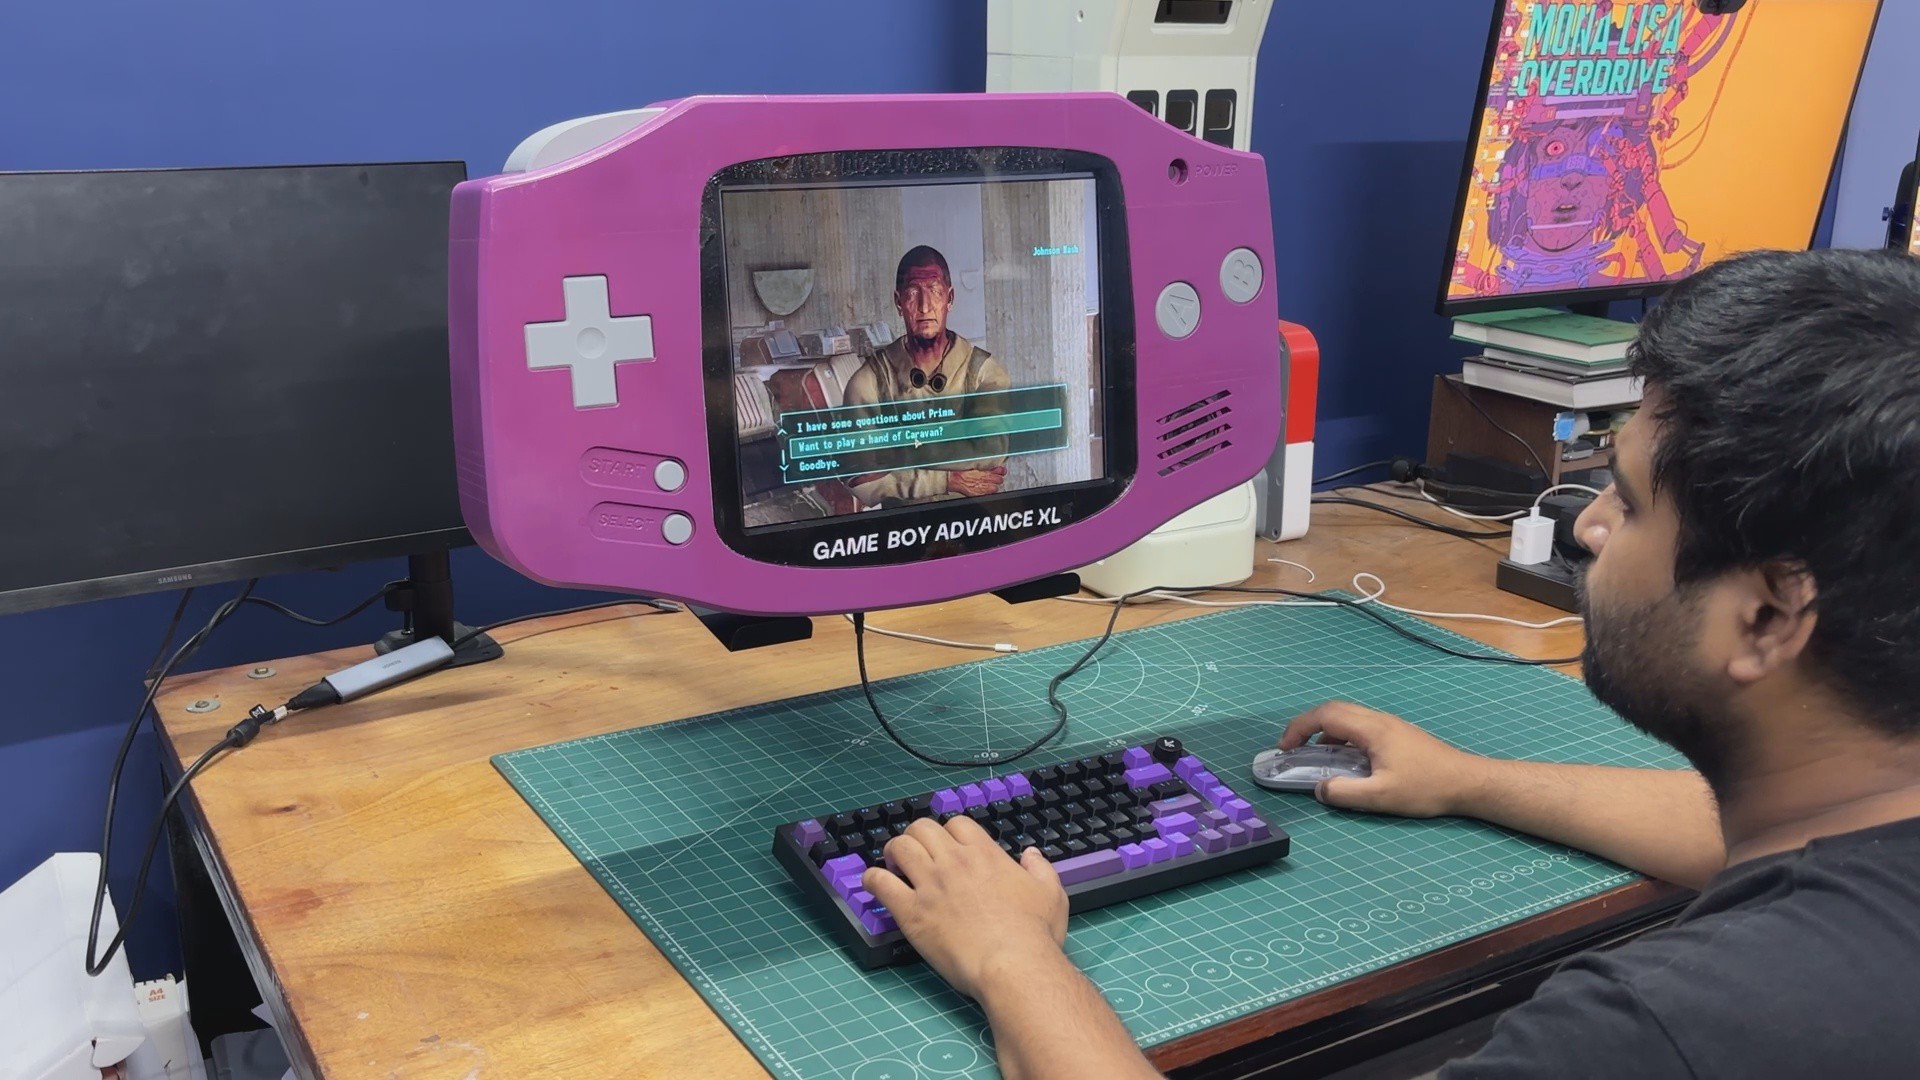
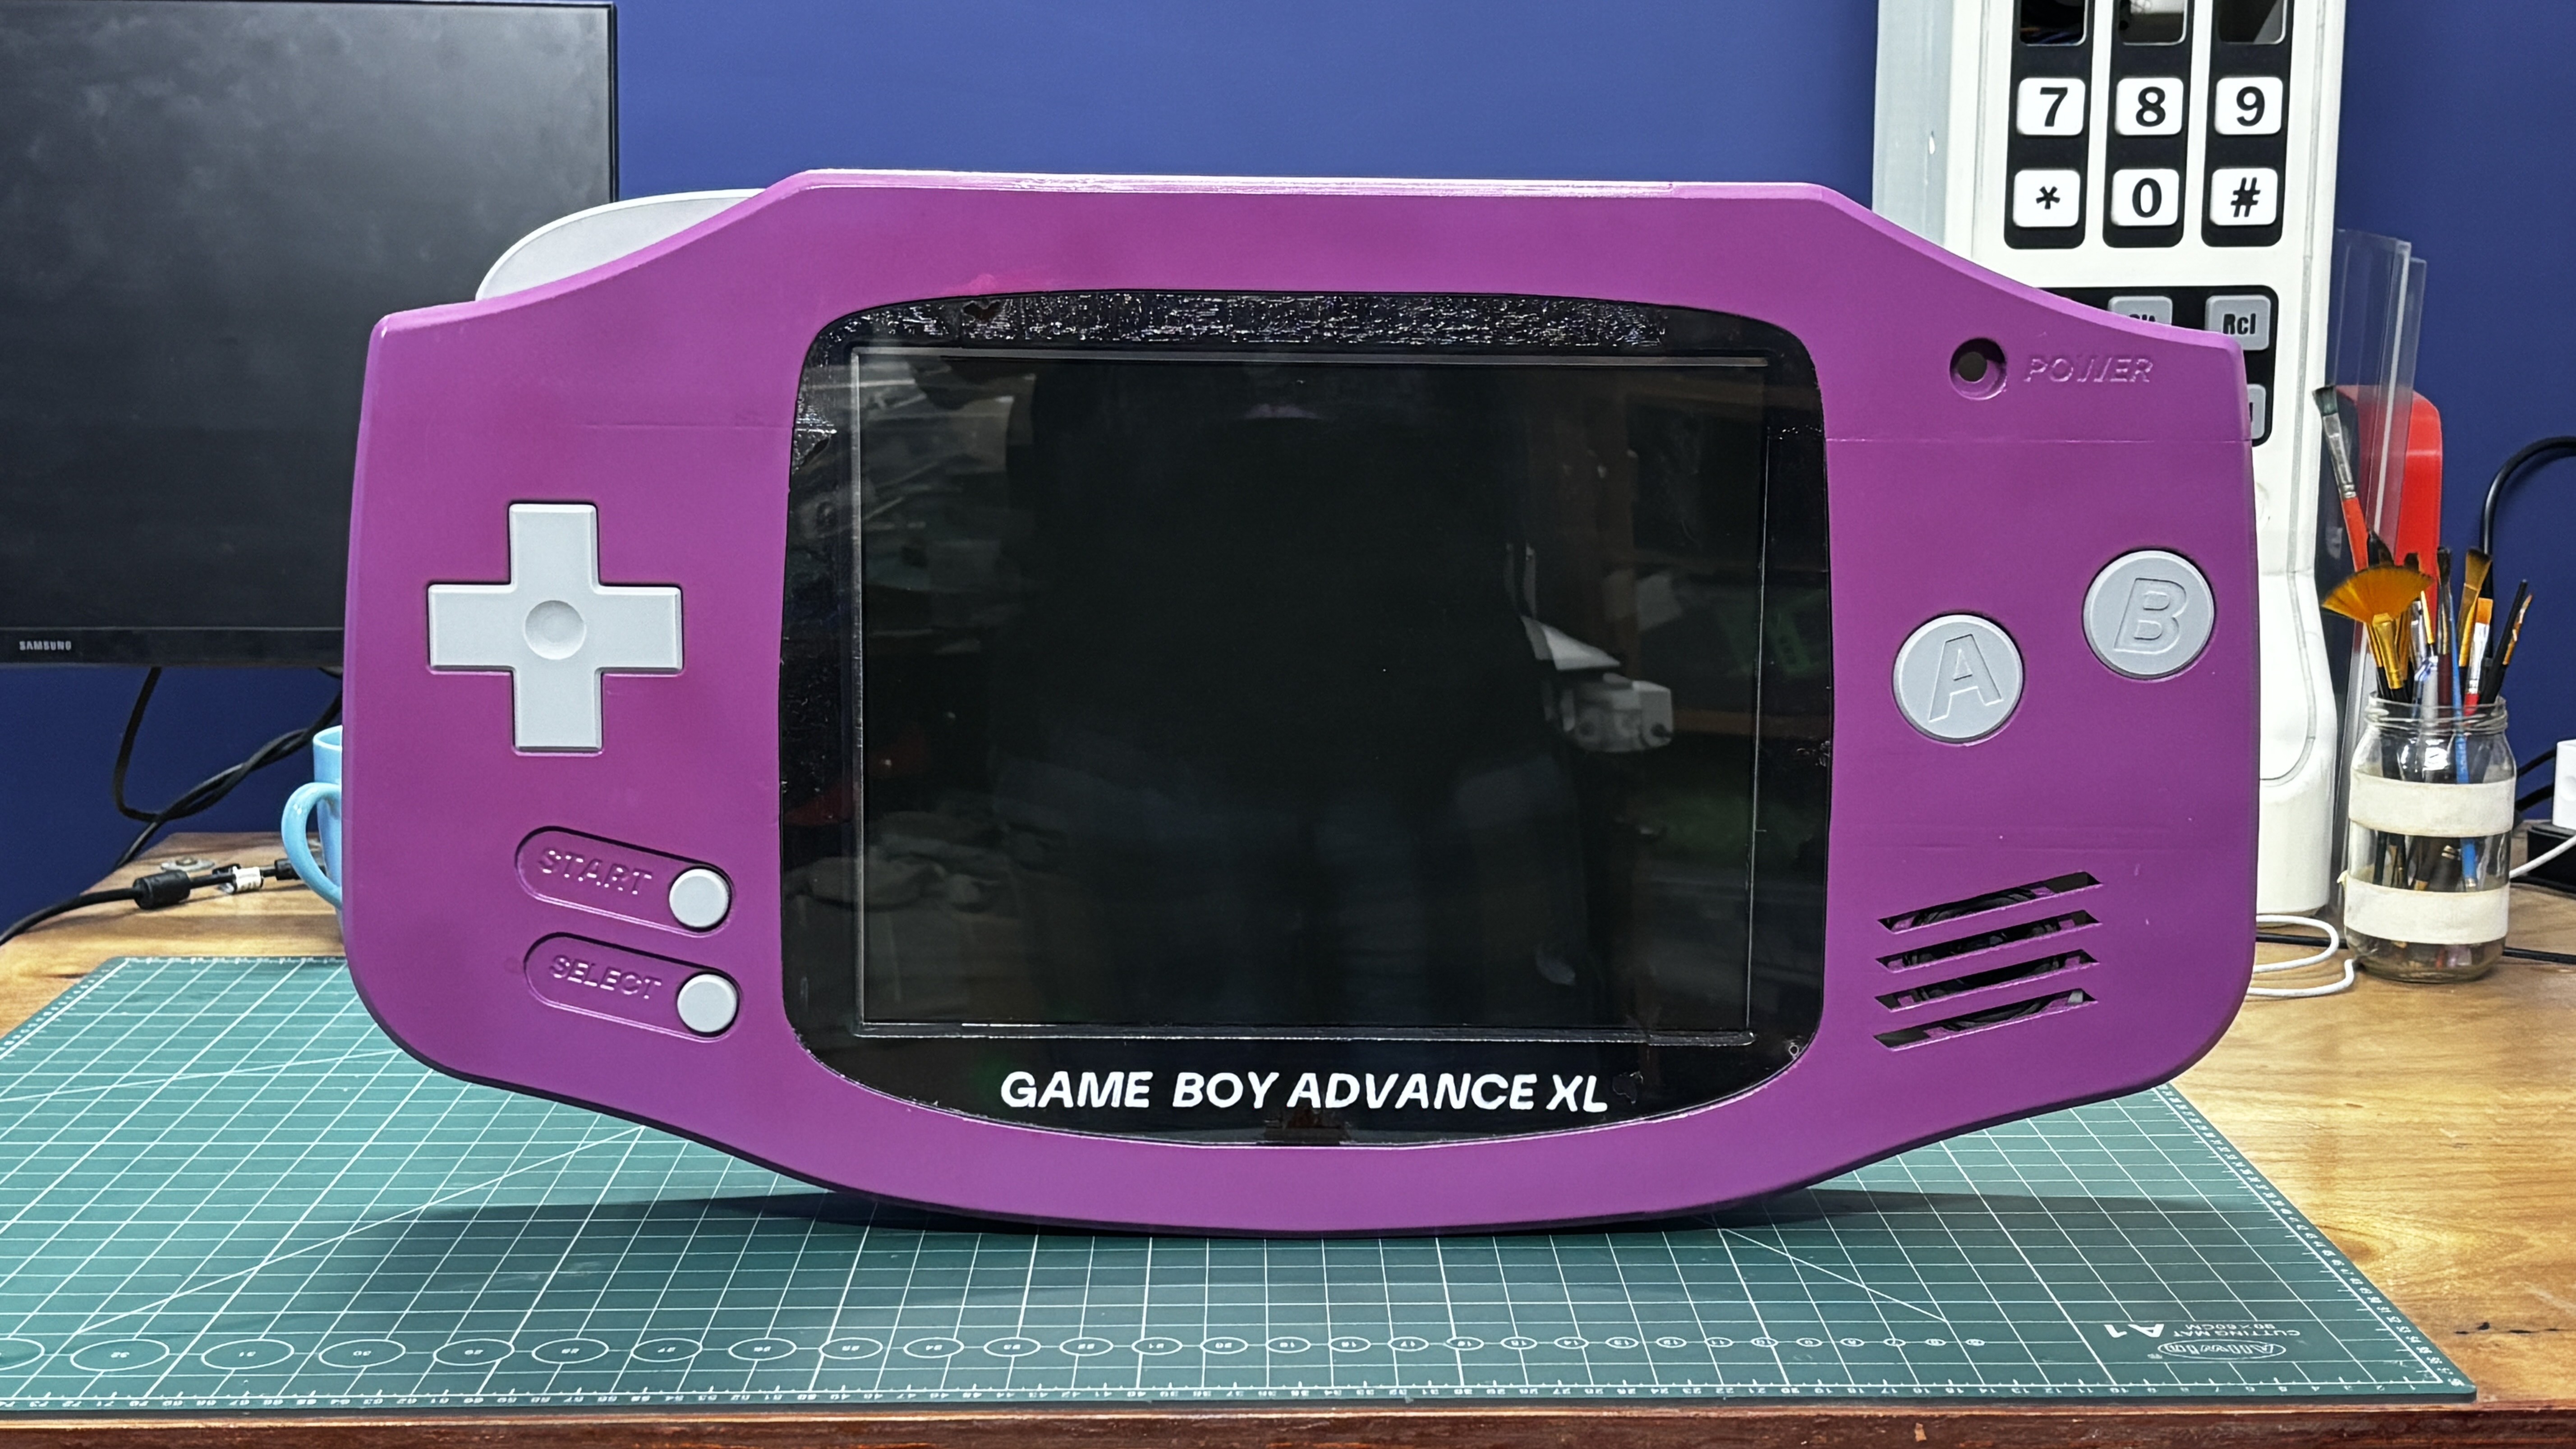
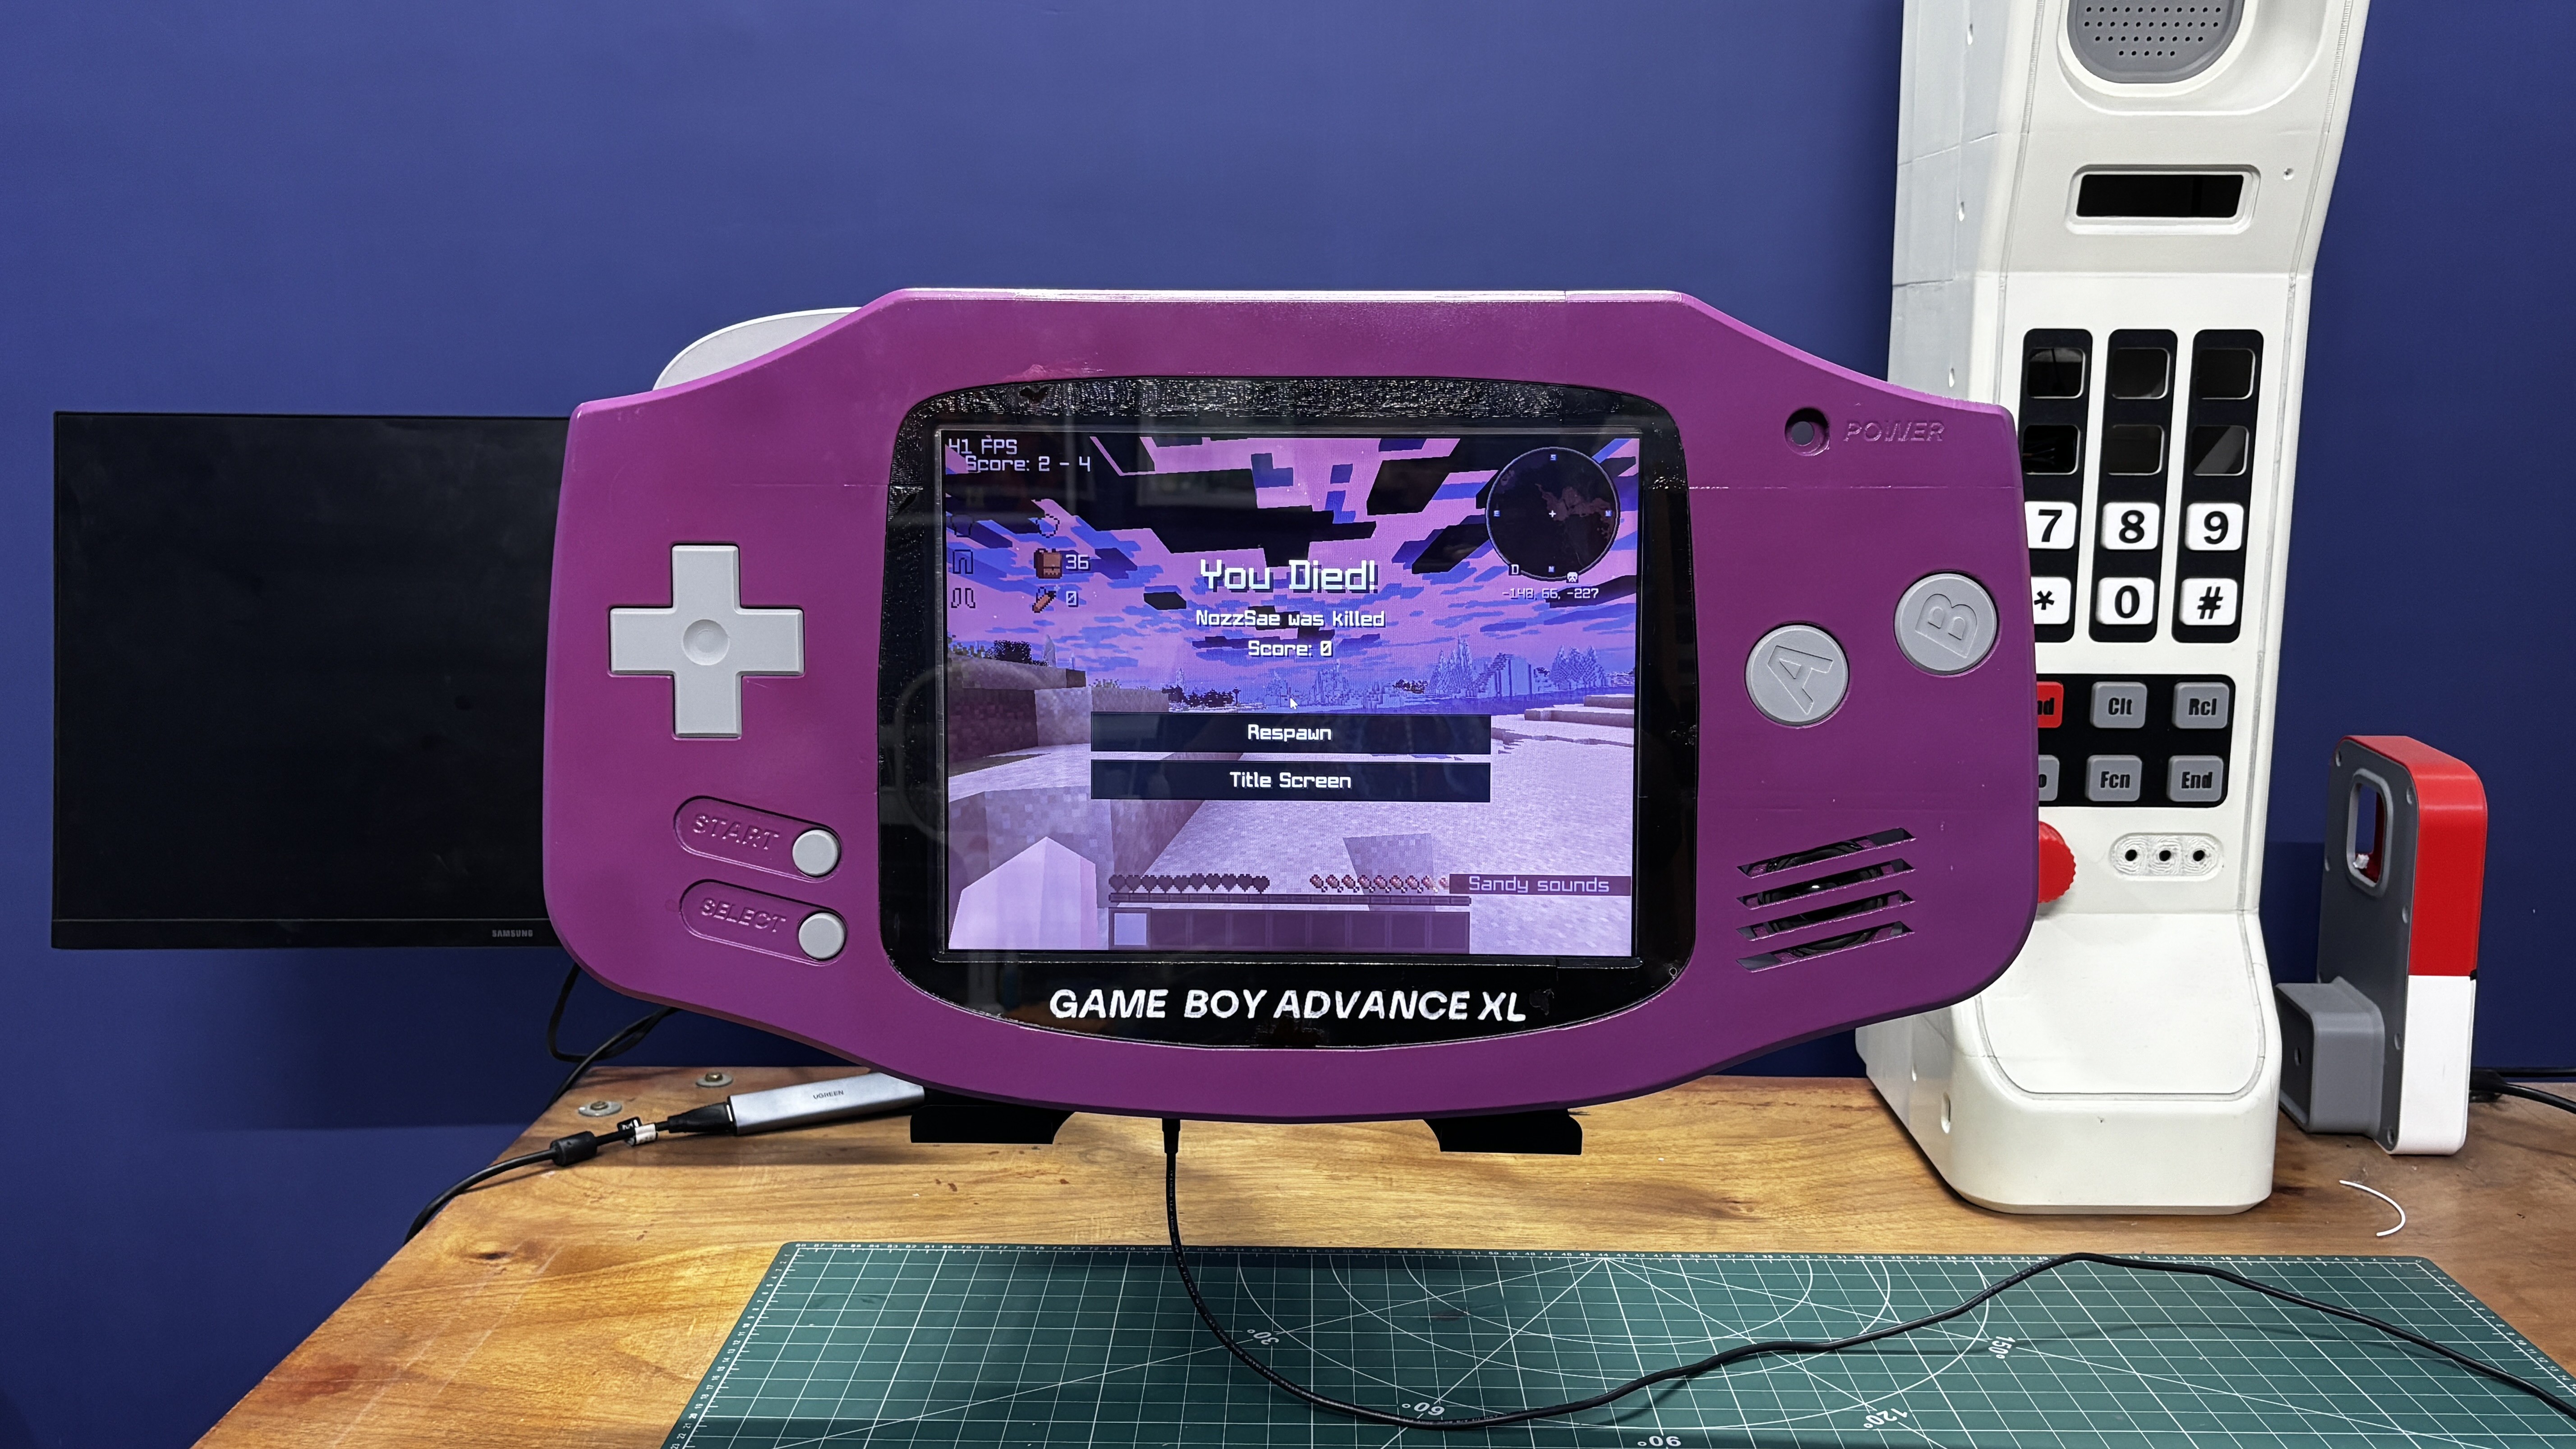
It's powered by a DFRobot LattePanda Mu N305 single-board computer, paired with its Lite carrier board and a massive 15-inch HDMI display salvaged from a PC monitor.
A few months ago, I built the Motorola DynaTAC Max, a giant replica of the iconic Motorola DynaTAC phone. That project got me hooked on building oversized versions of everyday devices, and I knew I wanted to take on something even more ambitious: the Game Boy Advance, in this case.
I've been working on this project for nearly three months, and trust me, it took a lot longer than I expected.
So, what exactly is the Game Boy Advance XL?
It's a giant Game Boy replica that I built from scratch using 3D printing. The body consists of multiple individually printed parts, all assembled to create this ridiculously oversized handheld console.
But unlike the original GBA, this one is powered by a DFRobot LattePanda Mu with an Intel N305 processor, paired with its Lite carrier board and a massive 15-inch HDMI display salvaged from a PC monitor.
For the controls, I'm using a Raspberry Pi Pico W configured as a Bluetooth game controller. Every button is mapped in Steam to work as the D-pad, A, B, Select, and Start buttons.
There's no onboard battery yet, so the entire device runs on an external 12V, 4A power adapter.
And what can it play?
Well, obviously, we have Pokémon Emerald running through RetroArch, but thanks to the LattePanda Mu, this thing can handle modern PC games, too! I've already tested Fallout: New Vegas, Bayonetta, Nier Automata, and Minecraft on it.
So, this isn't just a giant Game Boy Advance. It's basically a Windows PC disguised as a classic handheld console!
In this article, I'll walk you through the complete build process, from designing and 3D printing the massive enclosure to setting up the hardware, configuring the controls, and getting games running on this oversized beast.
Let's get started.
GAMEBOY ADVANCE
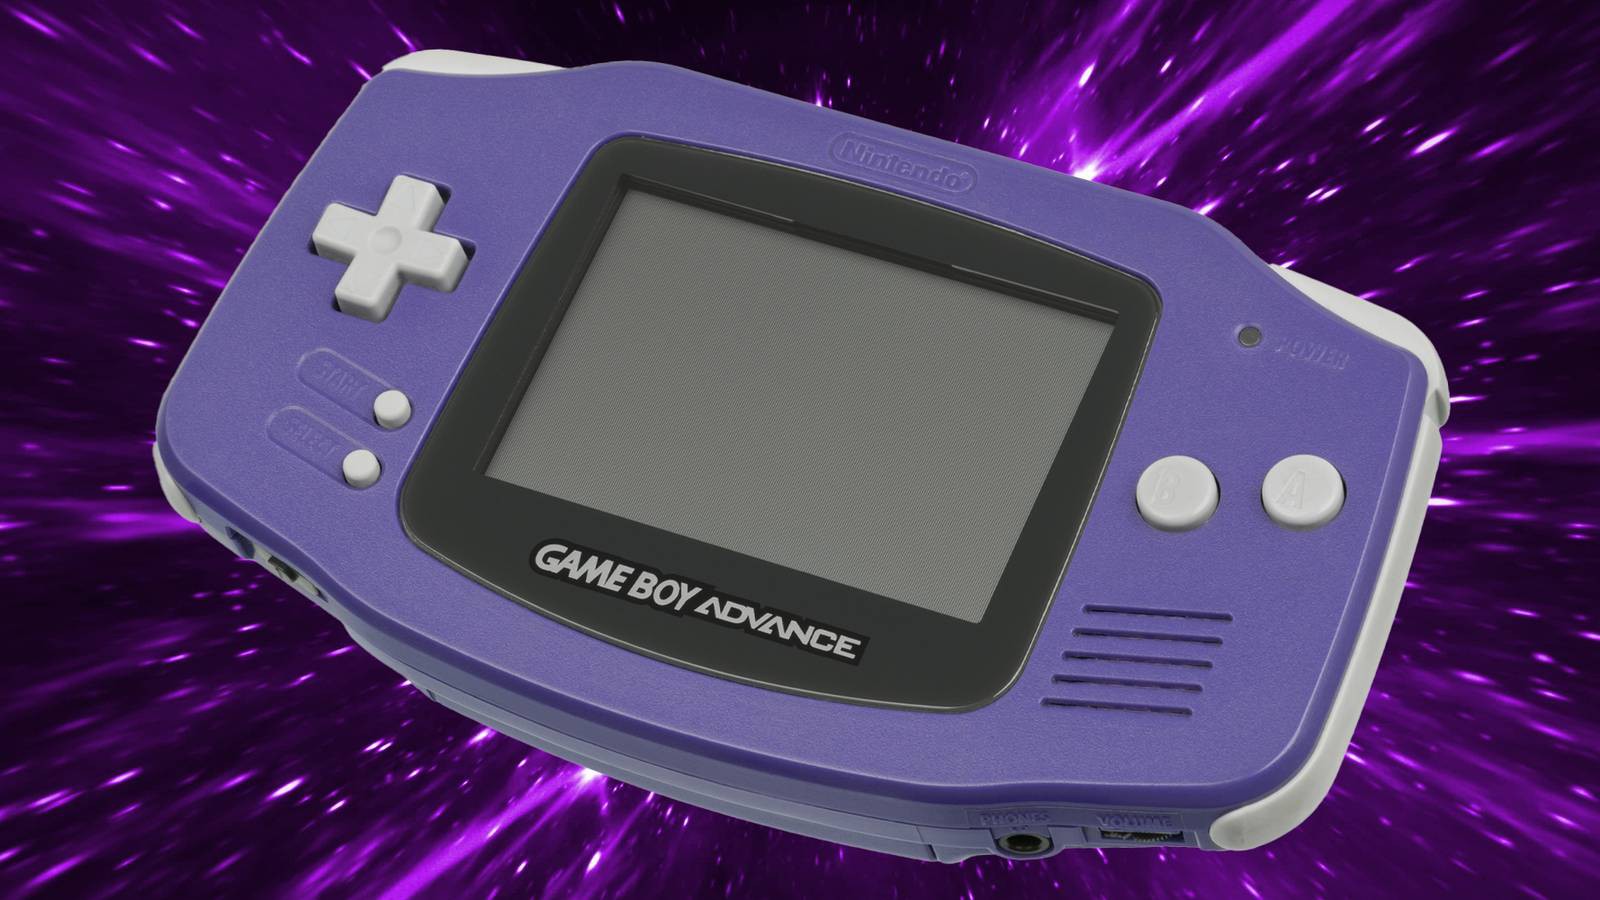
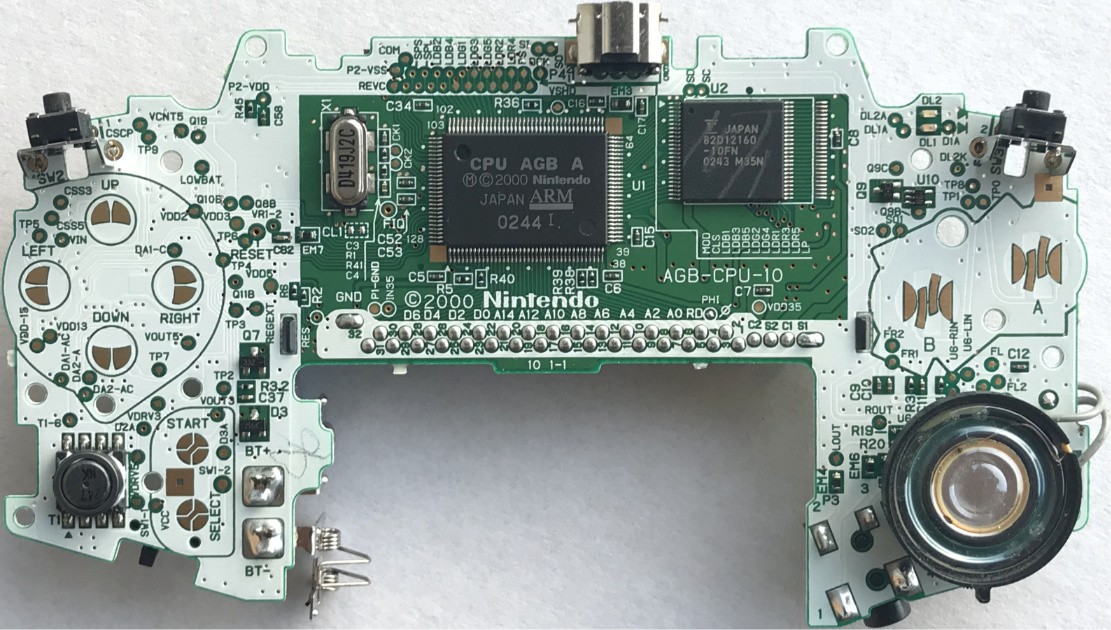
Released in 2001, the Game Boy Advance was a 32-bit handheld gaming console developed and manufactured by Nintendo. It succeeded the original Game Boy and Game Boy Color, bringing a significant leap in graphics, processing power, and gameplay to portable gaming.
The original Game Boy had already established Nintendo as a dominant force in handheld gaming, but the GBA took things to another level. Its landscape-oriented design, shoulder buttons, and improved display made it feel much closer to a home console experience that you could carry in your pocket.
The Game Boy Advance was powered by a 32-bit ARM7TDMI processor running at approximately 16.78 MHz, accompanied by 256 KB of external DRAM and 96 KB of VRAM. It also included 32 KB of internal work RAM and 96 KB of internal graphics memory, along with dedicated hardware for 2D graphics and audio.
Despite its modest specifications by today's standards, the GBA was capable of impressive visual effects, colourful environments, detailed sprites, and surprisingly complex games. Its hardware supported a resolution of 240 × 160 pixels and a colour palette of up to 32,768 colors, making it a substantial upgrade over its predecessors.
One of the most impressive features was its backward compatibility with Game Boy and Game Boy Color cartridges, allowing players to enjoy an enormous library of existing games alongside the new GBA titles.
Even today, the GBA remains popular among retro gaming enthusiasts, collectors, and hobbyists. Its extensive game library and relatively straightforward hardware make it an excellent platform for emulation and DIY gaming projects.
And that brings us to my own project. I always wanted a Game Boy Advance when I was younger but never got one. Years later, instead of buying the original console, I decided to build my own version; only this time, I made it absolutely massive!
HARDWARE- LATTEPANDA MU N305
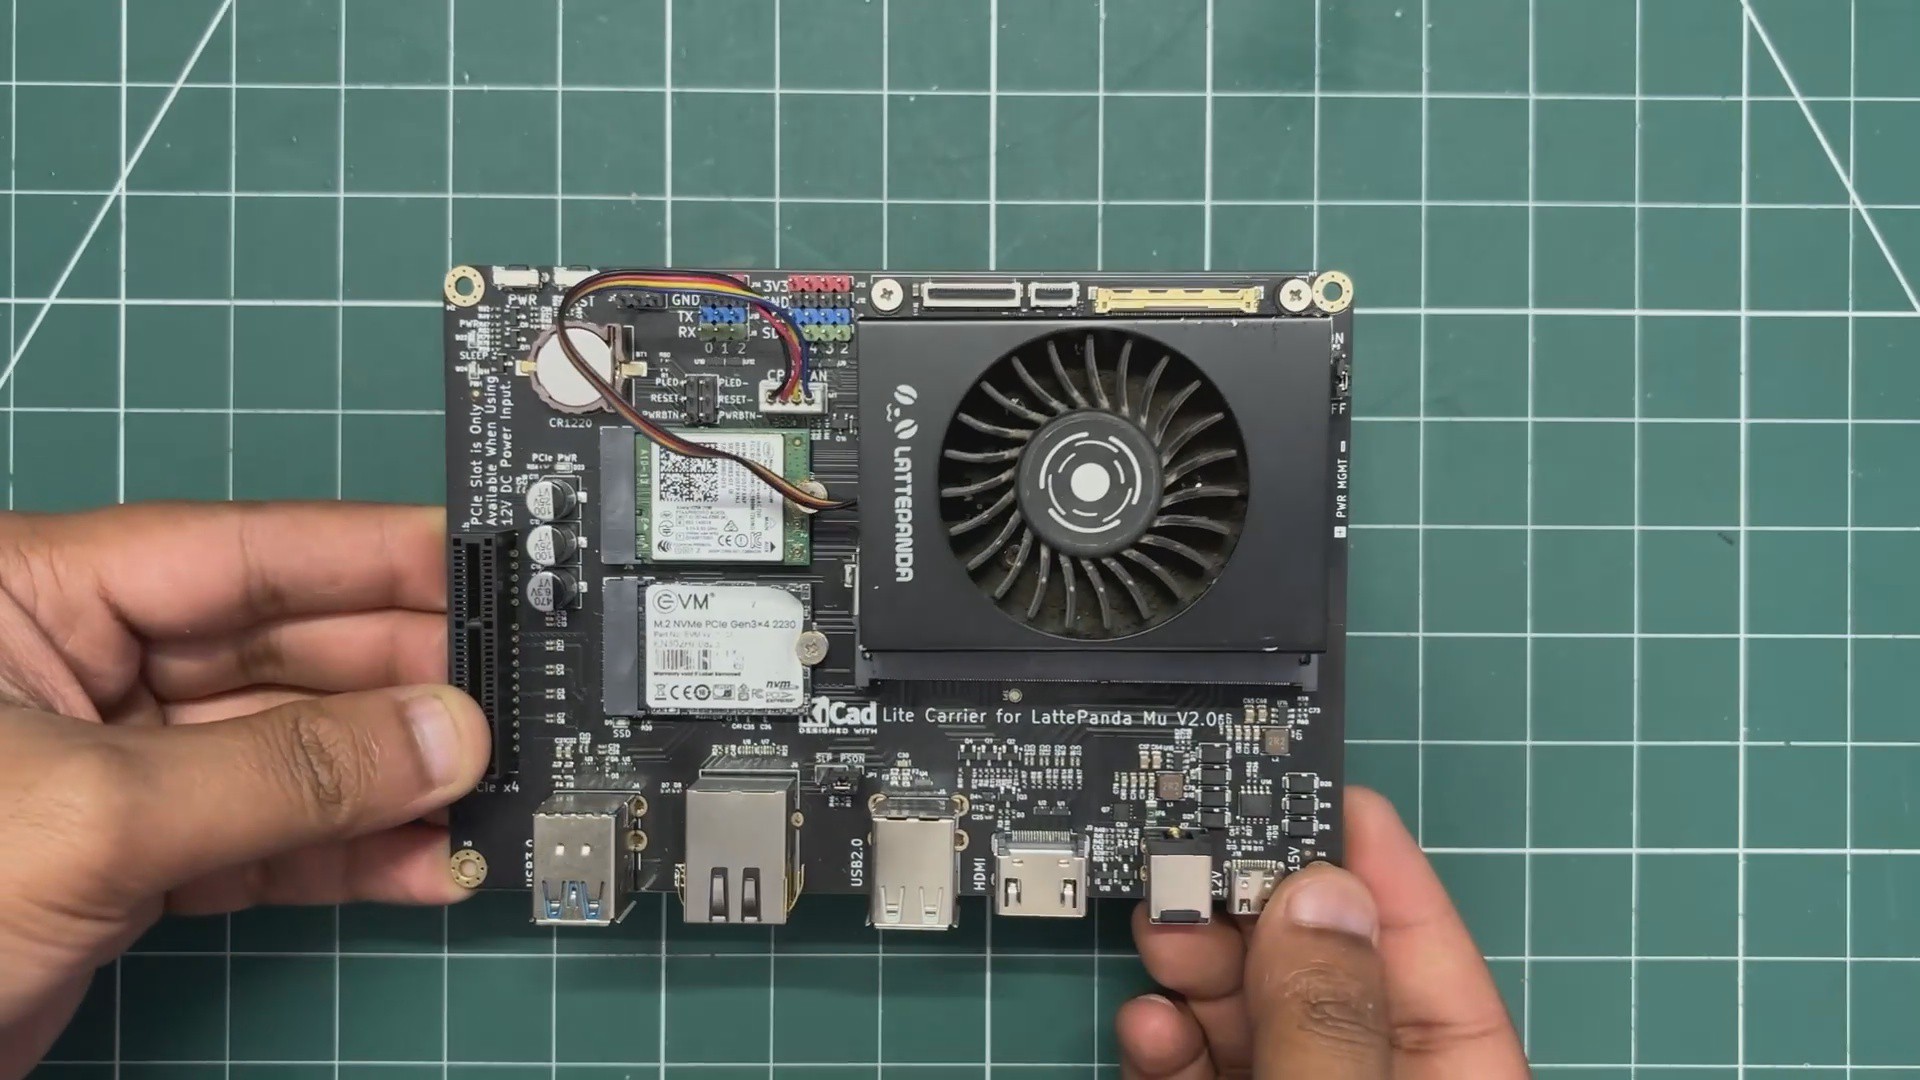
For the brain of this project, I'm using the LattePanda Mu compute module with the Intel Core i3-N305 processor. It's an 8-core, 8-thread x86 processor with a base frequency of 1.8 GHz and a maximum turbo frequency of 3.8 GHz, making it capable of handling desktop applications, multitasking, and even some gaming.
I'm using the 16GB RAM variant, which features 16GB of LPDDR5 memory running at 4800 MT/s, along with 64GB of onboard eMMC storage. However, for this project, I'll be using an external NVMe SSD for additional storage and faster access to my files. The module also features integrated Intel UHD Graphics, making it suitable for running a full desktop operating system without requiring a dedicated graphics card. (Will do some hella gaming on this setup)
The LattePanda Mu is a compute module rather than a conventional single-board computer, so it doesn't provide the usual external ports on its own. To make it usable in this project, I'm pairing it with the DFRobot LattePanda Mu Lite Carrier Board, which exposes the necessary connectivity and expansion interfaces.
The carrier board provides two USB 3.2 ports supporting speeds of up to 10Gbps, two USB 2.0 ports, Gigabit Ethernet, HDMI 2.0 with support for 4K output, and M.2 slots for storage and wireless connectivity. It also includes a PCIe 3.0 x4 expansion slot, along with UART and I²C interfaces for connecting additional hardware. The board supports a 12–20V DC input through its barrel jack, making it suitable for compact computing projects.
For storage, I've installed a 256GB NVMe SSD in the M.2 M-key slot and an M.2 Wi-Fi card in the E-key slot. I'm powering the entire setup using a 12V, 4A power adapter, which provides up to 48W of input power. This gives me a compact x86 computing platform with the storage and connectivity needed for the Fallout terminal.
DFROBOT SERVICE
A huge thanks to DFRobot for supporting this project and providing the hardware that made this build possible. From the LattePanda Mu N305 and its Lite Carrier Board, their support played a big part in bringing this GBA XL to life.
DFRobot is a great resource for makers, engineers, and electronics enthusiasts, offering a wide range of development boards, sensors, modules, robotics components, and other electronics hardware for all kinds of projects.
Their product wiki was also incredibly helpful throughout this build, with detailed documentation and examples that helped me understand how the hardware works and figure out the code for different modules.
I'm genuinely grateful to the DFRobot team for supporting my work and helping me bring this project to life. If you're planning your next DIY electronics project, make sure to check out DFRobot and explore their range of hardware. You might just find what you need for your next build!
HARDWARE- DISPLAY
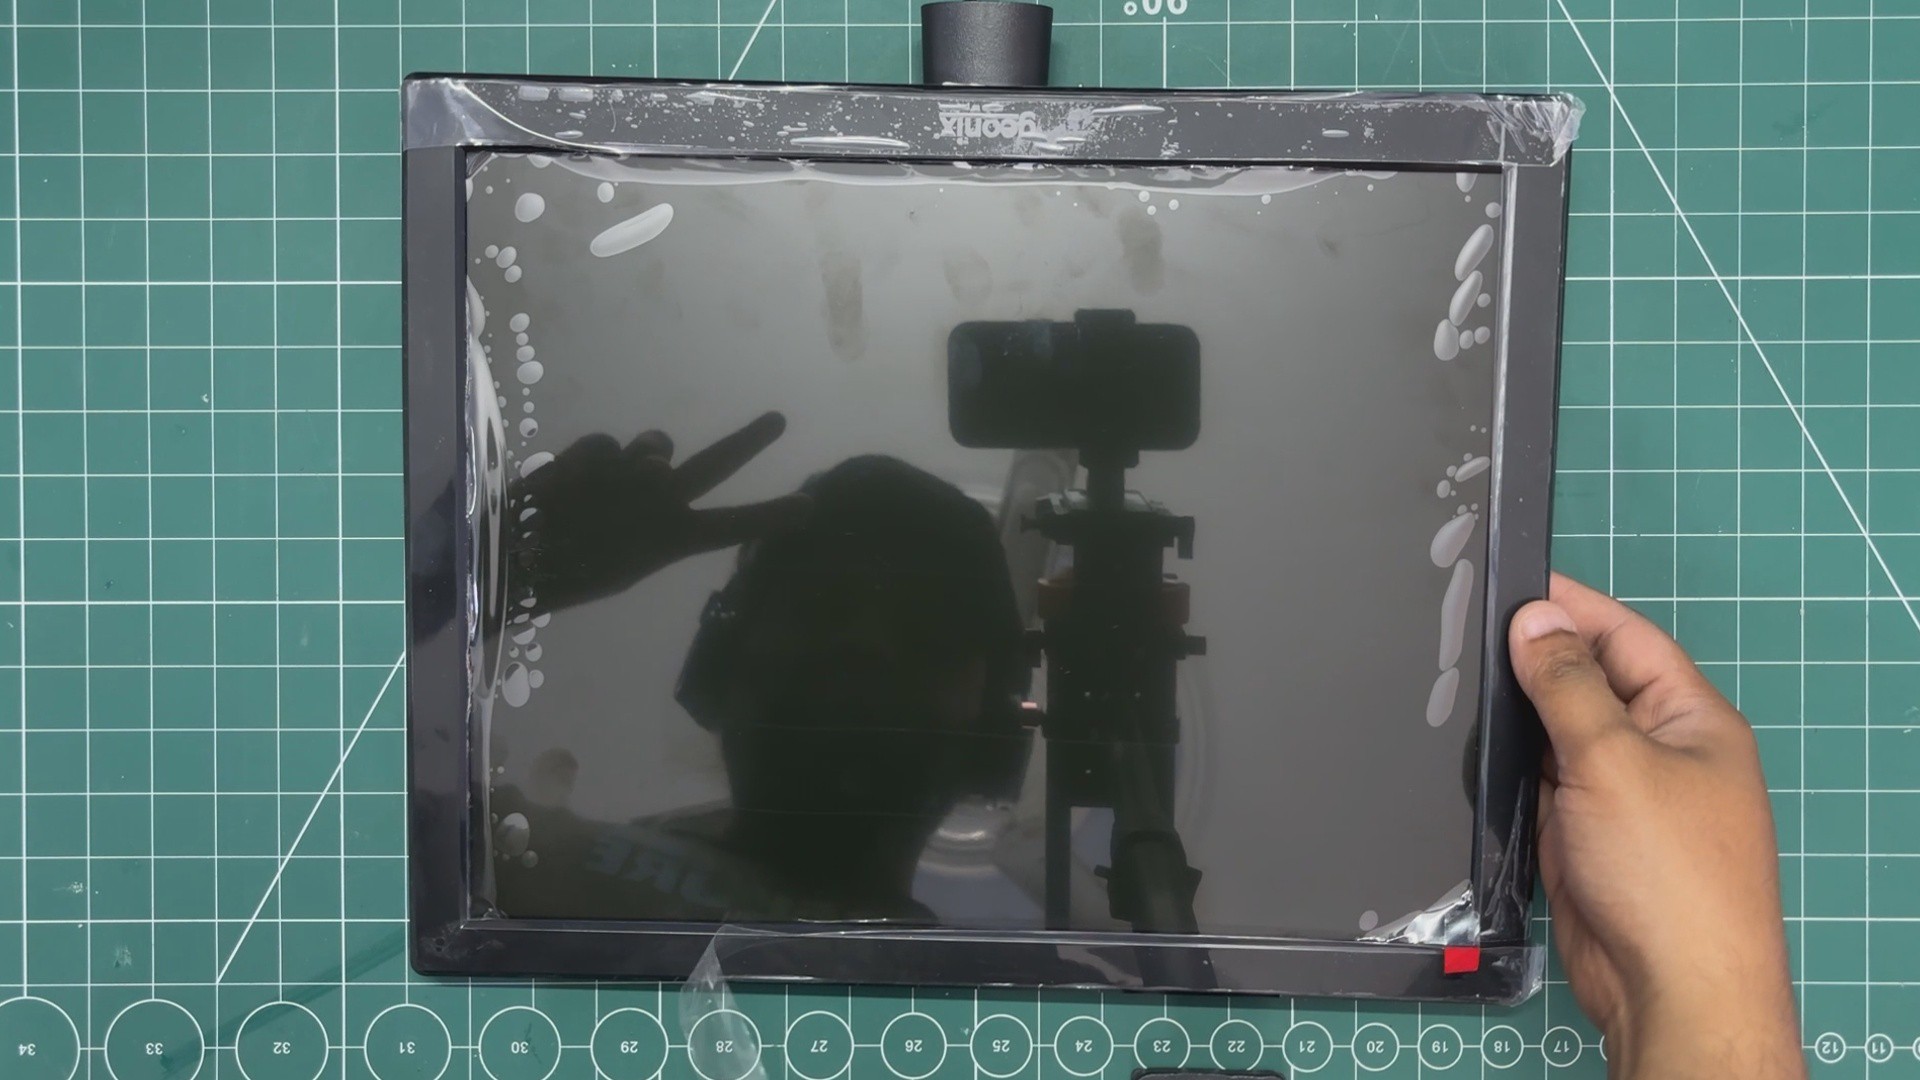
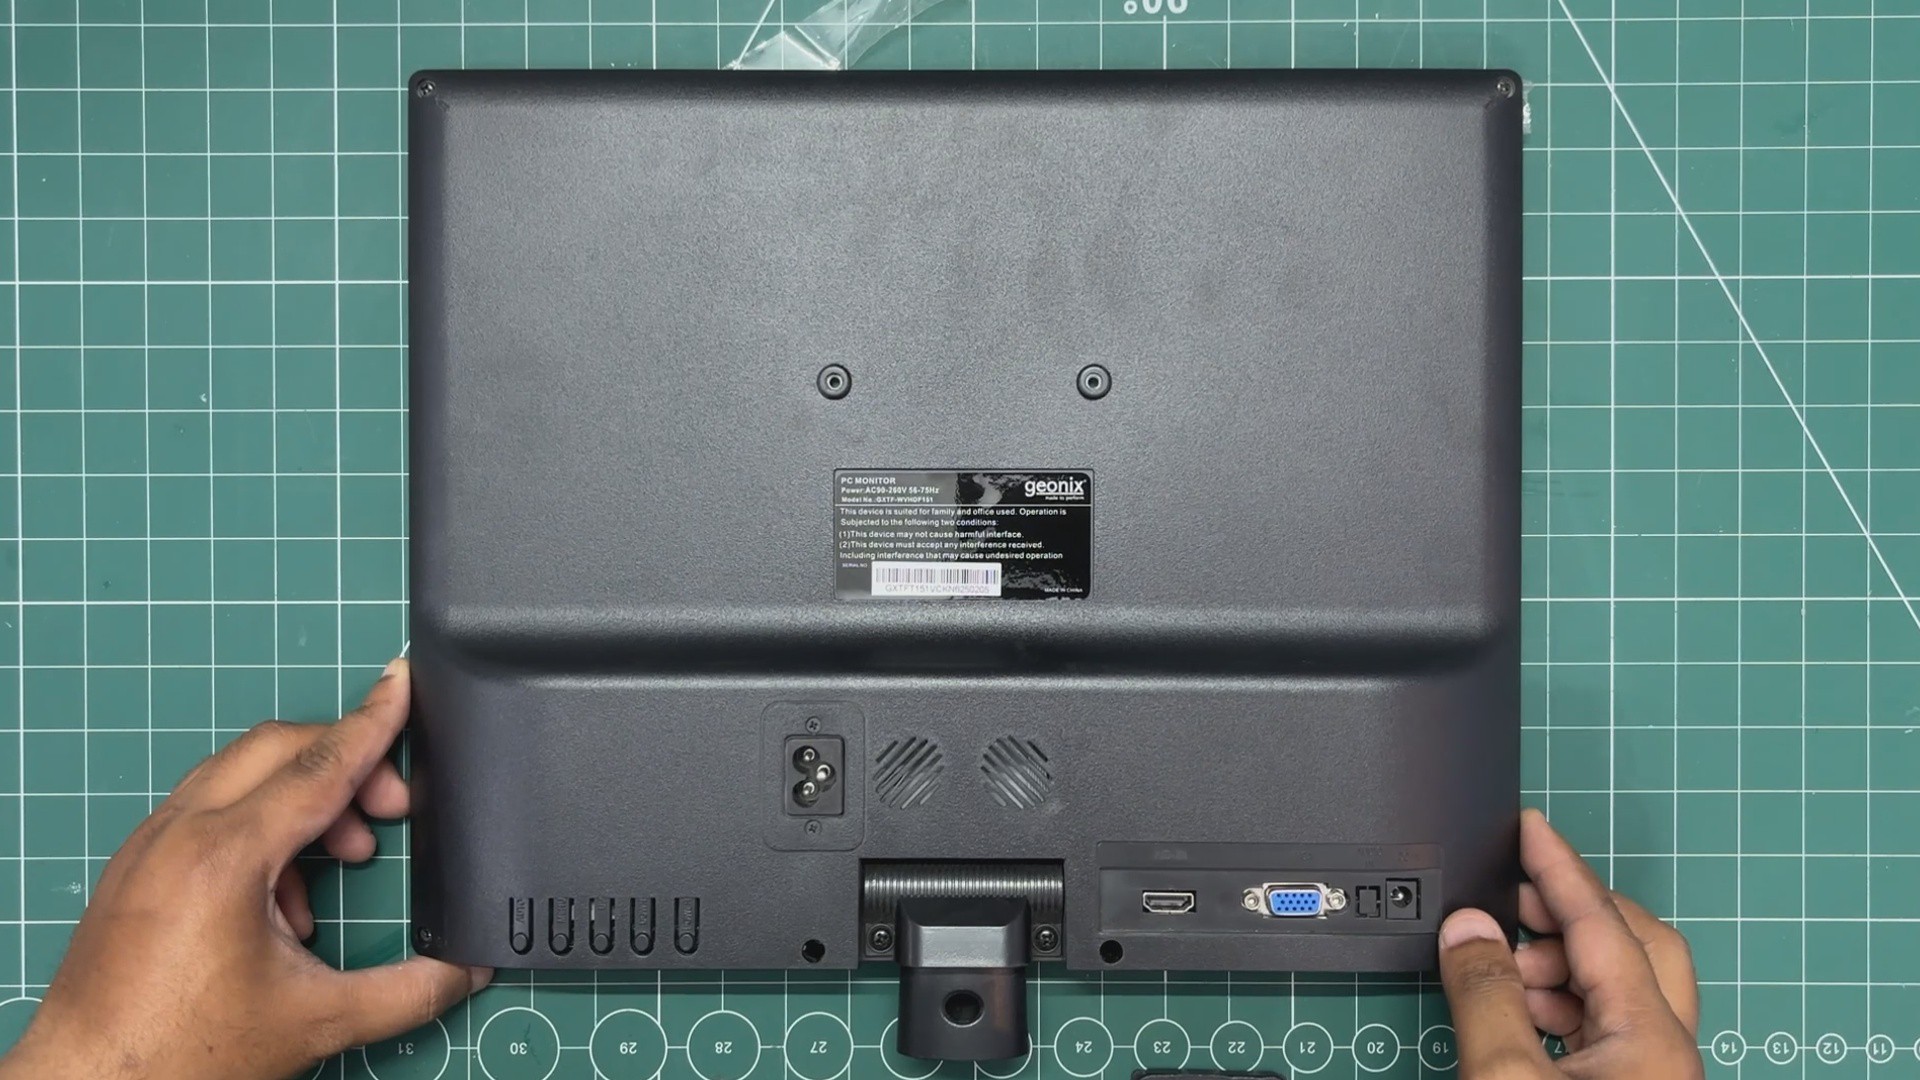
Since this was an extra-large project, it needed an extra-large display to match! Unfortunately, displays around 10 inches are much more readily available, while larger panels with similar specifications can get quite expensive.
So, I decided to take a different approach, which was to buy a 15-inch 4:3 monitor and salvage its display panel.
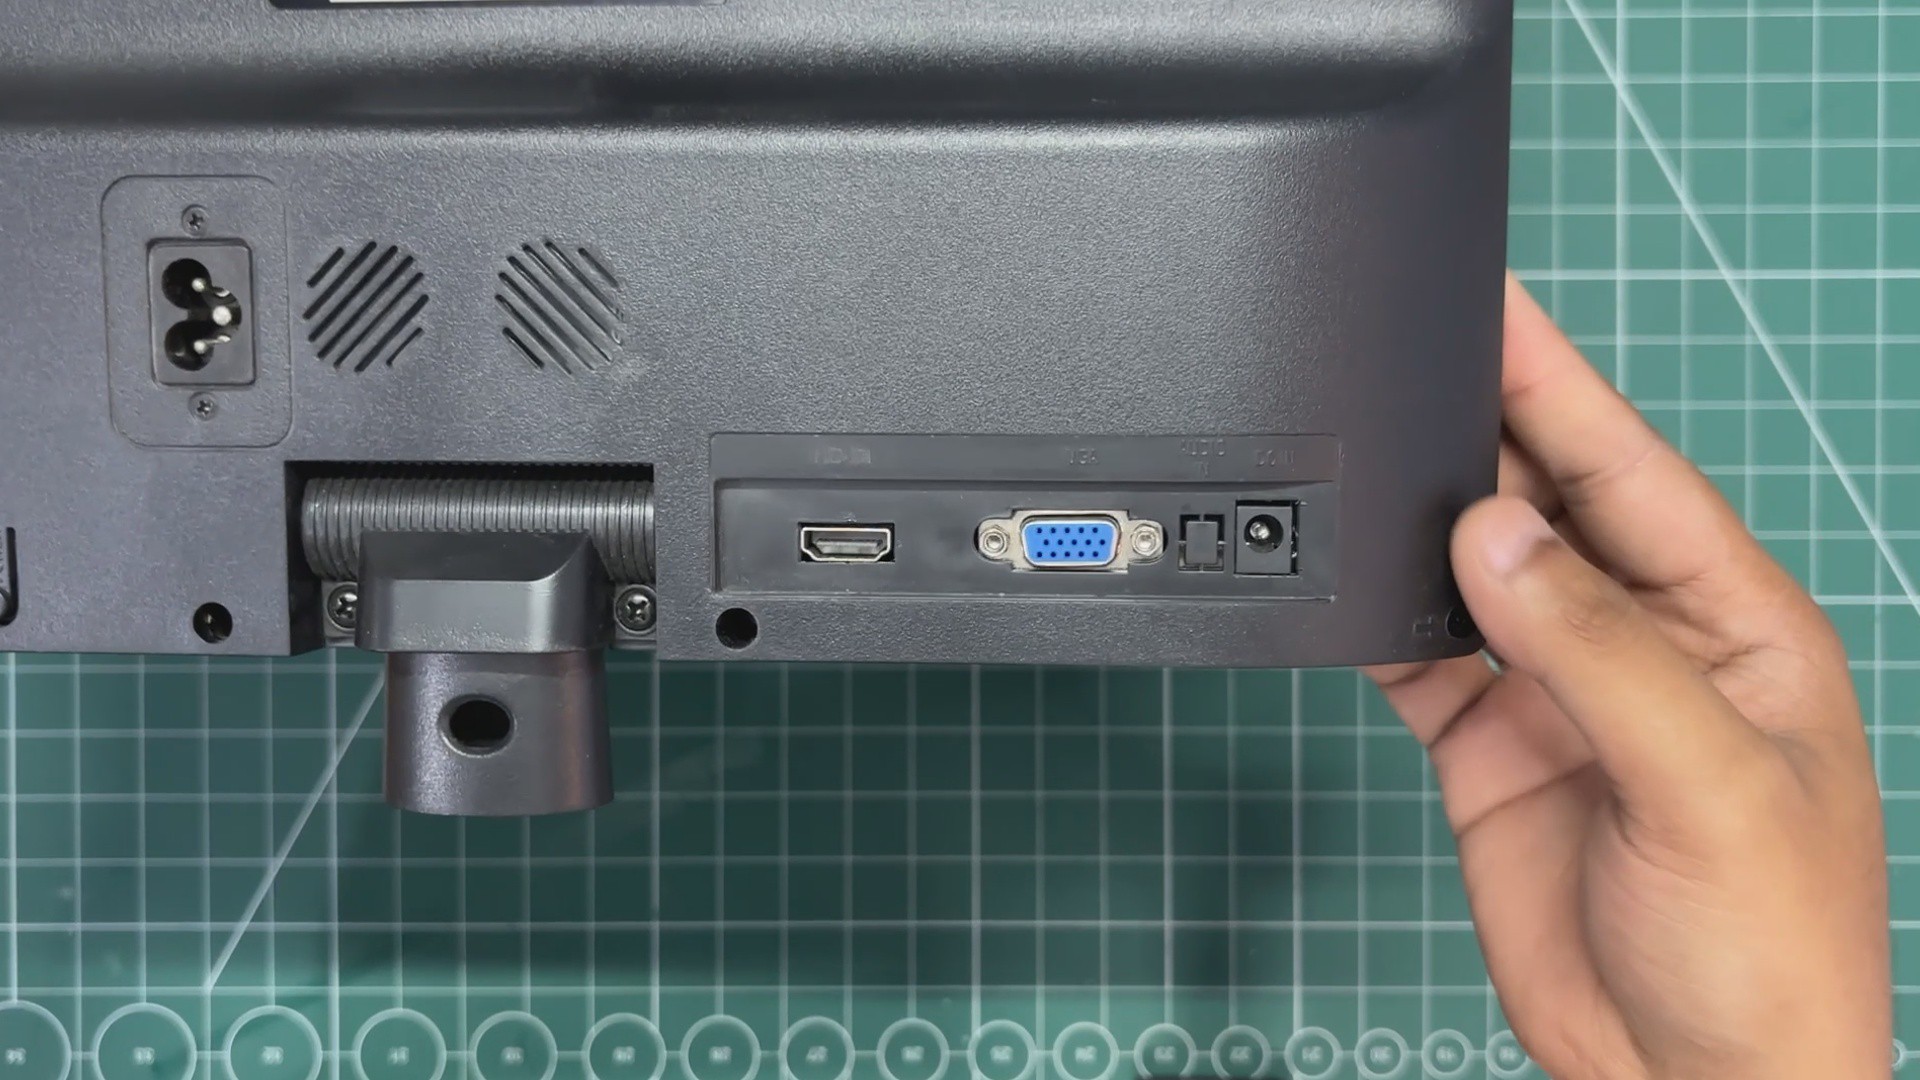
I specifically looked for a monitor that supported 12V DC power and included both HDMI and VGA inputs. HDMI was essential for connecting it to the LattePanda Mu, while the VGA port gives me the flexibility to reuse the display in future projects.
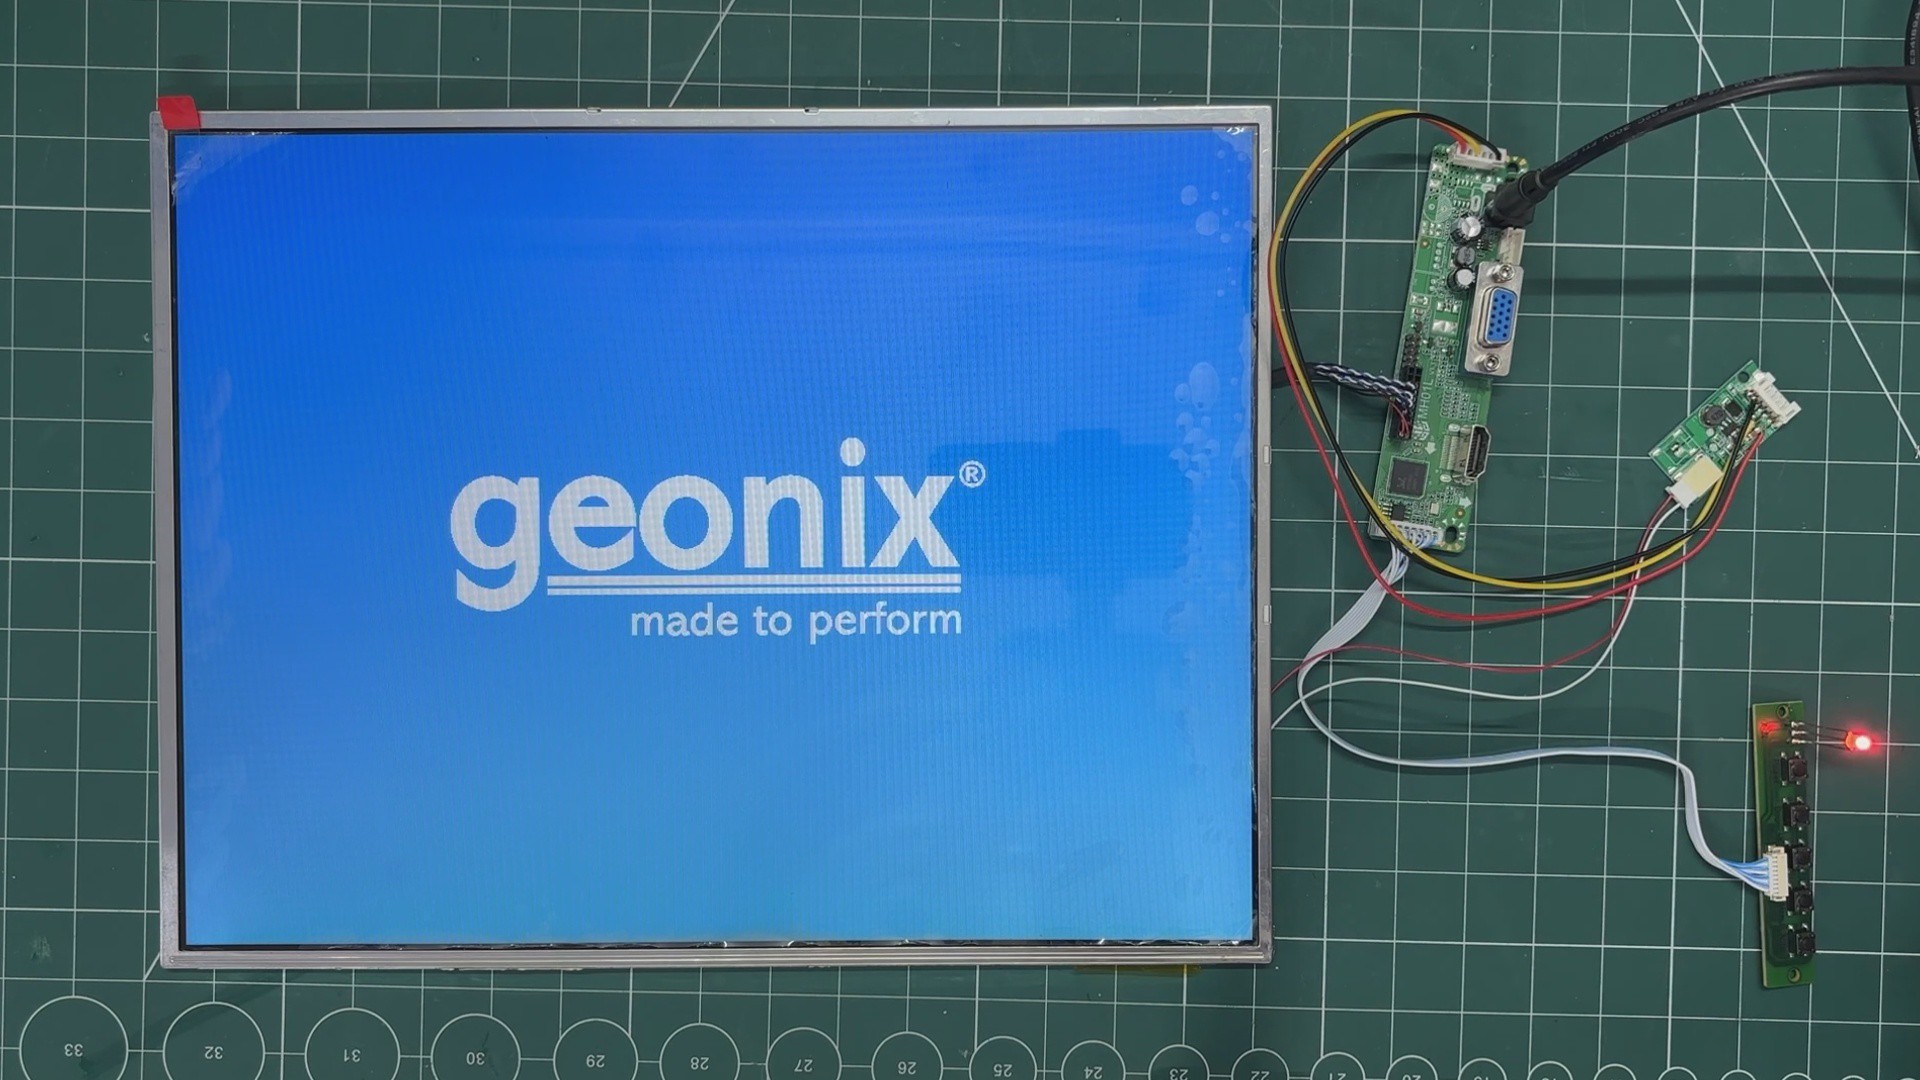
The salvaged LCD panel connects to a display driver board, which contains the necessary driver circuitry along with the HDMI and VGA ports and a DC power input. Since the panel's backlight requires its own driver, there's also a separate LED backlight driver board connected to the setup.
This arrangement lets us power the display electronics and backlight from a 12V supply, provided the power source can handle the combined load.
By salvaging the panel instead of buying a dedicated large-format display, I was able to get the screen size this project needed without spending a fortune. And with a 15-inch display fitted into the enclosure, our Game Boy Advance XL was starting to look appropriately gigantic!
MONITOR DISASSEMBLY
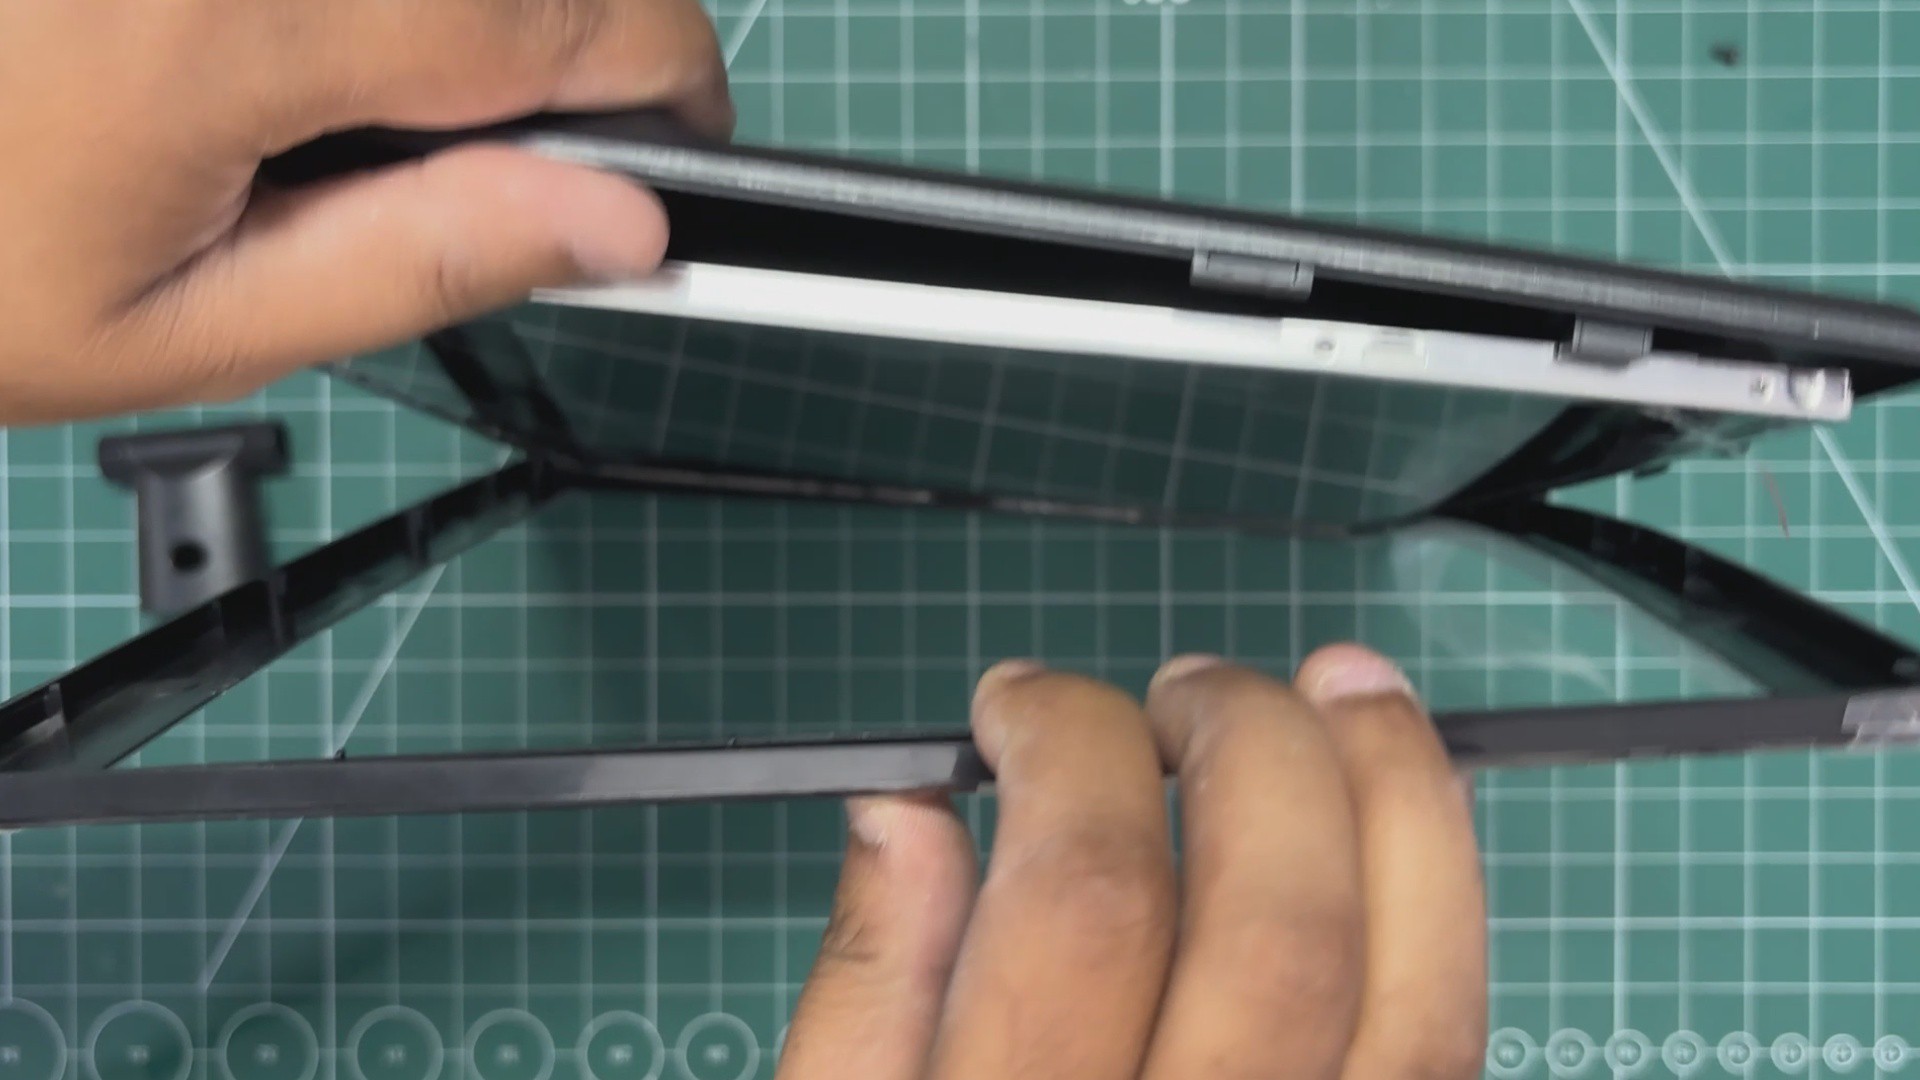
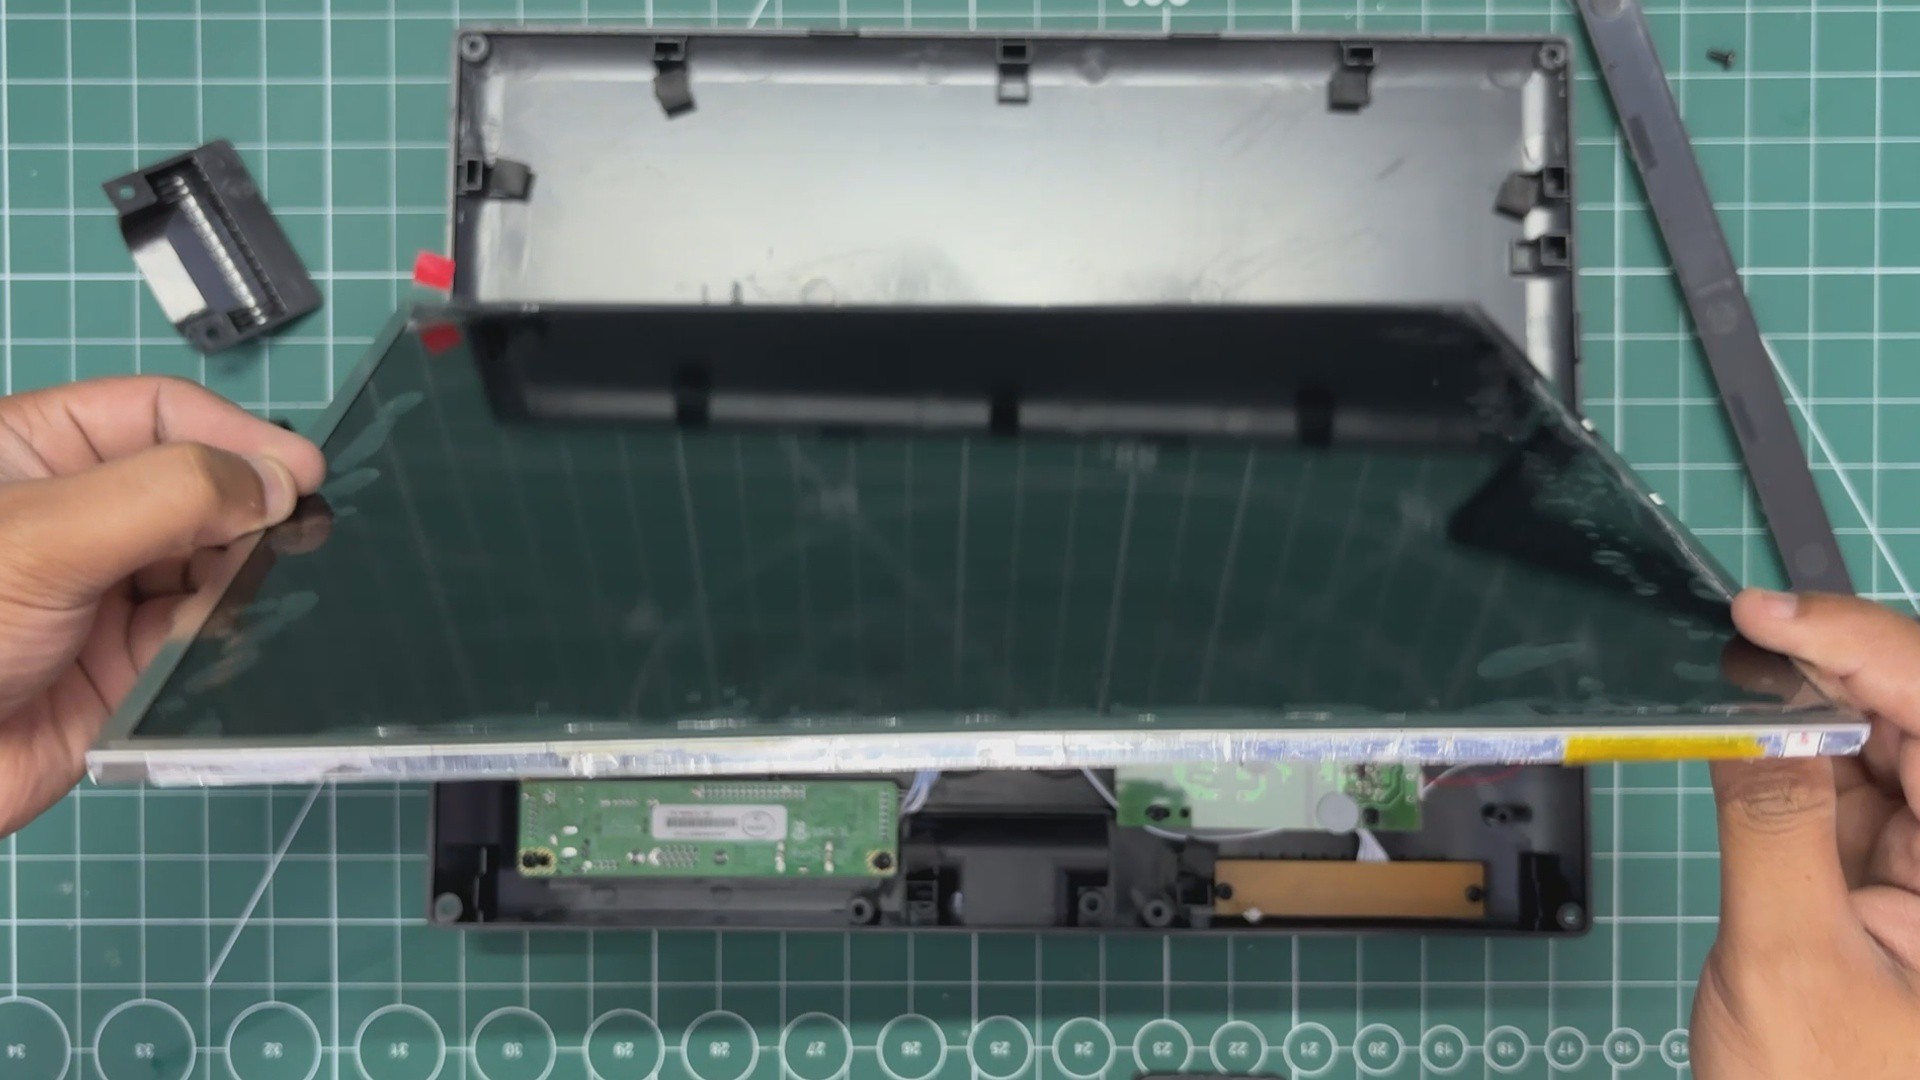
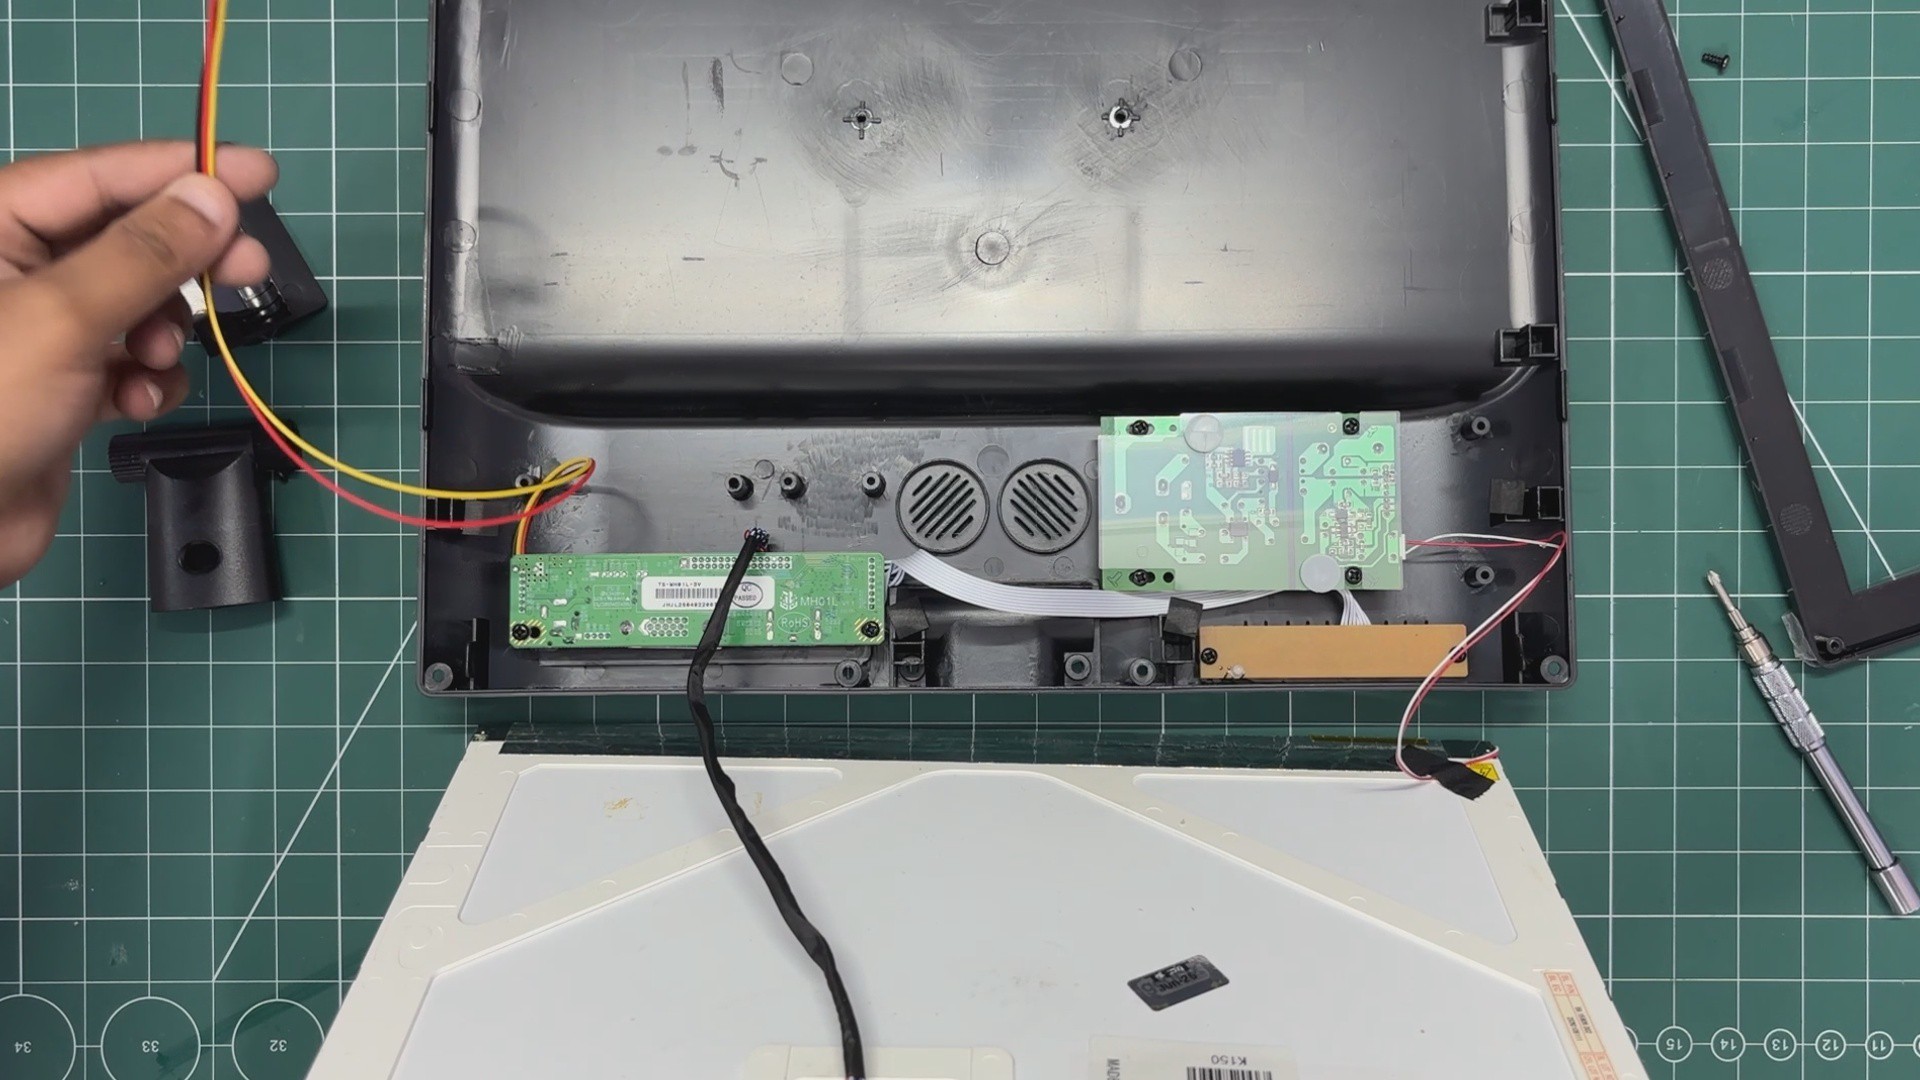
Here's a little sneak peek at how I salvaged the display for our Game Boy Advance XL from a standard 15-inch monitor!
I picked up a generic 15-inch monitor for less than $20, which made it a pretty affordable option for our project. It came with both a 12V DC power jack and an AC power input.
We start by removing all the screws from the back of the monitor and carefully prying open the frame.
Once it's open, we remove the display panel from its mounting position and disconnect it from the driver board.
Inside, we can see three separate boards: the AC power supply, the display driver board, and the button board.
The AC power supply provides power to both the display driver and the panel. However, we don't actually need it for our build! By removing the AC power supply, we can power the display driver directly through its 12V DC input jack.
Next, we need to take care of the display's backlight. For this, I used a separate LED backlight driver, which takes 12V DC and drives the LEDs behind the LCD panel. I connected its power input to the positive and negative terminals of the DC input on the display driver board. This allows us to power both the display electronics and the backlight from the same 12V supply, provided the power source is rated for the combined load.
The third board is the button board, which handles the monitor's brightness, contrast, and other display settings. Once everything was powered on, I adjusted the brightness and contrast to my liking, then disconnected the button board. We don't need it for normal operation anymore, unless we want to change those settings later.
And that's pretty much it! We've managed to salvage a 15-inch HDMI display for less than $20, making it a great fit for our Game Boy Advance XL project.
It's a much more affordable alternative to buying a dedicated display, and since we're building a giant handheld console anyway, that extra screen real estate is exactly what we need!
HARDWARE- BLUETOOTH SPEAKER
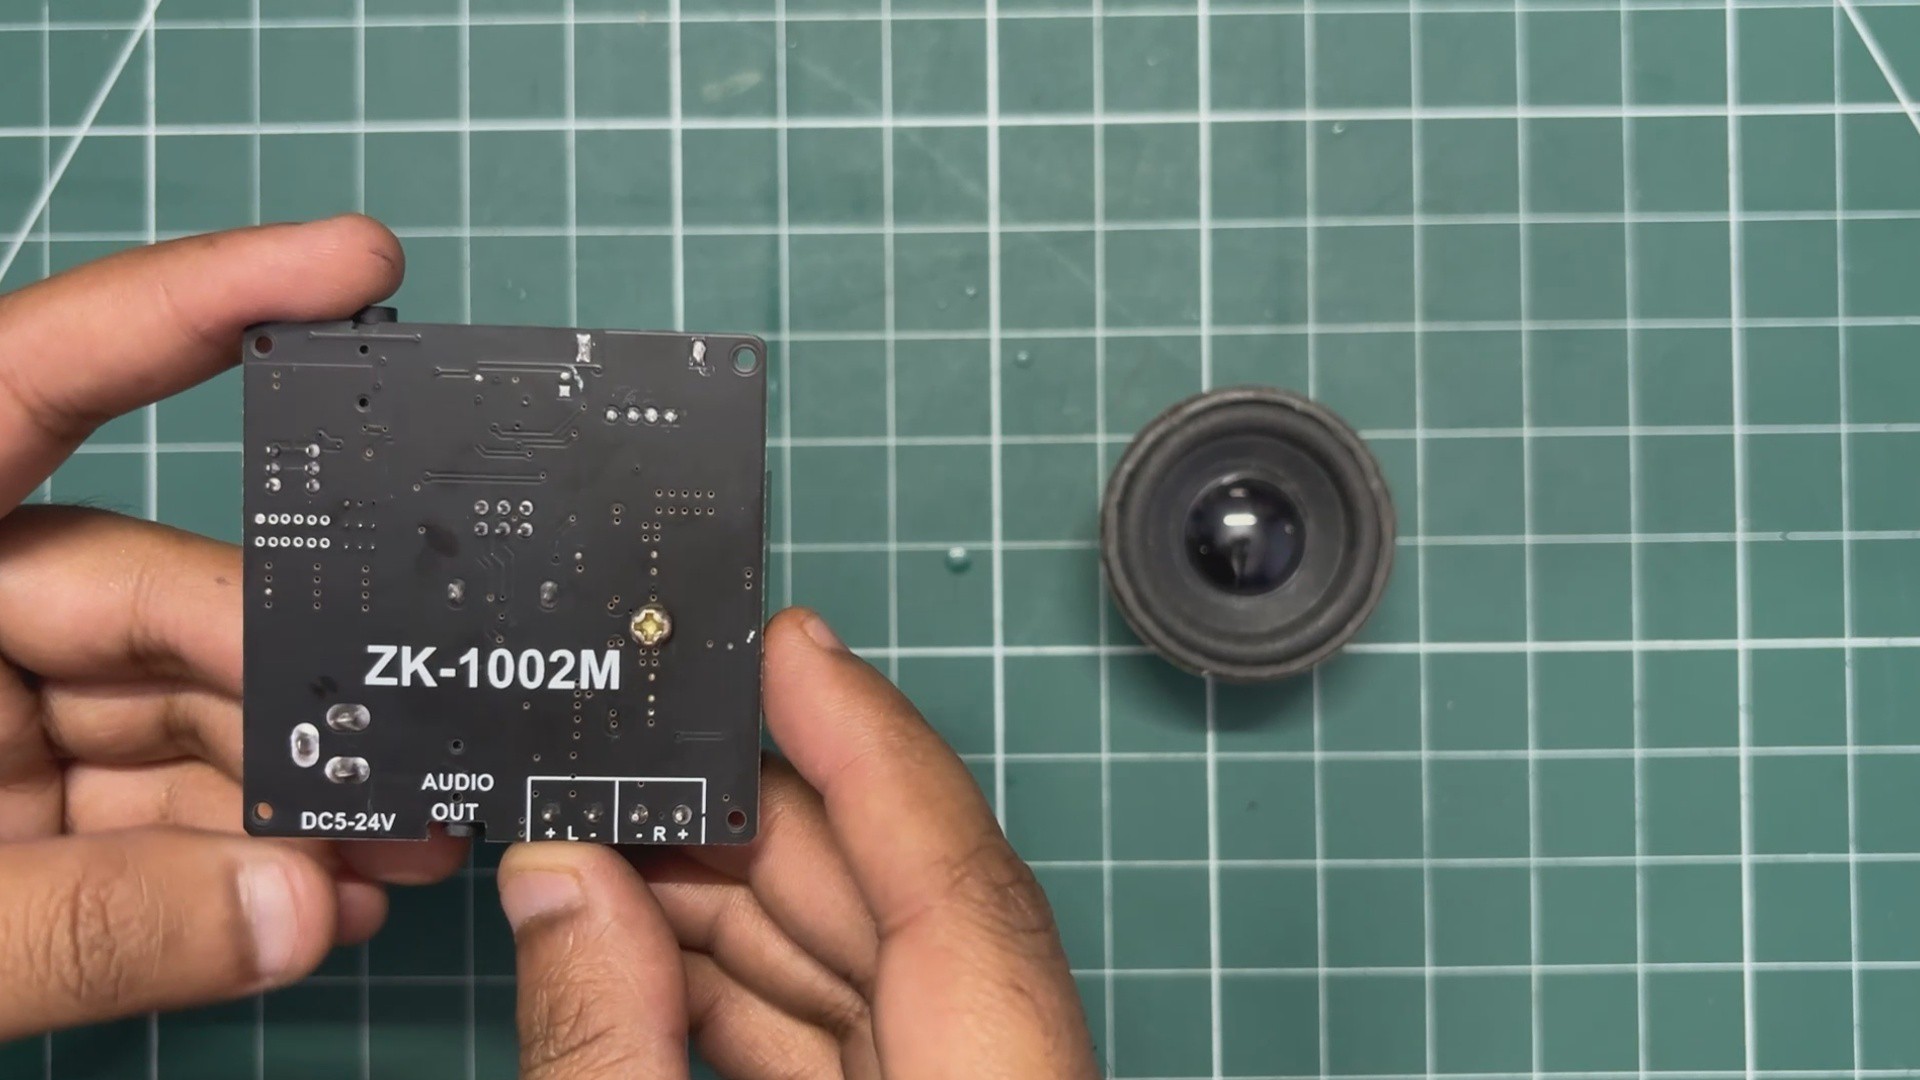
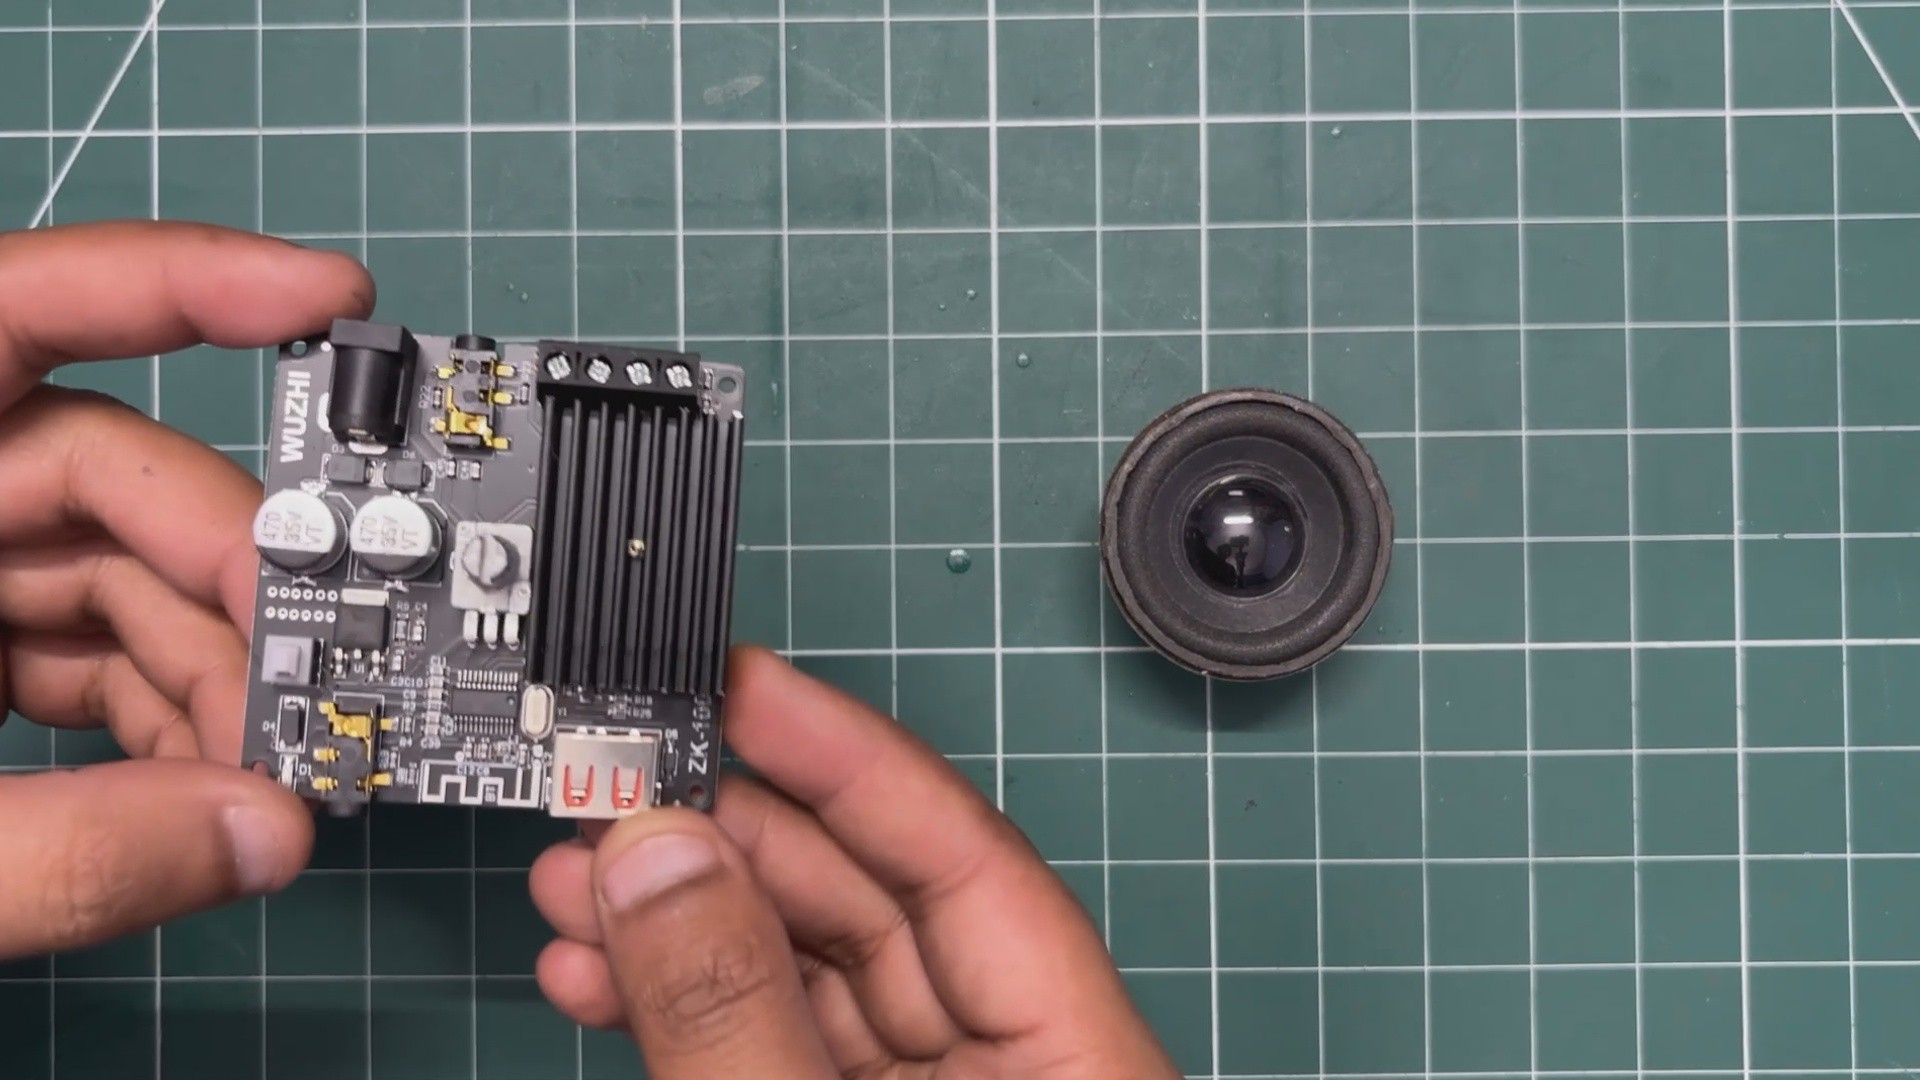
For audio, I'm using a ZK-1002M Bluetooth amplifier module. It supports dual-channel speaker output and comes with several additional features, including USB playback and 3.5 mm audio connections. However, for our project, we only need its Bluetooth audio functionality.
The idea is simple: we'll connect a speaker to the module and pair it with our Game Boy Advance XL over Bluetooth, allowing us to play audio wirelessly from the LattePanda Mu.
Another advantage is its DC power input, which allows us to power the audio setup using our existing 12V supply. This keeps the wiring simple and avoids the need for a separate power adapter.
CONSOLE DESIGN
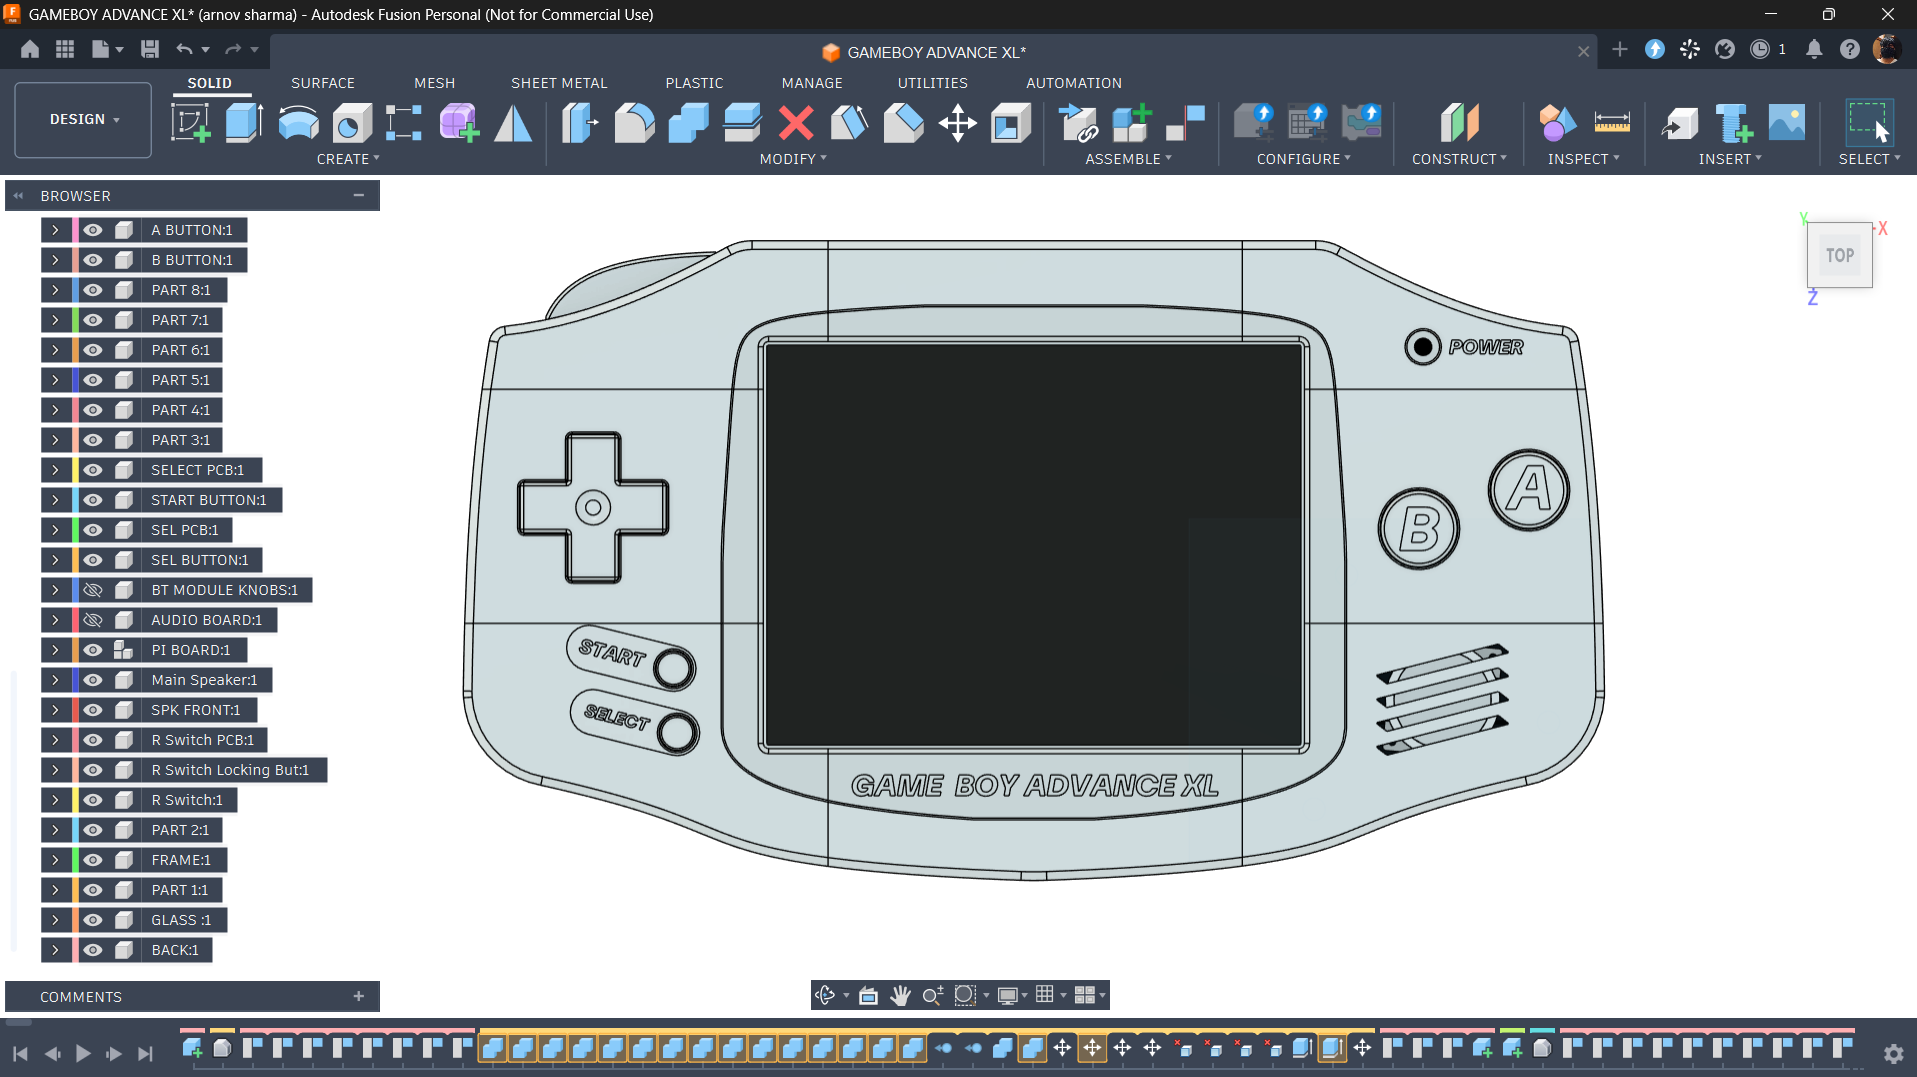
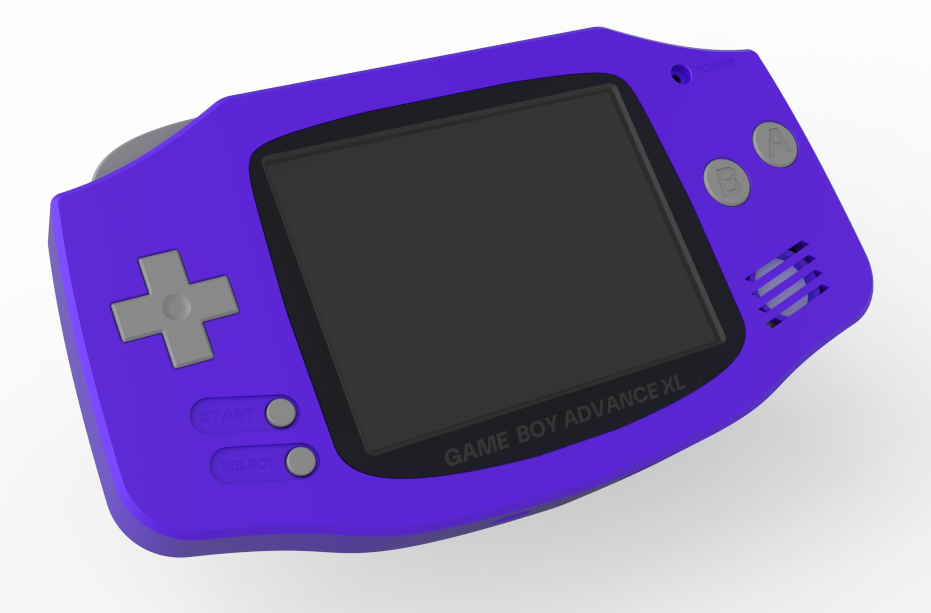
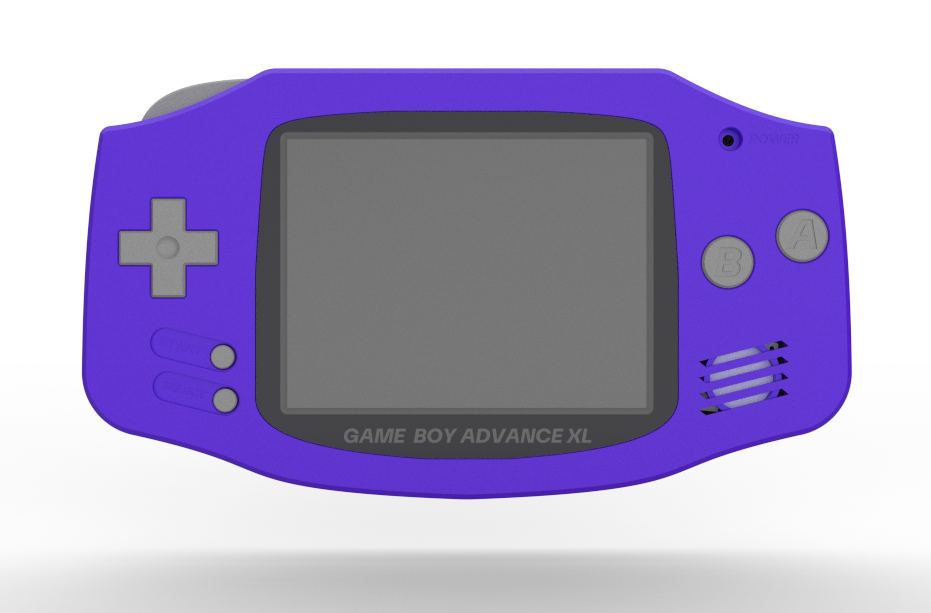
The main goal behind this project was to create a giant replica of the original Game Boy Advance while keeping its iconic design as close to the original as possible. I could have redesigned the entire enclosure to make it look more modern, but that would have defeated the purpose of this project. I wanted it to look like a Game Boy Advance, just on a much larger scale, with a few modifications to accommodate the hardware inside.
I started by finding a top-view image of the original Game Boy Advance and importing it into Fusion 360 as a reference. Using that image as a guide, I traced the outline and gradually built the main body, making adjustments along the way to get the proportions as close to the original console as possible.
Once I had the basic shape, I started working on the details. This included creating the display housing, hollowing out the enclosure to make room for the electronics, and dividing the model into smaller sections that could be 3D printed and assembled later.
I also modelled the familiar controls, including the D-pad, A and B buttons, Select and Start buttons, and the shoulder trigger. I designed the buttons as separate components so they could be printed individually and fitted into the main enclosure. Since I only needed one shoulder button to control the power of the LattePanda Mu, I modified that part of the design accordingly.
The model also includes dedicated mounting points for the internal hardware, including a holder for the LattePanda Mu and a space for the speaker. Every component had to be positioned carefully to make the most of the available space while keeping the exterior true to the original design.
One detail I particularly wanted to get right was the display bezel. I recreated the black frame surrounding the screen, just like the one on the original Game Boy Advance. However, printing such a large, flat piece would have been impractical, so I decided to have it laser-cut from a 3 mm-thick acrylic sheet instead. This gave me a cleaner finish and a more authentic look.
The overall design is fairly straightforward, consisting of two main sections: the front body, which houses the display, controls, and electronics, and the rear lid, which covers the internals. Everything else, from the buttons and switches to the hardware mounting brackets, was modelled as separate parts.
The entire design process took considerable time, especially because I had to balance the original console's proportions with the practical requirements of fitting a PC inside it. But that was the whole point of the project: to build a Game Boy Advance that looks as close to the original as possible, only much, much bigger!
MAIN BODY
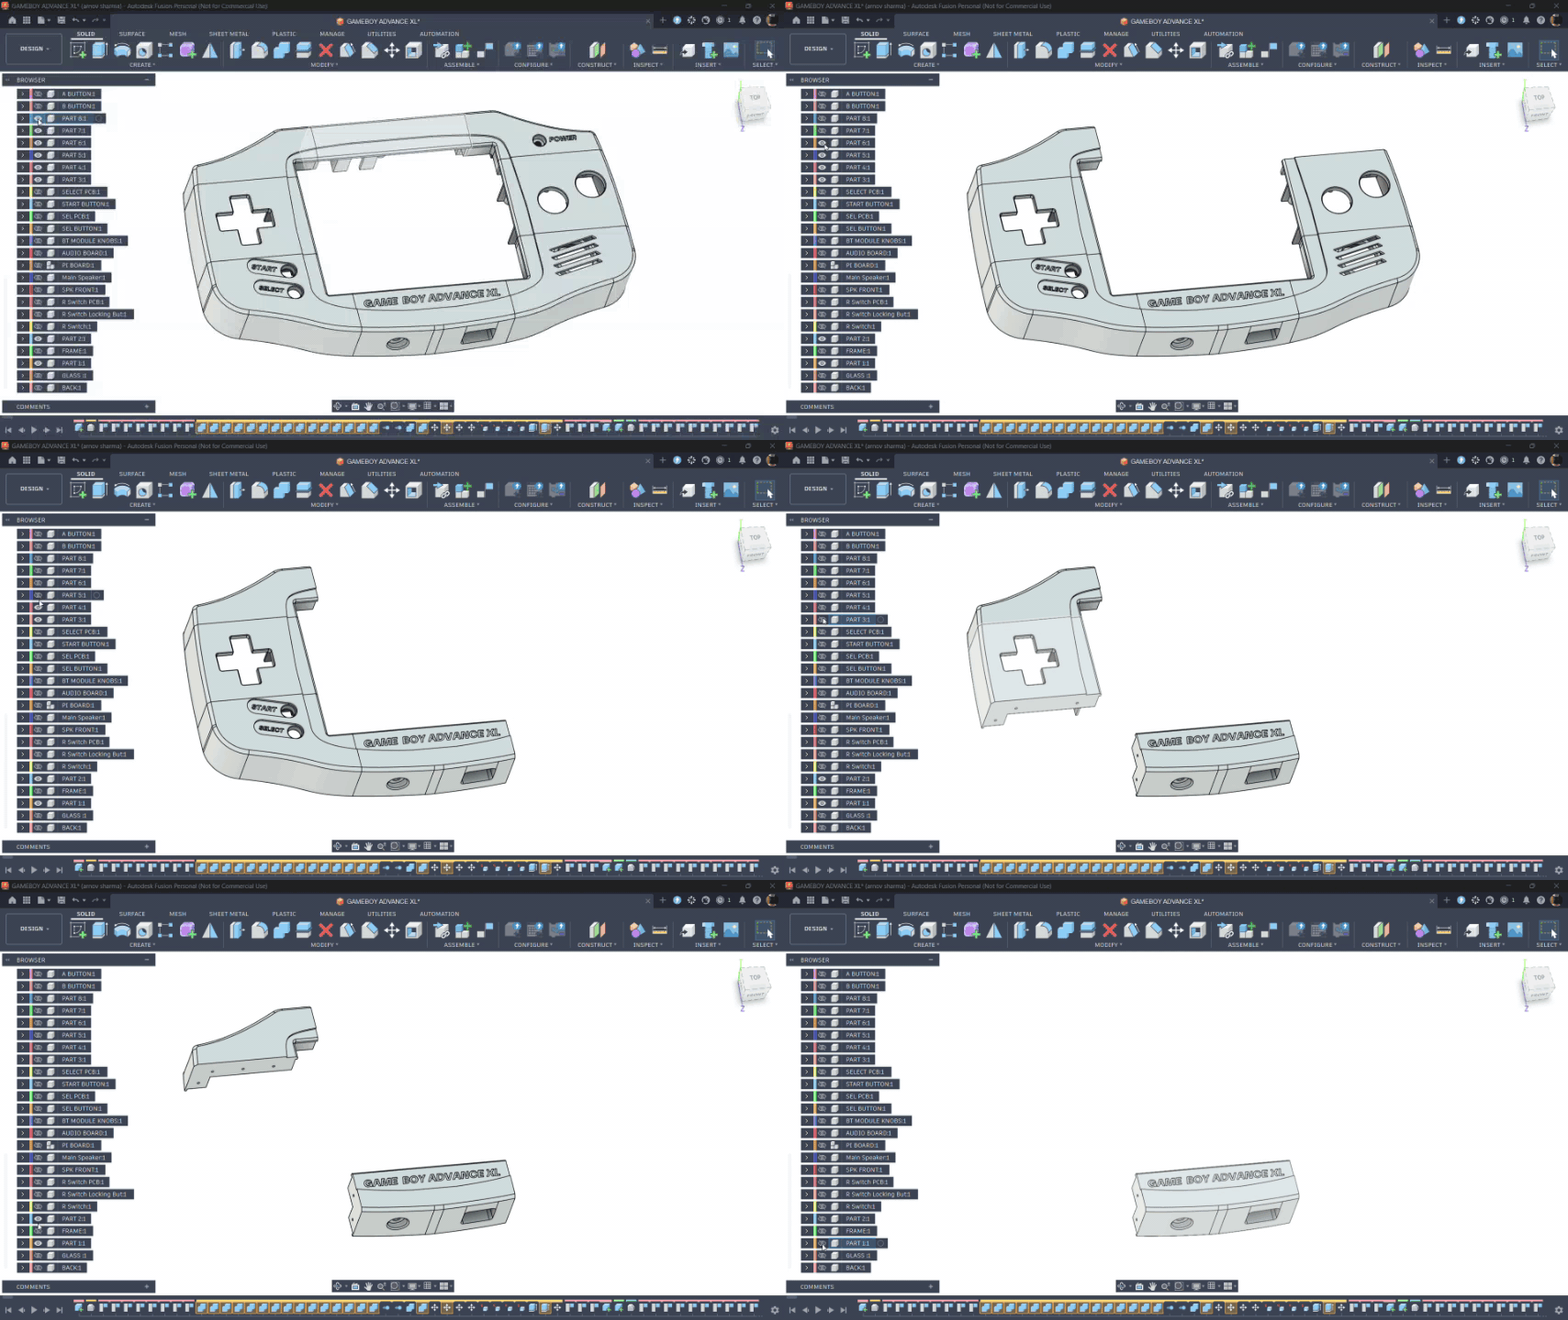
The main body was initially modelled as a single unit in Fusion 360.
However, considering the size of the enclosure and the build volume of my 3D printer (250 × 250 × 250 mm), I had to divide the model into eight individual parts so that each section could be printed separately.
To join these parts together, I designed mounting walls along the rear side of each section. These walls have four to five mounting holes positioned to align with the neighboring parts. The idea is to use M4 nuts and bolts to fasten the sections together, creating a rigid, unified structure.
This approach makes the model easier to print and assemble while keeping the Game Boy Advance XL's overall shape and dimensions intact. Once all eight sections are bolted together, they form the complete main body, ready for finishing and internal hardware installation.
I also made sure that the LattePanda Mu's I/O ports remain accessible once everything is assembled. To achieve this, I added an opening along the bottom edge of the main body, providing direct access to the ports on the carrier board without having to remove the lid.
Right next to this opening, there's a dedicated slot for the DC barrel jack, allowing me to connect the external 12V power adapter conveniently.
SCREEN POSITION
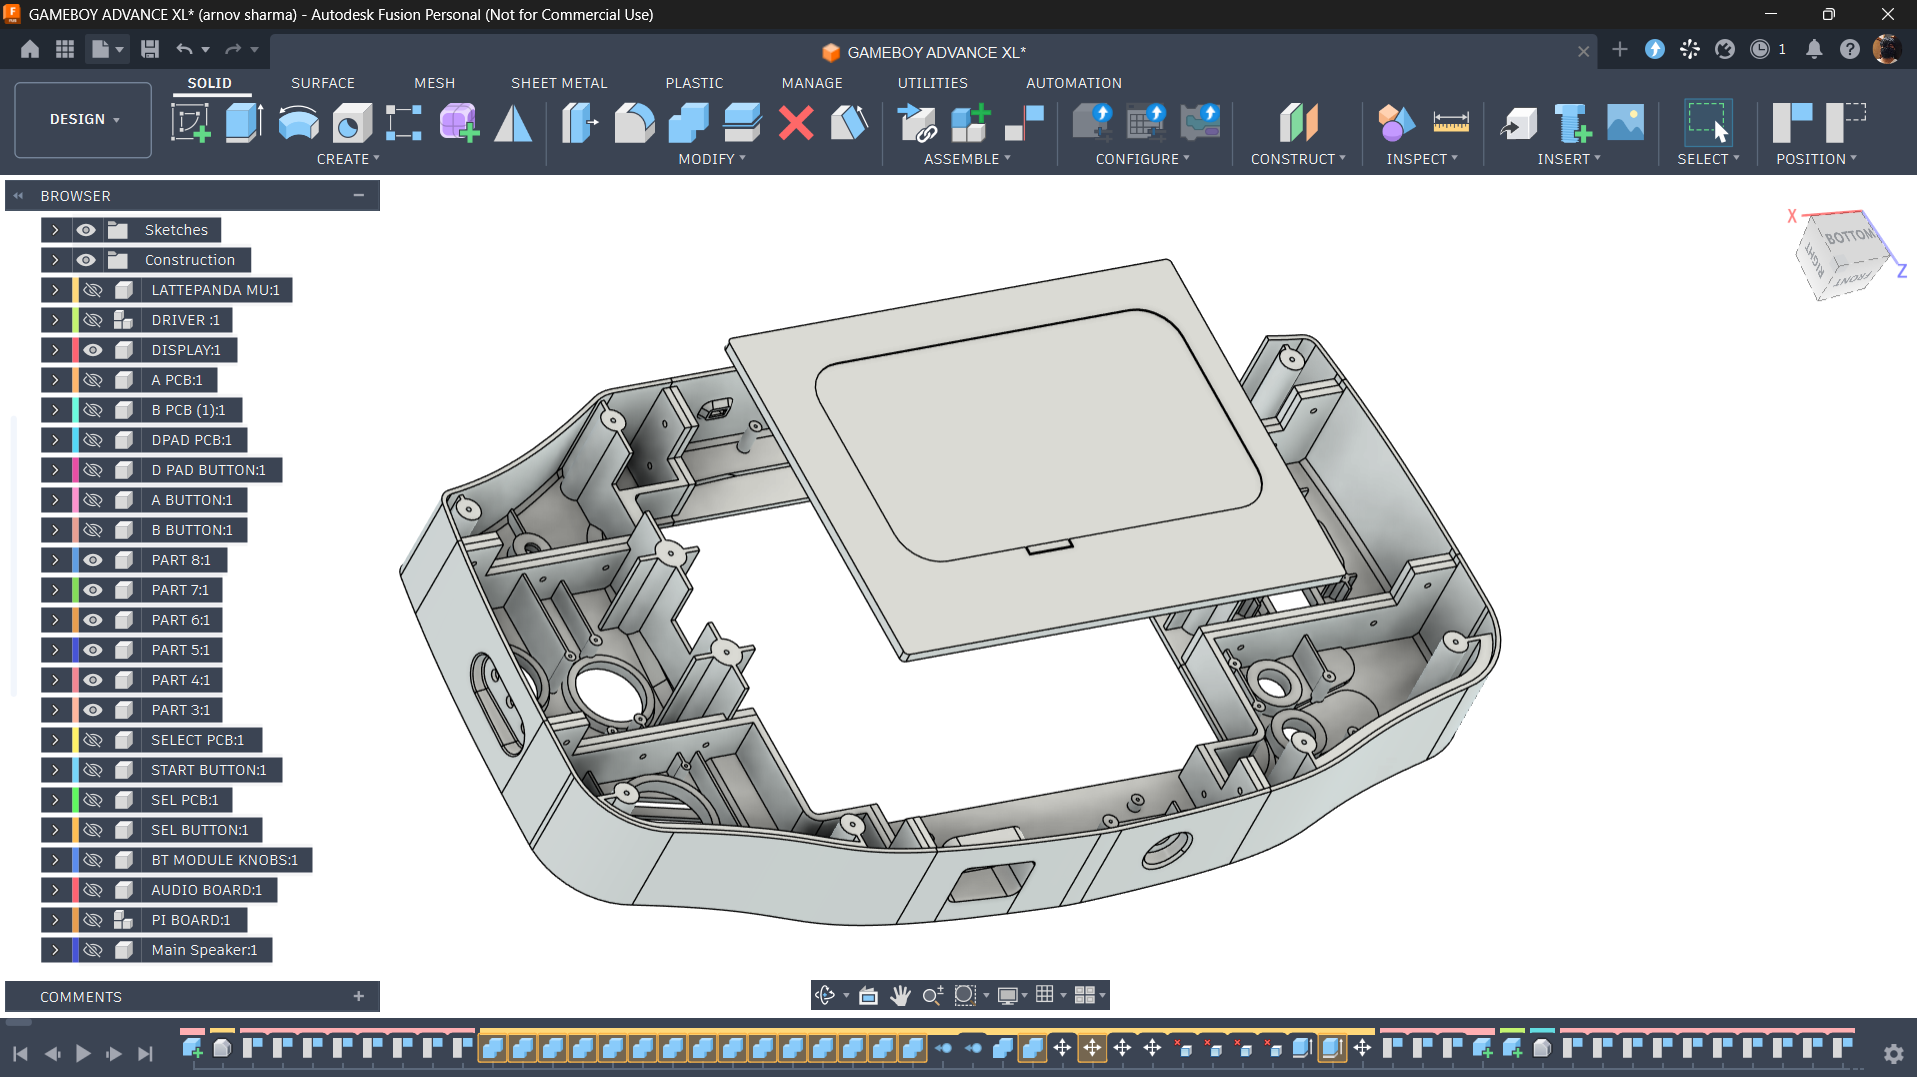
The 15-inch display is installed from the rear of the main body. I've modelled a dedicated mounting area inside the enclosure so that the display fits neatly into position and stays aligned with the front bezel.
For securing the display, I decided to go with the good old hot glue gun! I could have designed custom mounting brackets, but that would have added more complexity to the design and required additional parts to be printed.
After all, this is a DIY project, not a commercial product, so I decided to keep things simple and use what I had available. A few strategically placed spots of hot glue were enough to hold the display in place and get the job done!
LATTEPANDA & DISPLAY DRIVER HOLDER
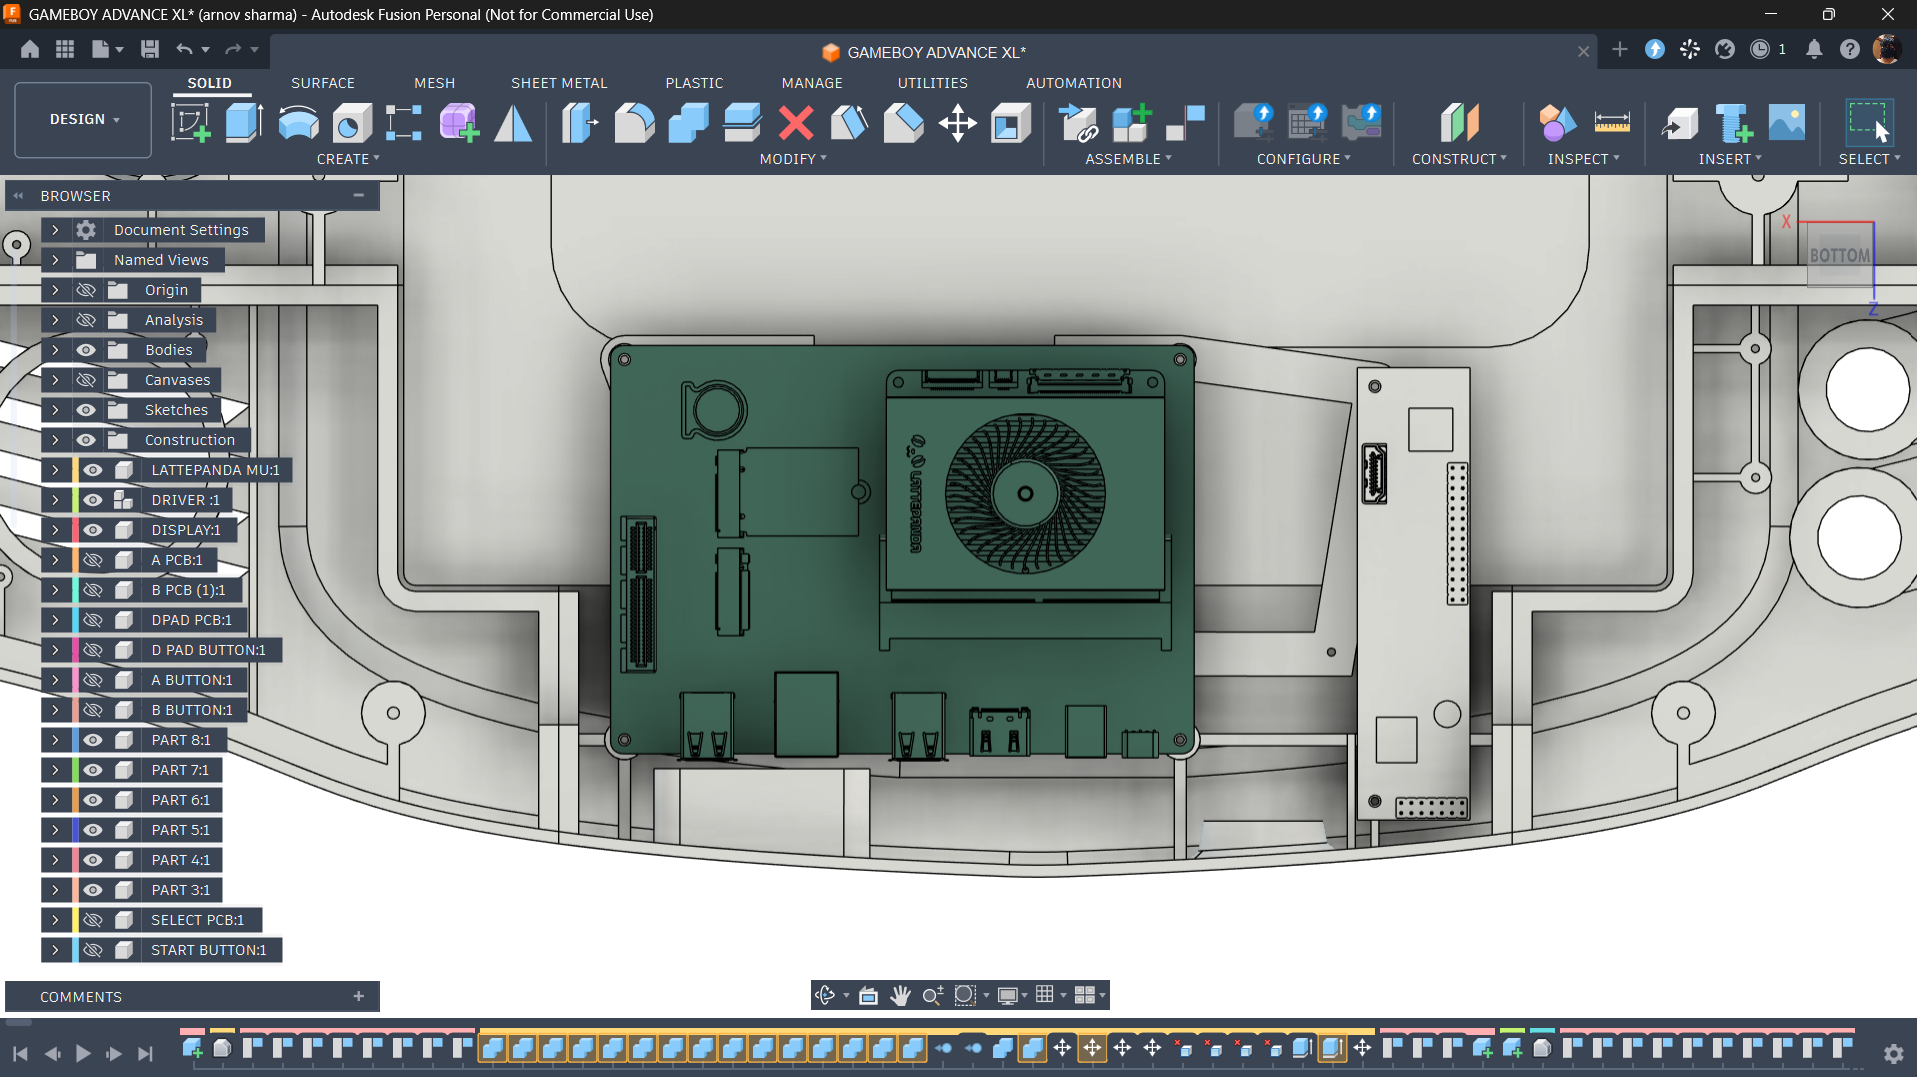
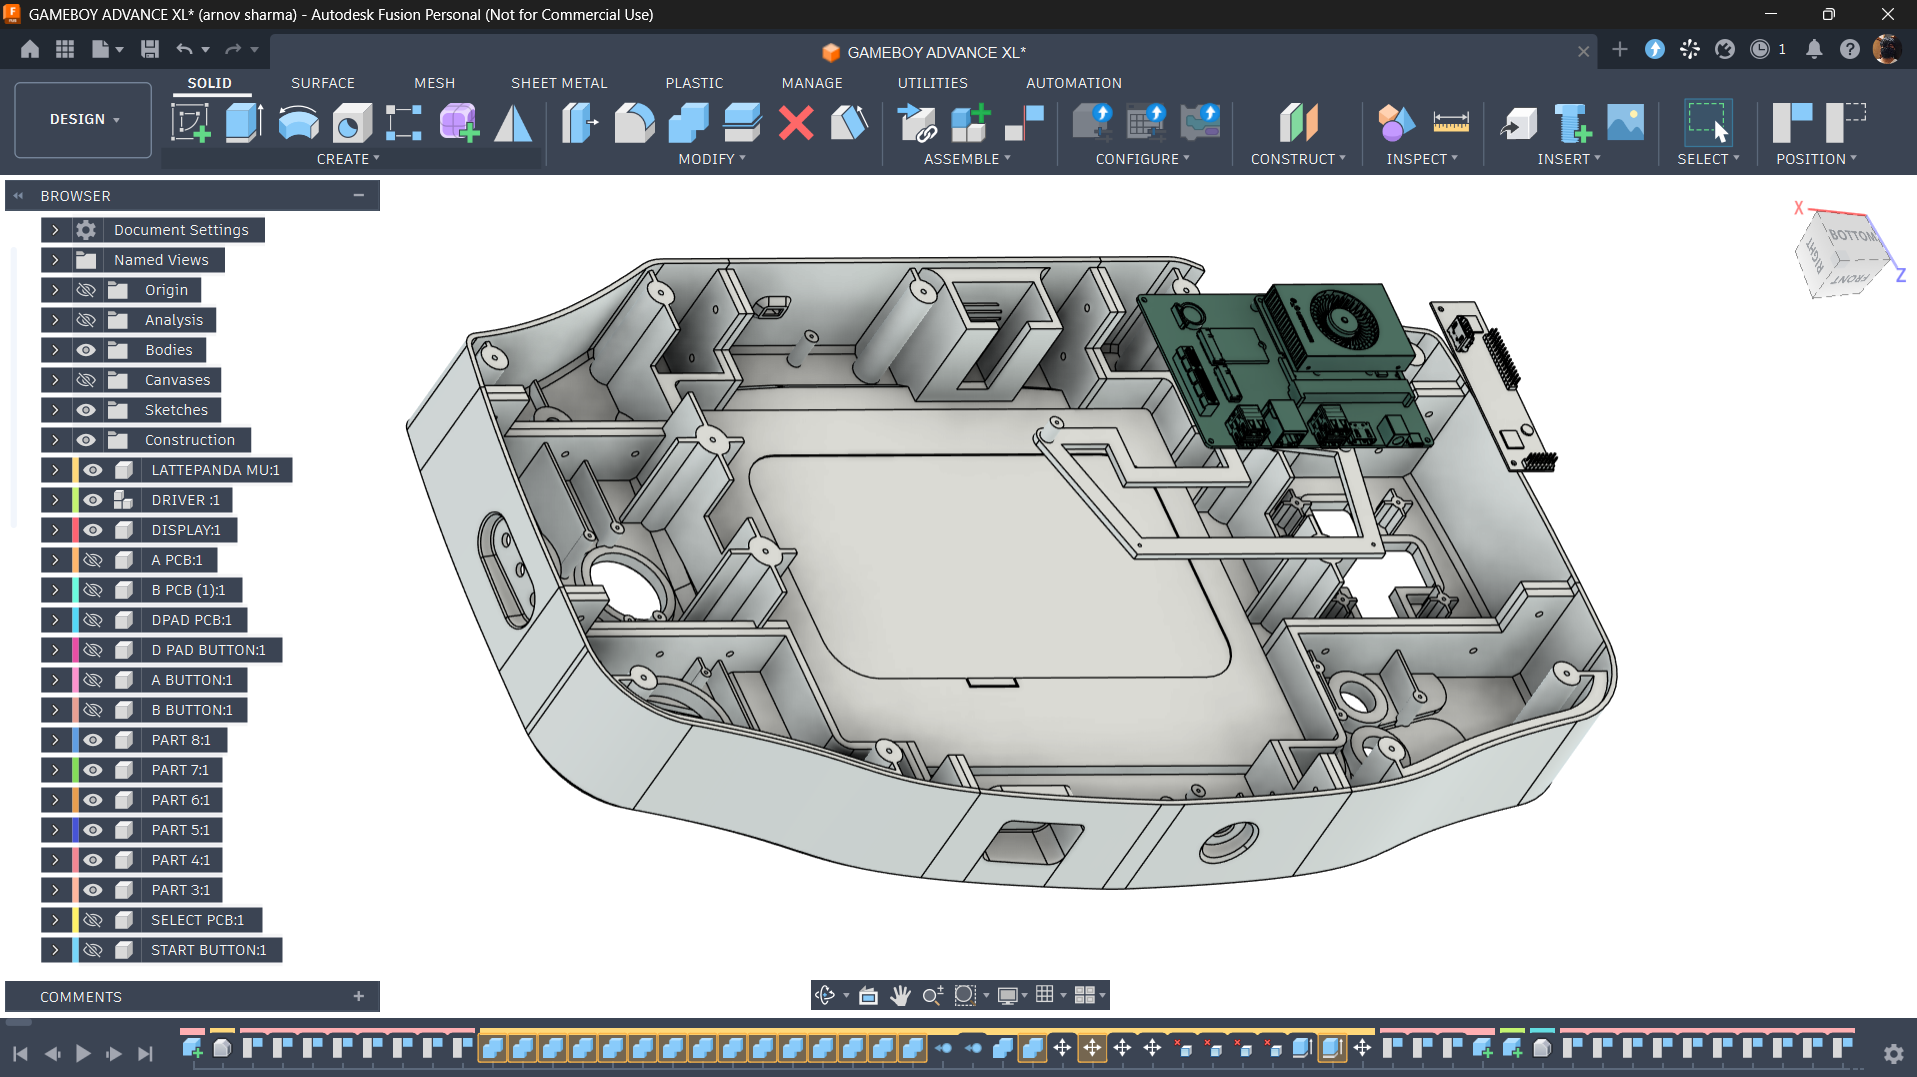
Next, we install the DFRobot LattePanda Mu Lite carrier board and the display driver board inside the main body.
To mount both boards securely, I designed a custom holder that fits inside the enclosure. First, we secure this holder to the main body, creating a stable mounting platform for the electronics. We can then mount the LattePanda Mu Lite carrier board and the display driver board onto the holder.
BUTTONS
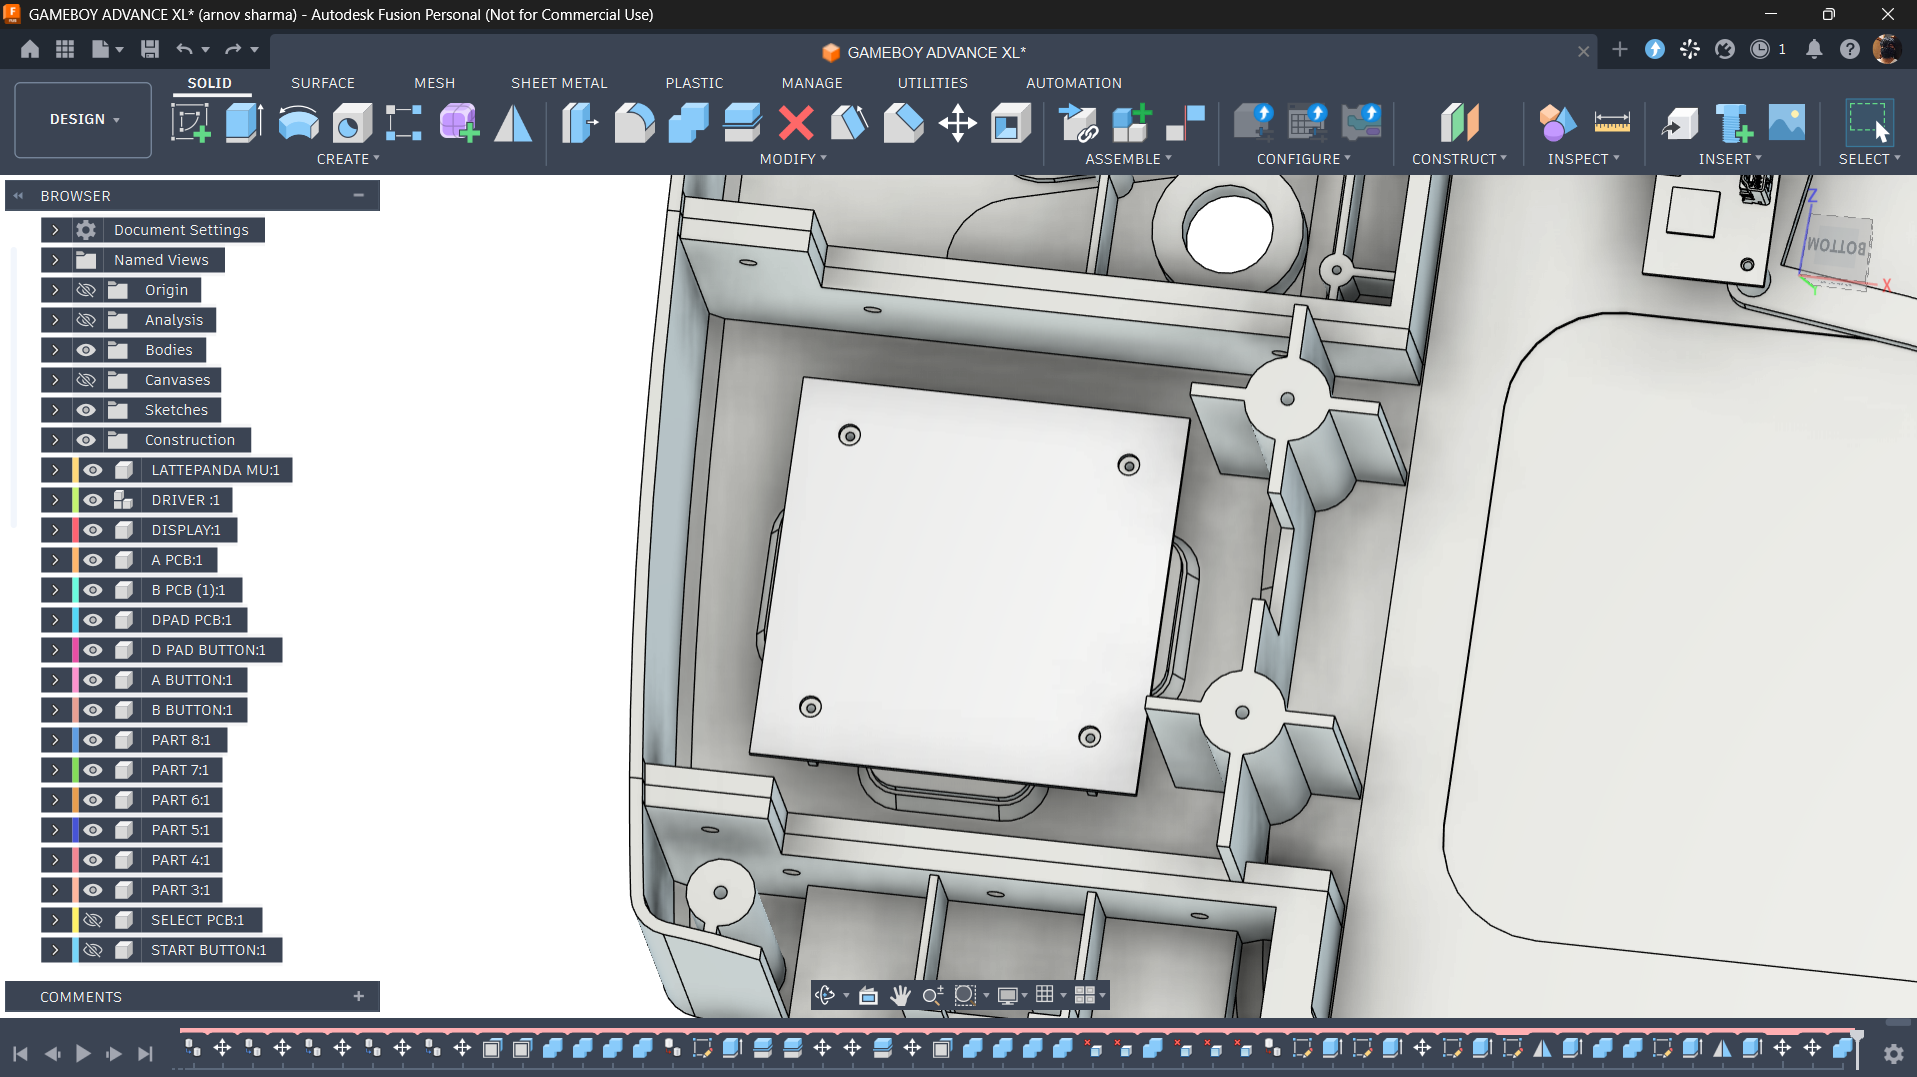
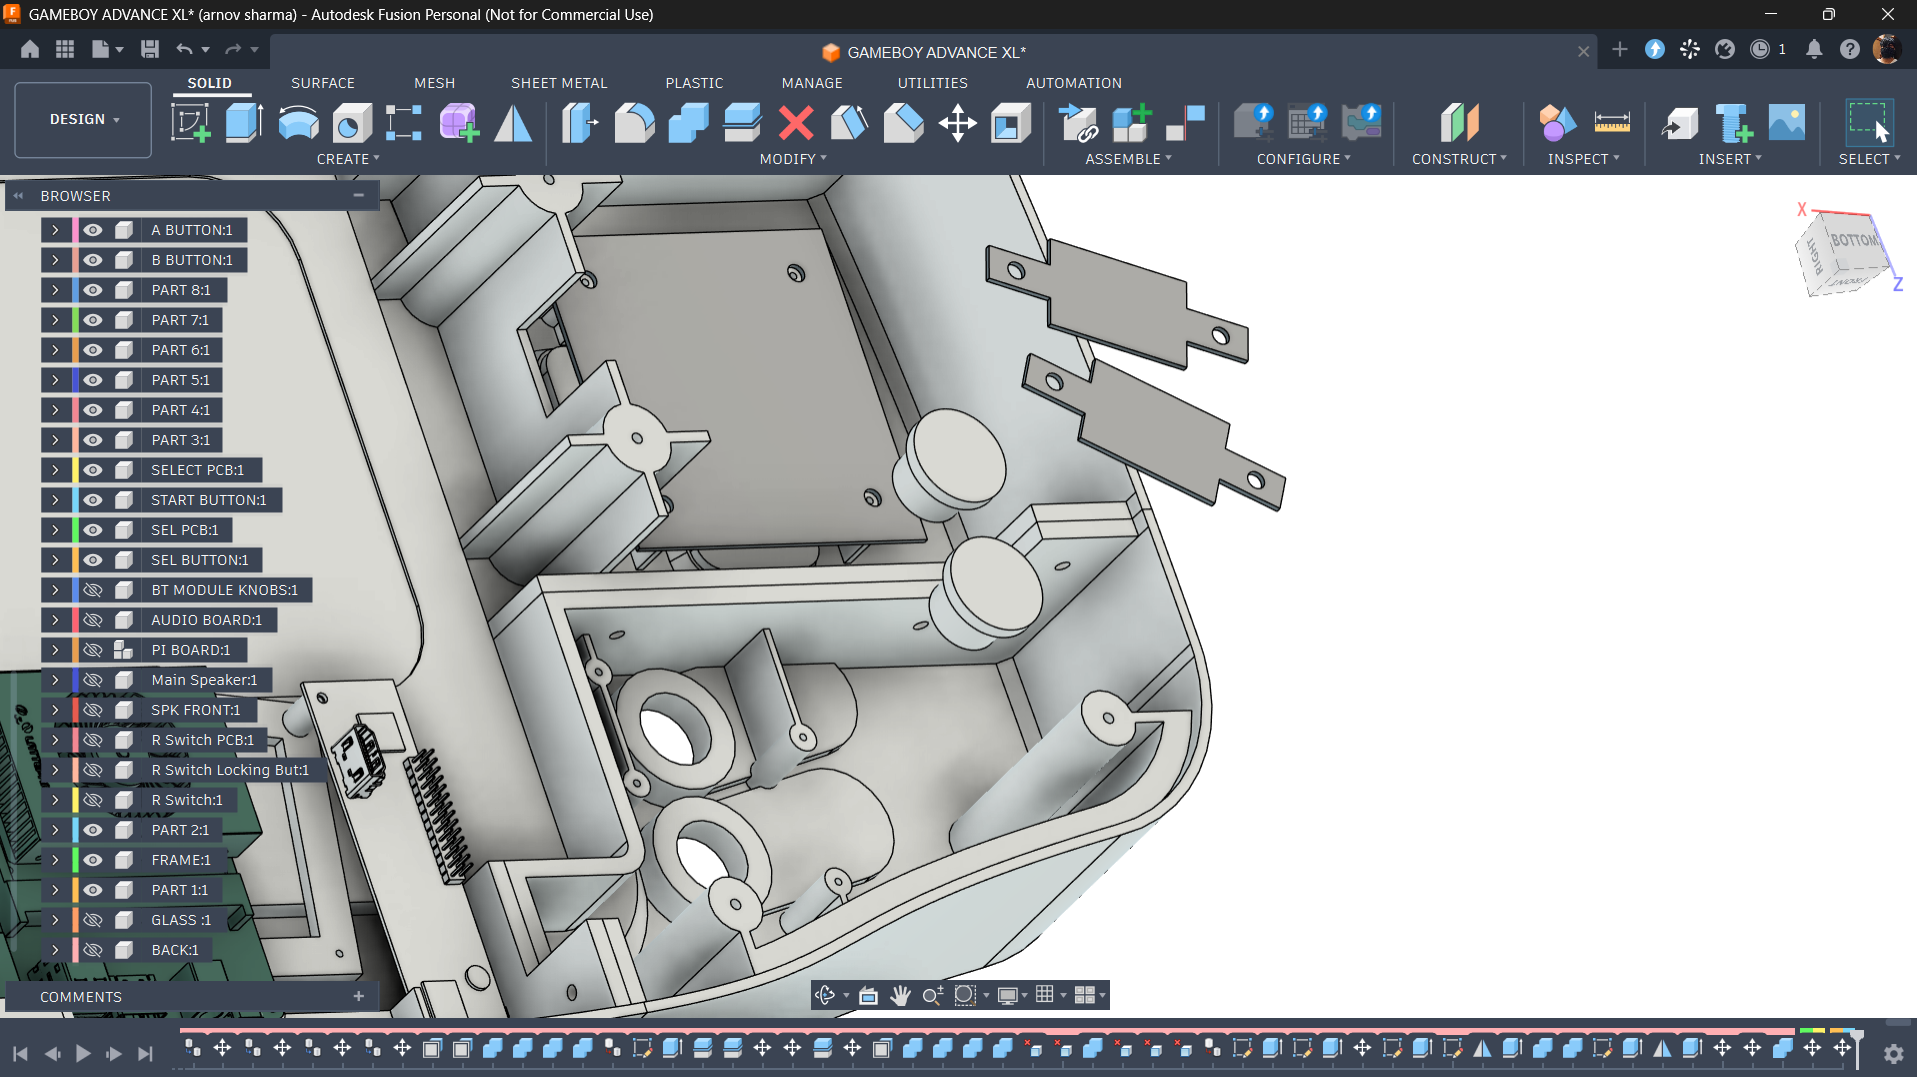
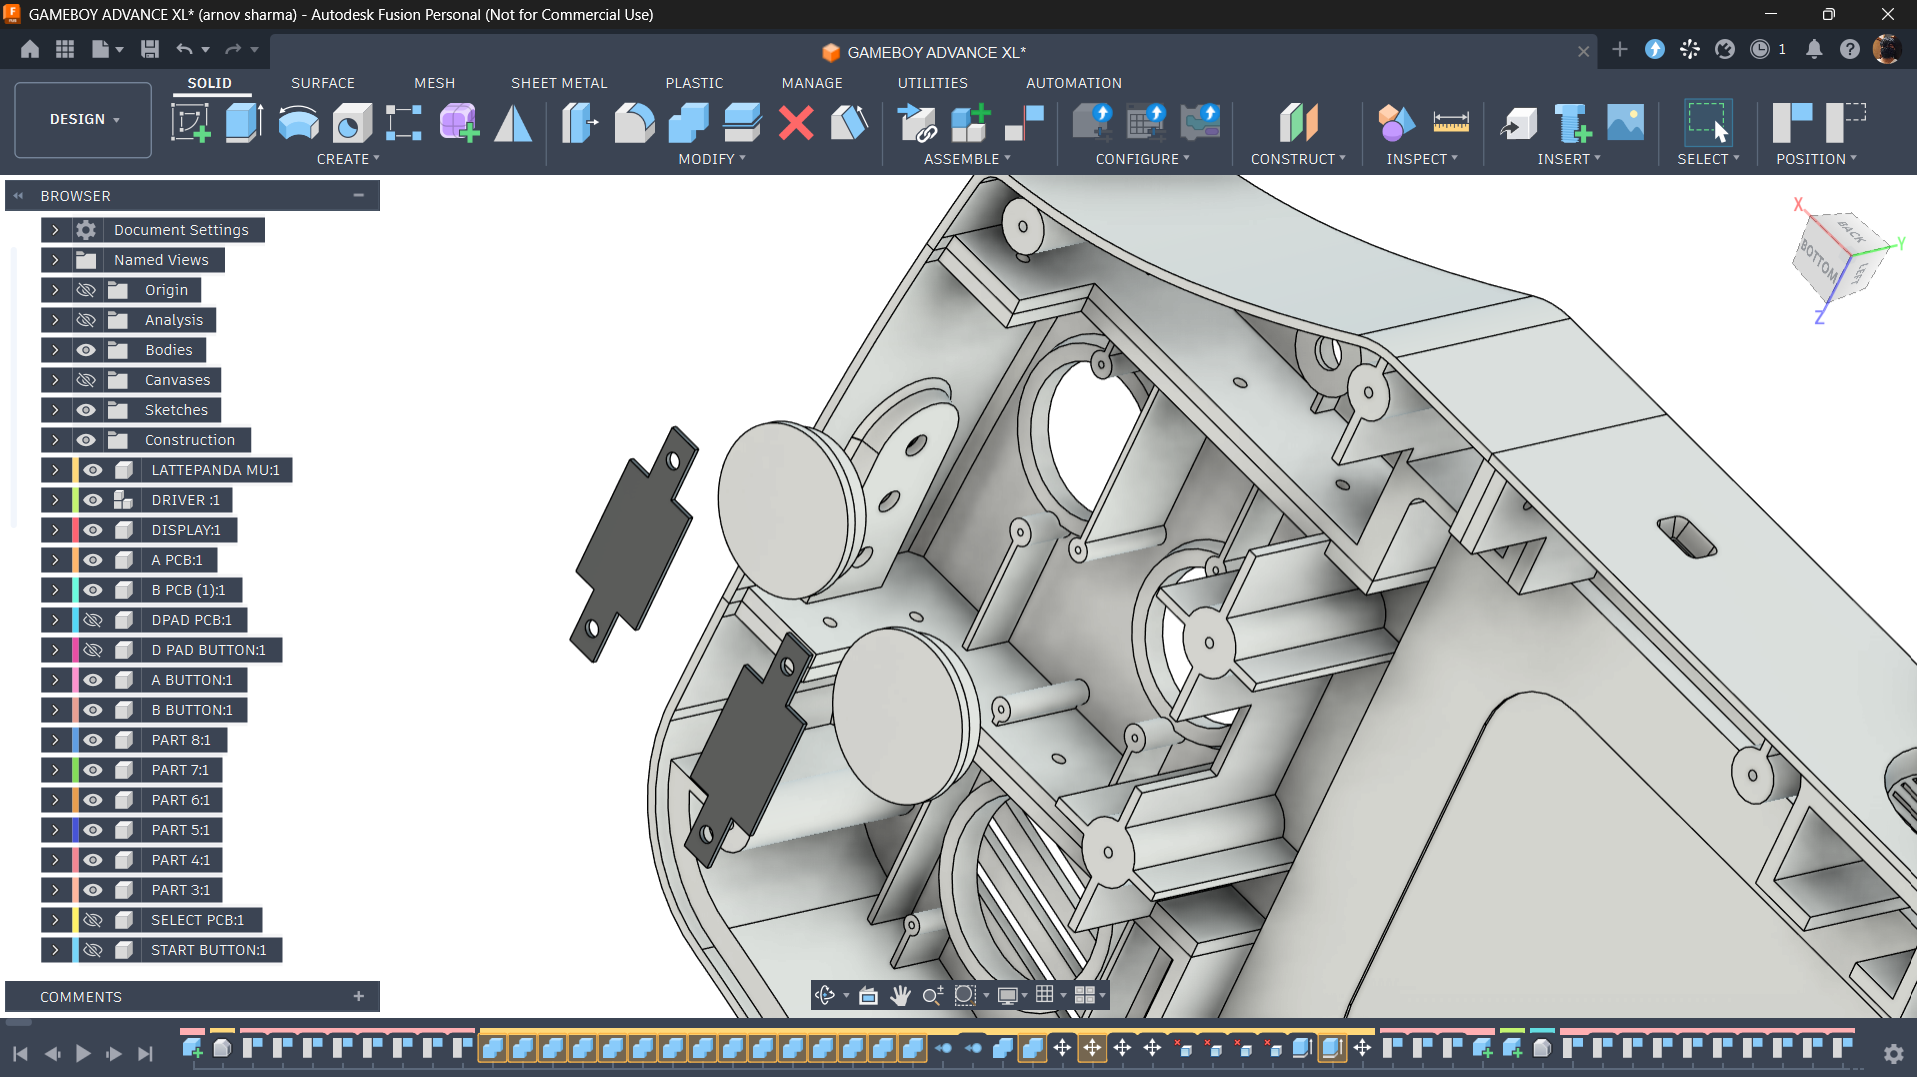
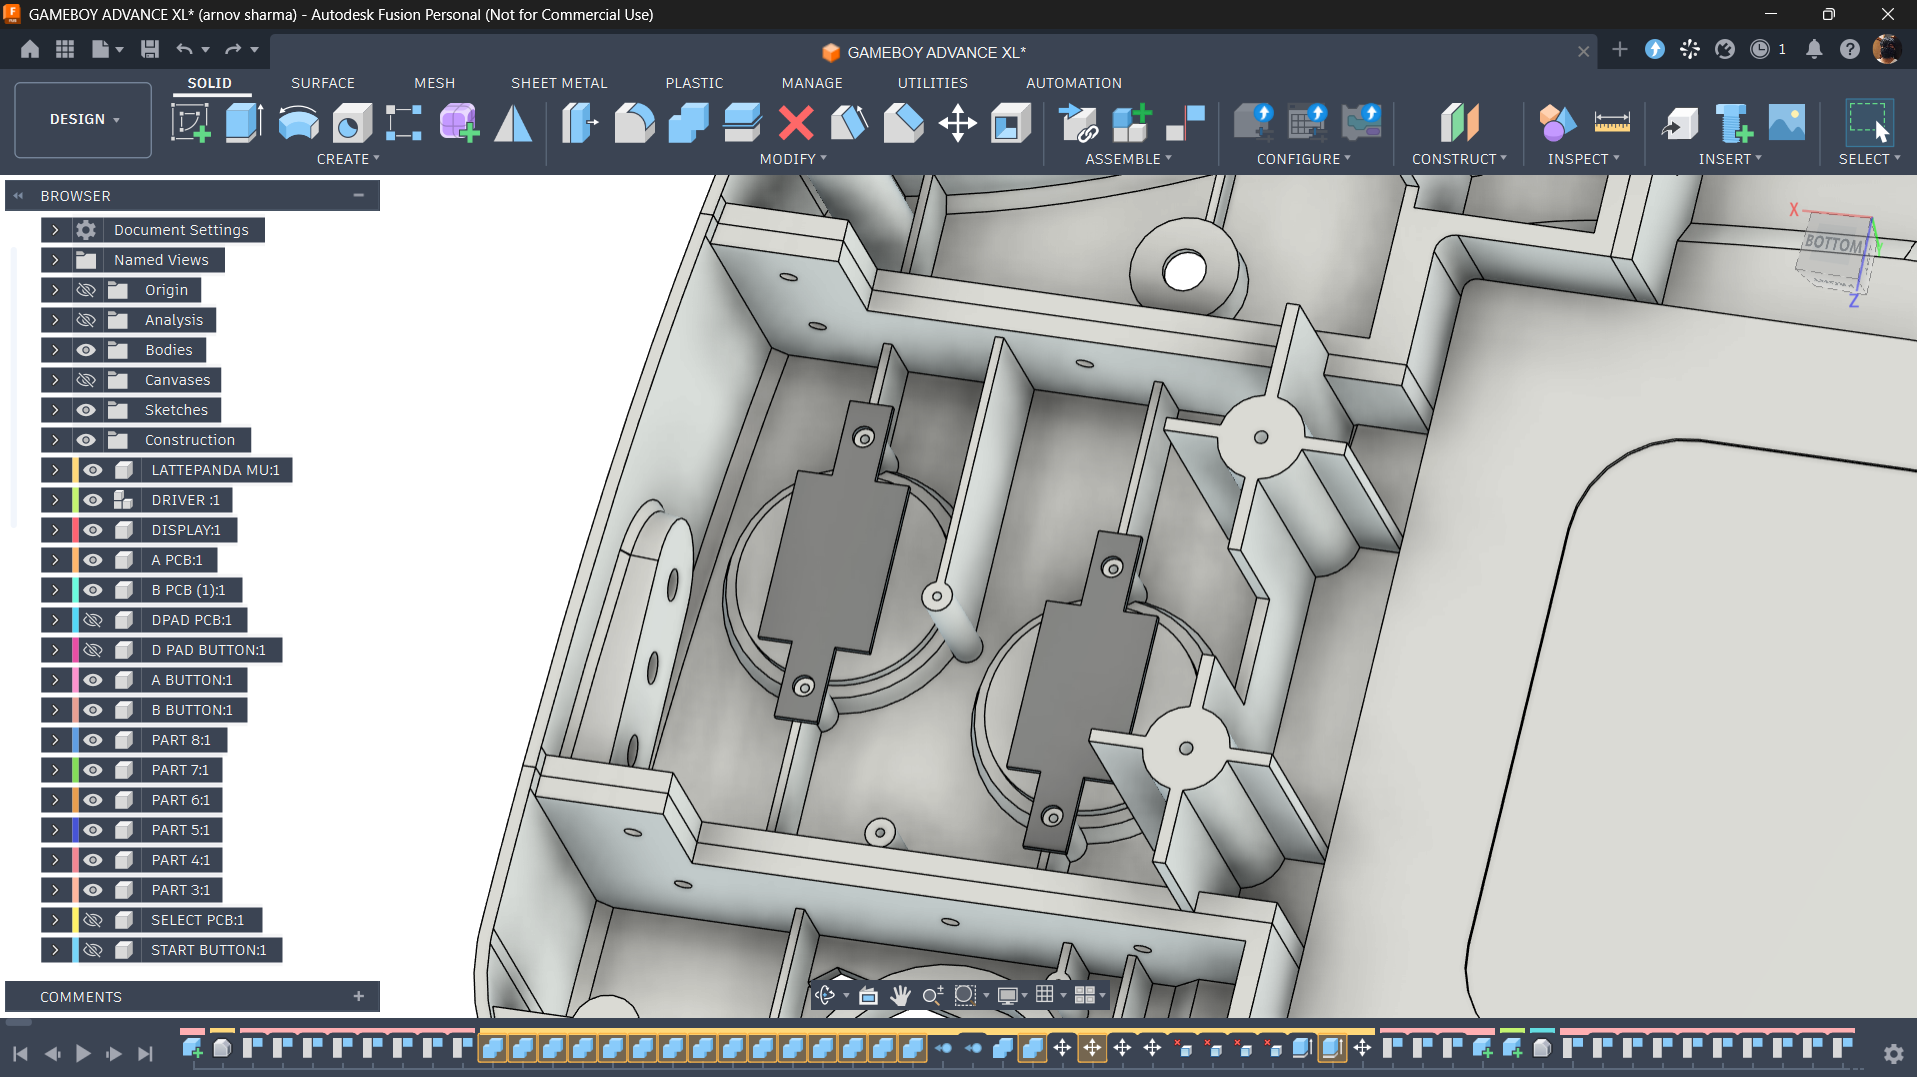
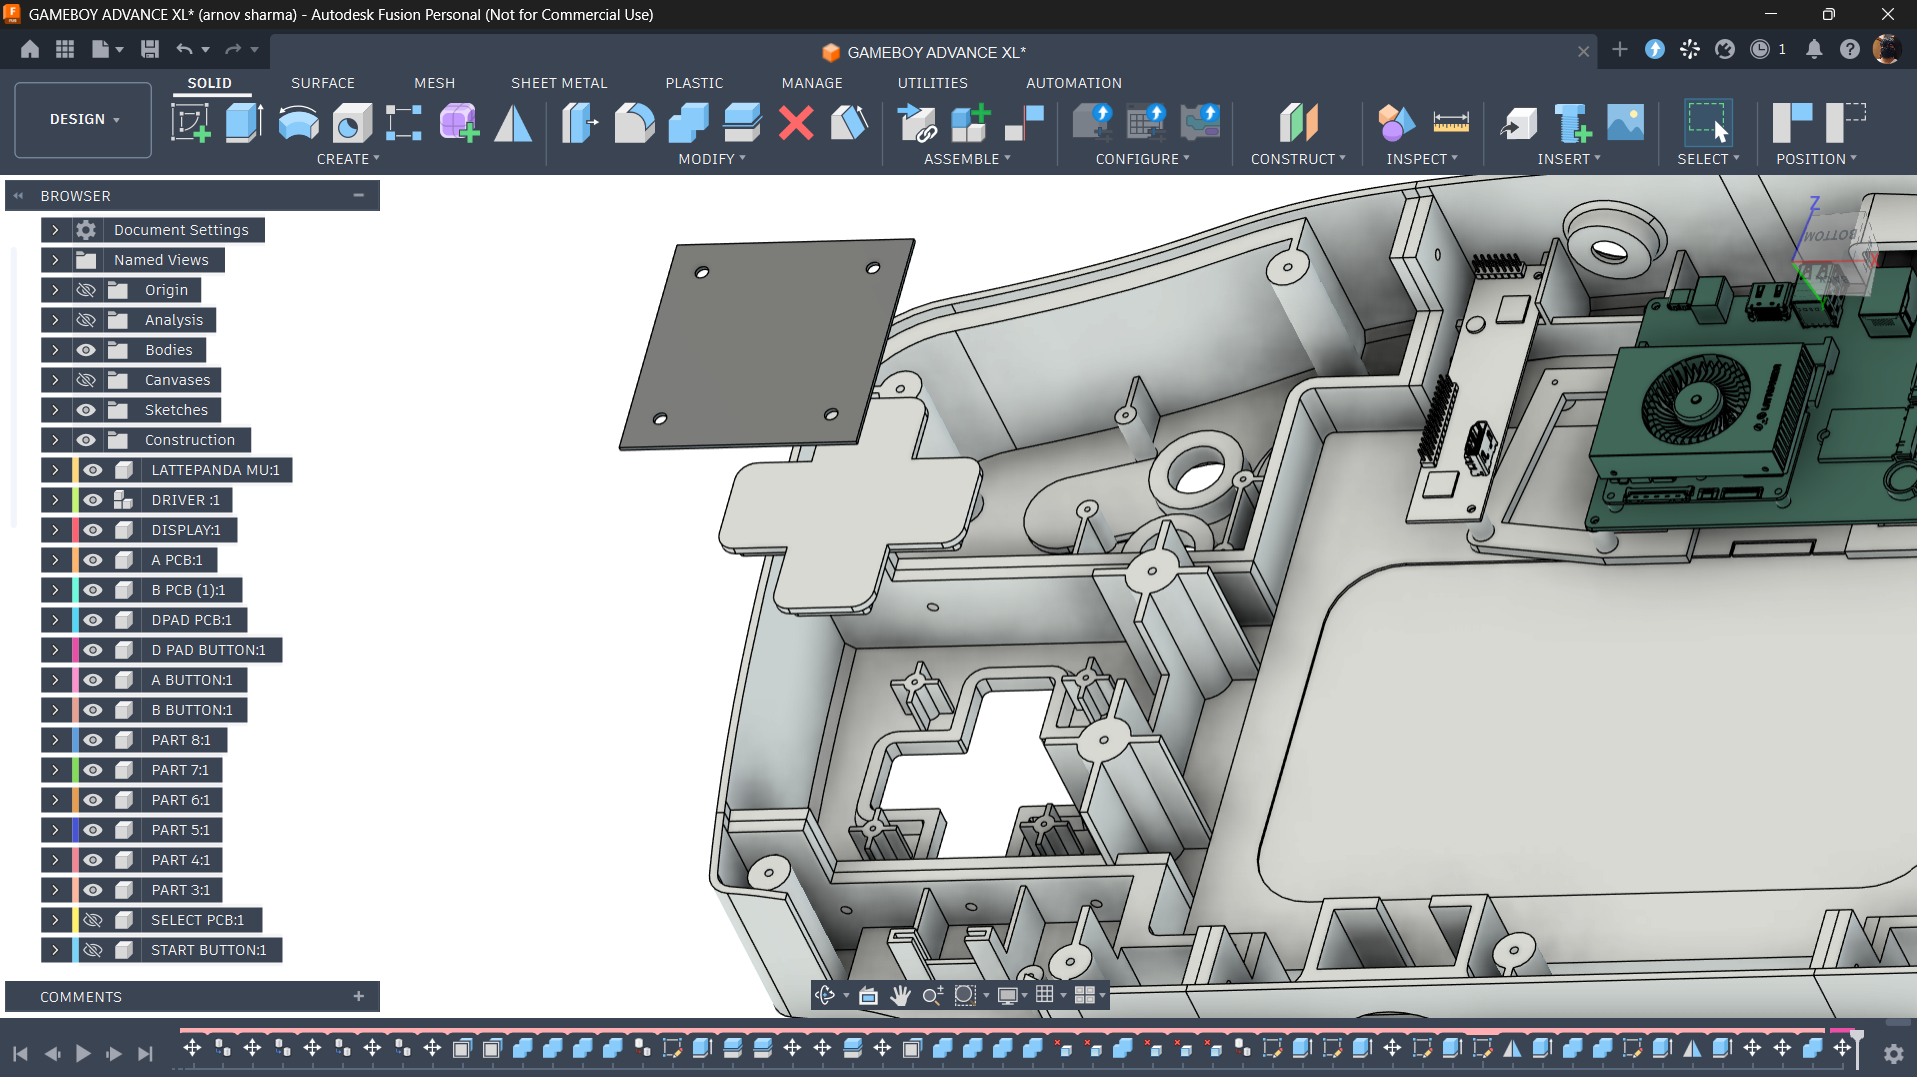
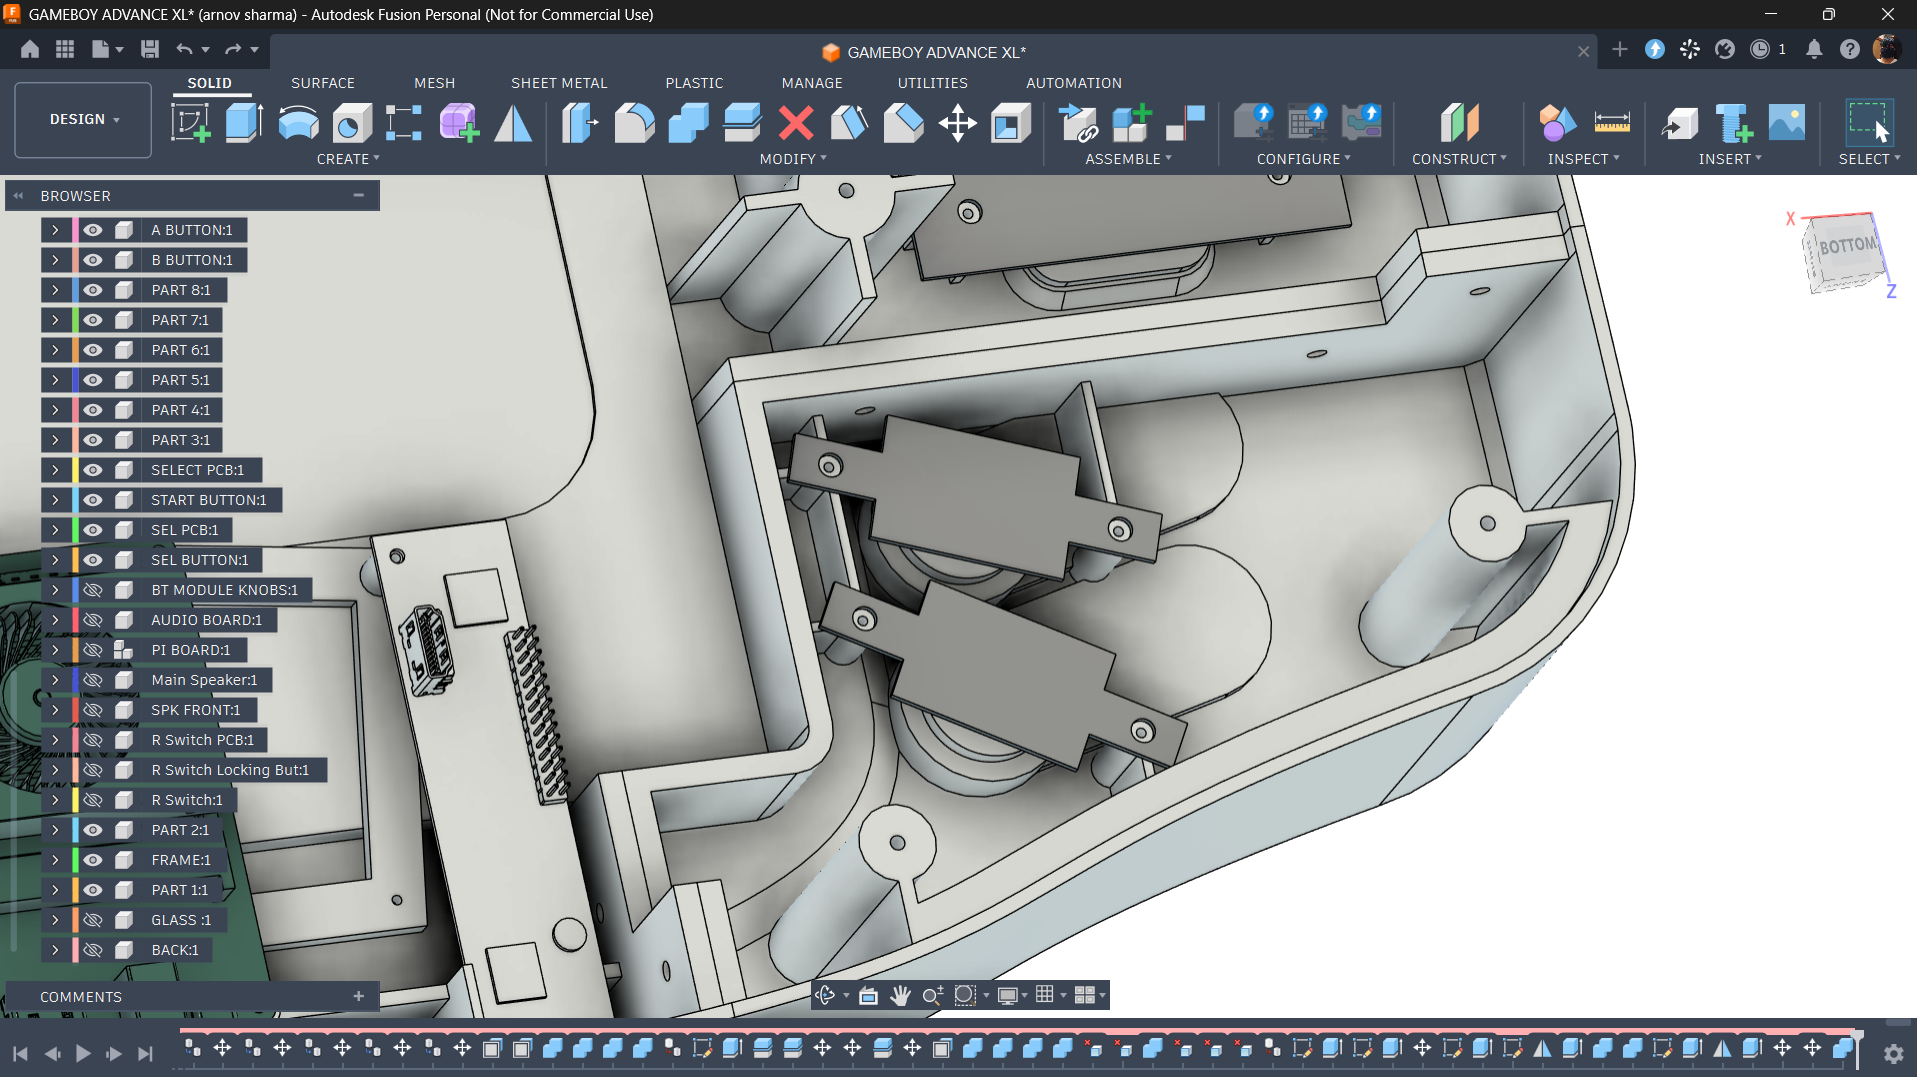
Next, let's work on the controls. The A, B, Select, and Start buttons all use the same button board PCBs, which I reused from another project. This saved me some time and meant I didn't have to design a new PCB specifically for this build.
Let's start with the A and B buttons. I modelled circular buttons in Fusion 360, keeping their proportions as close to the original Game Boy Advance as possible. The main body has dedicated openings for these 3D-printed buttons, allowing them to sit neatly in position.
Behind each button, we mount the corresponding button board PCB, which houses the tactile push button. I designed a 0.5 mm gap between the tactile switch and the 3D-printed button to allow for some movement when pressing it. This clearance is important because it lets the buttons move back and forth without constantly pressing against the switches, giving them a more natural button-press feel.
To secure the PCBs, I added two screw bosses for each board, allowing them to be fastened directly to the enclosure. This keeps everything aligned and prevents the boards from moving around during use.
The Select and Start buttons follow the same design and mounting approach, with the only major difference being that their 3D-printed buttons are slightly smaller.
The D-pad uses a similar mechanism, but instead of individual circular buttons, it features a larger, plus-shaped 3D-printed component. This sits inside a dedicated opening in the enclosure, with a square button PCB mounted behind it. Just like the other controls, the D-pad has a small clearance between the printed part and the tactile switches, allowing it to move freely and register directional inputs when pressed.
TRIGGER BUTTON
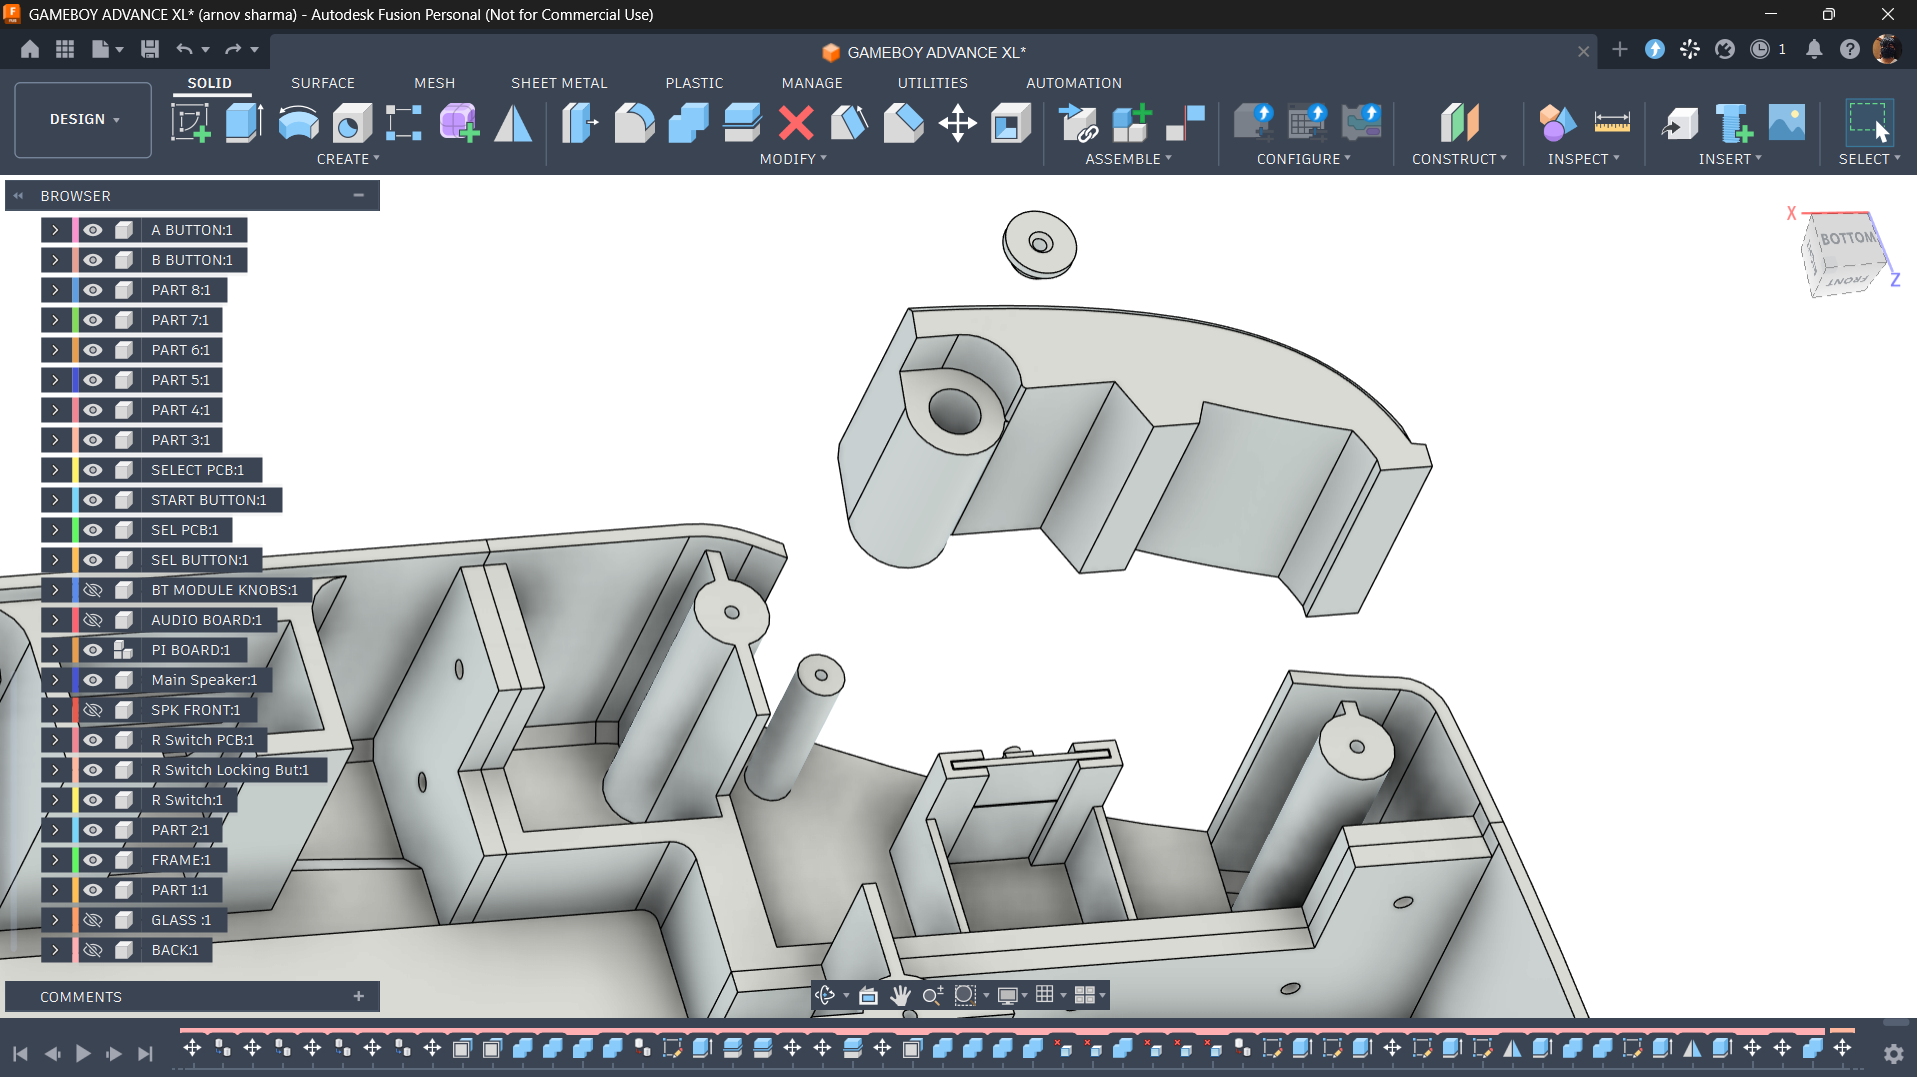
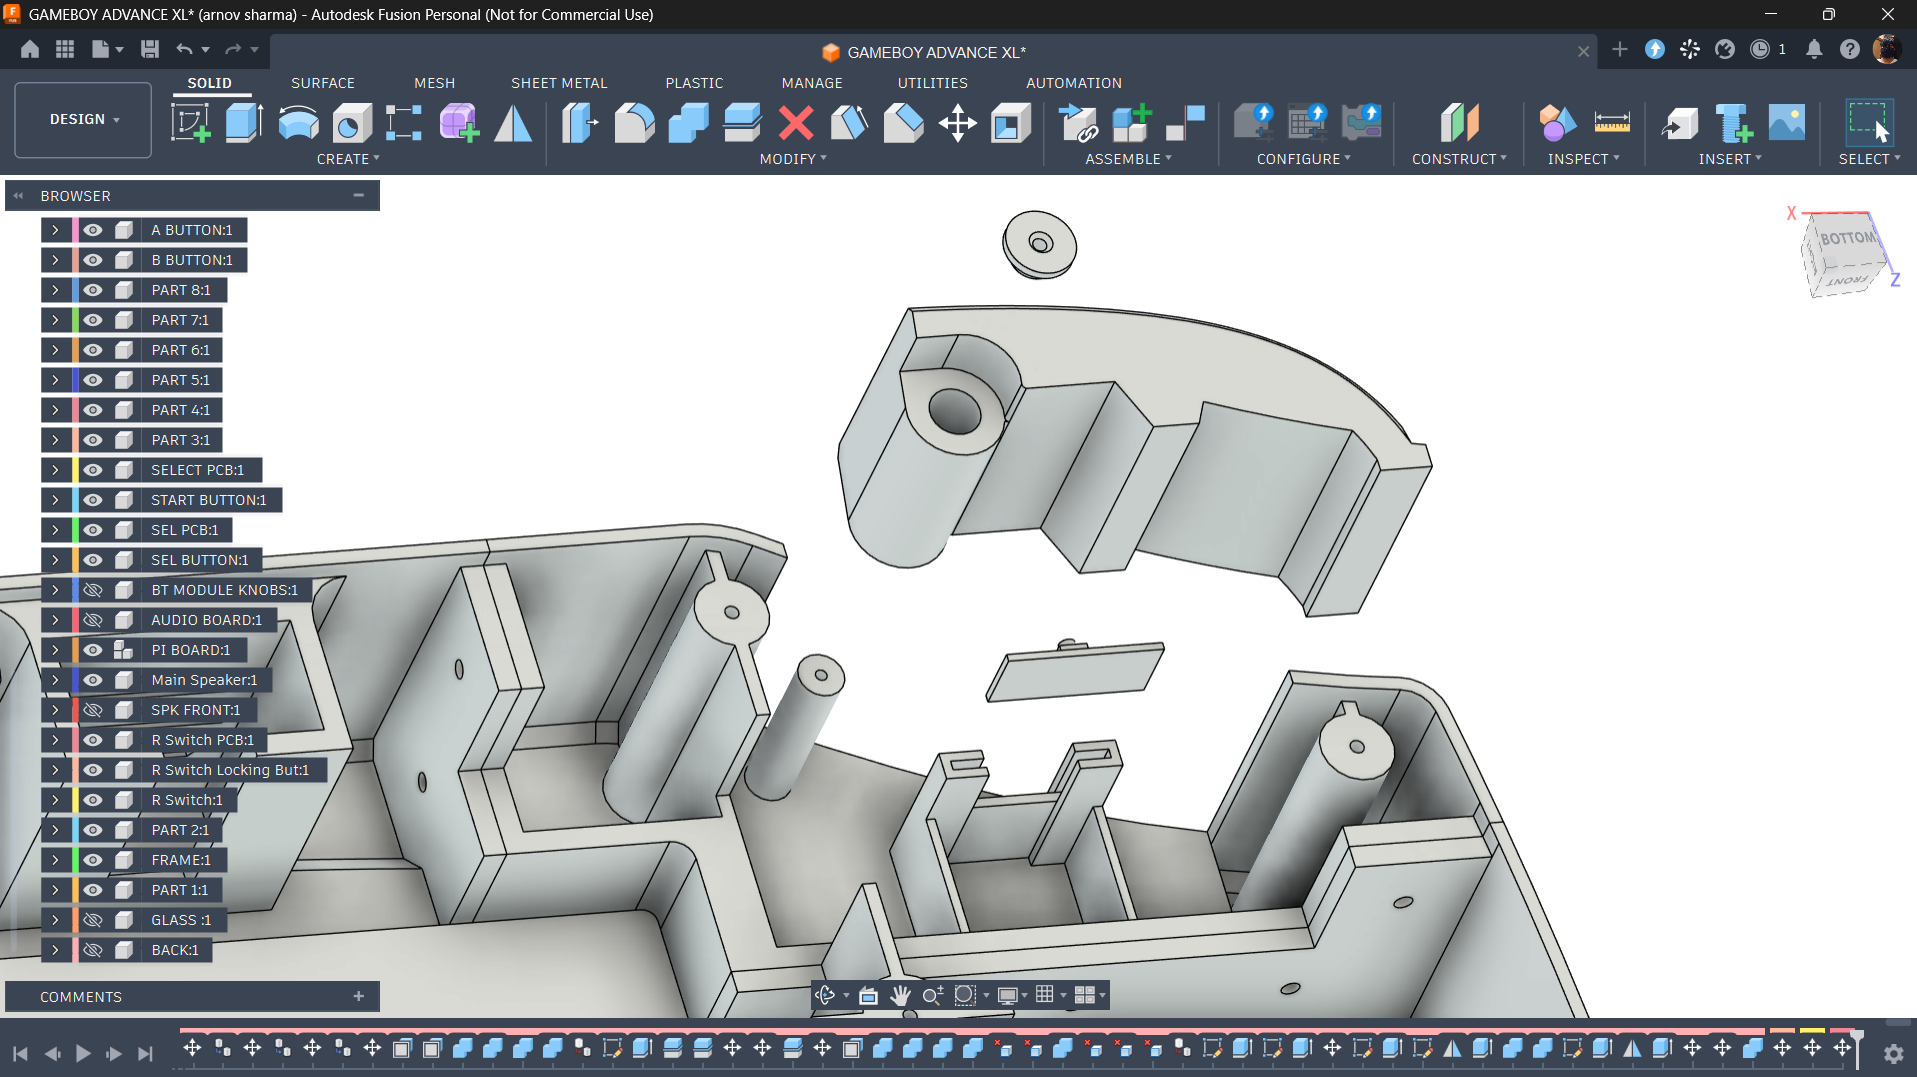
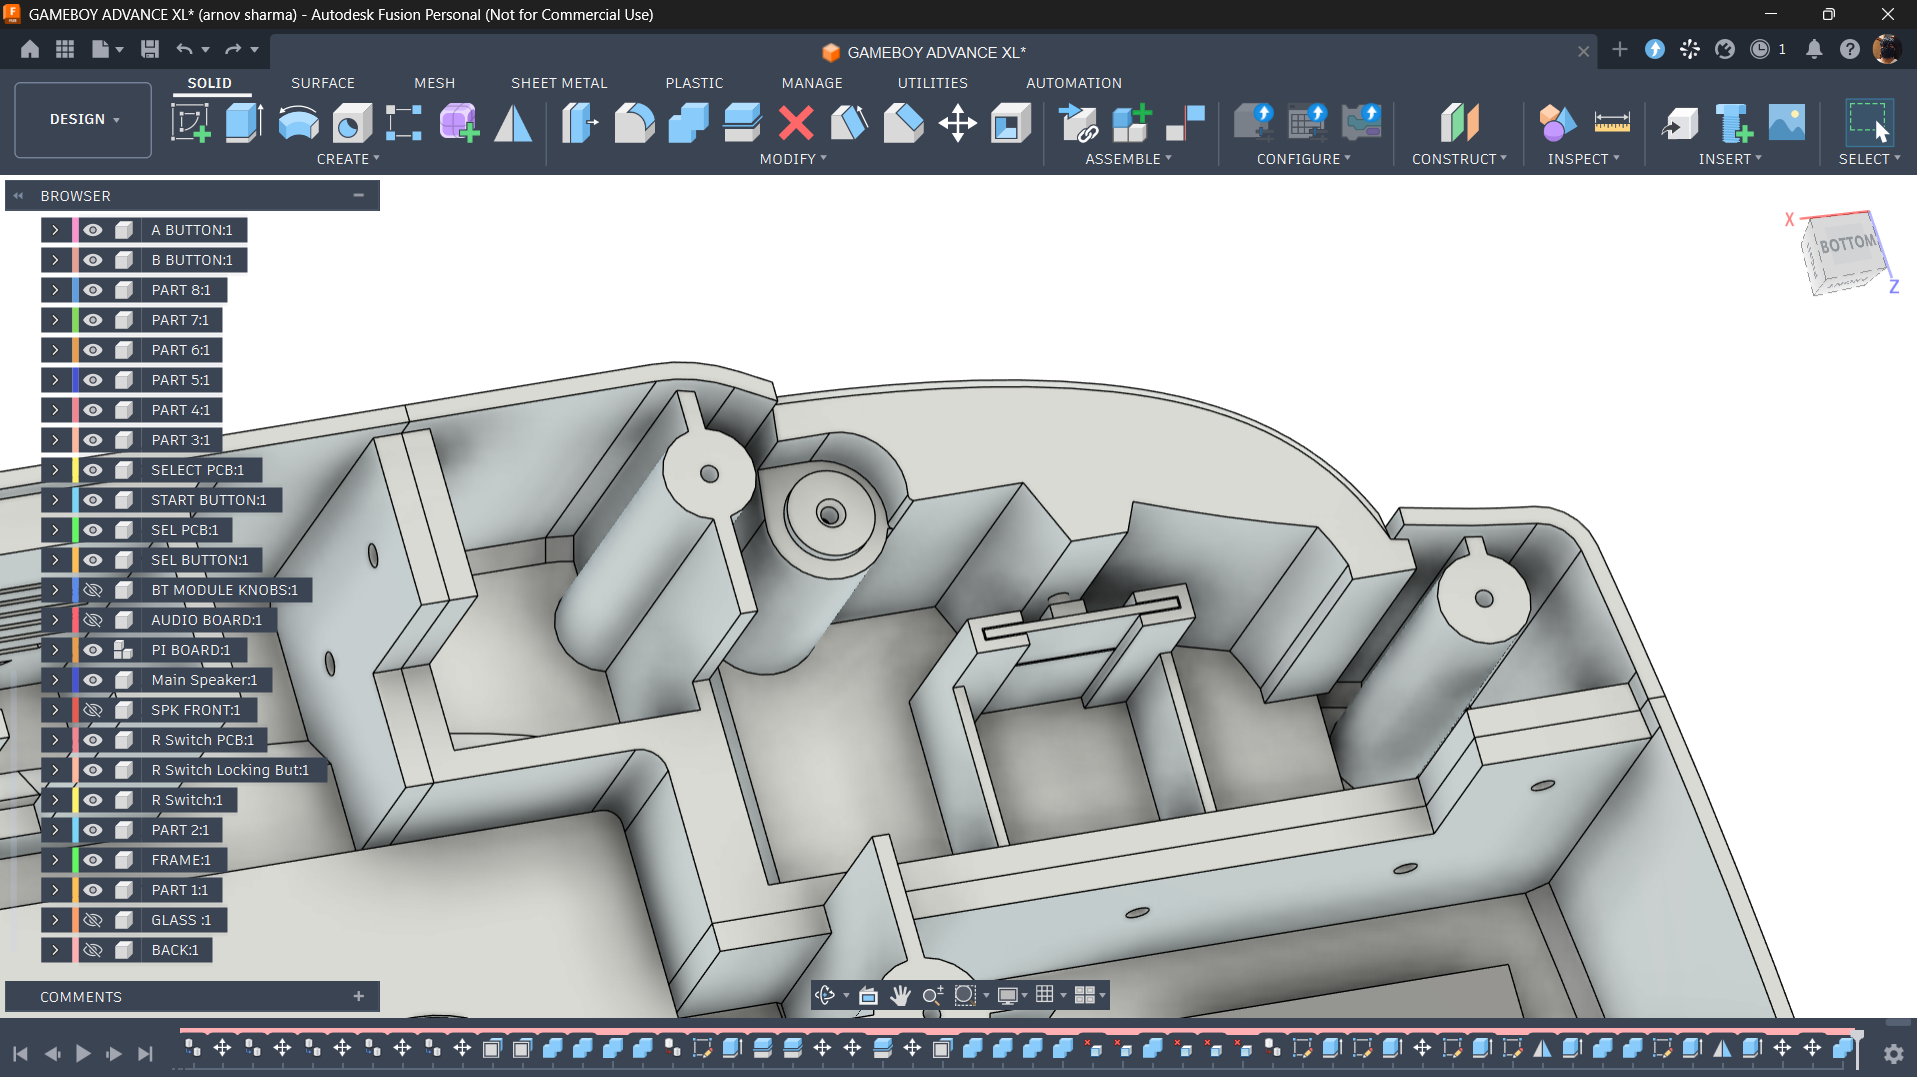
The trigger button uses a slightly different mechanism from the other controls. For this part, I reused a PCB from another project and designed a custom mounting arrangement to fit it inside the Game Boy Advance XL.
First, I added a small support rib inside the enclosure to hold the PCB vertically. This keeps the switch board firmly in position and aligned with the trigger mechanism.
Next, I modelled a trigger button with a hollow cylindrical opening. On the main body, I created a cylindrical pillar of the same size, which acts as the pivot for the button. The trigger fits over this pillar, allowing it to rotate slightly around the centre when pressed.
This small rotational movement is what activates the switch on the vertically mounted PCB. Instead of pushing the switch directly from the front, the trigger uses the pivot mechanism to transfer the movement to the switch.
To keep everything securely in place, I also designed a stopper that mounts onto the cylindrical pillar using an M2 screw. This prevents the trigger from slipping off the pivot while still allowing it to move freely when pressed.
PICO DRIVER HOLDER
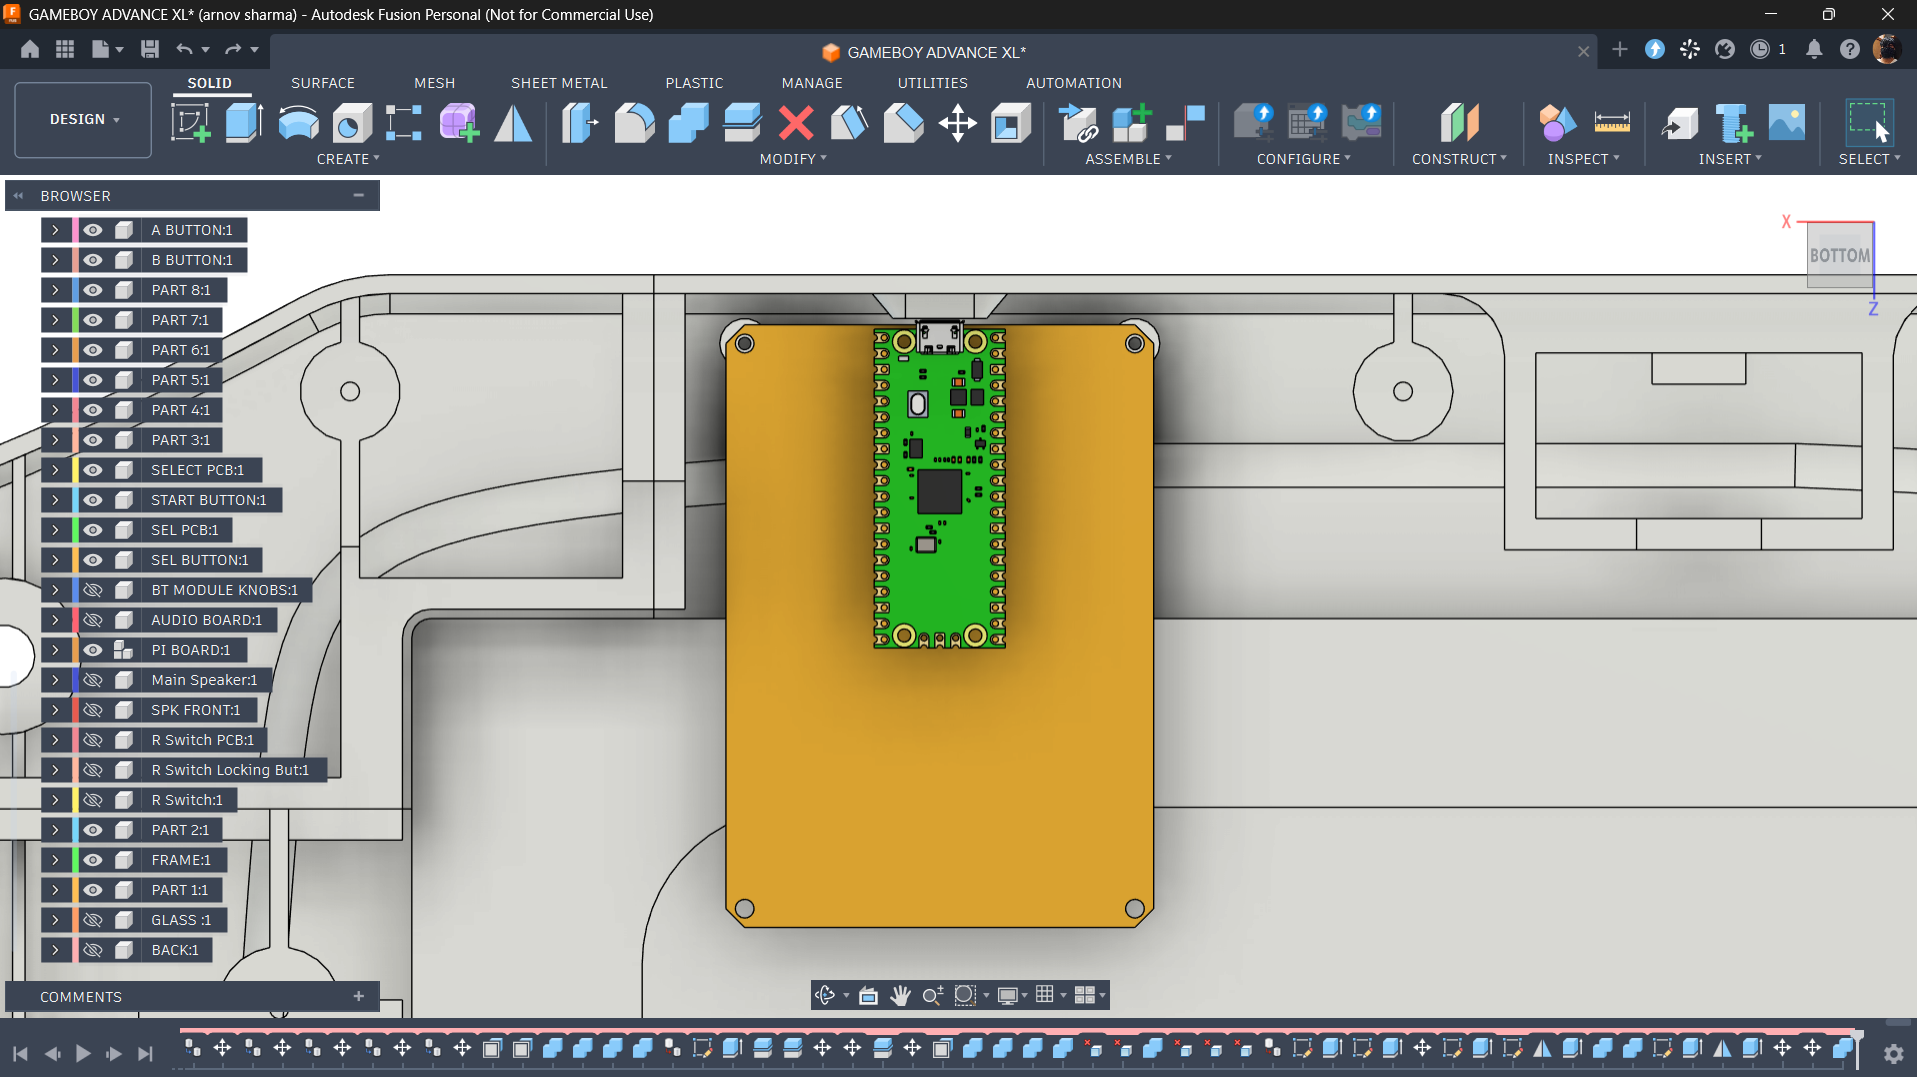
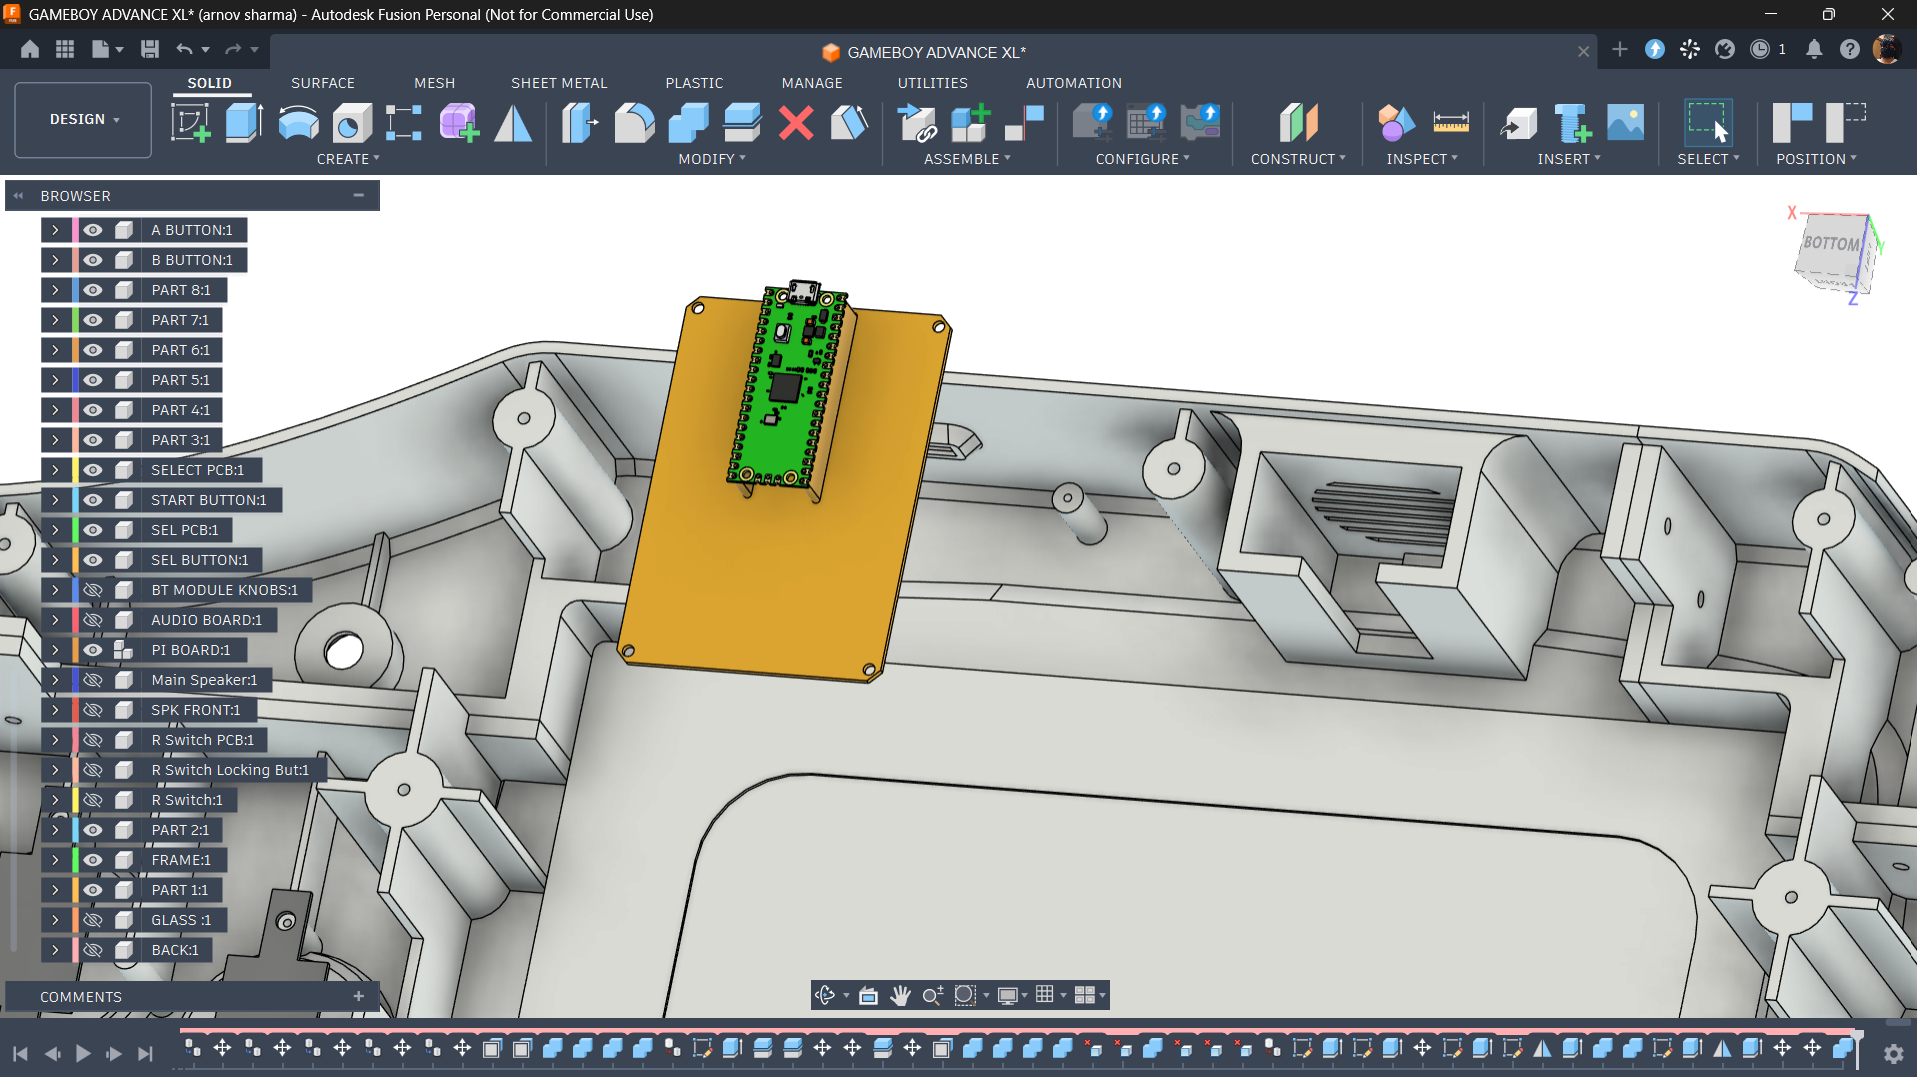
To handle all the button inputs, I'm reusing a controller board from one of my previous projects: the giant Motorola DynaTAC. This board features a Raspberry Pi Pico connected to a CD74HC4067 multiplexer, allowing it to handle multiple button inputs through a single microcontroller.
Rather than designing a new PCB from scratch, I decided to reuse the existing board as it was, saving time and making use of hardware I already had available.
For mounting, I selected a spot along the top of the enclosure where the board could fit comfortably without interfering with the other components. I then added two screw bosses to the 3D model, allowing the PCB to be secured firmly in place.
LID SECTION
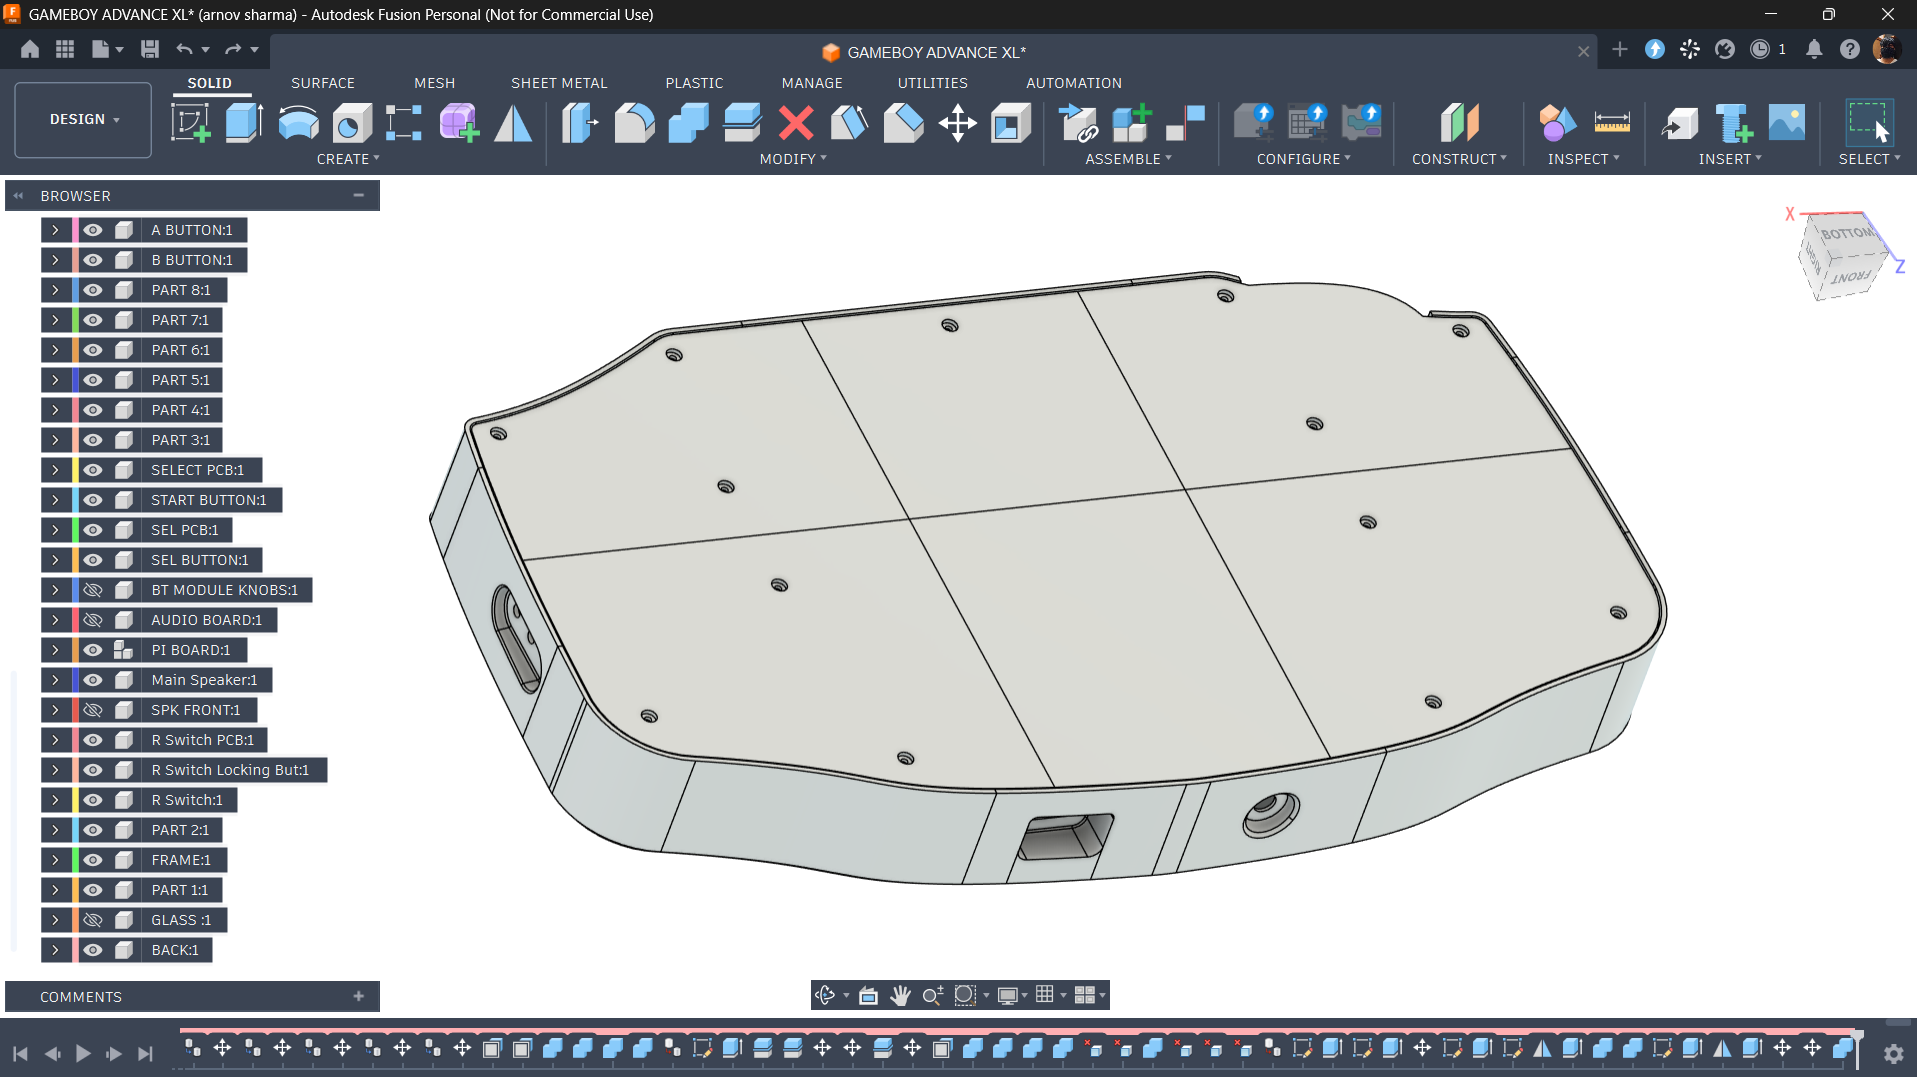
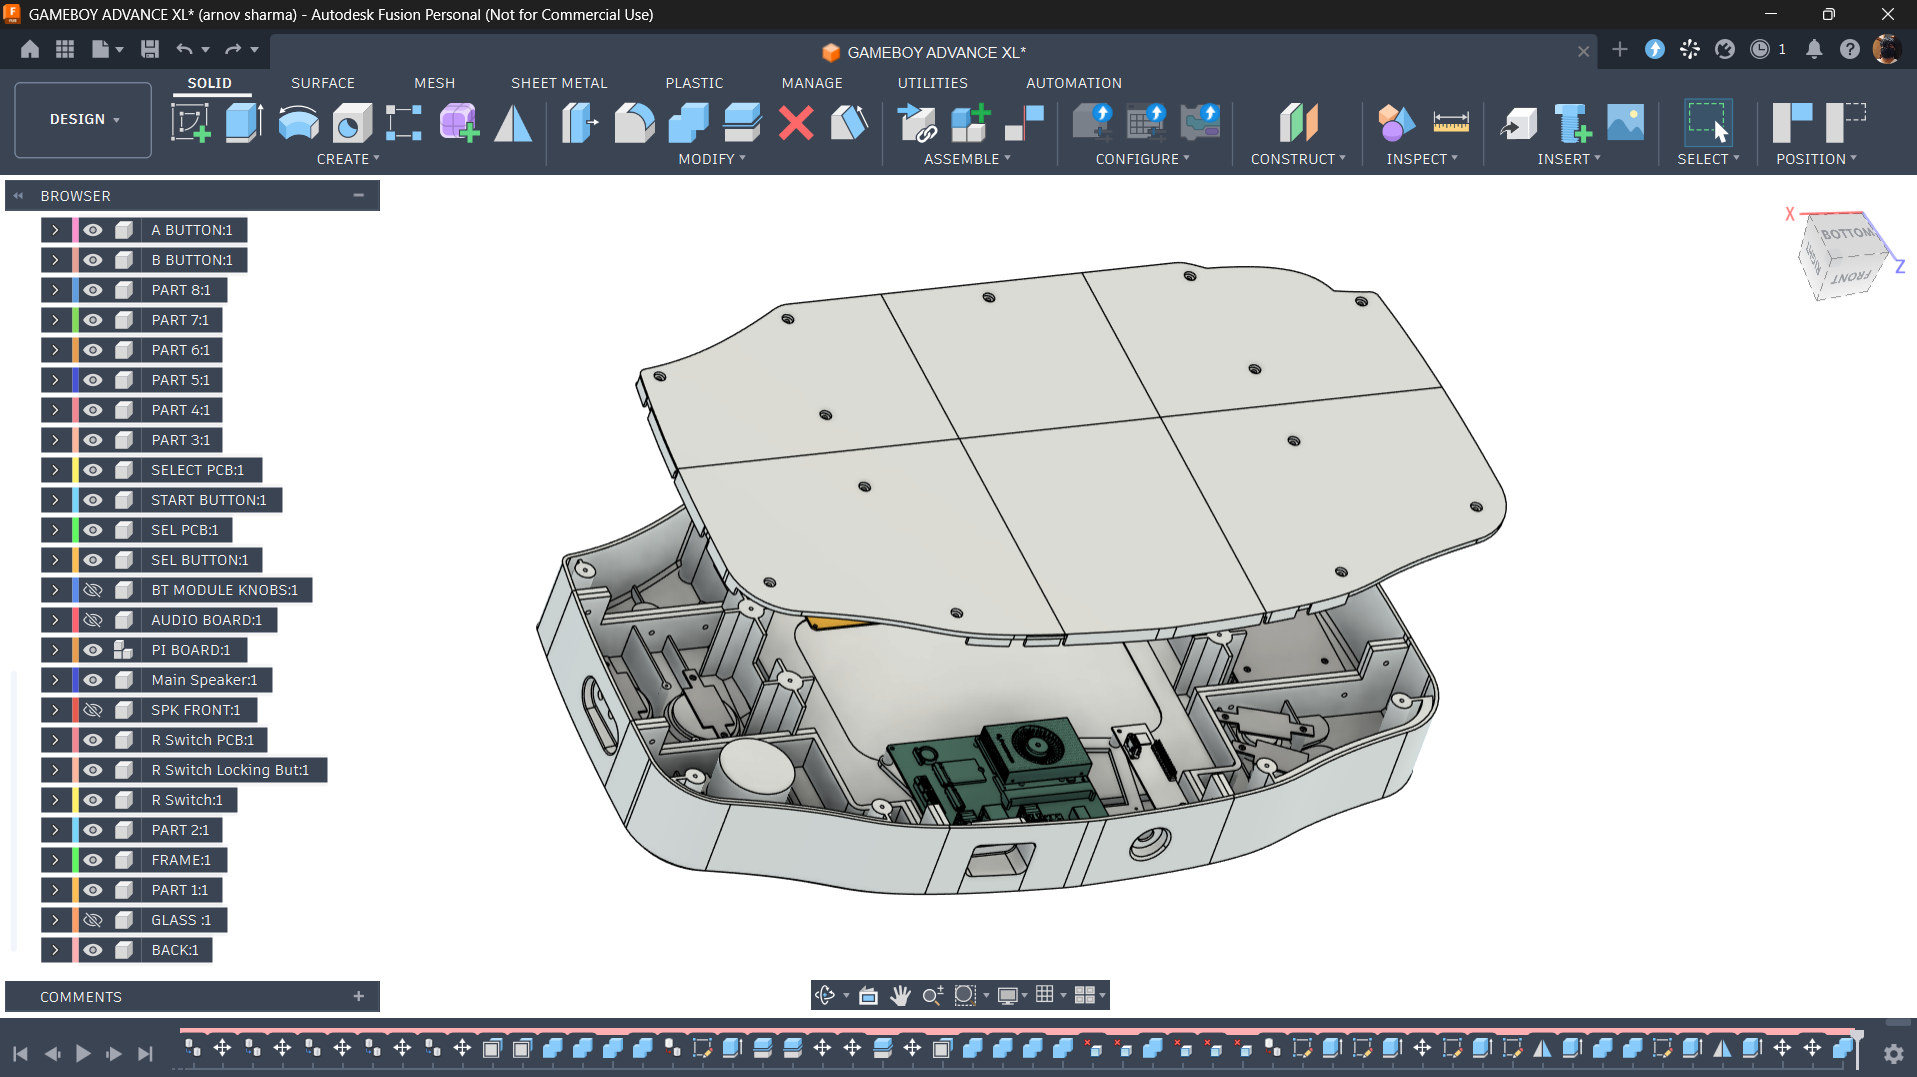
Moving on to the rear lid, I followed a similar approach to the main body. Since the lid is also quite large, I divided the model into six individual sections to ensure that each part would fit within my 3D printer's build volume.
For assembling these sections, I decided to use a plastic welder. To make this possible, I designed thicker joining areas along the inner edges of the lid, where the individual sections meet. These areas feature walls approximately 5 mm thick, providing enough material to reinforce the joints using plastic welding staples. The idea is to join the sections from the inside, keeping the exterior as clean as possible while creating a stronger, unified structure.
Next comes mounting the lid to the main body. In the main body, I designed reinforced screw bosses supported by additional ribs to provide strength and prevent the mounting points from breaking under stress.
Each screw boss has a pilot hole of approximately 2.5 mm in diameter, designed to accommodate M3 wood screws. These screws bite into the plastic and create a secure connection between the two sections.
In total, I added 13 mounting holes to the lid, allowing it to be fastened securely to the main body using M3 wood screws. This distributed mounting arrangement helps keep the lid firmly attached while maintaining the overall structural integrity of the enclosure.
3D PRINTED PARTS
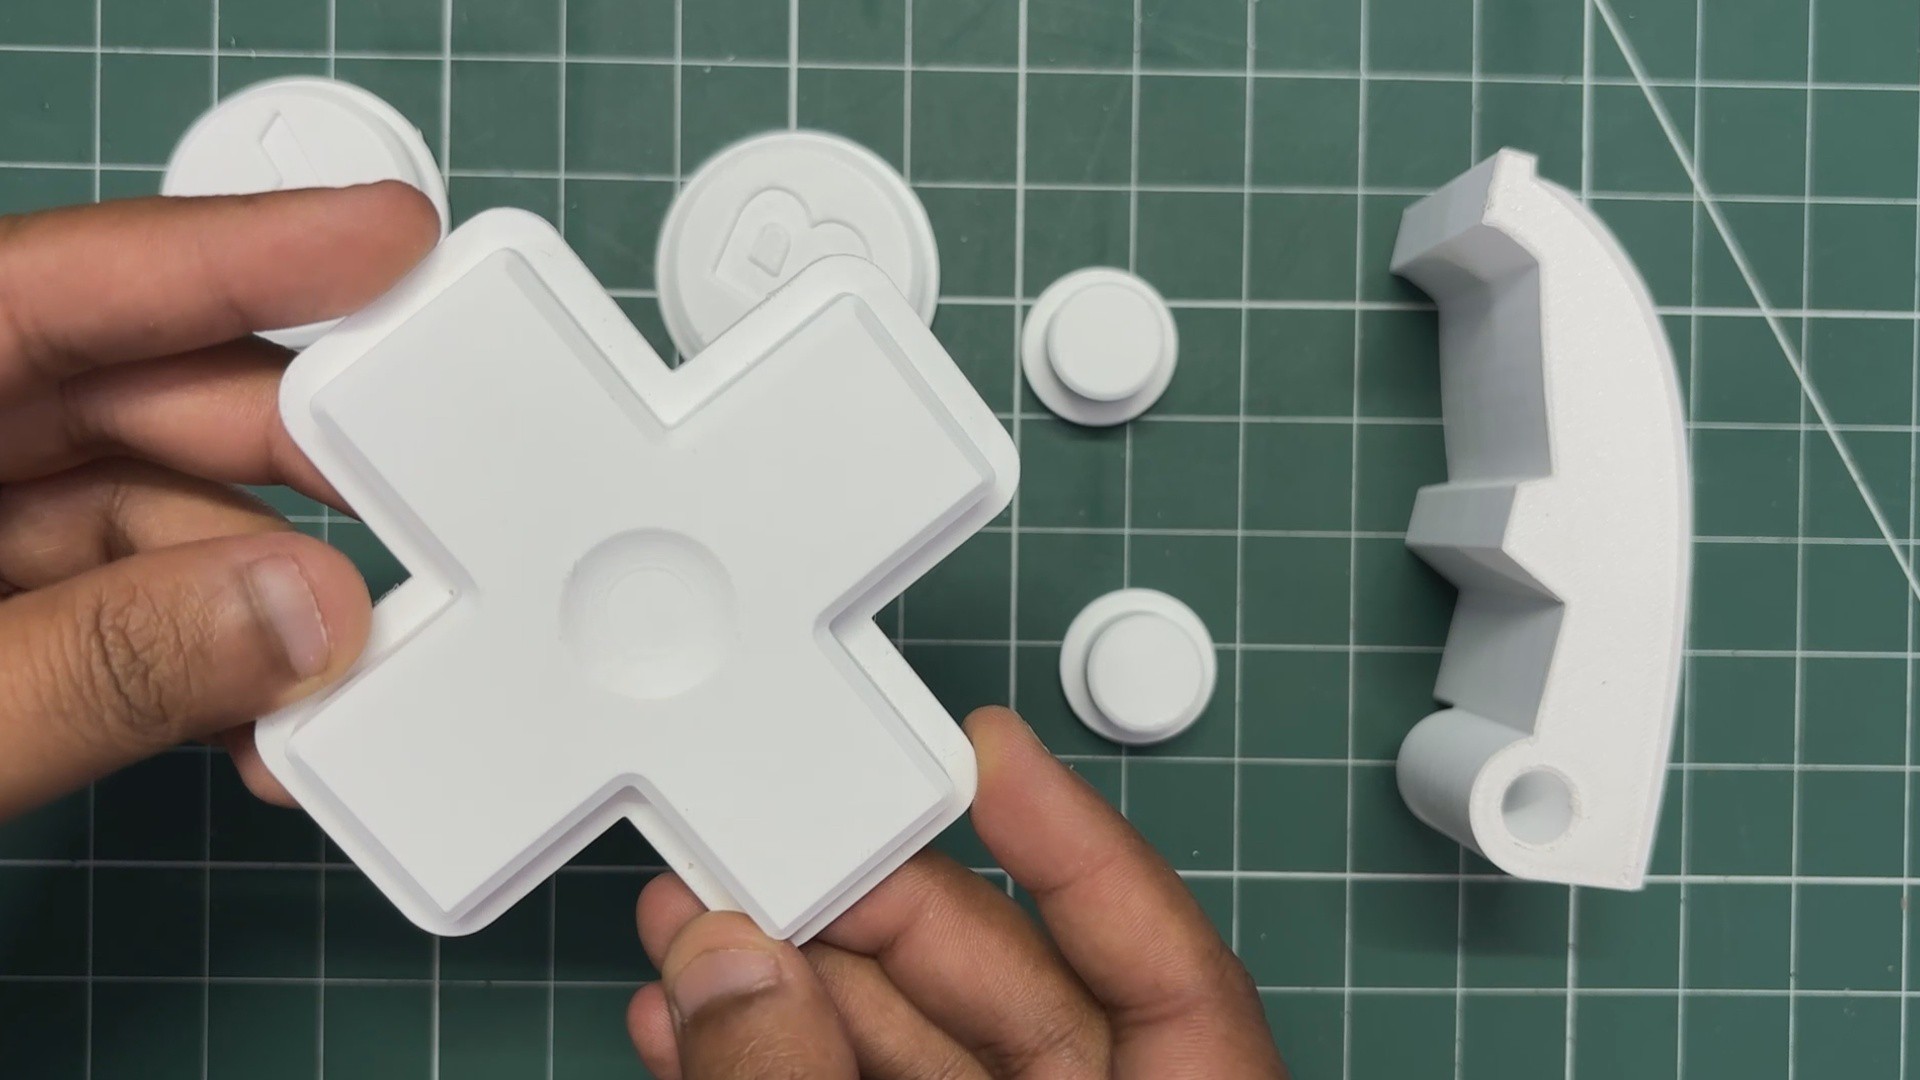
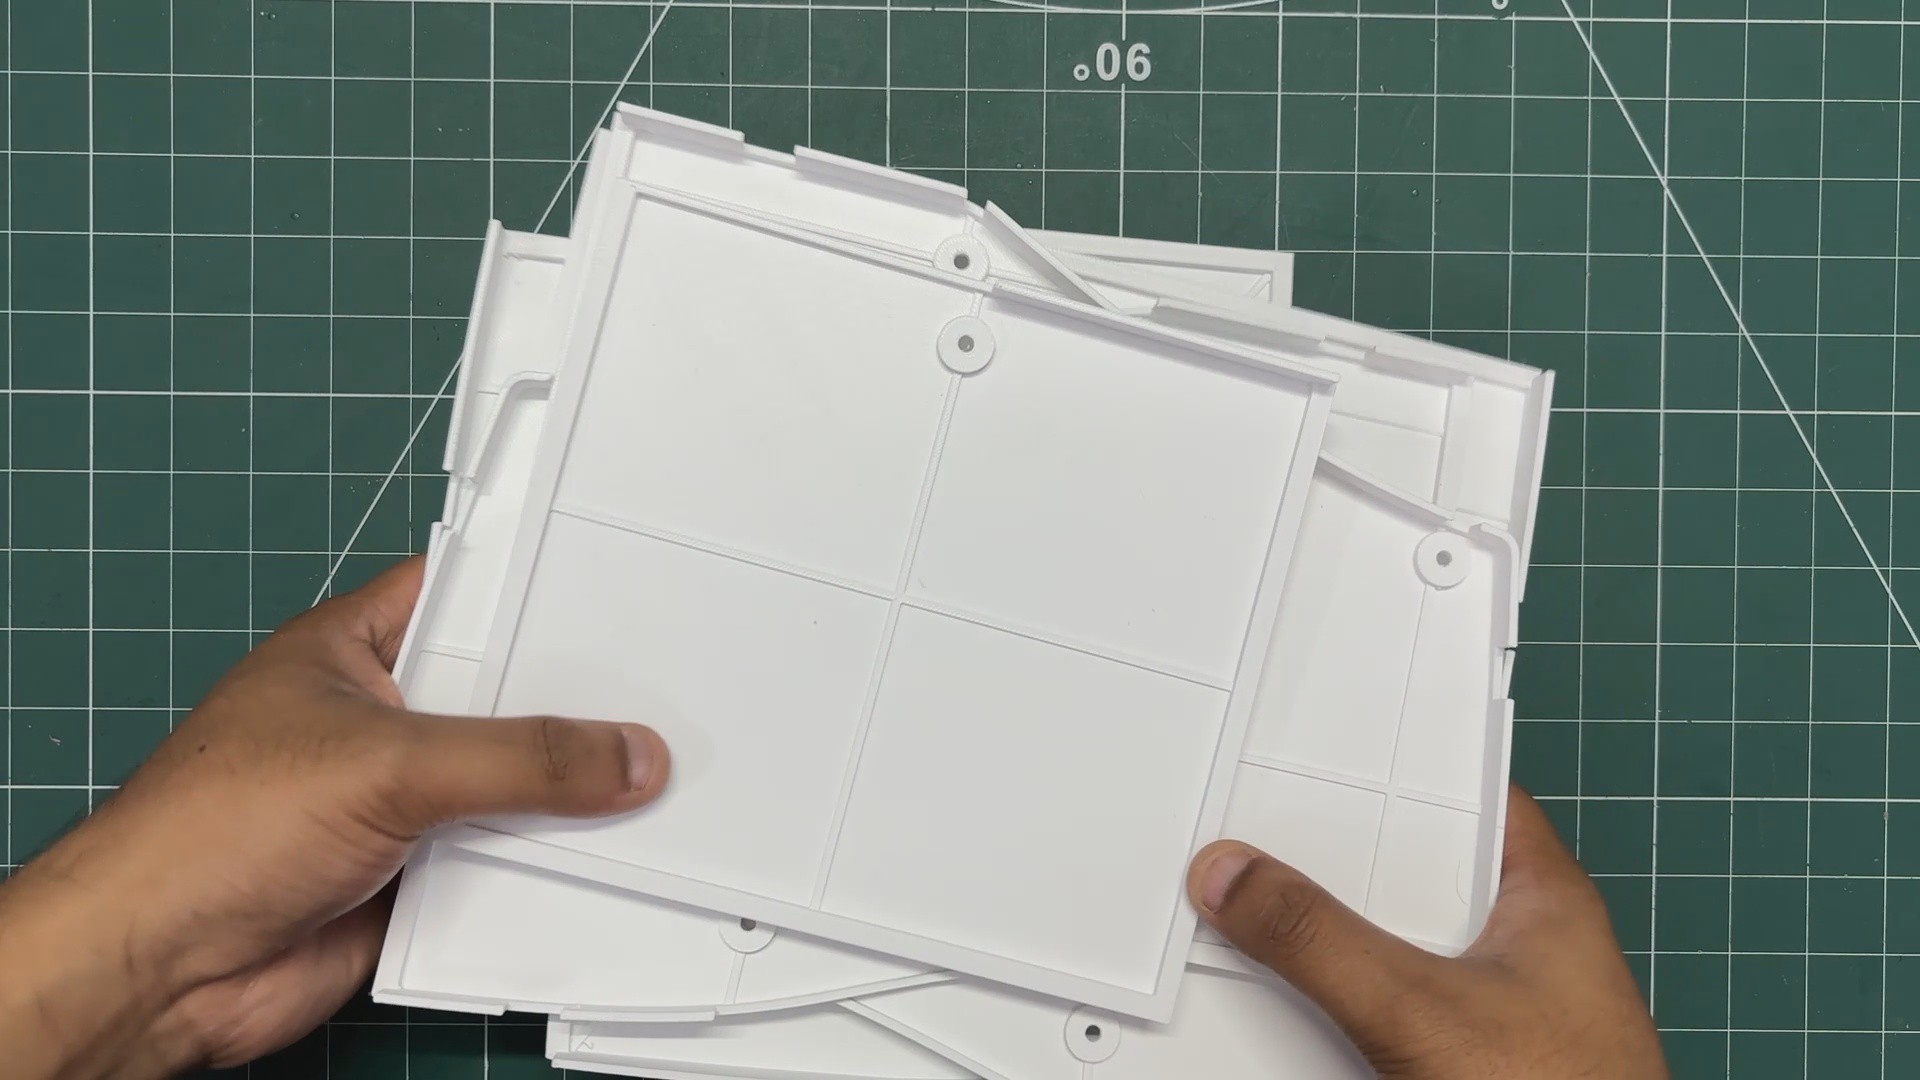
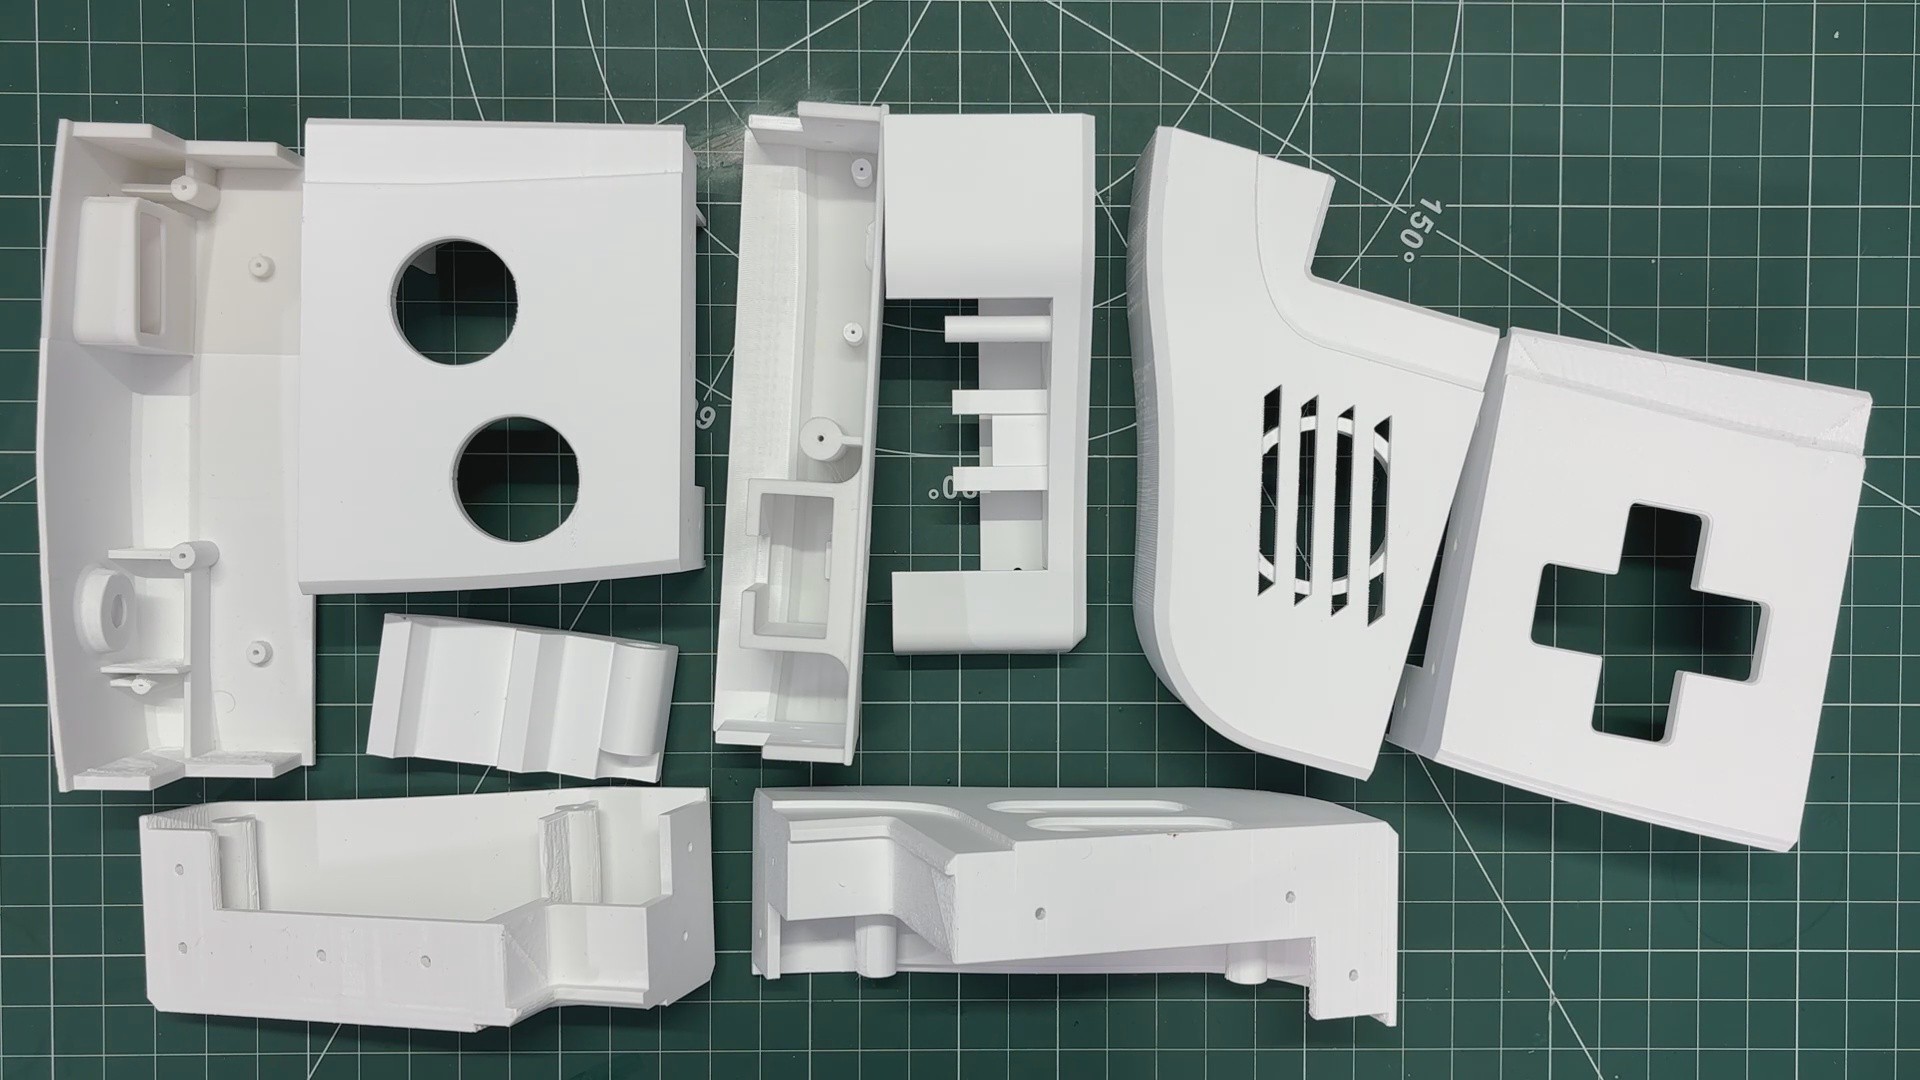
Once the design was finalised, I exported all the individual components as mesh files, ready for 3D printing. This included the main body, lid sections, button assemblies (D-pad, A and B buttons, Select and Start buttons), the trigger button and its holder, and the mounting frame for the LattePanda Mu.
For printing, I used my Anycubic Kobra S1 3D printer with white Hyper PLA filament. I went with a 0.4 mm nozzle, 25% gyroid infill, and a layer height of 0.16 mm to achieve a good balance between print quality and structural strength.
For parts that required support, I used tree supports with a 0.2 mm Z-top distance between the support structure and the printed part. This helped support the overhanging sections while making the supports easier to remove after printing.
Printing all the components was a lengthy process, taking nearly a week and a half to complete. The main body sections were the most time-consuming parts, with each taking around 10–12 hours to print, while the smaller buttons, holders, and mounting components took considerably less time.