Close
0%
0%

Simon Says learn Pi and IoT

This project provides hardware and software to learn/teach electronics and coding

Similar projects worth following
I have developed resources to teach the basics of the Raspberry Pi during workshops. This is the latest project, with hardware and software, which demonstrates the use of the various libraries I have written, along with basic I/O circuits : we all start with simple buttons and LED !

Some weeks ago, I have found buttons that contain LEDs and their colors match those of a famous (now vintage) electronic game. Why not use them to recreate it with modern tools and learn a "few things" in the process ?

Generally, this project provides a template for connected systems with remote/web GUI and GPIOs. Download the project, update the HTTaP vocabulary, the JavaScript and the C handlers, and you're good to go !

As with all my projects, the software is released under the AGPLv3 or later.

This educational project covers the whole HW/SW gamut :

"Simon Says" is a natural application because it's simple (much simpler than Tetris for example) but not trivial, and lets the students learn many inter-related subjects while having fun. This solves one issue I found : my workshop focused on either inputs or outputs, but not both.

As you can see in the abstracted doodle below, the "full stack" aspect ranges from the electrons and photons of the LEDs all the way up (down?) to the dynamic, abstracted, virtualised JavaScript program running on your browser.
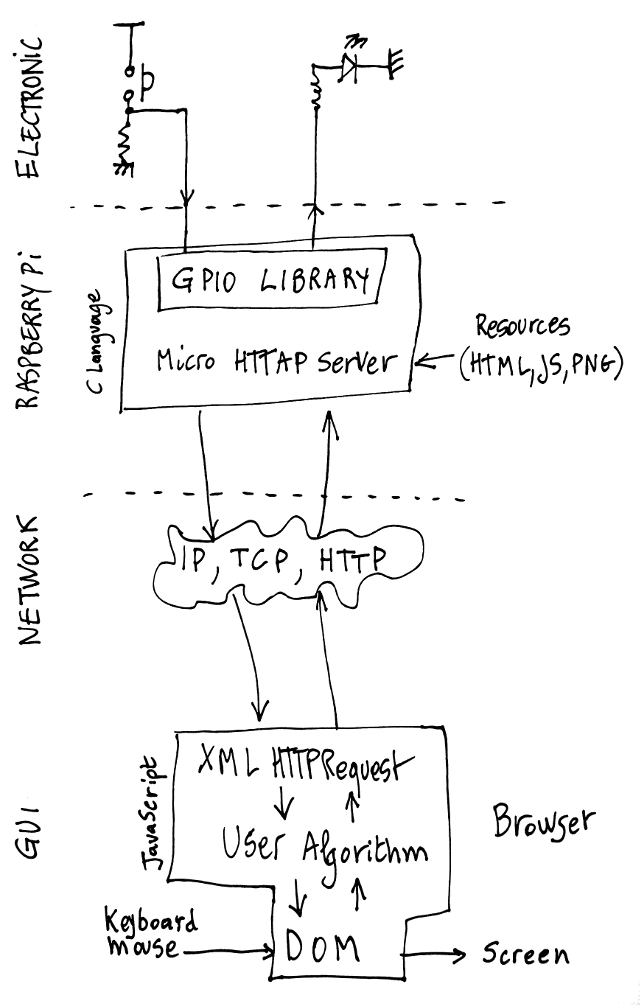
The project covers:

  1. The hardware part : setup a Raspberry Pi, make it work and learn about the GPIO. Then move on to building a board with 5 buttons/LEDs, as well as a few other status LEDs and a buzzer.
  2. The software part : the Operating System must be flashed to the memory cart, one must apply basic setup/maintainance then the real fun actually starts ! The high-level logic must be written in a HTML/JavaScript page while the low-level features must be written in C.

That's a lot to discuss, and I hope I'll have enough time in May 2017. Hopefully the whole system will be operational and ready to teach in september.

As you can imagine, implementing the game engine itself is may account for only 2% of the total time spent on the project... The real fun comes from developing the other lower layers !


Logs:
1. First prototype


Credits for the doodly logo go to @Blecky

  • First proto (the revenge)

    Yann Guidon / YGDES12/06/2020 at 14:50 2 comments

    Time to actually build it !

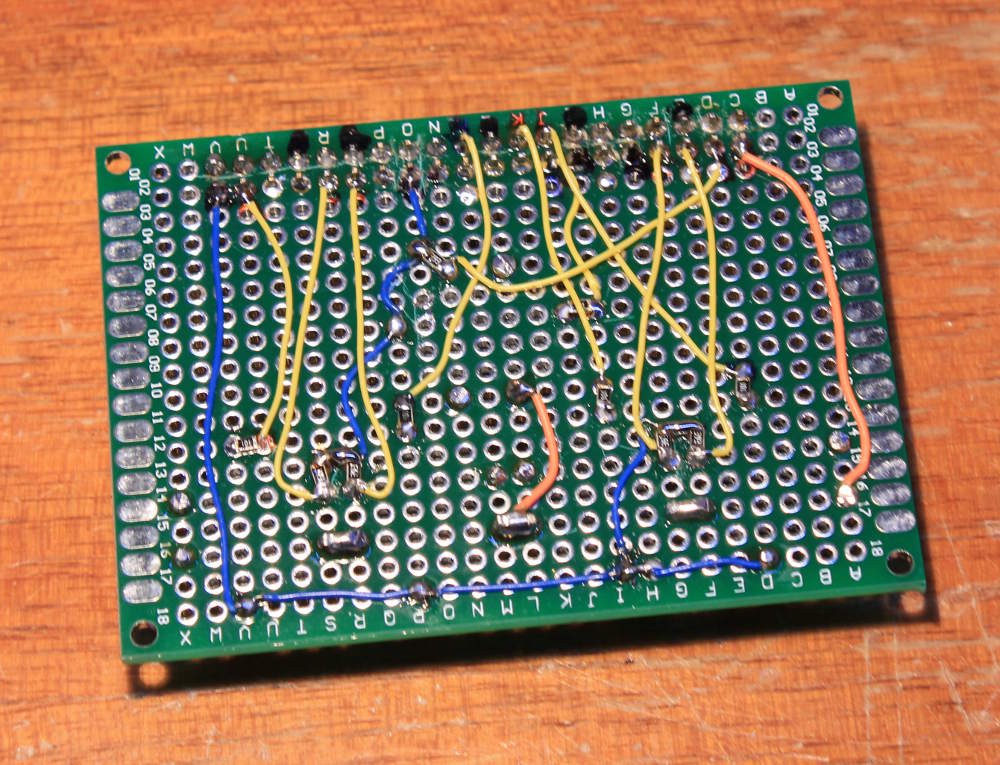
    For a first board, I put 100Ω in series with each LED and 39K for the pulldowns.

    LED GPIO
    colorSwitch GPIO
    22
    Orange2
    23
    Red3
    24
    Green4
    25
    Blue5
    26
    White6

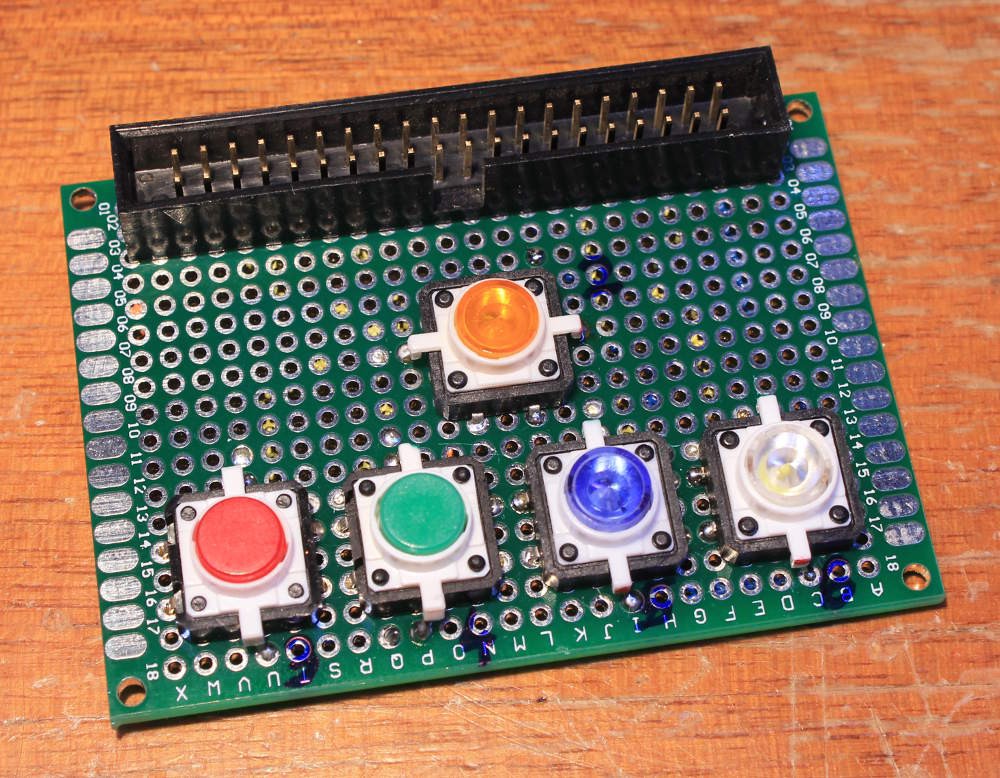
    The PCB is too small to make the typical cross but the 5 switches fit anyway.

    Now, let's code !

    for o in 22 23 24 25 26
    do
      echo $o > /sys/class/gpio/export 2>&1 > /dev/null
      echo out > /sys/class/gpio/gpio$o/direction
    done
    
    while true
    do
      for o in 22 23 24 25 26
      do
        echo -n " "$o
        echo 1 > /sys/class/gpio/gpio$o/value
        sleep .3
      done
    
      for o in 22 23 24 25 26
      do
        echo -n " "$o
        echo 0 > /sys/class/gpio/gpio$o/value
        sleep .3
      done
    done
    

    The green LED is quite dim, as noted in a comment of the project's main page.

    ...

    Aaaand... the buttons don't work ! I totally forgot about the internal pull-ups...

    In particular, GPIO2 & 3 are wired for I²C and have a 1K8 pull-up, the 39K pull-down lowers the voltage to 3.15V. Others are measured at 1.6V, meaning that about 30K of pull-up is already present. Damnit !

    So there is no need of pull-downs and the common rail can be tied to GND instead of Vcc.

    for o in 2 3 4 5 6 22 23 24 25 26 ; do
      echo $o > /sys/class/gpio/export
      sleep 0.1
    done
    sleep 1
    for o in 2 3 4 5 6 ; do
      echo in > /sys/class/gpio/gpio$o/direction
      sleep 0.1
    done
    for o in 22 23 24 25 26; do
      echo out > /sys/class/gpio/gpio$o/direction
      sleep 0.1
    done
    echo "loop:"
    while true
    do
      for o in 2 3 4 5 6
      do
        if [ "$(cat /sys/class/gpio/gpio$o/value)" = "0" ]
        then
          echo 1 > /sys/class/gpio/gpio2$o/value
        else
          echo 0 > /sys/class/gpio/gpio2$o/value
        fi
        sleep .01
      done
    done

    Now the buttons return 0 when pressed...

    The init code has taken quite a while to finally work, some setup time seems to be required...

    .

  • First prototype

    Yann Guidon / YGDES04/03/2017 at 20:31 0 comments

    I received the buttons today !

    They are pretty cute and I'll simply re-hash the circuits I made one month ago, shown at Raspberry Pi educational boards

    The only critical parameter is the value of the resistors, that I have to tune for low power (because the Pi's pins can't supply much current) and light emission matching.


    Update: OK I received a larger batch so I can consider the fabrication of a small series of boards :-)

View all 2 project logs

Enjoy this project?

Share

Discussions

electrobob wrote 04/06/2017 at 09:04 point

I got the same buttons recently. In my case, the green seems a lot dimmer that the other colors. Is it the same for you?

  Are you sure? yes | no

Yann Guidon / YGDES wrote 04/06/2017 at 09:13 point

That's something to examine in the next log :-)

  Are you sure? yes | no

Similar Projects

Does this project spark your interest?

Become a member to follow this project and never miss any updates