Waterpump control with ESP8266
Control waterpump with ESP8266 with some extra safety checks.
Control waterpump with ESP8266 with some extra safety checks.
To make the experience fit your profile, pick a username and tell us what interests you.
We found and based on your interests.
Well it has been few years, but guess what, the system has been running again after pause of few years (because of fresh family member and moving to larger apartment - life).
I have pushed some github updates, most importantly fixing some thingspeak and email send issues after compiling with updated toolchain (the certificates on ssl-connections caused certain issues).
I also improved error handling; now we reboot after error and delay and reboot also if wifi-is lost for too long. It has been running with some errors for full summer, but no single manual reboot was required. The errors have been "water level not up after pump time", and when i last checked there was pretty much algae on the sensor. Maybe part of issue. Anyway, its recovering.
The system has been also modified for full vertical installation (thanks to bigger balcony). The issue become installing the pipes together. I made 6 versions with 3d-printer - but none of them were durable enough (seems like pressure + 30C == pla not holding up). And water leaks were too often. Now its with metal tightener + pla structure + food plastic for water insulation. Seems to work but the PLA still changes shape.
Winter is coming. I tore down the setup for this season. The device worked fine, some notes:
Some todos:
The field testing - phase 1 - is now done. The unit has been deployed and after minor fixes its now up-n-running nicely. It was deployed on 6.6. so it has been running for a week. Some fixes/changes:
The latest version has been running only for day or so, lets see. The thingverse logging was changed from 15min interval to
This means that night time it will push in 15min delay, and during day it will push every pump-time (assuming <=15min, that is the case here). I also added new measured delays: delay of water detect to go high after pump has been switched on, and delay of water detect to go low after pump has been switched off. I hope to see a) pump wearing and b) roots filling up the tube from these figures. Lets see how it goes.
But the most important part is here, pictures:
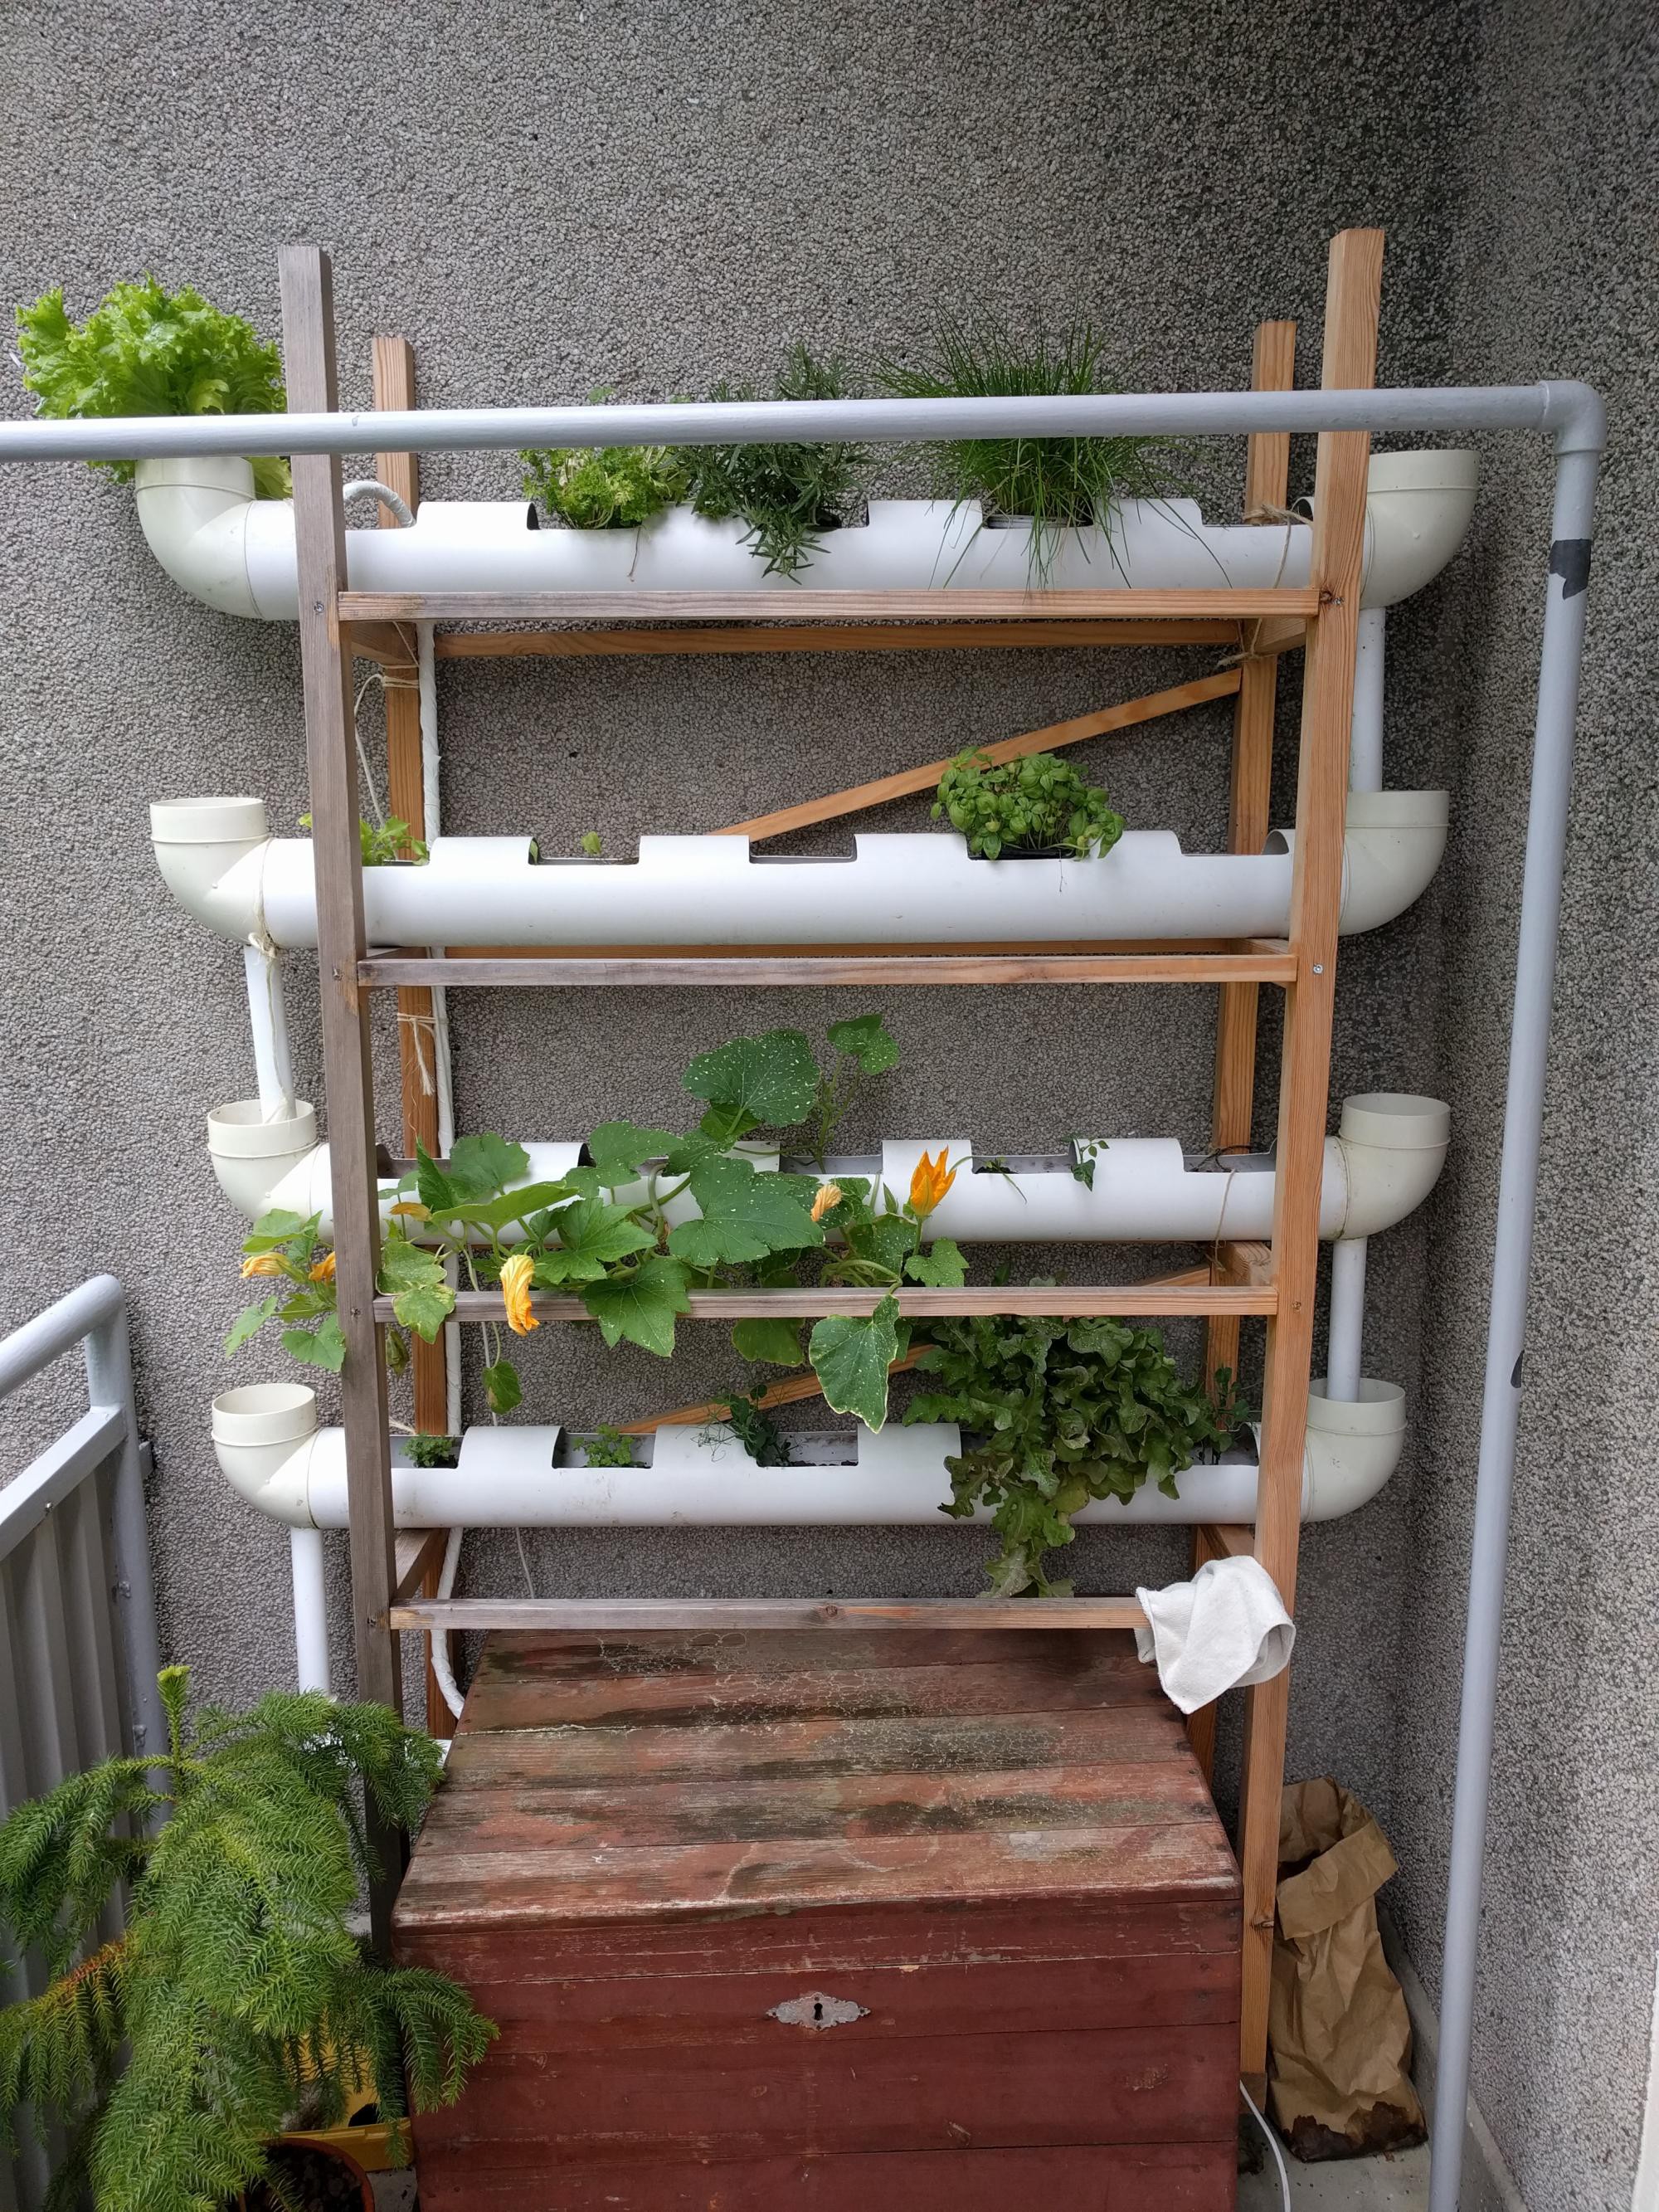
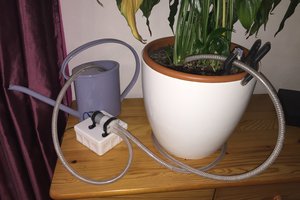
Picture 1: The full system. Water is pumped from the red container to upmost tube, where it slowly flows back to the container. The water detect switch is located at the pumping location.
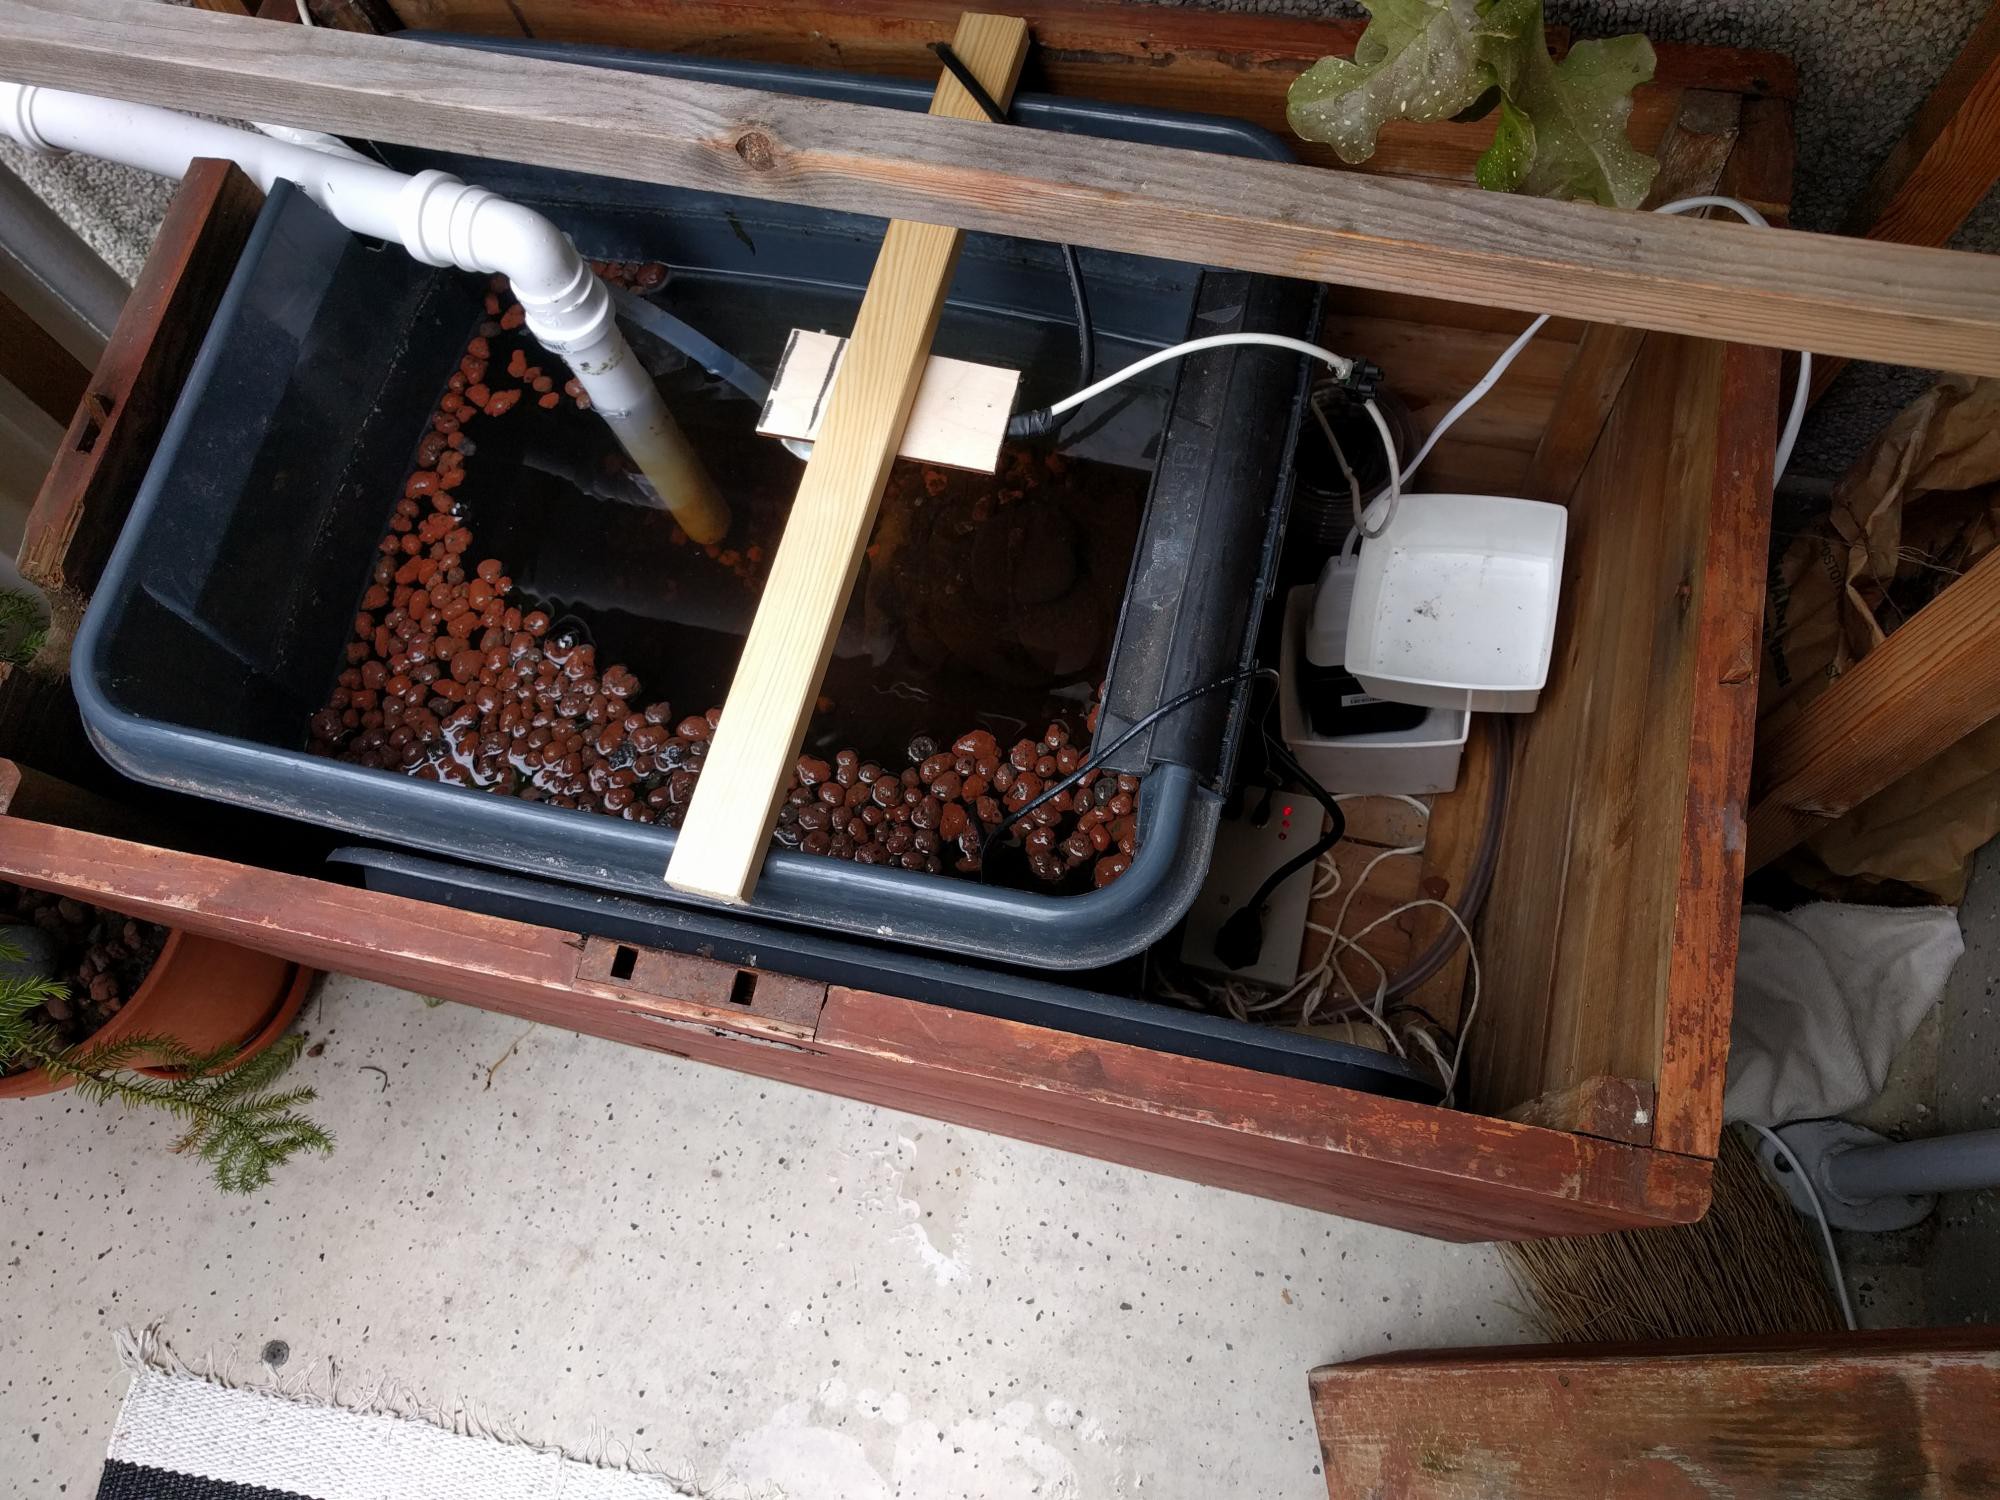
Picture 2:And here you can see the water container and the controller little red light.
I am bit sceptical about the HTTP server from the ESP8266 library, since
i think its not taking account DOS attacks in any proper manner. If i
find my self with too much free space i might bake my own memory and
security hardened arduino-esp-http-server.
And now starts the hard part ; endurance testing. Lets see if it works through the cold Finnish summer.
Now i have finished 'desktop' testing of the software and hardware. Some findings
Code updates:
Next: testing with the real thing (i have hydroponics stuff ready, now running with off-the-shelf timer).
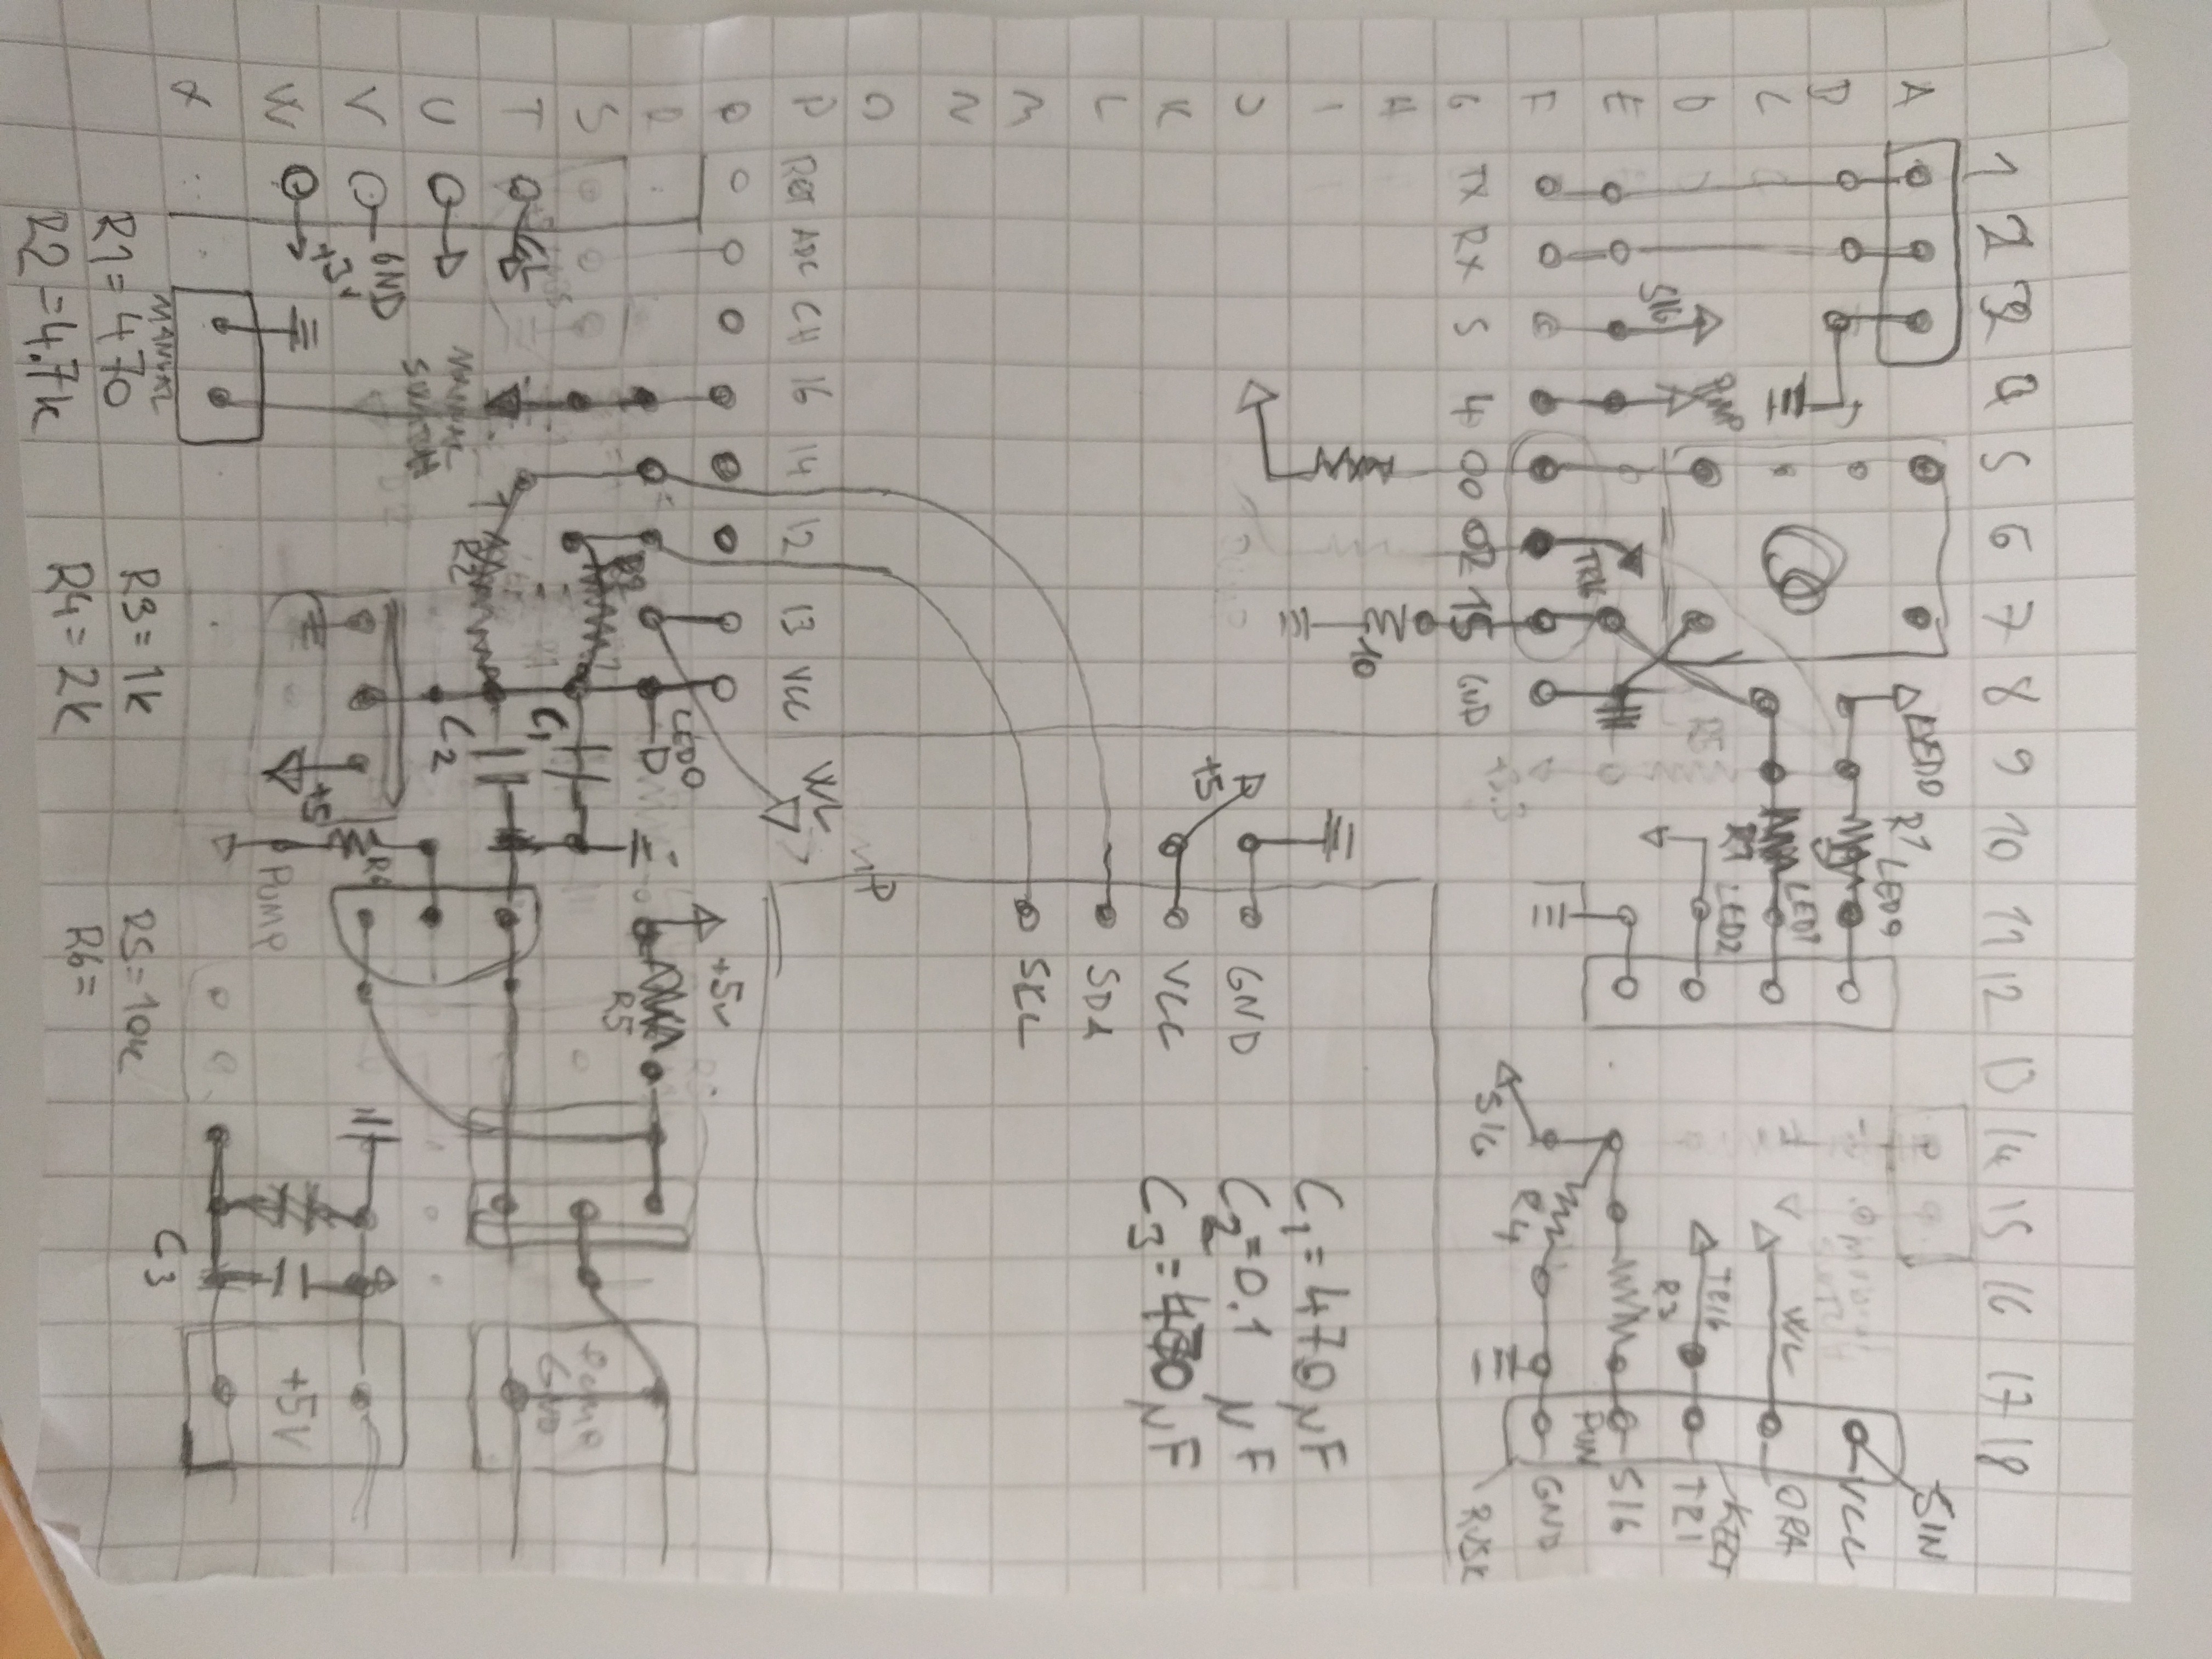
Here is the hand drawn circuit diagram, i'll document it here since i am going to loose the original one anyway. Pins are proper but changes were made on the X1 corner to fit the caps, and the push button was replaced with a jumper for space - since the rtc needed to be moved upwards to make space for 'screw headers'.
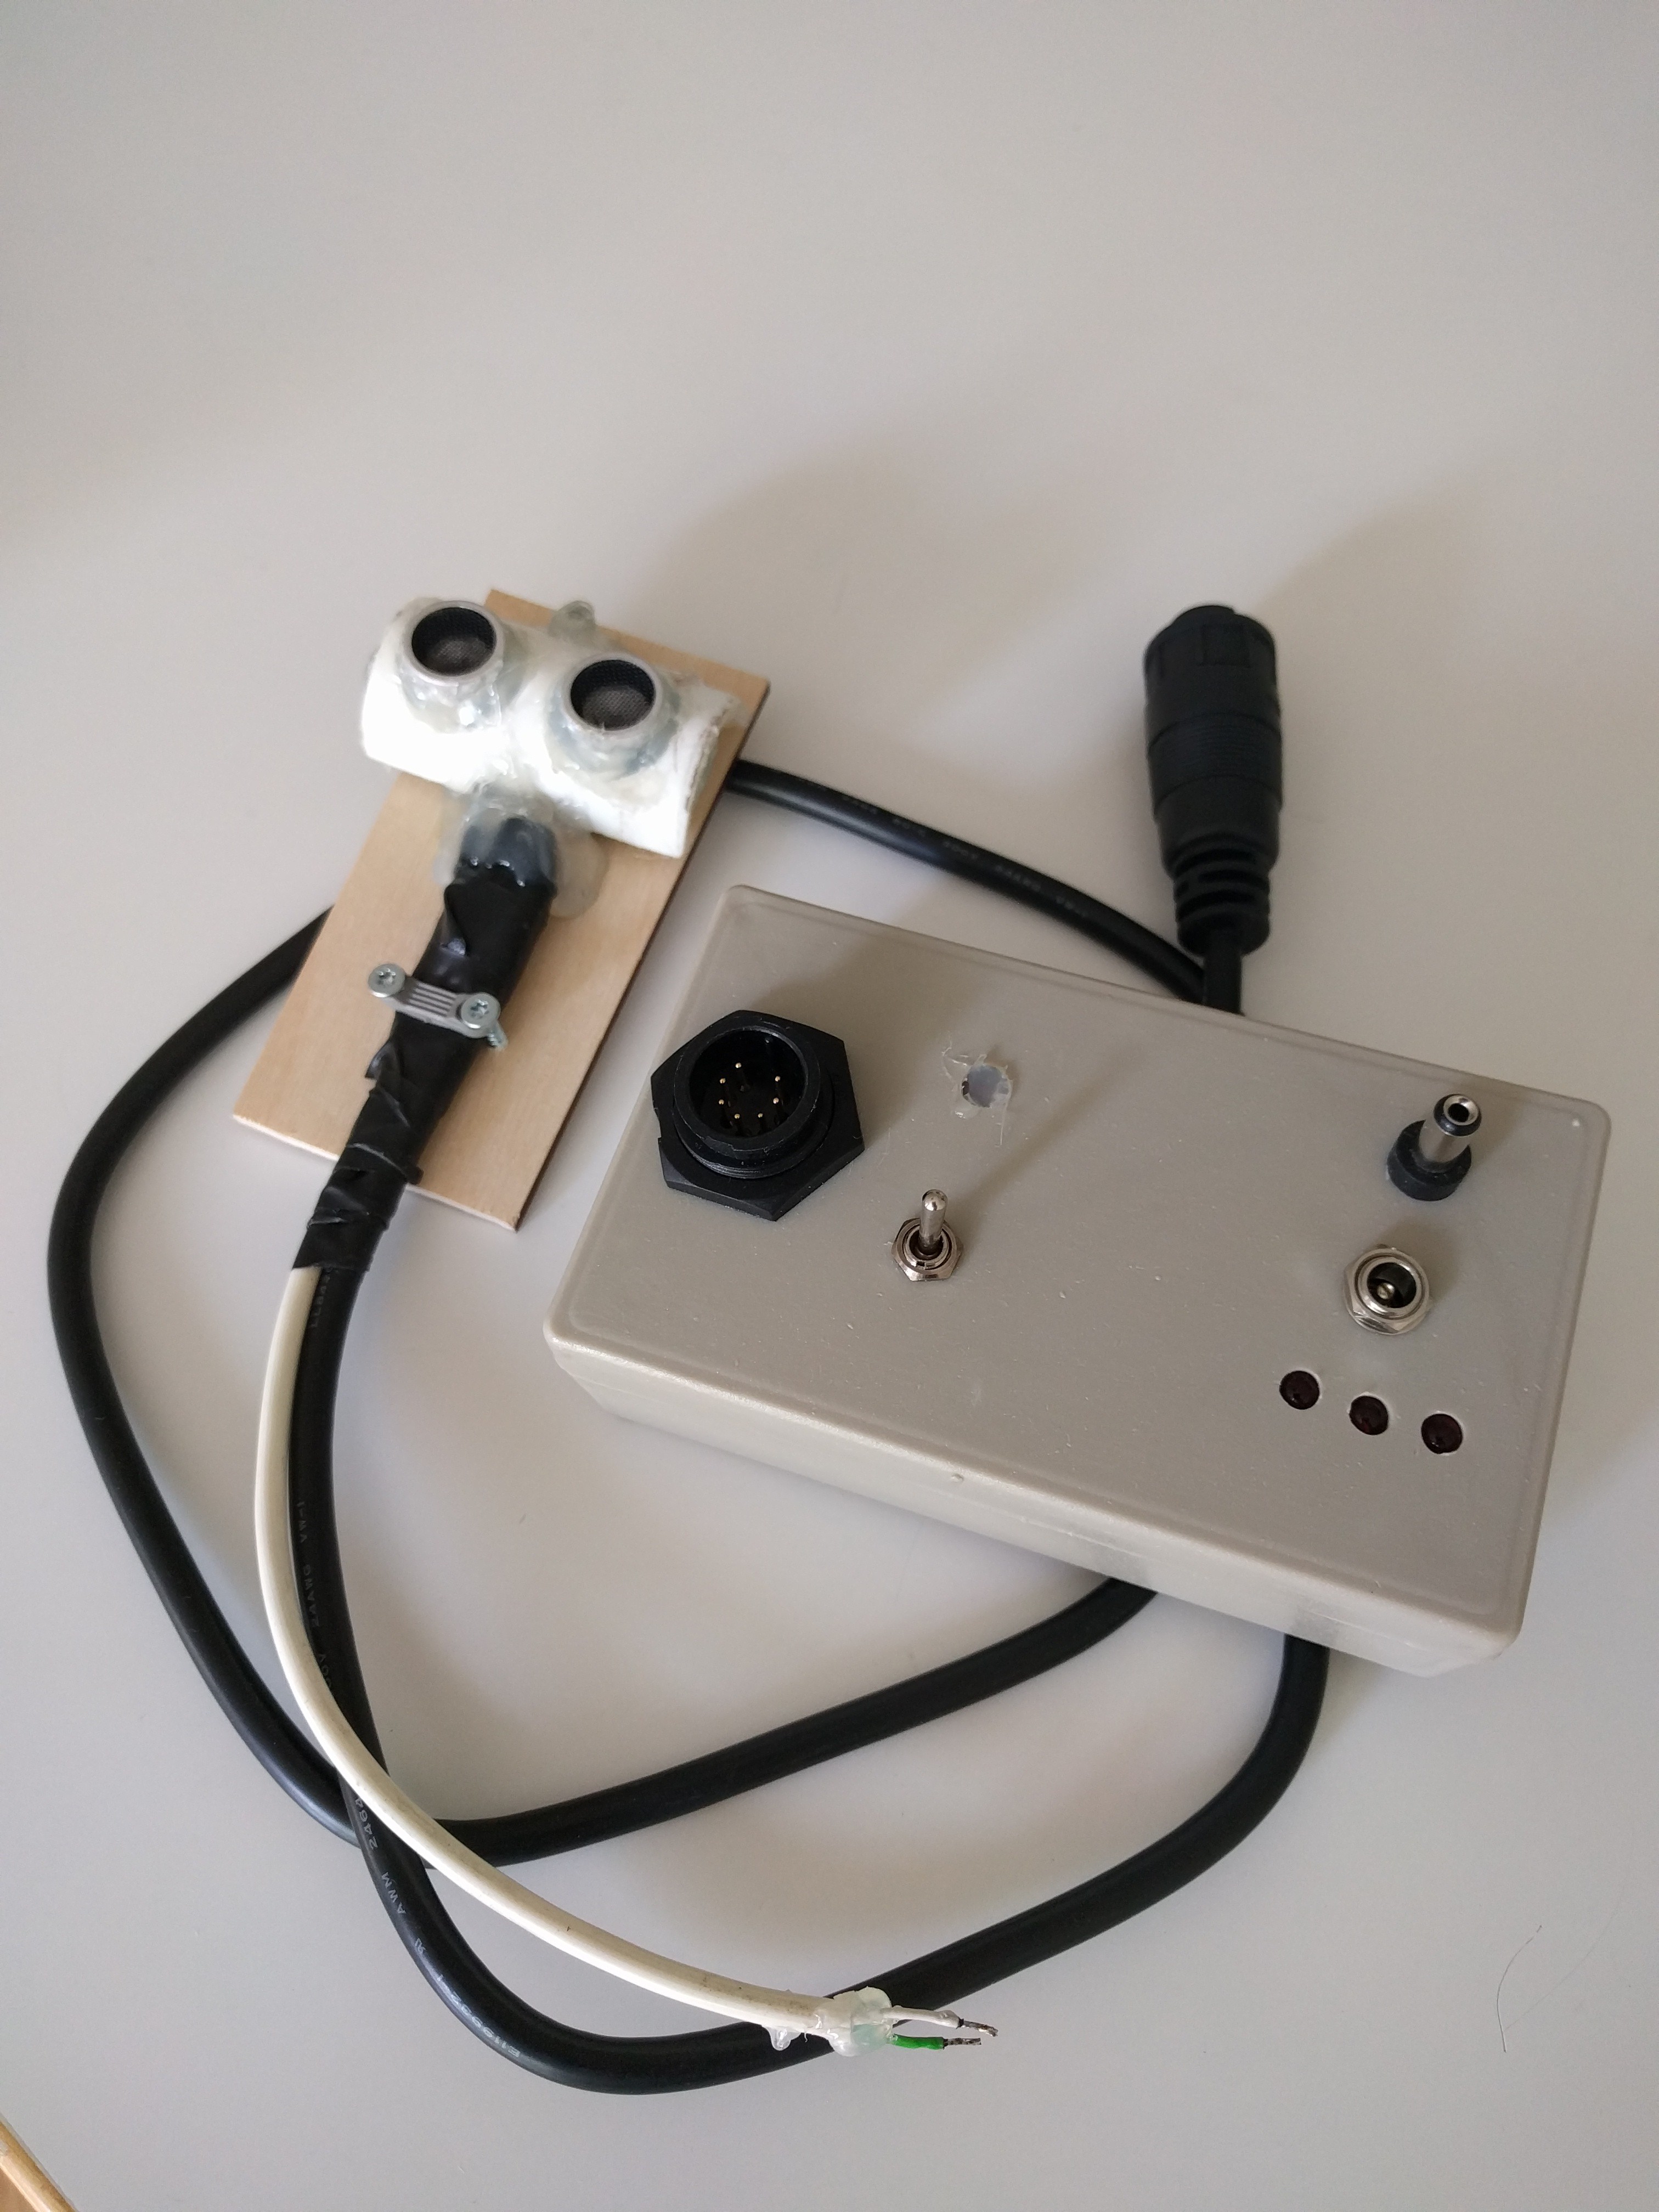
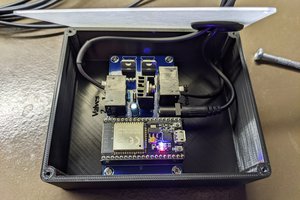
And here is the case. It has three leds - power, esp alive, and pump off (=inverted due NPN transistor). The case is too small, naturally, but it seems to be pretty firm when stuffed down. The nice looking connector is from dumpster diving. You can also see the professional looking ;) universal glue casing i made for the HC-SR04 ultrasound. I though it would be good to have some protection there since its going to hang over the water container. The switch is "manual on" - a switch to force the pump on for reason or another.
Now, back to code.
I have been soldering the first protoboard. Today morning, when power applied it woke up and everything seemed to work. I have almost up to date schematics on pen-n-paper style, but i think i will not draw them clean, unless requested. Some hardware changes:
I also updated the first code to github, that contains the current 'testcode' -- its to be fully rewritten. This one is for proof-of-concept and hardware verification.
I stumbled a bit with memory on the ESP, seems like the WiFiClientSecure (that is needed to send email via google smtp) is a shitty library. For debugging purposes i had my logs ringbuffer quite large -> memory quite low, and the board seemed to throw exception with no good reason when trying to send the email. Shit.
There are few more jump-wires to be connected but then the (board) hardware is done. Other hardware stuff needed is to make case for the ultrasound ranger (measuring water level) and something for the 'water switch' (making sure water appears on the top, and pipe is not disconnected).
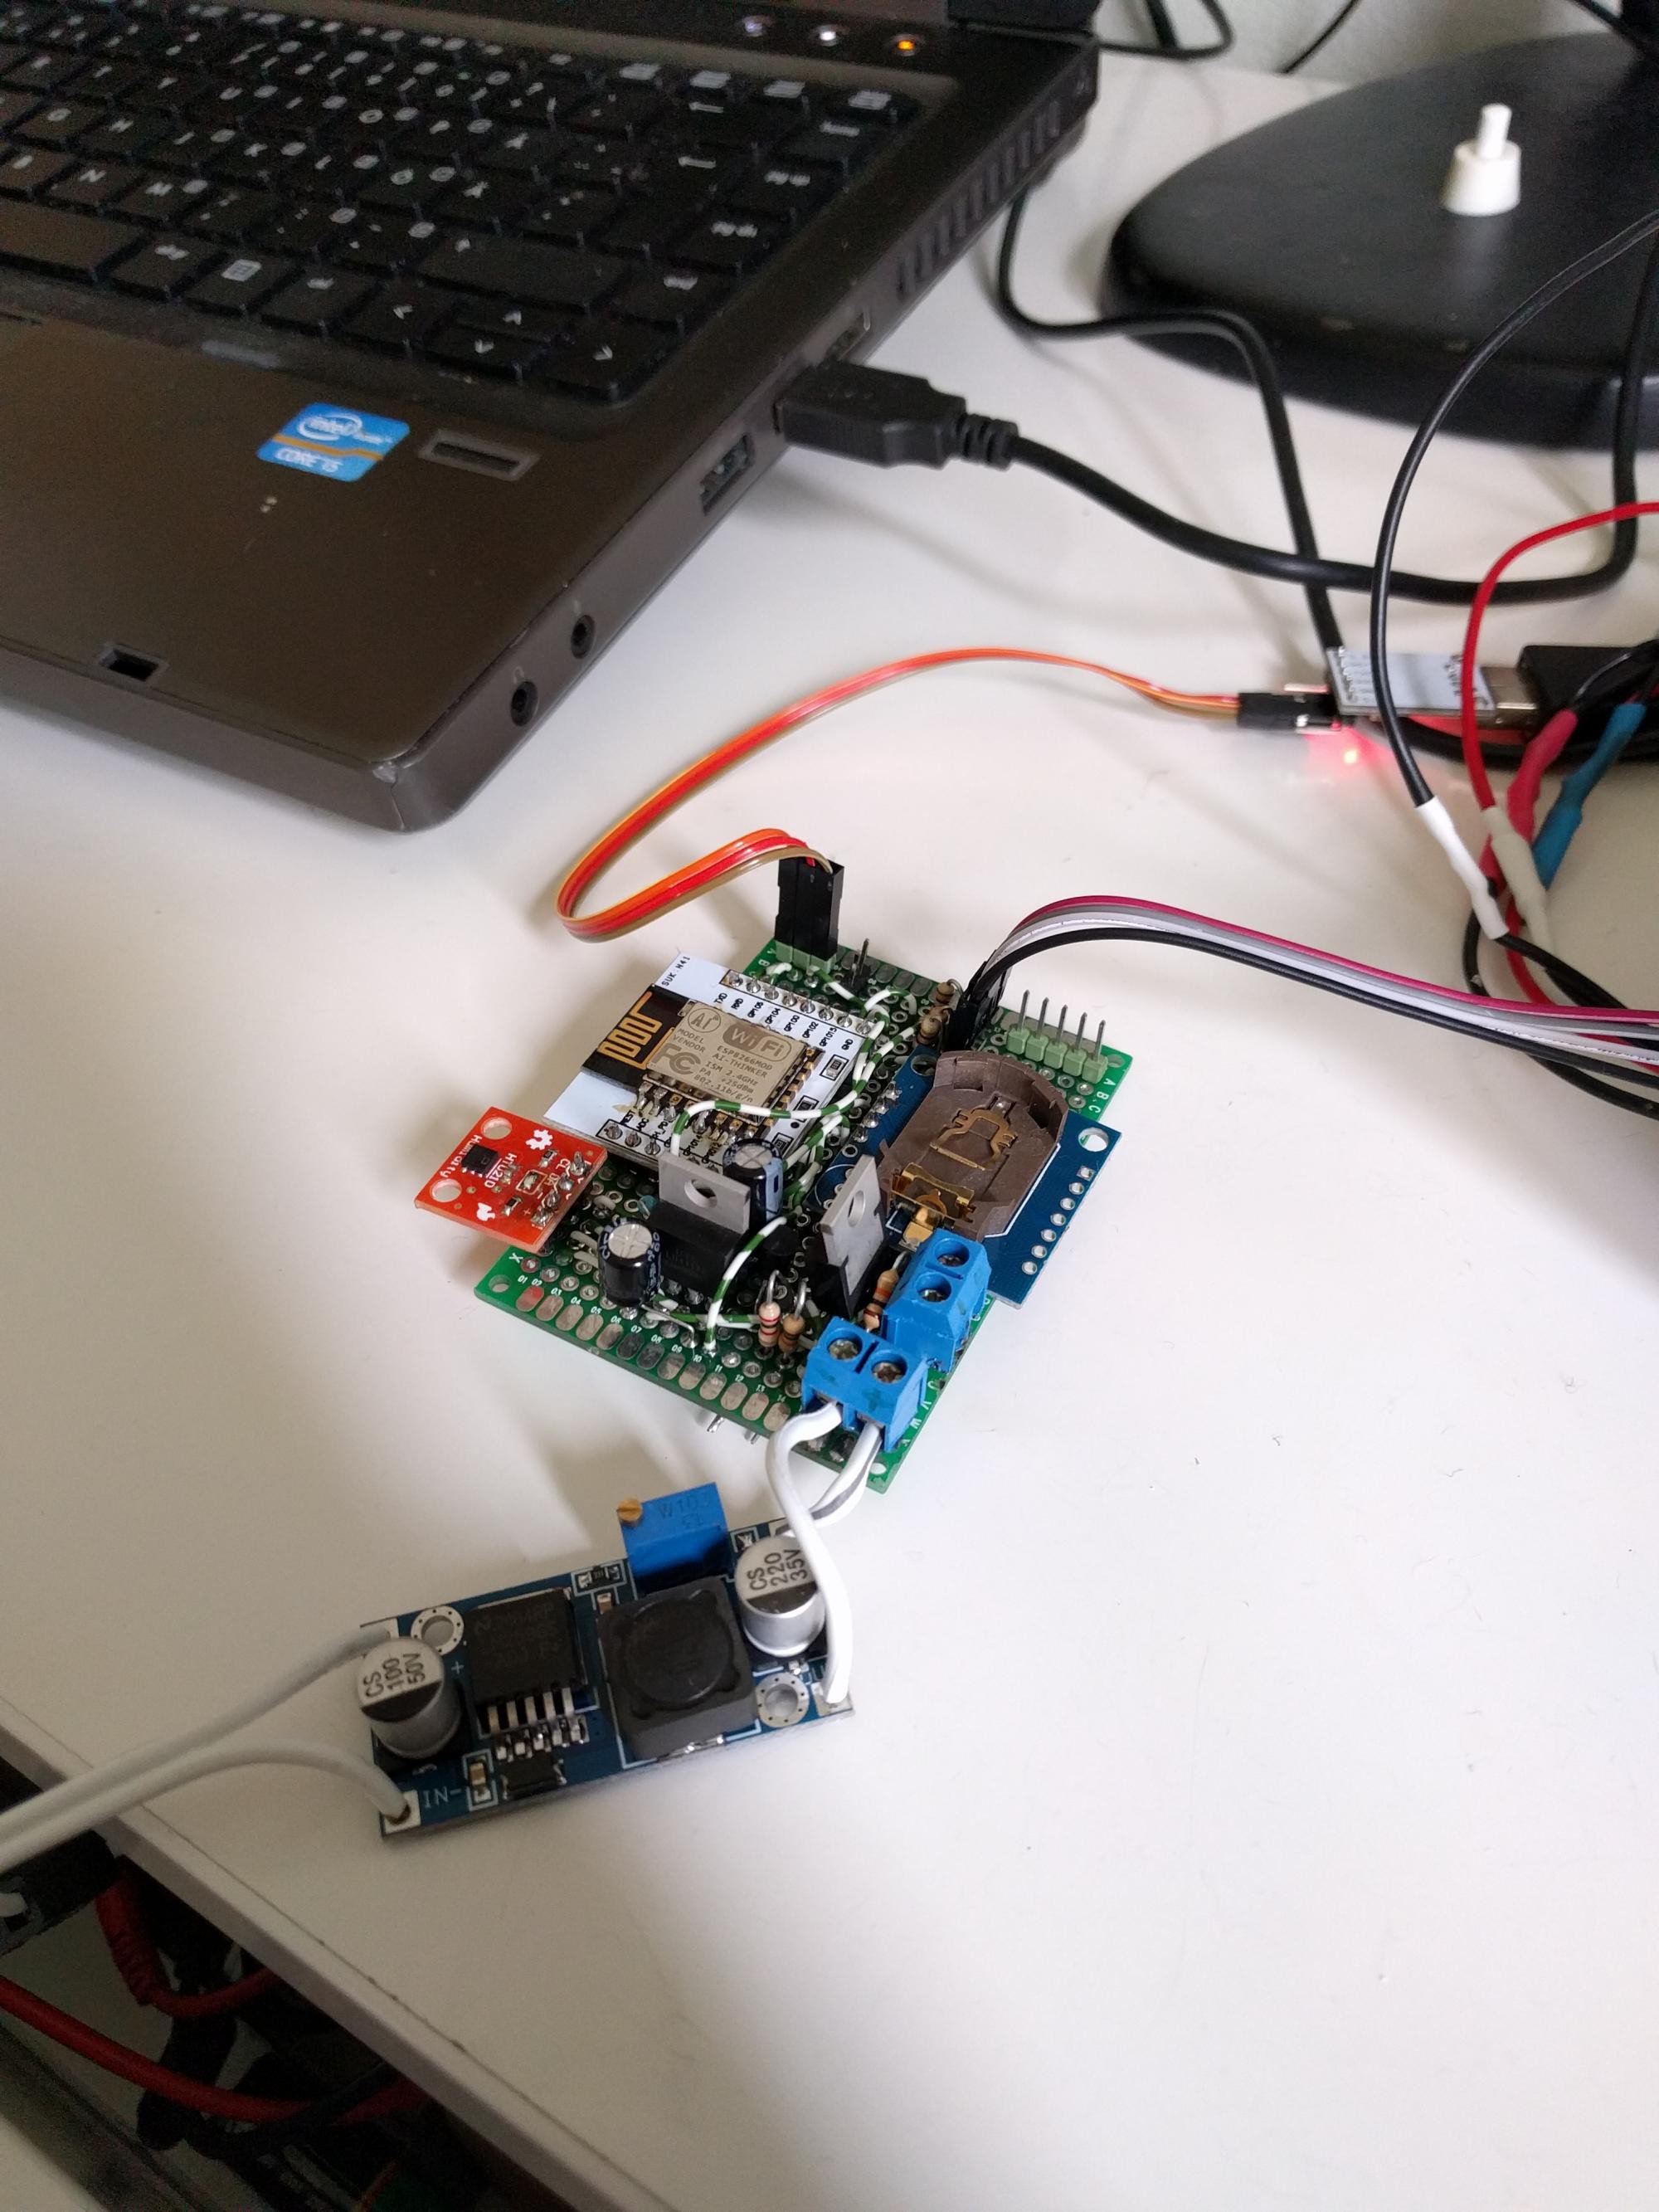
Ok, now i received a tinyrtc module from China. Seems like i did pick bad choice; this version requires +5V to work. And on top of that its made for LIR2032 rechargeable battery, and the China shop shipped it with "rechargeable CR2032", that i belive to be just normal CR2032. To avoid any troubles, i soldered some components of (include +5V pullups on the I2C bus) as described here: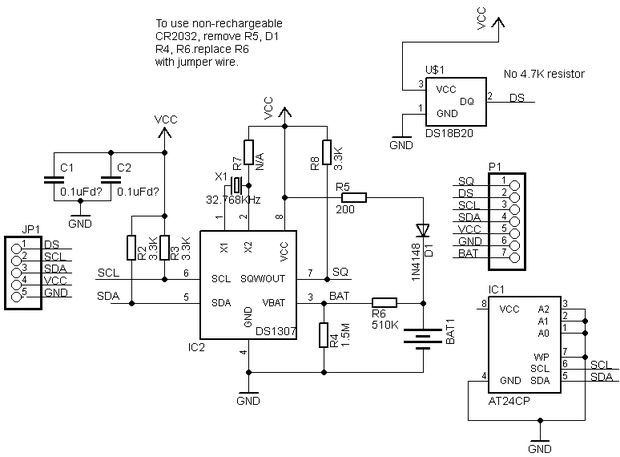 ( source: google gave me this but i think i found it on some discussion thread)
While getting the chip connected i first tried with GPIO16, but it seems like (after googling) there is something special with that pin, using pins 14 and 12 works fine.
Anyway, i need +5V rail for the HC-SR04 and LM35 so its no trouble. The (adjustable) buck-converter have not arrived, when it does i have all the components i need to make first proto board. I'll use the buck-converter to power +5V and then use linear regulator to get the 3.3V for the ESP.
I also managed to use the platformio data/ folder, that works fine as long as you remember to call SPIFFS.begin() before assuming anything to work. I dumped CSS and index.html file there and i am using the C++-code to provide json - get api for the static html. This way i do not have to hardcode any html to the C++ side, which is nice.
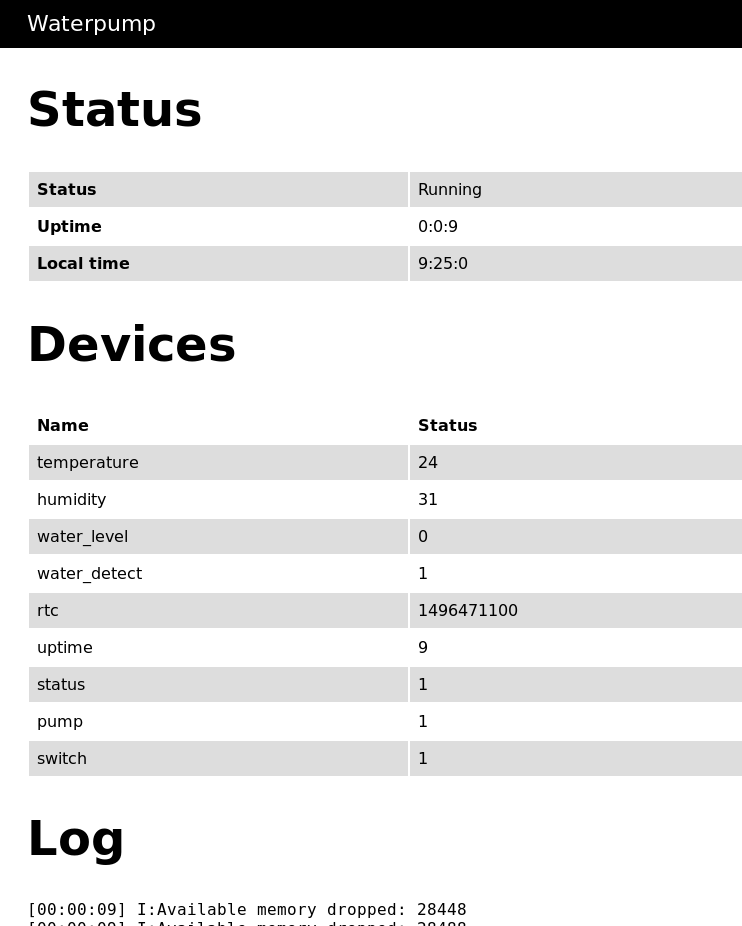
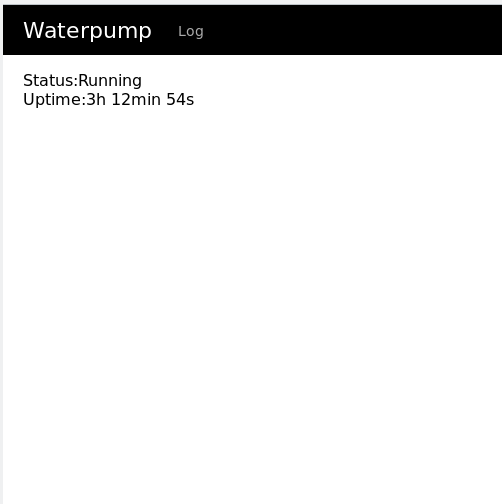 Here is screenshot of the current main page. Simple.
Leassons learned so far:
Material damage:

Figure 1: The ADC values calibrated with potentiometer. UP-DOWN: the value red from analogRead, LEFT-RIGT: The voltage measured with multimeter.
Create an account to leave a comment. Already have an account? Log In.
Become a member to follow this project and never miss any updates
 ZenVega
 Ben Brooks