 Ronald McCollam
-
1Step 1
Get the parts
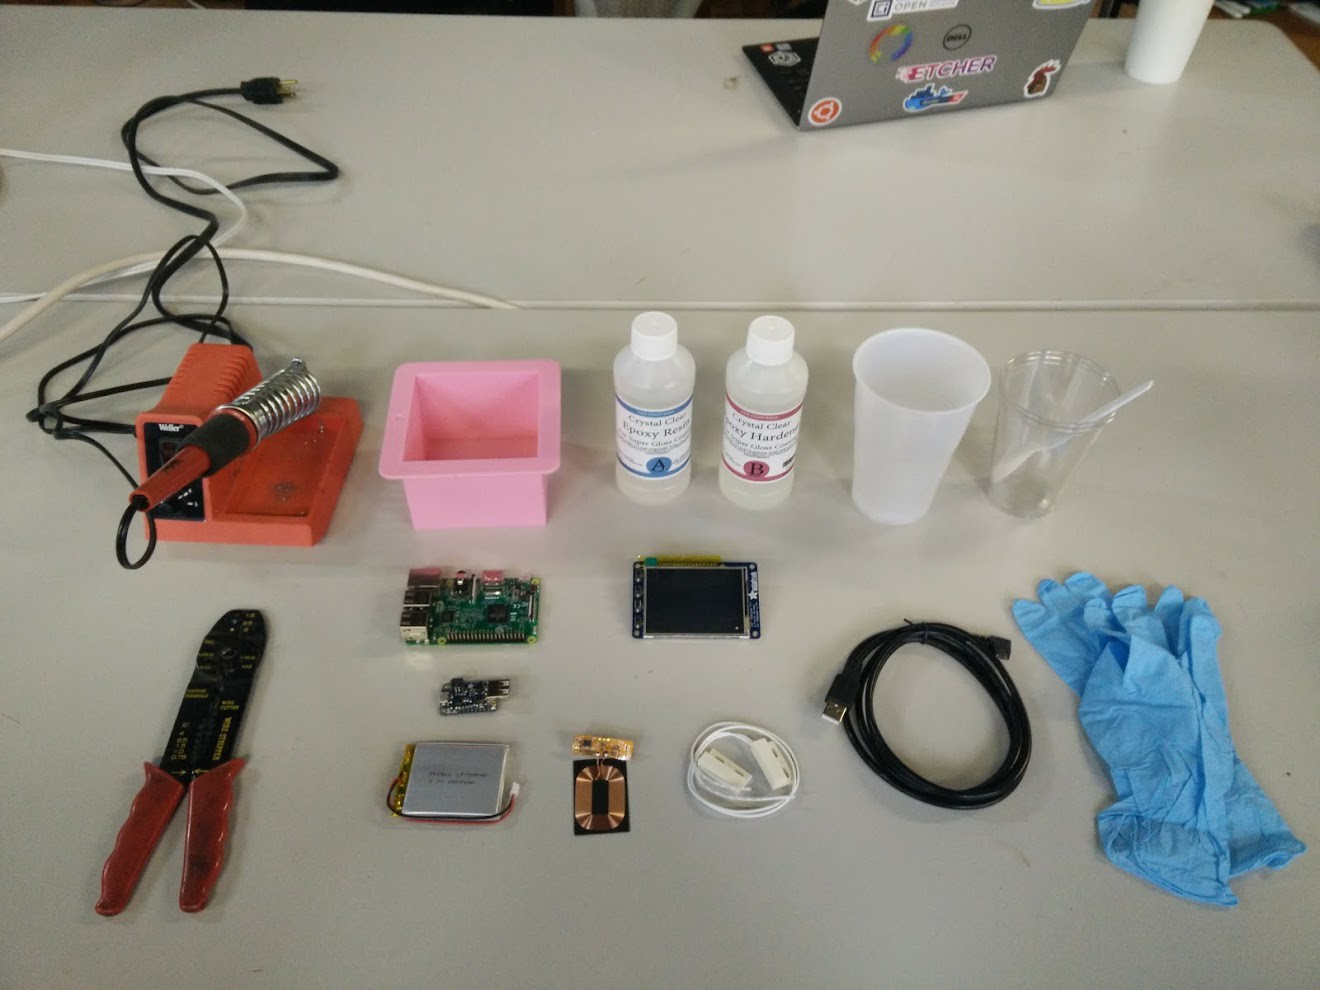
Grab the equipment needed. For simplicity I made a wishlist on Adafruit that contains all of the electronics. (I'm not associated with them in any way other than as a happy customer; feel free to get similar parts elsewhere if you have a preferred provider.)
The only thing you'll need aside from the electronics is a mold and some resin. I got a square silicone soap mold from Amazon. The mold I linked to is just barely big enough for all the components to fit in snugly and leave a tiny amount of epoxy around the edges. If you use something else make sure you measure carefully to be sure it will fit!
I also got the resin I used from Amazon, though you can likely get any similar epoxy from a craft store or home improvement store. Look for something intended to coat tables or counters. The 16 ounces (just shy of 500 mL) is enough to make one of these, but it's pretty close. If you haven't done this before, I recommend getting a bit more epoxy to experiment with first. (Or to make other cool projects after!) It's not expensive and you'll be much more likely to get a great result if you play around with some small, simple casting first.
-
2Step 2
Prepare
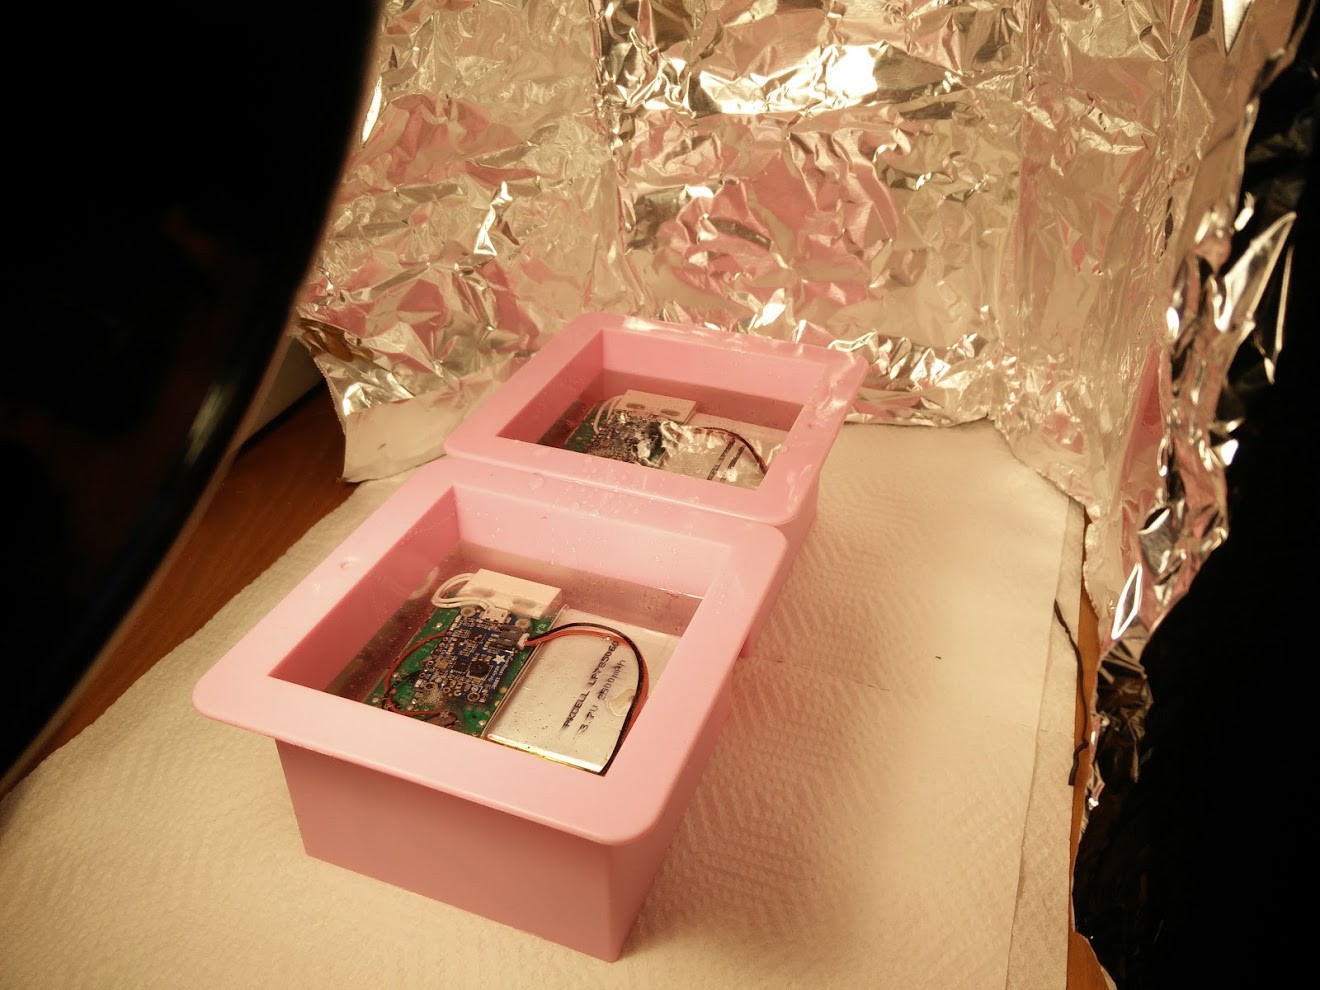
Get a nice work area ready. You'll want plenty of space to assemble everything as well as paper towels and gloves -- epoxy is sticky!
It's a step everyone wants to skip, but making sure you have everything laid out and ready to go will help you to not panic when you have epoxy curing and you're not sure if you're really doing this right or not.
![]()
-
3Step 3
Epoxy: Layer 1
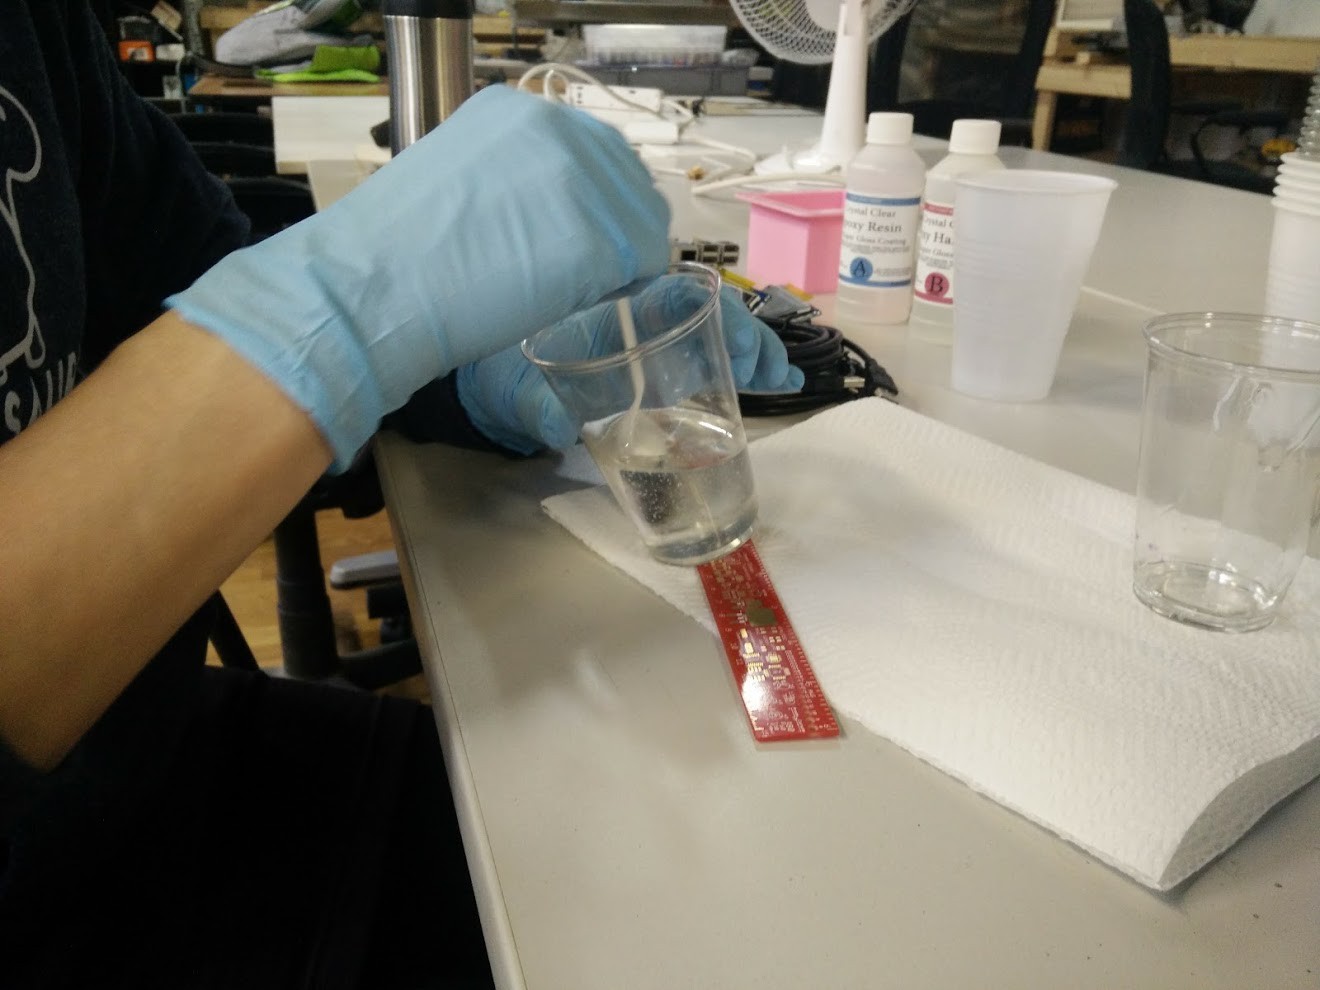
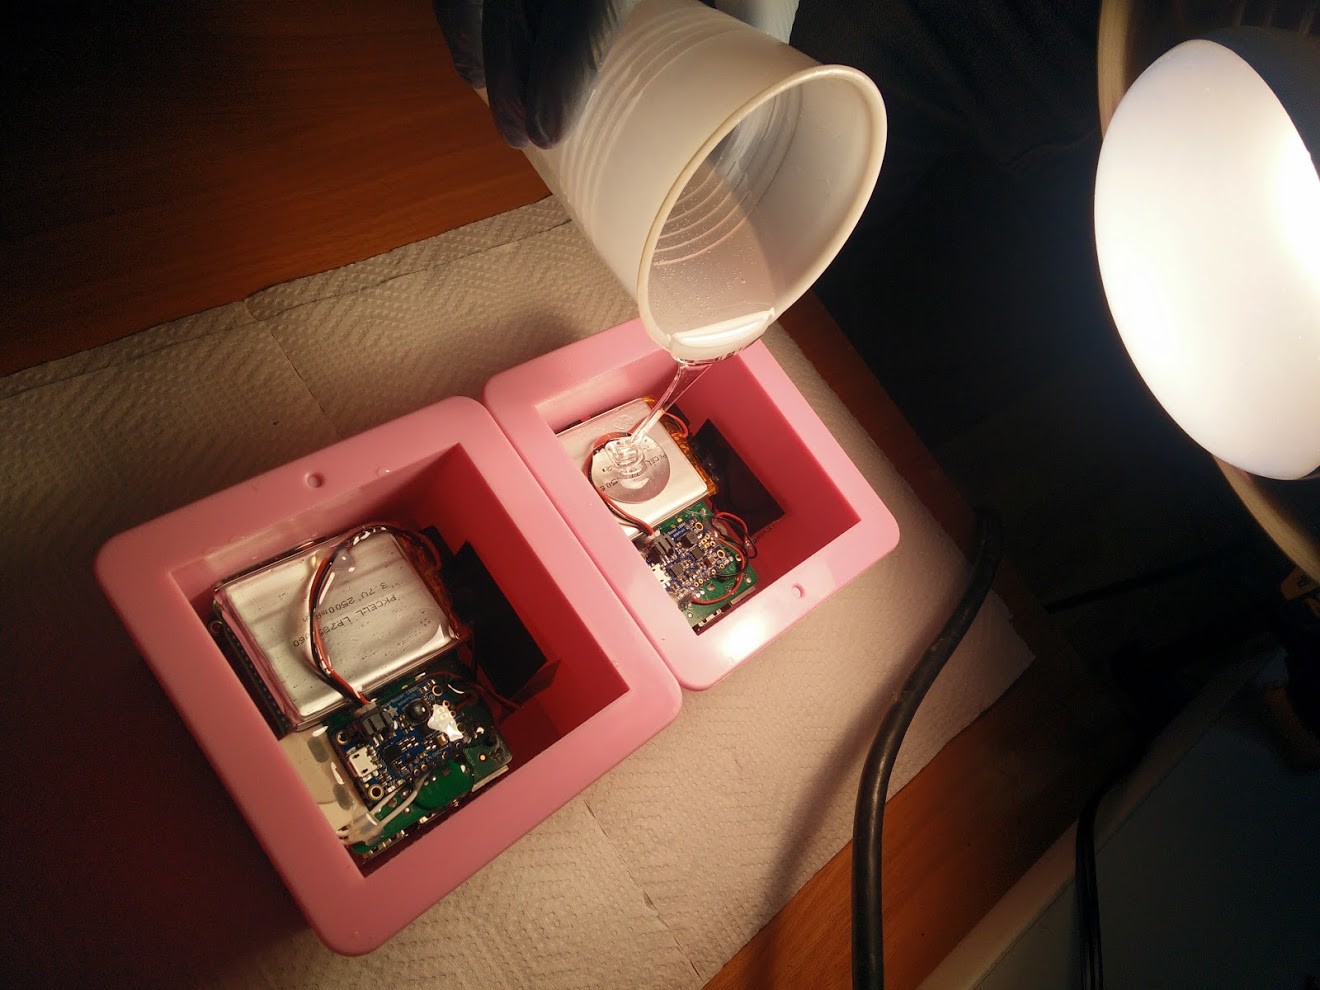
Mix and pour the first layer of epoxy. Follow the directions for your particular epoxy to mix it properly (mine is a simple 1:1 ratio).
![]()
Do this slowly so you do not introduce bubbles. It's a good idea to do it in a clear container so you can tell when the epoxy turns from cloudy into clear. (Hint: wait until you can see something with fine text clearly through the epoxy, then stir for like another 3 minutes. You want this stuff to be really mixed.)
When pouring, use just enough to make a thin layer in the bottom of the mold.
(Creepy lighting is optional.)
-
4Step 4
Cut cables to size
Roughly lay out the components so you know how long the wires will need to be.
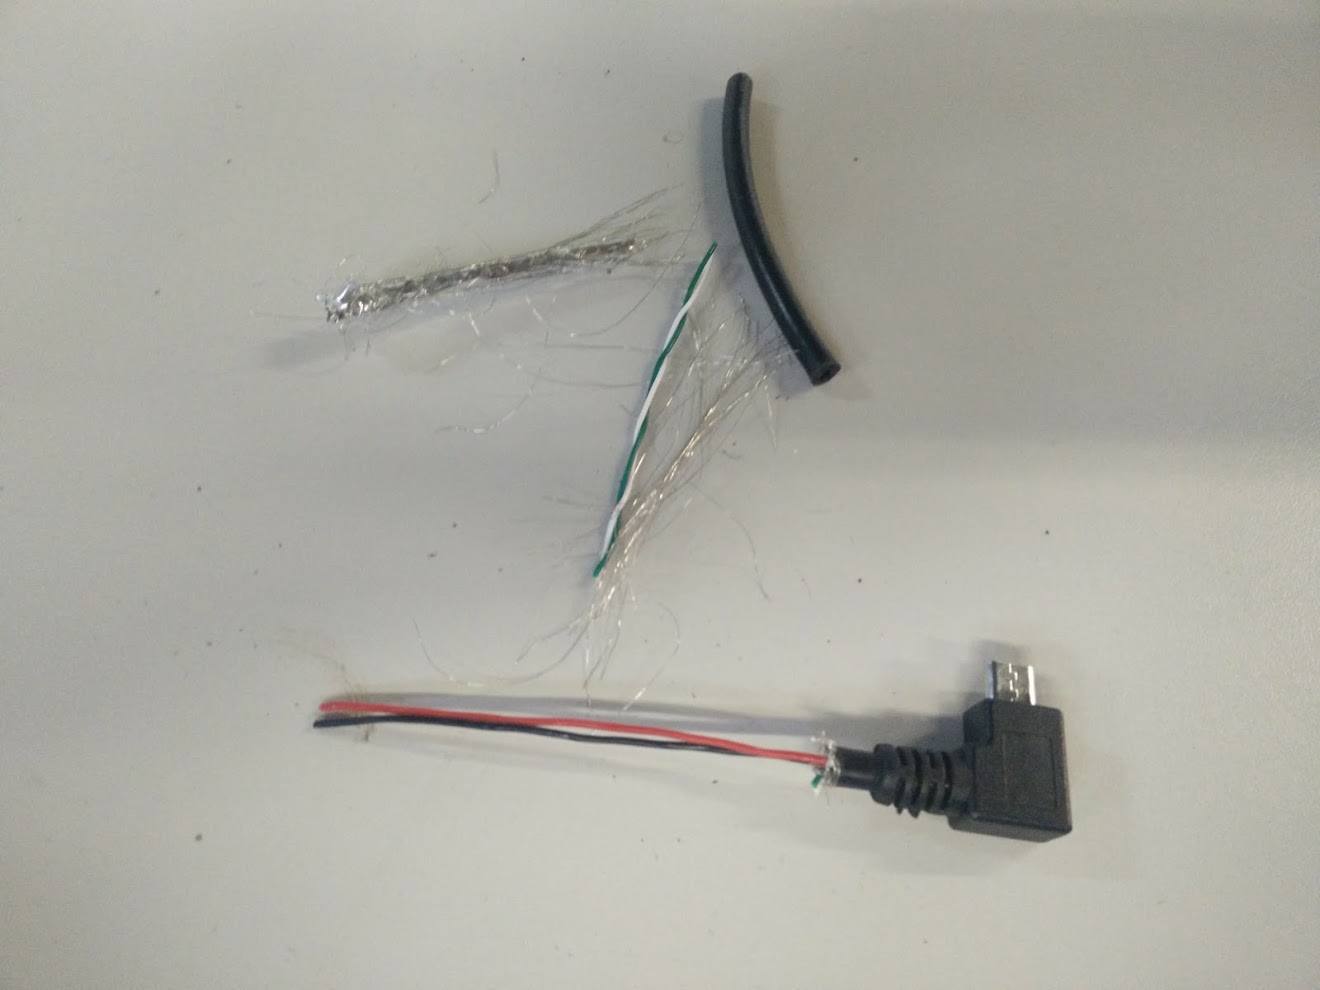
Cut the USB cable and remove most of its insulating jacket (including any foil or uninsulated wiring inside). Then cut all but the red and black wires inside it.
![]()
You'll also need to strip the ends of the red and black wires. You may need to use a sharp knife as they are very small and may not fit in normal wire strippers.
From the remainder of the USB cable (or any other wire you have handy) trim a length of wires to connect the charging coil to the power circuit.
Once you're done, you should have a bit of stripped cable with a micro USB header on one end, a magnetic switch with a much shorter cable than it started out with, and some extra wire for the power circuit:
-
5Step 5
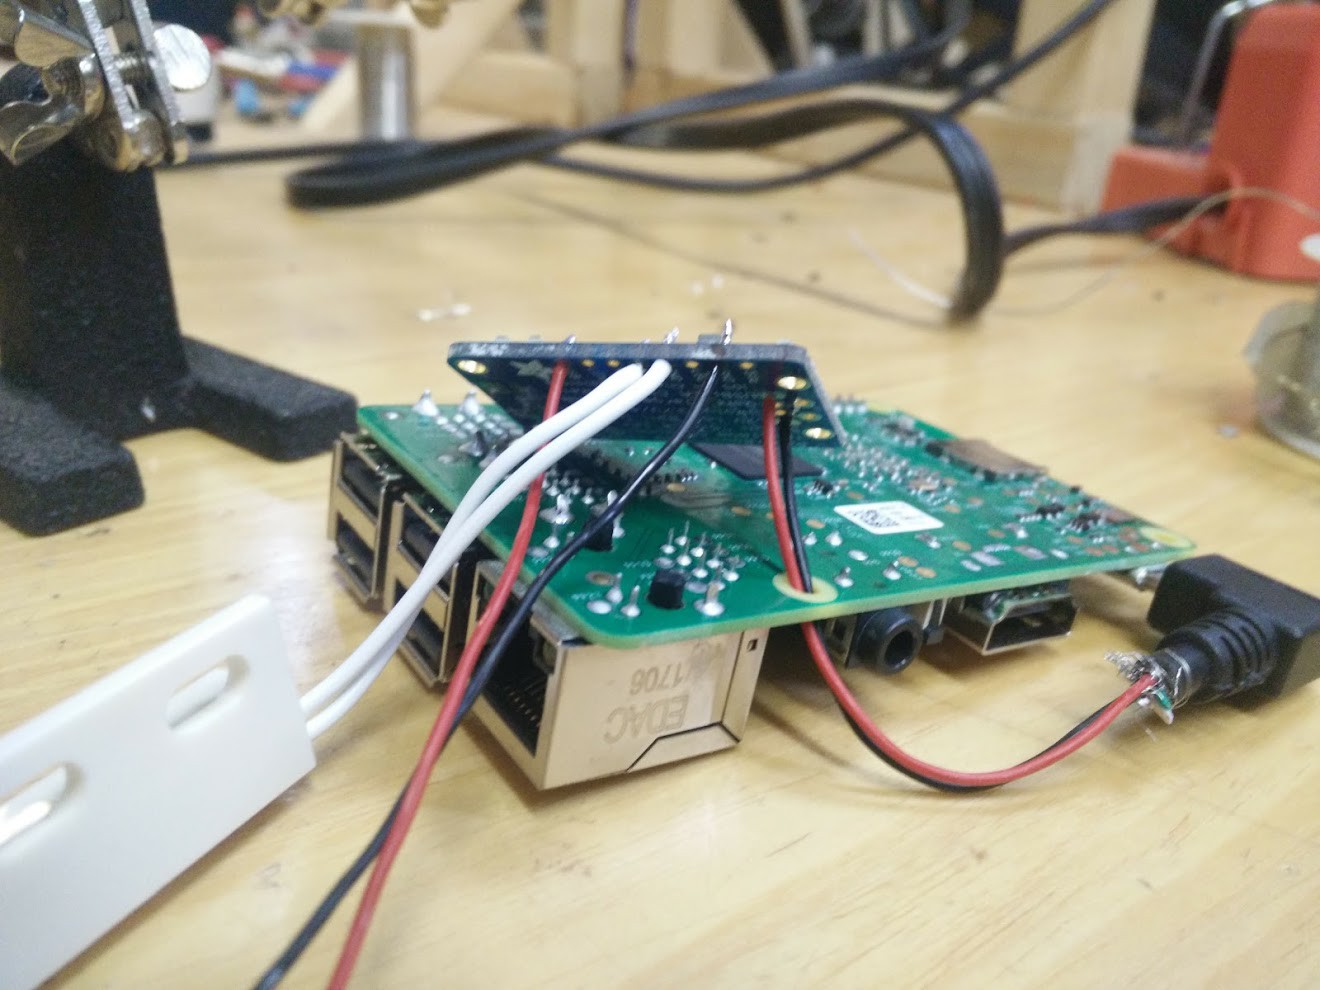
Solder
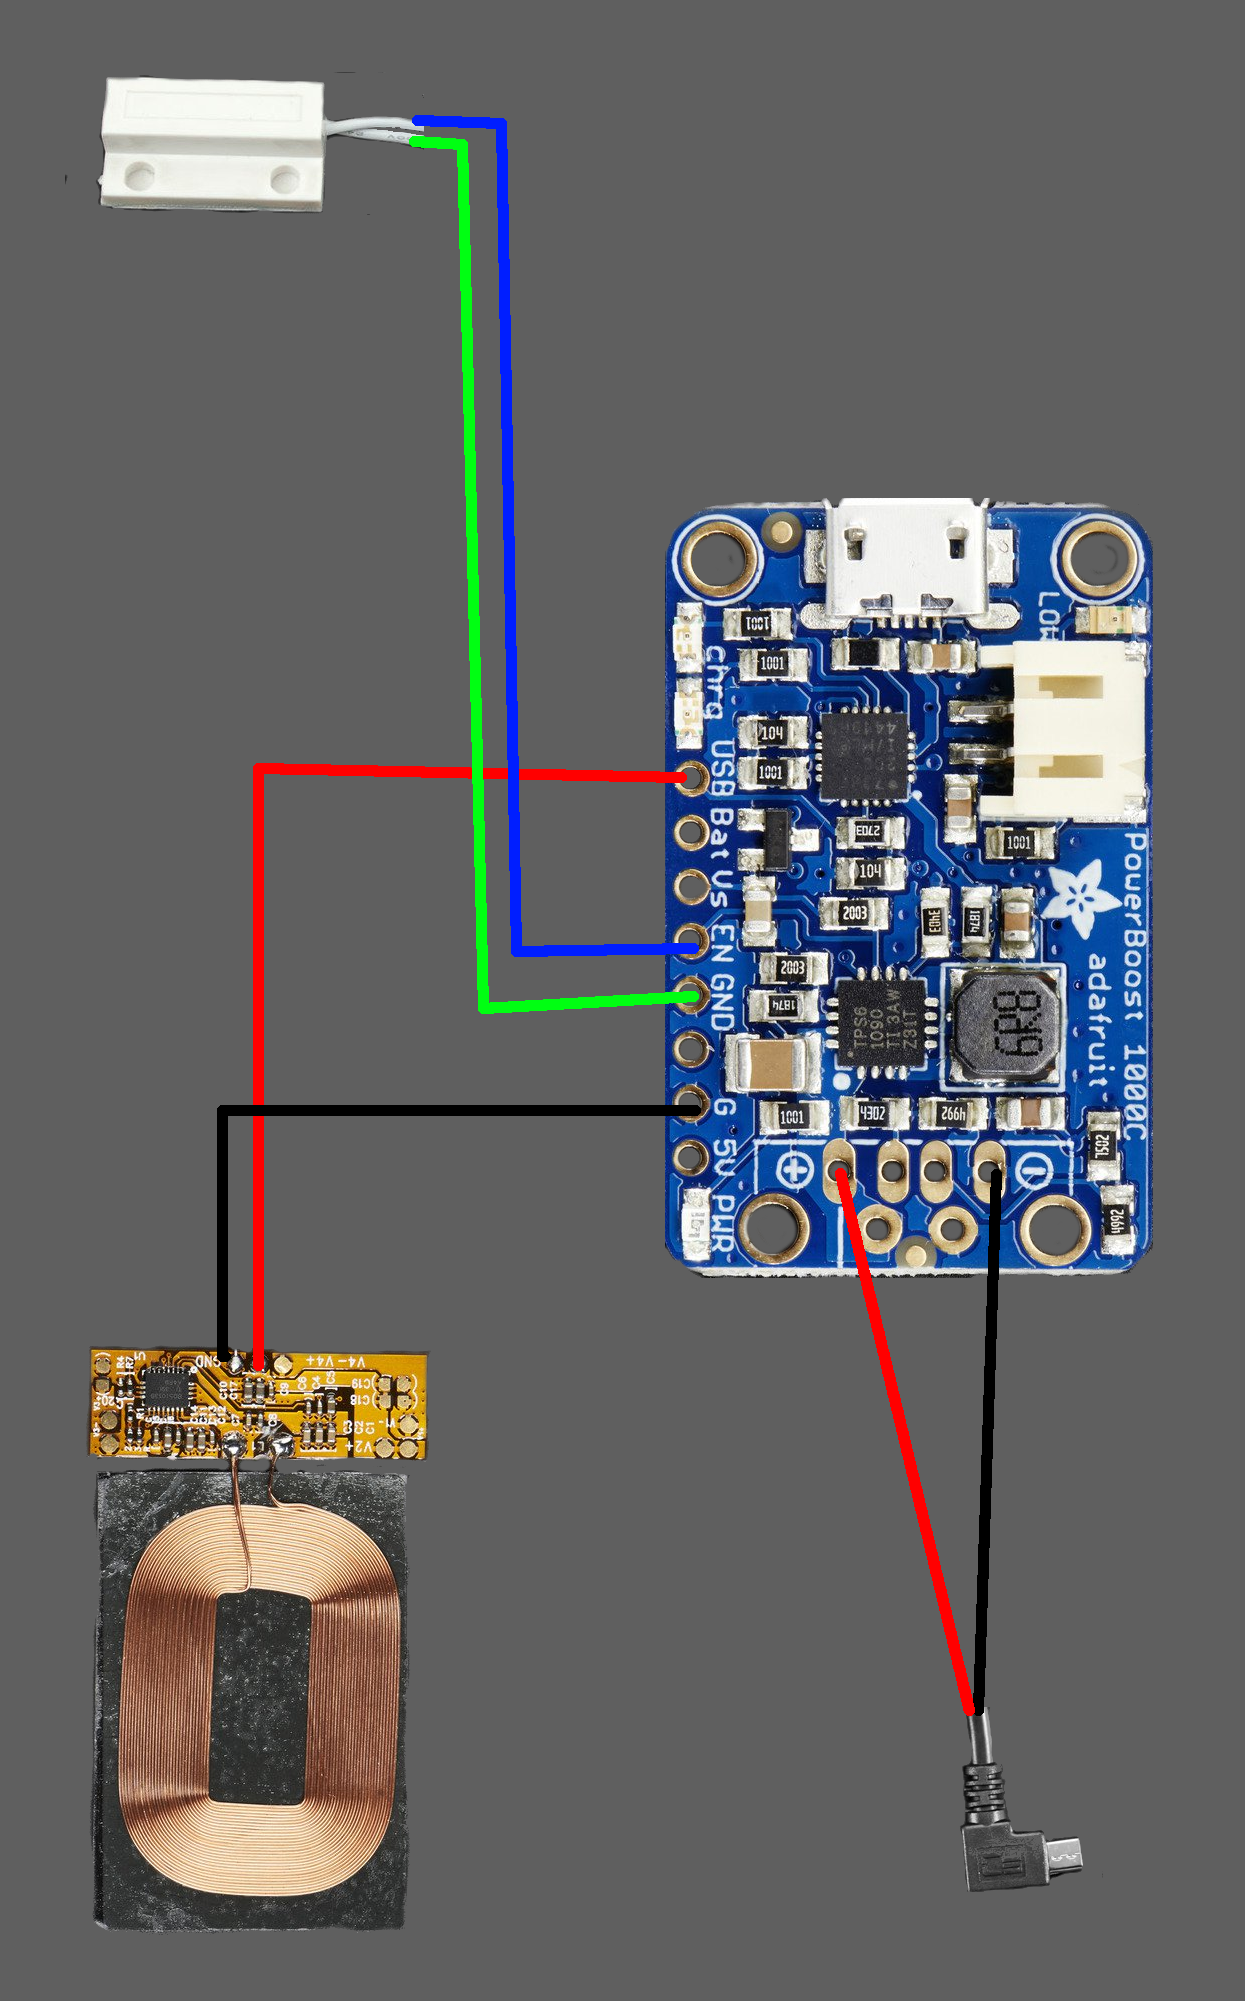
Solder everything up as follows:
![]()
- The magnetic switch is soldered to "EN" and "GND"
- The Qi charging coil is soldered with the middle pad connected to "USB" and the pad closest to the black IC soldered to "G"
- The micro USB cable is soldered with the red wire to "+" and the black one to "-"
When I did this, the easiest way was to solder the wires to the Qi pads first, then solder that and the reed switch on, then finally the micro USB cable. I snaked the micro USB cable through one of the screw holes on the Raspberry Pi to keep it more or less in place when things are assembled.
![]()
-
6Step 6
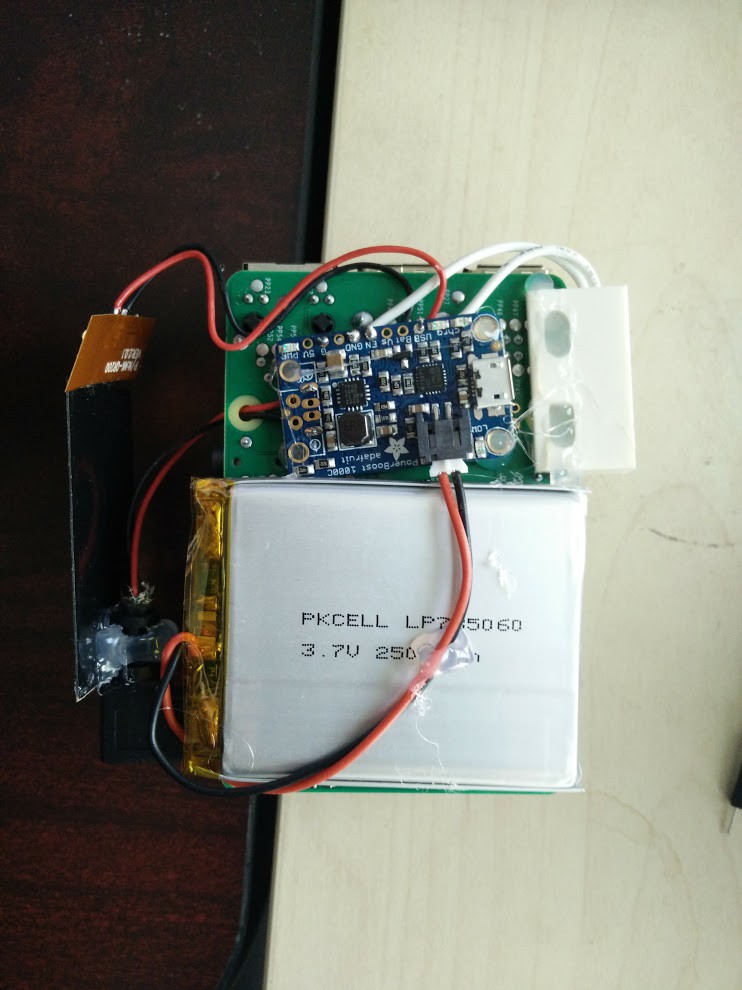
Hot glue (optional)
You don't technically need to hot glue everything down, but if you don't it will tend to float around a bit in the epoxy and look awkward. I recommend this step. (You can call the hot glue "craft solder" if that helps.)
![]()
Be careful to get the Qi coil lined up flat here. If it's at too much of an angle, you won't be able to charge later!
Also, it's important to note that the epoxy will loosen or slightly dissolve some of the bonds the glue makes. So you can't just tack things down lightly -- really glue the heck out of them! Try to work glue in underneath parts and up through screw holes or wrapped all the way around wires to make a solid bond.
-
7Step 7
Flash your Raspberry Pi
You can do this with any OS you like, but remember that once it's in the epoxy, it's in there forever. If you mess something up it's messed up forever!
I strongly recommend using resin.io to do this. Resin will allow you to push updates to your application running on the device without worrying about "bricking" it if you mess up. If you push a bad update you can just roll back to your previous code commit.
-
8Step 8
Test everything
Make sure everything works: this is your last chance!
- Connect the battery and make sure that the Pi turns on.
- Use the magnetic switch to turn the Pi off.
- Put the Qi coil over a charging pad and make sure the blue "power" and yellow "battery charging" light on the power circuit turns on (but nothing else).
- Remove the magnetic switch and make sure the Pi turns on again.
- Make sure the screen is properly connected and lights up when the Pi is on.
-
9Step 9
Drop it in
Once the epoxy has started to cure it will become like a sticky jelly on top -- not totally hard but not still a liquid. (Test with a toothpick.) At this point, it's time to add the Pi to the mold!
Mix up a somewhat larger batch of epoxy. Pour in a small amount to make a very thin wet layer and carefully set the Pi on top of it.
Arrange it so that everything is lined up properly, especially the charging coil! It should be as close to flat with the bottom of the mold as possible and 1-2 mm away from the edge. You want just enough space for epoxy to fill in, but no more.
![]()
Once it's aligned, carefully pour on more epoxy. Make sure you get all around the edges and don't leave air bubbles in the USB or Ethernet ports.
-
10Step 10
Last layer
Once this layer partially cures, mix up another batch of epoxy and coat everything again. Make sure everything is totally submerged at this point.
![]()
Now let it cure overnight.
Resin-in-resin
Resin-in-resin is a Raspberry Pi with a display completely encased in a block of clear epoxy, but still able to be updated and used.
Discussions
Become a Hackaday.io Member
Create an account to leave a comment. Already have an account? Log In.