Close
0%
0%

Robotics for the Rest of Us

A solid robotics platform developed in Viet Nam for under 100$

Similar projects worth following
I was sitting at a coffee shop in Ho Chi Minh City, and a friend said it would be cool to have a robot, and if I could check out a servomotor controller he had seen online. It was expensive and not that great... and so a story begins.

The goal isn't to build a pretty robot or the best robot. The goal is to build an affordable, reproducible, durable, connected, extendable robotics platform from parts that are easy to find in southeast Asia.

The first version will cost more than 100$, and then the build materials will be adjusted to try and meet that goal.

I remember reading that engineering is "doing for a dime, what any fool can do for a dollar". 

With that in mind, I'm not trying to reinvent the wheel, just cut a few corners (hah!). I want to show my friends here that robotics isn't something super expensive that requires ordering foreign-designed kits: it's something the average engineering class in this city can easily afford to do, has the know-how to do, and moreover all the parts can be sourced from local markets.

Features I want:

-Powerful ARM computer running Debian or Ubuntu

-Wifi connectivity (4G if budget allows, but smartphones that can act as wifi hotspots are ubiquitous here anyway)

-4+ hour battery life off of lead-acid, and ability to accept a wide range of power sources.

-Easy to turn into a budget telepresence bot for educational purposes (conferences, guest speakers in classrooms)

-Custom servomotor controller 

-Webcam

-Entropy-resistant chassis

I've named this project 'Robotics for the Rest of Us' because I don't have the budget to build something with cool features from a kit, and maybe other people are in a similar situation... but also like me have no previous experience in robotics!

License: I release all code, schematics, circuit diagrams, and methods developed as part of this project  under a Creative Commons Attribution 4.0 International License.

  • 1 × DC-DC converter A variable output DC-DC converter lets you use a wide range of power supplies
  • 1 × battery Evaluation, Demonstration Kits, Boards and Modules / Evaluation Kits, Boards and Modules
  • 1 × Beaglebone Black
  • 1 × Office chair wheel
  • 2 × Circular supports More wheels

View all 20 components

  • Current Control System

    Legionlabs08/17/2014 at 04:22 0 comments

    I want the project to be easy to control over the web, so I threw together some web2py stuff and got it working in a few minutes:

    It's ugly, high latency, and literally caught on fire the first time I tried it. At least the instructions are clear and optimistic (Press buttons!).
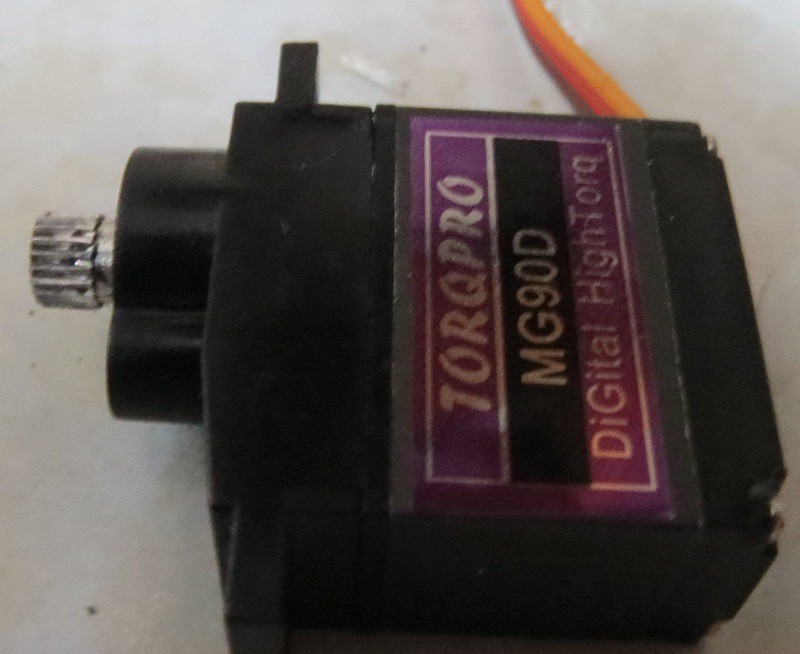
    The reason for the fire is interesting! It's due to a signal problem. Basically, small variations in the servo control signal can cause the servomotor to grind back and forth tiny amounts. I'd seen this before, and it didn't really cause any problems before. However, the metal geared servo built up enough heat doing this to melt the plastic case and catch on fire... which is fine, I rarely learn anything without some sort of unplanned combustion taking place.

    Of course this was the only servo that I didn't have a spare for. My amusement and lack of amusement were simultaneously noteworthy.

    Anyway, the fix is easy. The steering servo is pretty powerful and turns quickly, so it's sufficient to turn off the signal when done sending new positions. It takes a good 2-3 minutes of grinding before spontaneous combustion, so using it normally doesn't cause a problem.

    A little bit more about web2py:

    I'm using this because it's easy to install in Linux (download and run a single file), and easy to recycle any code back and forth between this and any future control systems (which will also be in Python).

    The note about chmod is a reminder that web2py doesn't have permissions to access /dev/ttyUSB0 (it's not running as root or anything), and that I have to SSH into the robot each time and chmod 666 it until I stop being lazy and fix permissions properly.

    If anyone asks for the code, I'll put the controller and view code up. It's not exactly super exciting stuff.

  • General Design

    Legionlabs08/16/2014 at 12:19 0 comments

    General System Design

    Some general decisions needed to be made about the overall design before trying to do much. Overall various websites seem to suggest buying robot kits, quality parts, and never trying to build your own servomotor controller. We'll be ignoring all that advice, especially the part about not being able to just use scrap, random parts, and glue to build a decent robot. All these sections will be covered in more detail later, with circuit diagrams and firmware.

    Power:

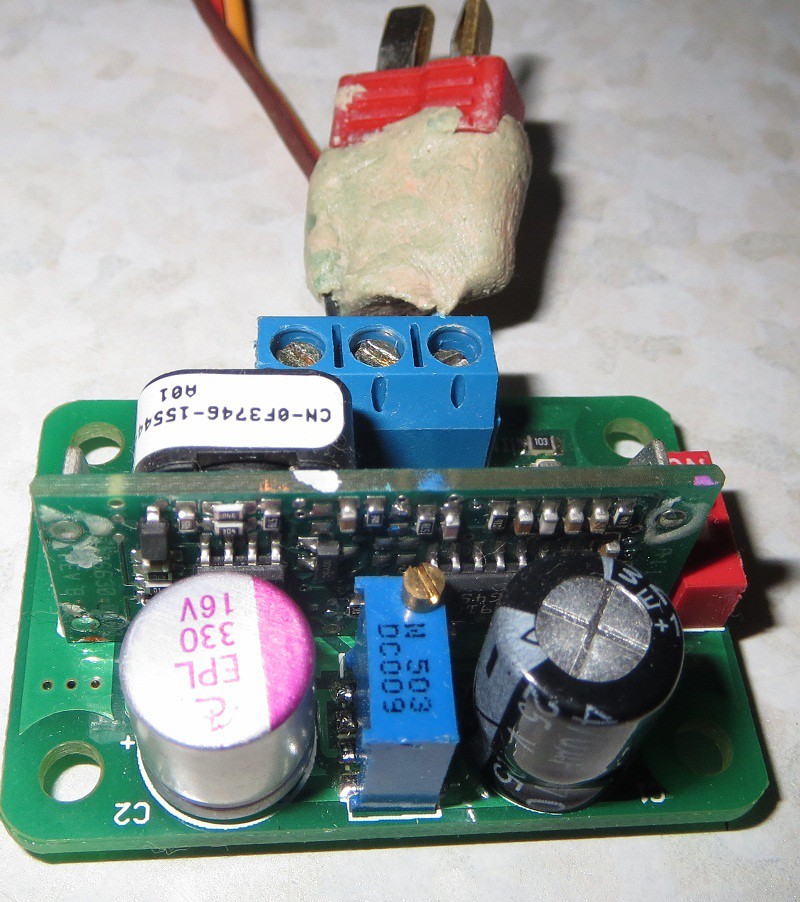
    A small DC-DC converter module is 5$ and can power the robot from either a Lead-Acid electric bike battery, LiPo batteries, or really anything. It's small and cheap and works great:

    Before anyone rips into lead acid batteries, keep in mind that run-down lead-acid batteries are far too valuable to go to waste here. They are recycled and resold, so you trade your old ones+money for new ones. Lithium battery technology is also uncommon here beyond cellphones/laptops.

    A 2200mAH, 11.1v LiPo battery should power it for 5-7 hours of constant use.

    Movement:

    By using a mix of servos modified for continuous rotation and unmodified servos, we get reasonable movement. It's not high power, but all runs off 5v, meaning all systems run off a unified 5v. They don't require a H-bridge or special circuit protection. Plastic gear servos are also 2$ each, metal gear ones are about 7$. I figured dual continuous rotation plastic gear ones are OK for movement:

     ...and a metal gear one for steering. I don't recognize the brand... as far as I can tell it's a mainland knockoff of a Hong Kong copy of a cheap servo. If your software has any hunting problems, it will grind back and forth, generating enough heat to melt and catch on fire.

    As another added benefit, this design means basic movement only requires 2 servo control signals. Currently, movement works but needs improvement.
    Chassis:

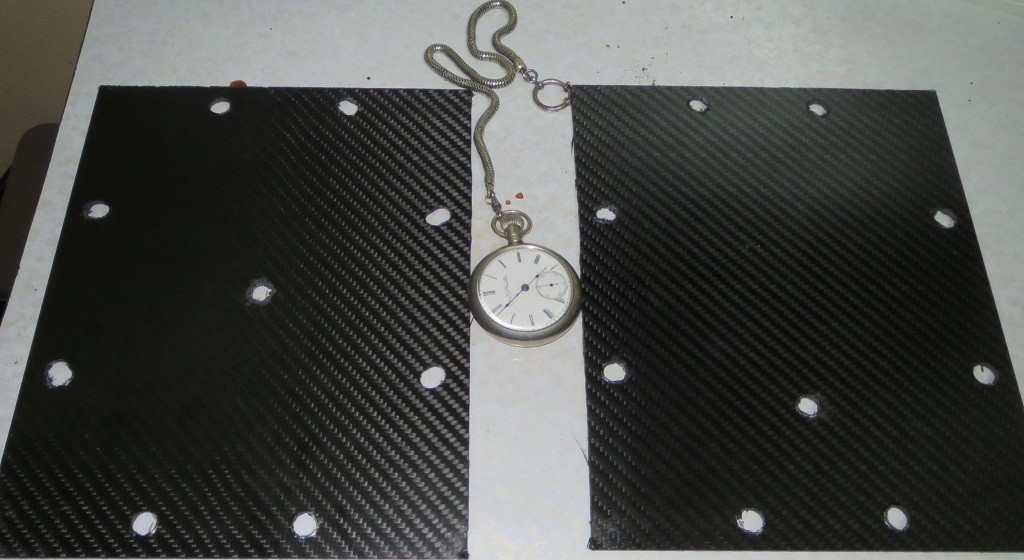
    The alpha version will use carbon fiber bolted to more carbon fiber, because I randomly saw a piece lying around a store. Future revisions will use copper clad board because it's way cheaper, easier to work with, and reasonably strong and lightweight.

    The two drive wheels that power the robot forward/reverse are aluminium model aircraft wheels, but any reasonably wheel-like object will do. If traction is bad, sand it and coat with silicone sealant.

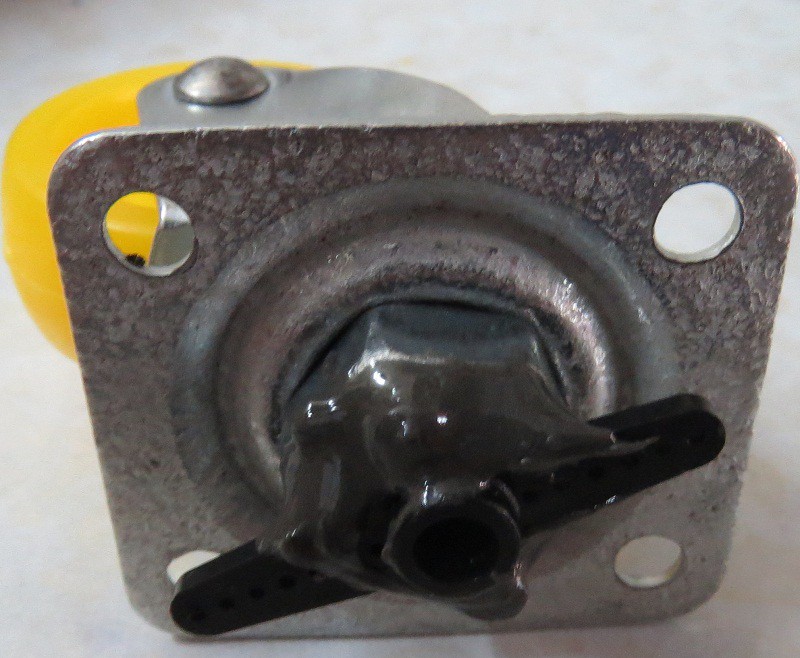
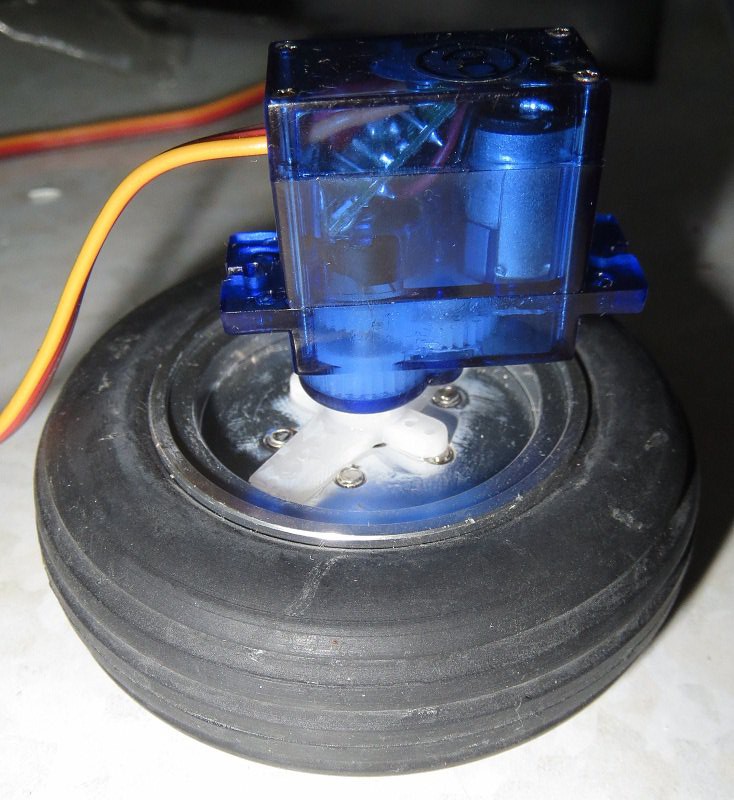
    The steering is a bit more complex. Basically, it's a servo that pokes through a hole in the chassis, and is stuck to a modified office chair wheel. This actually works surprisingly ok for a first try, although there's a lot of room for improvement here. Some sort of rack-pinion steering with 2 front wheels would probably be better.

    I'll note here that I'm terrible at mechanical stuff, but I refuse to re-purpose a toy car because I won't get any better that way, and the design will be difficult to reproduce.

    Servomotor controller:

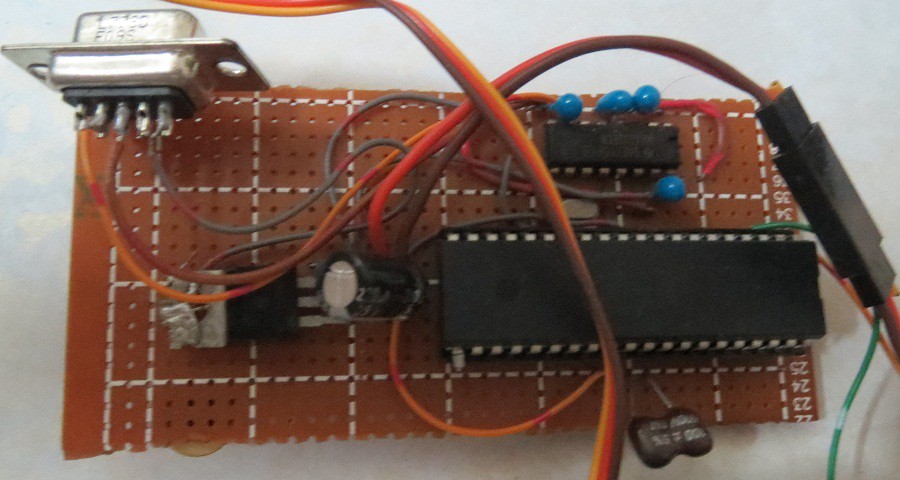
    Completely custom and hand soldered to perfboard. It's based on the common ATMega16 MCU, because I can buy that here and it's quite powerful, and adding a MAX232 makes serial communications trivial:

    Right now the firmware works, but only handles 2 servomotor control lines. It could handle way more (and motors and sensors/lasers), but there's no point in coding that now because I'm not sure what I'll add or to what MCU pins.

    Firmware is coded in assembly: What is power without control?

    An Arduino would work at extra cost and you can probably copy paste something from somewhere... What is power or control without understanding?

    I've provided the working firmware (Github) with commented code, but I'll devote a nice long post to explaining it section by section.

    Processing:

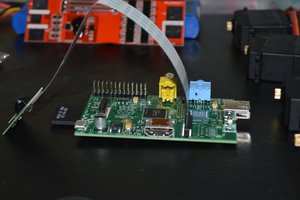
    I chose the beaglebone black because it runs ubuntu/debian headless well, and has more processing power than a raspberry pi. I felt this was worth the small difference in price.

    The raspberry pi is a great machine and it would also work well for this application. If you already have one, go ahead and use it instead.

    Control:

    At first this will be just web2py accessing the ...

    Read more »

  • Cheap tricks

    Legionlabs08/16/2014 at 11:03 0 comments

    On Bolts:

    You know what's good for bolting stuff together? Bolts. 1cm diameter steel bolts, lots of them. 

    The chassis design is simple: Two carbon fiber plates with 8 evenly-ish spaced matching holes in each. They are connected with 1cm wide steel bolts, with nuts acting as a sort of spacer to hold the plates apart. 

    It's stable enough that I could stand on it and jump up and down without any fear of damaging it.

    On Boxes:

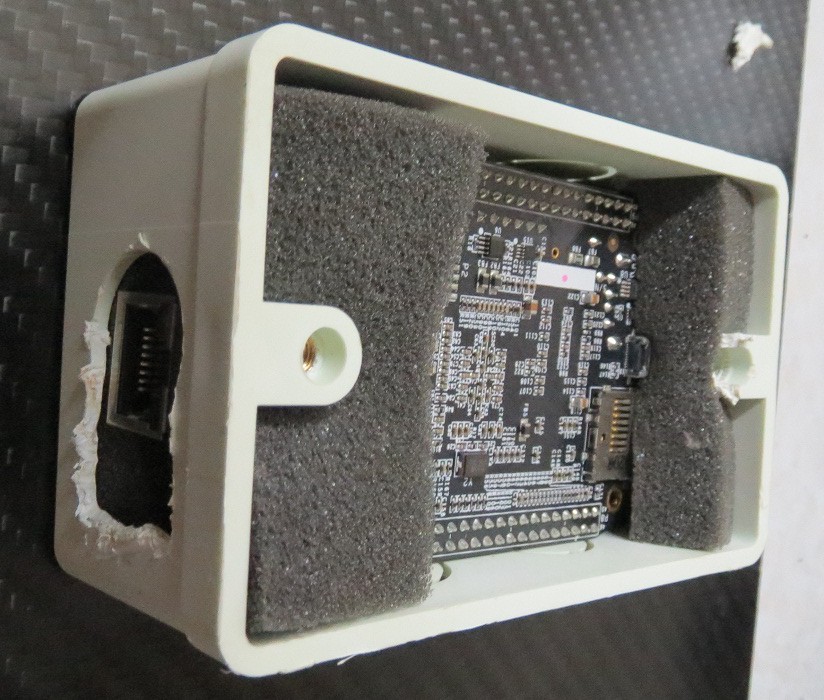
    The Beaglebone black happens to fit nicely inside a plastic lightswitch box. The holes in the box line up reasonably well with the power input, the ethernet and usb ports (a little cutting required). This keeps and stray wire from... interacting... with the most expensive component. Not shown is that there is in fact some space left free underneath for thermal reasons.

    On Wheels:

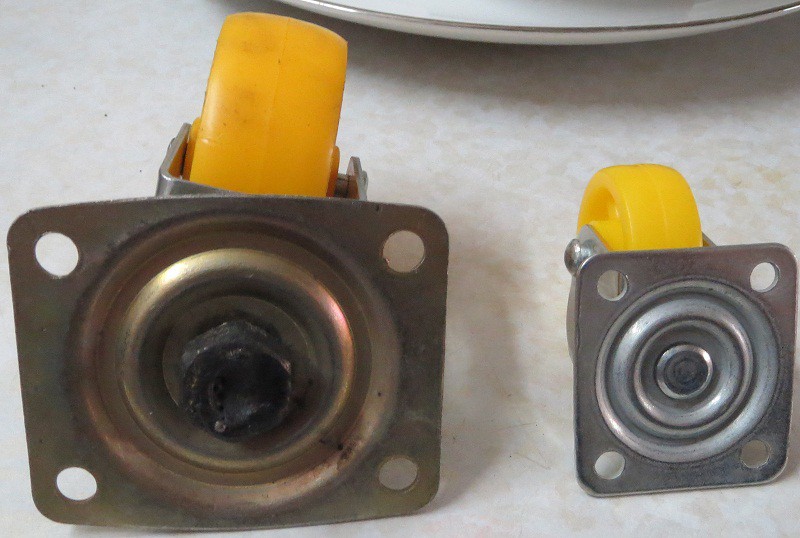
    Office chair wheels are pretty great. The have a mounting bracket, if used right this keeps your steering servo happy. They turn on an axis. Heck, the ones I found even have ball bearings!

    The only problems are, too many of the parts turn freely relative to each other and it's hard to mount it to a servo.

    If you want torque applied through the top to actually turn the wheel, you need to apply cyanoacylate then 2-part epoxy glue to some parts of the mechanism. They have a wide surface area in contact, so this works reasonably well.

    The more difficult problem is attaching a cheap servo to it to turn the wheel, steering the robot. I tried arc/spot-welding a bolt to the top of the piece, which I could then cut to fit a servo horn. This was quite solid and worked for a while, but damage to the ball bearings from the welding heat made the part unreliable.

    Careful welding should still work, but finally 2-part epoxy can just glue that cut bolt into place... although a better solution is proper rack-pinion steering.

    A final note on this: sanding the wheels a bit and applying a thin coat of silicone (the cheap tube of rubbery sealant stuff) should improve traction.

  • Cutting Carbon Fiber

    Legionlabs08/16/2014 at 10:18 0 comments

    Cutting carbon fiber was an adventure. I expected it to be easy: walk down to the CNC shop (there's one on almost every street here), tell them to cut it like steel, give them a proper diagram, wave my hands around a lot, and end up with something cut to specifications.

    The second issue arose in that I couldn't convince anyone it wasn't plastic, so everyone wanted to laser-cut it. After trying a few places, I gave in and said they could try (we were semi-outdoors), but warned them it would smell awful and probably not work. It smelt awful and could only make a tiny scratch in the carbon fiber plate after several passes.

    Luckily, a friendly stranger hanging around offered to cut it after he heard it was for a robot, he had some power tools at home. We went with him, and after being unable to scratch it, he asked:

    "What is this, bulletproof?"

    I started working that out (it's probably not, it's too brittle), but he got the point and took out the tools to cut metal. After that, things went relatively smoothly, although he cut his foot on a stray piece of plastic (not seriously). 

    He absolutely refused to accept any payment, he was just happy to help. I took his name card to put on the robot, the least I could do is try to advertise his shop, since I'll hopefully be showing the robot to people around here who like building things.

    Finally, the hole for the steering servo was the wrong shape. I didn't have an actual file, so I took a long steel bolt and used that to file it down. It took ages and I don't recommend it at all, but it worked.

    I learned my lessons from all this: All future versions will be made from glass fiber board (copper clad unetched circuit board). Also I should put some money aside to buy some simple power tools, maybe next Tet.

View all 4 project logs

Enjoy this project?

Share

Discussions

Similar Projects

Does this project spark your interest?

Become a member to follow this project and never miss any updates