Today was a good day. After realizing that rewriting lost instructions makes no sense at all since I should be able to create a proper wizard for machine calibration in the same time, I did just that.
With grblController you now can
- Mill double sided PCBs without any hassle
- Calibrate / mill down your X-Axis Alignment Fence to be 100% parallel to your X-Axis
- Perform the X-Axis calibration for milling the bottom side of a PCB
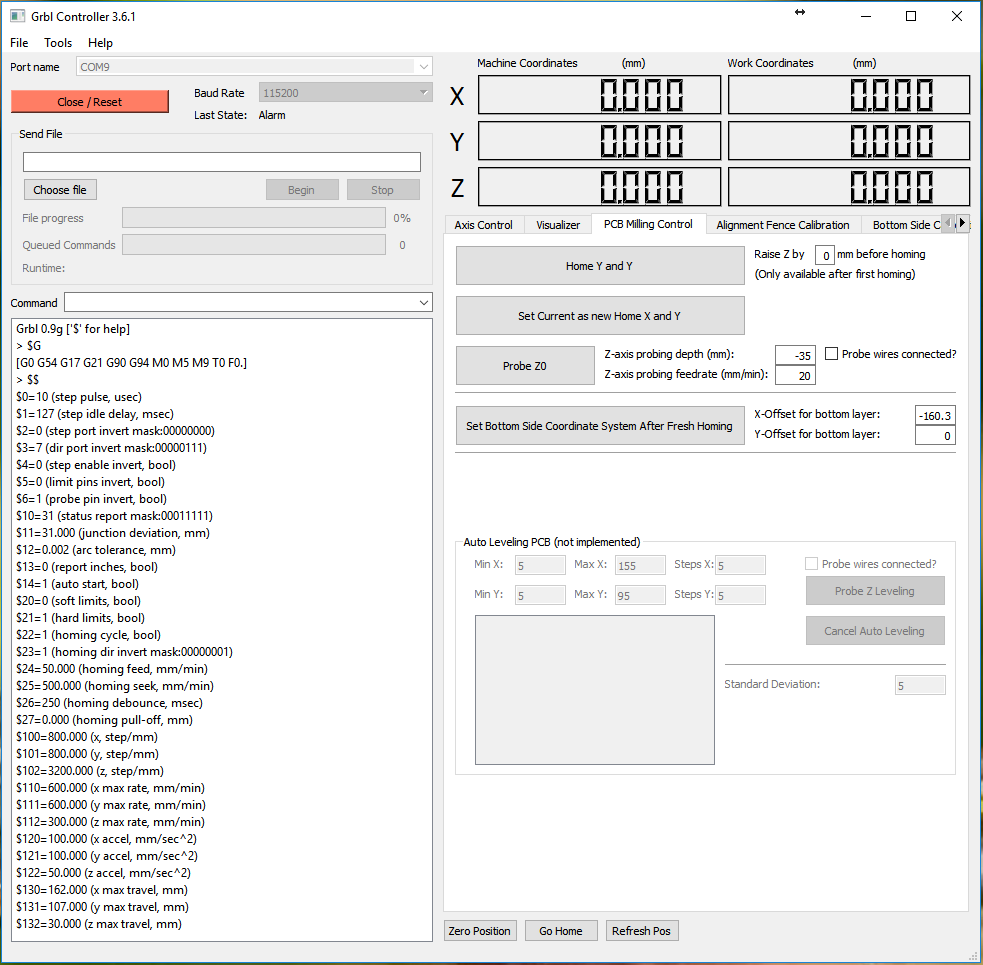
Since my goal is to make everything as simple as possible to the user, I created a step by step instruction set on new tabs in grblController:
Above you see the options you have available for PCB milling. I think, this should give you all the tools that you might need to mill your double sided PCBs. But since you need to calibrate your fresh machine first, I added the calibration tabs.
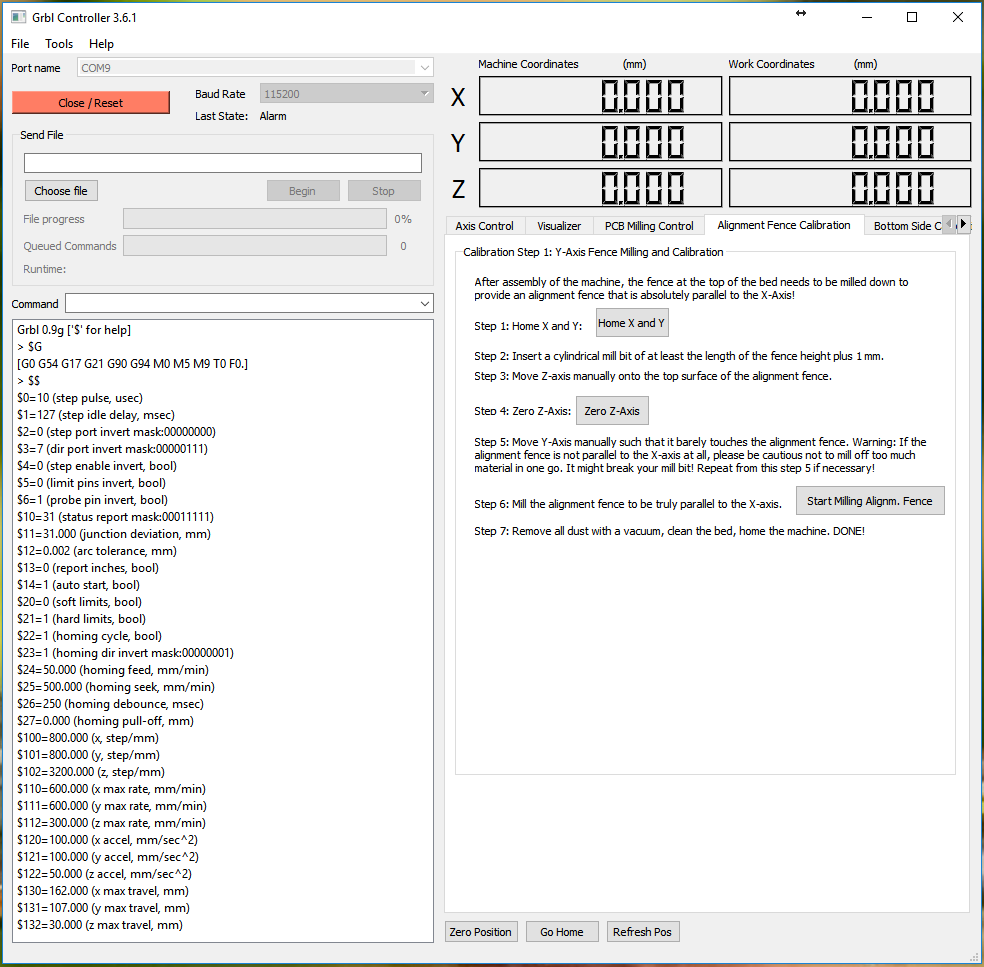
This tab provides you with step by step instructions to properly mill down your X-Axis alignment fence. Please use one of these mill bits to mill the fence down and to make it absolutely parallel with your mills X-axis.
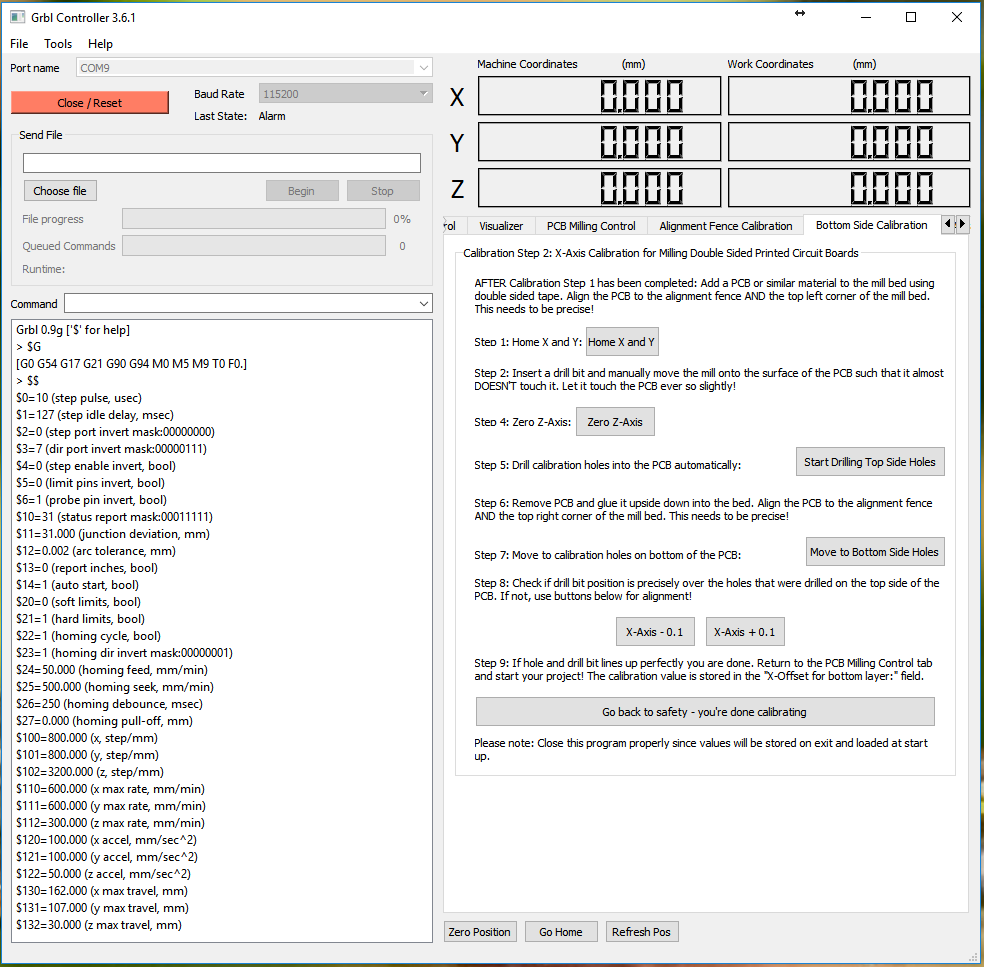
The bottom side is a bit more interesting, even though it will take much less time to get right. Just follow the instructions and you will end up with a perfectly calibrated machine.
One add-on I'm thinking about is storing the actual negative space coordinate system for milling the bottom side of the PCB into the grbl controller itself and not the software. It could be beneficial if you plan on moving the mill to another place and use it with different computers from time to time. But for now, I think it's fine that the settings are stored properly and platform independent on one computer.
 Timo Birnschein


Discussions
Become a Hackaday.io Member
Create an account to leave a comment. Already have an account? Log In.