Close
0%
0%

Connected Health: Open source IoT patient monitor

This project describes the use of Raspberry Pi as an IoT connected vital signs monitor. The HealthyPi HAT for Raspberry Pi used.

Similar projects worth following
Basic vital sign monitors are seldom low-cost and reliable at the same time, which limits their use usually to most medical facilities in developed countries. Also, these have limited connectivity, portability and interoperability with other platforms, services and analytics software. We developed the HealthyPi HAT for the Raspberry Pi as a way of opening up the healthcare and open source medical to anyone. The HealthyPi is made of the same "medical-grade" components found in regular vital sign monitors, for a fraction of the cost of such system. This is our way of democratizing medical hardware to develop new areas of research. Our objective when we began developing the HealthyPi was to make a simple vital sign monitoring system which is simple, affordable, open-source (important !) and accessible. For the sake of reproducibility, the entire PCB design is only 2-layers and can be opened/edited in the free version of Eagle. The BOM count also has been intentionally kept low

Why?

Why would you want to put vital sign and health data on the cloud? The simple answer is for the sake of analytics and collecting large amounts of data.

  • Early warning systems:

    Prevention is better than cure. This is best applied for the human health. By collecting data for "high-risk" patients inside or outside a healthcare facility (by outside we mean home-based healthcare), eventualities can be prevented. An Early Warning Score (EWS) is a way of assessing the health of a patient to some extent. This is possible by analyzing a large amount of historical data and use machine learning to "learn" from the data for predictive analysis.
  • Telemedicine:

    Telemedicine means a lot of things, but the most common interpretation is the diagnosis of patient health from a healthcare professional in a remote location. This especially is true of developing countries where healthcare is limited only to big cities and towns and inaccessible to remote areas.

Besides these, there are numerous other applications where cloud-based systems could be beneficial, ranging from automated analysis of huge data sets (such as Holter recording).

In these situations, it would be easier to move all the heavy lift computation to the cloud instead of performing everything on the node (which is the whole point of IoT).

How and What?

The Raspberry Pi 3 is an interesting device for such an application because it is:

  • It is an actual computer that is easy-to-use and easy to run any pre-processing and decision making that may be required on the side of the data source.
  • Affordable, at approximately $30 all over the world, it is definitely one of the most widely accepted, affordable computers.
  • Accessible: The Raspberry Pi 3 is the most widely used single board computer with a wide variety of support available. You can get a Raspberry Pi easily from any corner of the globe.

Given all these factors, the Raspberry Pi was the most obvious choice for developing our platform upon. This also fitted in with our objective of making something that is simple, affordable and accessible

The most important part of the whole development is that HealthyPi is completely open-source, both Hardware and Software alike. All our code and hardware schematics are available on our Github repo (https://github.com/Protocentral/protocentral-healthypi-v3).

What's to be done?

  • Regulatory compliance and certifications
  • Mass production would help in bringing down the costs even further
  • Needs to reach the rural population 

We are NOT trying to compete with the huge medical monitors corporations, but our reasoning behind the product is that for places that don't have anything at all, this would fit in perfectly. Also, compared to low-cost, off-brand patient monitors, HealthyPi uses "medical-grade" components, and most importantly is open source so that one can verify the quality of the data if required.

Business Plan - HealthyPi.pdf

HealthyPi Business Plan for Hackaday Best Product Prize 2017

Adobe Portable Document Format - 2.60 MB - 07/24/2017 at 10:55

Preview

pc_rpi_healthypi_v3.sch

Schematics

sch - 1.76 MB - 06/21/2017 at 09:03

Download

pc_rpi_healthypi_v3.brd

Schematics

brd - 534.40 kB - 06/21/2017 at 09:03

Download

pc_rpi_healthypi_v3.pdf

Schematics

Adobe Portable Document Format - 163.28 kB - 06/21/2017 at 09:03

Preview

View all 9 components

  • HealthyPi 5 is available for Pre-order !

    Ashwin K Whitchurch05/01/2023 at 05:08 0 comments

    Our HealthyPi 5 campaign on Crowd Supply is now live at https://www.crowdsupply.com/protocentral/healthypi-5

  • HealthyPi 5 is coming !

    Ashwin K Whitchurch02/12/2023 at 03:45 0 comments

    We released HealthyPi 4 on Crowd Supply in 2019-2020 and we have a great campaign. However, during the pandemic induced chaos that was going on, we faced major supply chain issues for critical components of our design. We started working on an alternate design with mostly discrete components for things such as power management ICs and specific TI chips that were in short supply. 

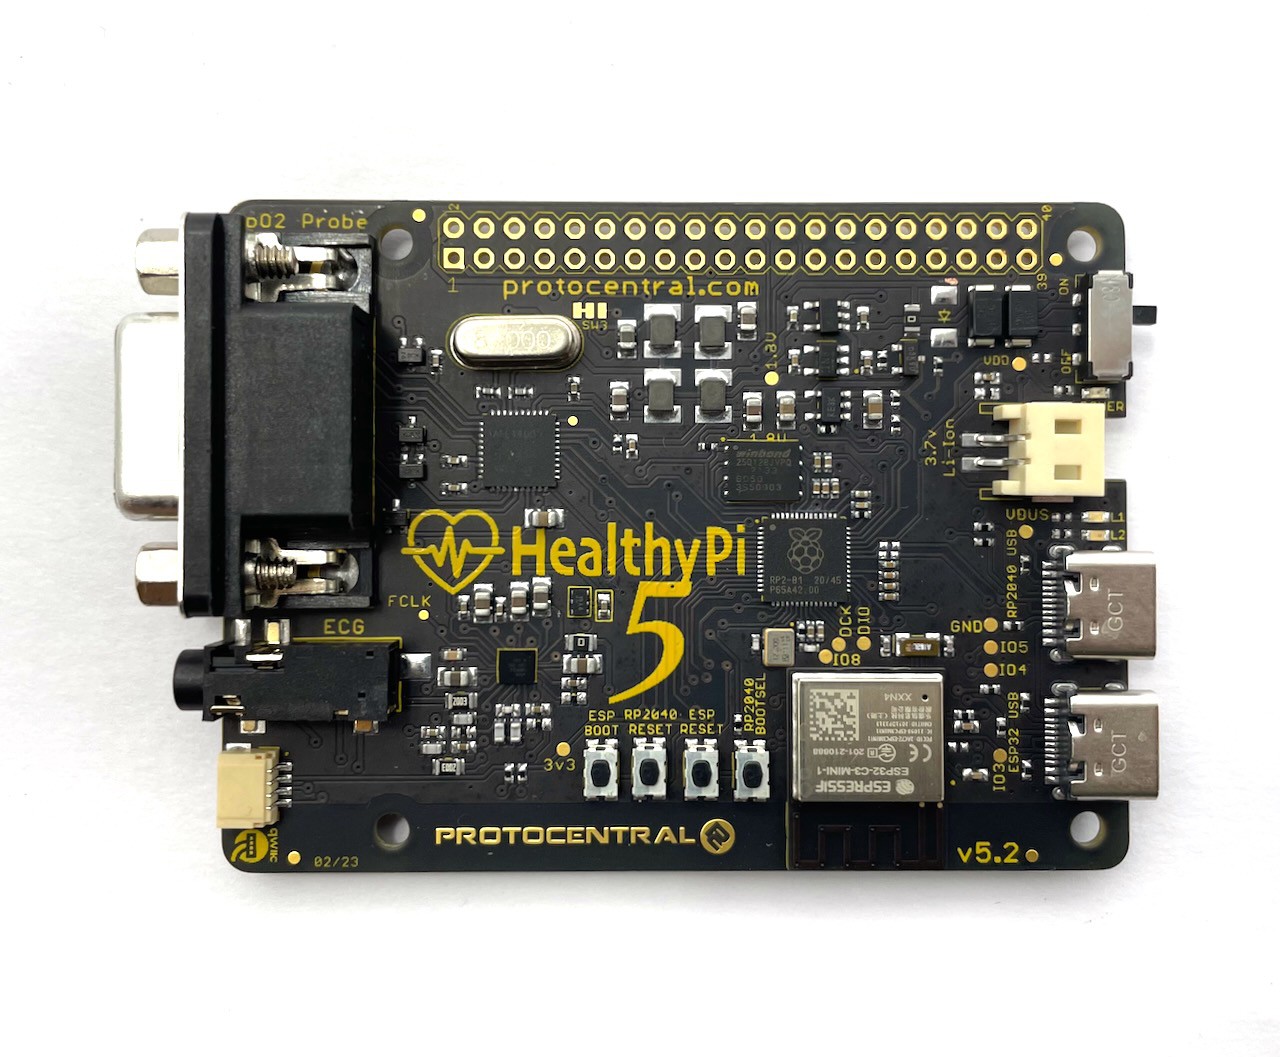
    We then decided to the change the entire design while we're at it and thus was born HealthyPi 5. Here is where it will be launched on Crowd Supply (sign up for updates if you wish to know when the campaign in live).  The new specs of the HealthyPi:

    • RP2040 main microcontroller
    • ESP32C3 RISC-V module with BLE and Wi-Fi support
    • MAX30001 analog front end for ECG and respiration measurement
    • AFE4400 analog front end for PPG
    • MAX30205 temperature sensor via onboard Qwiic/I²C connectors
    • 40-pin Raspberry Pi HAT connector (also used to connect our Display Add-On Module)
    • 1x USB Type-C connector for communication with a computer and programming the RP2040
    • 1x USB Type-C connector for programming and debugging the ESP32 module
    • Onboard MicroSD card slot
    • On-board Li-Ion battery management with charging through USB

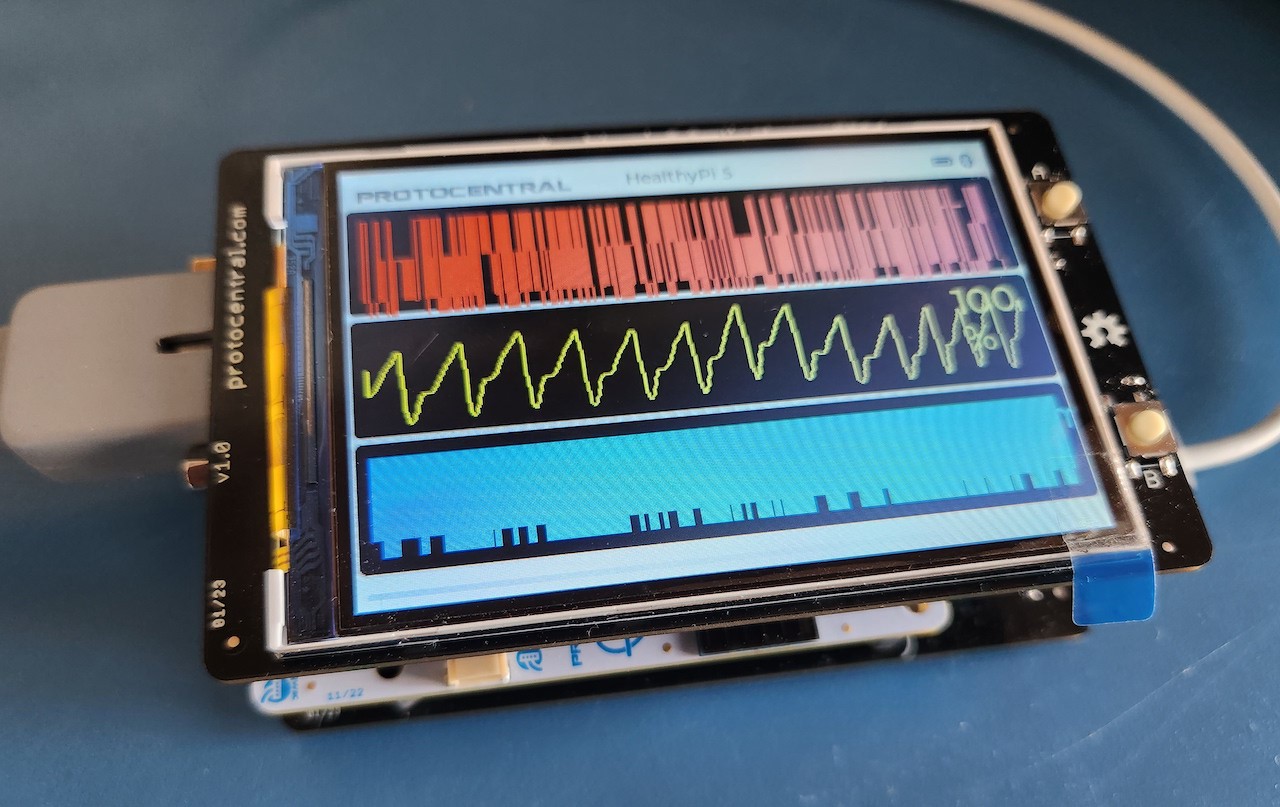
    We also now have a TFT display for the first time to preview signals and to use the device as a standalone data acquisition system, no need for a Raspberry Pi. We still kept the name HealthyPi since it is still compatible as a Raspberry Pi HAT and plus now also it also runs on a Raspberry Pi chip !

    Here is a photo of our current prototype of our display addon board and our "pro" carrier board. 

    Follow more development on Crowd Supply, we will keep posting updates here as well.

  • Introducing the HealthyPi v4

    Ashwin K Whitchurch09/24/2019 at 17:15 0 comments

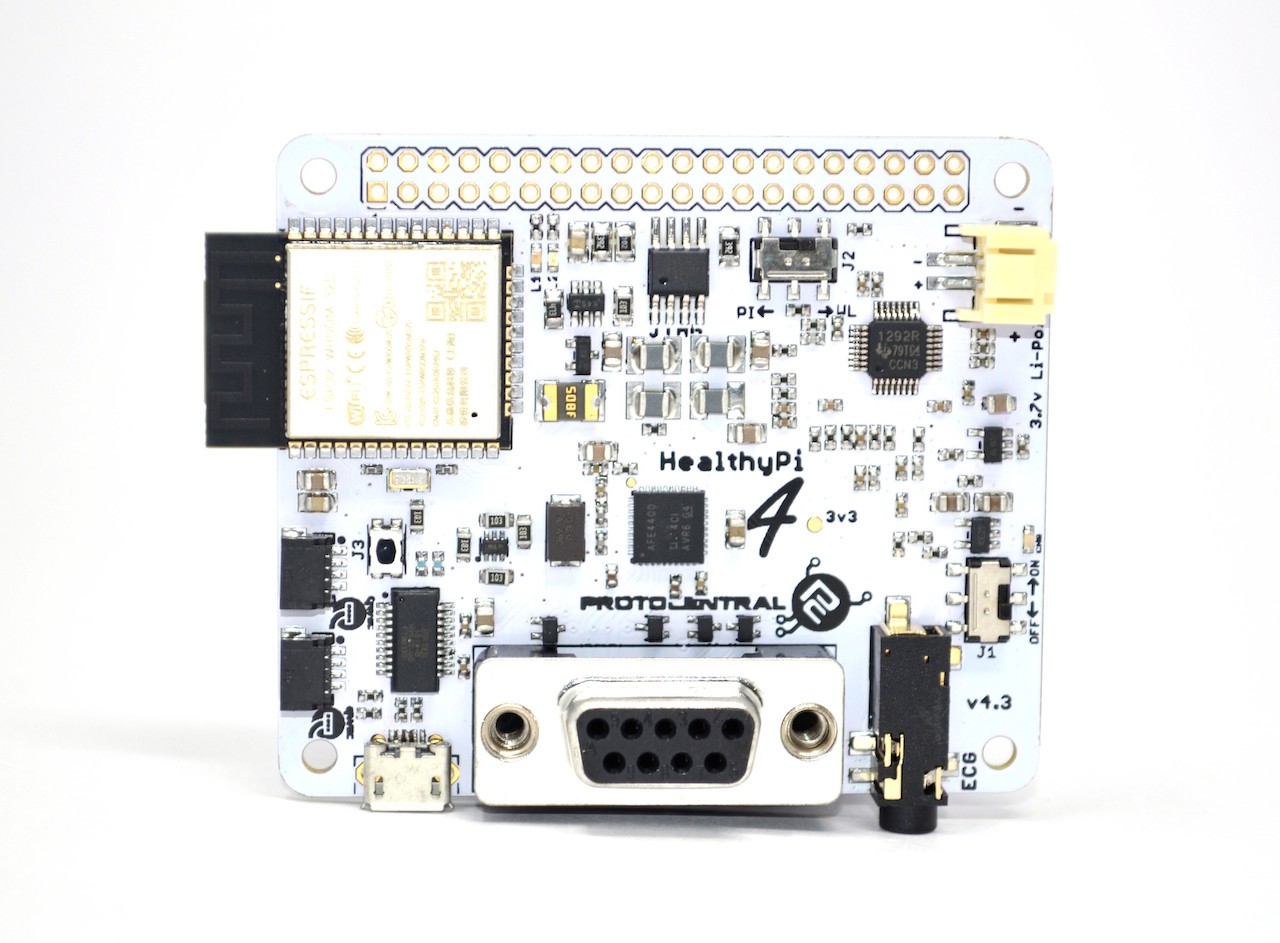
    We are excited to announce the launch of our crowd-funding campaign on Crowd Supply for the new HealthyPi v4. HealthyPi v4 brings together the best of HealthyPi v3 as well as HeartyPatch to create a fully open, wearable, vital signs monitoring development platform. Check it out on Crowd Supply now

  • HealthyPi 4 is getting ready to launch !

    Ashwin K Whitchurch07/09/2019 at 05:25 0 comments

    Thank you to all our supporters and contributors for making HealthyPi 3 a success, both as a a Hackaday prize winner as well as a successful campaign on Crowd Supply. 

    We are thrilled to announce the development of HealthyPi 4 - Unplugged, a dual-mode device that works in the same Pi HAT mode as well as in wireless "wearable" mode for standalone operation. 

    Watch out for updates on this page. You can sign up on our Crowd Supply page if you wish to be notified about the launch date.

    https://www.crowdsupply.com/protocentral/healthypi-v4-unplugged

  • HealthyPi will be at DEFCON 26

    Ashwin K Whitchurch08/10/2018 at 05:38 0 comments

    If you're at DEFCON 26 at Las Vegas this year, come check us out at the Demo Labs section at Caesar's Palace:

    Time: Saturday, August 11, 2018 at 2:00 PM to 3:50 PM

    Place: DC26 Demolabs area at Caesar's Palace, just outside the Palace ballroom where Track 1 is held

    For more details, check out the official DEFCON schedule: https://www.defcon.org/html/defcon-26/dc-26-demolabs.html

  • HealthyPi was at Maker Faire New York

    Ashwin K Whitchurch10/11/2017 at 03:50 0 comments

    We had a great time showing the HealthyPi at Maker Faire New York 2017. We had a lot of useful suggestions as well as use cases for medical education. Primarily, medical educators were interested in showing students how the devices they use actually work inside. 

    We had the ECG electrodes connected to copper rods so that people can try it out without having to stick electrodes. The ECG signal quality was surprising good even by holding the two rods, although respiration wasn't possible with hand-held electrodes.

  • New software updates

    Ashwin K Whitchurch08/03/2017 at 16:07 0 comments

    Check out our latest update to both the firmware as well as the GUI. Major improvements are:

    • ECG and Respiration signal filter performance improved
    • Respiration rate algorithm gives more accurate results
    • SpO2 calculation accuracy improved

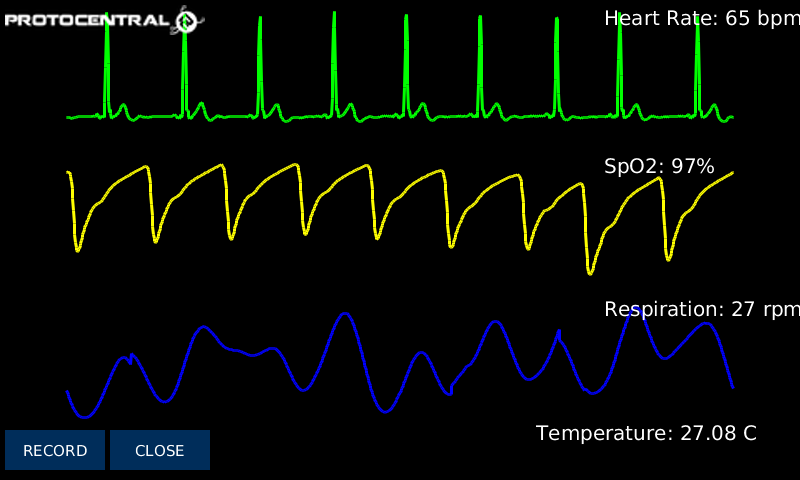
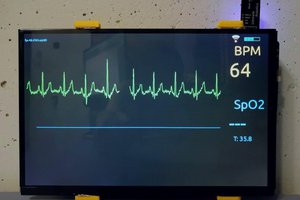
    As a result, you get nice looking signals, like the one in the below screen.

    For more details and to get the code, read the full update on Crowd Supply.

  • HealthyPi and Initial State

    Ashwin K Whitchurch07/07/2017 at 17:26 0 comments

    We liked Initial State as a great IoT platform that's easy to use and easy to configure. Check out a short video that we made for demonstrating use of the HealthyPi with Initial State.

    You can even embed a dashboard into a webpage, making it easy to share, like the one below.


  • A standalone wireless patient monitor

    Ashwin K Whitchurch06/28/2017 at 17:09 0 comments

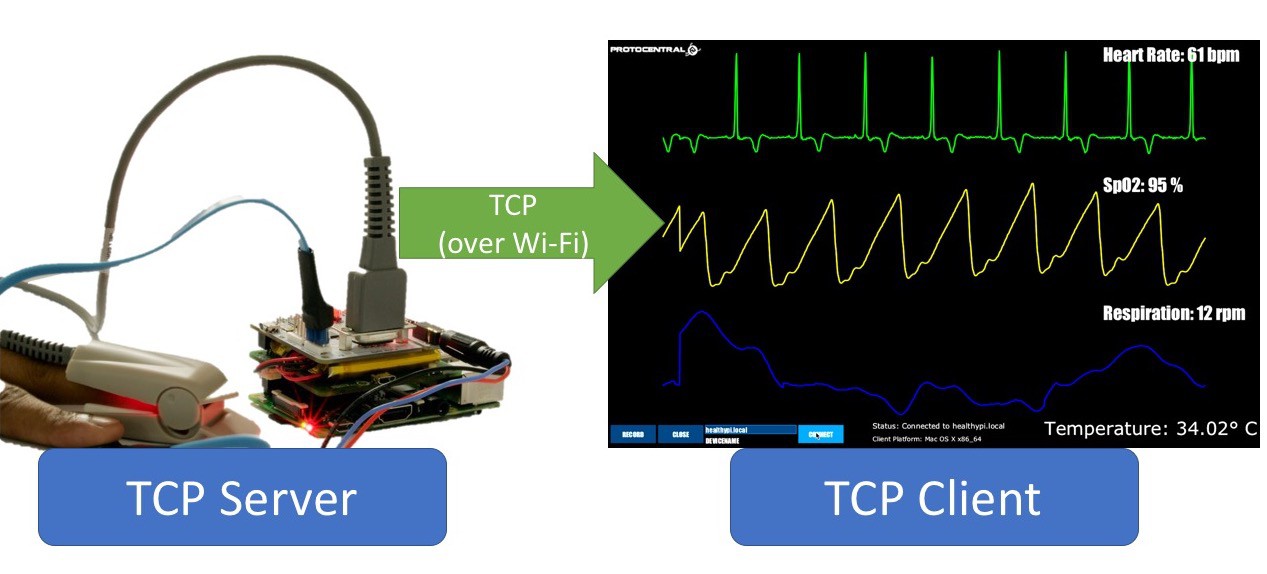
    We recently tried out the HealthyPi 3 with a Raspberry Pi 3 and a power source to create a truly wireless patient monitor. This can send the data continuously as a TCP stream for real-time monitoring or just post only the calculated values to a remote or IoT platform.

    We even tried it out with a Raspberry Pi Zero to make a really small unit for wireless monitoring. Check out out crowd supply update where we have posted all the details:

    https://www.crowdsupply.com/protocentral/healthypi-v3/updates/healthypi-v3-with-raspberry-pi-3-pi-zero-as-a-wireless-standalone-monitor

    We will also add this code to our Github repo as soon as we get a chance to clean up the code.

  • The HealthyPi can also work with a PC

    Ashwin K Whitchurch06/24/2017 at 06:05 0 comments

    Did you know that the HealthyPi board can be used by itself, without a Raspberry Pi? This allows for connection to a PC through USB. You can even use the UART pin on the header to directly connect to your own system or any other board. Beagleboard anyone??

    We'd love to see what other board or platform you can integrate HealthyPi with? For more information about this, check out our update on ourCrowd Supply campaign page.

    https://www.crowdsupply.com/protocentral/healthypi-v3/updates/using-healthypi-v3-in-usb-mode-with-a-pc

View all 12 project logs

  • 1
    Getting Started with the HealthyPi Complete Kit

    Plug in the HealthyPi HAT to the Raspberry Pi

    The HealthyPi is an add-on "HAT" board for the Raspberry Pi 3. It could also possibly be used with any other HAT compatible Raspberry Pi board, including a Raspberry Pi Zero. Connect the HealthyPi HAT to the main Raspberry Pi just snapping it on to the 40-pin header on the Pi.

    Check out the below video for complete instructions about assembling and getting the HealthyPi up and running.

  • 2
    Getting started with HealthyPi on your own Raspberry Pi

    If you have a Raspberry Pi setup already available, just follow the following steps on your Raspberry Pi. You will need a monitor and a keyboard/mouse and the Raspberry Pi should be running Raspbian before proceeding with HealthyPi installation. To find out how to install Raspbian check out this great tutorial on Raspberry Pi’s official site.

    The following video shows you how to connect the HealthyPi to a Raspberry Pi.

    After completing the steps shown in the video, open up the terminal window (Menu -> Accessories -> Terminal) on Raspbian running on your Raspberry Pi:

    Open the terminal

    In the terminal window, type the following lines.

    curl -sS http://pi.protocentral.com/hpi3.sh | sudo bash
    

    Follow the instructions shown carefully, this will download and install all that is required to get the HealthyPi running.

    It really is as simple as that. This code will install all the required overlays, configuration and application files to get the Healthy Pi up and running.

    After the script reboots your Raspberry Pi, you should be able to see the GUI display the sensor outputs in real-time on the screen.

    GUI in Processing

    This completes the install!

  • 3
    Getting started with the HealthyPi GUI on Windows, MacOS and Linux

    The HealthyPi board now streams the same data on the on-board USB port. This allows you to get the same data that goes to the Raspberry Pi, now on your desktop PC as well.

    Java 8 is required on all platforms for running the processing-based GUI application. You can download Java for your platform from the following link.

    https://java.com/en/download/

    Installing drivers (only for Windows)

    HealthyPi uses the same drivers as an Arduino Zero. Once plugged in to the USB port, the device would be recognized as an “Unknown Device”. You can locate the device is the Windows Device Manager and manually install the drivers provided in the “drivers” folder in the Windows Executable ZIP archive provided.

    MacOS and Linux do not need any drivers to be installed.

    Processing GUI Installation

    Download the zip file containing the executable files from the following links for 32-bit/64-bit Windows. If you do not know if you have a 64-bit or 32-bit computer, try with the 32-bit version.

    Download the latest release here

    Simply download the appropriate file for your operating system, unzip the contents and run the executable program contained in it. On desktop operating systems, you will have to choose the correct port name assigned to the HealthyPi by USB. Simply select the port from the dropdown on the top and port should be opened.

    Note: On MacOS, if you see an error saying “app is damaged”, please follow the steps given in https://support.apple.com/en-us/HT202491 .This is a known issue with Processing on MacOS.

View all 4 instructions

Enjoy this project?

Share

Discussions

dwasler wrote 11/09/2017 at 12:49 point

Can not add my name to follow this project! I'm using Chrome, any suggestions ? 

  Are you sure? yes | no

Transcendence wrote 08/03/2017 at 20:57 point

Amazing! good job man.

  Are you sure? yes | no

Similar Projects

Does this project spark your interest?

Become a member to follow this project and never miss any updates