Initially, I thought: OK, I'll hack that USB board together, wire up the keyboard, do some basic analysis and then write a project log. That's been some time ago and since the part after hacking the USB board together isn't that easy after all, I decided to split the log in two.
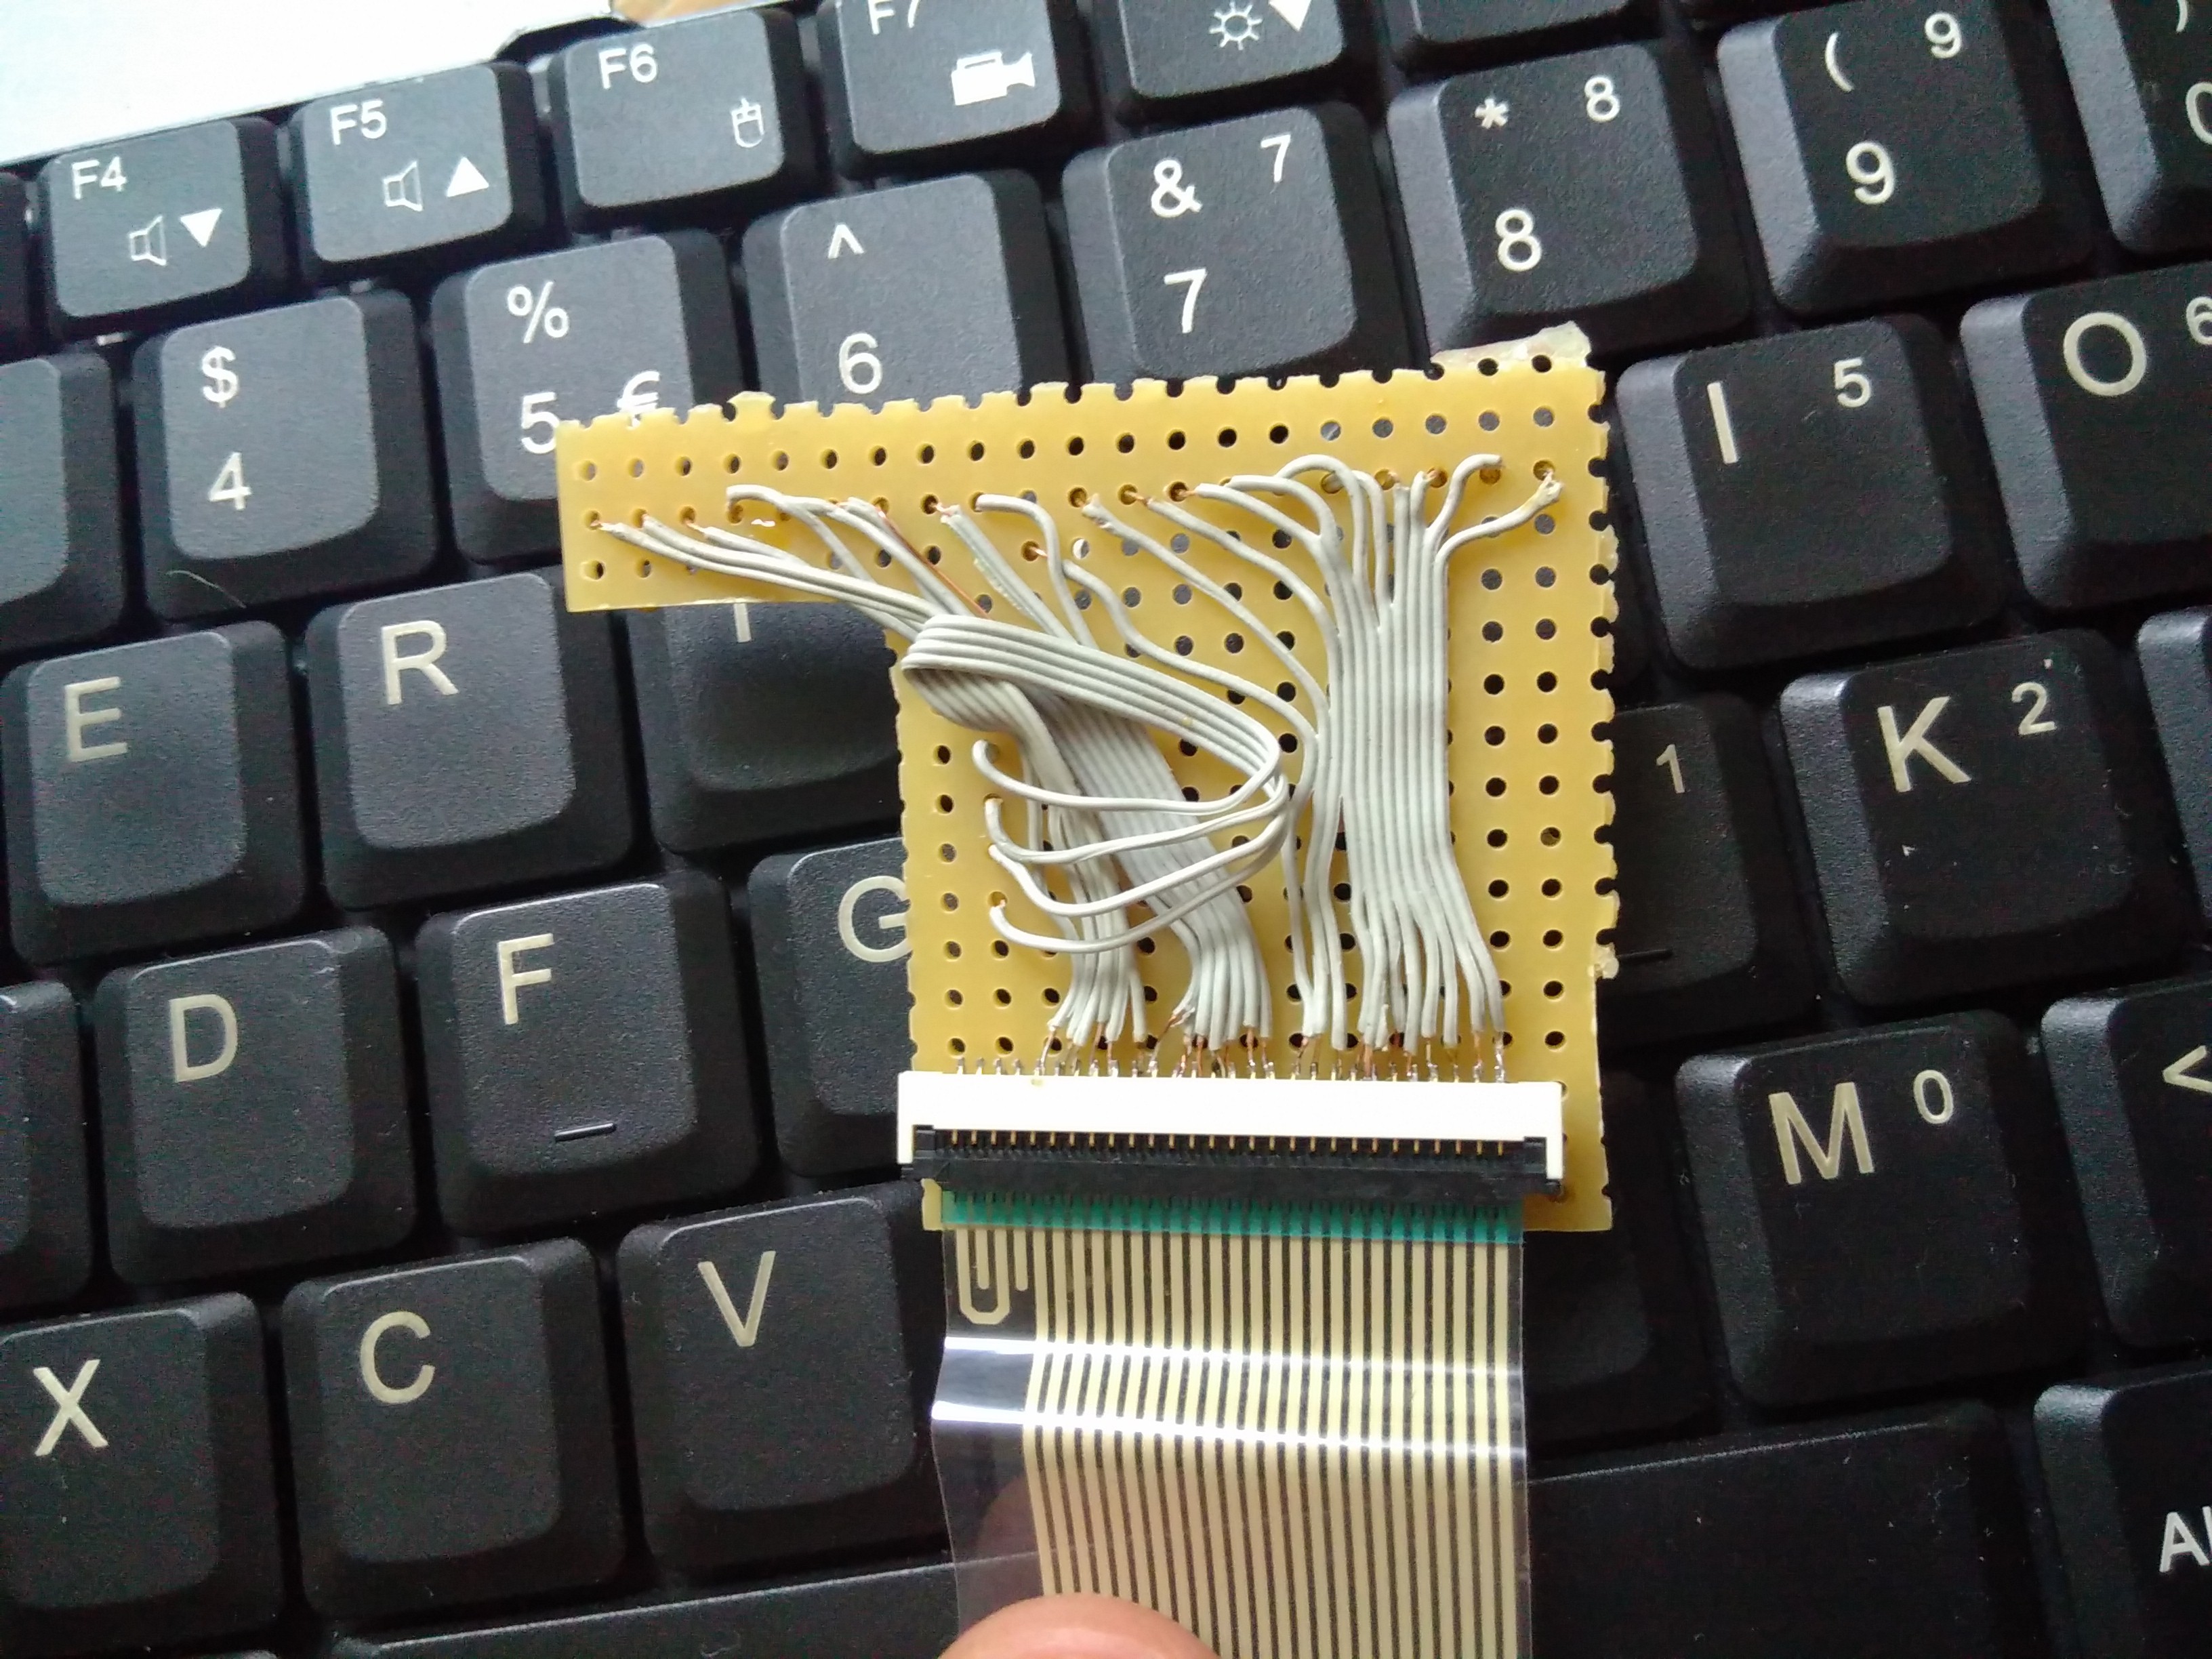
The adapter board, for a start, was a little more work than expected:

We have 11+13 wires, slightly separated at the location where they exit the keyboard. Which suggests that we have 11 columns and 13 rows. Makes... 143 keys! Nowhere near that amount of keys is found on the keyboard. And to make it more complicated, while measuring them it seems that among the 11 some are columns and some are rows.
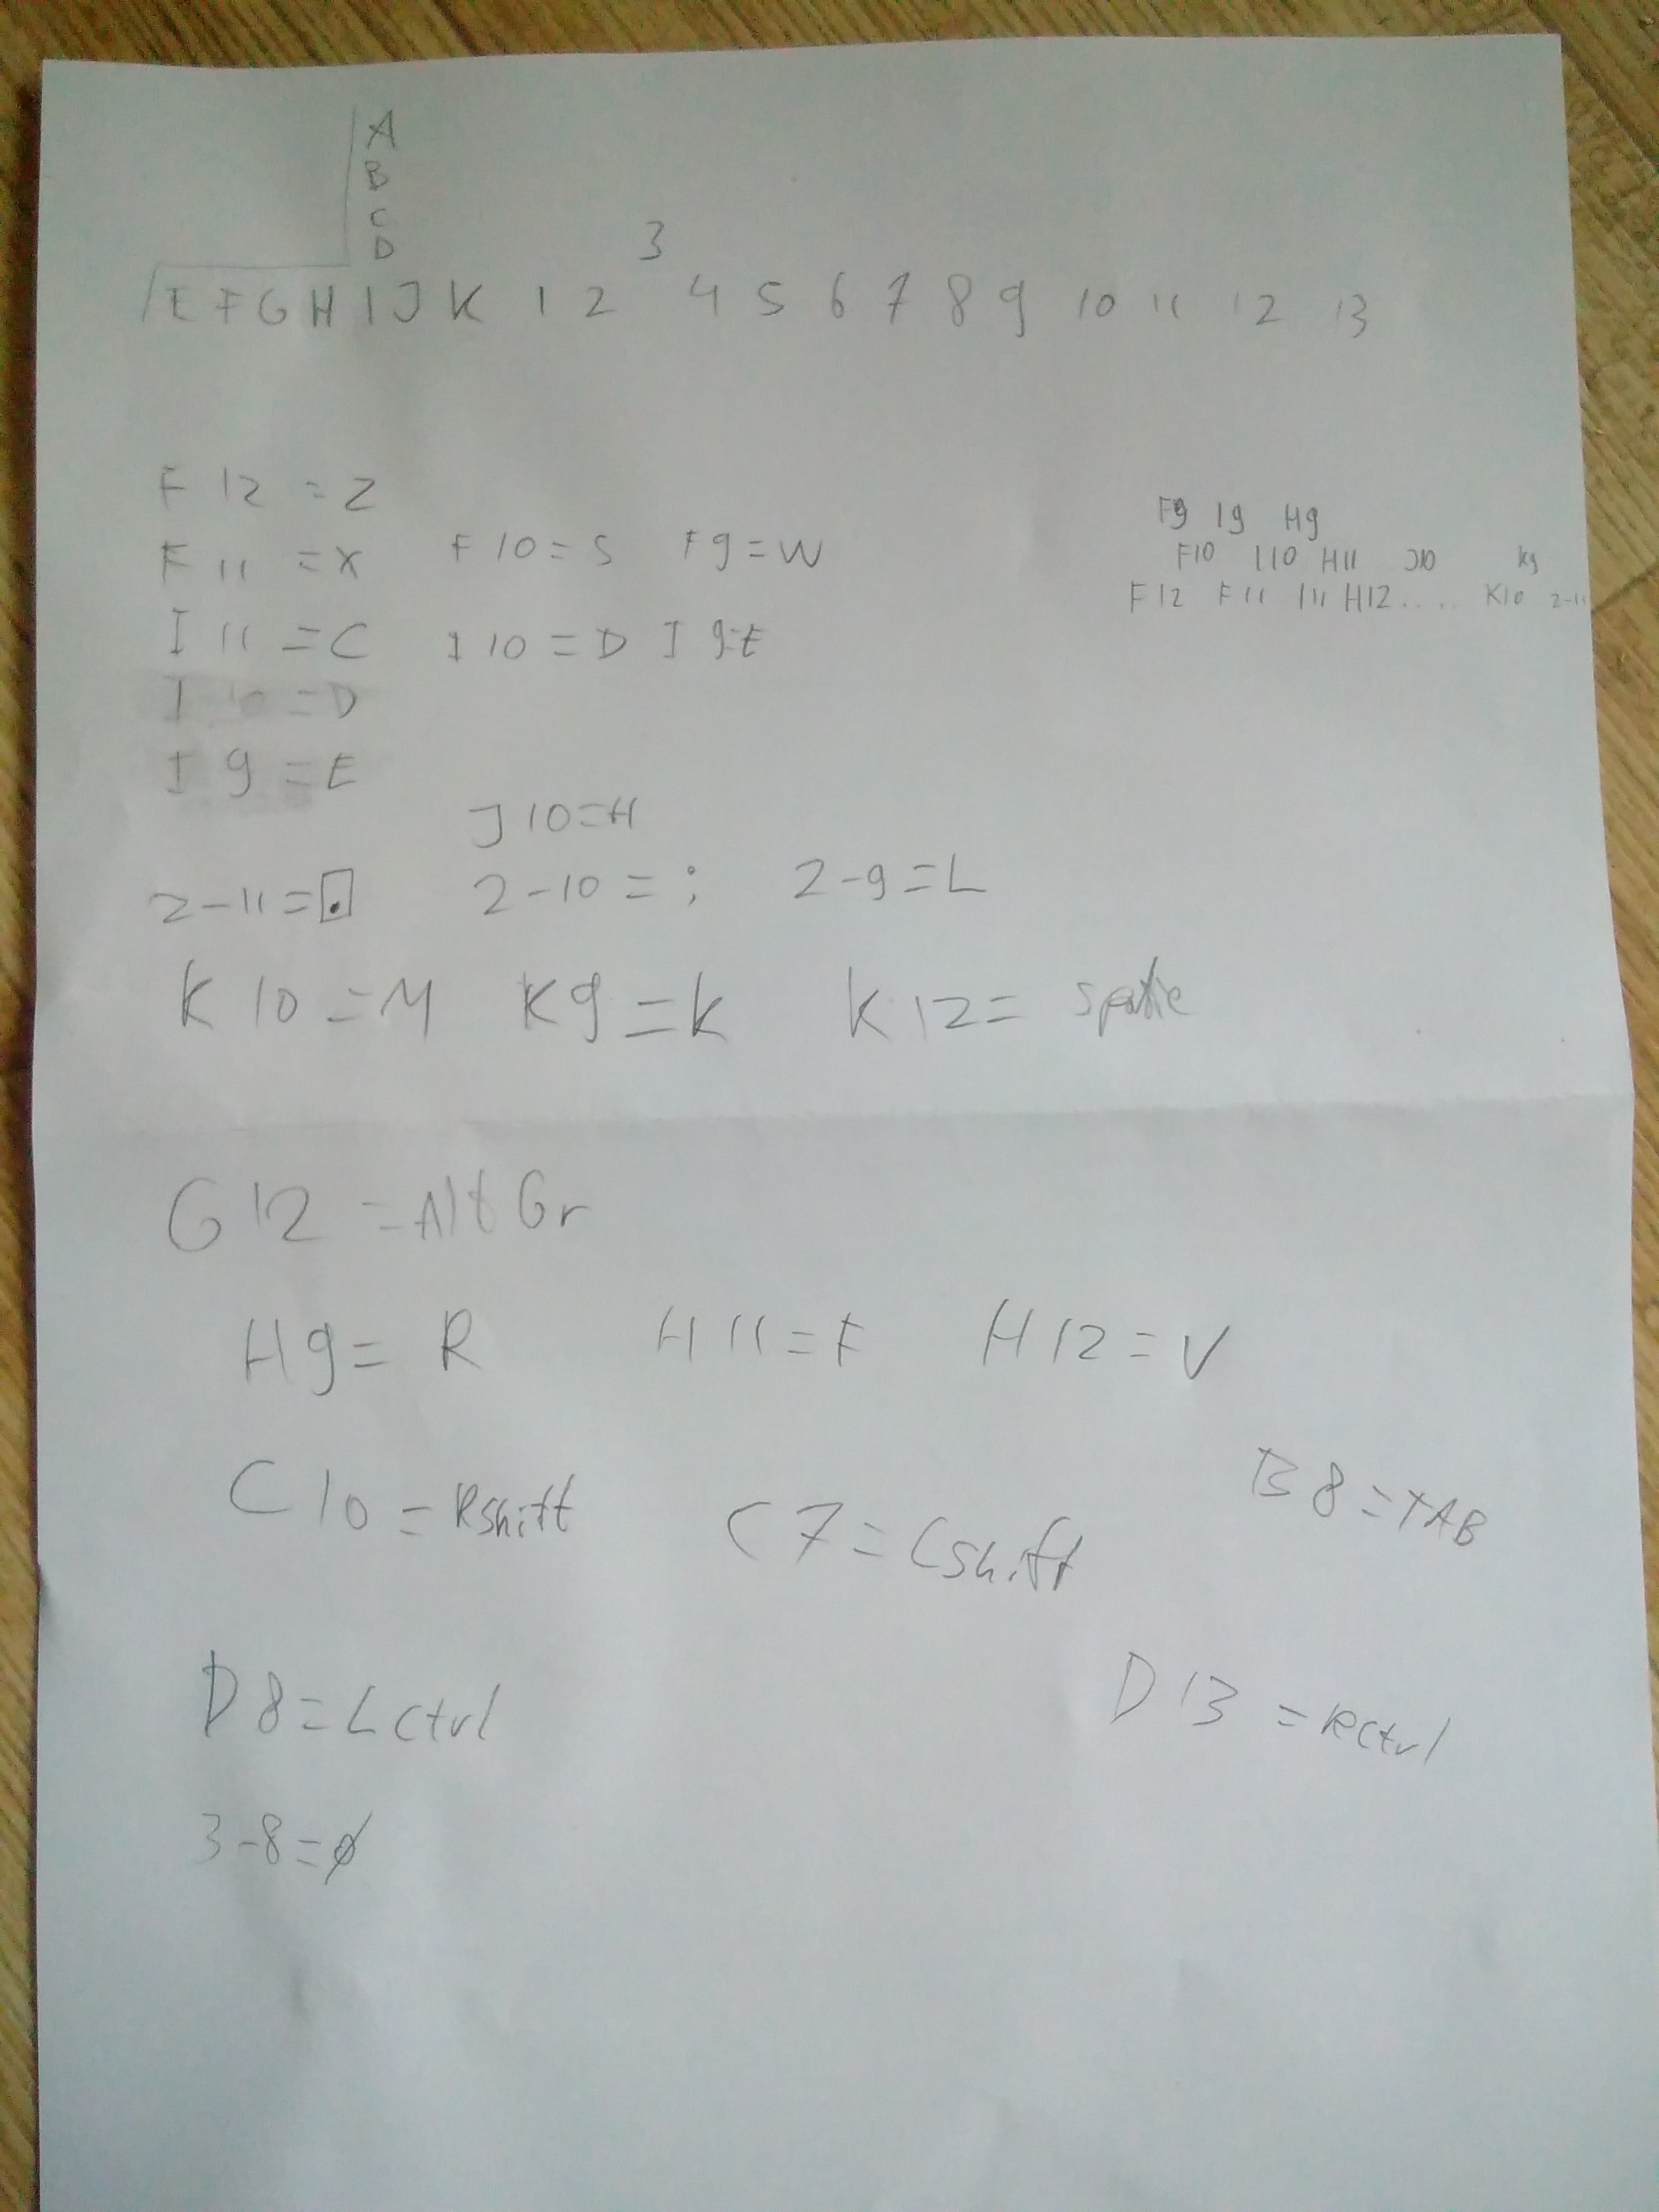
My analysis until now is this (A..K, 1..13 being the wires from the keyboard):

Initial conclusions:
- Most of the alphabetical keys are connected to the lines that I numbered 9-12.
- Some of the alphabetical keys I have not yet found (the QWERTY layout - apart from the Q which I didn't find yet - is in the top right corner as F10/F11/F12/I9/H9/etc.).
- It seems that special keys like Shift and Ctrl have dedicated rows just for themselves.
- I found the spacebar at K12! Which is very nice, itwouldbereallybadakeyboardifIwouldnothavefoundit.
- As you can see, the wires are very close together on the connector. Before I fixed a few loose wires, I did get measurements on column J for several keys. After fixing the loose wires, these measurements are gone for the exact same keys...
- A clip connector is very useful when you need three hands. However, it's not very reliable on single PCB contacts that are closer together than the width of the clip connector.
So, well, further work needs to be done...
Discussions
Become a Hackaday.io Member
Create an account to leave a comment. Already have an account? Log In.