Close
0%
0%

3D Printed Ergonomic & Friendly Asthma Inhaler

This simple 3D printed tool is an effective assistive solution to improve the usage of the inhaler devices by people suffering from asthma.

Similar projects worth following
This cool and simple 3D printed tool is an effective assistive solution to improve the usage of the inhaler devices by people suffering from asthma.
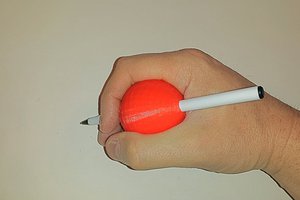
Most of the people have difficulties in managing their inhaler in the correct way and keeping it in a stable position while puffing it. The particular shape of this object lids to firmly push the canister without struggling. You can hold the inhaler better and adapt it to your more convenient handling. Because it easily rotates on top of the inhaler, it can be effectively used by both right-handed and left-handed people.
In addition, the smile face designed through the object provide a more friendly look, which makes the perception of the inhaler less sad and scary, especially in case of children or emotional people.
It normally works with all standard asthma inhalers (both the preventer and the reliever ones).

This 3D printed object is an assistive technology designed to make the asthma treatment more effective, convenient and friendly by improving the ergonomy of any standard asthma inhaler available on the market.

asthma_inhaler.stl

3D model (.stl) ready for 3D printing

Standard Tesselated Geometry - 1.21 MB - 08/28/2017 at 11:25

Download

  • 1 × 3D printer Any 3D printer is suitable to print this object.
  • 1 × 3D printer filament PLA or ABS are both OK for printing this object. Anyway, I suggest you to use a bright color to get a more friendly look.

  • 1
    ​Step 1 – Download the 3D model file​

    Just click on the following link and download the the .stl model file of the asthma inhaler:

    https://www.thingiverse.com/download:2658871

  • 2
    Step 2 – Open the stl file in your 3D slicer tool

    Open the downloaded .stl model file with your favourite slicer tool (i.e. Cura, KISSlicer, Repetier, Slic3r, etc.).

    The 3D printing slicer prepares the selected model for your 3D printer, generating g-code, which is a widely used numerical control programming language. There is a large number of slicing software, many of which is free. At the following link you can find a list of the top 3D printing slicer software tools:

    https://all3dp.com/1/best-3d-slicer-software-3d-printer/

  • 3
    Step 3 - Set the 3D printer parameters and generate the g-code

    Once you have opened the .stl model file with your slicer tool, set the 3D printer parameters as following:

    • Perimeters = 2
    • Solid top & bottom layers = 3
    • Layer Resolution = 0.25 mm
    • Layer Infill = 25 - 30%

    There are basically 2 ways to orientate the object to achieve an optimal printing:

    • 120 degrees rotation so that it lays on a side on the printing bed (see the attached picture of Cura);
    • bottom up so that it stands with the two small columns on the printing bed (see the attached picture of Cura).

    I've experimented both printing options and I got the best printing results implementing the rotation by 120 degrees.

    Then genetare the g-code file with the slicer tool and copy it to the SD card.

View all 5 instructions

Enjoy this project?

Share

Discussions

Similar Projects

Does this project spark your interest?

Become a member to follow this project and never miss any updates