 Jarrett
I also did this, like two months ago:
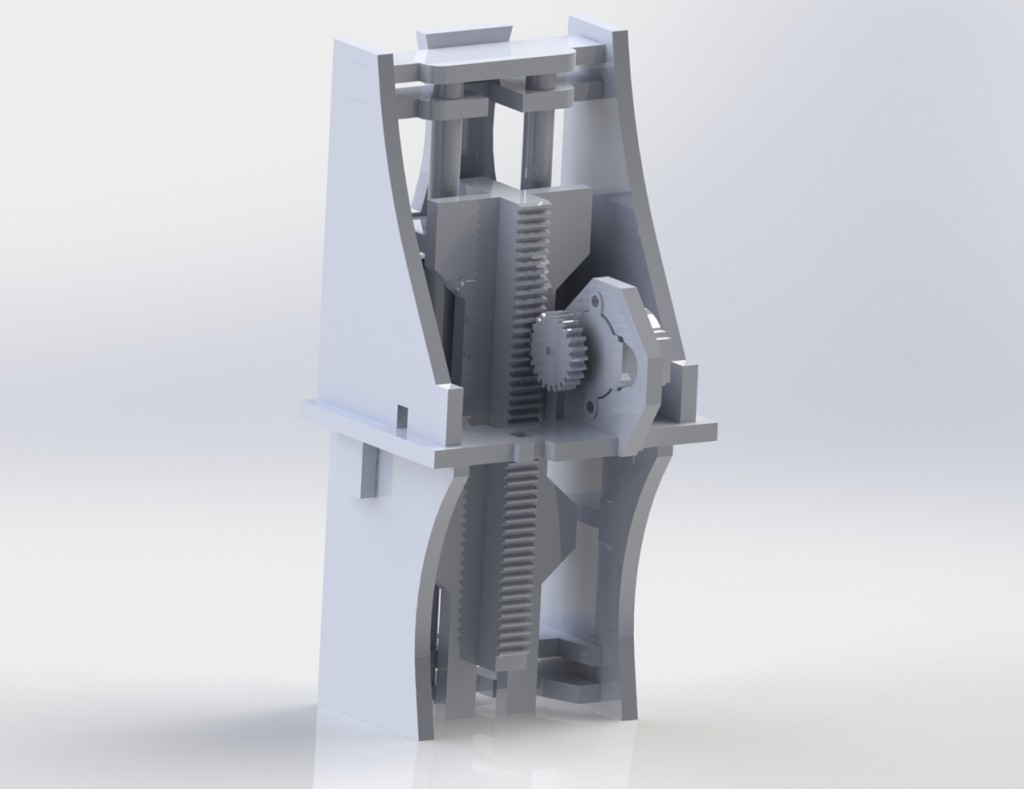
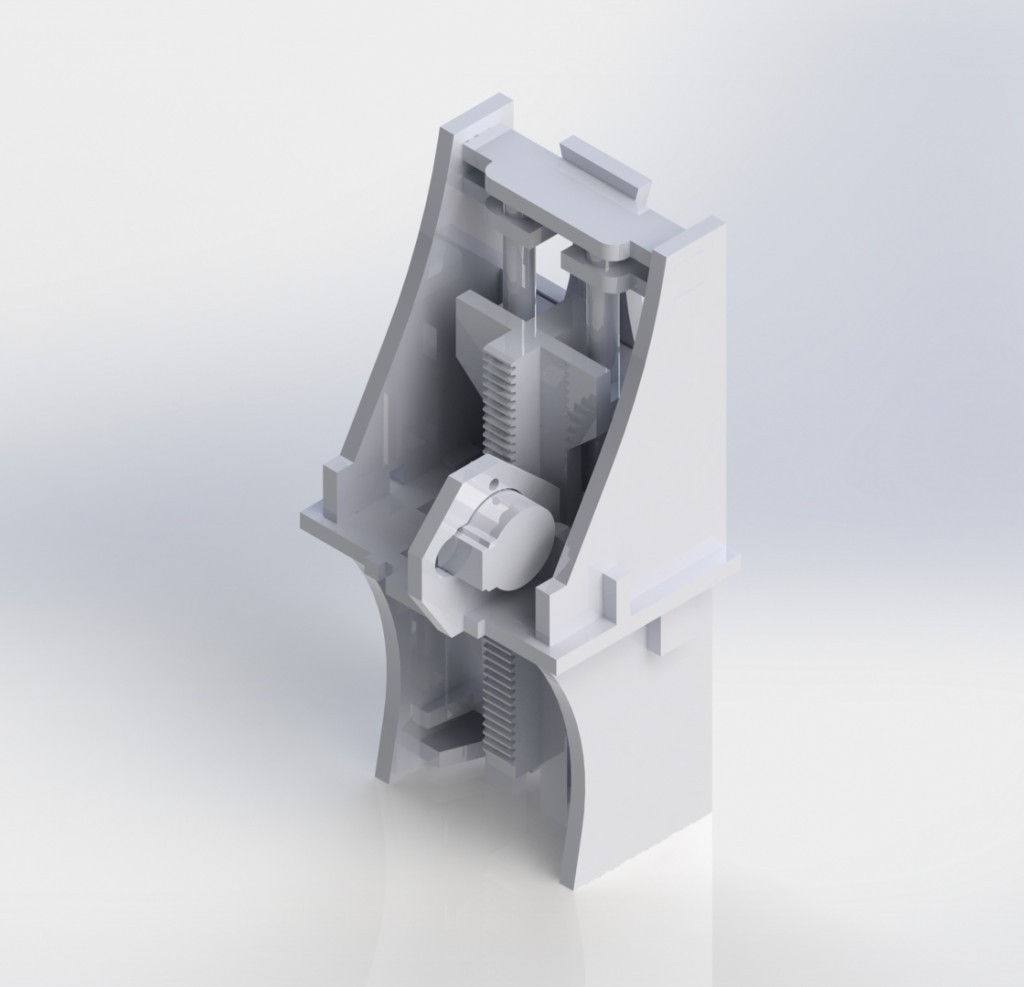
The idea behind this was a very cheap and quick Z-axis for controlling the spark. Basically when the electrodes get close enough with a high enough potential, then an arc gets created, ionizing the path between them. If you can get fine control of the up-down movement, then you can sustain this arc for a longer period of time, getting a better burn.
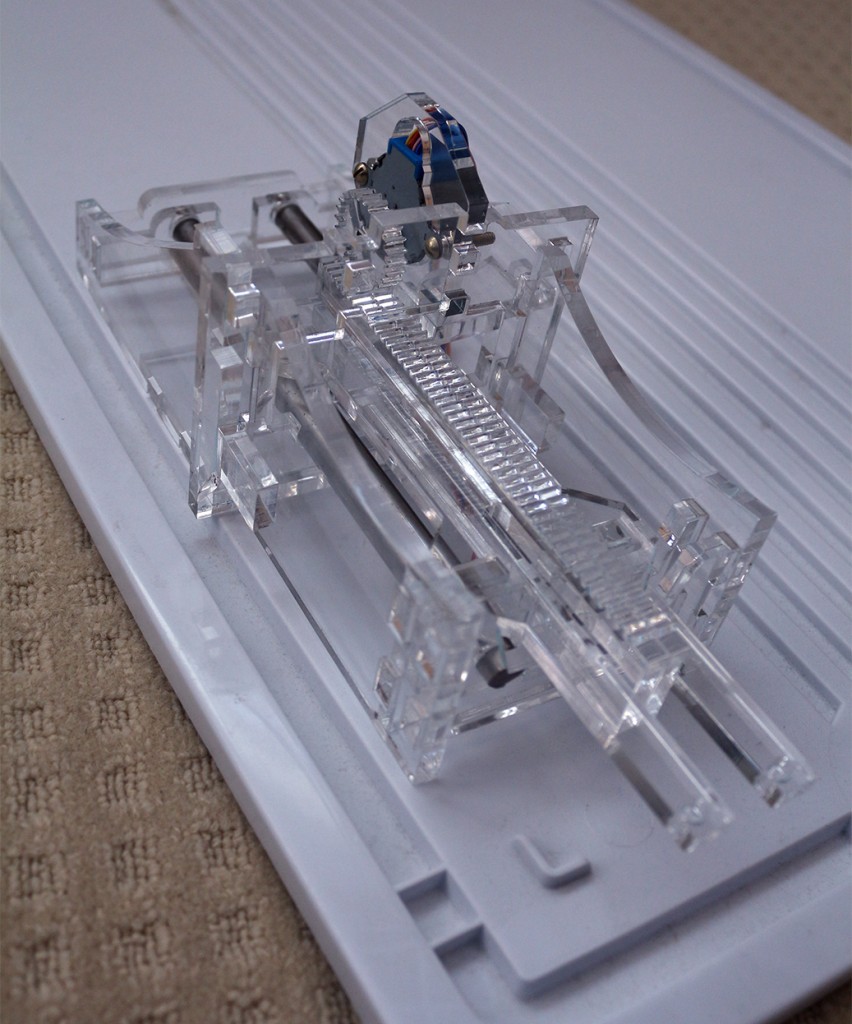
This took about 2 hours to mock up in SolidWorks, then 12ish to clean up and make sure it worked mechanically. 6 minutes to laser-cut out of 6mm acrylic, and then a couple hours to pressfit everything together.
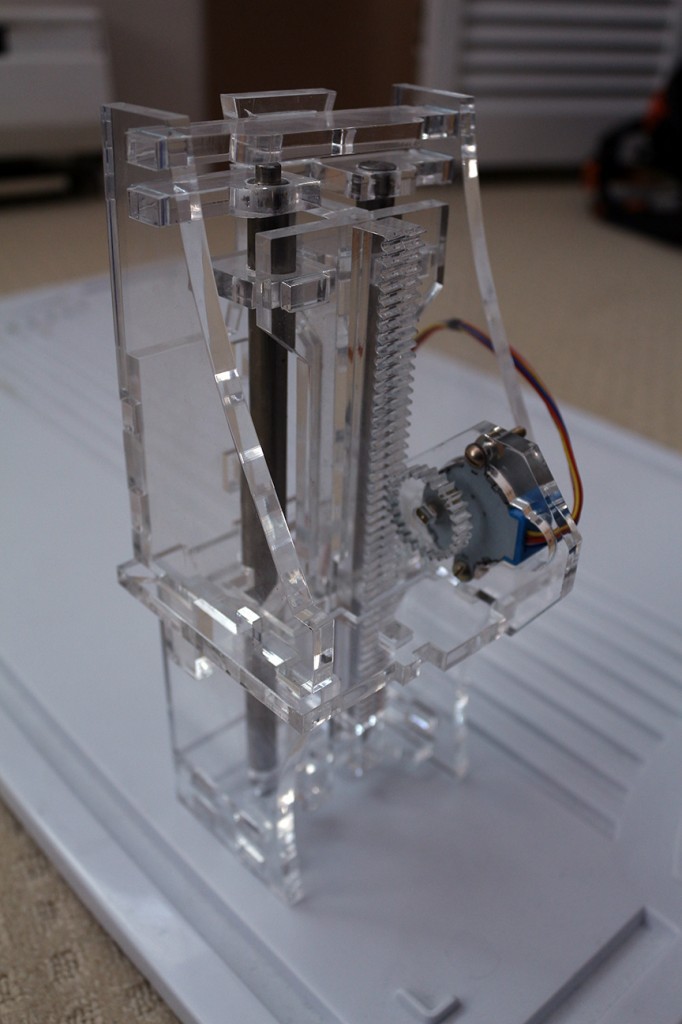
After building it, there are a couple problems. Next time I should do cutouts in my corners for laser cutting. The acrylic gets a little melty and it makes fitting pieces together a little challenging. That will also allow all of the tabs to fit in more thoroughly, helping the assembly keep in square and slide more smoothly.
I didn't use bushings on the linear rails. The rails came from a salvaged scanner, and I have the bushings, they're just encased in plastic and I haven't taken them out yet.
The backlash is also horrible with this design. I think that's going to have to change. Probably redesign at some point to use some threaded rod and homemade anti-backlash nuts.
Those motors are $2 eBay specials, but I made the mount for them reasonably modular to be swapped out with better ones.
Discussions
Become a Hackaday.io Member
Create an account to leave a comment. Already have an account? Log In.