Jerry Biehler
-
New Turbo Adapter and Re-evacuating the EDX Dewar
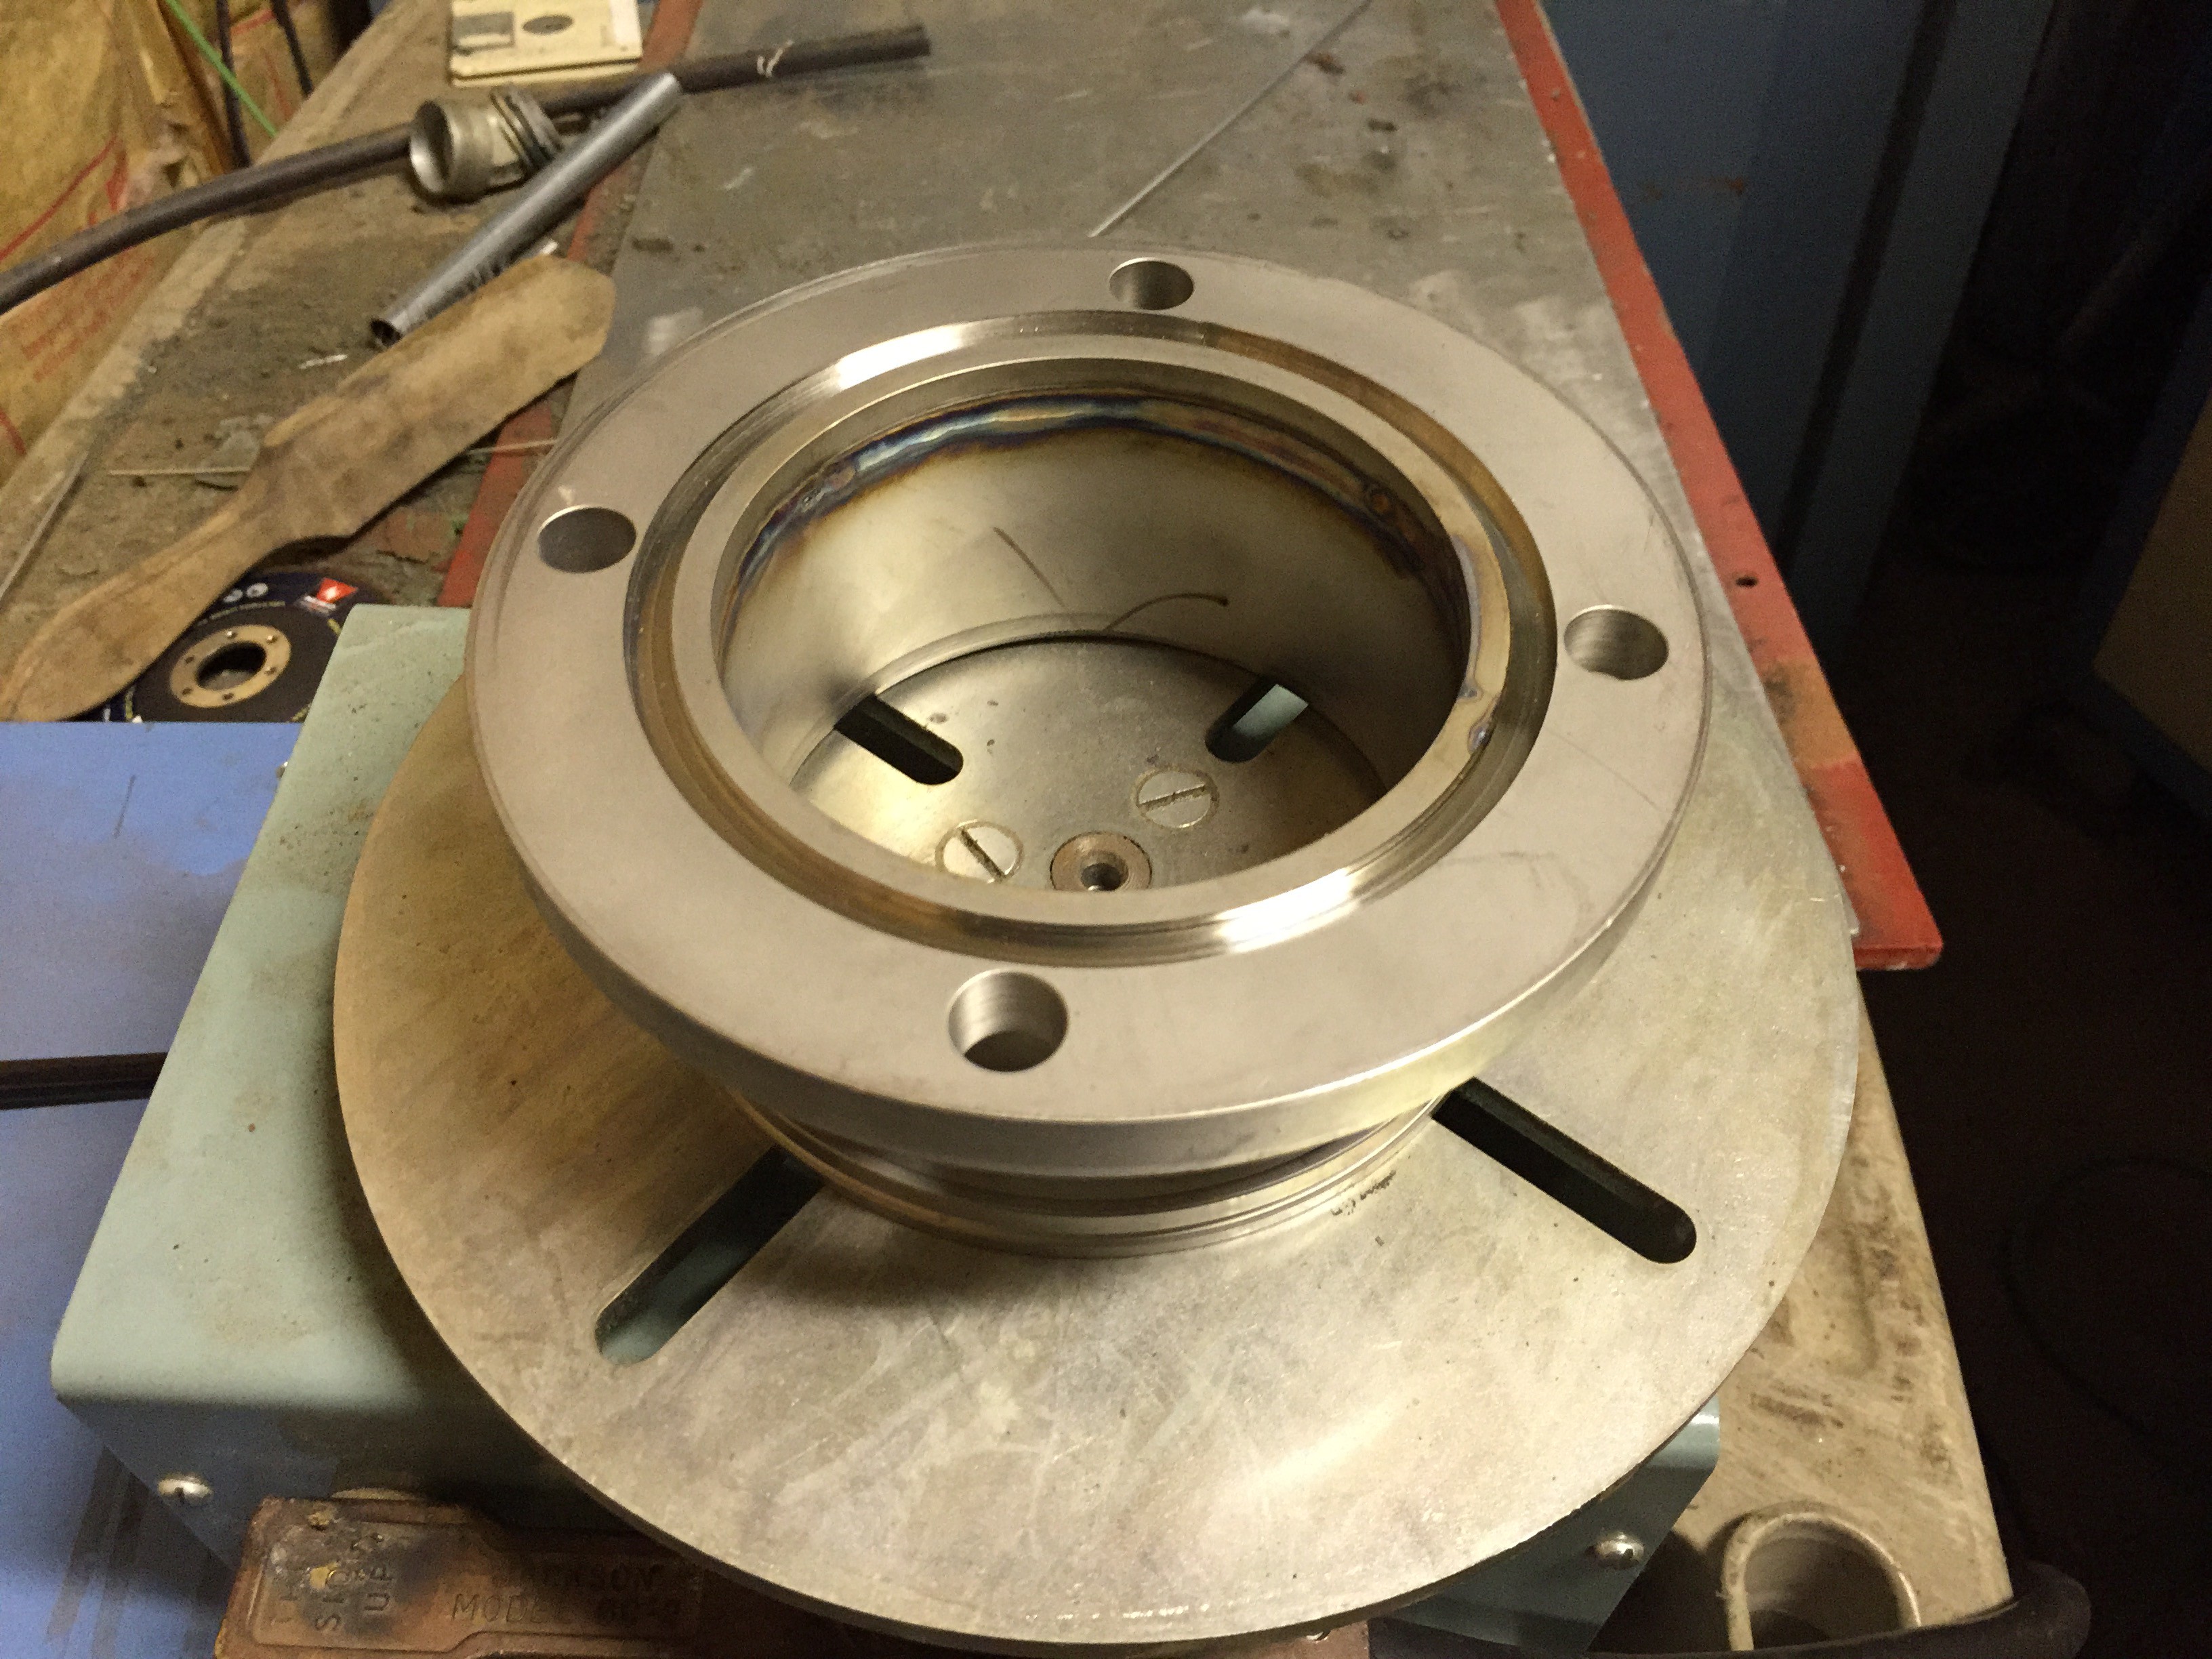
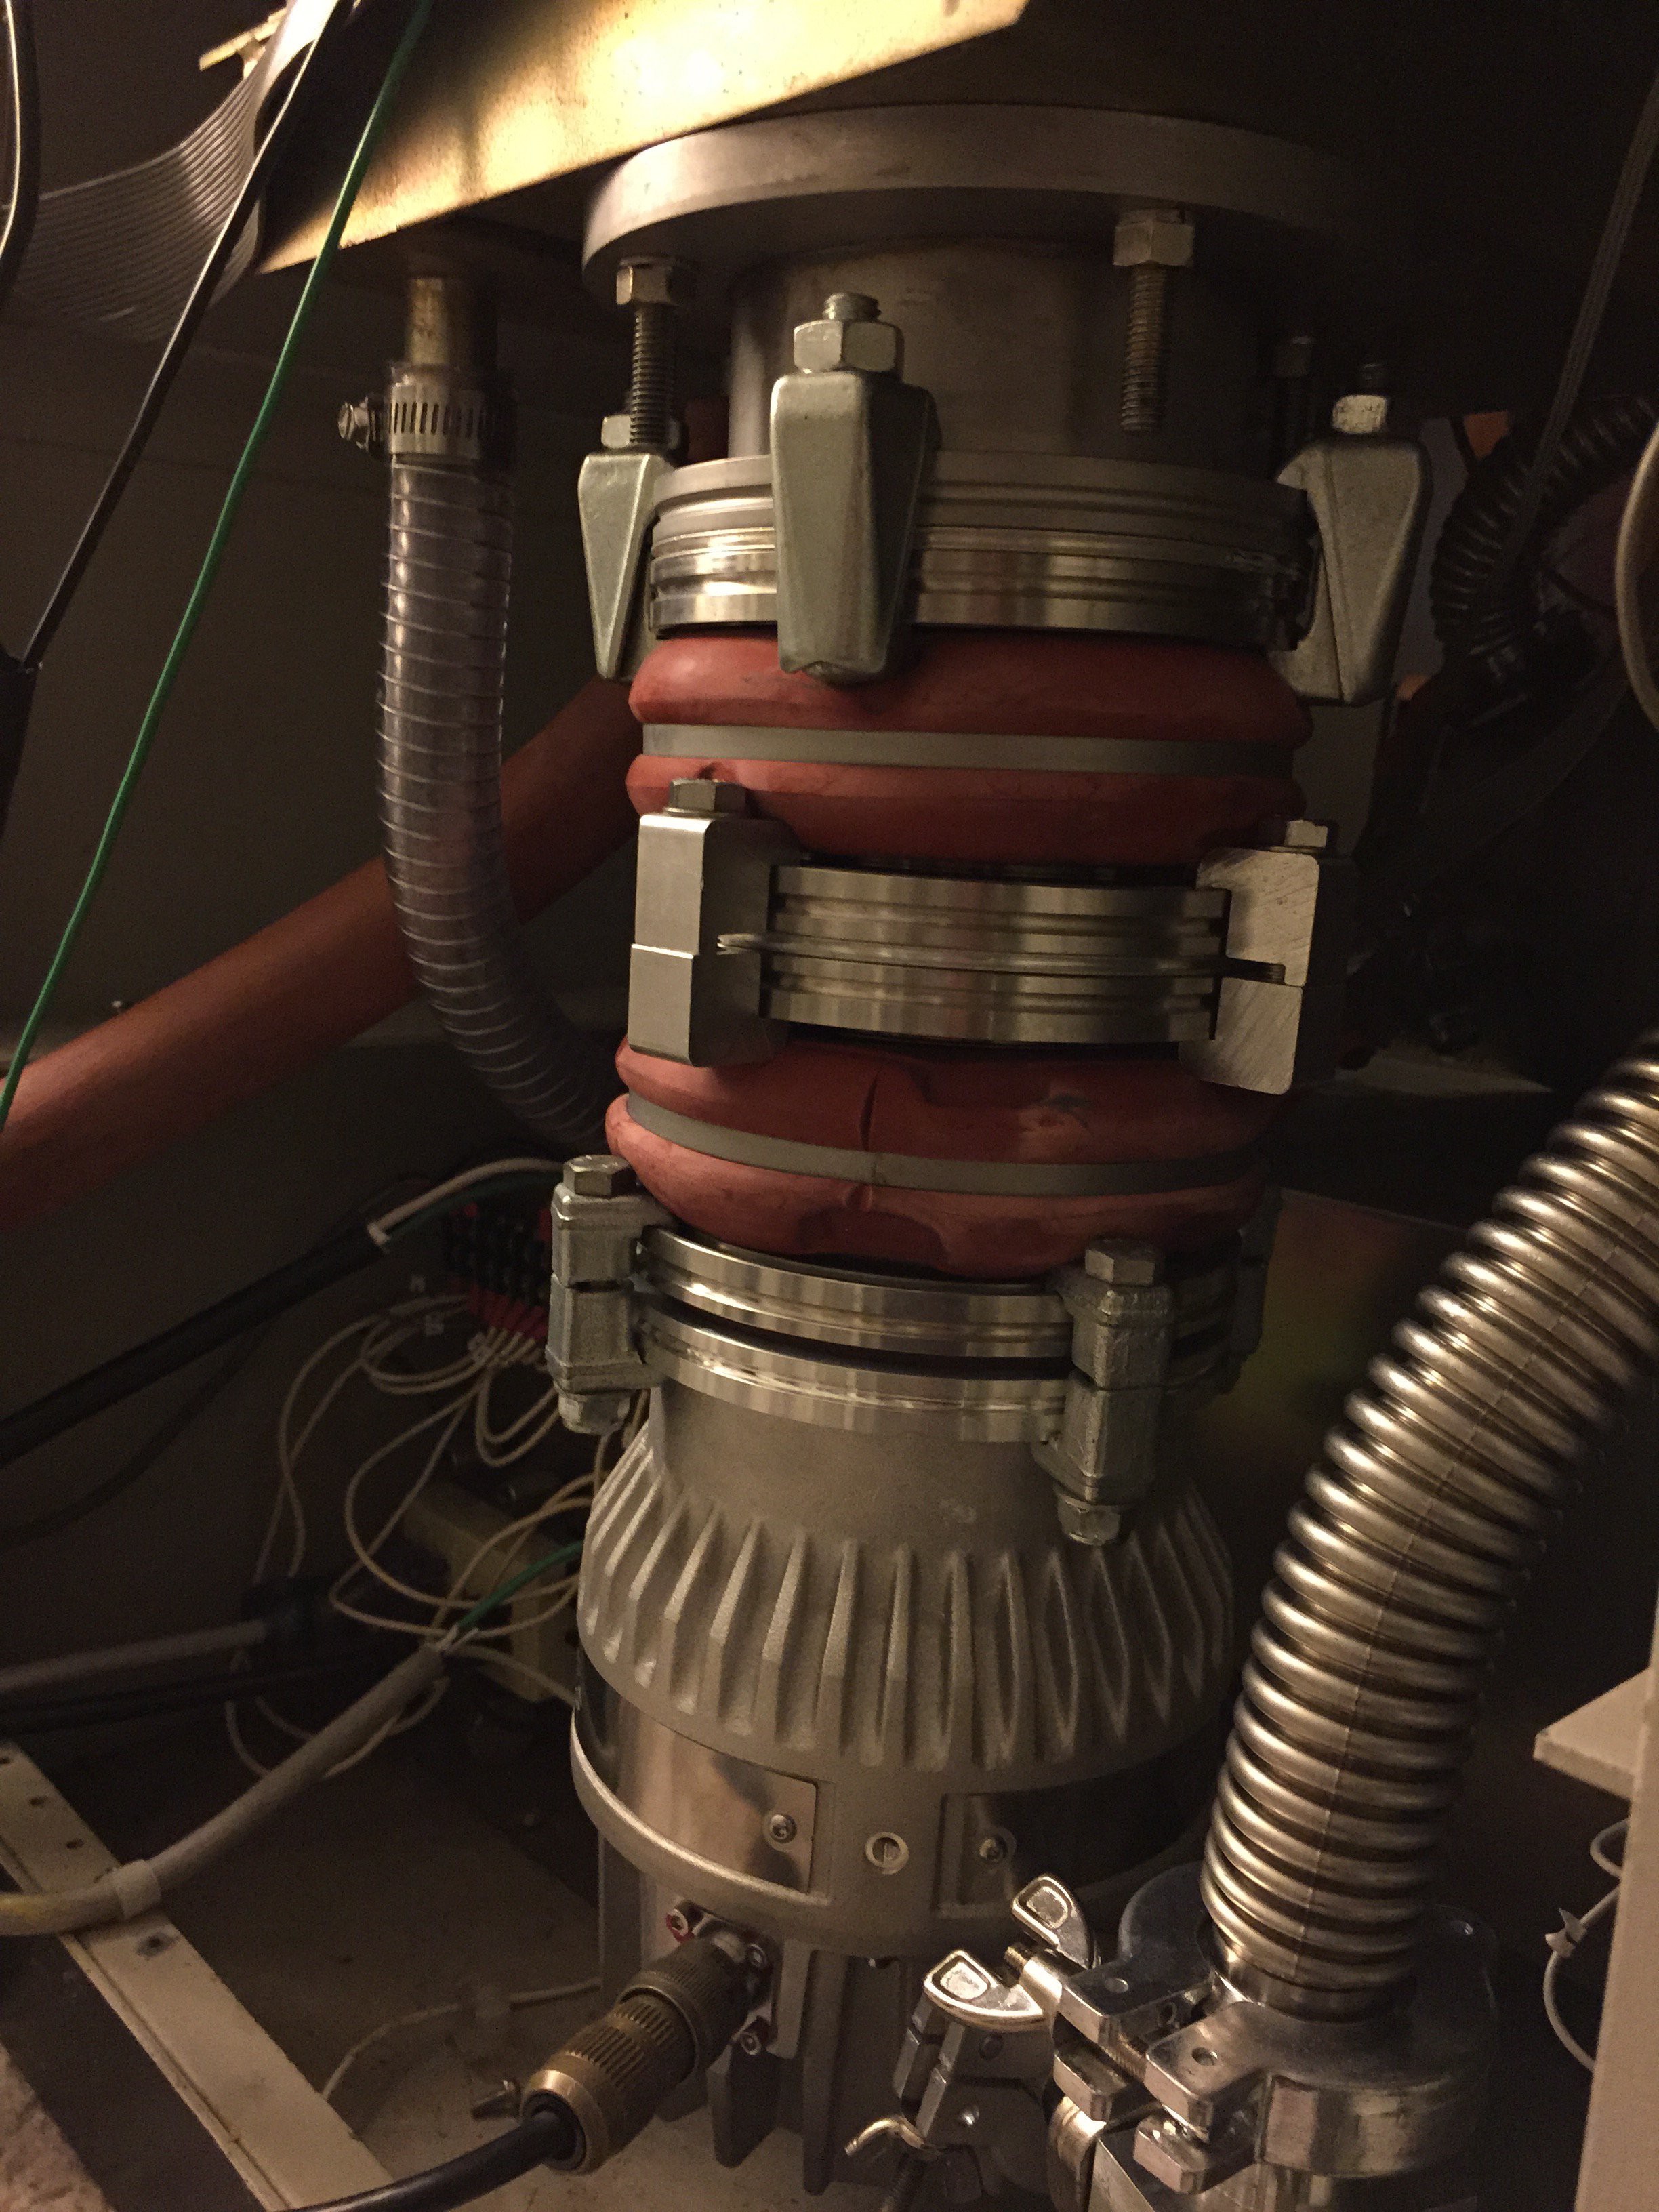
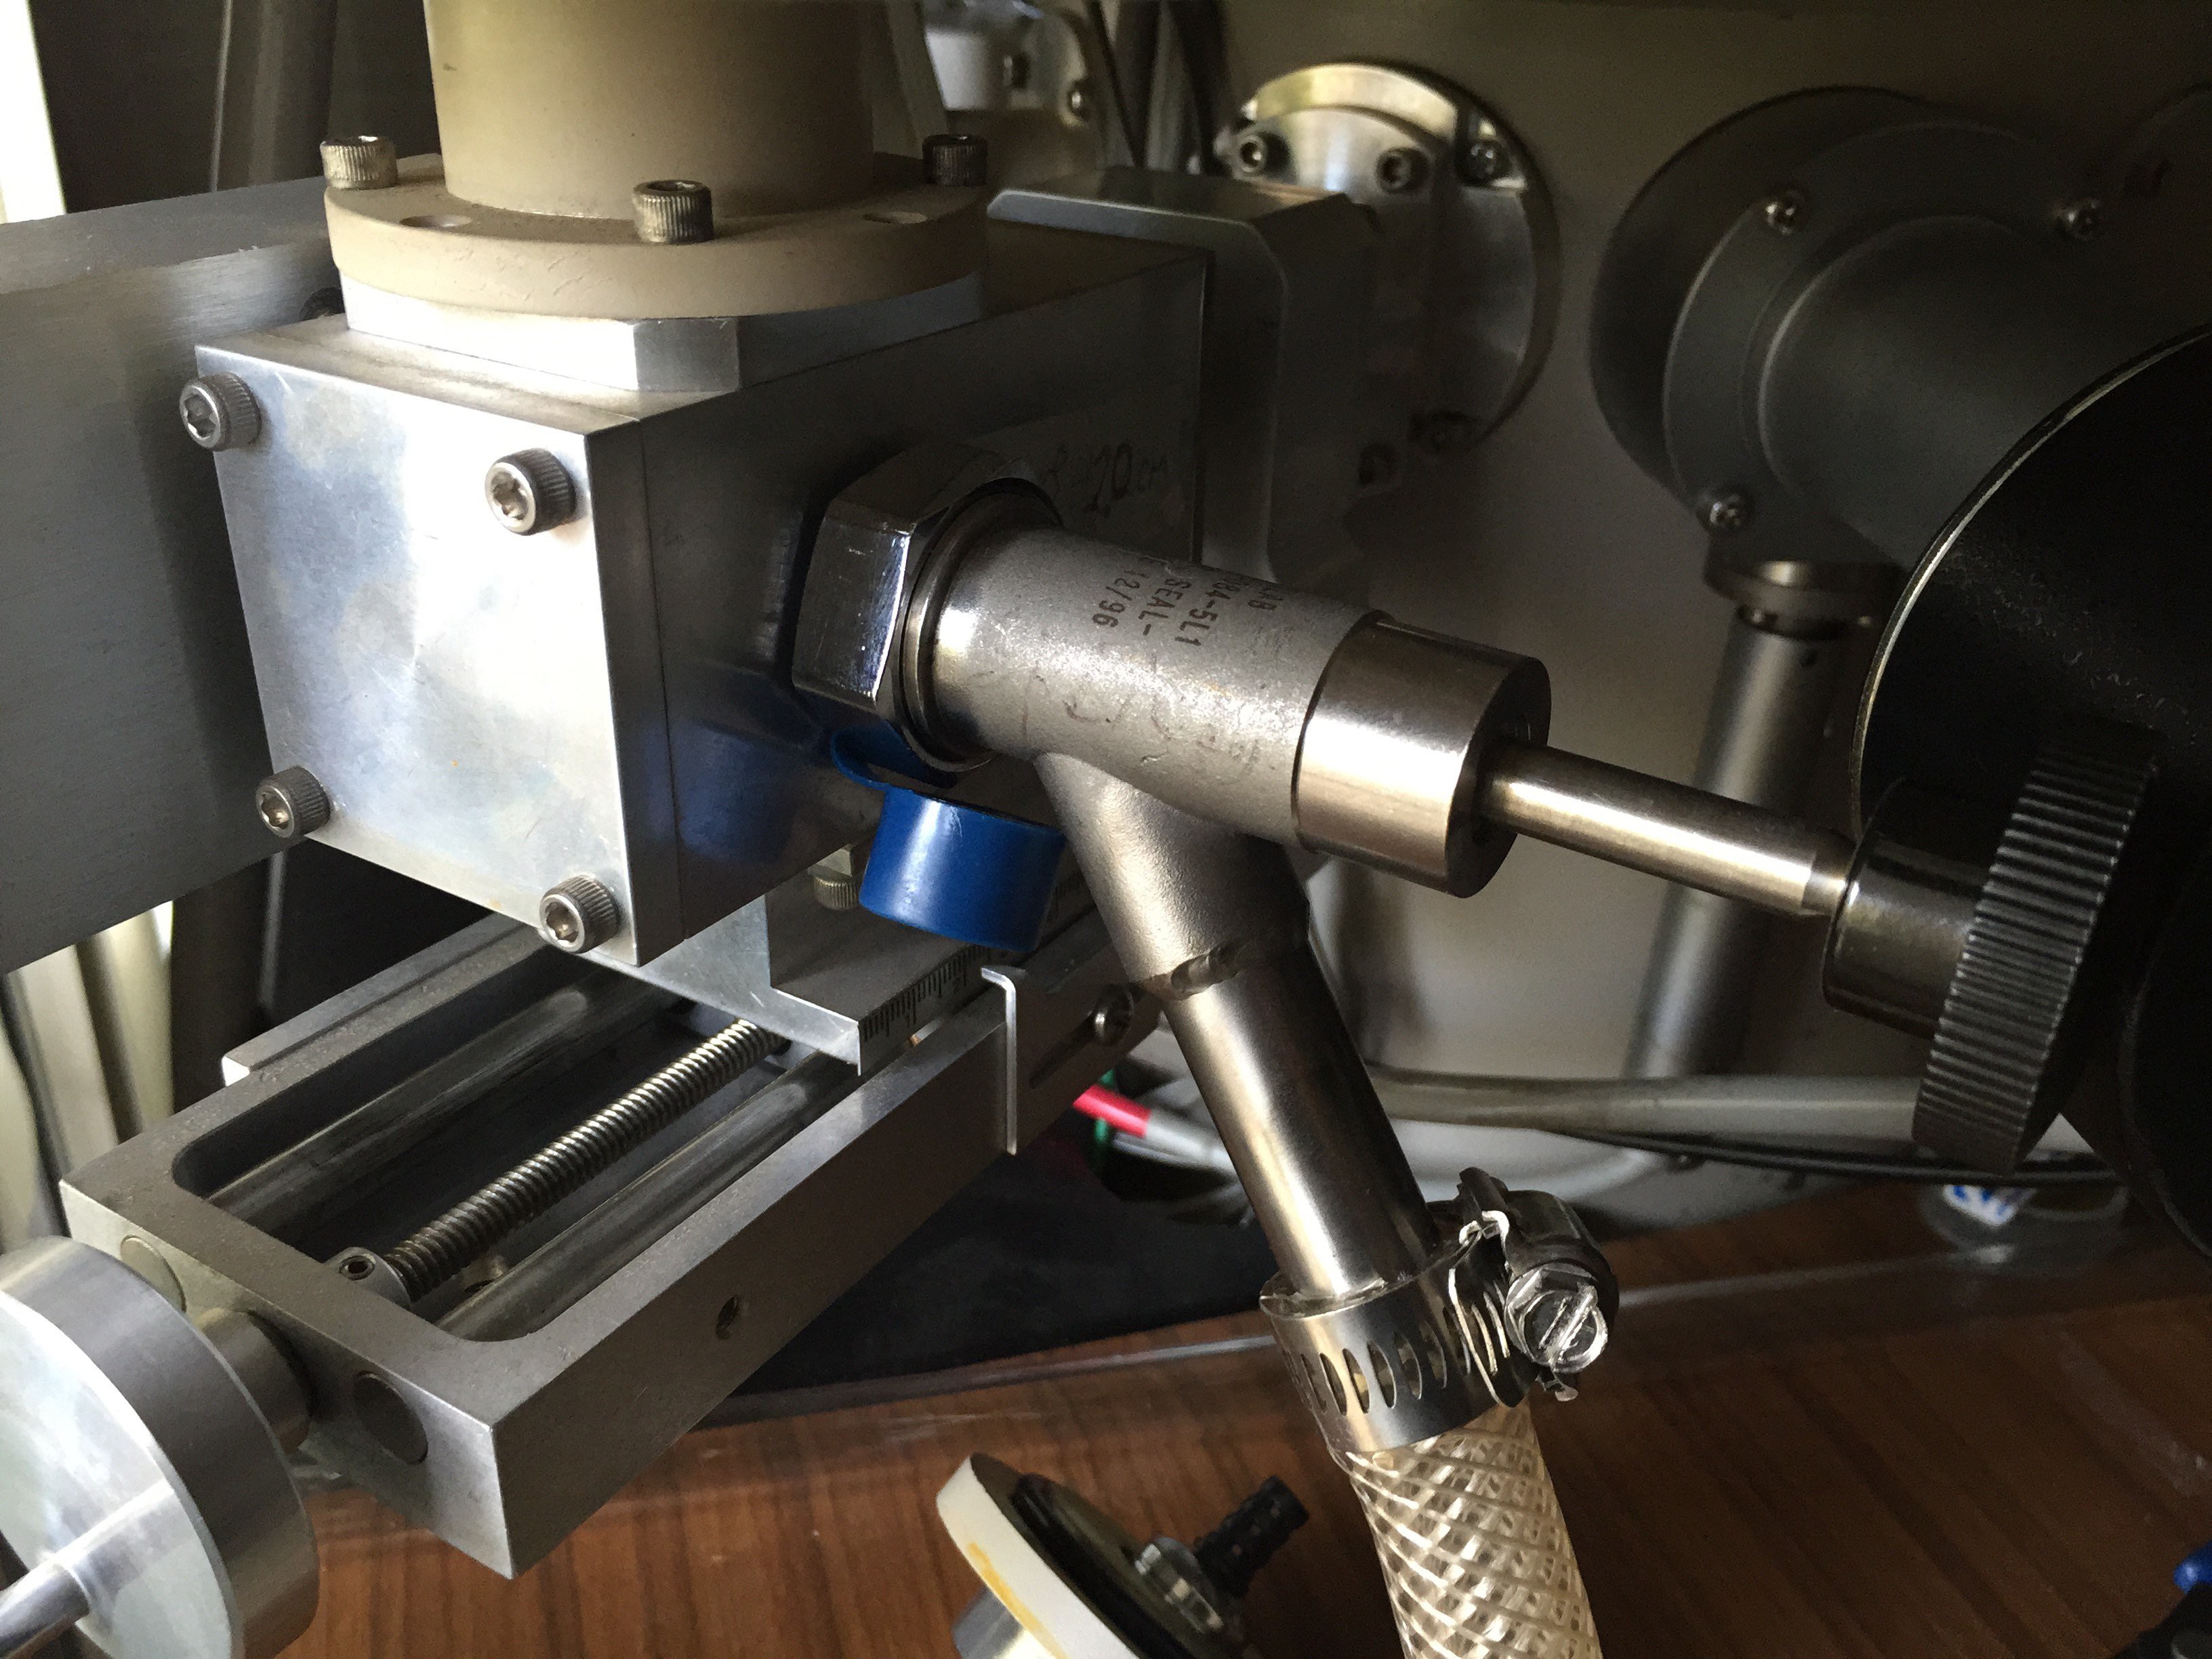
02/27/2015 at 19:55 • 0 commentsI finally got around to shortening the turbo pump adapter that allowed me to mount the new turbo where the old diff pump was. I wanted to take about 4" off the length of it so I could install the second vibration isolator. I chopped off the bolt flange with a bandsaw and then trimmed the tubing off the ISO-100 flange to about 2". Chucked up the bolt flange in the lathe and cut out the old tubing to the weld and then flipped it over and cut a groove in the stainless for a face seal. I tigged up the two pieces using a Atlas rotary positioner. Put it all together an no apparent leaks.
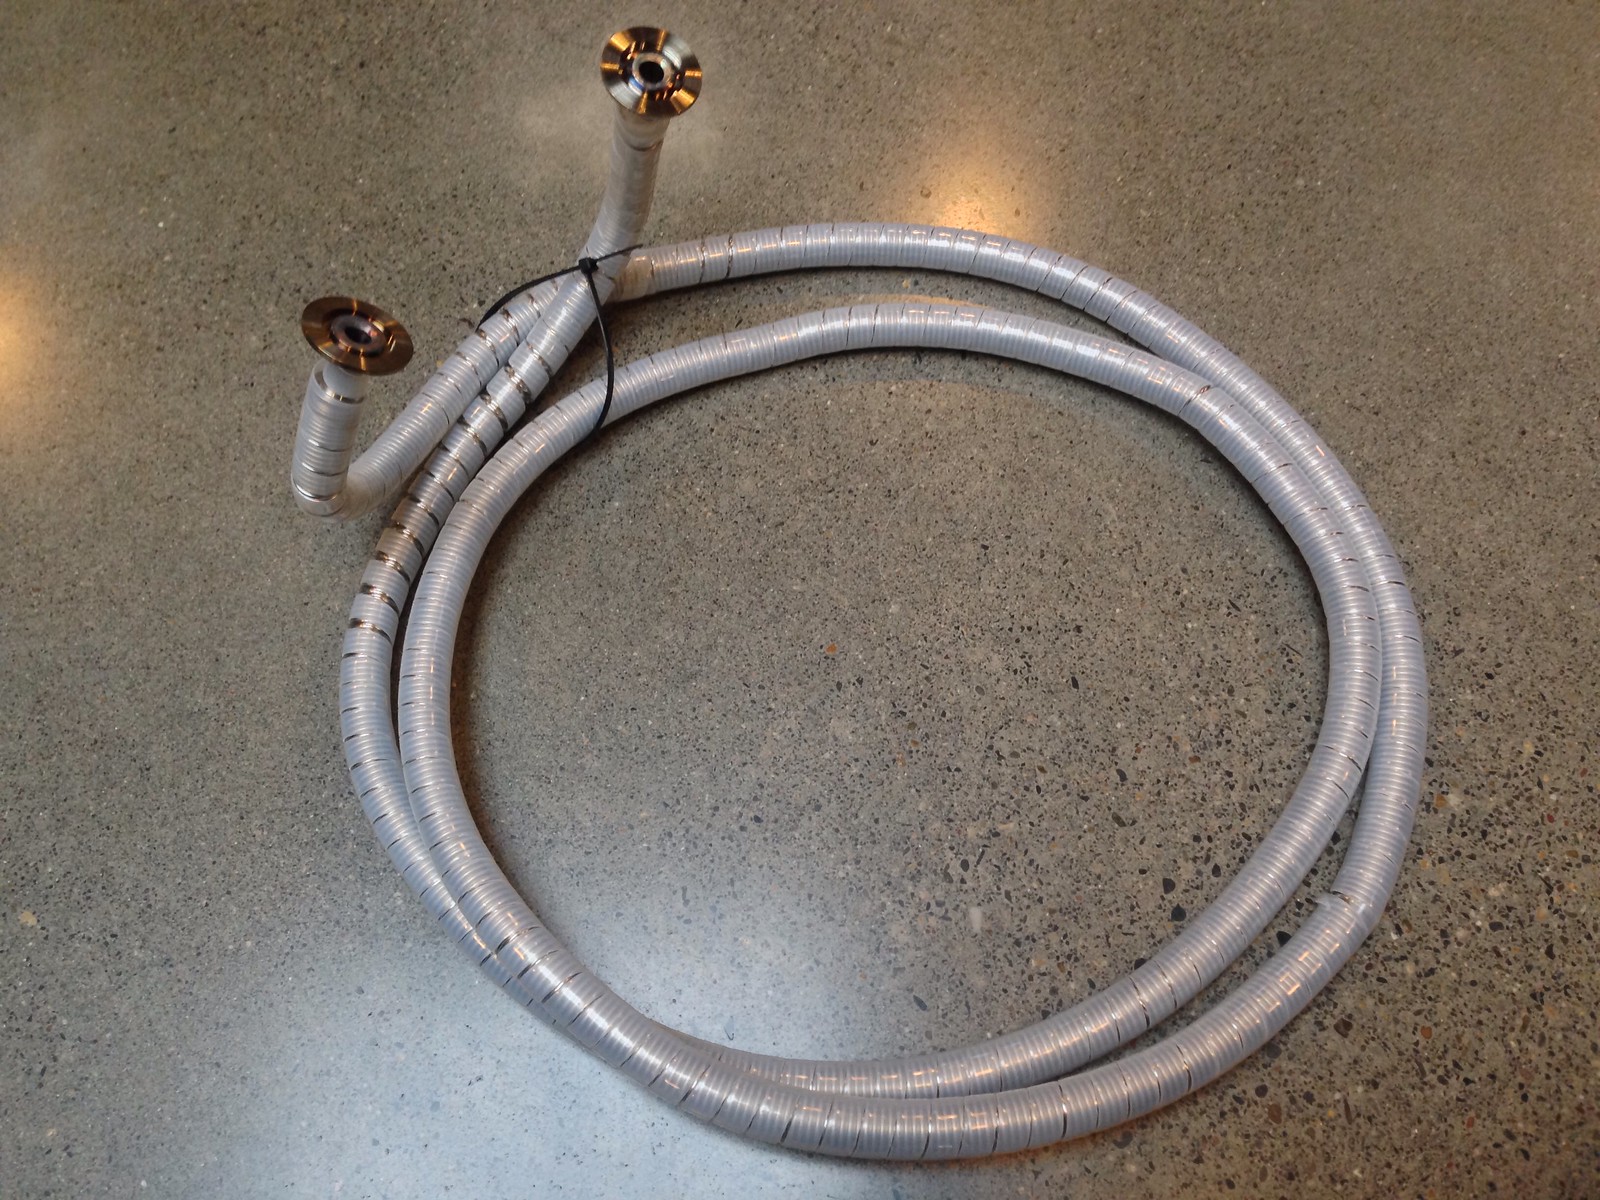
I also took this opportunity to re-evacuate the dewar on the EDX. I got one of the CryoLab vacuum operators from a friend and made up a hose to go to the chamber of the SEM to pump it down. I am going to let it run for about 24 hours to get it down as low as I can. As best as I can tell it was up to a few torr, at least.
![]()
![]()
![]()
-
More samples
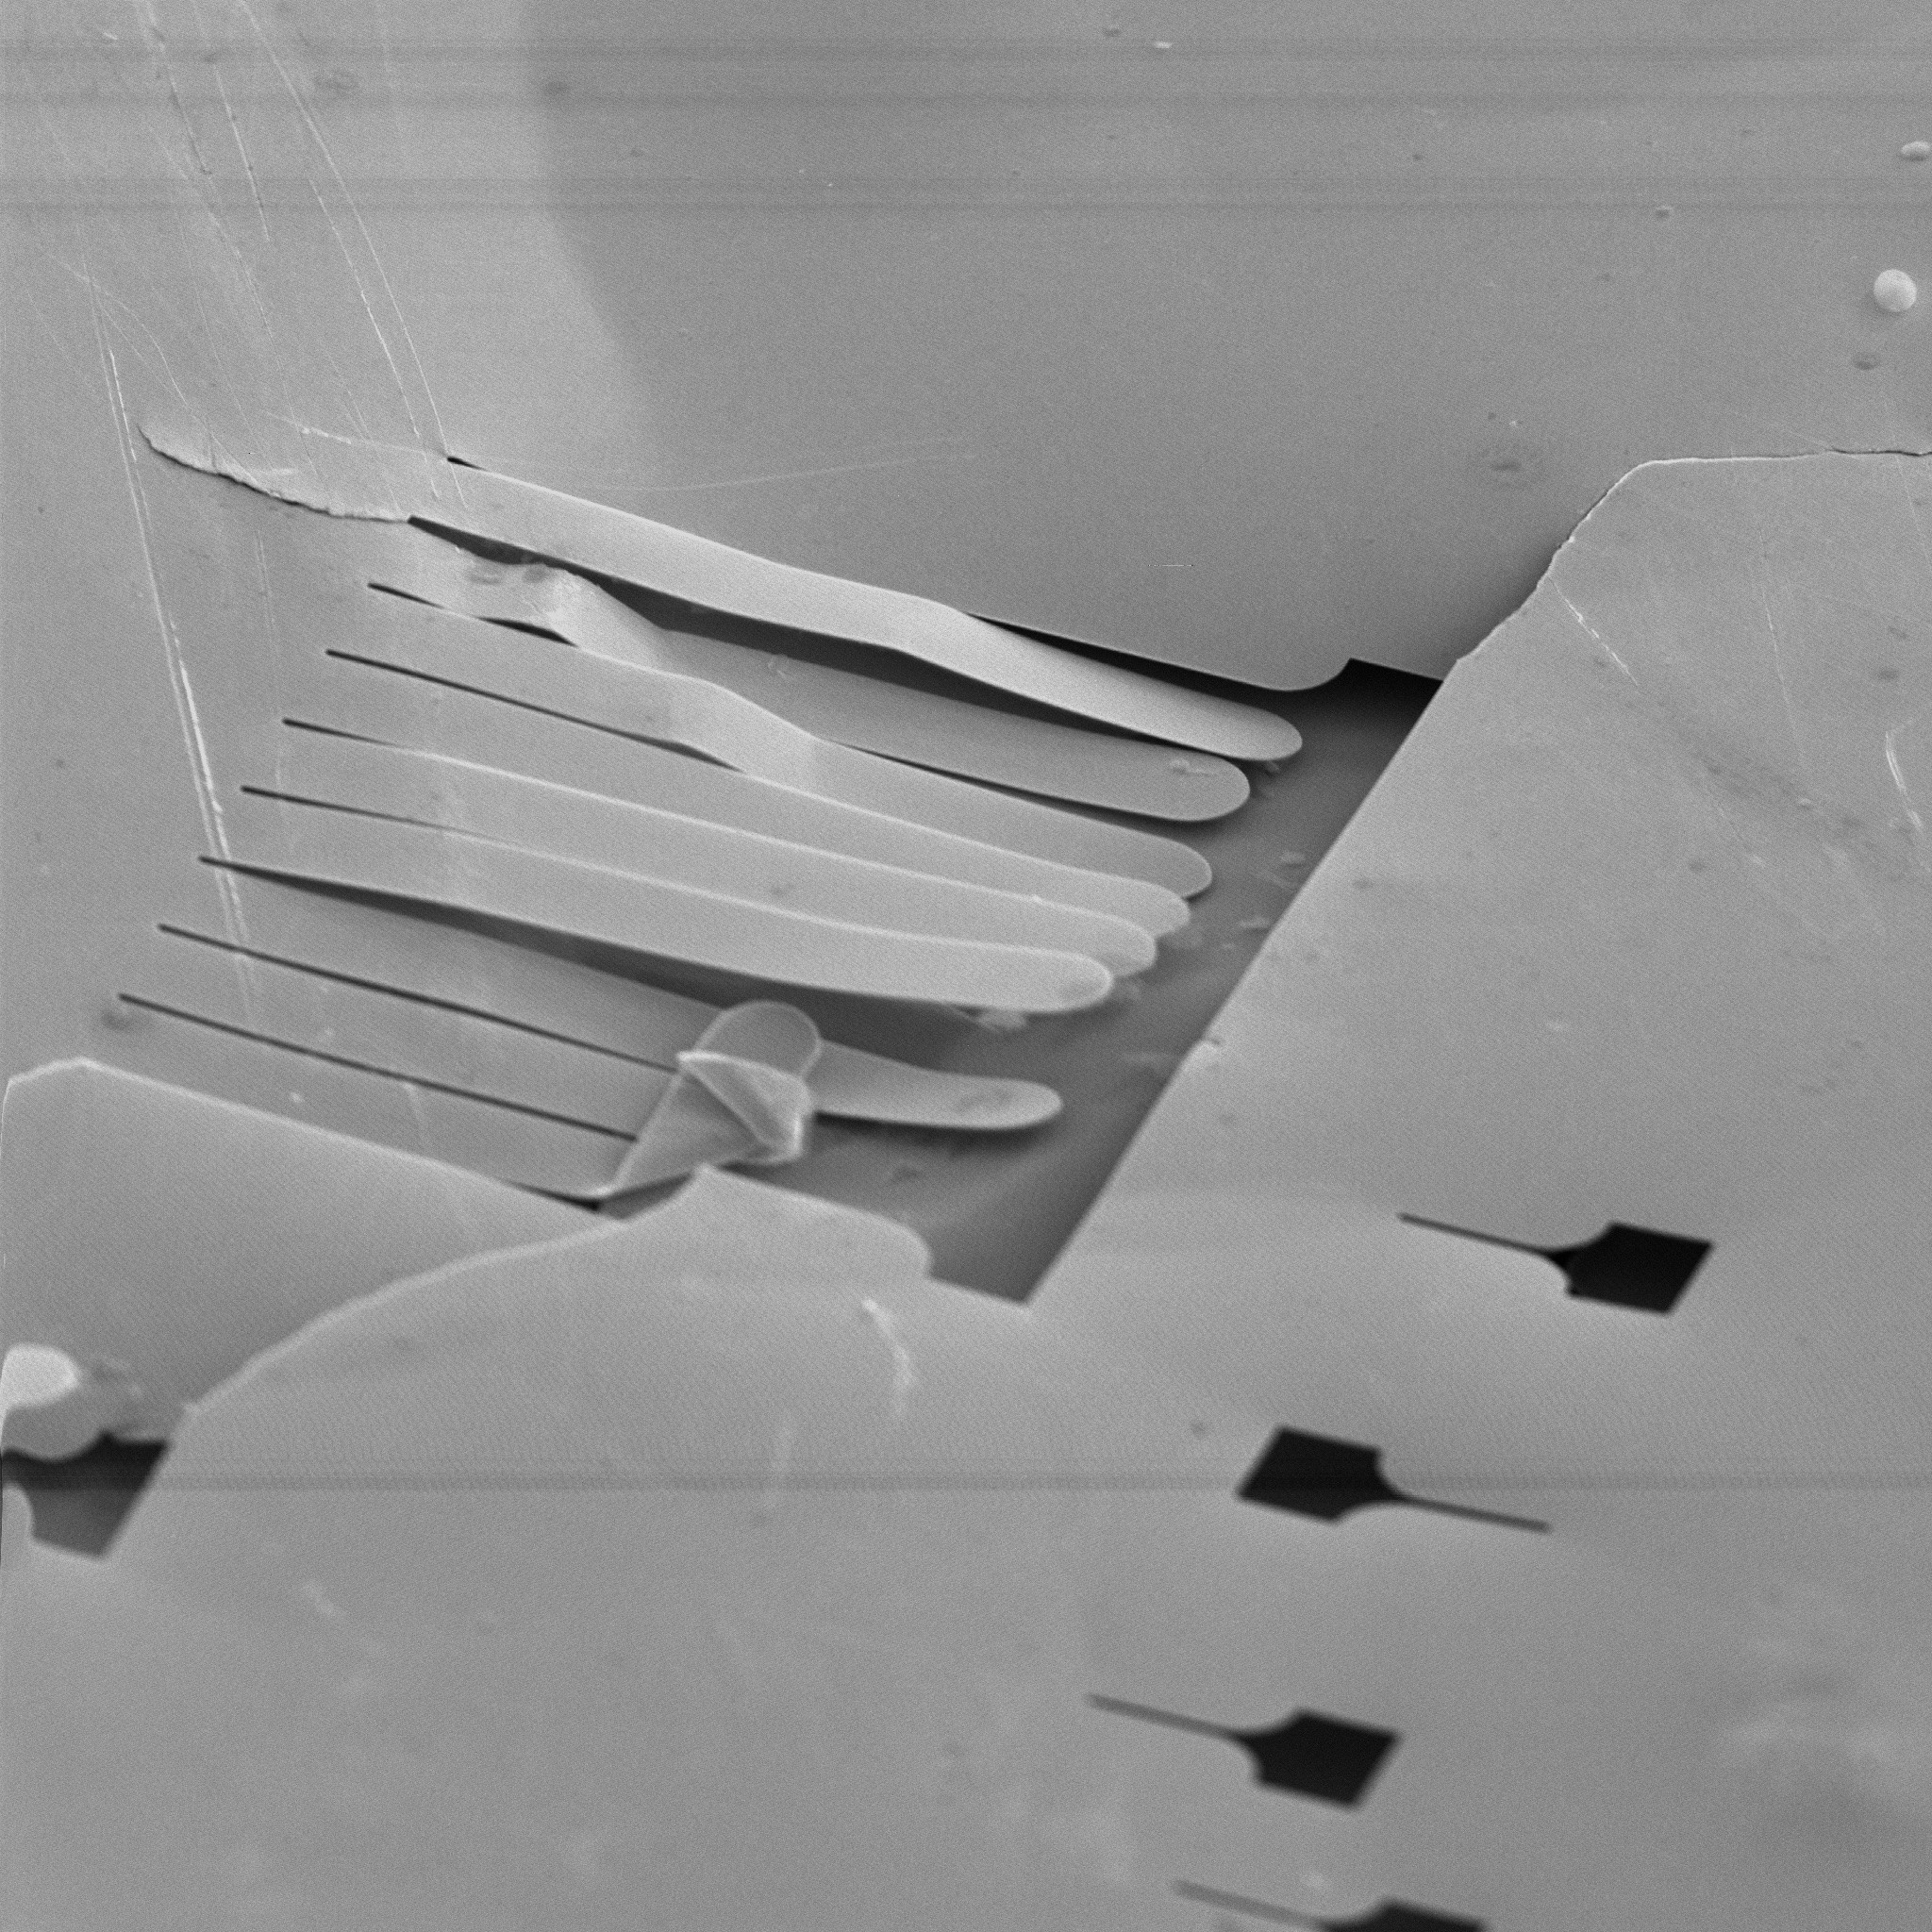
01/03/2015 at 05:29 • 0 commentsI analyzed a piece of goldish metal for a friend that came out of a machine that was used for washing silicon wafers. It is 81% gold, 11% rubidium, 3% Iron, and the rest copper. I was not expecting to find these features in the flake, this is at 490x, about 5um across the "big" feature.
![]()
-
EDX Mapping
01/02/2015 at 22:08 • 0 commentsTried the Map mode of the EDX for the first time last night. In the center window you can see an image of the sample (U Ore) and the surrounding images are heat maps of different elements that are found in that image. the more towards the red end of the spectrum, the more of that element was found. This was a "quick" 256x256 scan at 15ms per pixel dwell time. It took 15 minutes. Looks like it is a very time consuming process but still pretty neat.
![]()
-
There be gold in them there ore!
12/28/2014 at 09:03 • 0 commentsI threw a piece if U Ore that I bought a couple years ago in the scope to see what it would show, here it is, no pic of the sample, it was pretty boring looking:
[A N A L Y S I S R E P O R T]

GENERAL CONDITIONS

------------------

Result File : UORE

File Version : 1

Background Method : Foil

Decon Method : Gaussian

Decon ChiSquared : 6.13

Analysis Date : 28-DEC-2014

Microscope : SEM

Comments :

ANALYSIS CONDITIONS

-------------------

Quant. Method : XPP/ASAP

Acquire Time : 400 secs

Normalization Factor: 100.00

SAMPLE CONDITIONS

-----------------

kV : 30.0

Beam Current : 100.0 picoAmps

Working Distance : 25.0 mm

Tilt Angle : 30.0 Degrees

TakeOff Angle : 35.0 Degrees

Solid Angle*BeamCurrent: 0.9

Element Line Weight% K-Ratio Cnts/s Atomic%

---------------------------------------------------------

Mg Ka 3.16 0.0117 9.87 5.37

Al Ka 8.21 0.0365 33.43 12.59

Si Ka 40.97 0.2064 194.23 60.36

Ca Ka 7.39 0.0471 33.73 7.63

Ti Ka 0.00 0.0000 0.00 0.00

Fe Ka 8.69 0.0743 32.49 6.44

Cu Ka 3.47 0.0309 9.58 2.26

Pd La 0.00 0.0000 0.00 0.00

Au La 12.69 0.1014 8.26 2.67

U La 15.42 0.1138 2.89 2.68

Total100.00
I was surprised by the gold. I guess I should have not been, U was first found in Gold mines so says the internets. But I am scanning a very tiny piece of the ore so who knows if it is homogenous throughout the sample.
![]()
-
EDX Calibration
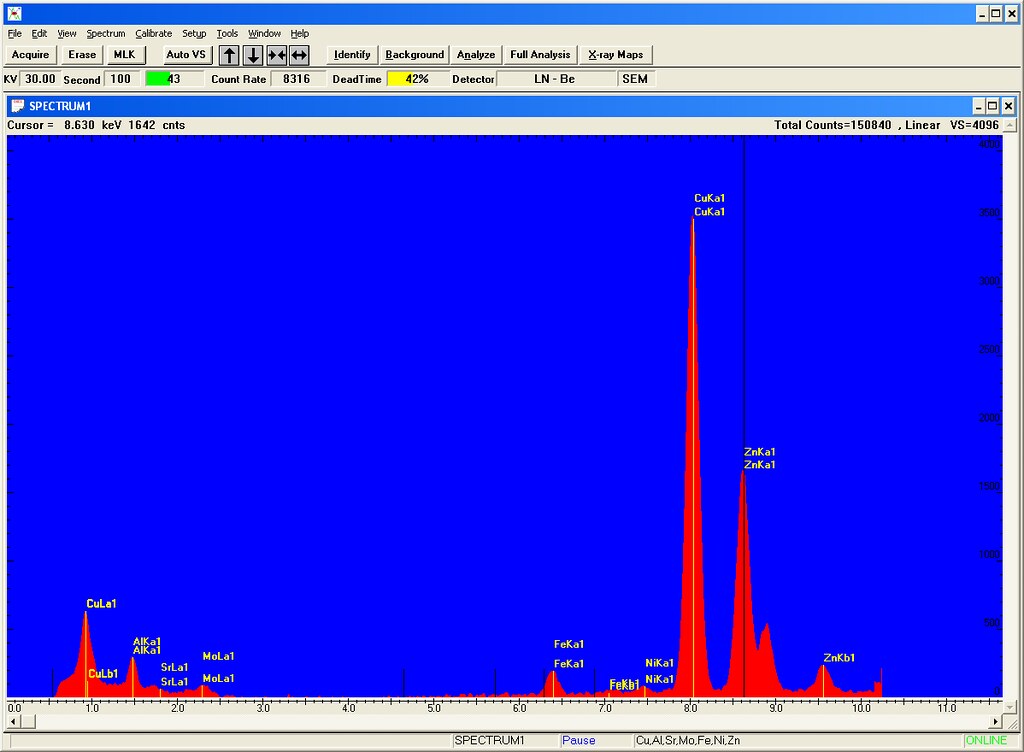
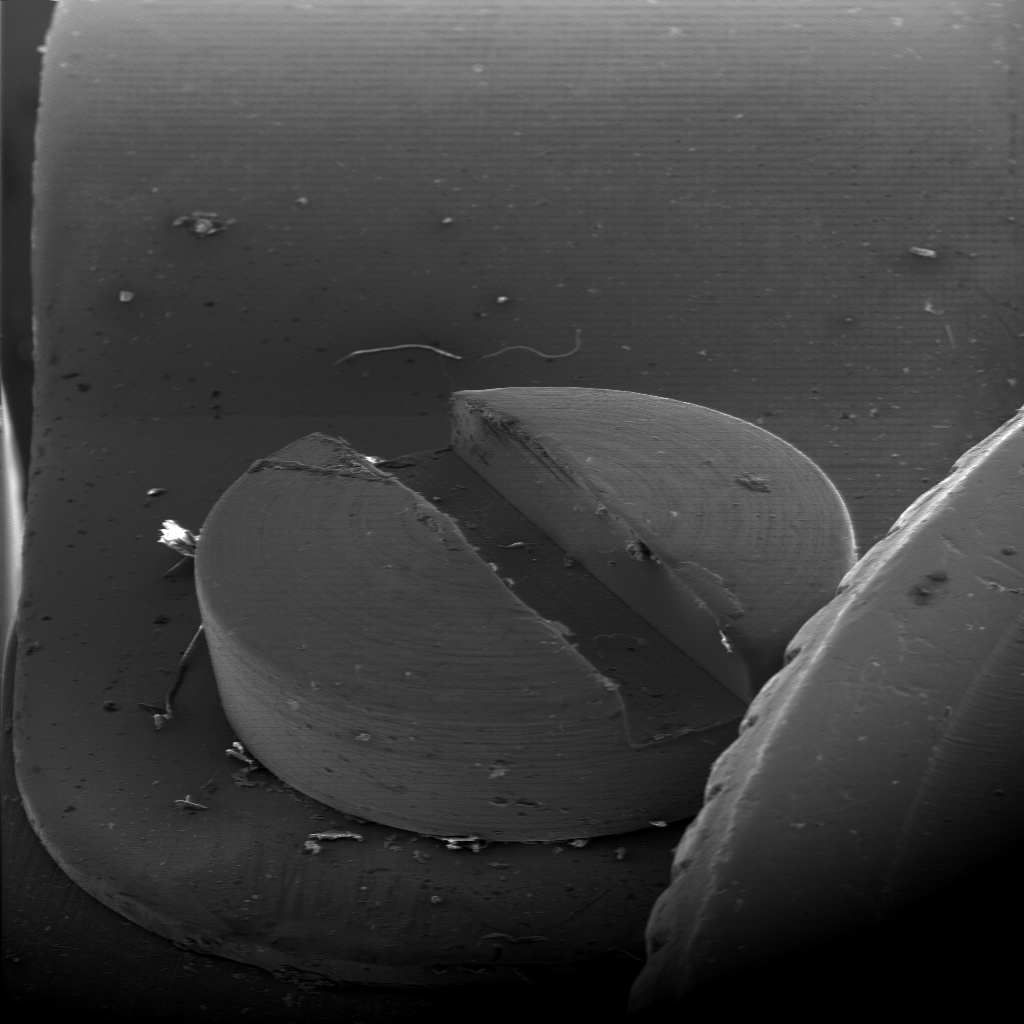
12/26/2014 at 07:55 • 0 commentsI calibrated the EDX tonight, the software uses a sample with aluminum and copper to create a spectrum and then figures out the offset and gain to get the peaks in the right place. With that done I zoomed into the little screw in the picture with the dime edge and did an acquisition. This is what I got and the analysis side says the screw is composed of the following:
Element Line Weight% K-Ratio Cnts/s Atomic%

---------------------------------------------------------

Al Ka 6.26 0.0115 90.84 13.78

Fe Ka 1.68 0.0206 77.55 1.79

Ni Ka 1.06 0.0130 39.00 1.08

Cu Ka 55.95 0.5566 1483.97 52.35

Zn Ka 31.62 0.3132 728.50 28.76

Sr La 1.91 0.0066 19.13 1.30

Mo La 1.51 0.0079 23.45 0.94

Total 99.99
This works out to be a brass with aluminum added. Adding aluminum increases the strength of brass and makes it more corrosion resistant. I did have to go into the setting to tell it that it was seeing Aluminum and not Bromine and Zinc and not Rhenium. There are several elements that overlap.
![]()
-
Getting EDX Running
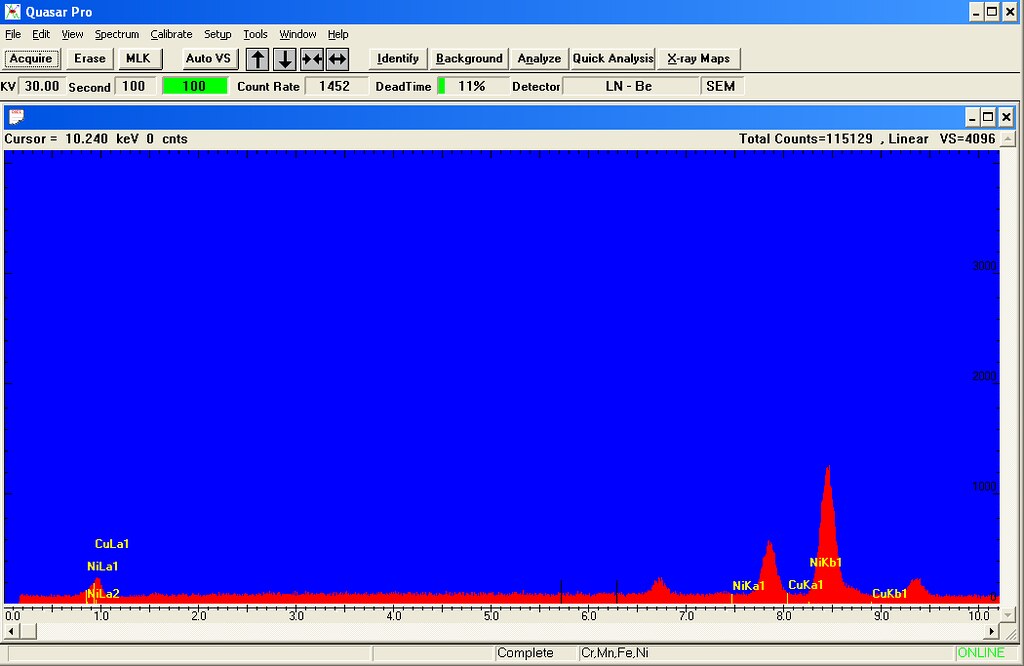
12/25/2014 at 06:45 • 0 commentsI picked up a 50L dewar of liquid nitrogen Monday and filled the dewar on the EDX head. You need to let it sit from 4-10 hours to make sure the sensor is cooled. If the sensor is not cool (cryogenic temps) the sensor will be ruined.
I threw a dime in the chamber and scanned it and did an acquisition with the software and it showed me some peaks, a dime's outer plating is about 75% copper and 25% nickel. The histogram showed some peaks pretty close to where they should be, it needs to be calibrated and the gains adjusted but it is pretty good for just hooking it up. I need to go through the manual some more and do all the adjustments. You use calibration samples of known materials to adjust everything. I need to get some of these standards.
I also picked up another sensor head off ebay the other day. It has different windows you can use as well as a windowless operation mode that will allow you to sample light elements like carbon and oxygen. The standard sensor used a beryllium window which makes it hard to see light elements. It turns out the adapter on it is identical to the accessory ports on the Hitachi so I can just mount it in place with no problems.
![]()
-
Kevex Digital Beam Control
12/04/2014 at 04:51 • 1 commentI went ahead and installed the DBC unit yesterday. First thing I did was choose a place to tie into the console. The DBC box replicated the function of the scope's scan/raster generator that both drives the e-beam deflection as well as the CRT deflection. There is a connector that feeds the signal to the optional Dual Mag and X-ray modules that ties into the magnification control. I hooked my old Tek DSO to the connected and recorded the polarity, P-P, and offset values and replicated them in the DBC by adjusting a couple trimmers and a jumper. I took 4 lengths of RG174 coax with BNCs on one end and wires on the other and spliced those into the two wires leaving the board. Add one more BNC for the video output on the main board and I tie it all together on to the back of the DBC box. Make a few adjustments for contrast and brightness and I get this:
![]()
Woo, it works! This is a screw head on a sample stage clip and the edge of a dime.
This is a pic of the main control board:
![]()
X and Y waveforms:
![]()
![]()
-
EDX, Kevex Sigma, and Digital Beam Control
11/27/2014 at 05:18 • 1 commentThe SEM came with a EDX setup for it.
What is EDX.
EDX (EDS) is Energy Dispersive X-Ray Spectroscopy. When an electron beam hits a sample x-rays are created. The energy of these x-rays is measured with a sensor and the unique pattern of the energy levels is indicative of the elements being scanned. This is very useful if you are trying to determine the alloy of a metal or composition of a solid object. The sensors are cooled, the most common ones are the cryogenically cooled Si(Li) detectors so you need to keep a dewar of liquid nitrogen around to keep it cool. This is very similar to the Germanium sensors used for Gamma Spectroscopy.
The detector mounts to the side of the specimen chamber and is mounted on a movable feedthrough that allows you to bring the sending end of the unit close to the sample. The detector is biased with high voltage (~-500v) and when a x-ray hits the sensor there is a pulse that is proportional to the energy of the x-ray outputted. This goes through a FET mounted right behind the sensor and that resulting pulse is passed though a preamp.
The pulse is then sent to the mainframe where there is filtering and discrimination and then passed to a MultiChannel Analyzer (MCA) where the pulses are binned in regards to the pulse height. This data is displayed as a histogram where you can determine energy peaks so you can figure out what is in there. Software databases can analyze the data and match the data to known materials and alloys.
So that's it in a nutshell, horribly simplified and quite boring. And my SEM has this, or well, I hope it will have it. There are issues, first the control mainframe and computer that came with it is freeking old, early 80's. It even has dual 8" floppy drives! There is a power supply issue, I could probably fix it but I would still be stuck with a 30 year old computer mainframe full of unobtainable parts and who knows if those floppys will even boot anymore.
Second problem, this may be a show stopper. EDX sensors do not like to be warmed up after they are brought up to temperature. Apparently what happen is the insulation around the sensor dewar is in a vacuum and these leak, as they leak the LN2 will liquify the gasses and absorb into the insulation. When the sensor warms up the absorbed gases are rereleased and a positive pressure is created in the dewar which results in the rupturing of the very thin beryllium window on the sensor tip rupturing. This is bad... very bad. You can get them repaired but that costs thousands.
Last problem, I hope. If the sensor was exposed to the high bias voltage while warm it is toast. It removes the lithium from the silicon in the sensor and it is all over with.
So I am just going to cross my fingers on the sensor unit. If it is bad I can get another old unit off ebay, it will be a crap shoot, but it is about the only option.
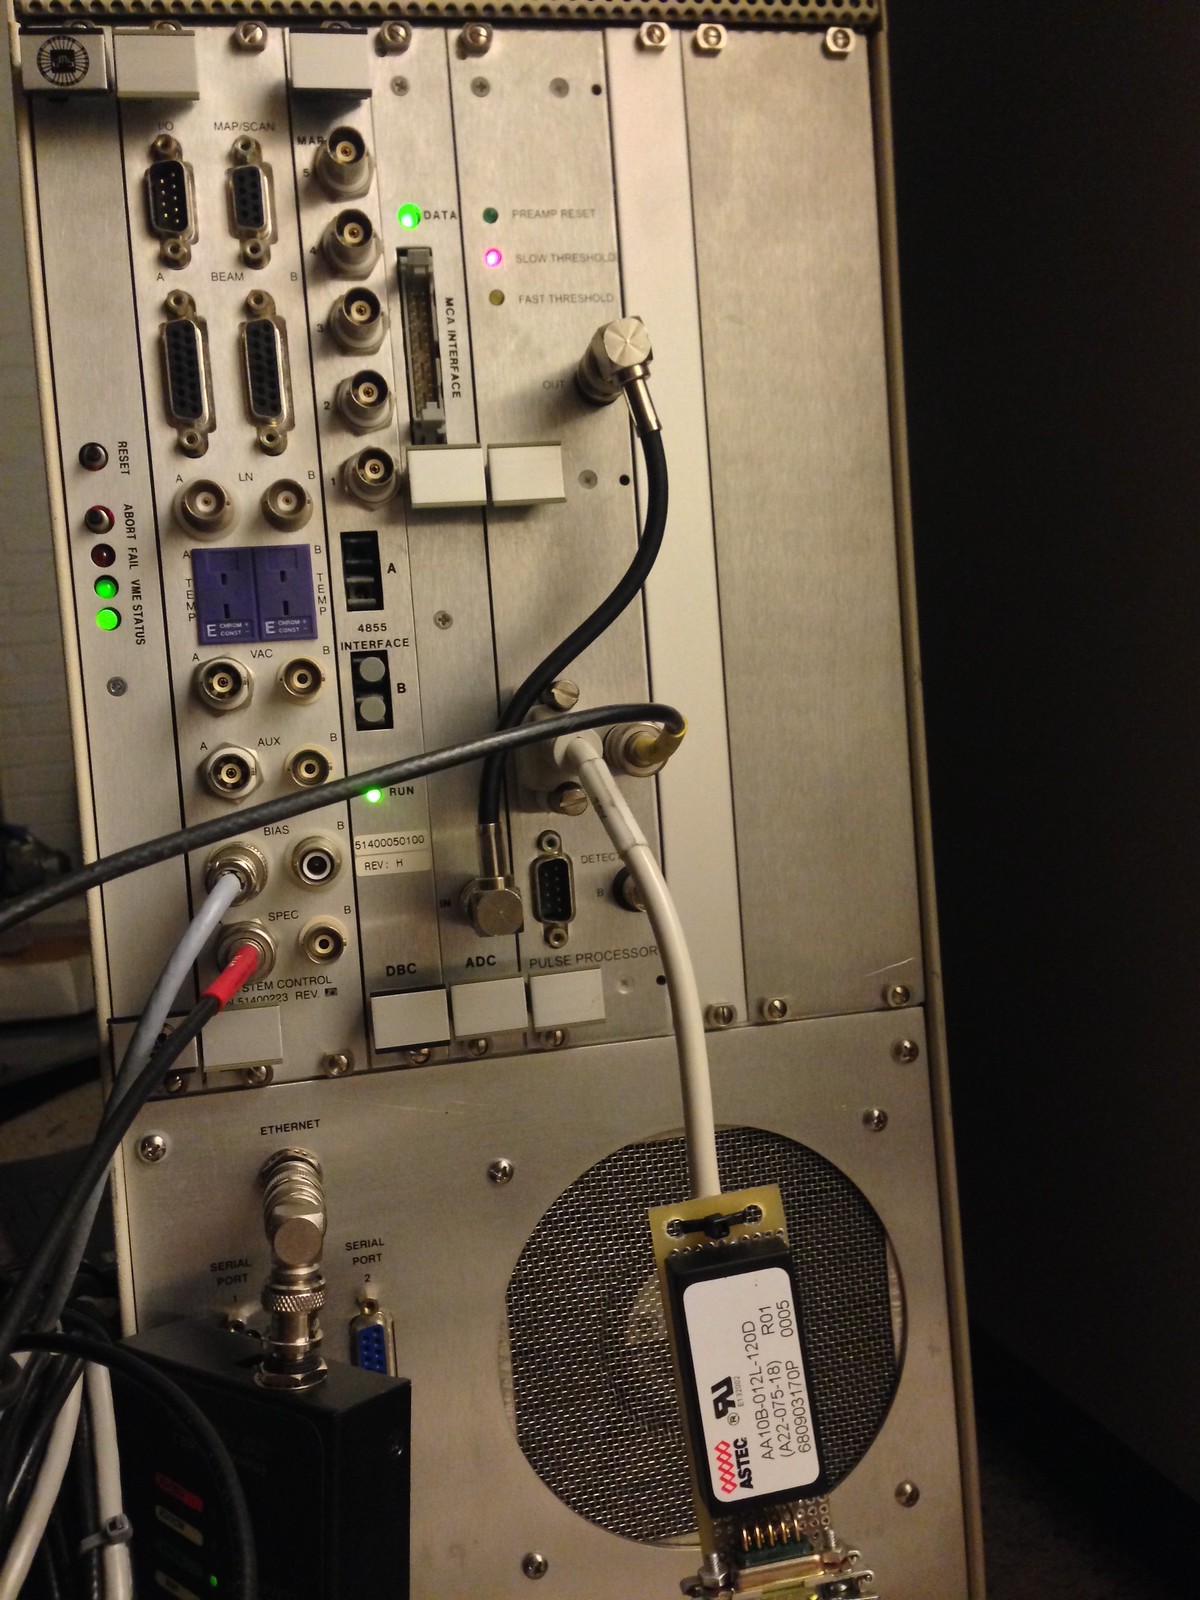
To replace the mainframe a friend gave me a Kevex Sigma Gold chassis to control it. It is basically a VME chassis with pulse processing and data acquisition cards built in that captures the data and sends it off to a PC over ethernet that controls the box and hosts the software that analyzes the output. Luckily the sensor and their preamps have hardly changed in the 10-15 years between the two units were made and the only real difference between the two interfaces was the gender of the DB9 connector and that the old preamp needs -24v for the opamp and the newer preamp uses -15v. No big deal, I pulled a isolated output 24v DC/DC converter out of the parts bin and used it to boost the -15 to -24.
I also got real lucky with getting data on the Kevex units. An Engineer at Thermo Fischer, who now owns Kevex, sent us a full set of schematics and a CD-ROM with the software for the box. The software is intended to run under Windows 98 but seems to be happy under XP though I cant get it to run on one PC with it. Probably something to do with the ethernet. The ethernet connection is kludged together with a 10Base2 to 10BaseT adapter on the Sigma, through a hub and to the PC. It works fine on an old Epson laptop I have but a desktop I tried with does not seem as happy. I will have to mess with that more.
The schematics have been very useful. They had the needed info for the connector for the preamp and other ports on the unit. They also showed an accessory which I did not have, the 4855 DBC, or Digital Beam Control. This is a box that is connected though a fiber optic serial link that is tied into he insides of the SEM. When off the box just passes signals though, when active it takes over the task of generating the X and Y scan signals through on board DACs and intercepts the "Video" signal from the Secondary Electron Detector.
This allows you do do a couple neat things. First, you can digitally capture images out of the scope. Second, you can map the results of the EDX over the image to give you an element map of the sample. So you can have one color represent copper, one silicon, and so on over the image of the sample. Pretty nifty.
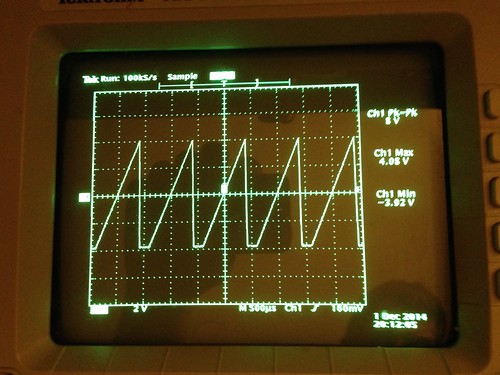
I got one of the DBC boxes off eBay last week and the fiber optic cables showed up yesterday. It all seems to work. I hooked my scope to the outputs of the DBC and I got a nice Sawtooth pattern out on both channels and when I touched the Video input BNC it showed up on the computer.
Next step is to tie it all together. These boxes are designed to drive just about any Electron Microscope out there so they are very configurable and the schematics have a listing of all the jumper and trim pot settings. The ex-Hitachi service guy who I met online that sent me the filament bases thinks he has some information on how they wired these up in the day, if that fails I think I have figured out where I can tie in after the sweep generator on the SEM.
A few pics:
The back of the Kevex Sigma and the adapter for the old preamp:
![]()
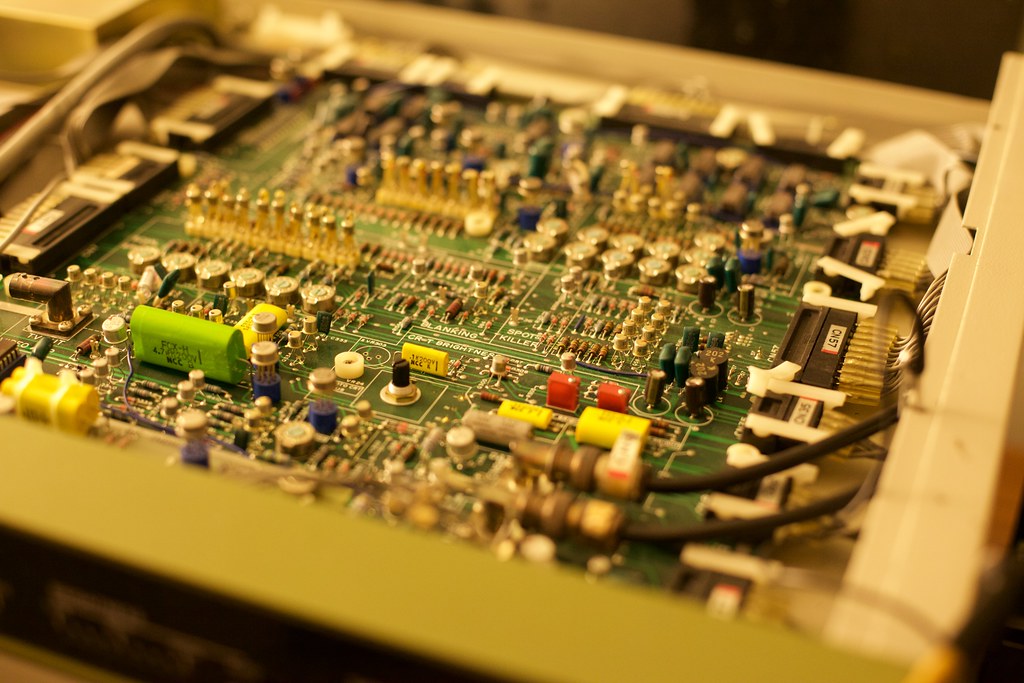
The insides of the DBC Box, quite vintage (c1995)
![]()
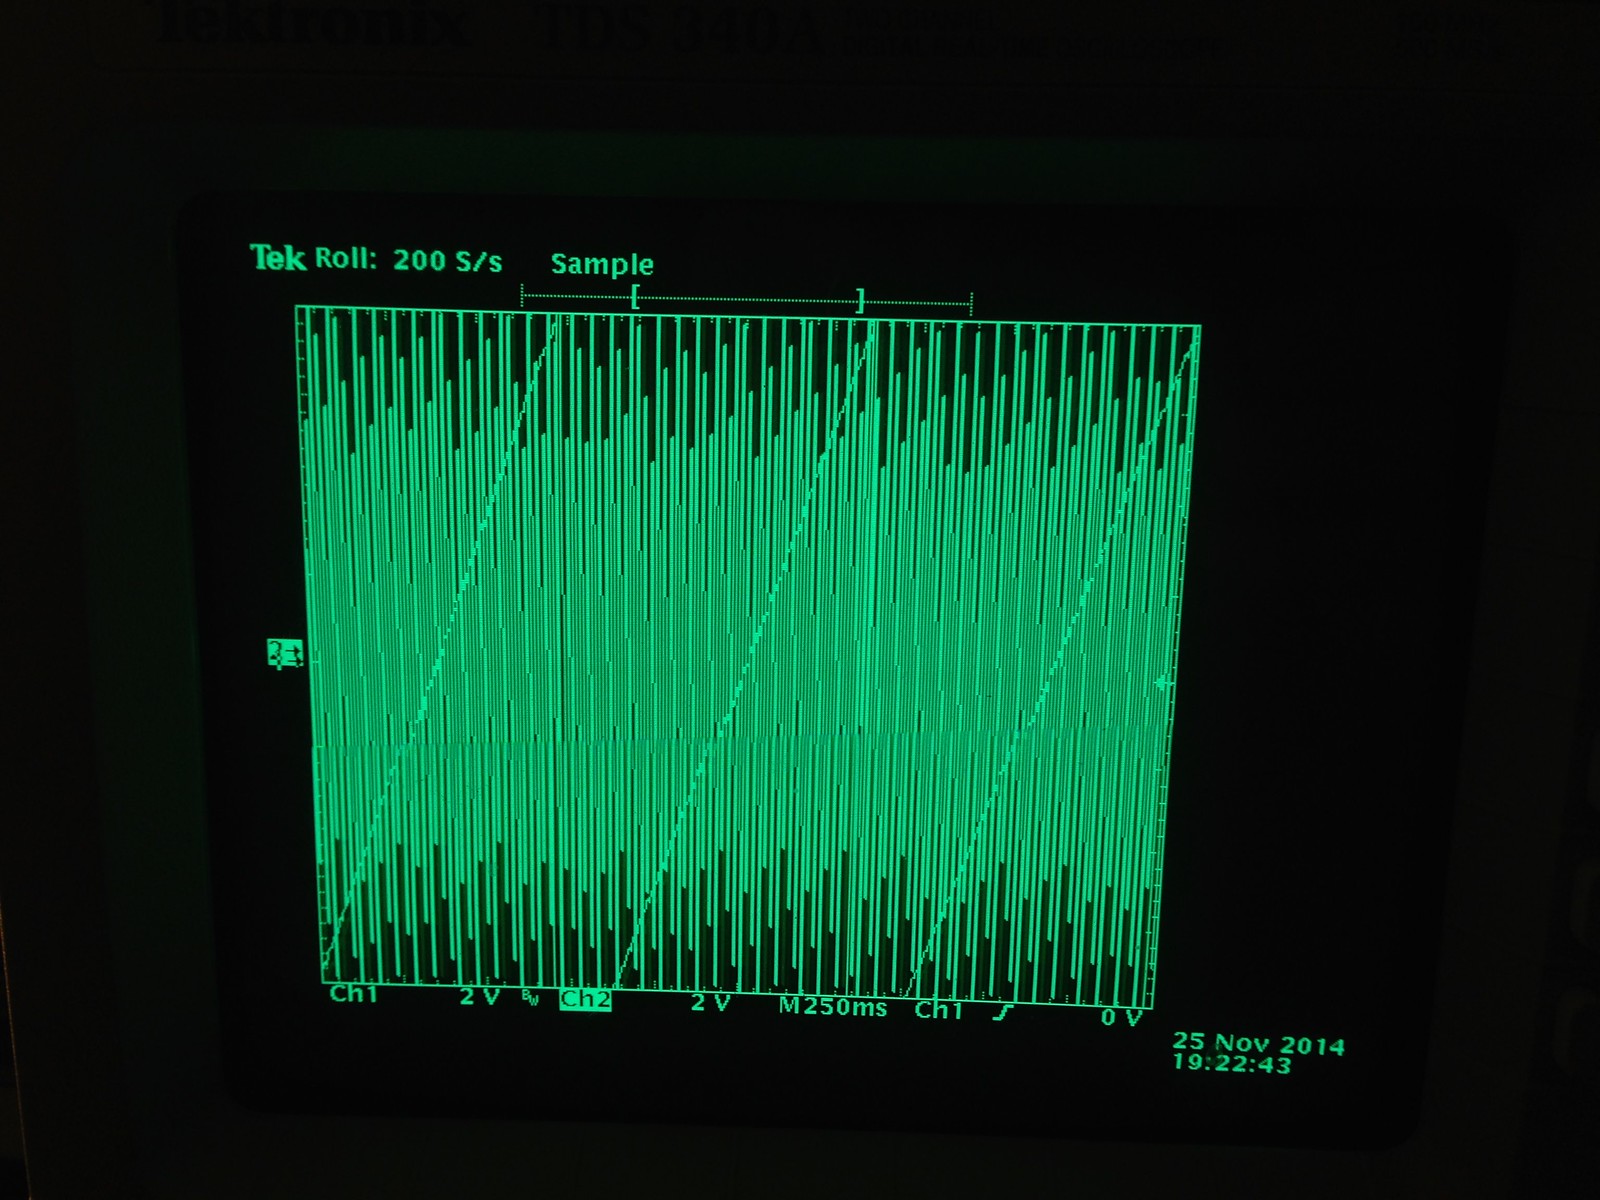
And the resulting waveform out of the DBC Box, both X and Y are presented, you can see the slow Y over the fast X. Times like this I wish I had a color scope! There is some aliasing gun on because I am overlaying a significantly faster signal over the Y. I believe at this setting it is 512 vertical pixels, it will do up to a 2k x 2k image.
![]()
-
Rebuilding Filaments
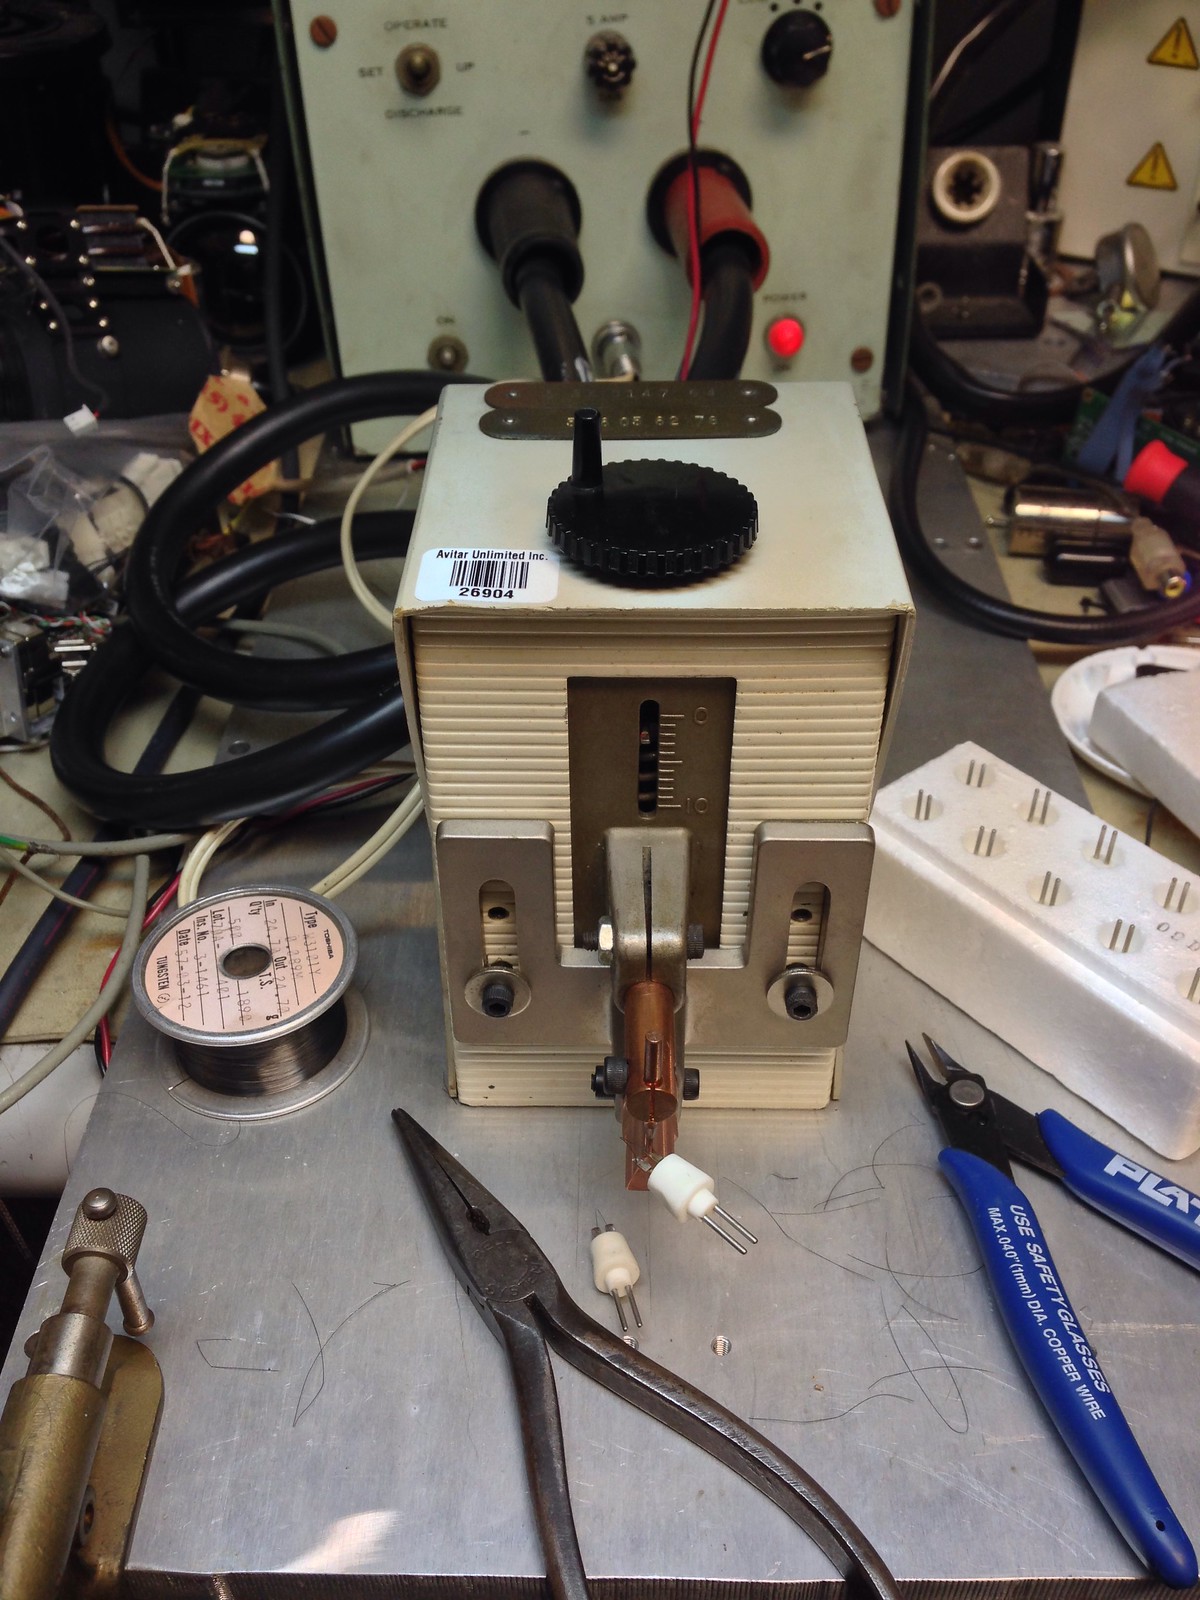
11/21/2014 at 20:39 • 0 commentsFilaments are expensive, around $50-55 each and you must buy 10 at a time. You can also send in your old bases for rebuild. But since I have the wire and the tools to do it myself I am rebuilding my own.
I am using an old Hughes stored energy welder and a Unitek spot welding head to make my own with the .089mm tungsten wire I bought off eBay. I use a small vise to hold a loop of the wire and then thread another loop of wire though that and pull tight with a pair of pliers. I then use fingernails to form the wire tight around the other to get a nice sharp tip. This is then spot welded to the filament base as close to center as possible.
Ideally after this you would put them in a vacuum chamber and run current though them to let them anneal and do all their moving around before you mount them in the electron microscope. That is a project for a later date.
![]()
-
Settling In
11/21/2014 at 20:30 • 0 commentsThe SEM came with a big transformer to drop the line voltage down from whatever your mains voltage is to the 100v needed by the scope. Big 'ole transformer too, must weigh about 60 pounds. I would rather not use it if I could and looking thought the specs in the manual I find that it says the scope will run off 100 or 120. I get out the schematics and sure enough there are jumpers on the power supplies to switch it to 120v operation. I do that and it works just fine. One less thing to take up space.
With the new configuration of the column sitting 90 degrees from the console I find that the power cable going from the column to the console is not long enough so I extend that, the cable also has the high vacuum interlock for the high voltage supply so I wire that up with a separate wire.
With everything working as it should, more or less, I lowered the console and the column off the carts with the help of a toe jack. The legs of the console are just lengths of square tubing laid flat so I took some adhesive backed teflon tape and coated the bottom of the tubing. This lets me slide it along the carpet pretty easily to get access to the back. I do a similar thing with the console, I bought some furniture sliders at the hardware store and just left it under the column base.
There are a few more bugs to work out. The data display module that overlays the voltage and scaling bar on the CRT is not displaying voltage correctly. I popped it open and even with the manual I have no freaking clue how the thing works. I know someone who might have a spare module that I am hoping to buy from.
I do seem to have a leak in the column someplace. It might be one of the valves on the pumping side of it, I took one of the accessory port covers off and machine it to accept a KF-25 elbow so I could install a pfeiffer PKR-251 full range ion/pirani gauge. With this installed I was able to find out that I was able to get down to about 5x10^-6 torr but after shutting down it would be up to about a torr in a day or so. Not a terrible leak, but something I want to fix. The next step on this will be to connect my RGA/Leak checker to the column and see if I can locate the leak with helium. To connect the leak checker to the column I took a flexible corrugated stainless vacuum line I had and chopped off the 1/2" VCR fittings from the ends and tig welded a KF-25 flanges in their place. I still can't connect to the RGA until I get another KF-16 fitting to replace the one I scavenged off it to hook up the turbo on the SEM. oops!
![]()
Hitachi S-450 Scanning Electron Microscope
Getting an old (1980s) SEM running and adding digital capture