 Michele Perla
Hello there,
The main parts that will compose the project have arrived! See them in all their glory here below!
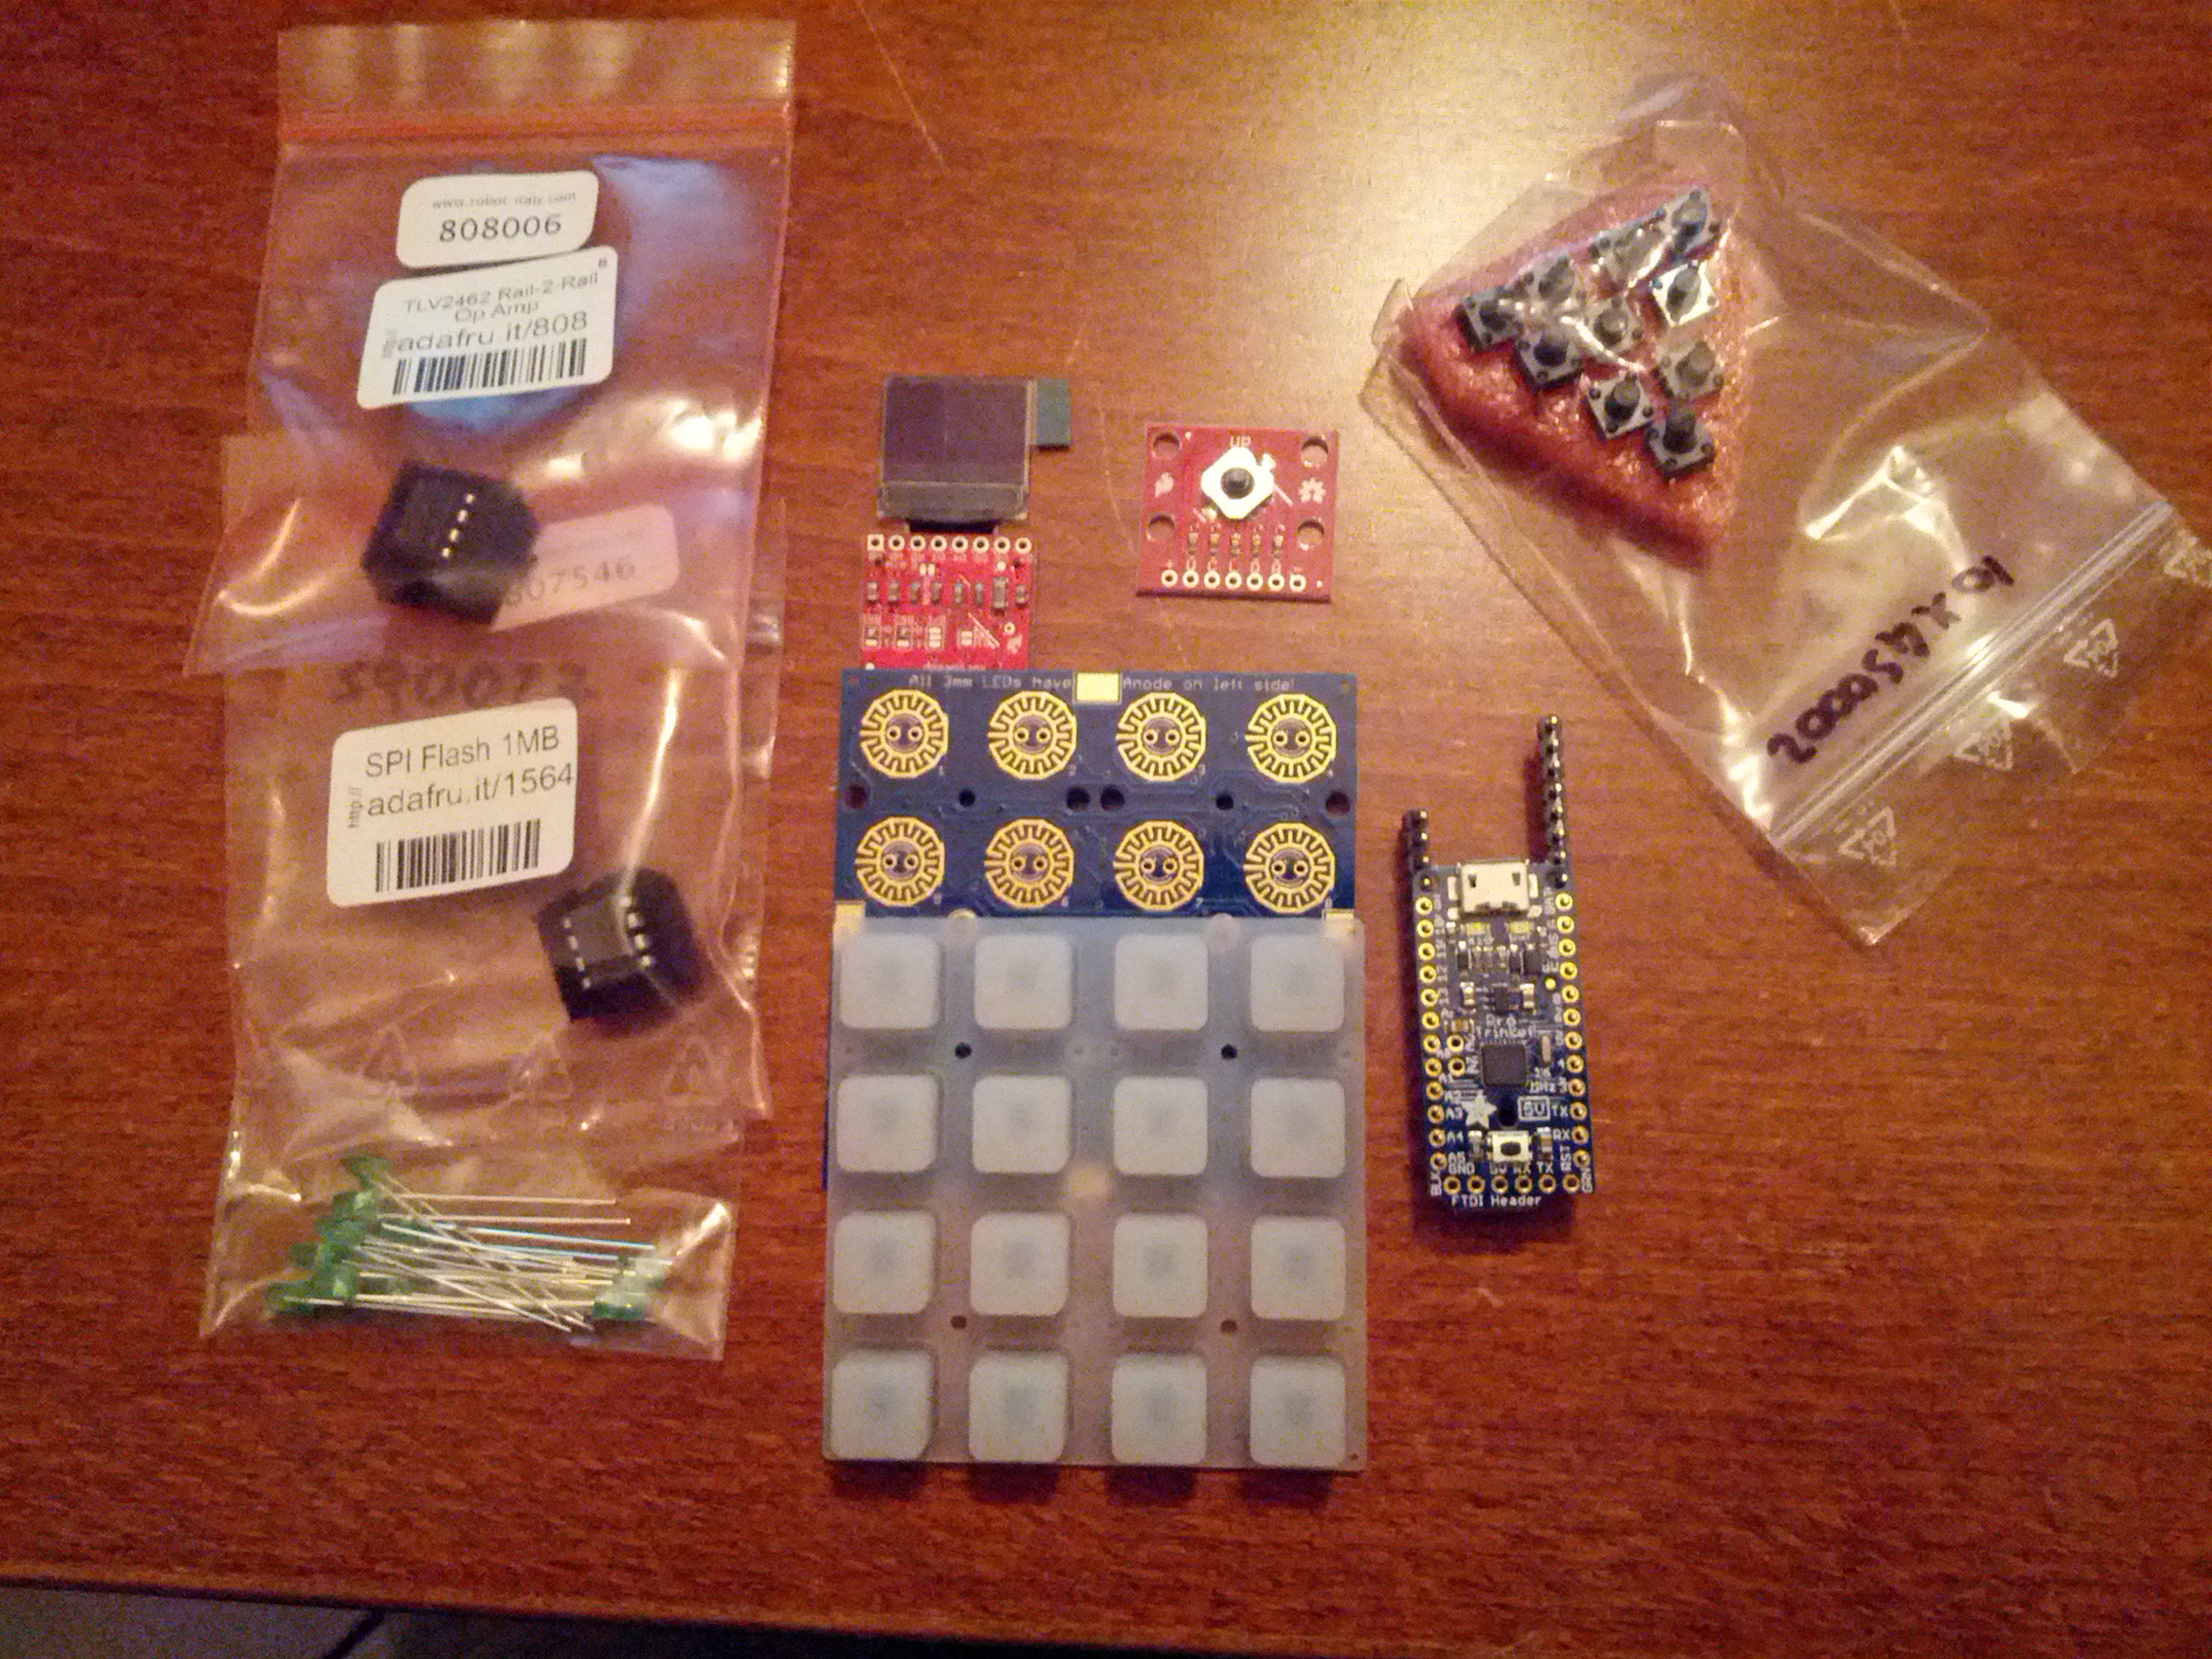
You can see a few random buttons (just in case I might need them) on the up-right corner and the model of the op-amp (in the left side) that I may use for the headphones amp, a TLV2462 rated for current outputs of up to 80 mA, and it's rail to rail! I also got some TL072-074 chips that will probably be used for the mixer part, which is mandatory to blend the 1-bit outputs with the PWM outputs together.
Other than for the charger/step-up/monitor circuit, I was concerned on where to print the 3D case for this beauty, but LUCKY ME! I found www.3dhubs.com and a new world opened in front of me, in fact I found some pretty good places (or "hubs") that have high quality 3D printers and for cheap here in Rome!
More on the case design: I will start from the Trellis enclosure design took by Adafruit and enlarge it and cut a few extra holes to fit the display, the 5-way joystick, the power switch, the headphones and line-out jack; probably I'll also reduce its height, so to better fit in a pocket.
I'm starting work on the charger circuit now, then I'll source its parts along with a 2000 mA 3.7 LiPo battery (the cheapest I could find on Farnell); I hope that they have the exact parts of the Sparkfun designs...
See you next update!
Mick
Discussions
Become a Hackaday.io Member
Create an account to leave a comment. Already have an account? Log In.