While I'm still waiting for my PCB, I did a bit of work on software. In fact, I should have done my high-level programmer routines, as the low-level ones already do work, but I was impatient enough to start to work on the AVR assembler.
The assembler isn't that complicated piece of software - in theory, at least. Just take a line like
LDI R25, 0x23
meaning for the CPU - take value 0x23 and put it into register R25. This meaning is not important for assembler, it just needs to translate this form - easy to understand for human brain - into machine code, actually being easy to understand for the silicon brain. The instruction set is probably in every datasheet, but deeper explanation, including binary opcodes is in separate document. By the way, machine code for this instruction is:
1110 0010 1001 0011
Simple enough, huh? In fact, you could write all your software in machine code, but humans tend to be less error-prone when writing in assembly language, or better in higher-level languages, but we will ignore those for the time being. Running AVR assembler on AVR is just about the right task.
The assembler needs to read source file line by line, determine whether the line seems to be valid instruction (in this case LDI), read operands (in this case R25 and 0x23) and create correct bit pattern of machine code. Unfortunately, the machine code patterns are quite different between instructions and some instructions do have two operands, some just one and lot of them have no operands. As usual, this is the detail that makes assembler complicated, not mentioning the assembler has no clue what the heck is "R25" and it needs to substitute it with proper register number.
Side note regarding C code writing and debugging
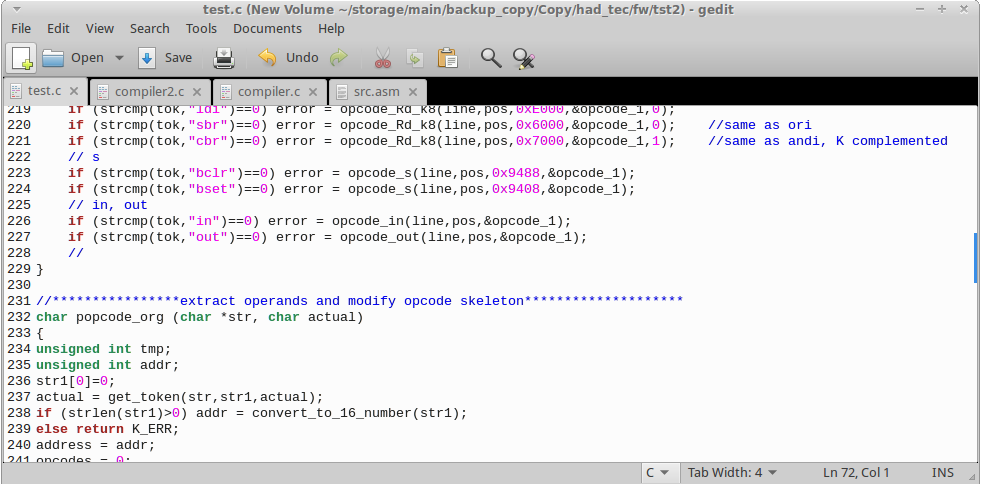
For this purpose, I put arduino IDE away and decided to write and debug vital assembler parts in plain C using C compiler of my PC workstation, to be transferred later into arduino IDE. As Linux has inherent support for this development, I used GCC and Gedit editor. It is not that complicated and described countless times in tutorials, like this one.

Notice the editor. Pure joy, compared to arduino IDE.
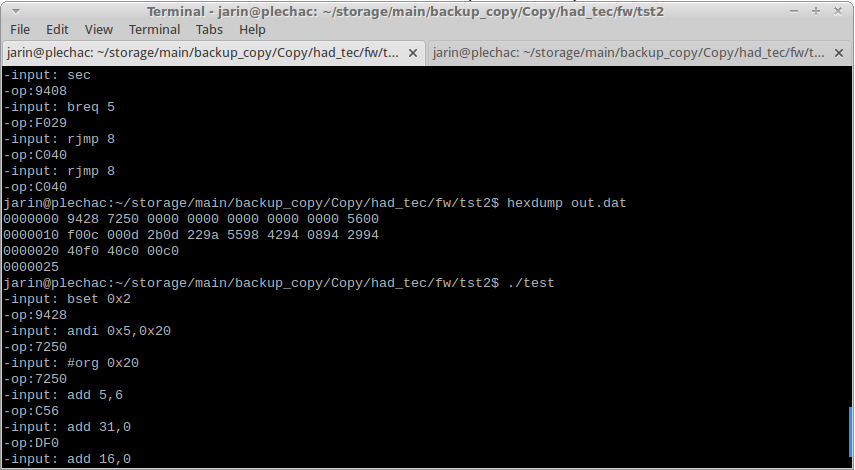
Together with xfce terminal (I'm using Ubuntu with XFCE desktop) it makes simple, but powerful development combo, allowing much faster edit/compile cycle and easier debugging via console messages, compared to arduino.

Terminal window, with debug messages.
End of side note regarding C code writing and debugging
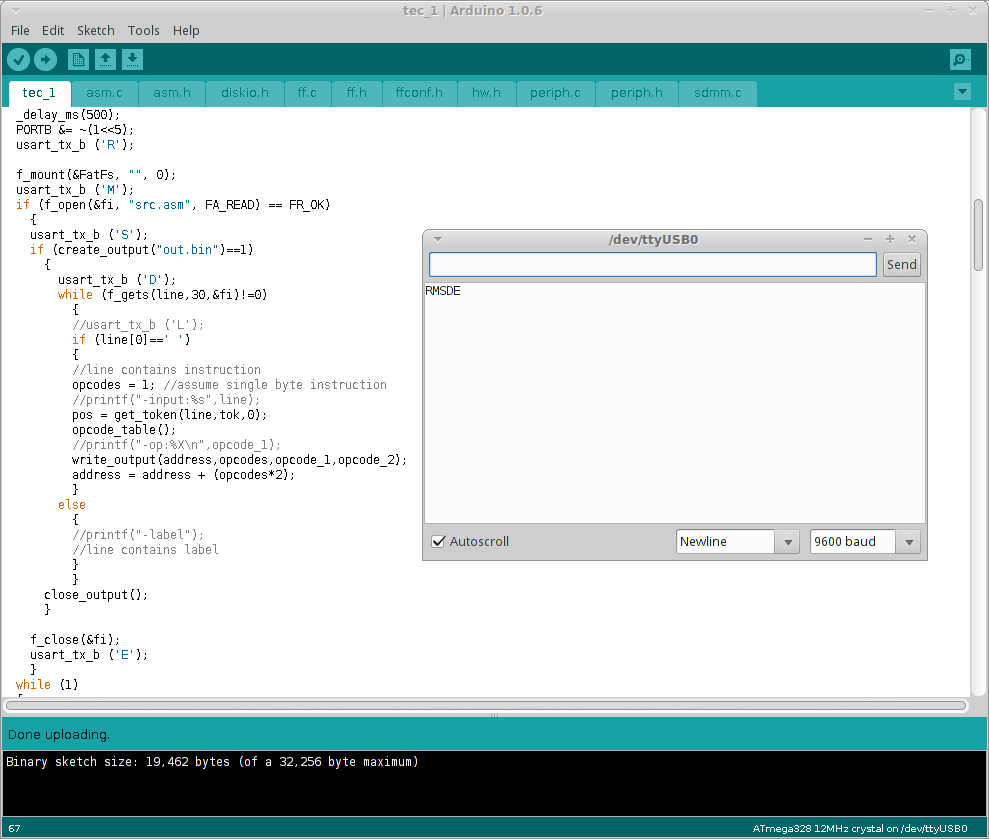
The assembler now counts around 600 lines of C sources and takes approx. 6kB of FLASH memory. Along with he fatfs and display routines, the total FLASH requirement is around 19kB. So far so good, I have 9kB of FLASH left, for editor and high-level programmer routines. RAM footprint is quite low, around 60 bytes, but the assembler needs to read and write input/output files. Fortunately, fatfs overhead is quite low, so now I'm using less than half of available (2kB) RAM. And this is how it looks, running on real AVR

I'm using serial port and arduino built-in serial monitor to display debug messages. R stands for 'run', meaning running program, M means that filesystem was mounted, S - source file is open, D - destination file is open too and finally E - program reached its end. There was lag a few tens of miliseconds between D and E, meaning intense data crunching inside the AVR.
Oh yes, and I updated my github repo for this project.
 jaromir.sukuba
Discussions
Become a Hackaday.io Member
Create an account to leave a comment. Already have an account? Log In.