Close
0%
0%

Neptune

Low Cost Open source hardware/software platform for Underwater Remotely Operated Vehicles.

Similar projects worth following
Neptune will be a low cost platform for underwater exploration. The end goal is to make the circuitry and software necessary to to control motors, connect network cameras, read sensor, and transmit data to a host computer.

Neptune is an Underwater Remotely Operated Vehicle (UROV) with some semi autonomous features. The main goal of the project is to create a hardware/software platform for a generic UROV system, so that anybody can build their own physical configuration around it.

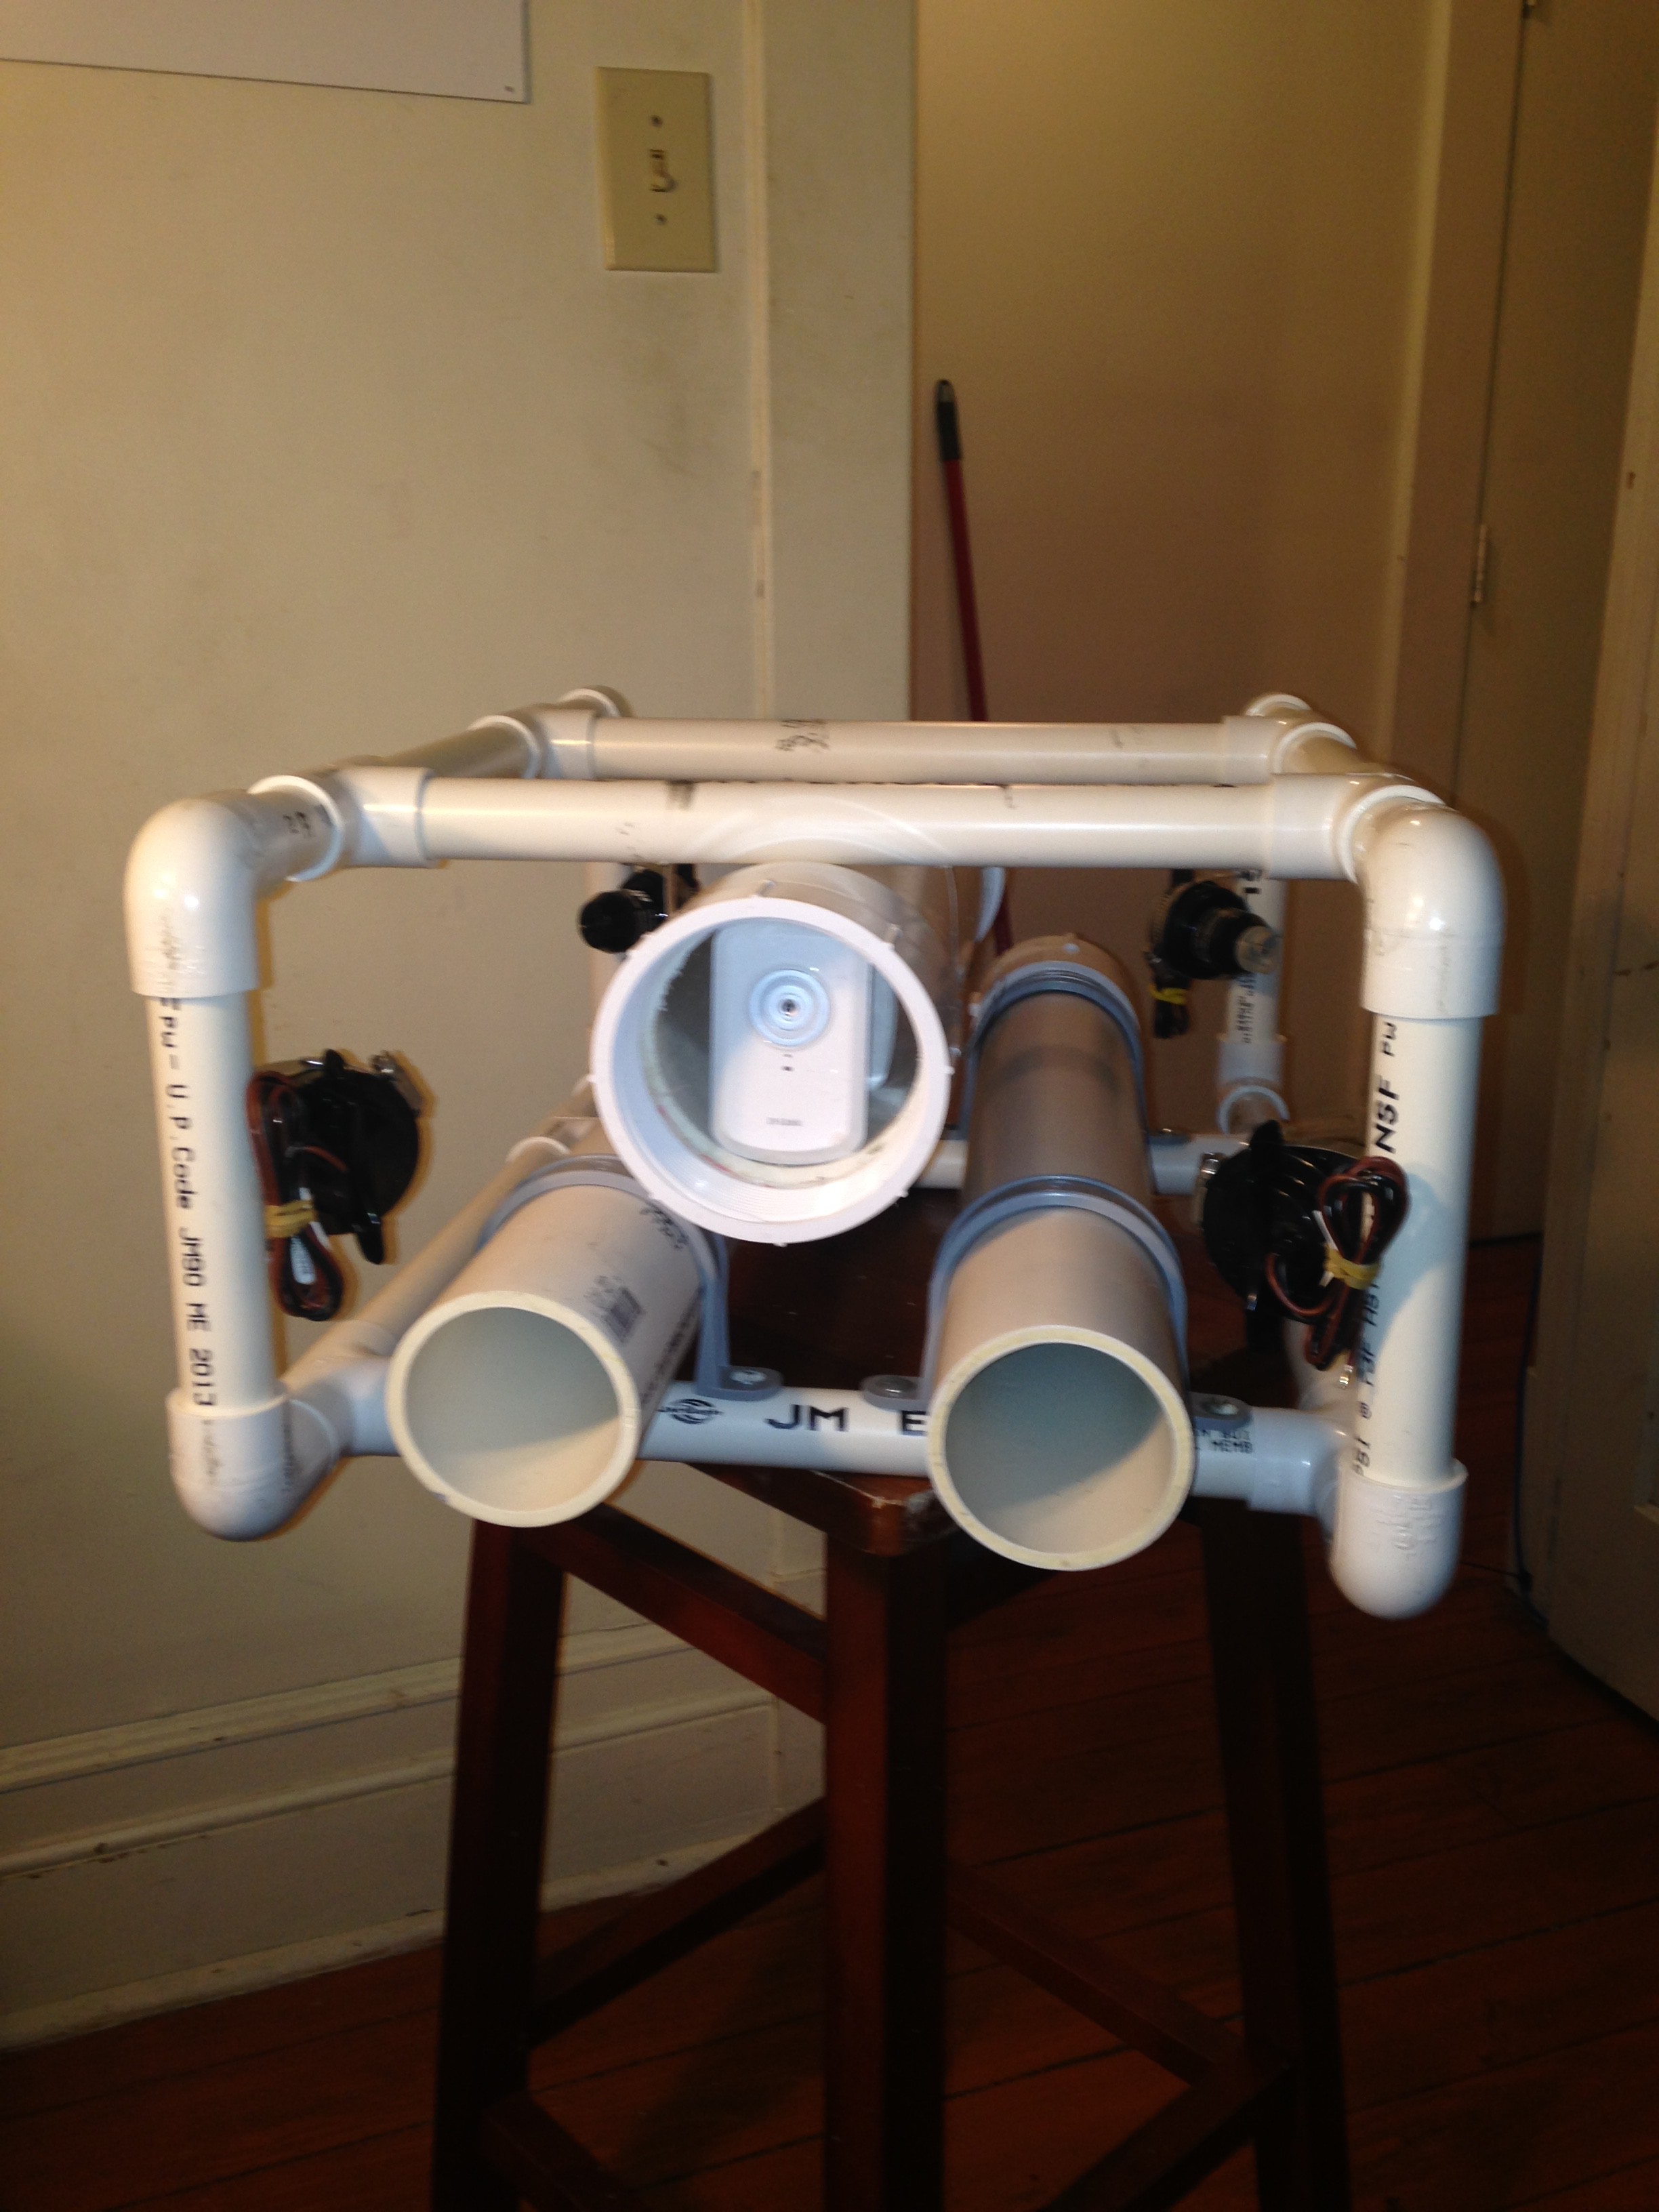
My physical prototype is made of PVC and the thrusters are oriented in a vectored format, but nobody else would be limited to these configurations.

The general system overview looks roughly like this:
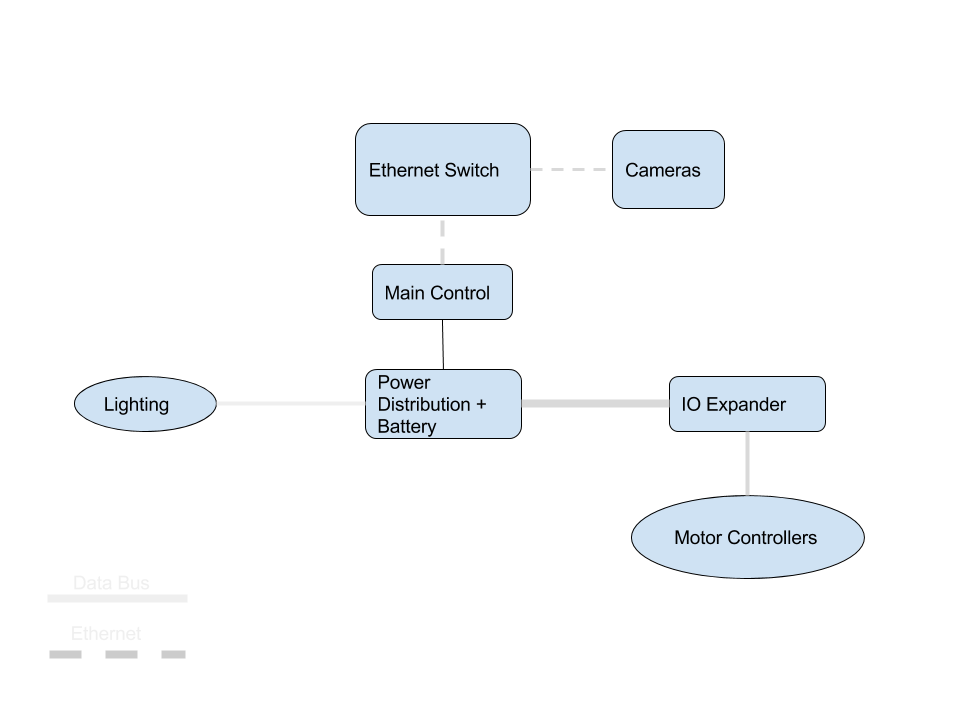
In my particular setup, the UROV is tethered via ethernet to a floating buoy on the surface with and Access point that the computer can connect to. This isn't required, I just found it easier to work with. The buoy will also have a GPS and data logging system connected to the network when I get around to it.

The PC application is currently written in python, but because all communication goes through TCP and UDP it can easily be written in almost any other language (maybe browser application in the future?)

In the actual UROV there is an IP camera, and the main controller connected to the ethernet switch. This setup has the benefit of a bunch of flexibility. I can add any number of extra IP cameras, or devices in the network.

The control system is logically separated in a few different boards. This is mostly to allow them to be replaced and upgraded, as well as to give some flexibility with the physical configuration of the UROV.

The entire system is powered by two 11.7v Lipo batteries housed in the UROV.

Physical Configuration

I built the physical body of my UROV from various sizes of PVC, and a lot of caulk and marine glue. It is rectangular, with 3 central tubes that house the electronics. This physical configuration has been reimplemented and will be replaced soon.

The center tube houses the 3 control boards, as well as the camera, and network switch. The two smaller tubes have super bright LED's on the front, and the left one houses the batteries.

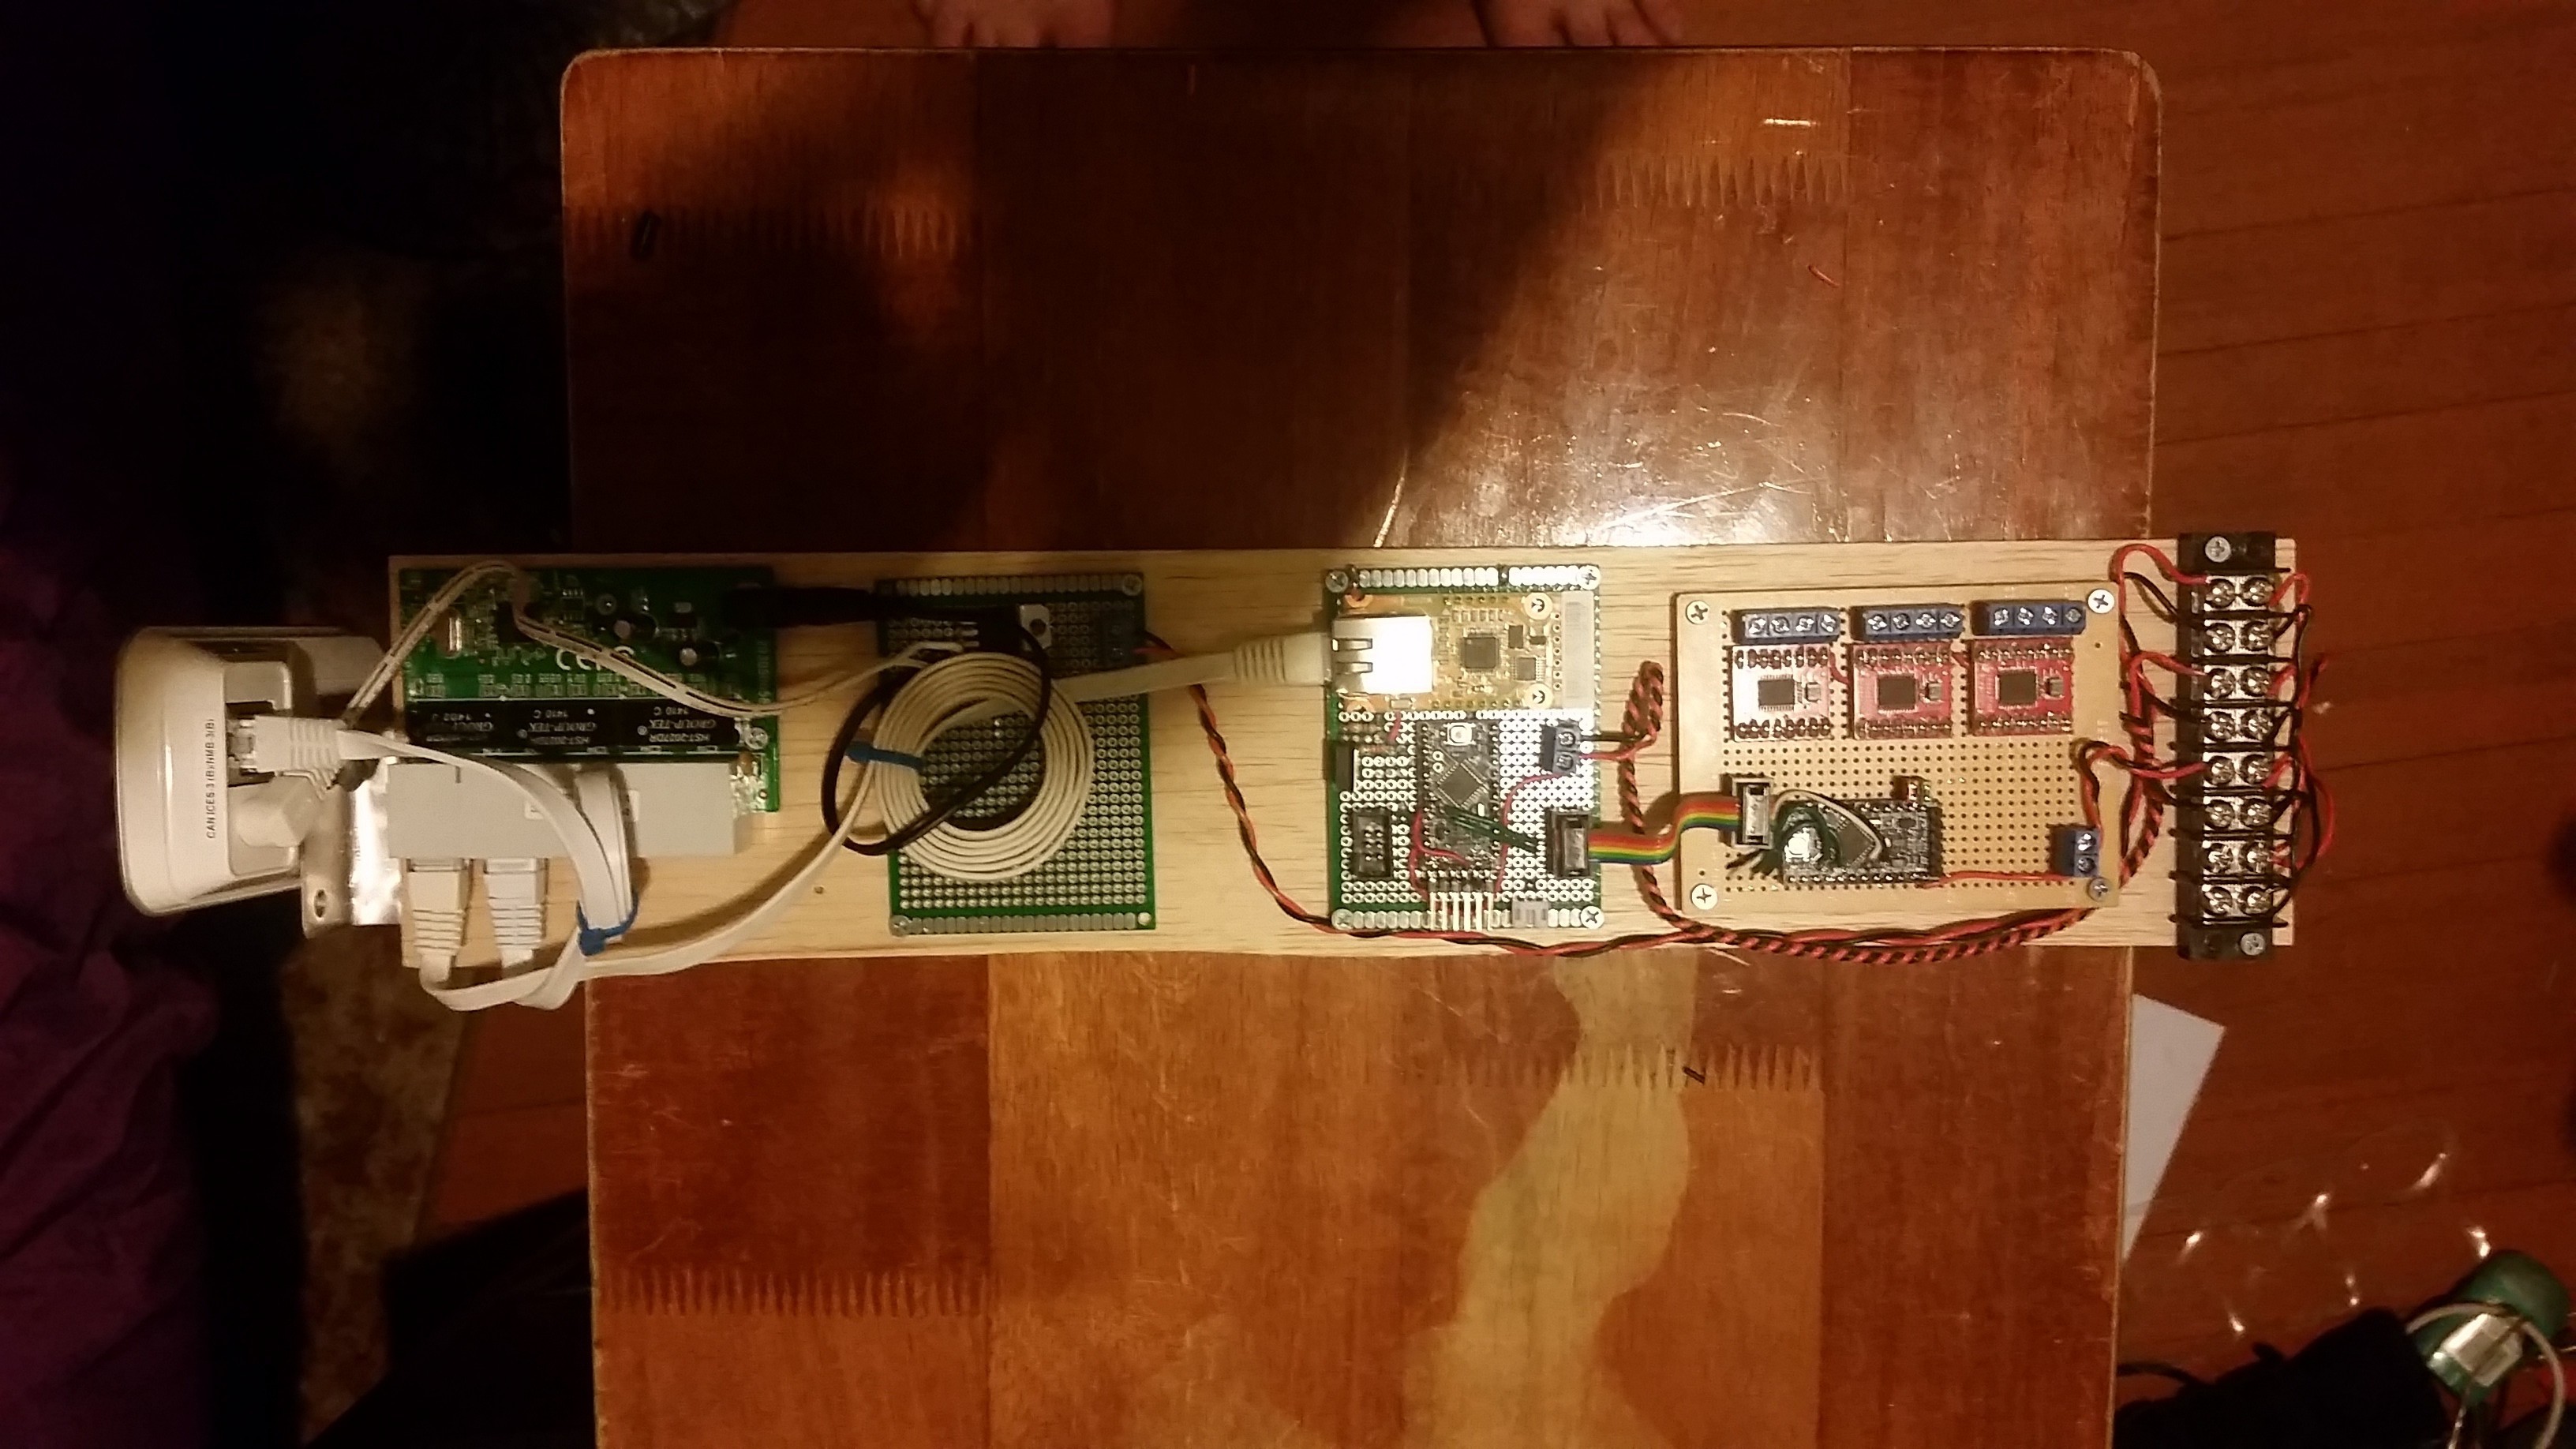
The electronics in the center tube are arranged in a "Core" all mounted to a piece of balsa wood.
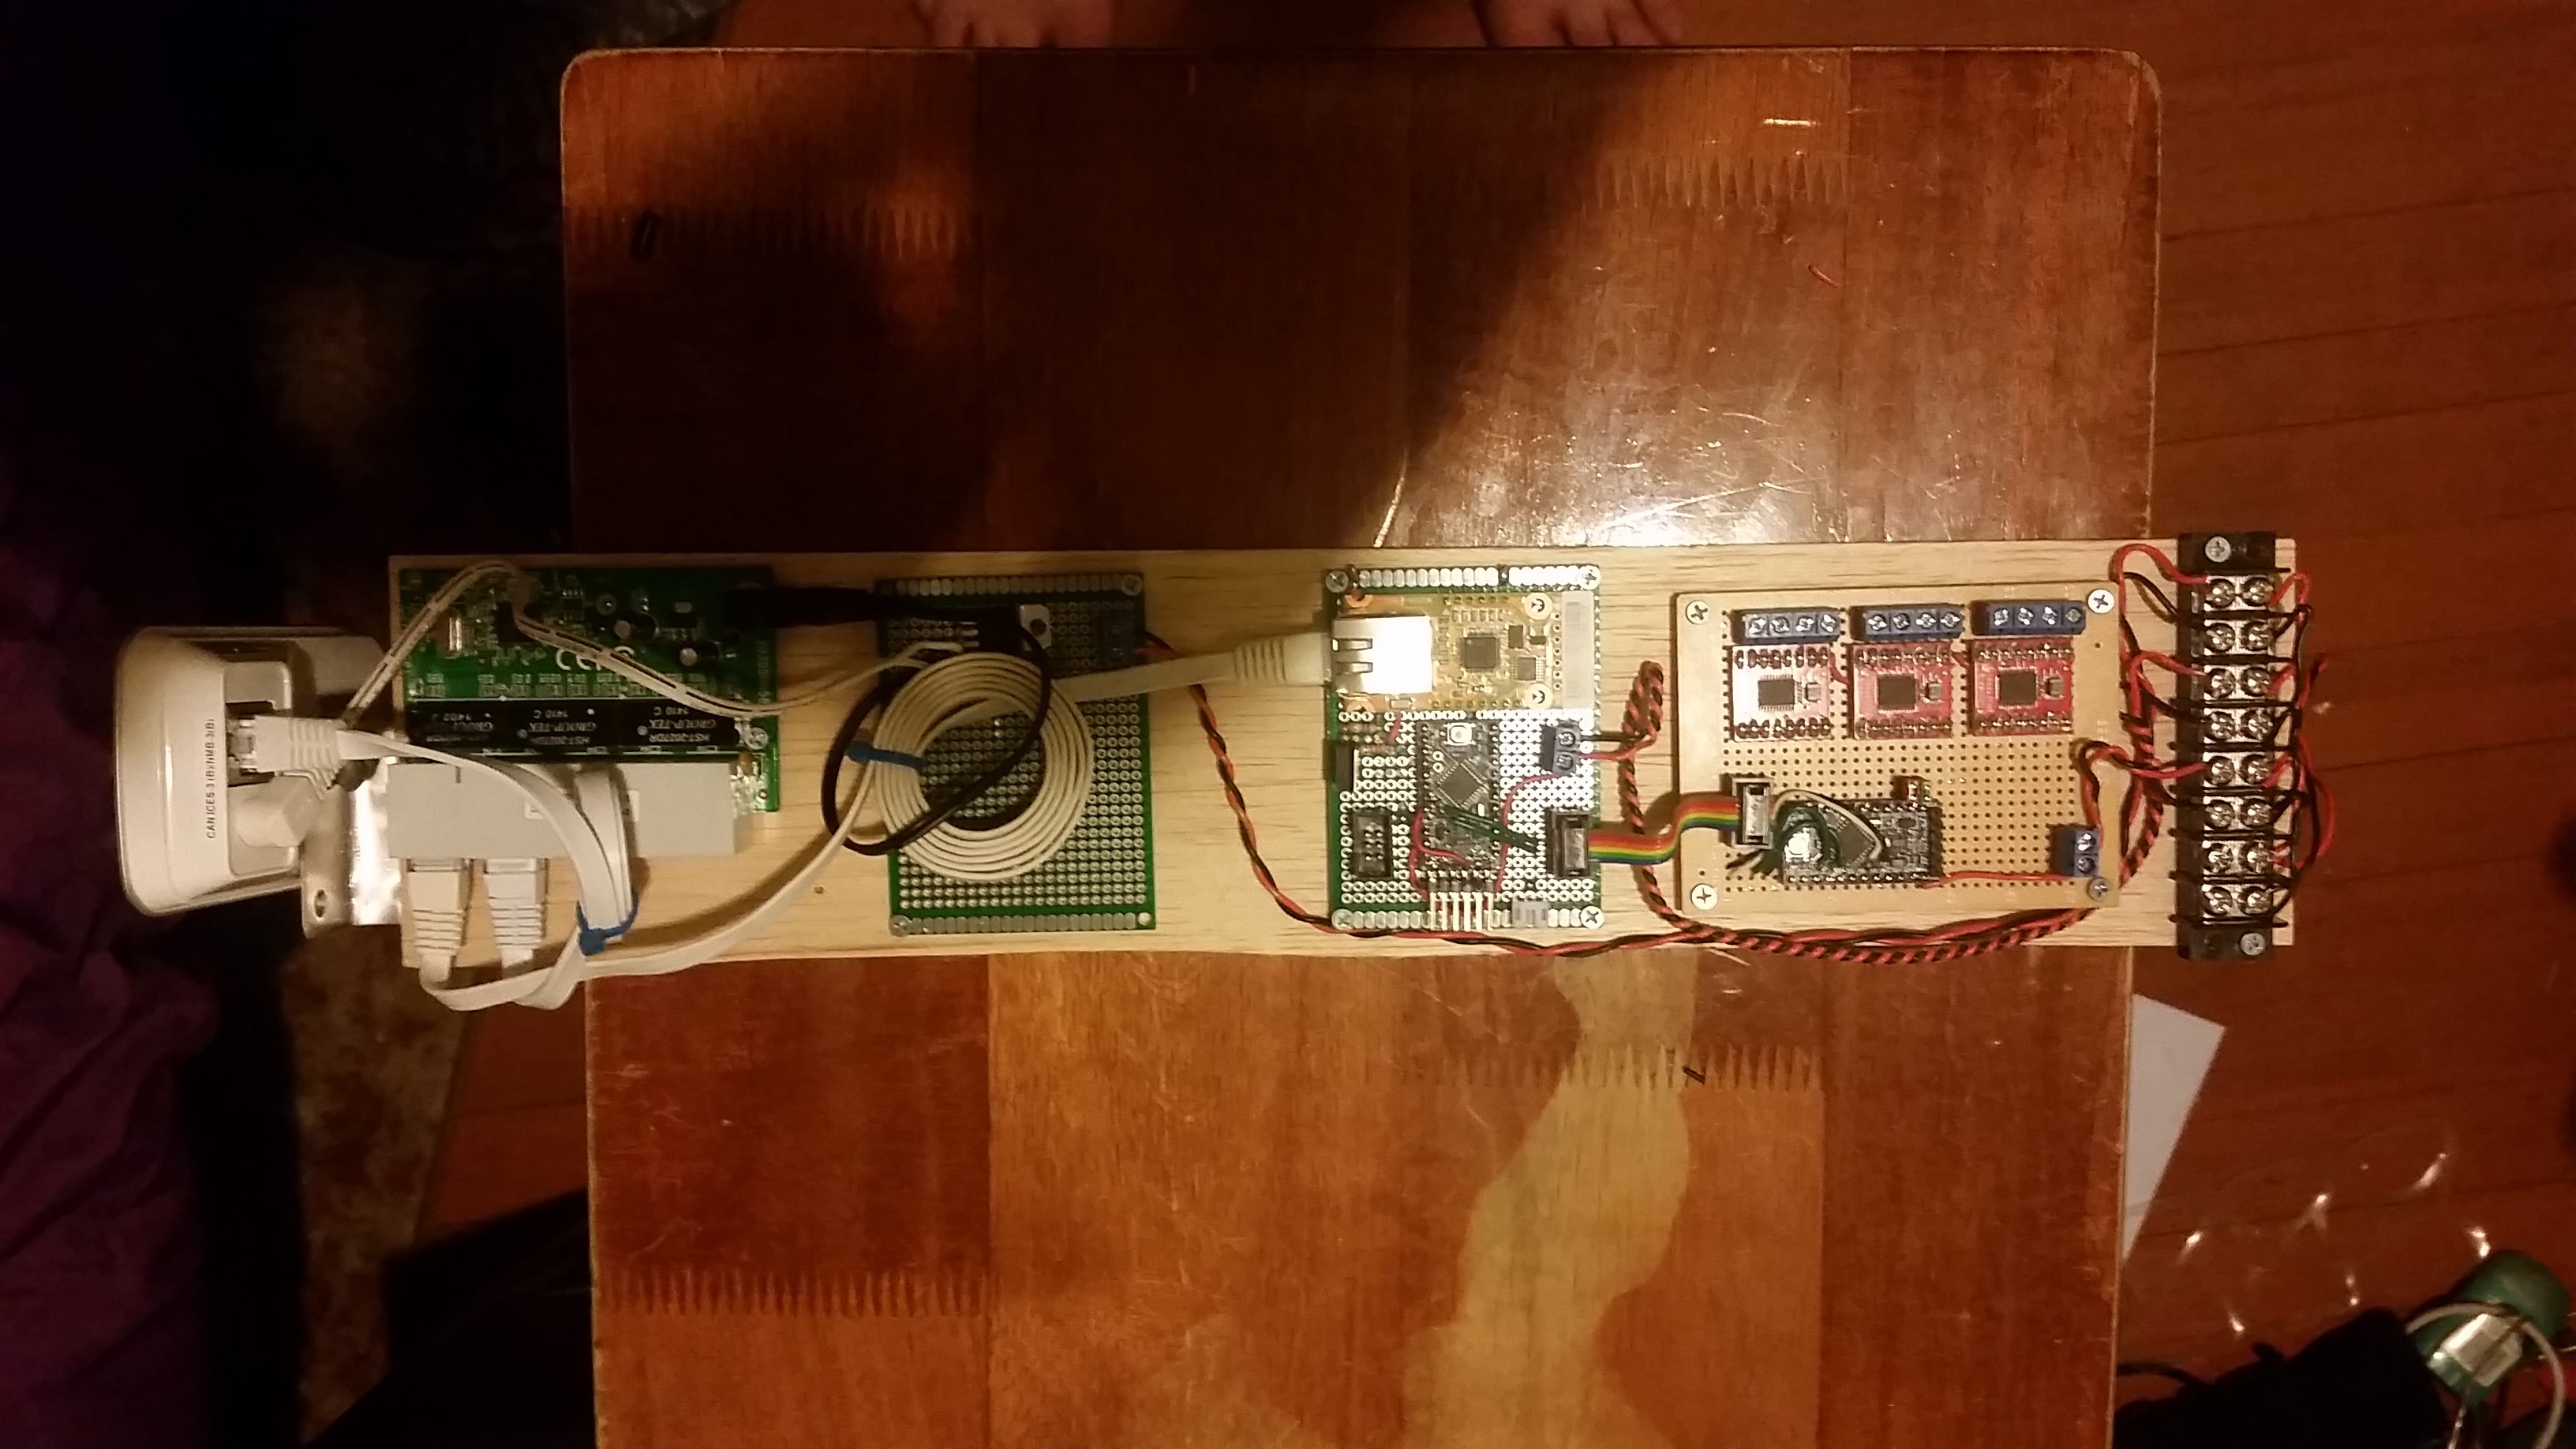
The parts, from left to right are the camera, ethernet switch, a power conversion board, the main control board, the motor controller/relay board, and a power distribution bus. The whole thing just slides into the back of the main tube and closed with a waterproof sealed screw cap. This is being replaced with new board designs and a 3D printed core.

The thrusters are oriented in a vectored configuration. this configuration uses 7 motors to allow translation and rotation along every axis. This image shows how the thrusters are controlled to make those maneuvers.
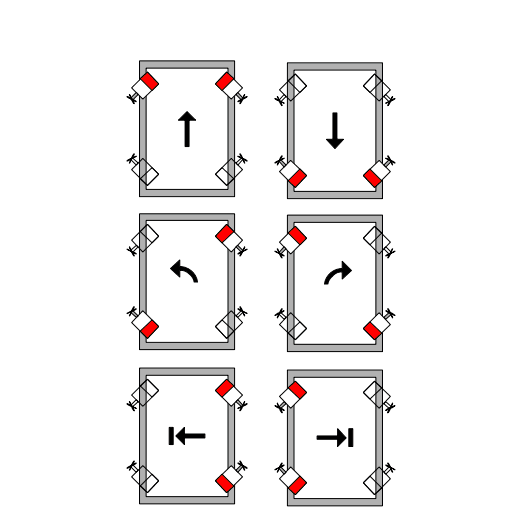
  • 7 × Bilge Pump Thrusters Waterproof bilge pump motors with propellers attached
  • 1 × wiz550io Ethernet Module
  • 1 × Network Ethernet Switch
  • 1 × IP Camera

  • Big Changes, Core Module

    Bash Sarbora01/22/2017 at 18:57 0 comments

    It's been a while since I had an update on Neptune, but I have been making a ton of progress. I've been focusing on taking everything I learned from prototyping and previous boards and turning that into more effective designs.

    Most of these changes are to solidify some of the older design philosophies (modularity, extensibility), and introduce some new ones. Instead of writing out each new board and system in one big post, I will push an update about a particular system every few days.

    I want Neptune to be pretty compact, so my implementation of the core module has been updated to reflect that.

    Pictured above is the old core module. It is a slab of balsa wood with all of the electronics screwed on top. It slots into the main 4" pvc tube, and a few waterproof connectors expose the motor, power and LED connections.

    The problem with it is that it is very long(14"), not very stable, and has too many boards on it. Not all of those boards will be used in all configurations of Neptune.

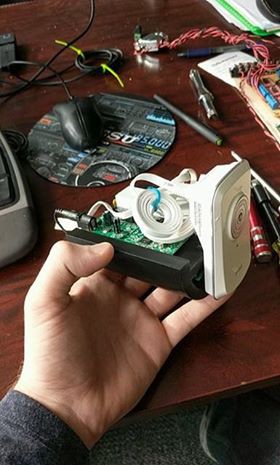
    This is the new core module. It's got the bare minimum for a Neptune configuration, the Camera, the Ethernet switch, and the MCU board. It's about 6" long, allowing for a much more compact configuration. The only connections it needs to the outside are the ethernet line, system power, and data bus (6 wires). Its 3D printed to fit perfectly into a 4" PVC tube.

    I plan to make the same sort of modules for the motor controllers, IO expanders, and Power management boards so that you could fit them all in a single 4" tube or split them up however you choose. I've already made some for the batteries that fit into 3" tubes.

    For my first implementation I will be sticking with my standard 3 tubed vectored configuration, but instead of being about 26"x18"x12" I will try to pack it into a lightweight 12x12x12 cube. The central tube will have this core module, and each secondary tube will house a battery and LED system. The motor controllers, power distribution, and IO expander will be housed in a waterproof project box between the battery tubes.

    For a second implementation I will try a single tube solution that looks more like a traditional submarine. The beauty of Neptune is that it makes it easy to do either.

  • First Board Designs

    Bash Sarbora02/09/2016 at 22:27 0 comments

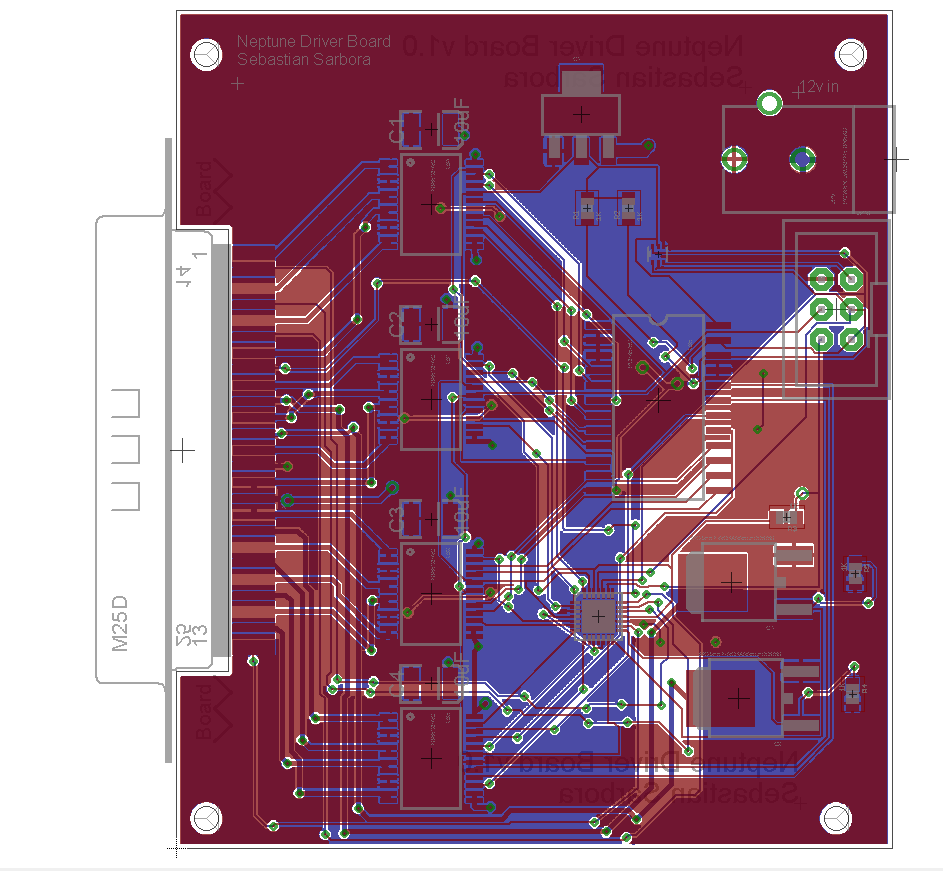
    I finally got a board designs done and sent out to oshpark. I spent a bit of time working on the Driver board, which will control the motors, high power LED's, and servo's.

    All of the outputs come out of a 25DB connector mounted on the edge of the PCB. This makes it a much easier and central location for attaching to the waterproof connectors.

    A few other notable parts:

    • 6 pin control connector, with high temp interrupt and I2C
    • temp sensor to help with overheating
    • Four 2 channel PWM motor controllers
    • Two I2C GPIO expanders, one exclusively for controlling the logic of the motor controllers, one with PWM, for motor speed and servo control.
    • 2 Mosfets for LED control

    The Schematic:

    The board:

View all 2 project logs

Enjoy this project?

Share

Discussions

Alan wrote 10/12/2022 at 02:20 point

Hi, I’m Alan, a Wiznet engineer. Thanks for your post. I'm very happy that you made a wonderful project using our products. You can get a lot of information by visiting our site. I hope you come and get a lot of information. If you have any questions, please feel free to tell me. Thanks again

  Are you sure? yes | no

texane wrote 01/04/2016 at 20:18 point

Hi,

Great project, what glue are you using to hold PCB tubes together ?

Cheers,

  Are you sure? yes | no

Bash Sarbora wrote 01/04/2016 at 20:25 point

I'm using a combination of caulk and marine glue. It provides an excellent waterproof seal, and is not too hard to hammer off if I make a mistake. I've read on a few forums that regular PVC glue doesn't give a very good bind and will still cause leaks.

  Are you sure? yes | no

texane wrote 01/04/2016 at 20:48 point

Fine, thanks for the reply !

  Are you sure? yes | no

AVR wrote 05/04/2015 at 03:50 point

Looking forward to how it comes!

  Are you sure? yes | no

Similar Projects

Does this project spark your interest?

Become a member to follow this project and never miss any updates