I got the system working a while ago. But I'm going to take it apart today.
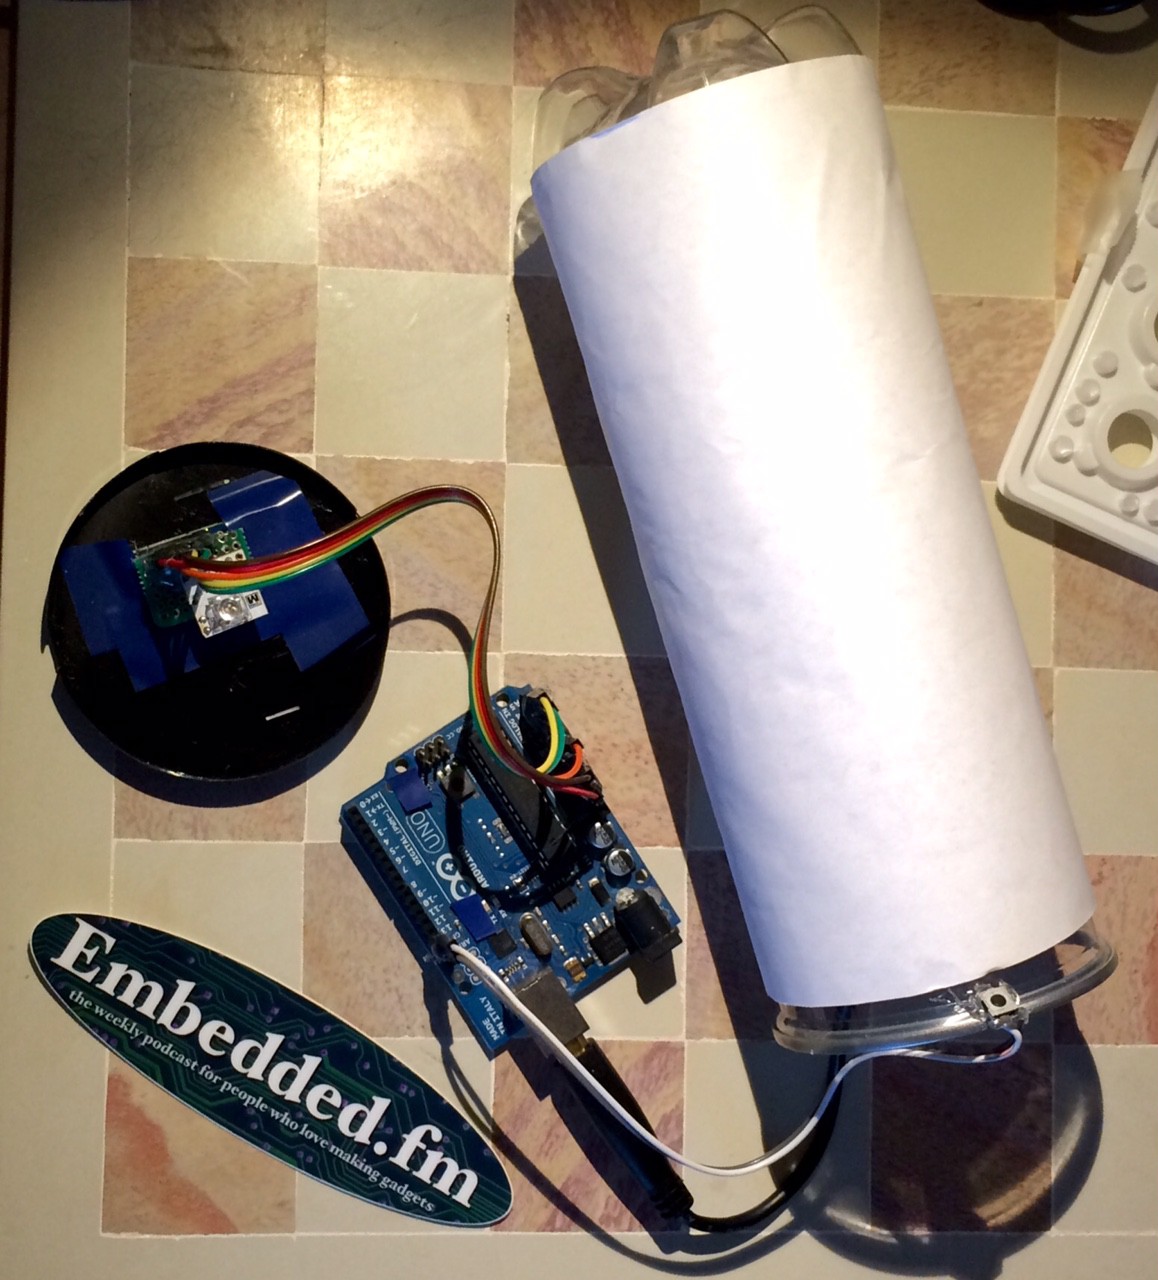
I put together the system with an Arduino UNO, the IMU, and BlinkM. I added a USB battery power supply.
There are four modes: accelerometer, gyro (rate sensor), magnetometer, and off.
In accelerometer mode, X is red, Y is green, Z is blue. (The XYZ -> RGB transform is consistent through the entire project.) When you set it on the table, it glows steady. When you move it gently, there is a change but the primary color is in the direction of gravity.
Initially, I used an accelerometer double tap to change modes. Not only was this unreliable, it meant I couldn't show what the accelerometer sees when you tap it: usually an impulse of light, often white, sometimes a little directional.
I switched to a button. That also meant I did not need to use my modified sensor code, I could use the Adafruit 9-DOF Arduino code directly.
So a button press takes me to gyro mode (rate sensor mode) and suddenly the device goes dark.
Oh, I forgot to mention the housing. I fussed about that in my last project post so it seems like I should give an update. I put it in a tennis ball canister. (My beagle was pleased to receive the leavings from that purchase.) And then I put paper around the outside to diffuse the light.

The good news is that this all fits. The bad news is that it barely fits. I've scraped my hand a few times trying to get it in place. The worse news is that with all those things packed in, the impact of the light is lost a little. There are lots of shadows on the outside making it even more difficult to see except in very low-light conditions. It loses something from my original concept (which was a ring, I should remind you.)
Back to gyro mode: it is dark until you move it. Unlike accelerometers with their persistent pointing toward the earth and occasional blip from you, gyros are only interesting when you move them. By turning or swinging the can, I can show X, Y, and Z as RGB. Also, it becomes much more difficult to get white out of the light. (I'm still dizzy from trying.)
Pushing the button (it is pretty small, a friend saw this demo and didn't know how I was doing it, was confused about the mode switches. This is good because I want this to seem sort of like a magic trick but back because she was more focused on that than the explanations. Also, I put the button on the X axis for the sensor so it is easy for me to find (Z is the long ways on the canister)....
Let me try that again: Pushing the button again puts you in magnetometer mode. This is the naming inspiration (North Star). When you are facing north, the light is white, east is green and west is red. South is dark. I use tilt compensated magnetometer heading (oh Adafruit, thank you for making those calculations readable!).
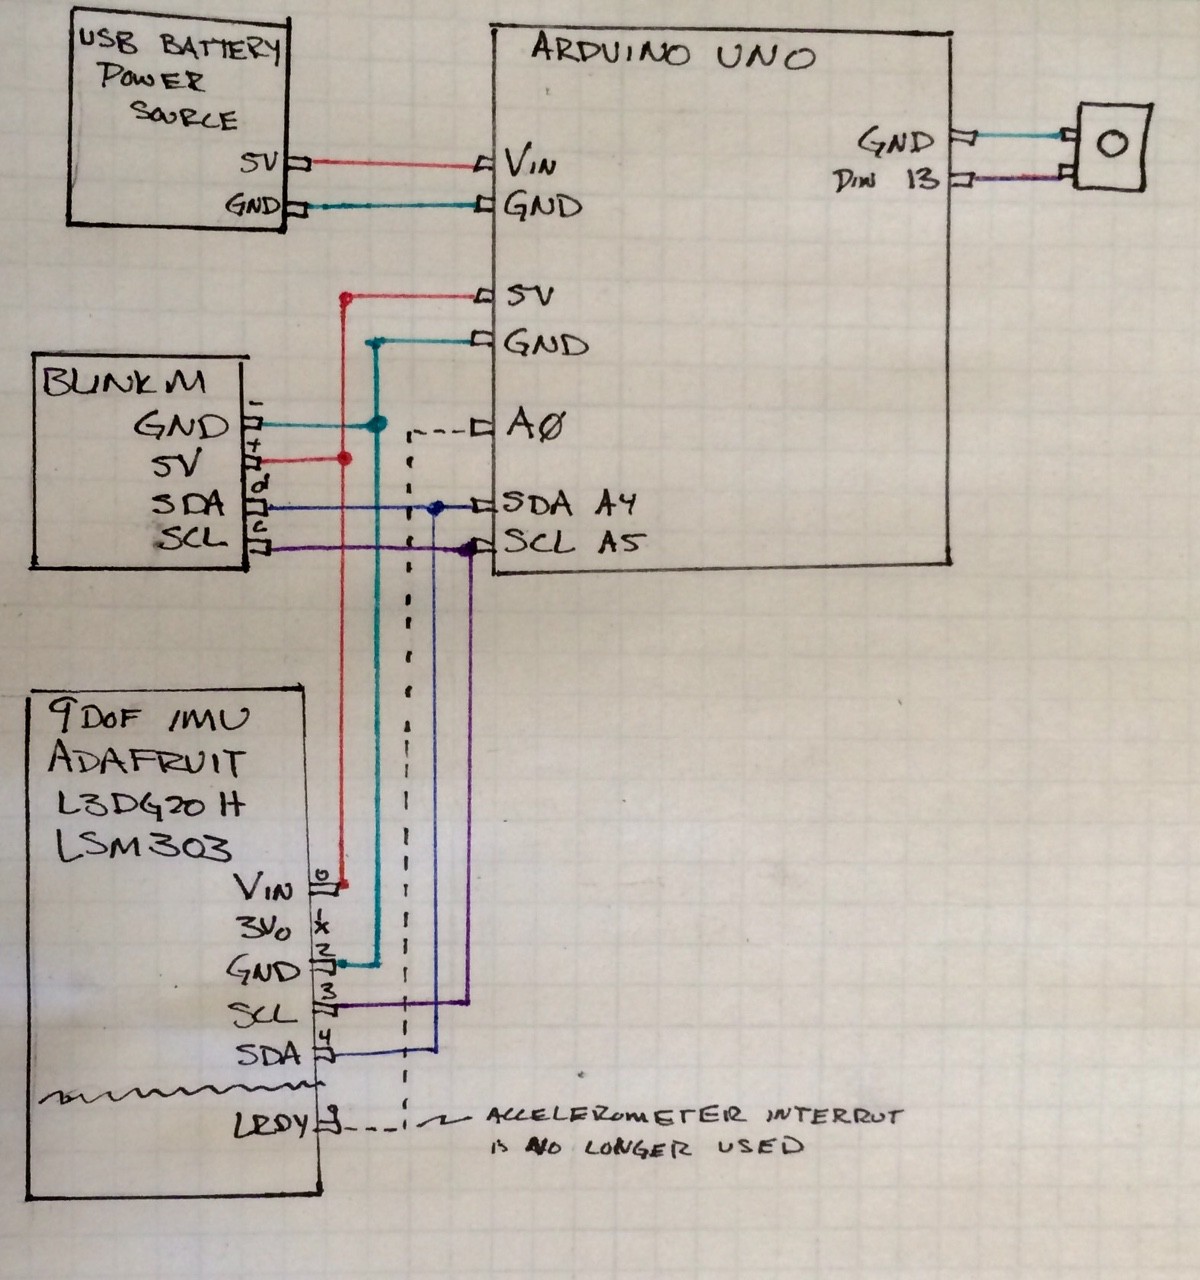
So this all works. Here is a rough schematic.

The Arduino code is in github: https://github.com/eleciawhite/northstar
However, with the too big battery and too big board, I'm not happy with the project. I got a BLENano for work and have an extra one. I plan to redo it with that and a small battery, maybe I can get rid of the shadows. Given the size... maybe it is small enough... hmmm...
Oh, and yes, I do plan to use the BLE part of the Nano. I have some ideas for Python scripts that plot accel, gyro, mags in real time. Ah, who am I kidding? I wrote some scripts for work and plan to rewrite them for you.
 Elecia White
Discussions
Become a Hackaday.io Member
Create an account to leave a comment. Already have an account? Log In.