 James Newton
-
First Trial Assembly
02/21/2015 at 07:33 • 0 comments![]() Here it is with the inlet and solenoid valve, and the motor just resting on those nuts. It will be pretty easy to cut and drill a motor mount by hand. The inlet was, of course, too big for the holes and had to be hand sanded down to fit. Note to self: Buy and measure the hardware FIRST, THEN design the part. Just because the catalog says the part fits a 1/2" hose, that does not mean it's actually 1/2". They make them bigger so the hose has to stretch a bit... plexi doesn't stretch.
Here it is with the inlet and solenoid valve, and the motor just resting on those nuts. It will be pretty easy to cut and drill a motor mount by hand. The inlet was, of course, too big for the holes and had to be hand sanded down to fit. Note to self: Buy and measure the hardware FIRST, THEN design the part. Just because the catalog says the part fits a 1/2" hose, that does not mean it's actually 1/2". They make them bigger so the hose has to stretch a bit... plexi doesn't stretch.![]() Better view of the chamber. I still have to figure out a way to get the stirrer attached to the motor shaft. Prolly just a coupler to another shaft, but then I'll have to file or grind the shaft flat where the stirrer paddle attaches to it. And I need to trim down the outlet 90' adapter and attach the flow rate sensor. Then it's Lights! Camera! (well... photosensor) and Action! (well... moving the stirrer and controlling the valves, etc... )
Better view of the chamber. I still have to figure out a way to get the stirrer attached to the motor shaft. Prolly just a coupler to another shaft, but then I'll have to file or grind the shaft flat where the stirrer paddle attaches to it. And I need to trim down the outlet 90' adapter and attach the flow rate sensor. Then it's Lights! Camera! (well... photosensor) and Action! (well... moving the stirrer and controlling the valves, etc... ) -
Quick mock up with received parts.
02/19/2015 at 21:27 • 0 commentsNote: This is all upside down. The motor will be on top, so water doesn't leak down into it.
![]()
Lovely laser cut parts from Pololu. The wiper paddle is /just/ a bit too high (apparently 1/4 inch plexi isn't 1/4 inch) so I will have to add a bit of padding with a sheet or 6 of transparency film or something. I just put the paddle on a bit of wire with a bit of thinner wire... need a better shaft and /tiny/ screws. The chamber is separated from the motor by some chip tube plugs that were laying about, but that will be the 90' elbows for the inlet and outlet. A water valve is shown to the right. The motor and valve are from Adafruit. OFF! To the Hardware store with it for elbows and screws and shafts and couplers.
Reagent Robot
Automate the Reagent (take a sample, put a drop of stuff in, shake, look at the color) testing of water for Aquaponics, Ponds, Aquariums.
 Here it is with the inlet and solenoid valve, and the motor just resting on those nuts. It will be pretty easy to cut and drill a motor mount by hand. The inlet was, of course, too big for the holes and had to be hand sanded down to fit. Note to self: Buy and measure the hardware FIRST, THEN design the part. Just because the catalog says the part fits a 1/2" hose, that does not mean it's actually 1/2". They make them bigger so the hose has to stretch a bit... plexi doesn't stretch.
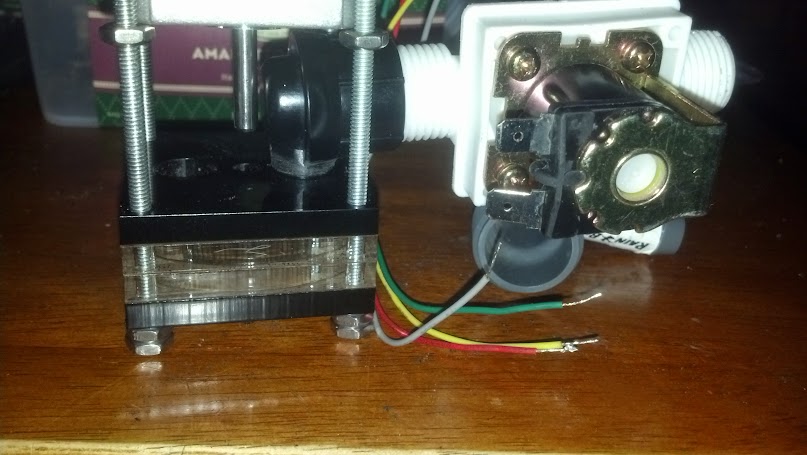 Better view of the chamber. I still have to figure out a way to get the stirrer attached to the motor shaft. Prolly just a coupler to another shaft, but then I'll have to file or grind the shaft flat where the stirrer paddle attaches to it. And I need to trim down the outlet 90' adapter and attach the flow rate sensor. Then it's Lights! Camera! (well... photosensor) and Action! (well... moving the stirrer and controlling the valves, etc... )