Aha! This is the ESP32 - for those who haven't heard of it, search about it in the net! It's the pretty much of the 'sequel' of the ESP8266, which is also a popular little WiFi module that can be reprogrammed using Arduino and can be coupled with other systems like microcontrollers.
However, I couldn't find much of a sturdy platform for the ESP32 environment - it looks pretty fragmented. The stuff offered by the ESP32 is abundant - you have got FPU, Dual-core, bluetooth, WiFi, more RAM and higher speeds, but there need to be accessible tools to realize the powers inside!
Here I am, trying to torture myself with installing the fragmented toolchain. For the start, installing Visual Studio Code and PlatformIO are both very straightforward tasks.
The problem is: Getting it to compile!
Here are some steps to get the thing to compile successfully:
1.) Install Visual Studio Code + PlatformIO. Tons of examples outside - prefer not to repeat it here.
1a.) Install the MSYS32 from the ESP32-IDF official page. The version used is esp32_win32_msys2_environment_and_toolchain-20170330.
Do not use new version - it would not compile since PlatformIO is still using the older version of the ESP32-IDF!
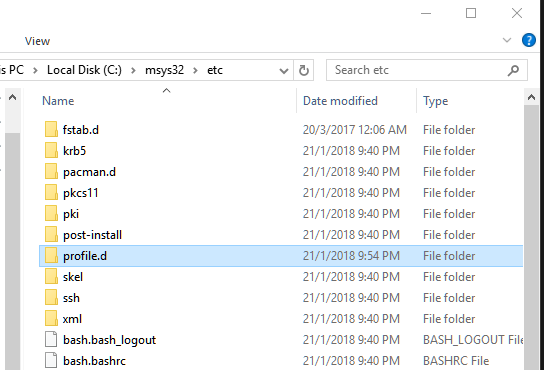
1b.) You need to set up the path for the MSYS32 to access the ESP32-IDF related files:
- Create a "profile.d" folder. Location: msys32/etc ->
- Inside the profile.d, create a file named "export_idf_path.sh"
- Paste this into the file and save it:
export IDF_PATH="C:/Users/comp1/.platformio/packages/framework-espidf"
2.) Start Visual Studio Code. The PlatformIO is automatically launched here upon starting.
3.) Click "New Project" on the right of the logo.
4.) Select the board. Here on my hand it is a MakerAsia/Gravitech Nano32. Select it.
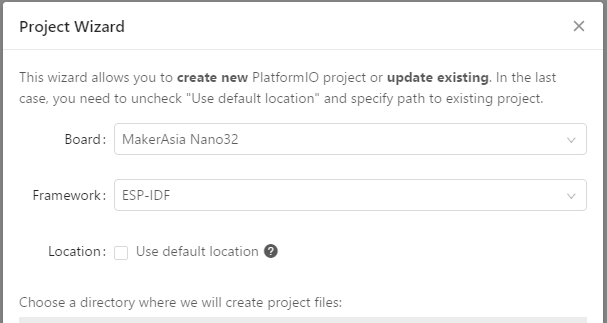
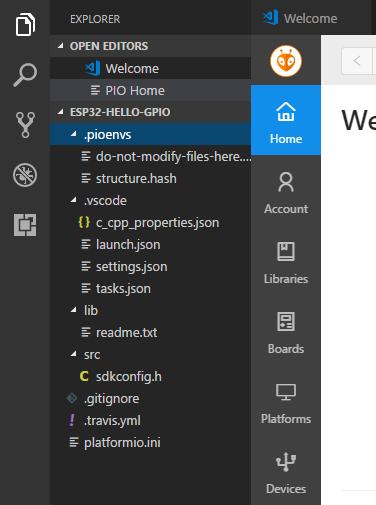
For the location: Simplicity purposes, create another separate folder for these esp32 projects. The example will be ESP32-Projects\ESP32-hello-gpio to create a new project named "ESP32-hello-gpio". Click finish after you have created the respective folder for the project.
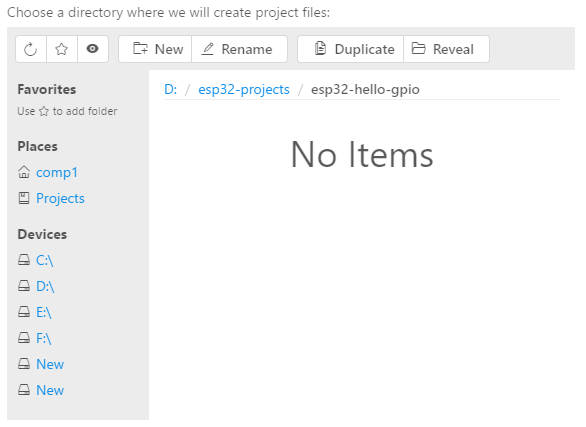
It is not done yet! After you created the project, there are missing files. A lot of it!
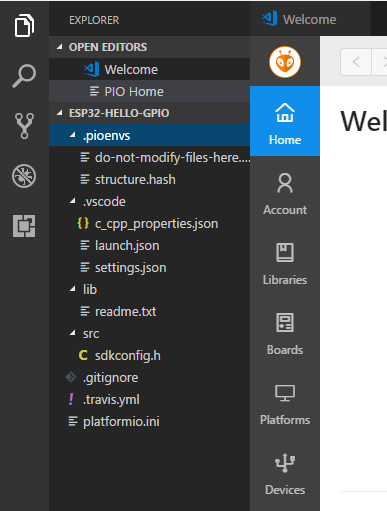
Create a new "tasks.json" and paste it back into the ".vscode" folder in your project folder:
Afterwards: Here, fill the "tasks.json" with the following code. [Special thanks to the author from http://fanoutsendai-yagiyama.blogspot.my/2017/07/esp32-idfmakelinuxemacszsh-grep.html]
{
    "version": "0.1.0",
    "command": "c:/msys32/usr/bin/bash",
    "args": ["--login","-c"],
    "isShellCommand": true,
    "showOutput": "always",
    "suppressTaskName": true,
    "options": {
        "cwd": "${workspaceRoot}",
        "env": {
            "CHERE_INVOKING": "enabled_from_arguments",
            "MSYSTEM": "MINGW32"
        }
    },
    "tasks": [
        {
            "taskName": "build app",
            "args": ["make app"],
            "isBuildCommand": true,
            "problemMatcher": {
                "owner": "cpp",
                "fileLocation": "absolute",
                "pattern": {
                    "regexp": "^(.*):(\\d+):(\\d+):\\s+(warning|error):\\s+(.*)$",
                    "file": 1,
                    "line": 2,
                    "column": 3,
                    "severity": 4,
                    "message": 5
                }
            }
        },
        {
            "taskName": "clean app",
            "args": ["make app-clean"]
        },
        {
            "taskName": "flash app",
            "args": ["make app-flash"]
        },
        {
            "taskName": "monitor",
            "command": "c:/msys32/mingw32",
            "args": ["make","monitor"],
            "isShellCommand": false,
            "showOutput": "never"
        },
        {
            "taskName": "menuconfig",
            "command": "c:/msys32/mingw32",
            "args": ["make","menuconfig"],
            "isShellCommand": false,
            "showOutput": "never"
        }
    ]
}
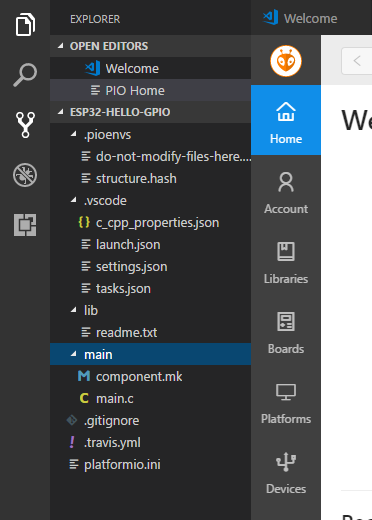
Great. Now create a "main" folder, and create the "components.mk" and "main.c" files inside the folder:
Now, in the component.mk, write this and save:
#
# "main" pseudo-component makefile.
#
# (Uses default behaviour of compiling all source files in directory, adding 'include' to include path.)
And, in the main.c, write this and save: [Alternatively, go get the whole folder from the page if you are too lazy to do it!]
#include <stdio.h>
#include "freertos/FreeRTOS.h"
#include "freertos/task.h"
#include "esp_system.h"
#include "esp_spi_flash.h"
#include "driver/gpio.h"

void blink(void *pvParameter) ;

void app_main()
{
    printf("Hello world!\n");
    xTaskCreate(&blink, "blink task", 2048, NULL, 5, NULL);


}

void blink(void *pvParameter) {

    // toggle GPIO here
    gpio_pad_select_gpio(22);
    gpio_set_direction(22, GPIO_MODE_OUTPUT);
    while(1) {
        gpio_set_level(22,0);
        vTaskDelay(500/portTICK_RATE_MS);
        gpio_set_level(22,1);
        vTaskDelay(500/portTICK_RATE_MS);
    }

}
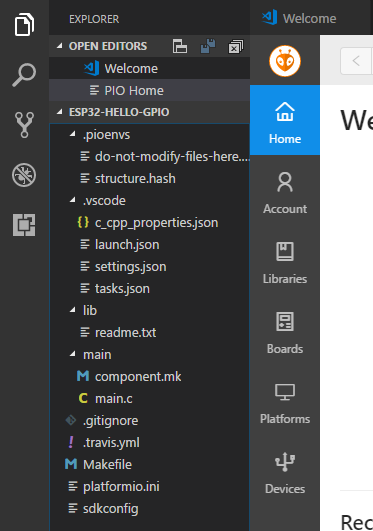
Finally, don't compile it yet! If you did (by accident), all you end up seeing is an annoying message "couldn't find make" or whatever it is. You need the last two files in the project folder, which is in the attachment:
- Makefile
- SdkConfig
Here is the project with these files:
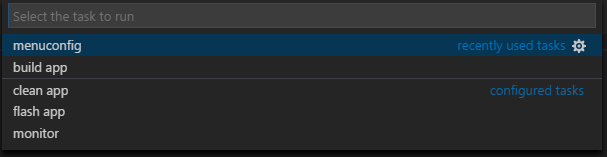
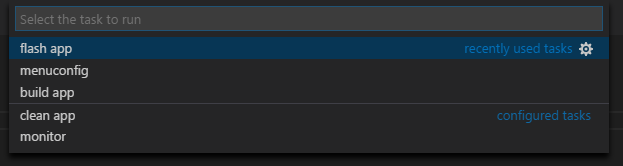
Yes! You can compile it now. Click on Tasks -> Run Task, and you will be greeted with this drop-down menu:
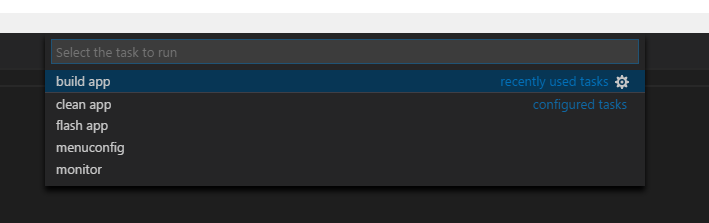
Click on "build app". While you are at it, go grab some coffee or watch comedy on Youtube. Once it's done, you will see "App built" there:
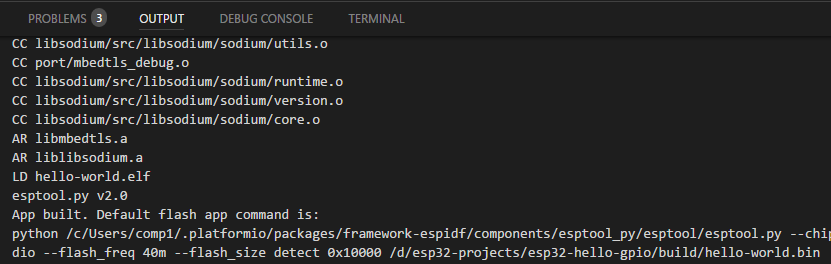
This part is now done. Putting the entire binary into it is another story, but it's much shorter!
Now plug in your Nano32 and wait for the Windows to get things sorted out.
Then go to your device manager and see what COM port does the ESP32 connected to:

Here, it is connected to COM7. Yours might be different - so you need to take note of the port that is detected. Obviously it is not COM1 since it is the PC or your laptop's one.
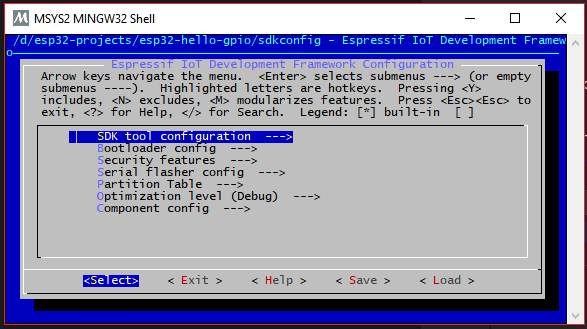
Once you have remembered it, go back to your Visual Studio Code, and start the "menuconfig" in the task list you accessed earlier:
When it is launched, you will see a seperate window. Go to the "Serial Flasher config":
Then, on the "Default Serial Port":
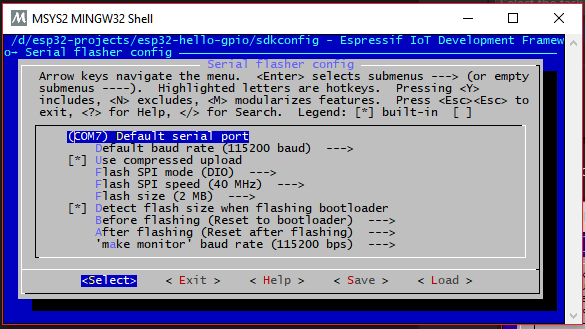
Press Enter, and type in your serial port that you have seen in the Device Manager. Here it is "COM7". Replace "7" with the number you seen on that place.
When all is done, press "TAB" until the "Save" is highlighted. Then, "TAB" until you select "Exit".
Good. Now select "Flash App" from the tasks (CTRL-ALT-T) .
When it is successful, you will see the LED blinking from the GPIO 22, and here are the results:
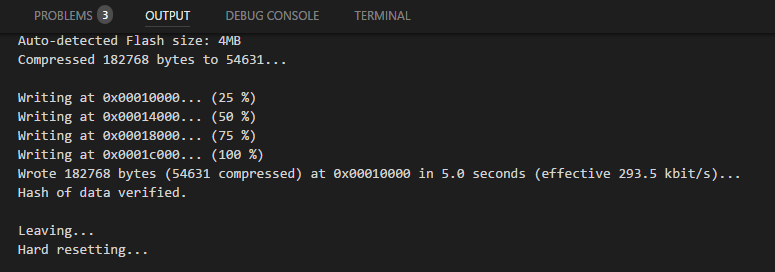
Here it is! You have deployed your first ESP32-IDF project using PlatformIO and Visual Studio Code!
But could I recycle this whole file and rename it so I don't have to keep redoing these steps? Would that work?? So far on some platforms like MPLAB Harmony, it doesn't work too well on it! Let me try this...